Introduction
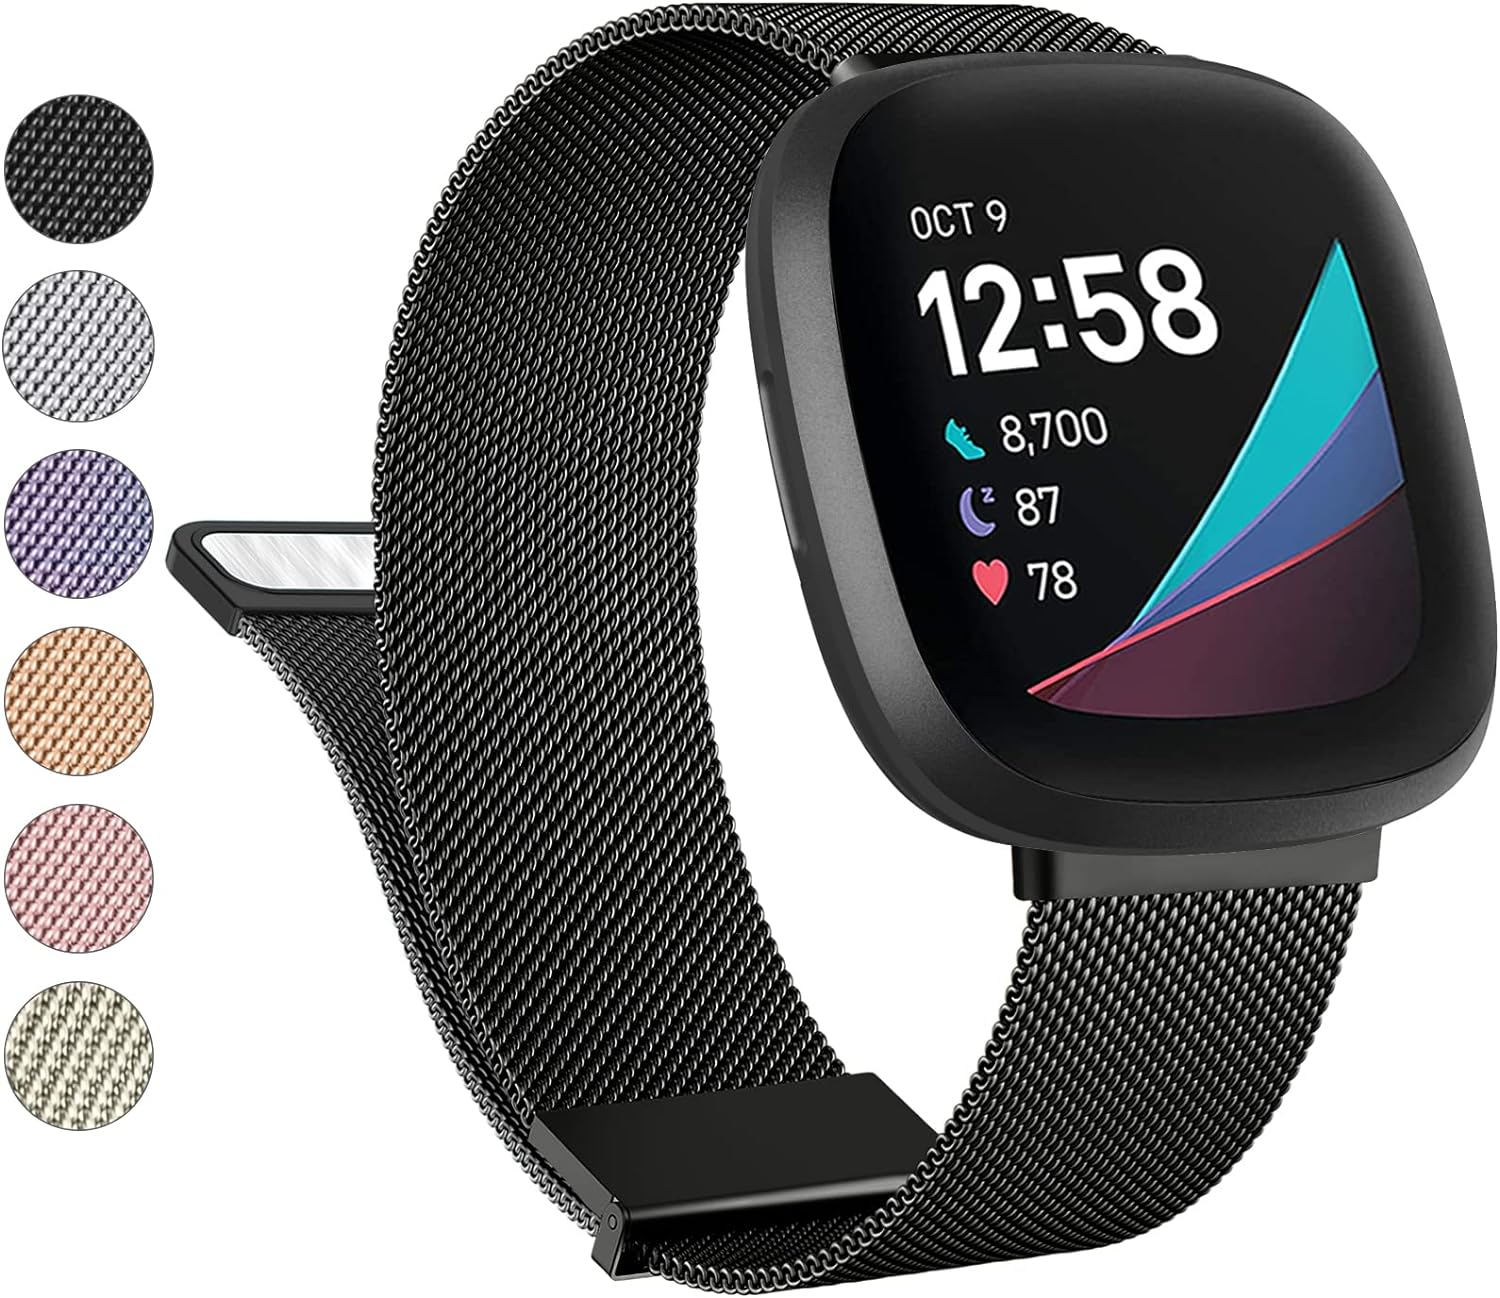
The Fitbit Charge 2 is a popular wearable device that offers a range of features to help users track their fitness and monitor their overall health. One of the key customizable aspects of the Fitbit Charge 2 is the ability to change its band, allowing users to personalize their device to suit their style or activity. Whether you're looking to replace a worn-out band or simply want to switch up the look of your Fitbit Charge 2, knowing how to swap the band is a valuable skill for any user.
In this comprehensive guide, we will walk you through the step-by-step process of changing the band on your Fitbit Charge 2. By following these instructions, you'll be able to effortlessly remove the current band and attach a new one, giving your Fitbit Charge 2 a fresh and personalized appearance. With just a few simple tools and a little bit of know-how, you can transform the look of your Fitbit Charge 2 to match your unique style or activity, ensuring that it remains a fashionable and functional accessory for your everyday life. Let's dive into the process and learn how to easily swap the band on your Fitbit Charge 2.
Step 1: Gather the Necessary Tools
Before embarking on the band swapping process for your Fitbit Charge 2, it's essential to gather the necessary tools to ensure a smooth and hassle-free experience. Here's what you'll need:
-
Replacement Band: Select a compatible replacement band that suits your style and activity preferences. Fitbit Charge 2 bands are available in a variety of materials, such as silicone, leather, metal, or woven fabric, allowing you to choose a band that complements your fashion sense and lifestyle.
-
Spring Bar Tool: This specialized tool is crucial for safely removing and attaching the bands to your Fitbit Charge 2. The spring bar tool features a small, forked end that aids in compressing the spring bars, facilitating the effortless removal and attachment of the bands.
-
Clean Cloth: Having a clean cloth on hand can help ensure that the Fitbit Charge 2 remains free from smudges or dirt during the band swapping process. A gentle wipe with a clean cloth can keep the device looking fresh and well-maintained.
-
Flat Surface: Prepare a flat and stable surface to work on, providing a secure area for handling the Fitbit Charge 2 and performing the band replacement. This will help prevent any accidental damage to the device and ensure a steady workspace for the task at hand.
By gathering these essential tools, you'll be well-prepared to proceed with the band swapping process for your Fitbit Charge 2. With the right tools in hand, you can confidently move on to the subsequent steps, knowing that you have everything you need to successfully customize the look of your Fitbit Charge 2.
Step 2: Remove the Current Band
To begin the process of removing the current band from your Fitbit Charge 2, it's important to ensure that you are working on a stable and flat surface to prevent any accidental damage to the device. Once you have set up your workspace, you can proceed with the following steps to safely detach the current band:
-
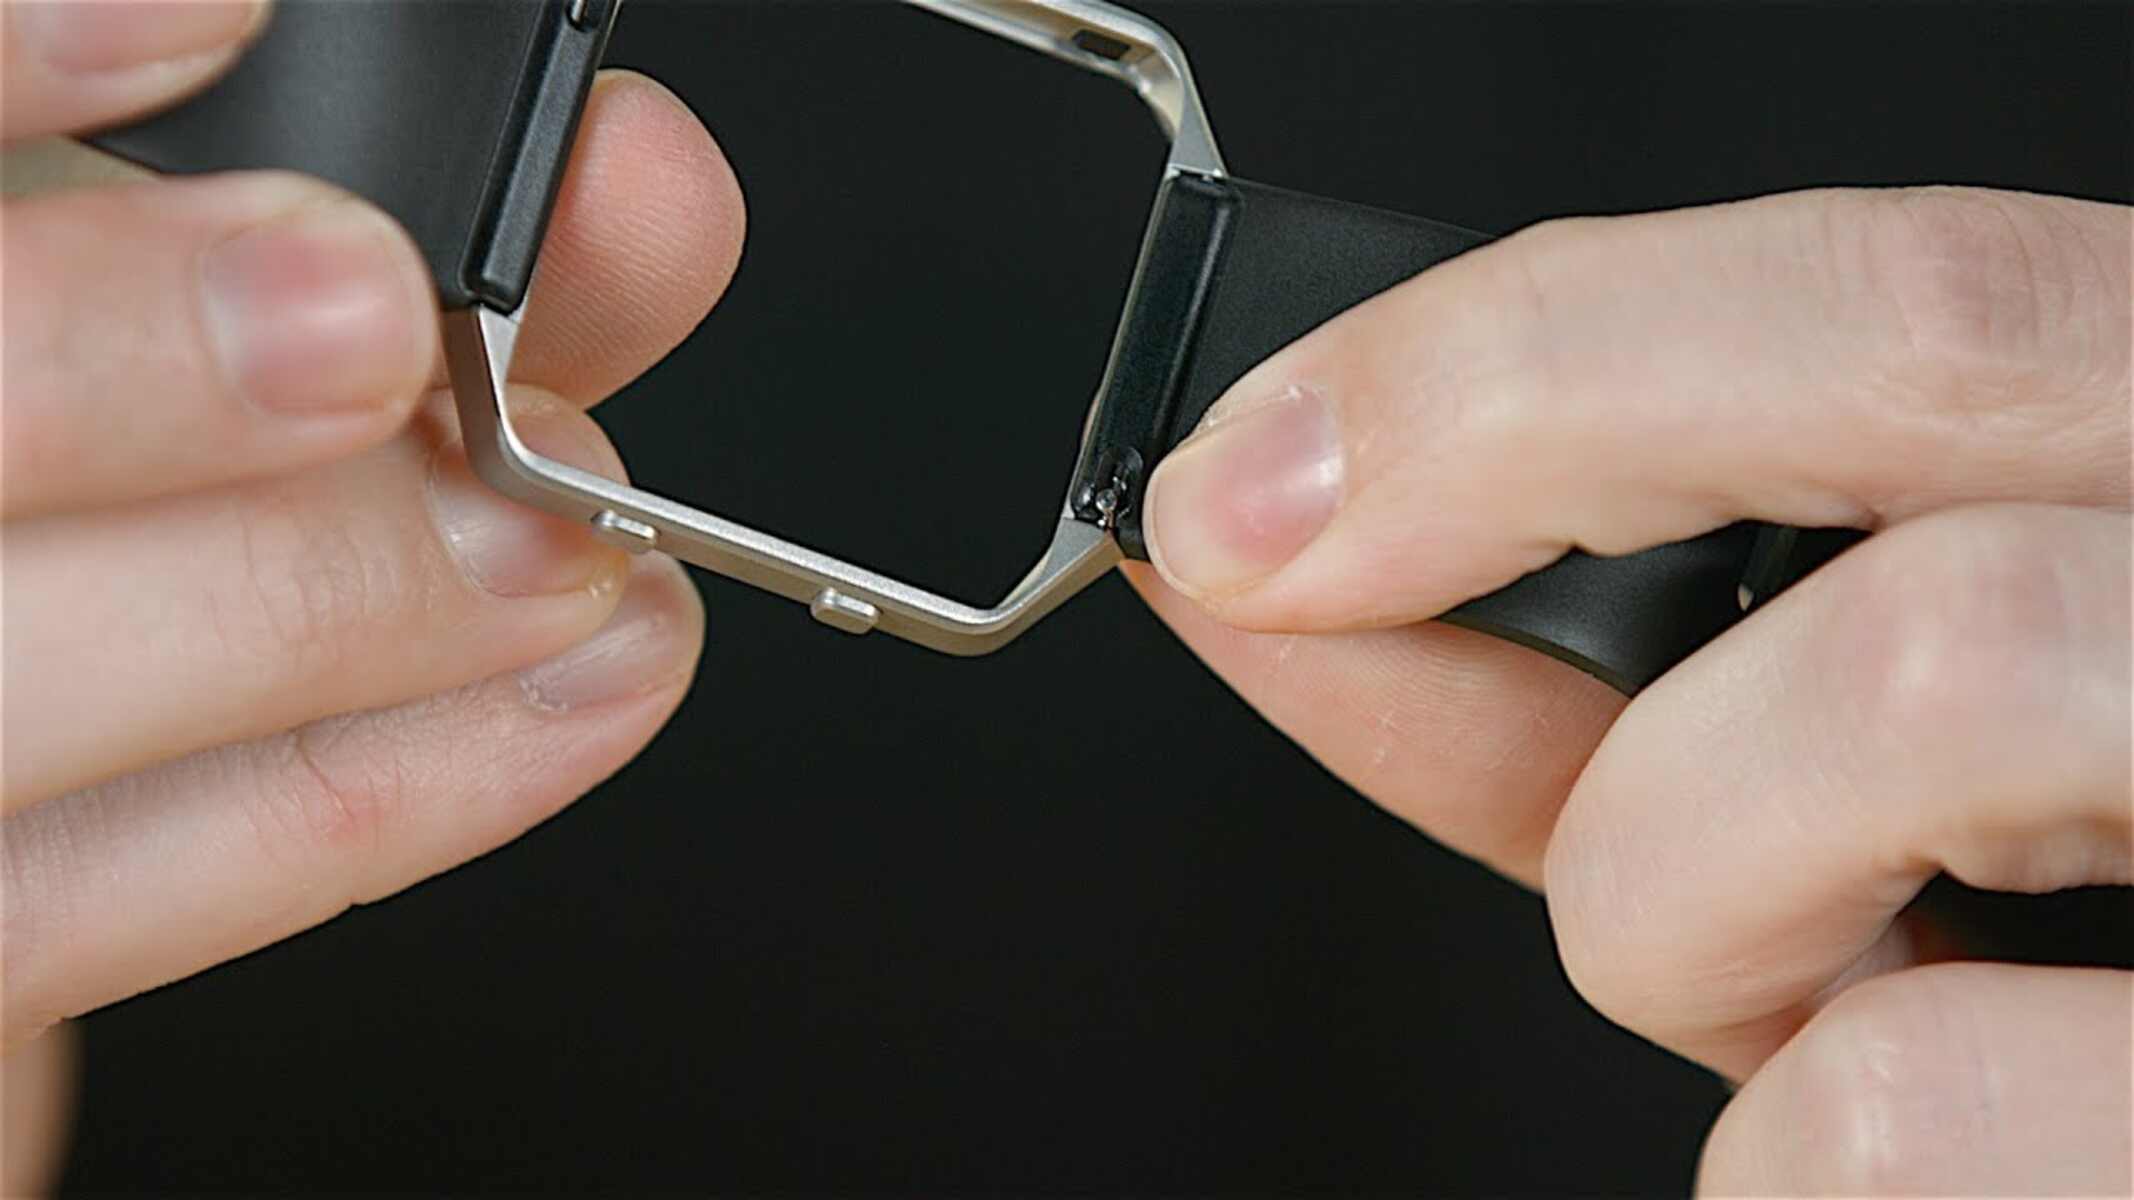
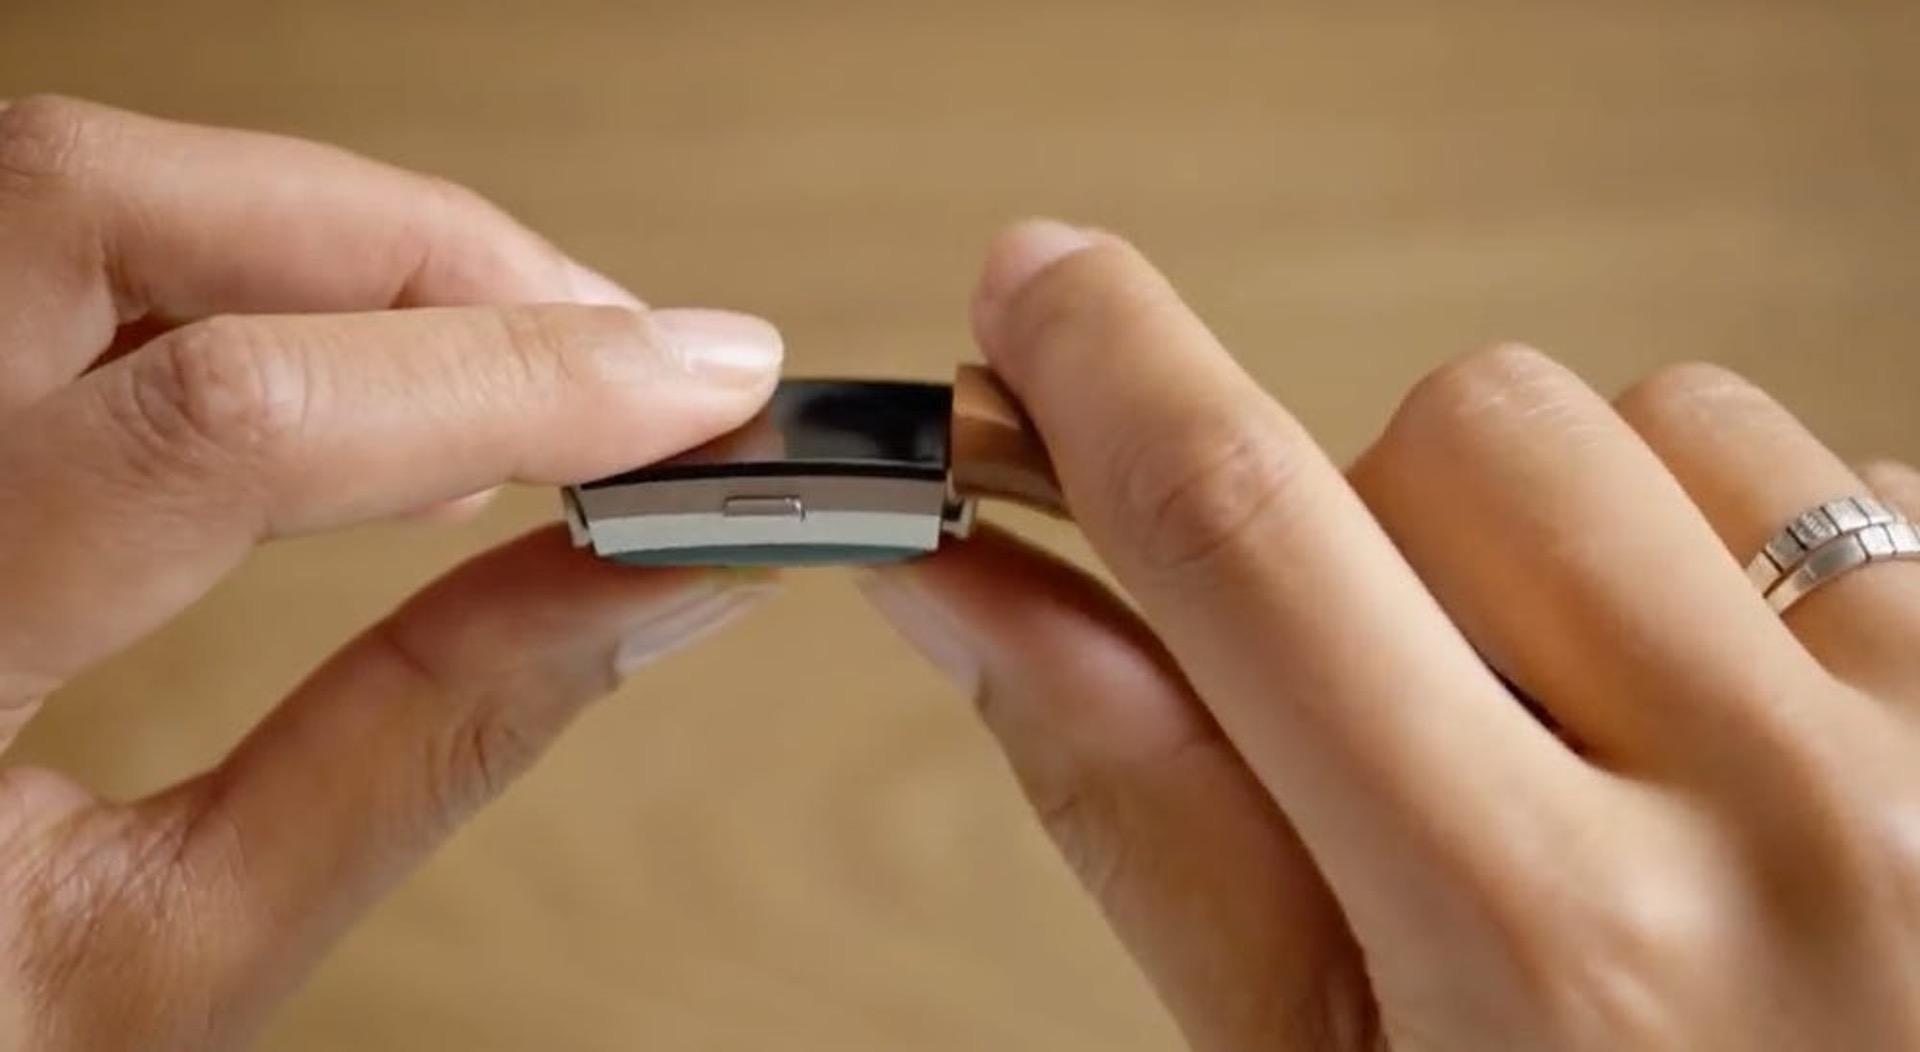
Locate the Spring Bar: The Fitbit Charge 2 features spring bars on each end of the band, which secure it to the device. Using the spring bar tool, carefully insert the forked end under the edge of the band where it meets the watch case. Apply gentle pressure to compress the spring bar, allowing it to disengage from the watch case.
-
Release the Spring Bar: Once the spring bar is compressed, continue to hold it in that position while gently pulling the band away from the watch case. Be cautious during this step to prevent any sudden movements that could cause damage to the device or the band.
-
Repeat for the Other Side: After successfully removing one end of the band, repeat the same process on the opposite side to release the second spring bar. Use the spring bar tool to compress the spring bar and carefully detach the band from the watch case.
-
Set Aside the Current Band: Once both spring bars have been disengaged, carefully set aside the current band in a safe location. This will prevent any accidental damage to the band and ensure that it remains in good condition if you plan to use it again in the future.
By following these steps, you can safely remove the current band from your Fitbit Charge 2, preparing it for the attachment of a new and personalized band. With the band successfully detached, you are now ready to proceed to the next step and learn how to attach the new band to your Fitbit Charge 2.
Step 3: Attach the New Band
With the current band successfully removed, it's time to embark on the exciting process of attaching a new band to your Fitbit Charge 2. Whether you're looking to add a sporty silicone band for your workouts or a stylish leather band for everyday wear, the steps for attaching the new band remain consistent. Here's a detailed guide to seamlessly affixing the new band to your Fitbit Charge 2:
-
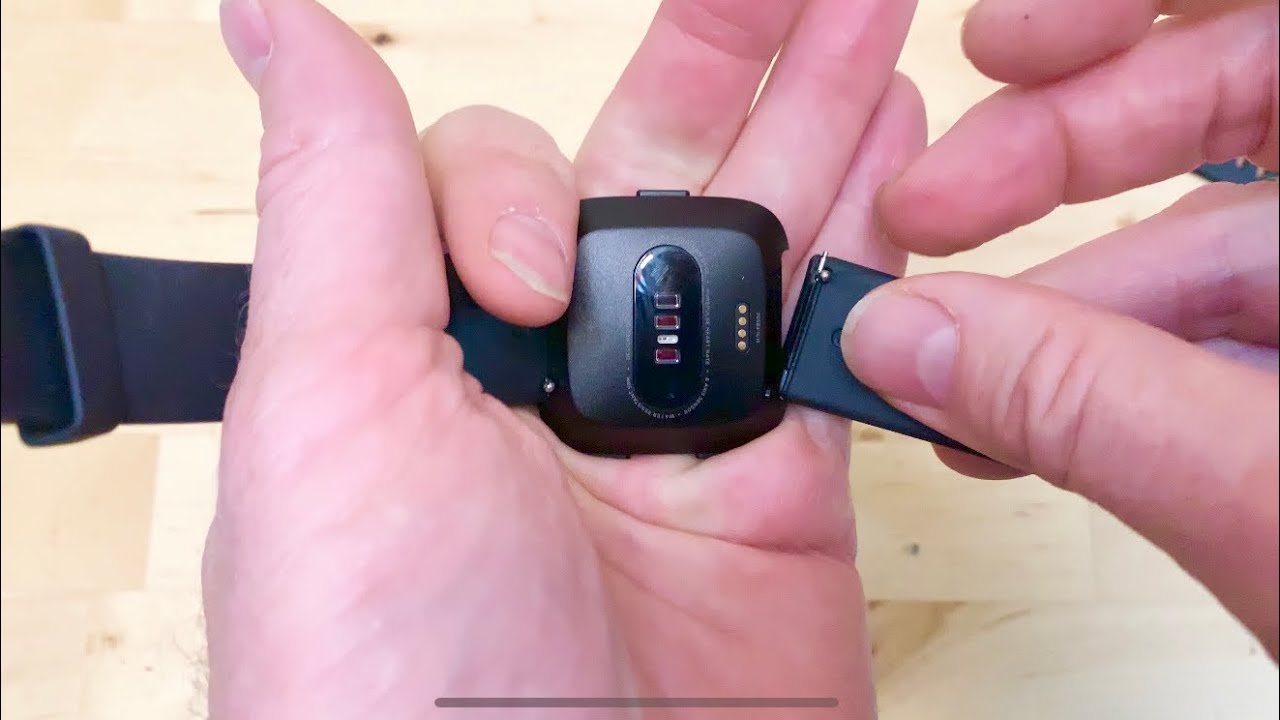
Select the New Band: Begin by choosing the replacement band that best suits your style and activity needs. Ensure that the new band is compatible with the Fitbit Charge 2 and aligns with your personal preferences in terms of material, color, and design.
-
Position the Spring Bars: Locate the spring bars on the new band, which will be used to attach it to the device. Position the spring bars at each end of the new band, ensuring that they are securely in place and aligned with the corresponding notches on the Fitbit Charge 2.
-
Align the Band: Hold the Fitbit Charge 2 with the display facing upward and position the new band above the watch case. Align the spring bar on one end of the band with the notch on the device, ensuring a snug fit before proceeding to the next step.
-
Attach the Band: Using gentle pressure, press one end of the new band against the watch case, engaging the spring bar with the notch. You may hear a subtle click, indicating that the spring bar has securely locked the band in place. Repeat this process for the other end of the band, ensuring that both sides are firmly attached.
-
Secure Fit Verification: Once the new band is attached, perform a quick but careful tug on each end to confirm that it is securely fastened to the Fitbit Charge 2. A properly attached band should remain firmly in place without any wobbling or movement.
By following these steps, you can effectively attach a new band to your Fitbit Charge 2, transforming its appearance to match your style and activity preferences. With the new band securely in place, your Fitbit Charge 2 is now ready to complement your unique fashion sense and support your daily adventures.
Step 4: Secure the New Band
Ensuring the secure attachment of the new band to your Fitbit Charge 2 is essential to maintain its functionality and aesthetics. After successfully attaching the new band, it's crucial to verify its stability and security to prevent any unexpected detachment during daily wear. Here's a detailed exploration of the steps involved in securing the new band to your Fitbit Charge 2:
Verify Alignment and Fit
Once the new band is attached to the Fitbit Charge 2, take a moment to visually inspect the alignment and fit of the band. Ensure that the band sits flush against the watch case on both sides, with the spring bars fully engaged in the notches. A properly aligned band contributes to a comfortable and secure wearing experience while minimizing the risk of accidental detachment.
Perform a Tug Test
To further validate the security of the new band, gently tug on each end to assess its resistance and stability. A properly secured band should withstand light tugging without any movement or slippage. Pay close attention to any signs of looseness or instability, as these could indicate that the spring bars may not be fully engaged. By conducting this simple yet effective test, you can gain confidence in the reliability of the band attachment.
Check for Evenness
While wearing the Fitbit Charge 2 with the new band, observe its position on your wrist to ensure that it sits evenly and comfortably. An evenly secured band contributes to a consistent and ergonomic fit, preventing discomfort or irritation during extended wear. Additionally, an evenly positioned band enhances the overall aesthetic appeal of the device, creating a polished and well-balanced look.
Periodic Inspections
After securing the new band, it's advisable to periodically inspect the attachment points to confirm that the spring bars remain securely engaged. Regular visual checks can help identify any potential issues early on, allowing for timely adjustments or maintenance as needed. By incorporating periodic inspections into your routine, you can uphold the long-term integrity of the band attachment and enjoy a worry-free wearing experience.
By following these steps and guidelines, you can confidently secure the new band to your Fitbit Charge 2, ensuring a reliable and personalized fit that aligns with your style and activity preferences. With the band securely attached, your Fitbit Charge 2 is ready to accompany you on your daily endeavors, reflecting your unique sense of fashion and functionality.
Step 5: Test the Fit
After successfully attaching the new band to your Fitbit Charge 2, it's crucial to conduct a comprehensive assessment of the fit to ensure optimal comfort, functionality, and style. Testing the fit of the new band involves various aspects that contribute to a seamless and enjoyable wearing experience. Let's delve into the detailed process of testing the fit of your Fitbit Charge 2 with the newly attached band.
Comfort and Flexibility
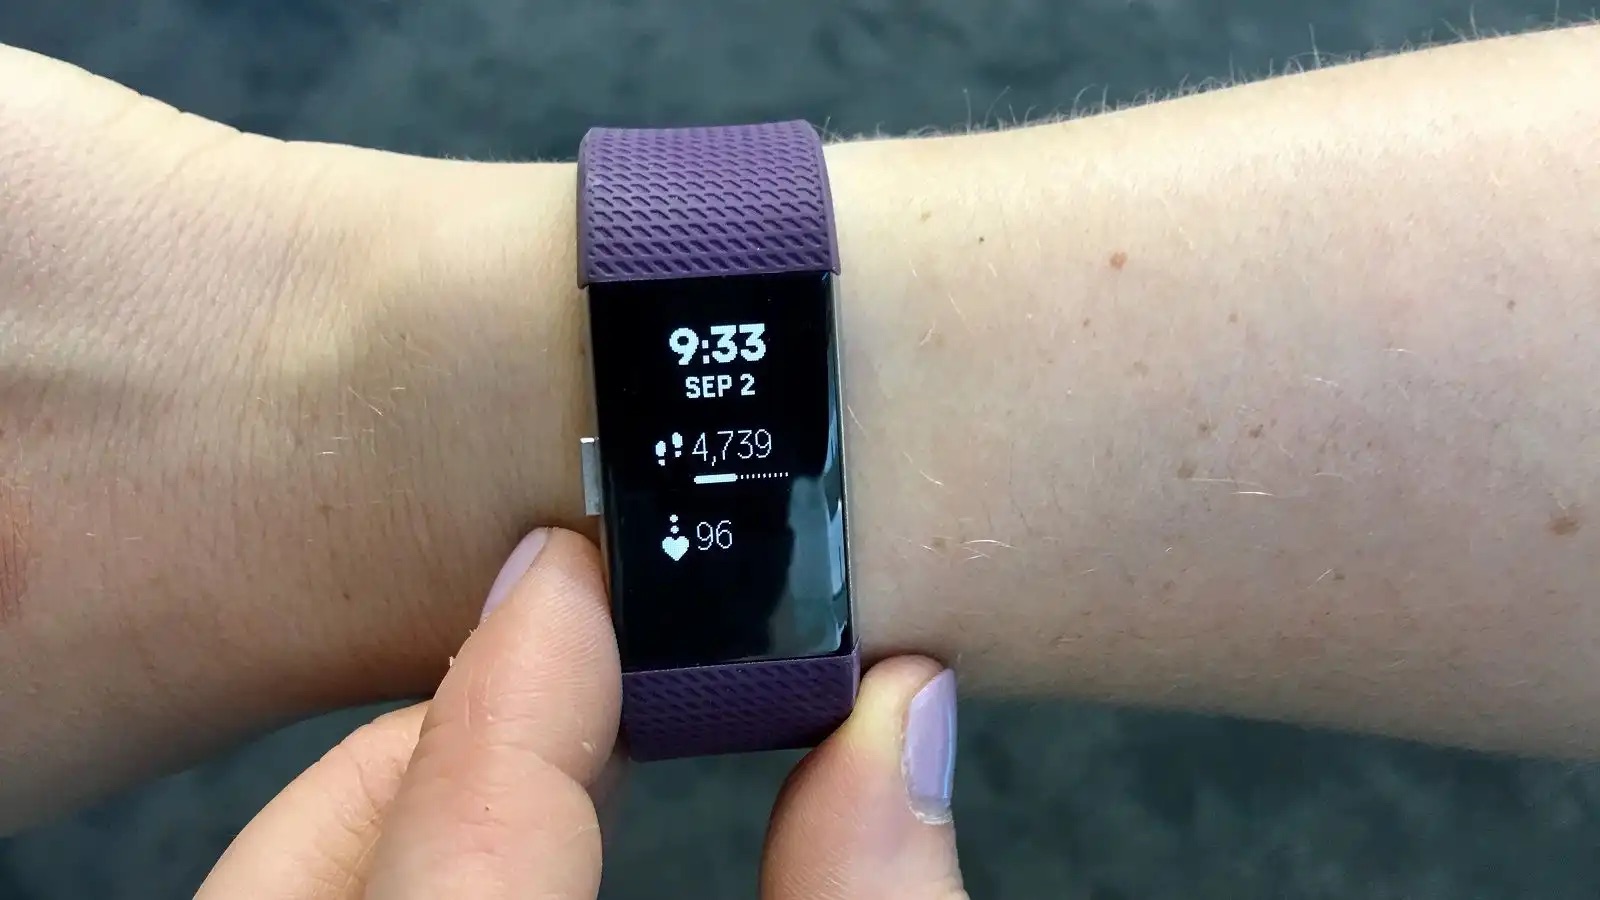
The first element to evaluate when testing the fit of the new band is its comfort and flexibility during wear. Secure the Fitbit Charge 2 on your wrist with the new band and assess how it feels against your skin. Pay attention to any areas of potential discomfort or irritation, ensuring that the band does not pinch or rub against your skin during movement. Additionally, perform a range of natural wrist movements to gauge the flexibility of the band, ensuring that it adapts to your motions without causing any restrictions or discomfort.
Secure Fastening
Verify that the new band is securely fastened to the Fitbit Charge 2 by performing a series of activities that simulate your daily routine. Engage in light exercises, brisk walks, or other physical activities to assess the band's ability to remain firmly in place during movement. A securely fastened band should maintain its position without slipping or loosening, providing confidence in its reliability during various activities.
Visual Appeal
Assess the visual appeal of the new band on your Fitbit Charge 2, taking note of how it complements your style and overall appearance. Consider the color, material, and design of the band in relation to your personal fashion preferences. Additionally, observe how the new band enhances the aesthetic appeal of the Fitbit Charge 2, creating a cohesive and stylish look that resonates with your individuality.
Functionality Check
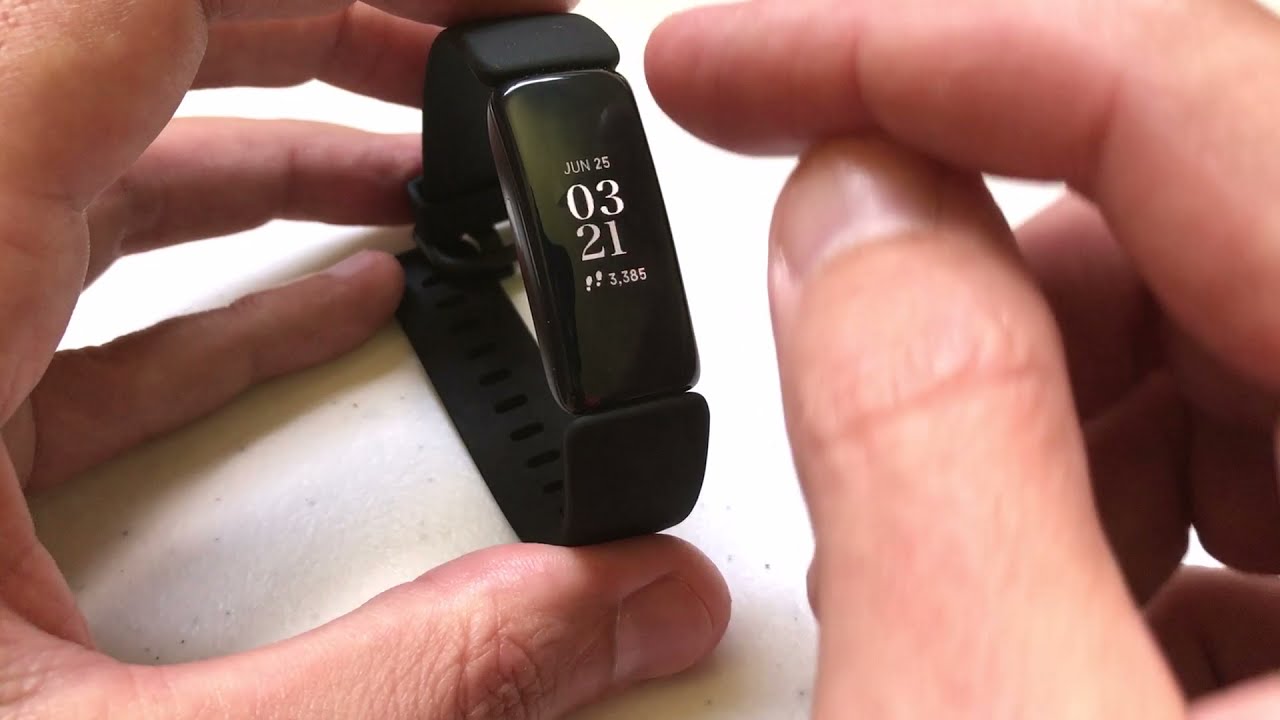
Test the functionality of the Fitbit Charge 2 with the new band by accessing its features and navigating the interface. Ensure that the new band does not obstruct the device's sensors, display, or buttons, allowing for seamless interaction and accurate fitness tracking. Verify that the attachment of the new band does not impede the device's functionality in any way, preserving its usability and performance.
By thoroughly testing the fit of the new band on your Fitbit Charge 2, you can confidently embrace its comfort, style, and functionality as integral components of your daily routine. With the band passing the fit assessment with flying colors, your Fitbit Charge 2 is now fully equipped to accompany you on your fitness journey, reflecting your unique sense of style and supporting your active lifestyle.
Conclusion
In conclusion, the ability to change the band on your Fitbit Charge 2 presents a remarkable opportunity to personalize and enhance the appearance of this popular wearable device. By following the step-by-step process outlined in this guide, users can seamlessly transition from their current band to a new and customized option, reflecting their unique style and activity preferences. The journey of band swapping encompasses not only the practical aspects of attachment and security but also the expression of individuality and the seamless integration of fashion and functionality.
The process begins with gathering the necessary tools, including a replacement band, a spring bar tool, a clean cloth, and a flat surface. These tools form the foundation for a successful band swapping experience, ensuring that users are well-equipped to navigate the transition with confidence and precision. The careful removal of the current band sets the stage for the exciting introduction of a new band, allowing users to explore a diverse range of materials, colors, and designs to find the perfect match for their personal style.
As the new band is securely attached and tested for fit, comfort, and functionality, users can revel in the transformative impact of this simple yet significant customization. The Fitbit Charge 2, now adorned with a fresh and personalized band, becomes more than just a fitness tracker; it becomes a reflection of the user's identity and a seamless companion for their active lifestyle. From silicone bands designed for intense workouts to elegant leather bands suited for everyday wear, the possibilities for personalization are as diverse as the individuals who wear them.
Ultimately, the process of changing the band on the Fitbit Charge 2 transcends the mere act of customization; it embodies the fusion of technology and personal expression. With each step, users have the opportunity to infuse their wearable device with a touch of their own personality, creating a harmonious blend of style and functionality that resonates with their daily lives. As the Fitbit Charge 2 seamlessly adapts to the ever-changing needs and preferences of its users, it solidifies its position as not just a piece of technology, but a trusted companion that evolves alongside its wearer.
In embracing the art of band swapping, users can celebrate the versatility and adaptability of their Fitbit Charge 2, ensuring that it remains a stylish and functional accessory that effortlessly complements their unique journey towards health and wellness. With the newfound knowledge and expertise in band swapping, users are empowered to continually refresh and revitalize their Fitbit Charge 2, ensuring that it remains a steadfast and fashionable ally in their pursuit of an active and vibrant lifestyle.