Introduction
Welcome to the world of immersive audio! If you’re looking to set up a surround sound system, you’ve come to the right place. Proper wiring is crucial to ensure optimal sound quality and performance from your speakers.
In this guide, we’ll walk you through the process of wiring speakers for a surround sound system. Whether you’re a seasoned audio enthusiast or a newbie, understanding the basics of speaker wires and connections is essential to get the most out of your audio setup.
Before we dive into the nitty-gritty of speaker wire choices and connections, it’s important to note that proper wiring plays a significant role in delivering accurate sound reproduction. The quality of your speaker wires and the way you connect them can make a noticeable difference in the audio experience, whether you’re watching movies, listening to music, or playing video games.
Don’t worry if you’re not an expert in the technical aspects of audio systems. We’ll break down everything into simple terms, providing you with a step-by-step guide to help you wire your speakers correctly and efficiently.
So, whether you’re setting up a home theater system or revamping your existing audio setup, let’s embark on this journey together to ensure you get the best sound possible from your surround sound system!
Understanding Speaker Wires
Before we dive into the world of speaker wire connections, it’s important to understand the fundamentals of speaker wires. Speaker wires are the cables that transmit the audio signal from your amplifier or receiver to your speakers. They play a crucial role in delivering high-quality sound without any distortion or loss.
Speaker wires consist of two conductors: positive (+) and negative (-). These conductors are usually color-coded for easy identification. The positive wire carries the audio signal from the amplifier to the speaker’s positive terminal, while the negative wire completes the circuit by connecting the speaker’s negative terminal to the amplifier.
It’s essential to use the appropriate gauge (thickness) of speaker wire to ensure efficient transmission of the audio signal. Thicker wires have lower resistance, which allows for better signal flow and reduces the chances of signal loss or distortion.
When it comes to distances, longer wiring runs call for thicker cables to compensate for the resistance. Generally, a 16-gauge wire is suitable for runs of up to 50 feet, while a thicker 14-gauge wire is recommended for longer runs.
Now, let’s talk about insulation. Speaker wires are available with different types of insulation, such as PVC, rubber, and Teflon. The insulation protects the wires from external environmental factors and ensures the integrity of the audio signal. It’s essential to choose wires with durable insulation to prevent damage and maintain audio quality over time.
Lastly, some speaker wires come pre-terminated with connectors, such as banana plugs or spades, while others require manual connection using bare wire or pin connectors. The choice of connectors depends on your setup and personal preference. The goal is to ensure a secure and reliable connection between the speaker wires and the amplifier/receiver terminals.
With a basic understanding of speaker wires, you’re now ready to explore the various types of speaker wire connections. In the next section, we’ll delve into the different options available and guide you on selecting the right speaker wire for your specific needs.
Choosing the Right Speaker Wire
When it comes to selecting the right speaker wire for your audio system, there are a few factors to consider. Let’s explore these factors to ensure you make the best choice for your specific setup:
Gauge: The gauge, or thickness, of the speaker wire is one of the most important considerations. As mentioned earlier, thicker wires have lower resistance, allowing for better signal flow. For shorter wire runs, a 16-gauge wire is generally sufficient. However, if you have longer wire runs, it’s recommended to opt for a thicker 14-gauge wire to minimize any loss in audio quality.
Length: Determine the length of speaker wire you’ll need to connect your speakers to the amplifier or receiver. Measure the distances accurately, taking into account any turns, corners, or obstacles. It’s always a good idea to add a couple of extra feet to ensure flexibility during installation.
Construction: Speaker wires come in various constructions, such as solid core and stranded. Solid core wires are made of a single solid conductor and offer excellent signal transmission. Stranded wires, on the other hand, consist of multiple smaller strands and provide flexibility for easier installation. Consider the specific requirements of your setup to determine which construction suits your needs best.
Insulation: Look for speaker wires with high-quality insulation. This ensures durability and protects against potential damage or interference. PVC insulation is common and offers excellent protection, but for more advanced setups or higher-end audio systems, consider wires with more advanced insulation materials like Teflon.
Price: Speaker wires come in various price ranges. While it’s important to choose a quality wire that meets your requirements, you don’t necessarily need to break the bank. Consider your budget and strike a balance between quality and cost.
Remember, the goal is to select a speaker wire that matches your setup and allows for optimal audio performance. By considering factors such as gauge, length, construction, insulation, and price, you can confidently choose the right speaker wire for your needs.
Now that you’re equipped with the knowledge of choosing the right speaker wire, let’s move on to understanding the importance of gauge in the next section.
The Importance of Gauge
When it comes to speaker wires, the gauge, or thickness, plays a vital role in ensuring optimal audio performance. The gauge of a wire refers to its diameter and is typically measured in American Wire Gauge (AWG). Understanding the importance of gauge is crucial for selecting the right wire for your speakers. Let’s explore why gauge matters:
Signal Loss: Speaker wires with smaller gauges have thicker conductors, which means they have lower resistance. Lower resistance allows for the efficient transmission of the audio signal, resulting in minimal signal loss. Using a thicker gauge wire for longer wire runs helps counteract the resistance and ensures that the signal reaches your speakers without significant degradation in quality.
Power Handling: Thicker gauge wires have a higher power handling capacity. This means they can safely handle more electrical current without overheating. If you’re driving powerful speakers or amplifiers, it’s essential to use a thicker gauge wire to prevent the wire from becoming a bottleneck and potentially damaging your equipment.
Speaker Impedance: The impedance of your speakers is an important consideration when choosing the right gauge wire. Impedance is the measure of opposition to the flow of electrical current and is typically measured in ohms. Speakers with lower impedance (e.g., 4 ohms) require thicker gauge wires to ensure there is sufficient current flow and prevent any undue stress on the wire or amplifier.
Audible Difference: While the gauge of speaker wire may not make a noticeable difference in shorter wire runs or with lower-powered systems, it can become more pronounced in longer wire runs or with more demanding setups. Thicker gauge wires provide a cleaner and more stable audio signal, resulting in improved sound quality and overall performance.
It’s important to note that using a thicker gauge wire than necessary for your setup is not detrimental. In fact, it offers a margin of safety and flexibility for any future upgrades or changes in your audio system. Therefore, it’s generally recommended to err on the side of thicker gauge wires, especially for longer runs or higher-powered systems.
By understanding the importance of gauge, you can make informed decisions when selecting the appropriate wire for your speakers. Remember to consider factors such as wire length, speaker impedance, and power requirements to ensure optimal audio performance.
Now that we’ve explored the significance of gauge, let’s move on to discussing the different types of speaker connections in the next section.
Types of Speaker Connections
When it comes to connecting speakers to your audio system, there are various types of connections available. Each connection method has its advantages and considerations. Let’s explore the most common types of speaker connections:
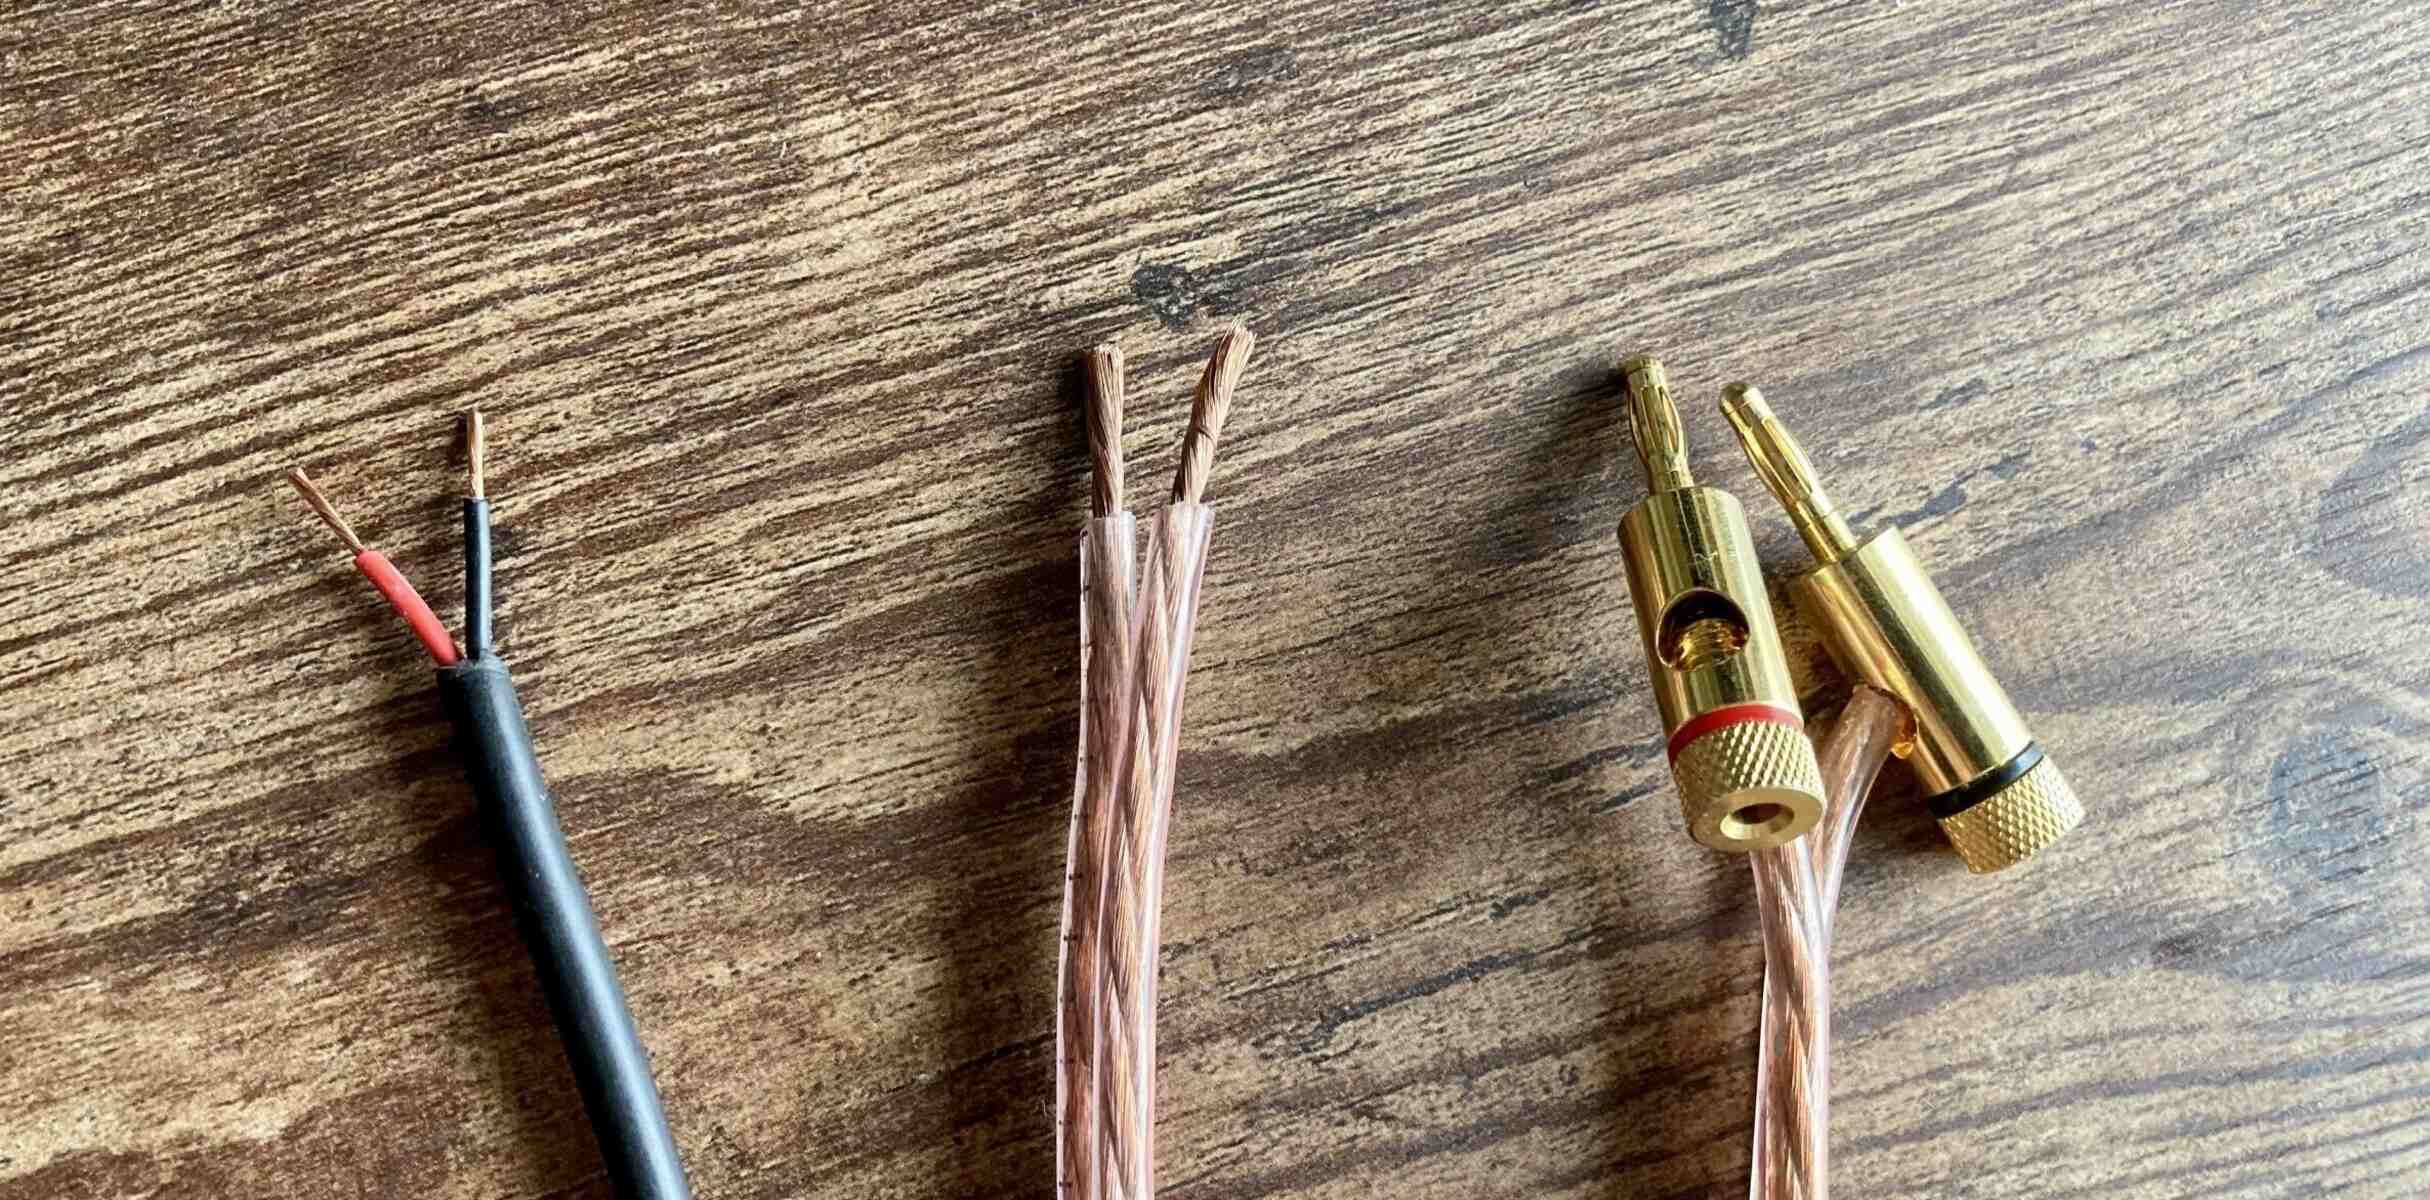
Bare Wire: This is the simplest and most basic method of connecting speakers. It involves stripping the insulation from the speaker wire and directly inserting the exposed wires into the binding posts or spring clips on the speakers and the amplifier or receiver. While this method can provide a secure connection, it may be more prone to accidental short circuits if the bare wires touch each other or other metal surfaces.
Pin Connectors: Pin connectors are small pins that slide into the speaker terminals and lock into place. They provide a more secure and convenient connection compared to bare wires. Pin connectors are available in various sizes to accommodate different speaker and amplifier terminals. They are easy to install and remove, making them a popular choice for many audio enthusiasts.
Banana Plugs: Banana plugs are plug-type connectors with a cylindrical shape and a metal pin. They provide a safe and reliable connection and are widely used in home theater systems and professional setups. Banana plugs can be easily inserted into the speaker and amplifier terminals, and they provide a tight connection without any risk of short circuits. They are also convenient for connecting and disconnecting speakers quickly.
Spade Connectors: Spade connectors are fork-like metal connectors that slide under the binding posts of the speakers and amplifier/receiver. They offer a secure and stable connection, similar to banana plugs. Spade connectors are often preferred in high-power systems or when a more permanent and robust connection is desired.
Wireless Connections: With advancements in technology, wireless speaker connections have become popular. These systems eliminate the need for physical wires, providing flexibility in speaker placement. Wireless connections typically use technologies like Bluetooth or Wi-Fi to transmit the audio signal from the amplifier/receiver to the speakers. While convenient, it’s essential to ensure a stable and reliable wireless connection to avoid audio dropouts or disturbances.
Each type of speaker connection offers its own set of advantages and may be more suitable for specific situations or preferences. Consider factors such as convenience, ease of installation, security, and compatibility with your audio components when choosing the right connection method for your setup.
Now that we’ve explored the various types of speaker connections, let’s move on to the practical aspect of connecting speakers to the amplifier or receiver in the next section.
Connecting Speakers to the Amplifier or Receiver
Connecting your speakers to the amplifier or receiver is a crucial step in setting up your audio system. Here’s a step-by-step guide on how to properly connect your speakers:
Step 1: Power Off: Before making any connections, ensure that the amplifier or receiver is powered off and unplugged. This prevents any accidental electrical shock or damage to the equipment.
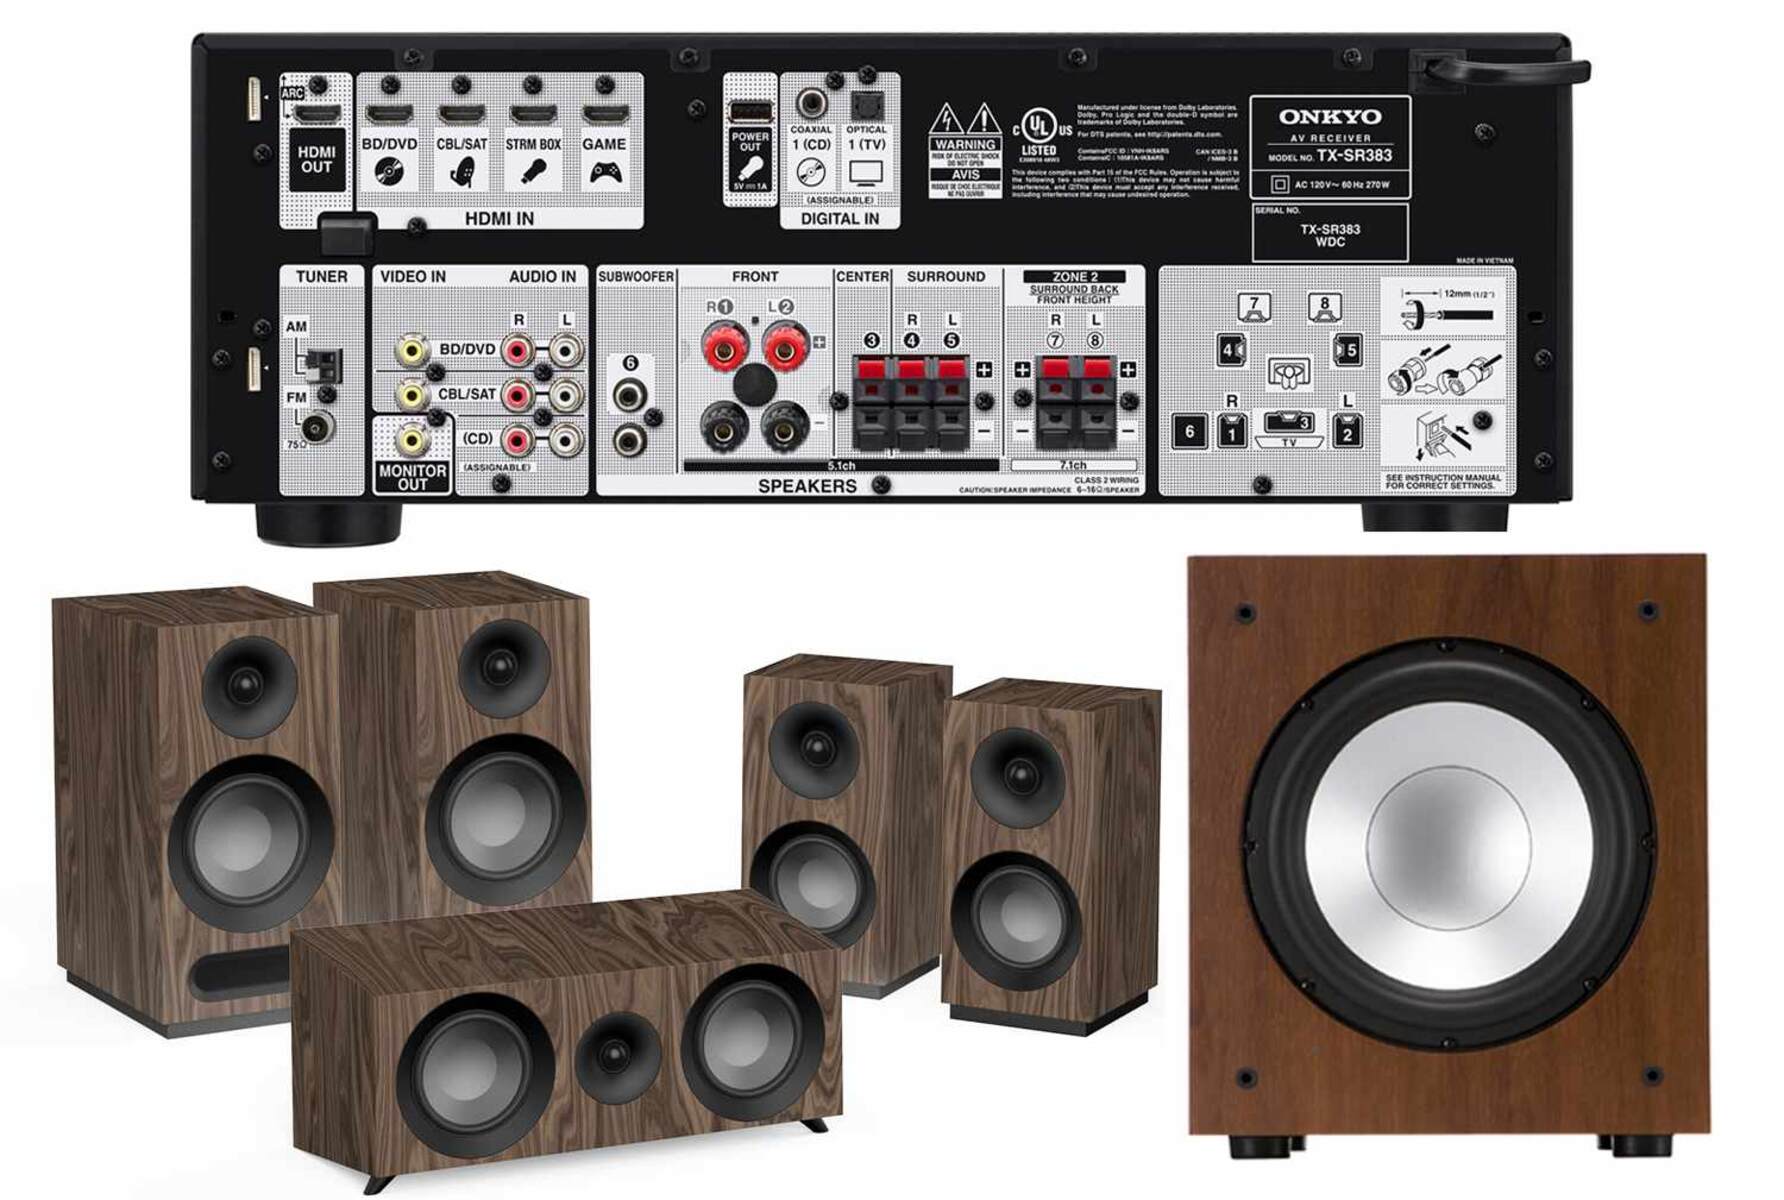
Step 2: Identify Speaker Outputs: Locate the speaker outputs on your amplifier or receiver. These are typically labeled as “Speaker Out,” “Front L/R,” or similar. Each output corresponds to a specific channel or set of speakers in your system.
Step 3: Prepare the Speaker Wires: If you’re using bare wires, strip a small amount of insulation from the ends of the speaker wires. Twist the exposed wires to ensure they’re tightly bound together, eliminating any loose strands. If you’re using connectors like banana plugs or spades, follow the manufacturer’s instructions to attach them to the speaker wires.
Step 4: Connect Positive (+) and Negative (-) Terminals: Take one end of the prepared speaker wire and connect the positive (+) terminal of the speaker to the corresponding positive (+) terminal on the amplifier/receiver. Make sure the connections are secure and tight. Repeat the process for the negative (-) terminals.
Step 5: Double-Check the Connections: Once all the speaker wires are connected, double-check that each wire is securely connected to the correct terminals. Ensure that there are no loose strands of wire or accidental short circuits.
Step 6: Power On and Test: After verifying all connections, power on your amplifier or receiver. Set the volume to a low level initially, then gradually increase it to test the sound output from each speaker. Make sure all speakers are functioning correctly and producing sound. If you encounter any issues, double-check the connections and consult the user manual for troubleshooting steps.
Step 7: Speaker Placement: Once the connections are established and the sound is tested, position your speakers in their desired locations. Optimal speaker placement can greatly enhance your audio experience. Refer to the speaker’s user manual or follow general guidelines for ideal speaker positioning.
By following these steps, you can ensure a proper and secure connection between your speakers and the amplifier or receiver. Take your time during the setup process to avoid any mistakes or issues that may compromise the sound quality.
Now that we’ve covered the connection process, let’s move on to wiring multiple speakers in series or parallel in the next section for more advanced setups.
Wiring Multiple Speakers in Series or Parallel
If you have multiple speakers in your audio system, you may need to wire them in either series or parallel configurations to achieve the desired sound distribution. Here’s a breakdown of each wiring method:
Series Wiring: In series wiring, you connect the positive terminal of one speaker to the negative terminal of the next speaker, forming a daisy chain. This increases the overall impedance and reduces the power delivered to each speaker. Series wiring is useful when you want to connect speakers that have higher impedance ratings. However, keep in mind that when using series wiring, the total impedance of the speakers adds up. For example, if you connect two 8-ohm speakers in series, the total impedance will be 16 ohms.
Parallel Wiring: Parallel wiring involves connecting all the positive terminals of the speakers together and all the negative terminals together, effectively creating multiple paths for the audio signal to flow. This decreases the overall impedance and allows each speaker to receive more power from the amplifier. Parallel wiring is suitable when using speakers with lower impedance ratings. When speakers are wired in parallel, the total impedance decreases. For instance, if you connect two 8-ohm speakers in parallel, the total impedance will be 4 ohms.
It’s important to consider the impedance requirements of your amplifier or receiver when wiring speakers in series or parallel. Speakers and amplifiers have specific impedance specifications, so make sure they are compatible to prevent any potential damage to your equipment.
Additionally, it’s crucial to maintain consistency with the wiring method throughout your entire audio system. For example, if you wire some speakers in series and others in parallel, the impedance values will vary, resulting in an uneven distribution of power.
When wiring multiple speakers in series or parallel, ensure that the connections are secure and that no wires are touching each other or causing a short circuit. It’s also essential to choose the appropriate gauge of speaker wire based on the total length of the wire runs and the impedance requirements of your setup.
If you’re unsure about wiring multiple speakers or if you have a complex setup, it’s best to consult the user manuals of your speakers and amplifier or seek the guidance of a professional audio installer. They can provide specific recommendations and ensure that your speakers are wired correctly for optimal sound quality.
Now that we’ve covered wiring multiple speakers, let’s move on to setting up a complete surround sound system in the next section.
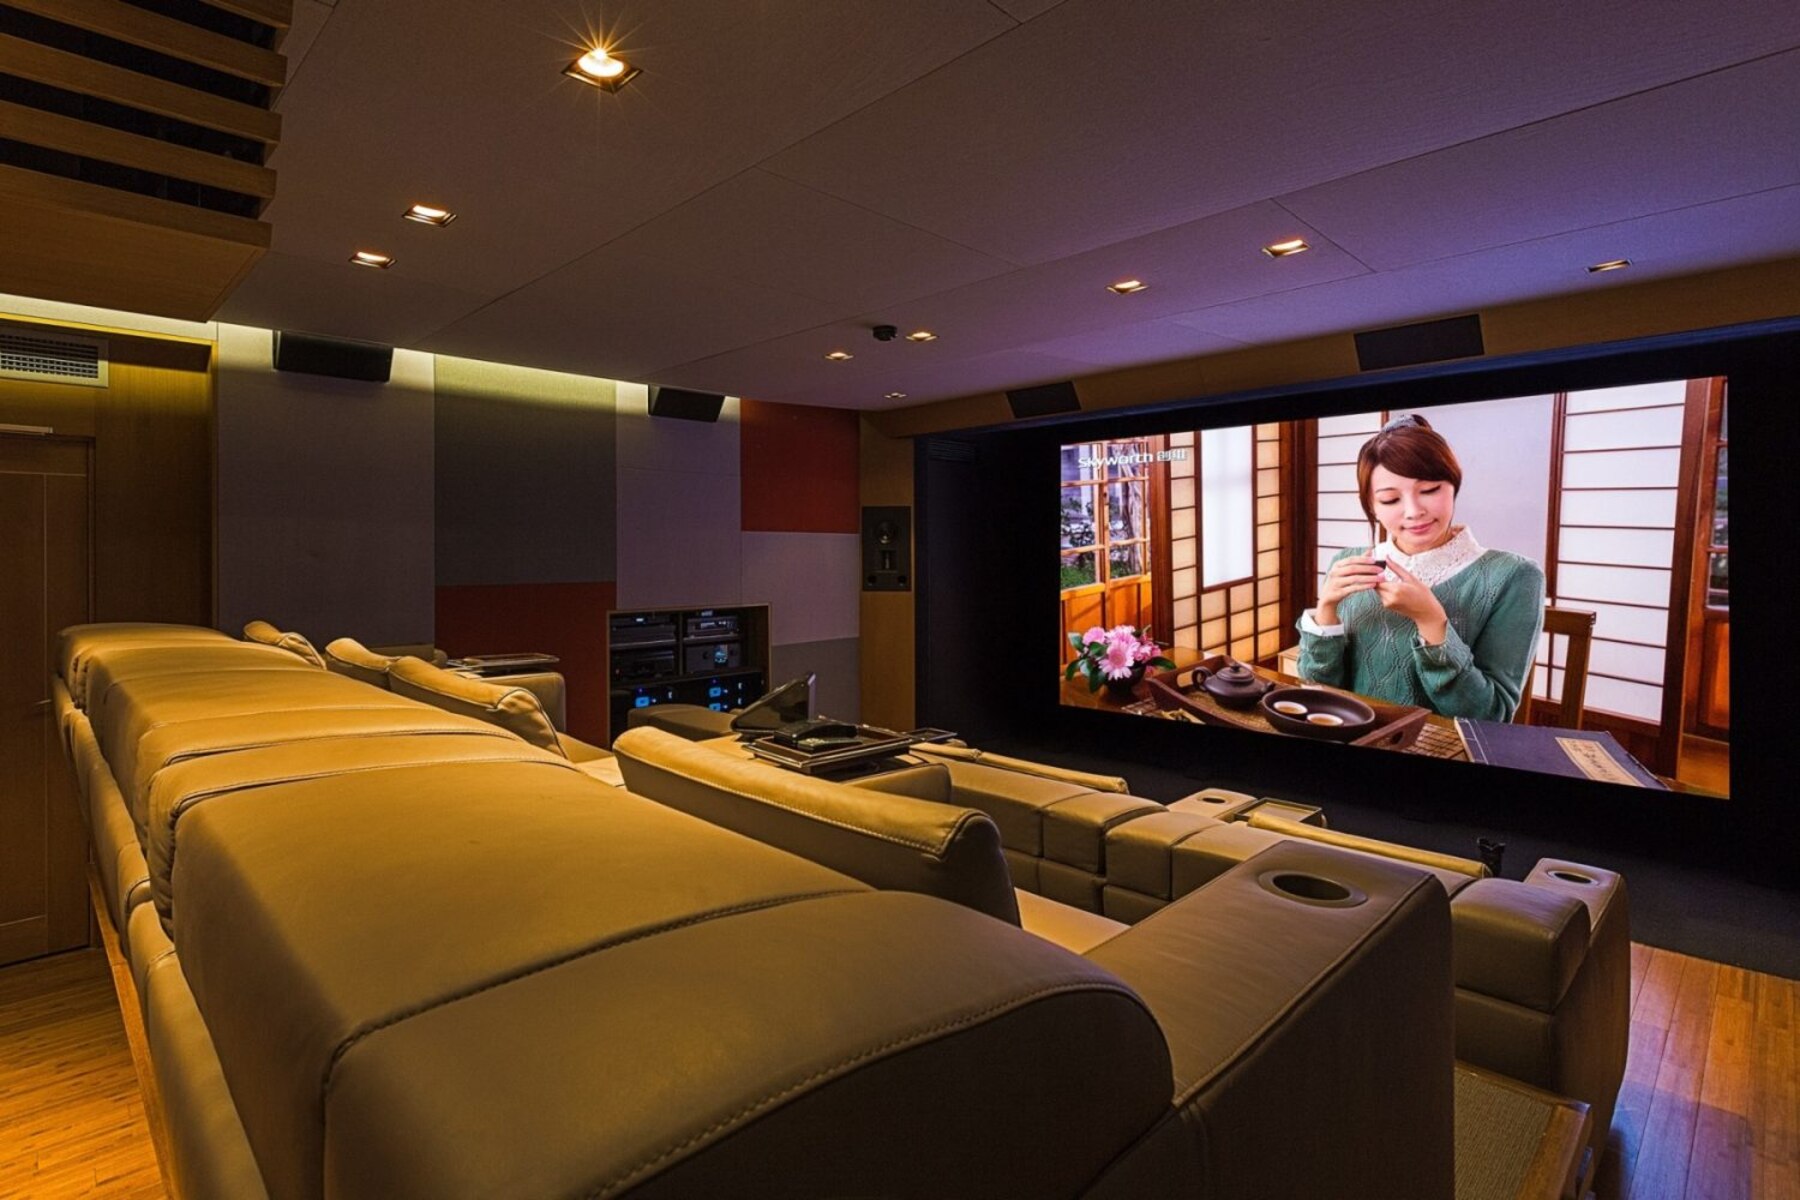
Setting Up a Surround Sound System
Creating a surround sound system can transform your audio experience and immerse you in a cinematic atmosphere right in your own home. To set up a surround sound system, you’ll need to consider a few essential components and follow these steps:
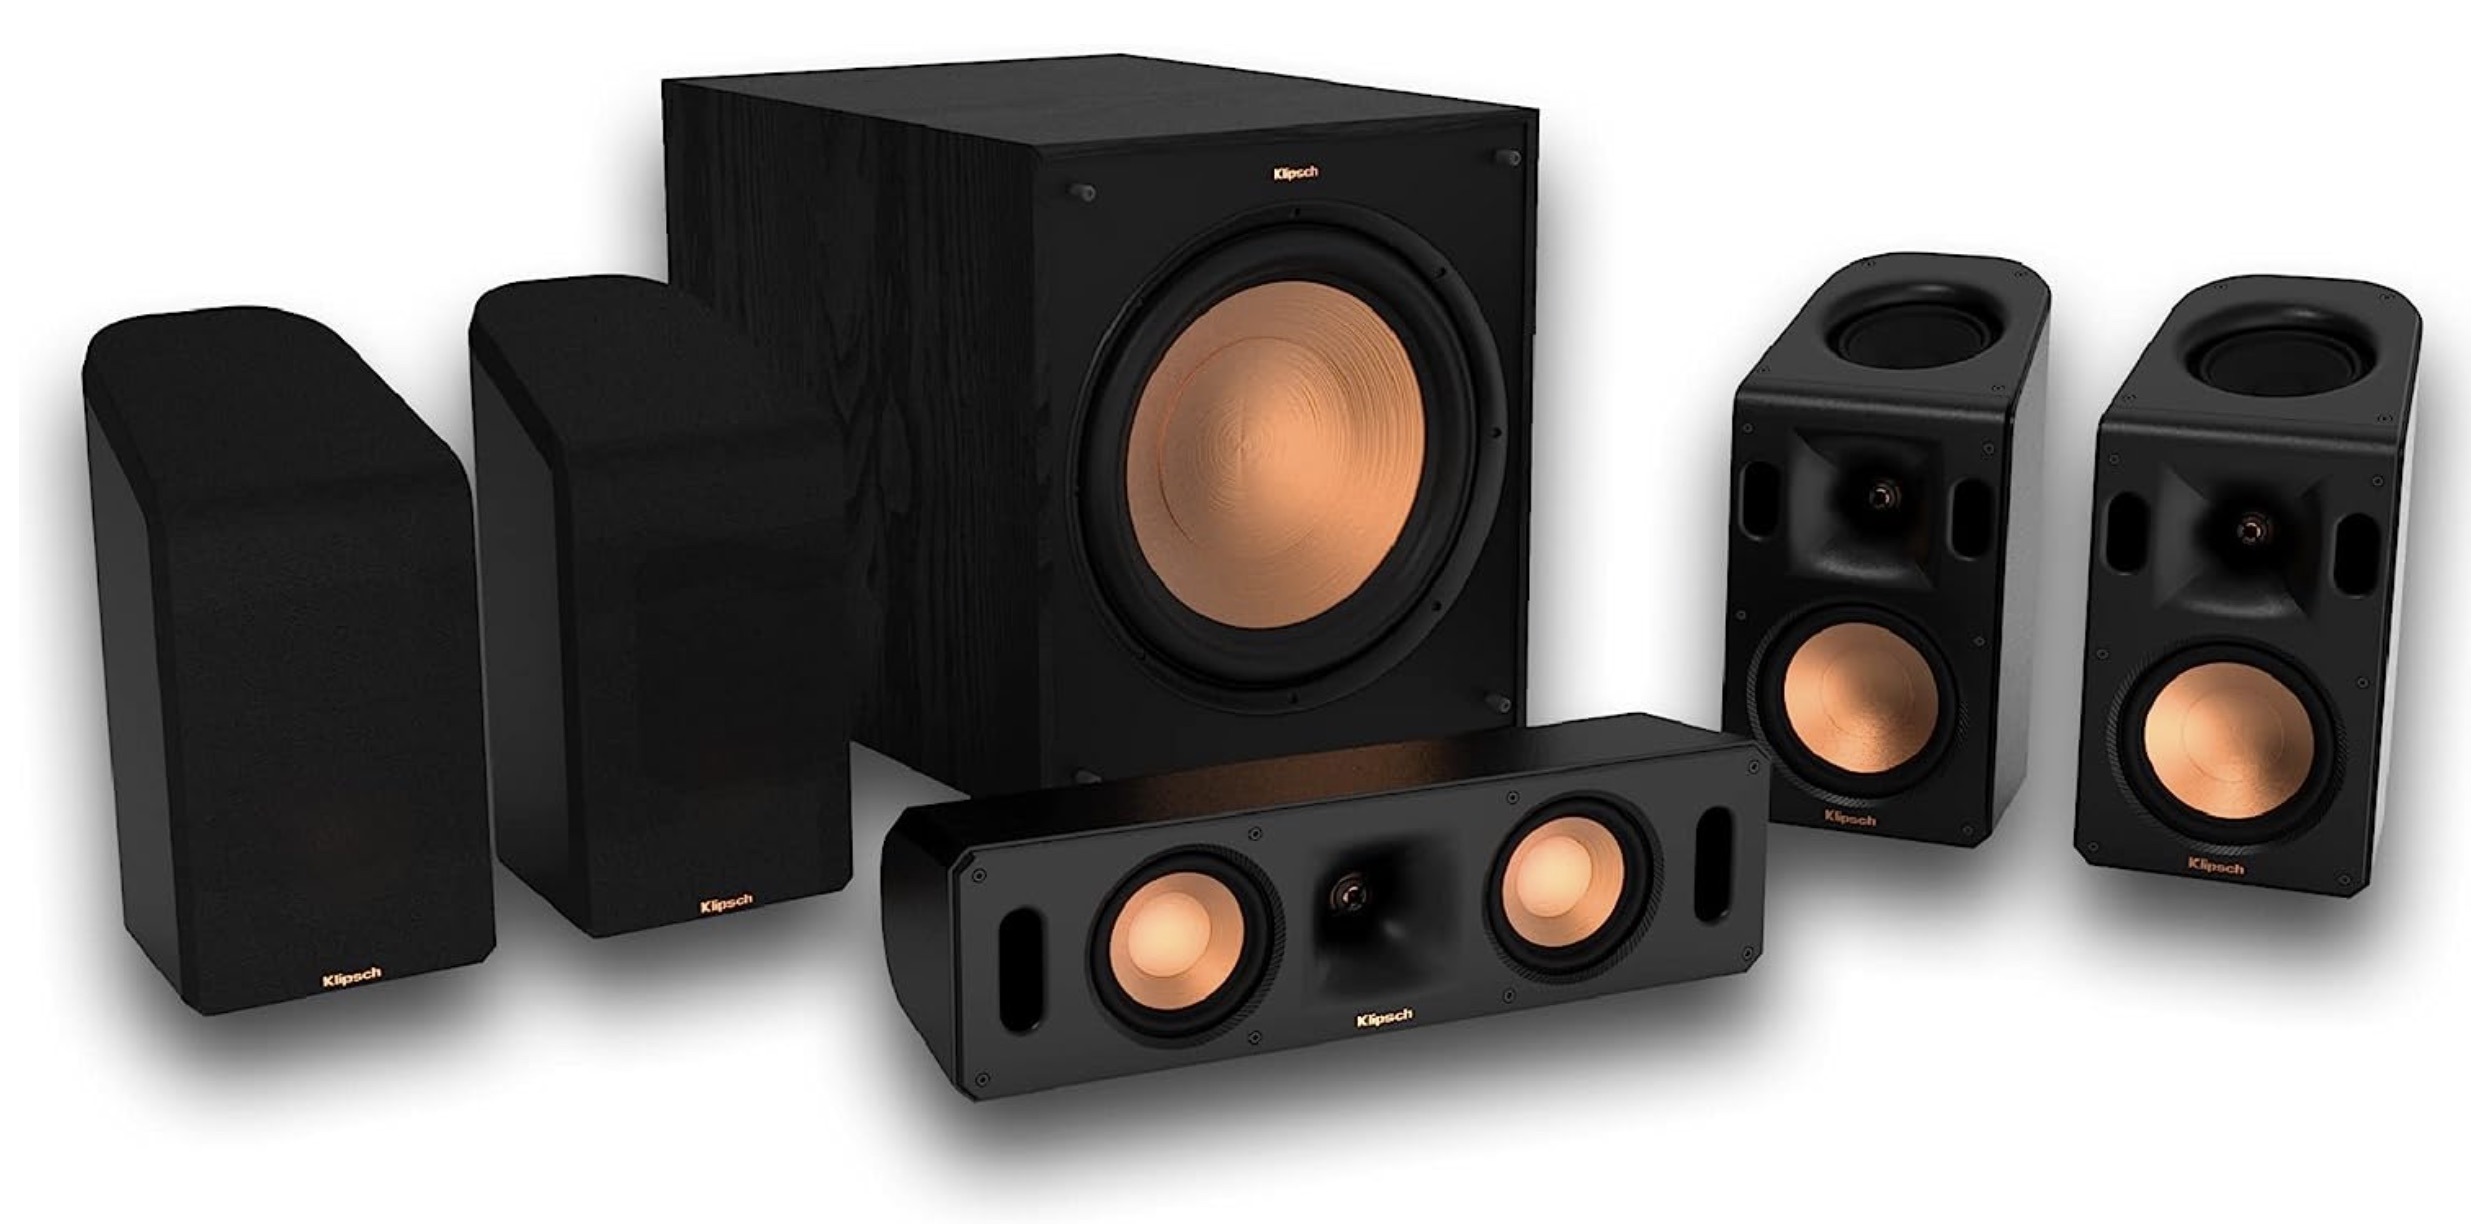
1. Determine the Room Layout: Assess the layout of your room and identify the ideal speaker placement. The most common surround sound configurations are 5.1 (five speakers and one subwoofer) and 7.1 (seven speakers and one subwoofer). Place the speakers strategically to create an immersive audio environment.
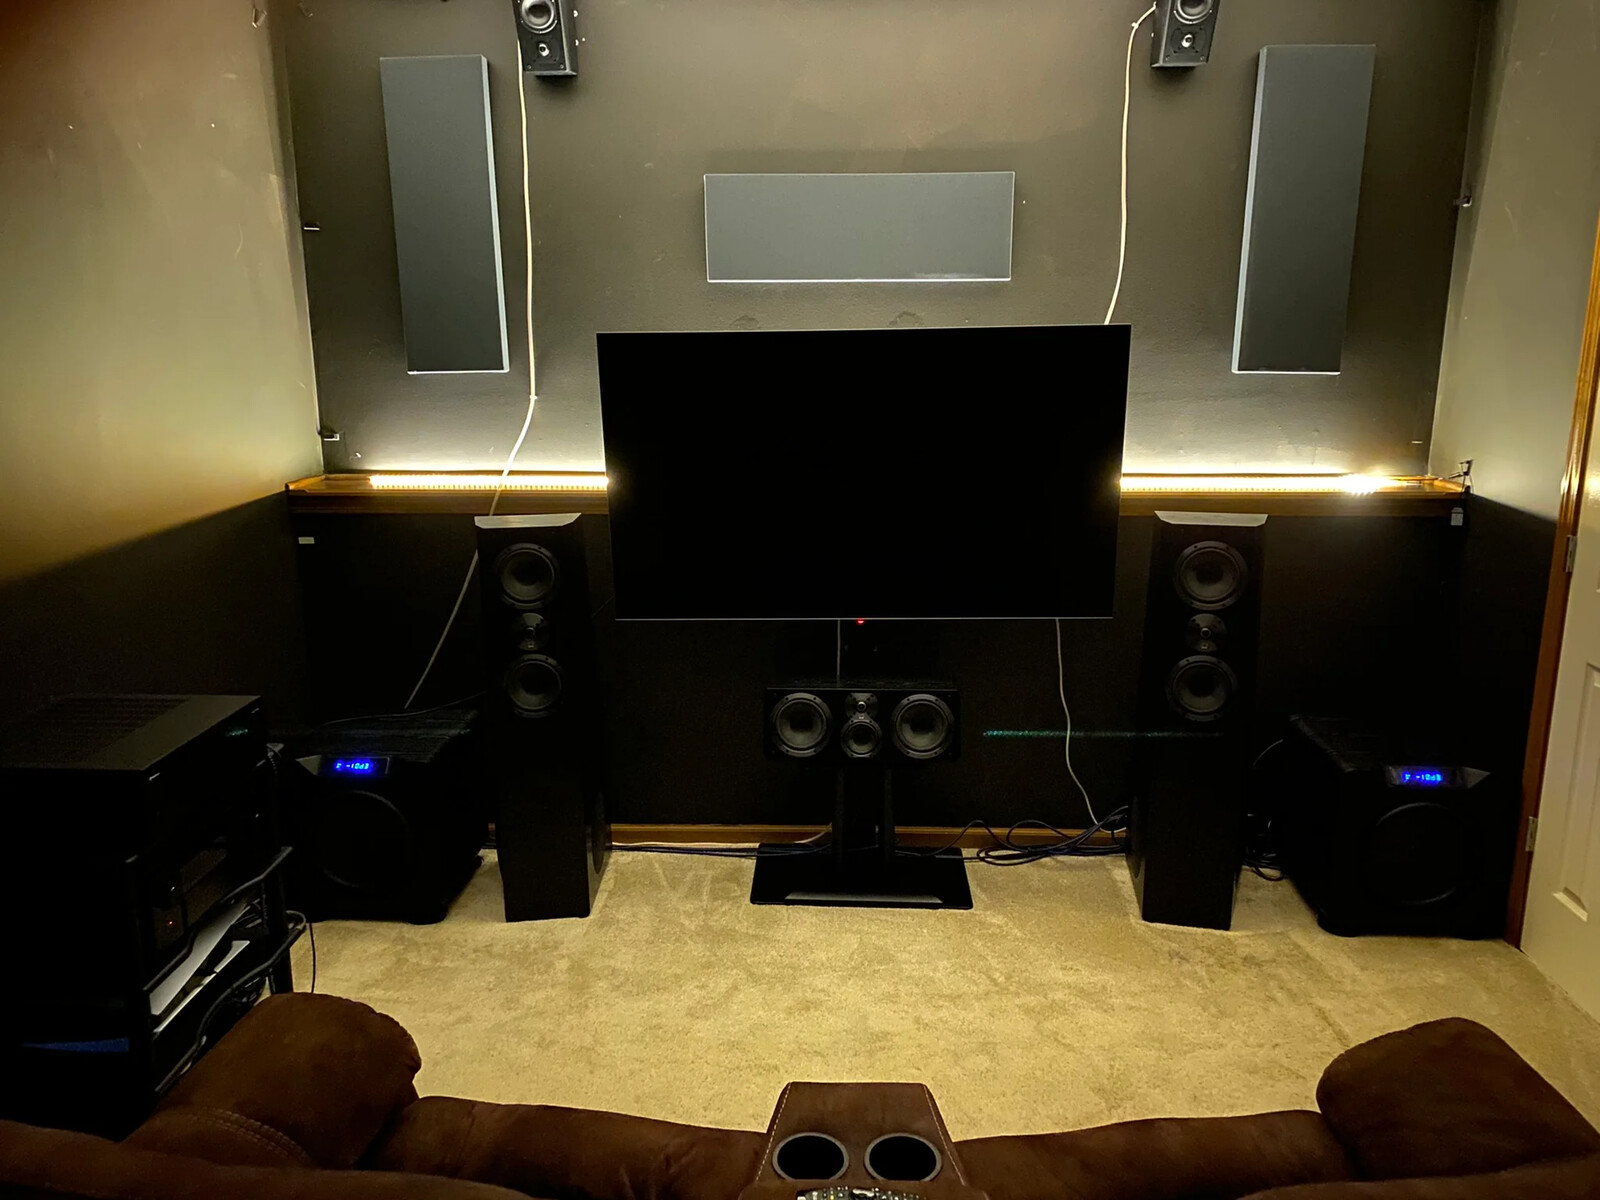
2. Connect the Front Speakers: Position the front speakers, typically placed on either side of the TV or screen, at ear level. Connect the front left and right speakers to the corresponding speaker outputs on your amplifier or receiver using the appropriate speaker wire connections.
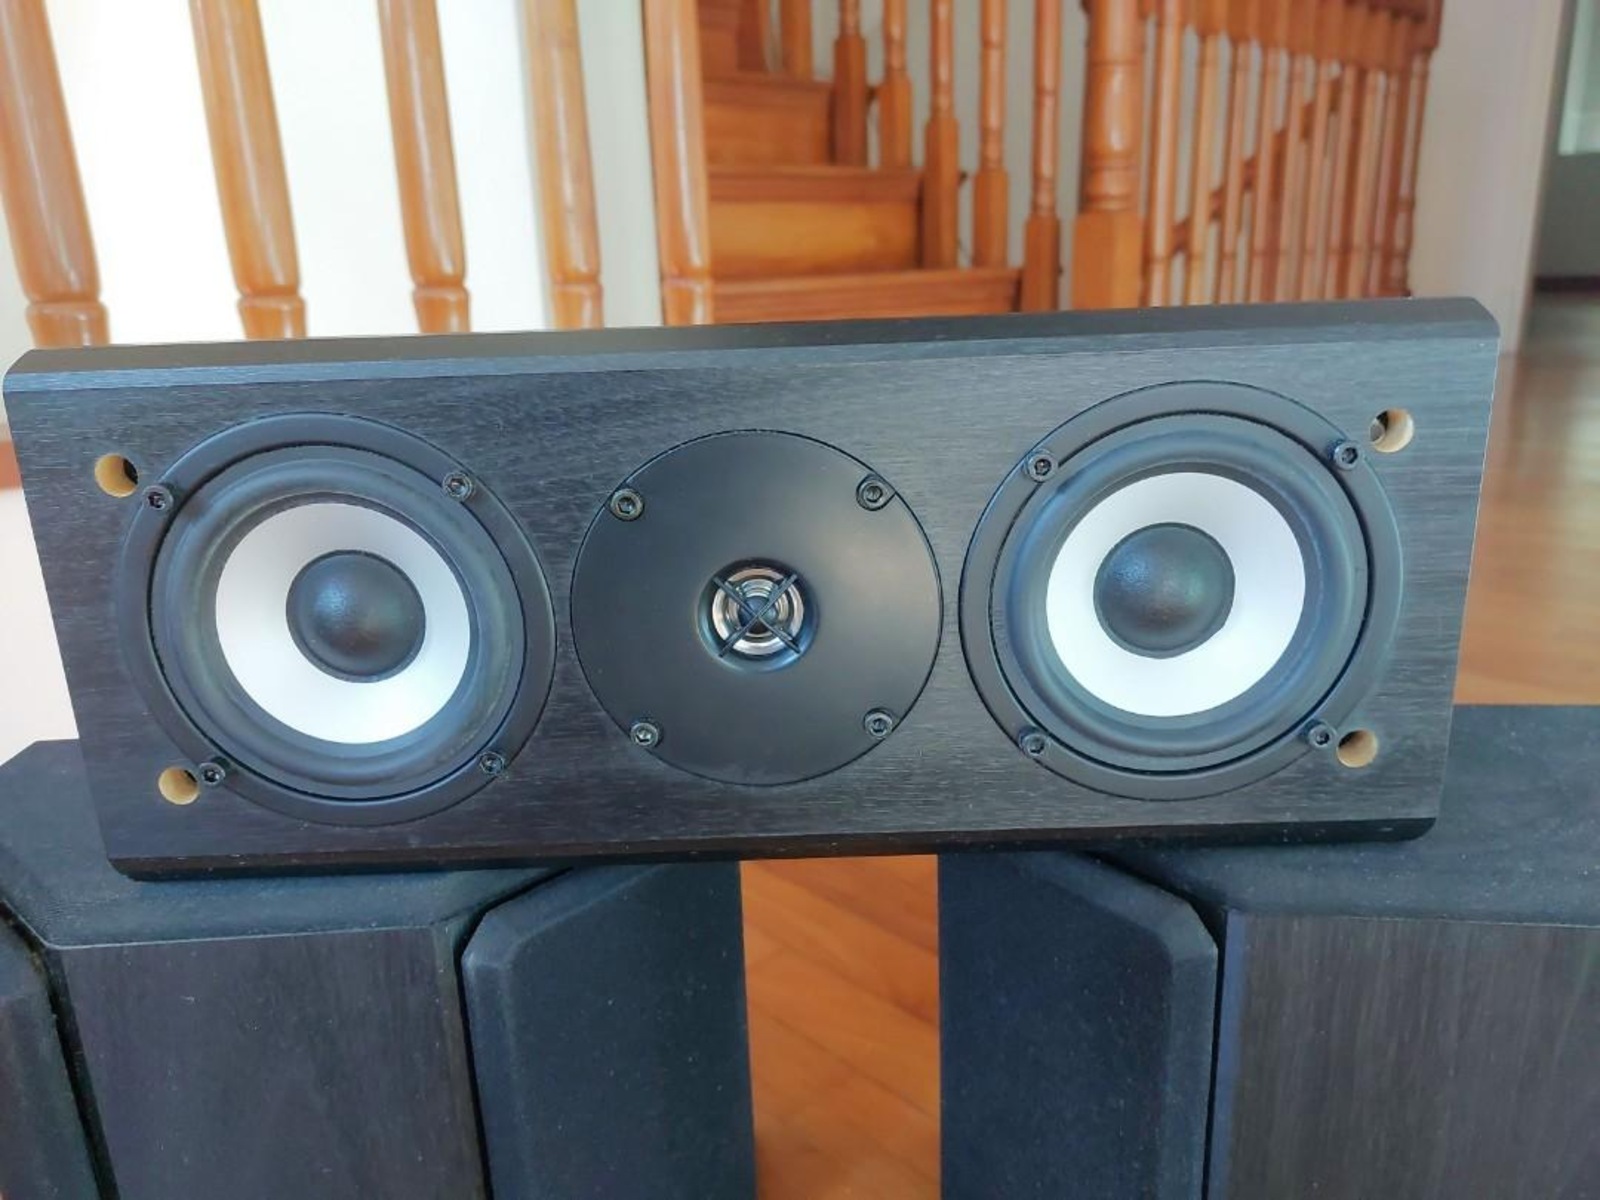
3. Set Up the Center Speaker: Place the center speaker either on top or below the TV or screen. The center speaker is responsible for delivering dialogue and front sound effects. Connect it to the center speaker output using the correct speaker wire.
4. Position the Surround Speakers: The surround speakers create a sense of depth and spaciousness in your audio. Place them behind or to the sides of the seating area, slightly above ear level. Connect the surround speakers to the corresponding speaker outputs on your amplifier/receiver.
5. Add the Subwoofer: The subwoofer provides the low-frequency bass for a more impactful audio experience. Place it in a corner or near the front speakers. Connect the subwoofer to the amplifier or receiver using an audio cable, usually an RCA cable or a dedicated subwoofer cable.
6. Configure the Amplifier/Receiver: Set up the amplifier or receiver by accessing the audio settings. Here, you can adjust speaker channels, assign the correct speaker types, and set various audio parameters, such as speaker distances and bass management.
7. Calibrate the System: Utilize the built-in calibration features of your amplifier or receiver to fine-tune the audio setup. These calibration systems use test tones and microphone measurements to adjust the audio levels and create a balanced soundstage for your specific room.
8. Test and Adjust: Play various audio sources and test the sound from each speaker to ensure they’re functioning correctly and providing the desired surround sound effect. Make any necessary adjustments to the speaker positions, settings, or audio levels to achieve the best sound quality.
By following these steps and taking the time to properly set up your surround sound system, you can create a truly immersive audio environment that enhances your movie-watching, gaming, and music-listening experiences.
Now that you have set up your surround sound system, let’s move on to the next section where we discuss testing and troubleshooting the wiring.
Testing and Troubleshooting the Wiring
Once you’ve completed the wiring for your surround sound system, it’s important to test and ensure that all connections are working properly. Here are some steps to help you test and troubleshoot any potential wiring issues:
1. Sound Check: Start by playing audio through your system and carefully listen for any issues. Check if all speakers are producing sound and if the audio is balanced across the channels. Pay attention to any distortion, buzzing, or inconsistencies in the sound.
2. Visual Inspection: Perform a visual inspection of the speaker connections and wires. Look for loose or disconnected wires, frayed insulation, or any signs of damage. Ensure that the positive and negative terminals on the speakers and amplifier/receiver are correctly connected and secure.
3. Swap Speaker Connections: If you notice issues with specific speakers, such as no sound or distortion, try swapping their connections. Disconnect the problematic speaker and connect it to a different channel on the amplifier/receiver. This will help identify if the issue is with the speaker itself or the wiring/connection.
4. Test with Different Sources and Inputs: Connect different audio sources, such as a DVD player, gaming console, or mobile device, to your amplifier/receiver. Play audio through these sources to check if the issues persist across different inputs. This will help determine if the problem lies with the wiring/connection or the specific audio source.
5. Check Amplifier/Receiver Settings: Verify that the amplifier/receiver settings are optimized for your specific audio setup. Ensure that the correct speaker size, distance, and audio levels are configured. Incorrect settings can affect the overall audio performance and cause issues with the sound output.
6. Recheck Wiring Connections: Double-check all the wiring connections, ensuring that they are securely connected and not loose. If required, tighten any loose connections. Replace any damaged or faulty cables or connectors that might be causing the issues.
7. Consult the User Manual: If you’re still experiencing issues, refer to the user manual of your speakers, amplifier, or receiver. Check the troubleshooting section for guidance on specific issues or contact the manufacturer’s support for further assistance.
By following these steps, you can effectively test and troubleshoot any wiring issues in your surround sound system. Remember to be patient and thorough in your assessment, as sometimes it may be a minor issue that can be easily resolved.
In some cases, particularly with complex setups or persistent problems, it might be best to seek the help of a professional audio technician or installer. They have the expertise and tools to diagnose and resolve any wiring or connectivity issues, ensuring optimal performance from your surround sound system.
Now that you’ve tested and addressed any wiring concerns, you’re ready to sit back, relax, and enjoy the immersive audio experience of your properly wired surround sound system!
Conclusion
Setting up a surround sound system can greatly enhance your audio experience, whether you’re enjoying movies, gaming, or listening to music. Properly wiring your speakers is a crucial step to ensure optimal sound quality and performance from your audio system.
In this guide, we’ve covered the basics of speaker wires, the importance of gauge, different types of speaker connections, wiring multiple speakers, setting up a surround sound system, and testing and troubleshooting the wiring. Understanding these concepts and following the steps provided will help you create a well-connected and immersive audio setup.
Remember to select the right gauge of speaker wire based on your setup, choose a suitable connection method for your preferences and equipment, and properly position and configure your speakers for an optimal surround sound experience.
If you encounter any issues with your wiring, take the time to troubleshoot and test the connections, and consult the user manuals or seek professional assistance when needed. Ensuring that all connections are secure and properly functioning is essential for achieving the best sound quality and preventing audio issues.
With a well-wired surround sound system, you can enjoy the full potential of your audio setup, immersing yourself in the rich soundscapes and captivating details of your favorite movies, games, and music.
Now it’s time to grab your popcorn, sit back, and let the immersive audio experience transport you into a whole new world of entertainment!