Introduction
Surround sound systems have become a staple of modern home entertainment, offering an immersive audio experience that enhances the enjoyment of movies, music, and games. However, getting the best sound from your surround sound system requires proper tuning and setup. Whether you’ve just purchased a new system or want to optimize your existing setup, this article will guide you through the process of tuning your surround sound system for optimal performance.
Understanding the intricacies of surround sound systems is essential for achieving the desired audio quality. These systems typically consist of multiple speakers strategically placed to create a surround sound effect. The speakers work together to create a three-dimensional audio experience, placing sounds not only in front of you but also to the sides and behind you, allowing for a more realistic and immersive audio experience.
However, before delving into the tuning process, it’s crucial to select the right speakers for your surround sound system. Consider factors such as speaker size, compatibility with your receiver, and the intended room size. High-quality speakers that are well-matched to your system will significantly impact the overall sound quality.
Once you’ve chosen the speakers, proper placement is crucial. Different speakers have different roles, such as front left and right channels, center channel, surround channels, and a subwoofer for low-frequency effects. Positioning the speakers correctly will create a seamless soundstage and ensure each speaker delivers sound from the intended direction.
Connecting the speakers to your receiver is the next step. Each speaker should be connected securely, and you may need to consult the manuals for both the speakers and receiver to ensure proper wiring and impedance matching.
After the physical setup is complete, calibration is essential for fine-tuning your surround sound system. This involves adjusting speaker levels, setting up the subwoofer, and adjusting audio settings to suit your preferences and the characteristics of your room. A well-calibrated system will ensure a balanced sound output and eliminate any audio imbalances.
Understanding Surround Sound Systems
Surround sound systems are designed to provide an immersive audio experience that places the listener at the center of the action. By utilizing multiple speakers strategically placed around the room, the system creates the illusion of sound coming from all directions – front, back, and sides. This adds depth, realism, and excitement to movies, music, and games.
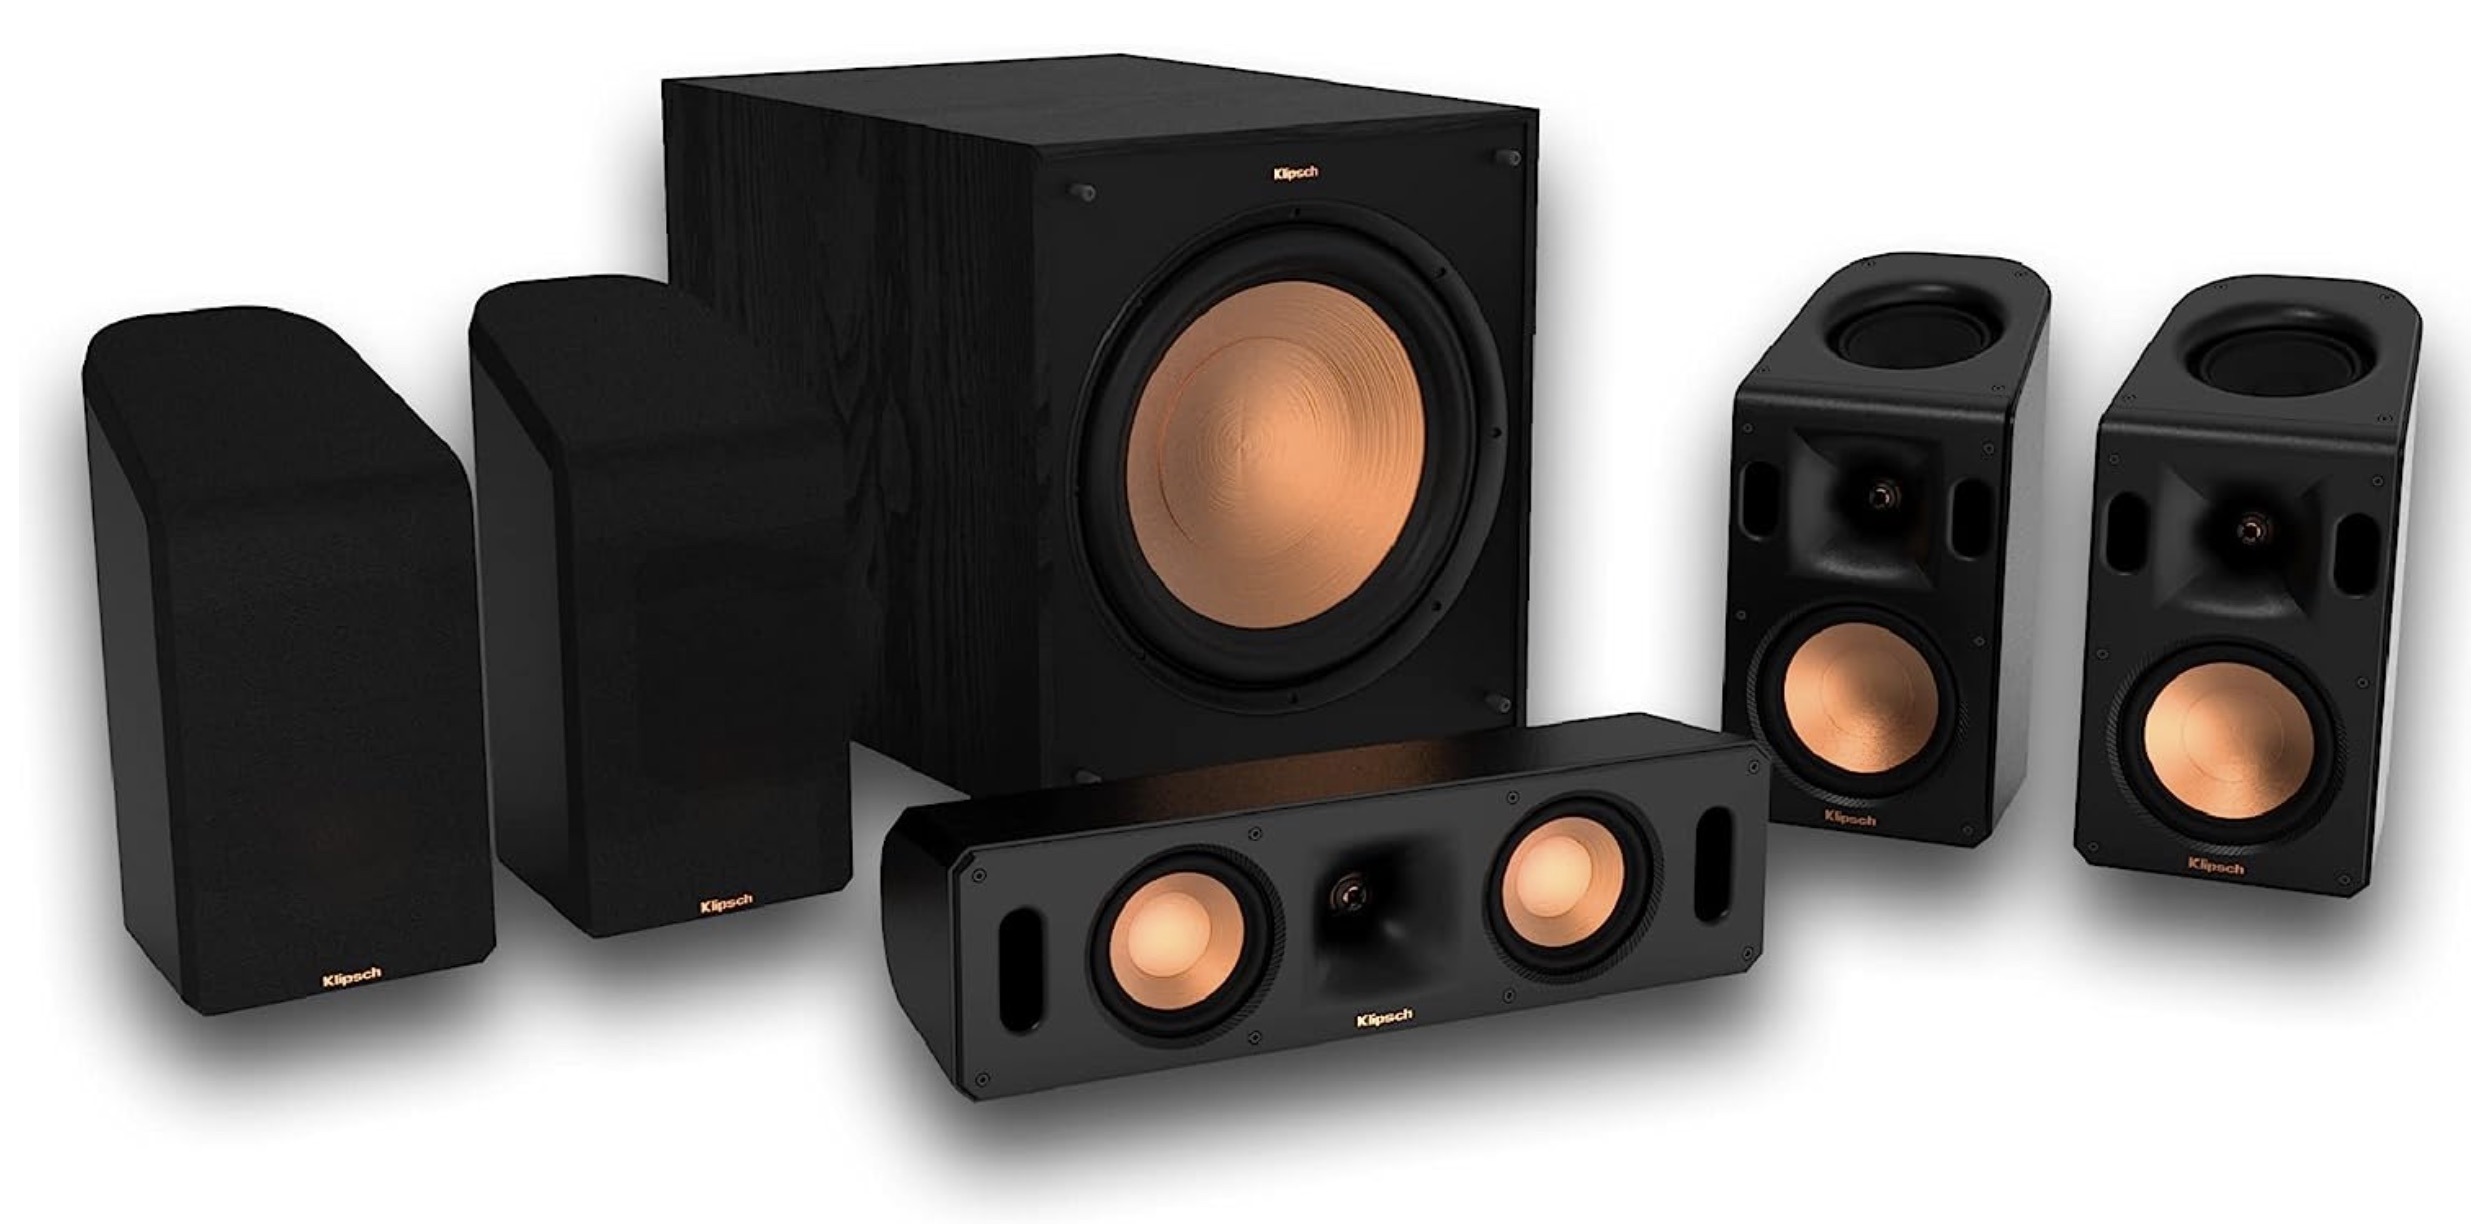
A typical surround sound system consists of several speakers and a receiver. The main speakers include the front left and right speakers, the center channel speaker, and the surround speakers. The front speakers deliver dialogue and sound effects that are meant to be heard from the front of the room, while the surround speakers create a sense of enveloping sound coming from the sides and back.
The center channel speaker enhances dialogue clarity by reproducing the majority of the dialogue in movies, making it sound like it is coming directly from the center of the screen. This ensures that dialogue remains clear and intelligible, even when accompanied by intense sound effects or music.
In addition to the main speakers, a subwoofer is an essential component of a surround sound system. The subwoofer is responsible for reproducing low-frequency sounds, such as deep bass and rumbling effects. It adds depth and impact to explosions, music, and other sound effects, making the viewing or listening experience more immersive and realistic.
Understanding the different types of surround sound formats is also important. The most common formats are Dolby Digital and DTS (Digital Theater Systems). These formats provide high-quality audio encoding that delivers superior sound reproduction. Dolby Atmos is an advanced audio technology that takes surround sound to the next level by adding height channels, creating a more three-dimensional sound experience.
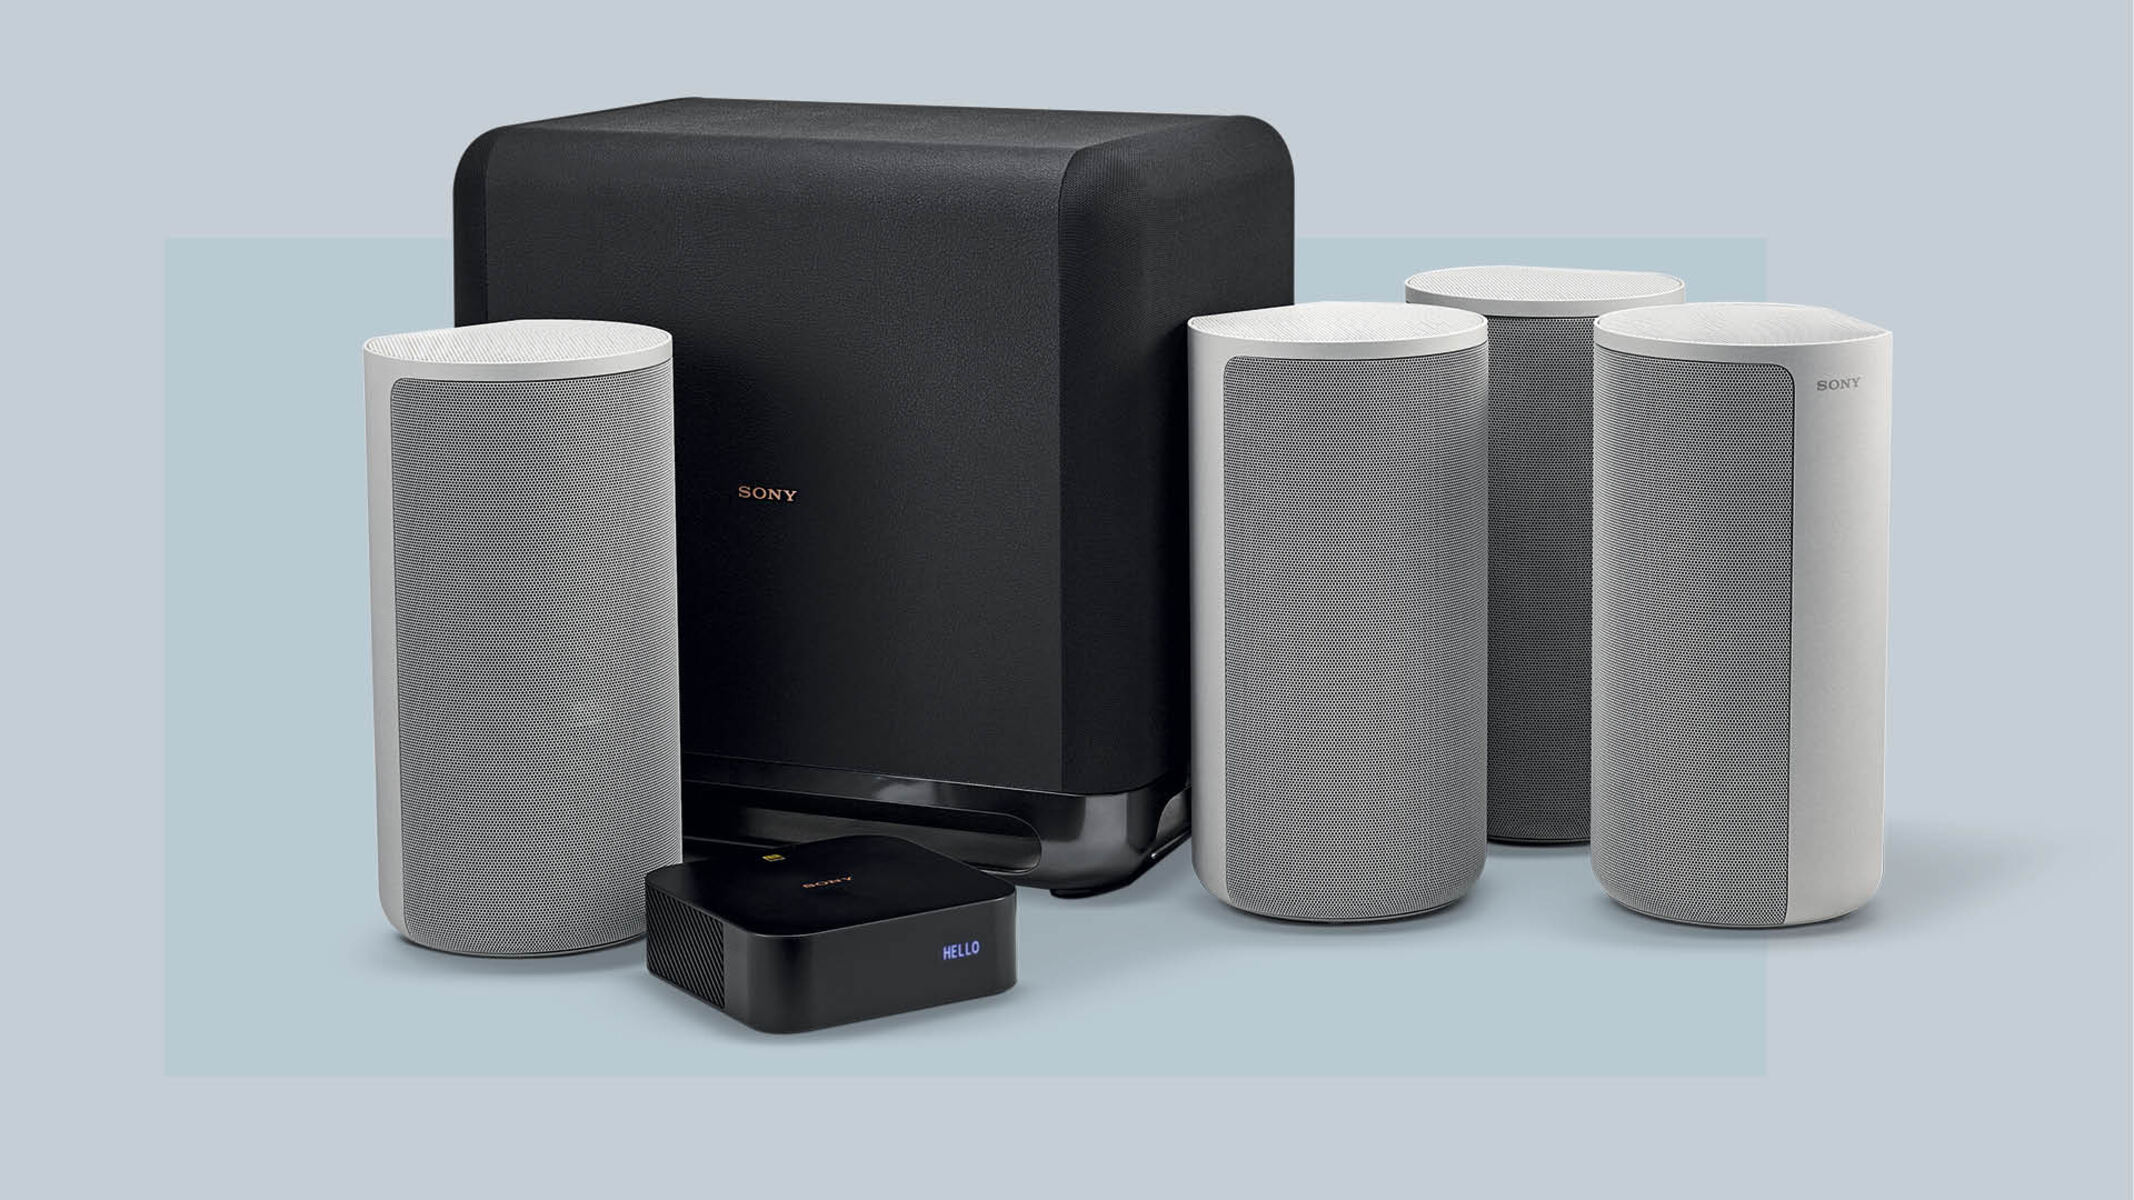
Surround sound systems can be set up in various configurations, such as 5.1, 7.1, or even more advanced setups with additional speakers. The numbers in the configuration represent the number of main speakers (including the center channel) and the number of subwoofers. The more speakers you have, the more immersive and realistic the audio experience will be.
Choosing the Right Speakers
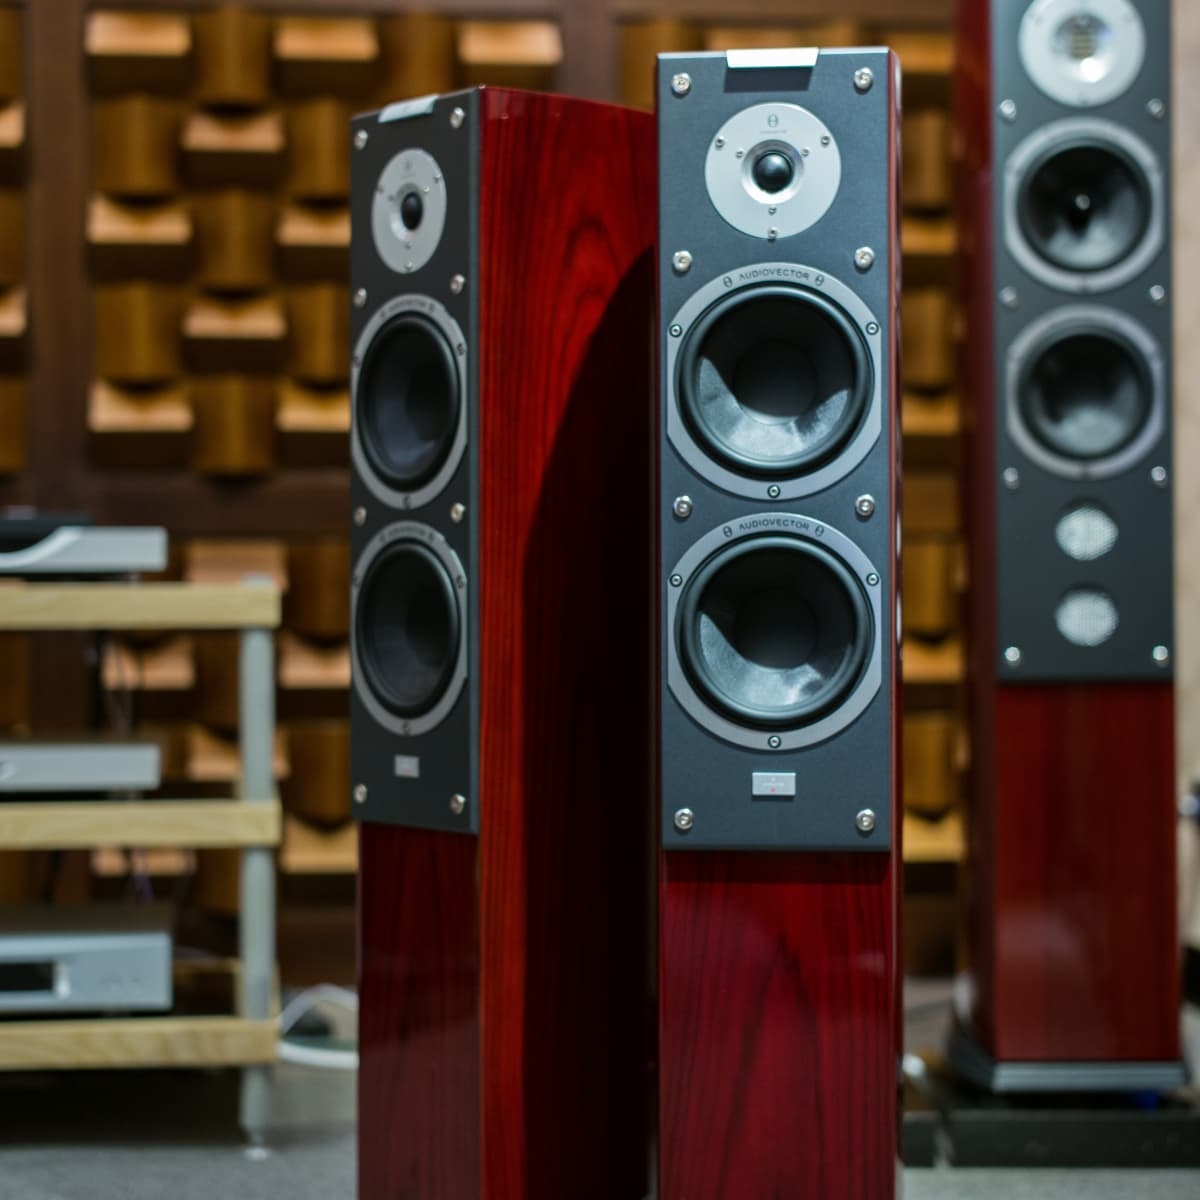
The quality and performance of your surround sound system heavily rely on selecting the right speakers. With a vast array of options available in the market, it’s important to consider several factors to ensure you choose speakers that meet your specific needs and preferences.
One crucial aspect is speaker compatibility with your receiver or amplifier. Check the specifications and power requirements of your receiver to ensure it can adequately power and handle the speakers you choose. Mismatched speakers and amplifiers can result in distorted or underpowered sound.
Speaker size is another important consideration. Different sizes provide varying levels of sound reproduction and frequency response. Larger speakers generally have more power and produce deeper bass, while smaller speakers can be more suitable for compact spaces or when a discreet setup is desired.
The room size and layout should also influence your speaker selection. Larger rooms may benefit from larger speakers or additional satellite speakers placed strategically to fill the space with sound. Conversely, smaller rooms may require smaller speakers to prevent overwhelming sound or excessive bass.
Another factor to consider is the speaker’s frequency response. This specification indicates the range of frequencies the speaker can reproduce accurately. Look for speakers with a wide frequency range to ensure detailed and balanced sound reproduction across the entire audio spectrum.
The sensitivity rating of the speakers is also significant. This rating indicates how efficiently the speakers convert power into sound. Higher sensitivity speakers require less power to produce the same volume level, making them suitable for use with lower-powered amplifiers or receivers.
Lastly, consider the overall aesthetic of your room and personal preference for speaker design. Speakers come in various shapes, colors, and finishes, allowing you to choose ones that complement your decor and style.
Remember that choosing high-quality speakers is an investment in the long-term enjoyment of your surround sound system. Research different brands, read reviews, and if possible, listen to them in person before making a final decision. Taking the time to select the right speakers will result in a more satisfying and immersive audio experience.
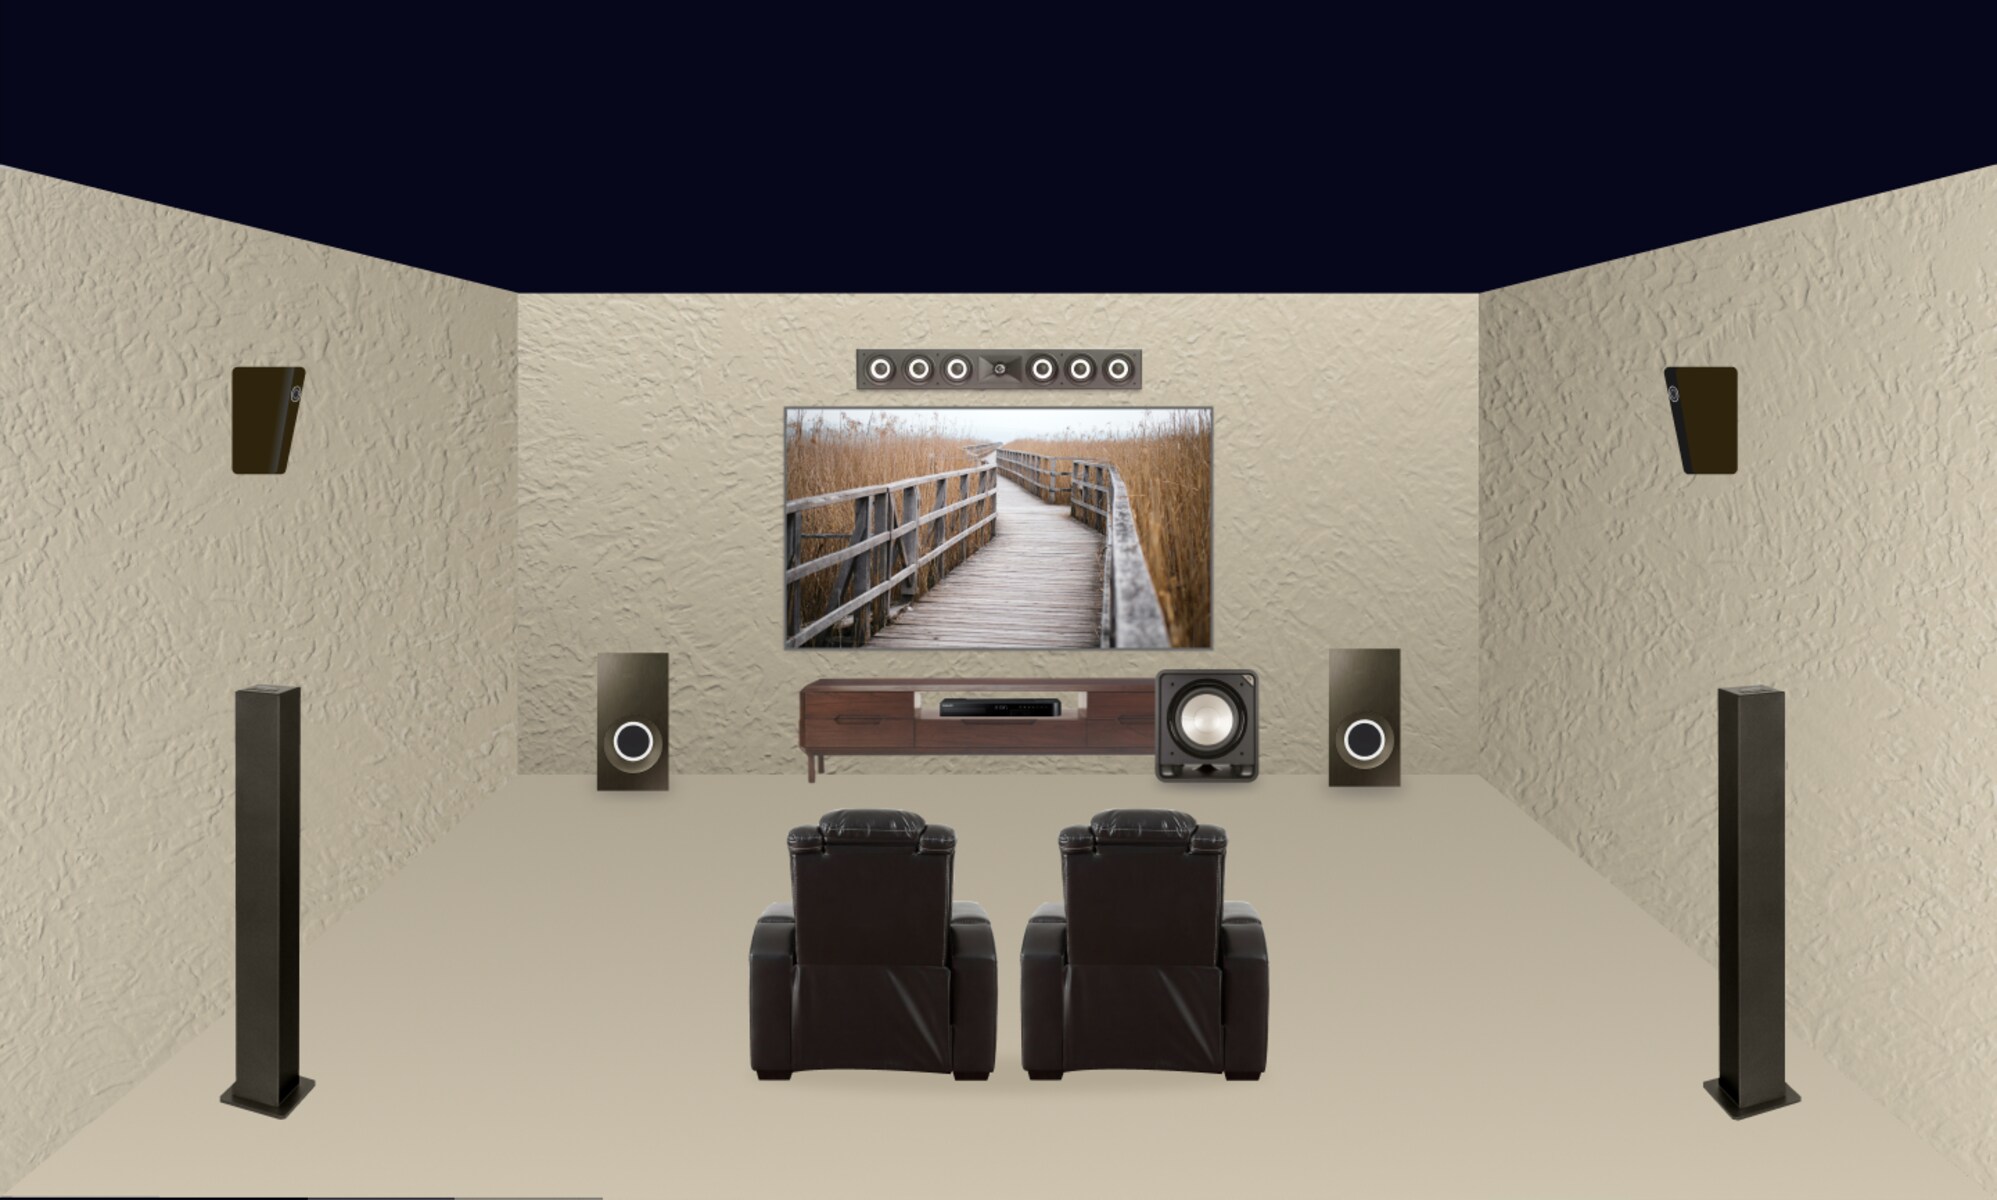
Placing the Speakers
The placement of speakers in your surround sound system is crucial for achieving optimal audio performance. Proper speaker placement ensures that sound is accurately delivered from the intended direction, creating a realistic and immersive experience. Here are some guidelines for placing your speakers:
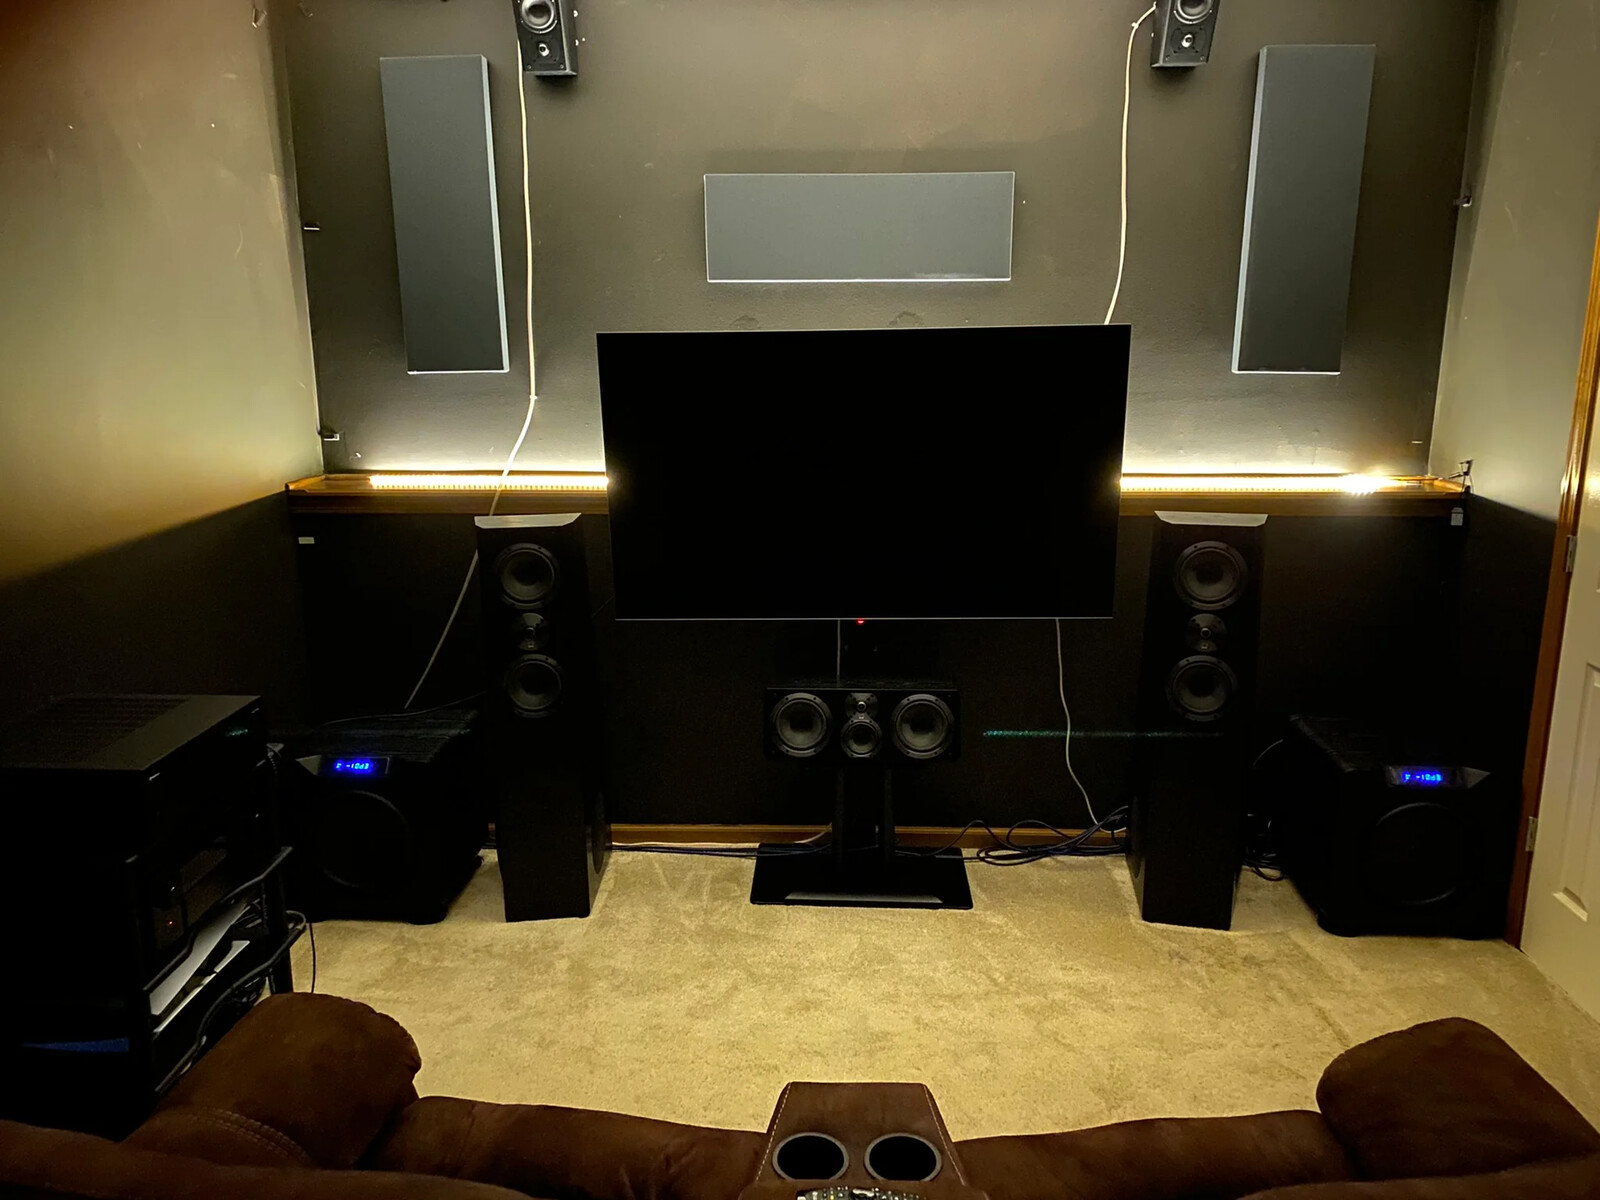
Front Speakers: The front left and right speakers should be placed at ear level, slightly angled towards the listening area. They should ideally be positioned equidistant from the TV or screen and form an equal triangle with the listening position. This setup creates a balanced soundstage and accurately reproduces sound effects and dialogue coming from the front.
Center Channel Speaker: The center channel speaker should be positioned directly above or below the TV or screen, aligned with the front speakers. This ensures that dialogue remains anchored to the center of the screen and enhances clarity. If placing the speaker above the TV, ensure that it is angled downwards to direct the sound towards the listening position.
Surround Speakers: The surround speakers should be positioned slightly behind the listening area, preferably at ear level or slightly above. They should be angled towards the listening position and placed equidistant from it. The purpose of the surround speakers is to create a spacious and enveloping sound experience, immersing you in the audio environment. Experiment with different angles and positions to find the optimal placement for your particular room.
Subwoofer: The subwoofer is less position-dependent due to its low-frequency nature, but strategic placement can still impact the overall sound quality. It is generally recommended to place the subwoofer near the front of the room, as close to the front speakers as possible. Experiment with different positions to find the location where the subwoofer provides the best bass response and integration with the main speakers.
Keep in mind that room acoustics can also affect the performance of your speakers. Hard surfaces can cause sound reflections and reverberations, while soft furnishings can help absorb some of these reflections. Consider adding acoustic panels or curtains to minimize any adverse effects on the sound quality.
It is important to note that individual room characteristics can vary, so take the time to experiment with speaker placement and listen critically to the results. Fine-tuning the placement based on your specific room and preferences will lead to a more accurate and immersive surround sound experience.
Connecting the Speakers and Receiver
Properly connecting the speakers to your receiver is essential for ensuring optimal performance and sound quality in your surround sound system. Each speaker should be wired correctly and securely connected to the appropriate channels on the receiver. Follow these steps to connect your speakers:
1. Check the speaker wires: Ensure that you have enough speaker wire to reach from the receiver to each speaker. For optimal performance, use high-quality wire with the appropriate gauge. Thicker wire is typically better for longer distances or more powerful speakers.
2. Connect the speaker wires: Strip a small section of insulation from each end of the wire. For each speaker, match the positive (+) terminal on the speaker with the corresponding positive terminal on the receiver, and do the same for the negative (-) terminals. Insert the wire into the terminals and tighten them securely to make a solid connection.
3. Pay attention to polarity: Ensure that the positive and negative terminals on both the speakers and the receiver are properly aligned. Correct polarity ensures that the speakers are in phase and produces accurate sound reproduction. Improper polarity can result in a loss of bass or an unbalanced soundstage.
4. Double-check the connections: Once all speakers are connected, double-check the wires to ensure they are securely fastened. Loose connections can cause intermittent sound or poor performance. Take extra care with banana plugs or other types of connectors to ensure a proper connection.
5. Consider color coding: To keep things organized, you may want to use color-coded speaker wire or labels to identify which wire corresponds to each channel on the receiver. This makes it easier to troubleshoot or make adjustments in the future.
6. Follow the receiver’s manual: Consult the user manual of your receiver to understand the specific terminals or connections for each speaker channel. Different receivers may have different labeling methods or configurations.
7. Perform a sound check: Once all the connections are made, turn on your surround sound system and test each speaker to ensure they are working correctly. Play a test tone or a piece of audio with distinct sound coming from each speaker to verify that the connection and positioning are accurate.
By following these steps and ensuring proper connections, you can ensure that each speaker in your surround sound system functions as intended, providing an immersive and high-quality audio experience.
Calibrating the System
Calibrating your surround sound system is a crucial step in achieving optimal audio performance. Proper calibration ensures that the speaker levels, subwoofer settings, and other audio parameters are all balanced for an accurate and immersive sound experience. Here are the essential steps to calibrate your system:
1. Access the receiver’s setup menu: Most receivers have an on-screen setup menu where you can adjust various audio settings. Consult the receiver’s manual to locate and navigate the setup menu.
2. Enable the room correction feature: Many modern receivers offer room correction features, such as Audyssey or other proprietary technologies. Enable this feature to automatically analyze your room’s acoustics and make adjustments accordingly.
3. Run the auto-calibration process: Follow the on-screen instructions to run the auto-calibration process. This usually involves using a microphone provided with the receiver to measure the sound output from each speaker. Allow the receiver to analyze and adjust the audio settings based on the measurements.
4. Adjust speaker levels: After the auto-calibration process, review the speaker levels assigned by the receiver. Fine-tune the levels manually if necessary, ensuring that all speakers are balanced in volume and output. You can typically adjust the levels individually for each channel in the receiver’s setup menu.
5. Set the crossover frequency: The crossover frequency determines the point at which the subwoofer begins to handle low-frequency sounds. Set the crossover frequency to blend smoothly with the main speakers. The recommended value is usually around 80Hz, but you can adjust it according to your preference and the capabilities of your speakers and subwoofer.
6. Adjust the subwoofer phase: The phase of the subwoofer can affect its integration with the main speakers. Experiment with the subwoofer phase setting to find the position that provides the smoothest and most cohesive bass response. This setting is typically found in the subwoofer or speaker setup menu of the receiver.
7. Fine-tune other audio settings: Explore the audio settings in the receiver’s menu to customize the sound output to your liking. This may include adjusting equalizer settings, applying sound modes, or tweaking surround sound effects. Be mindful not to overdo these adjustments, as they may affect the accuracy of the sound reproduction.
8. Save the settings: Once you are satisfied with the calibration and fine-tuning, save the settings in the receiver’s setup menu. This ensures that your adjustments are retained even after powering off the system.
Remember that room acoustics and personal preferences can vary, so feel free to make additional adjustments based on your listening environment and desired sound experience. Regularly reviewing and recalibrating your surround sound system can help maintain optimal audio performance over time.
Adjusting Speaker Levels
Properly balancing the speaker levels in your surround sound system is essential for achieving accurate and immersive audio. Each speaker should be set to the appropriate level to ensure that the sound output is well-balanced and that dialogue, music, and sound effects are properly reproduced. Here are the steps to adjust the speaker levels:
1. Access the receiver’s setup menu: Refer to the receiver’s manual to locate the setup menu. This is where you can access the speaker level settings and make adjustments.
2. Choose a test signal: Select a test signal or a piece of audio that allows you to hear distinct sounds coming from each speaker individually. This can be a test tone or a movie scene with sound effects positioned in different channels.
3. Start with the front speakers: Begin by adjusting the levels of the front left and right speakers. Play the test signal and listen carefully to the output from these speakers. Increase or decrease the level of each speaker in the receiver’s menu until they are balanced and sound equally loud.
4. Proceed to the center channel: The center channel speaker is responsible for dialogue reproduction. Play the test signal and focus on the clarity and volume of the dialogue. Adjust the level of the center speaker to ensure that dialogue remains clear and well-integrated with the other speakers.
5. Adjust the surround speakers: Play the test signal again and pay attention to the output from the surround speakers. These speakers should provide ambient sounds and sound effects from the sides and rear. Increase or decrease the level of each surround speaker to achieve a balanced and immersive surround sound experience.
6. Fine-tune other speakers: If your surround sound system includes additional speakers, such as height or overhead channels, adjust their levels individually. These speakers are responsible for creating a more three-dimensional audio experience. Ensure that their levels blend well with the rest of the speakers and provide a seamless soundstage.
7. Do a final sound check: Once you have adjusted all the speaker levels, perform a final sound check with a variety of audio content, such as movies, music, or games. Listen for any inconsistencies or imbalances in the sound output and make minor adjustments if necessary.
Remember that the ideal speaker levels can vary depending on your personal preferences, room acoustics, and the characteristics of your speakers. Take the time to experiment and listen critically to achieve a well-balanced and immersive surround sound experience.
Setting Up the Subwoofer
The subwoofer is a critical component of your surround sound system, responsible for reproducing low-frequency sounds and adding depth and impact to the overall audio experience. Properly setting up the subwoofer ensures that it integrates seamlessly with the main speakers and delivers well-balanced bass. Here are the steps to set up your subwoofer:
1. Placement: Find an optimal location for the subwoofer in your room. While subwoofers are typically non-directional, placing them near the front of the room, between the front speakers, tends to provide the best bass response. Experiment with different positions to find the location that produces the smoothest and most even bass throughout the room.
2. Connection: Connect the subwoofer to the receiver using a subwoofer cable. Most subwoofers have a dedicated subwoofer output on the receiver, labeled “Sub Out” or “LFE Out.” Connect one end of the subwoofer cable to this output on the receiver and the other end to the input on the subwoofer labeled “Sub In” or “LFE In.”
3. Power on the subwoofer: Ensure that the subwoofer is powered on and properly connected to a power source. Check the subwoofer’s power indicator to confirm that it is receiving power.
4. Subwoofer Phase: Many subwoofers have a phase control dial that allows you to adjust the phase of the subwoofer. Start with the phase set to 0 degrees or the default setting. If you notice a lack of bass or integration issues with the main speakers, experiment with adjusting the phase control to improve the bass response and blend with the other speakers.
5. Crossover Settings: The crossover settings determine the frequency at which the subwoofer starts to handle low-frequency sounds. Use the receiver’s setup menu or the subwoofer’s controls to set the crossover frequency. The recommended starting point is typically around 80Hz, but adjust it based on the capabilities of your main speakers and personal preference. A higher crossover point may result in more localization of the bass, while a lower point may provide a smoother transition between the subwoofer and main speakers.
6. Subwoofer Level: Adjust the subwoofer level to achieve a balanced bass response. Use the level control on the subwoofer or in the receiver’s setup menu to increase or decrease the subwoofer’s volume. Start with a neutral position and make incremental adjustments while listening to different audio content. Avoid overpowering the bass, as this can lead to boomy or distorted sound.
7. Sound Check: Test the subwoofer by playing audio that includes deep bass or low-frequency effects. Listen for a tight, impactful, and well-integrated bass response. Make minor adjustments to the subwoofer level or crossover settings as needed to achieve a balanced sound.
Remember to take the specific characteristics of your room into account when setting up the subwoofer. Experiment with placement and settings to achieve the best possible bass performance, enhancing the overall audio experience of your surround sound system.
Adjusting the Audio Settings
Adjusting the audio settings of your surround sound system allows you to fine-tune the sound output to suit your preferences and the acoustics of your room. By making adjustments to the equalizer settings, sound modes, and other audio parameters, you can enhance the audio experience and tailor it to your liking. Here are the key audio settings to consider:
1. Equalizer Settings: Most receivers offer equalizer settings that allow you to adjust the frequency response of the audio. Experiment with the equalizer to boost or cut certain frequency ranges to achieve the desired tonal balance. For example, increasing the low frequencies can enhance the impact of explosions and deep bass, while reducing the high frequencies can minimize harshness in the sound.
2. Sound Modes: Many receivers come with predefined sound modes that enhance specific types of content or simulate different listening environments. Experiment with different sound modes, such as “Movie,” “Music,” or “Game,” to find the one that suits your preference and optimizes the audio for the specific content you are enjoying.
3. Surround Sound Effects: Surround sound systems often offer various sound effects that simulate different listening environments or enhance specific audio elements. These effects may include virtual surround sound, dialogue enhancement, or dynamic range compression. Adjust these settings based on your preference and the content you are listening to.
4. Dynamic Range: The dynamic range refers to the difference between the quietest and loudest sounds in a piece of audio. Adjusting the dynamic range compression settings can help normalize the levels, making soft sounds easier to hear and reducing the volume of loud or sudden sounds. This is particularly useful when watching movies or playing games with wide variations in sound intensity.
5. Dialog Enhancements: Some receivers have features specifically designed to improve dialogue clarity. If you find that dialogue is getting lost in the mix or is difficult to understand, enable dialog enhancements or adjust the center channel level to ensure that dialogue remains clear and intelligible.
6. Bass Management: Use the bass management settings in your receiver to fine-tune how low frequencies are distributed between the speakers and the subwoofer. This allows you to control the crossover frequencies and set the appropriate levels for each speaker, ensuring a cohesive and balanced bass response.
7. Room Correction: Many receivers offer room correction features that analyze the acoustics of your room and make adjustments to compensate for any sound anomalies. Run the room correction process as per the receiver’s instructions to optimize the audio performance based on your room’s unique characteristics.
8. Experiment and Listen: Each room and personal preference is unique, so take the time to experiment with different settings and listen critically to the results. Make incremental adjustments and trust your ears to find the audio settings that best suit your listening environment and provide an immersive and enjoyable audio experience.
Remember to avoid excessive adjustments or over-processing of the audio, as this can negatively impact the accuracy and quality of the sound reproduction. Find the right balance and settings that enhance the audio without sacrificing fidelity.
Testing and Fine-Tuning the Sound
After setting up and adjusting the various components of your surround sound system, it’s important to test and fine-tune the sound to ensure optimal performance. By conducting thorough testing and making small adjustments, you can fine-tune the system to deliver the best possible audio experience. Here’s what you need to do:
1. Test Different Content: Play a variety of audio content, including movies, music, and games, to gauge the performance of your surround sound system across different genres and soundscapes. Different types of content may highlight specific strengths or weaknesses in the audio, allowing you to identify areas for improvement.
2. Assess Dialogue Clarity: Listen carefully to dialogue-heavy scenes in movies or TV shows to ensure that the dialogue remains clear and intelligible. Adjust the center channel level if needed to enhance dialogue clarity without overpowering other audio elements.
3. Evaluate Surround Effects: Pay attention to the surround sound effects and ambiance in movies or games. Make sure the surround speakers convey a sense of space and locality, with sounds moving smoothly and seamlessly from one speaker to the next. Adjust speaker positioning, levels, or sound modes if necessary to create a well-balanced and immersive surround experience.
4. Check Bass Performance: Listen for the impact and depth of bass from the subwoofer. The bass should be tight, well-integrated with the main speakers, and not overpowering. Experiment with the subwoofer level and crossover settings to achieve a balanced and full-bodied bass response that complements the overall sound.
5. Assess Overall Balance: Listen to a variety of audio content and assess the overall balance of sound. Ensure that different audio elements, such as dialogue, music, and sound effects, are well-balanced and not overshadowing one another. Make small adjustments to individual speaker levels or equalizer settings to achieve a harmonious and cohesive soundstage.
6. Seek Input from Others: Consider seeking feedback from others who can listen to your surround sound system. Their fresh ears may provide valuable perspective and help identify any areas that could benefit from improvement. Take their feedback into account and make necessary adjustments based on their recommendations.
7. Repeat the Process: Fine-tuning audio settings and speaker positioning is an iterative process. As you make adjustments and listen to different content, you may discover areas that require further refinement. Be patient and willing to make incremental changes until you achieve the desired sound quality.
8. Document Your Settings: Once you are satisfied with the sound performance, consider documenting your settings. Take note of the speaker levels, crossover settings, equalizer adjustments, and any other customizations you made. This way, you can easily restore or replicate the settings in the future.
Remember that every room and personal preference is different, so trust your ears and make adjustments that align with your preferences. By thoroughly testing and fine-tuning the sound of your surround sound system, you can unlock its full potential and enjoy a truly immersive audio experience.
Conclusion
Tuning a surround sound system is a crucial step in maximizing your audio experience. By understanding the components of a surround sound system, choosing the right speakers, placing them correctly, and calibrating and adjusting the settings, you can achieve an immersive and high-quality sound experience.
Start by selecting speakers that are compatible with your receiver and suited to your room size and preferences. Proper placement of speakers enhances the surround sound effect and creates a realistic and engaging audio environment. Take the time to connect the speakers securely to the receiver and check for proper wiring and polarity.
Calibrating your surround sound system involves running auto-calibration processes, adjusting speaker levels, setting up the subwoofer, and fine-tuning audio settings such as equalizer settings, sound modes, and surround sound effects. Through careful calibration, you can achieve balanced sound reproduction across all speakers and optimize bass response.
Testing and fine-tuning the sound is a crucial step in achieving the desired audio performance. By listening to various audio content, assessing dialogue clarity, evaluating surround effects, and balancing the overall sound, you can refine the system to your preferences. Paying attention to details such as bass performance and seeking input from others can help further enhance the sound quality.
Remember, the process of tuning a surround sound system is iterative. It may require experimentation and adjustments to achieve the perfect sound for your specific room and preferences. With patience and attention to detail, you can create a captivating and immersive audio experience that brings movies, music, and games to life.