Introduction
Welcome to the world of smart thermostats, where convenience and energy efficiency go hand in hand. Imagine being able to control your home’s heating and cooling system effortlessly from your smartphone or using voice commands. With a smart thermostat, you can do exactly that and more. Whether you’re looking to upgrade your current thermostat or have just moved into a new home and want to take advantage of the latest technology, this guide will walk you through the process of setting up your smart thermostat.
A smart thermostat is a device that connects to your heating and cooling system, allowing you to control and manage it remotely. It is equipped with advanced features like Wi-Fi connectivity, mobile apps, and even integration with voice assistants like Amazon Alexa or Google Assistant. By using a smart thermostat, you can optimize your energy usage, save on utility bills, and enjoy enhanced comfort in your living space.
In this guide, we will provide step-by-step instructions on how to set up your smart thermostat. We’ll cover everything from unboxing the device to troubleshooting common issues. By the end, you’ll have a fully functional smart thermostat that suits your lifestyle and helps you maintain a comfortable environment in your home while reducing energy waste.
Before we dive into the details, it’s important to note that each brand and model of smart thermostat may have specific setup instructions. Therefore, it’s crucial to refer to the manufacturer’s user manual for your particular device to ensure accurate installation and configuration. However, this guide will give you a general overview of the process and highlight common steps involved in setting up a smart thermostat.
Step 1: Unbox the Smart Thermostat
The first step in setting up your smart thermostat is unboxing the device. Start by locating the box that contains your new smart thermostat. Carefully remove the packaging and check that all the necessary components are included. These components typically include the thermostat unit, mounting hardware, screws, and any additional accessories that may be required for installation.
Once you have confirmed that all the components are present, take a few moments to familiarize yourself with the thermostat unit. Look for any labels or instructions on the device that may help you during the installation process. It’s also a good idea to read the user manual or installation guide provided by the manufacturer, as it may contain important information specific to your thermostat model.
During this step, you may also want to take note of any additional features or smart capabilities that your thermostat offers. This will help you understand the full range of functionality available to you and make the most of your smart thermostat experience.
After unboxing and familiarizing yourself with your smart thermostat, you can now proceed to the next step of the installation process. Each step will bring you closer to enjoying the benefits of a smart and efficient heating and cooling system in your home.
Step 2: Install the Smart Thermostat
Now that you have unboxed your smart thermostat, it’s time to install it. Before you begin the installation process, make sure that you have turned off the power to your heating and cooling system to prevent any accidents or damage. If you’re not familiar with your home’s electrical system, it’s best to consult a professional electrician for assistance.
Start by removing your old thermostat from the wall. Gently unscrew and detach the thermostat unit, being careful not to damage any wiring behind it. Take note of the wiring connections and how they are labeled. This will be useful when connecting the wires to your new smart thermostat.
Next, take the mounting plate that came with your smart thermostat and align it with the holes from the previous thermostat. Use the provided screws to secure the plate in place. Make sure it is level and tightly secured to the wall.
Now, it’s time to connect the wires from your heating and cooling system to your new smart thermostat. Refer to the user manual or installation guide for your specific thermostat model to identify which wires correspond to each terminal on the thermostat. Carefully connect the wires to the corresponding terminals, ensuring a tight and secure connection.
Once the wiring is complete, gently push the excess wires back into the wall and attach the smart thermostat to the mounting plate. Make sure it is properly aligned and securely attached.
Finally, turn the power back on to your heating and cooling system. Your smart thermostat should now be installed and ready for the next step in the setup process. Well done!
Step 3: Connect to Wi-Fi
Connecting your smart thermostat to Wi-Fi is crucial for remote access and control. It allows you to manage and monitor your thermostat from anywhere using your smartphone or computer. Follow these simple steps to connect your smart thermostat to your home’s Wi-Fi network.
1. On your smart thermostat, navigate to the settings menu. This is usually accessible through the device’s touchscreen or buttons.
2. Look for the Wi-Fi or Network settings option. Select it to begin the Wi-Fi setup process.
3. Your smart thermostat will scan for available Wi-Fi networks in the vicinity. Once the scan is complete, a list of networks will appear on the screen.
4. Select your home’s Wi-Fi network from the list. If your network is secured with a password, you will be prompted to enter it. Use the on-screen keyboard to input your Wi-Fi password correctly.
5. Once you have entered the password, confirm and wait for the smart thermostat to establish a connection to your Wi-Fi network. This may take a few moments.
6. Once the connection is established, your smart thermostat will display a confirmation message or an indicator to signify that it is connected to Wi-Fi.
Great! Your smart thermostat is now connected to your home’s Wi-Fi network. This enables you to control your thermostat remotely using your smartphone or computer. You can adjust the temperature, set schedules, and access advanced features easily through the accompanying mobile app or web portal.
With the Wi-Fi connection in place, you can now proceed to the next step of setting up your smart thermostat, which involves downloading and setting up the mobile app. This will grant you even greater control and convenience in managing your home’s heating and cooling system.
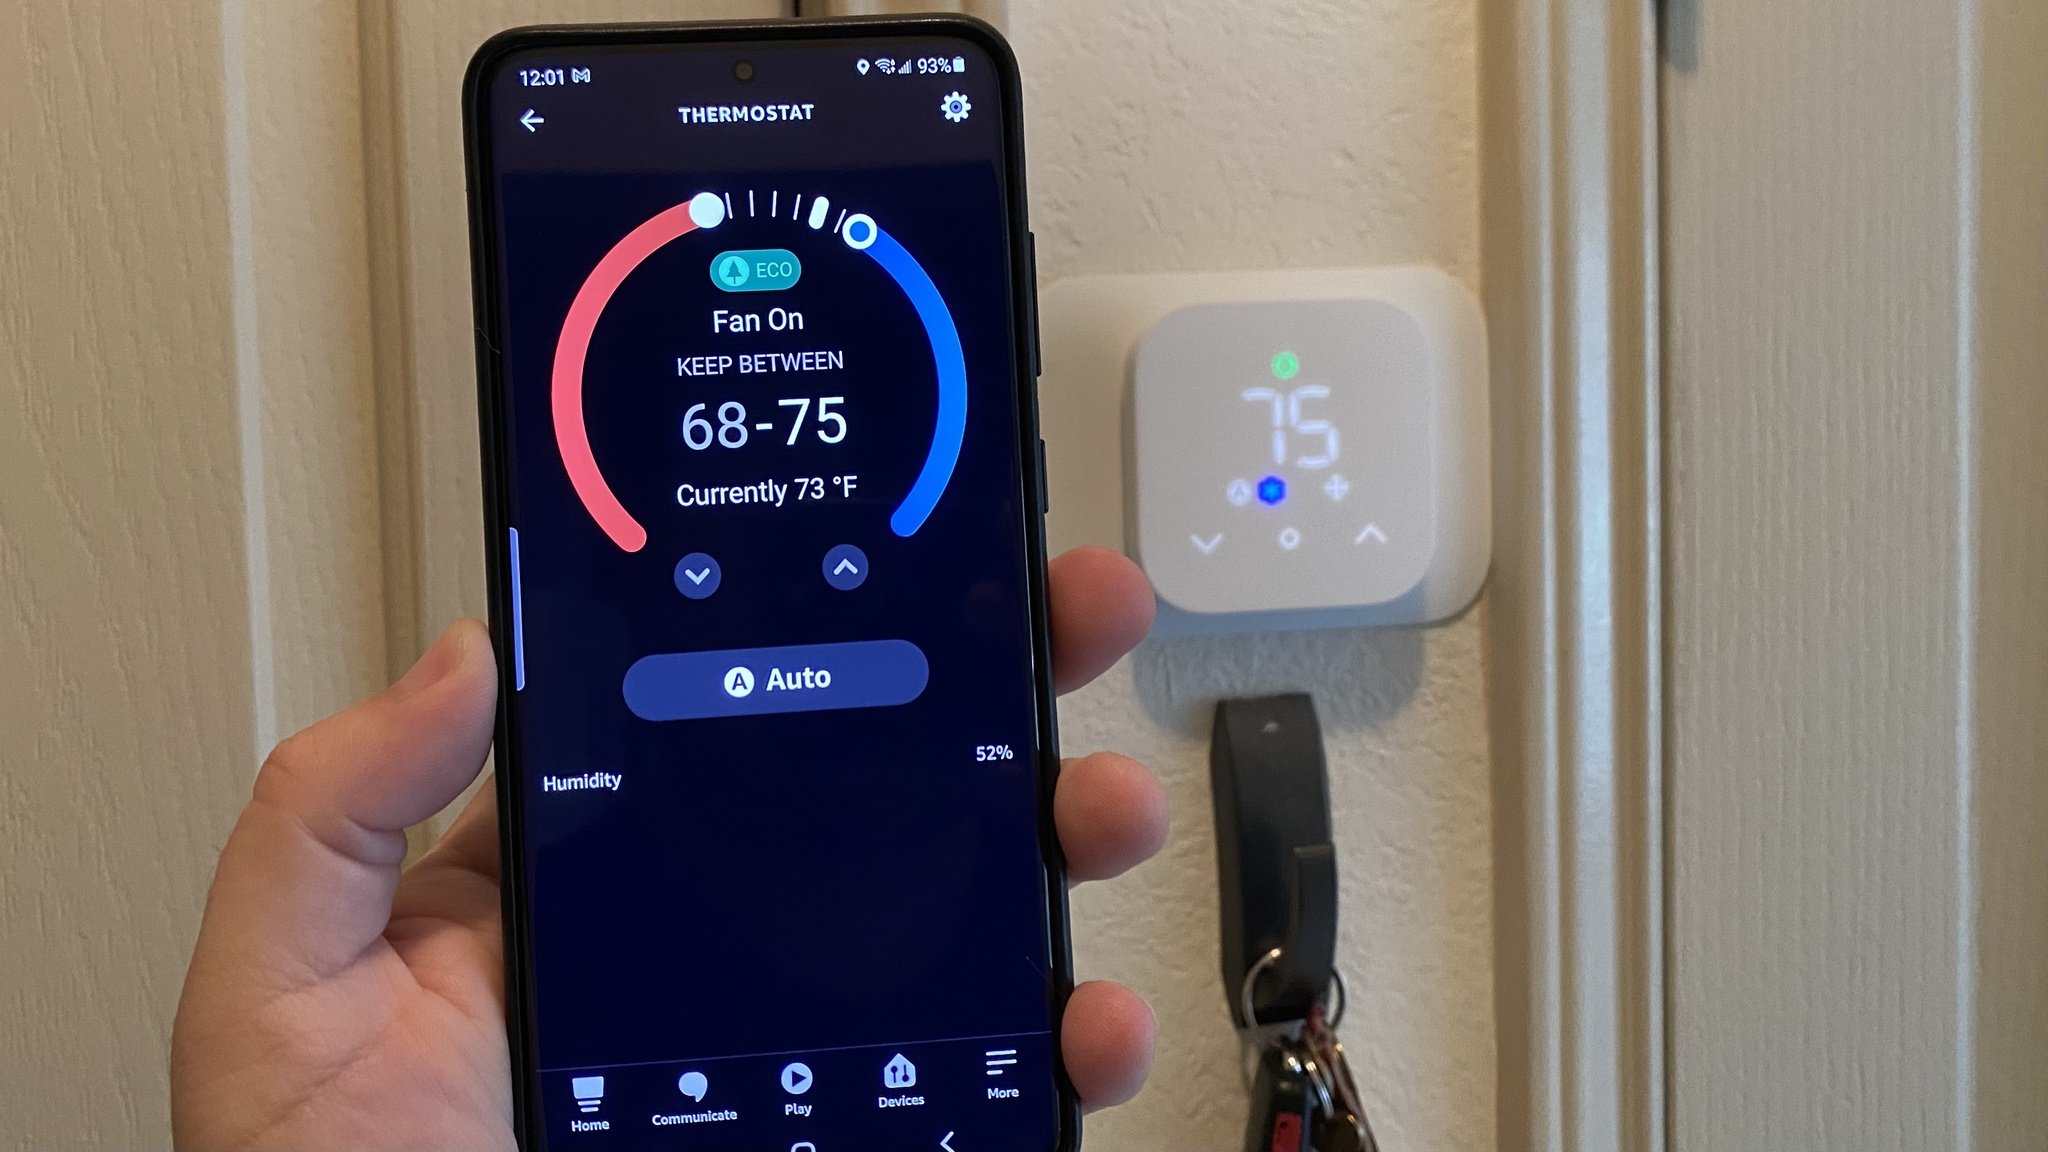
Step 4: Download and Set Up the Mobile App
To fully utilize the features and functionality of your smart thermostat, it’s essential to download and set up the accompanying mobile app. This app allows you to control and monitor your thermostat from your smartphone or tablet, providing you with convenient access wherever you are. Follow these steps to download and set up the mobile app.
1. Visit the App Store or Google Play Store on your smartphone or tablet.
2. Search for the app associated with your smart thermostat brand. It is usually provided by the manufacturer or a dedicated app for their smart home products.
3. Download and install the app onto your device. Make sure you have a stable internet connection for a smooth download and installation process.
4. Once the app is installed, locate and open it. You may be prompted to create an account or log in if you already have one.
5. Follow the on-screen instructions to set up an account. This typically involves providing your email address, creating a password, and agreeing to the app’s terms and conditions.
6. Once you have created an account, log in to the app using your credentials.
7. The app will guide you through the process of connecting your smart thermostat to the mobile app. This may involve scanning a QR code on the thermostat or entering a serial number. Refer to the app’s instructions or the manufacturer’s guide for specific details.
8. Once the connection is established, you should now be able to control your smart thermostat through the app. Explore the app’s interface to familiarize yourself with its features, such as setting temperature schedules, adjusting temperature settings, and accessing advanced settings.
By completing this step, you have successfully downloaded and set up the mobile app for your smart thermostat. Now you can enjoy the convenience of controlling your thermostat from the palm of your hand.
In the next step, we will guide you through the process of creating an account for your smart thermostat, which will further enhance your overall experience.
Step 5: Create an Account
Creating an account for your smart thermostat is an essential step that allows you to take full advantage of its features and capabilities. By creating an account, you can customize settings, access remote control options, and receive software updates. Follow these steps to create an account for your smart thermostat.
1. Open the mobile app associated with your smart thermostat on your smartphone or tablet.
2. If you haven’t done so already, log in to the app using your credentials. If you haven’t created an account, look for the sign-up or registration option.
3. Provide the required information, such as your email address, name, and password. Make sure to choose a strong and secure password to protect your account.
4. Once you have entered the necessary information, submit the registration form. You may receive a verification email to confirm your account. Follow the instructions in the email to complete the verification process if necessary.
5. After verifying your account, you can log in to the app using your newly created credentials.
6. Once you are logged in, you may be prompted to enter additional details, such as your address or preferences. Fill in the requested information as needed.
7. Take a few moments to explore the app’s settings and personalize your experience. You may have options to customize temperature units, enable energy-saving features, or set up notifications for system updates or maintenance reminders.
By creating an account, you now have access to all the features and functionality that your smart thermostat offers. You can control and monitor your thermostat remotely, set personalized schedules, and make adjustments to ensure optimal comfort and energy efficiency.
With your account created, you can now proceed to the next step, which involves setting up the thermostat schedule to align with your daily routine.
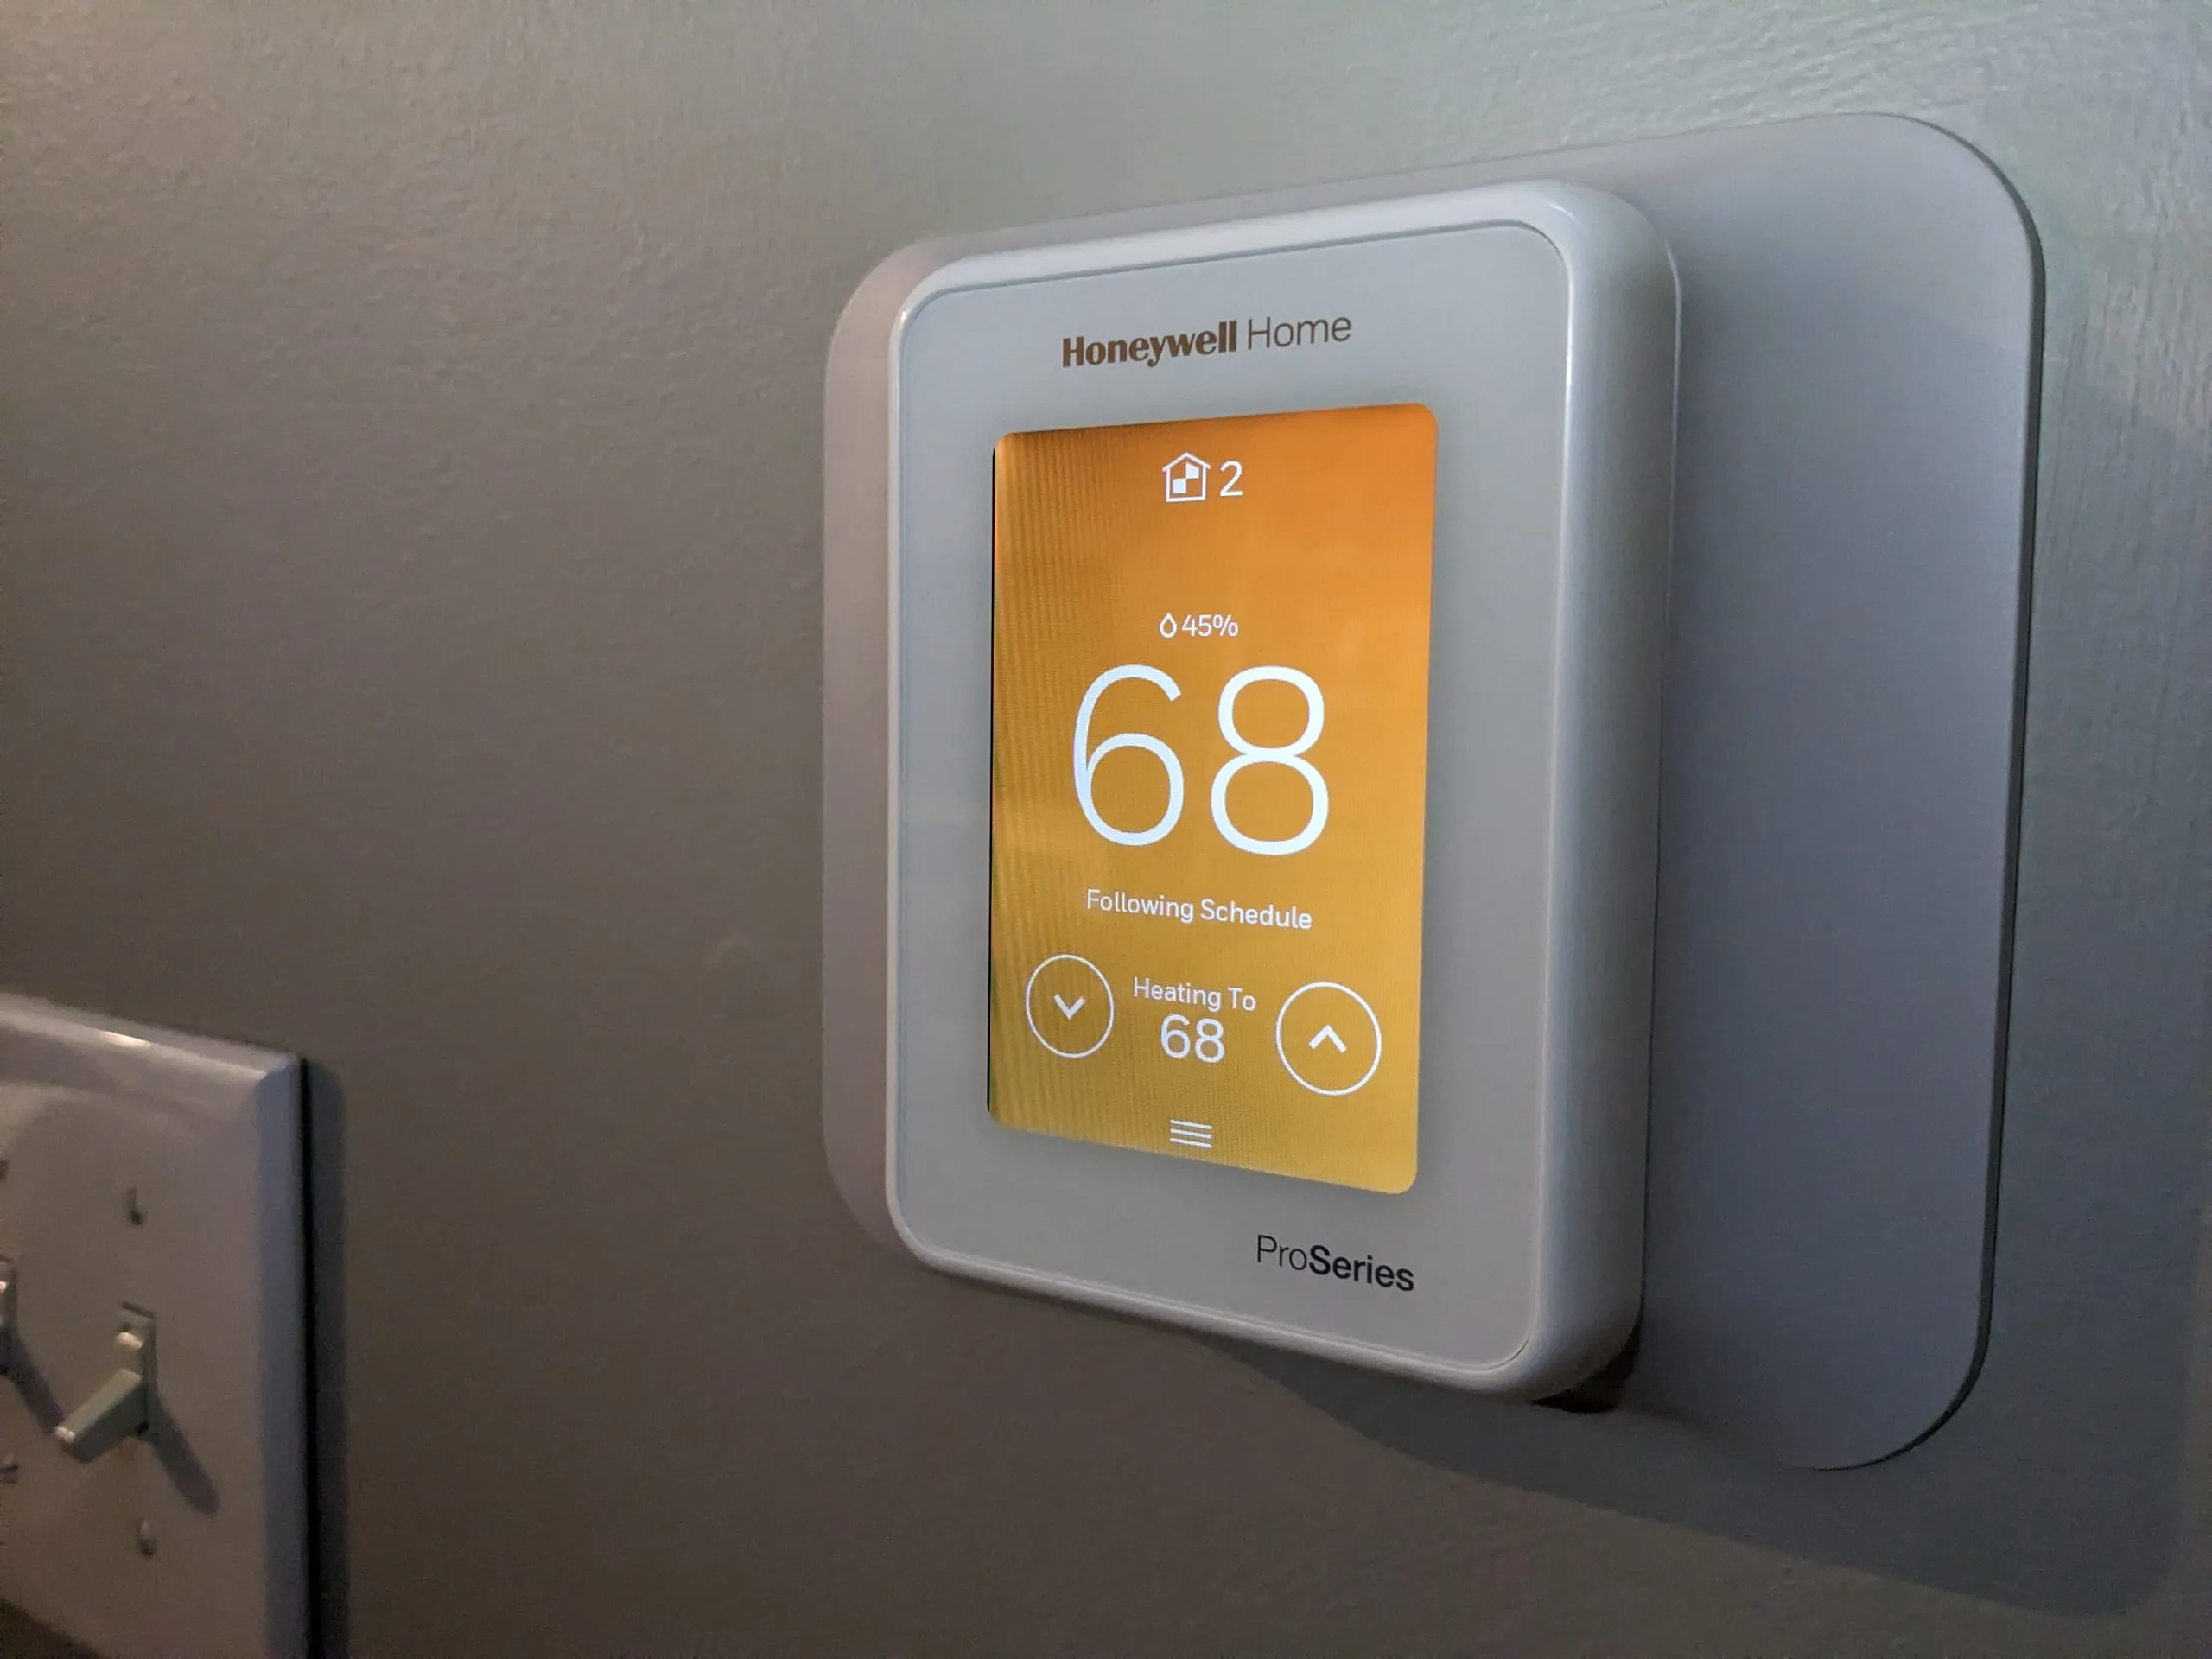
Step 6: Set Up the Thermostat Schedule
Setting up a thermostat schedule is an important step in maximizing energy efficiency and comfort in your home. By creating a schedule, you can ensure that your smart thermostat automatically adjusts the temperature based on your daily routine. Follow these steps to set up a thermostat schedule.
1. Open the mobile app for your smart thermostat on your smartphone or tablet.
2. Navigate to the schedule or programming section of the app. This is where you can customize the temperature settings for different times of the day and days of the week.
3. Review the default schedule, which is often based on a typical 9-to-5 workday. You can adjust these settings to align with your specific schedule and preferences.
4. Tap on the time slot or day of the week you want to modify. This will allow you to set the desired temperature for that specific period. For example, you may want a lower temperature during the night when you’re asleep and a comfortable temperature during the day when you’re at home.
5. Adjust the temperature settings by using the app’s interface. Some apps allow you to drag a temperature slider, while others may require you to input the desired temperature manually.
6. Repeat this process for the different time slots and days of the week as needed. Customize the temperature settings to match your daily routine and preferences.
7. Save your schedule settings once you’re satisfied with the adjustments you’ve made.
By setting up a thermostat schedule, you’re optimizing the heating and cooling of your home to align with your lifestyle. This not only increases comfort but also helps lower energy consumption and reduce utility bills.
Keep in mind that your smart thermostat may have additional features to enhance energy efficiency, such as geofencing or occupancy sensors. Consider exploring these features to further optimize your thermostat’s performance.
In the next step, we will guide you on how to adjust temperature settings manually when necessary.
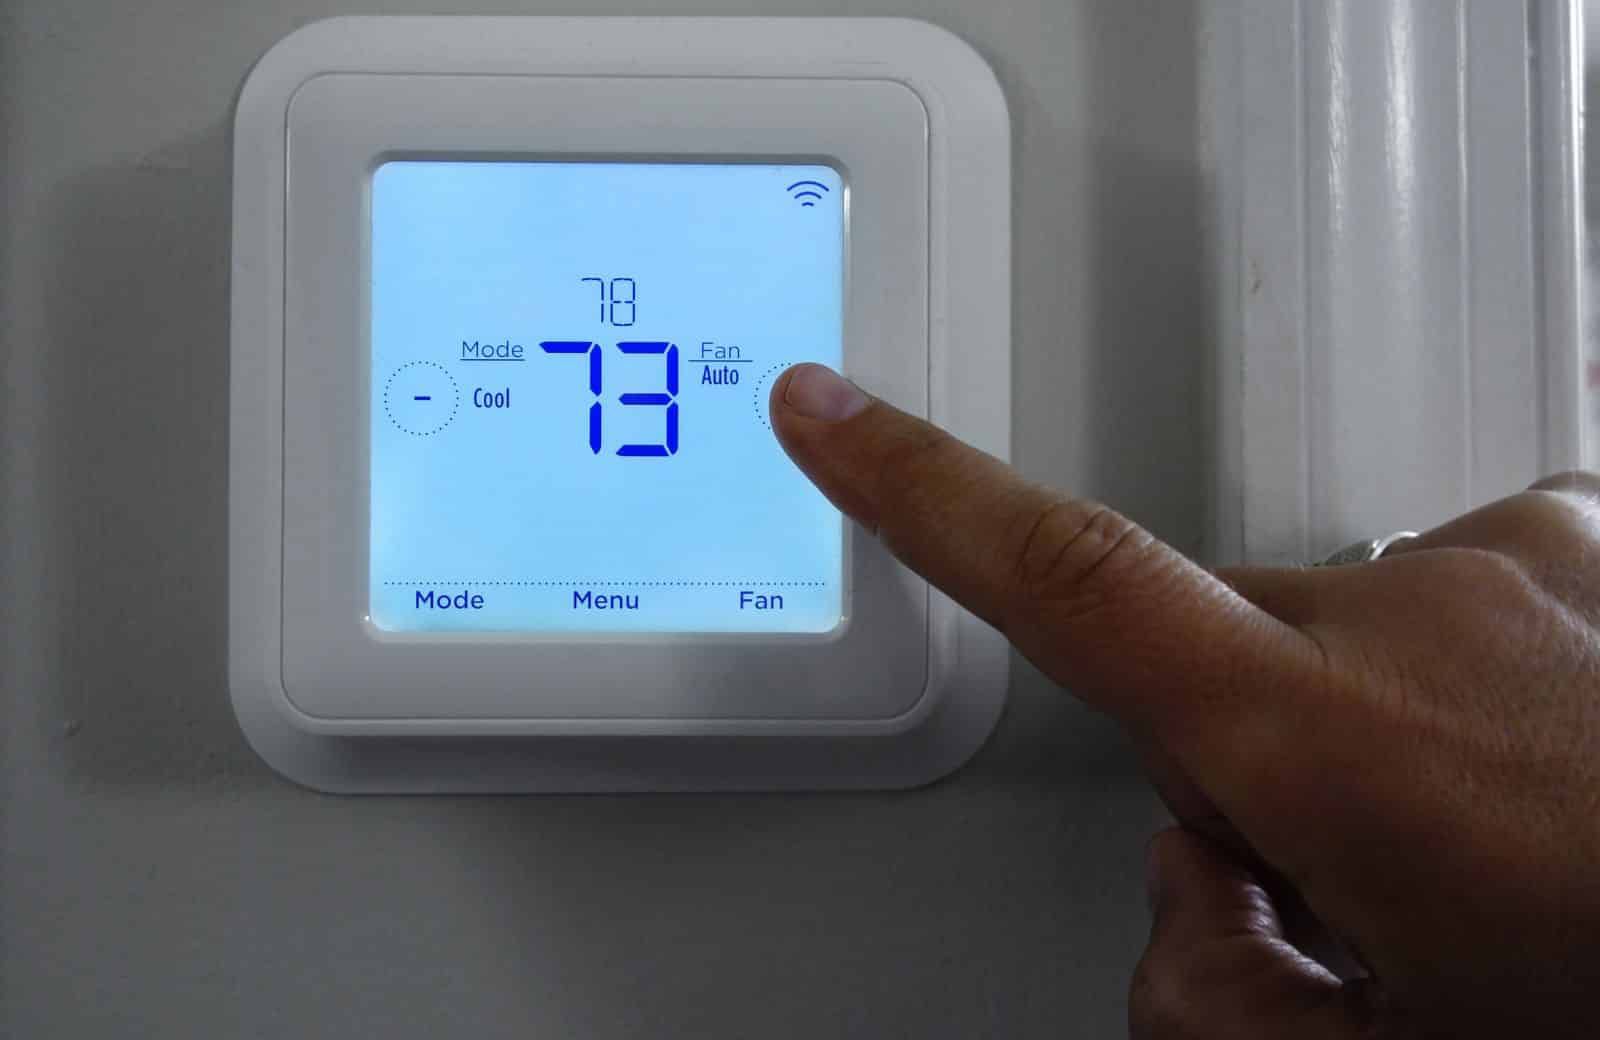
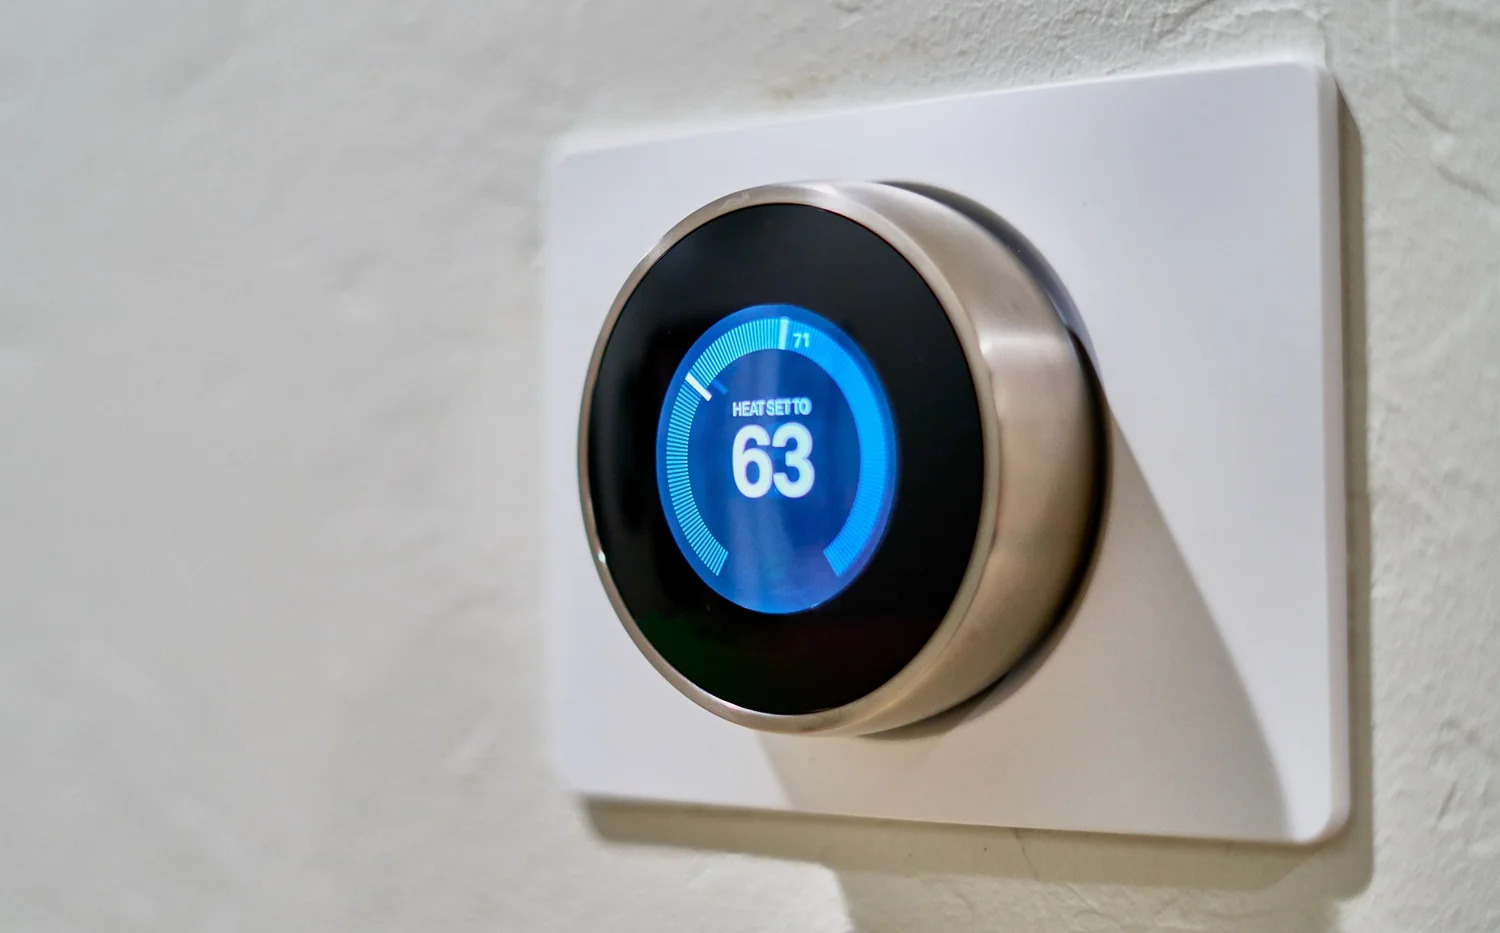
Step 7: Adjust Temperature Settings
While your smart thermostat is designed to automate temperature adjustments based on your schedule, there may be times when you need to manually adjust the temperature. Whether it’s to accommodate unexpected changes in your routine or to simply customize the temperature in the moment, here’s how you can make manual temperature adjustments:
1. Open the mobile app associated with your smart thermostat on your smartphone or tablet.
2. Look for the “Temperature” or “Manual Control” option in the app’s menu. The specific wording may vary depending on your thermostat model and app interface.
3. Tap on the temperature display to enter manual control mode.
4. Use the app’s interface to adjust the temperature to your desired setting. Most apps allow you to either increase or decrease the temperature by dragging a slider or tapping on directional buttons.
5. Once you’ve set the desired temperature, the smart thermostat will maintain this setting until you manually change it again or until the next scheduled temperature adjustment.
It’s important to note that manual temperature adjustments may override the scheduled settings temporarily. Once the next scheduled temperature adjustment occurs, the thermostat will revert to following the predefined schedule.
By having the flexibility to manually adjust the temperature, you can quickly respond to changing circumstances and maintain comfortable indoor conditions. Whether it’s during unexpected hot or cold weather, guests visiting, or special occasions, manual temperature adjustments offer you greater control over your smart thermostat’s settings.
In the next step, we will explore the smart features of your thermostat, such as voice control and energy-saving modes.
Step 8: Utilize Smart Features
One of the biggest advantages of a smart thermostat is its ability to offer a range of smart features that enhance both convenience and energy efficiency. In this step, we will explore some of the key smart features and how you can utilize them with your smart thermostat.
1. Voice Control: If your smart thermostat is compatible with voice assistants like Amazon Alexa or Google Assistant, you can control it using voice commands. Simply connect your smart thermostat to your preferred voice assistant and use commands like “Hey Google, set the temperature to 72 degrees” to make adjustments without even touching your phone or thermostat.
2. Geofencing: Geofencing allows your smart thermostat to detect when you leave or return home. By utilizing the location data from your smartphone, the thermostat can automatically adjust the temperature based on your proximity. This feature helps save energy by ensuring your heating or cooling system isn’t running unnecessarily when you’re away.
3. Energy-Saving Modes: Most smart thermostats offer energy-saving modes that help optimize energy usage and reduce utility bills. These modes may include settings like “Away” mode, which reduces energy consumption when no one is home, or “Smart Learning” mode, where the thermostat learns your preferences and adjusts the temperature accordingly to maximize energy efficiency.
4. Adaptive Learning: Some smart thermostats have the ability to learn your temperature preferences and daily routines over time. Through machine learning algorithms, the thermostat can automatically adjust settings based on your behavior and create a personalized temperature schedule tailored specifically to your needs.
5. Energy Reports: Take advantage of the energy reporting features available in the mobile app or web portal of your smart thermostat. These reports provide insights into your energy usage patterns, allowing you to identify areas where you can make further adjustments to save energy and reduce your carbon footprint.
By utilizing these smart features, you can enhance the efficiency and convenience of your smart thermostat. Take the time to explore the settings and options available on your specific thermostat model to make the most of these features and ensure optimal comfort and energy savings in your home.
In the final step, we will provide troubleshooting tips to help you address common issues that may arise with your smart thermostat.
Step 9: Troubleshooting Tips
While smart thermostats are designed to be reliable and easy to use, you may encounter occasional issues or challenges. Here are some common troubleshooting tips to help you address any problems that may arise with your smart thermostat:
1. Check Power and Connectivity: Ensure that your smart thermostat is receiving power and properly connected to your heating and cooling system. Verify that the power switch is turned on and that all the necessary wires are securely connected.
2. Restart the System: Sometimes, a simple restart can resolve minor glitches. Turn off the power to your heating and cooling system, including the smart thermostat, for a few minutes, and then turn it back on. This can help refresh the system and restore proper functionality.
3. Check Wi-Fi Connection: If you’re experiencing issues with remote control or connectivity, make sure your smart thermostat is still connected to your Wi-Fi network. Check that your Wi-Fi signal strength is strong and that there are no obstructions interfering with the connection.
4. Update Firmware: Regularly check for firmware updates for your smart thermostat. Manufacturers often release updates to address performance issues, enhance features, and improve compatibility. Follow the instructions provided by the manufacturer to update the firmware of your smart thermostat.
5. Reset to Factory Settings: If you’re encountering persistent issues, you may need to reset your smart thermostat to its factory settings. Refer to the user manual or manufacturer’s instructions on how to perform a factory reset. Keep in mind that resetting your thermostat will erase all custom settings, so be prepared to reconfigure it from scratch.
6. Contact Customer Support: If you’ve exhausted all troubleshooting options and are still experiencing issues, reach out to the customer support team for your smart thermostat. They can provide specific guidance tailored to your thermostat model and help resolve any persistent problems you’re facing.
Remember, each smart thermostat model may have unique troubleshooting processes, so consult the manufacturer’s documentation or support resources for detailed instructions. By following these troubleshooting tips, you can swiftly resolve common issues and enjoy a hassle-free experience with your smart thermostat.
Congratulations! You have successfully set up your smart thermostat and learned how to troubleshoot any potential problems. Now, you can enjoy the convenience, energy efficiency, and comfort that your smart thermostat provides.
Conclusion
Setting up and utilizing a smart thermostat can transform the way you control and manage your home’s heating and cooling system. With the ability to adjust temperature settings remotely, create personalized schedules, and take advantage of smart features, you can enjoy enhanced comfort and energy efficiency in your living space.
In this guide, we have walked you through the step-by-step process of setting up your smart thermostat. From unboxing the device to connecting it to your Wi-Fi network, downloading the mobile app, creating an account, and setting up a thermostat schedule, you now have a complete understanding of how to get the most out of your smart thermostat.
We’ve also explored the various smart features available, such as voice control, geofencing, energy-saving modes, and adaptive learning. These features allow you to customize and optimize your thermostat settings to align with your lifestyle and preferences.
Additionally, we’ve provided troubleshooting tips to help you address common issues that may arise with your smart thermostat. By following these tips, you can quickly and effectively resolve any problems that may impede the performance of your device.
Remember, while this guide provides a general overview, it’s important to refer to the manufacturer’s instructions and user manual specific to your smart thermostat model for accurate installation and configuration guidance.
Now that you are well-equipped with the knowledge and guidance to set up and utilize your smart thermostat, it’s time to enjoy the benefits of convenience, comfort, and energy efficiency that it brings to your home. Stay in control of your heating and cooling system and embrace the future of smart home technology.