Introduction
Welcome to our guide on how to set the time on your Honeywell Smart Thermostat! With this helpful step-by-step tutorial, you’ll be able to effortlessly adjust the date and time settings on your thermostat, ensuring accurate and precise functionality.
Having the correct time set on your Honeywell Smart Thermostat is not only essential for accurate scheduling of temperature changes but also ensures that your thermostat is synchronized with any time-dependent features like occupancy sensors, programming schedules, and energy-saving modes. By following these simple instructions, you can easily configure the time settings on your thermostat to match your local time zone and Daylight Saving Time adjustments, if applicable.
Whether you’ve recently installed a Honeywell Smart Thermostat or need to update the time due to a time change, our guide will walk you through the entire process. You don’t need any advanced technical expertise—just a few minutes of your time and a willingness to follow the steps outlined below.
So, let’s dive in and learn how to set the time on your Honeywell Smart Thermostat!
Step 1: Accessing the Thermostat Settings
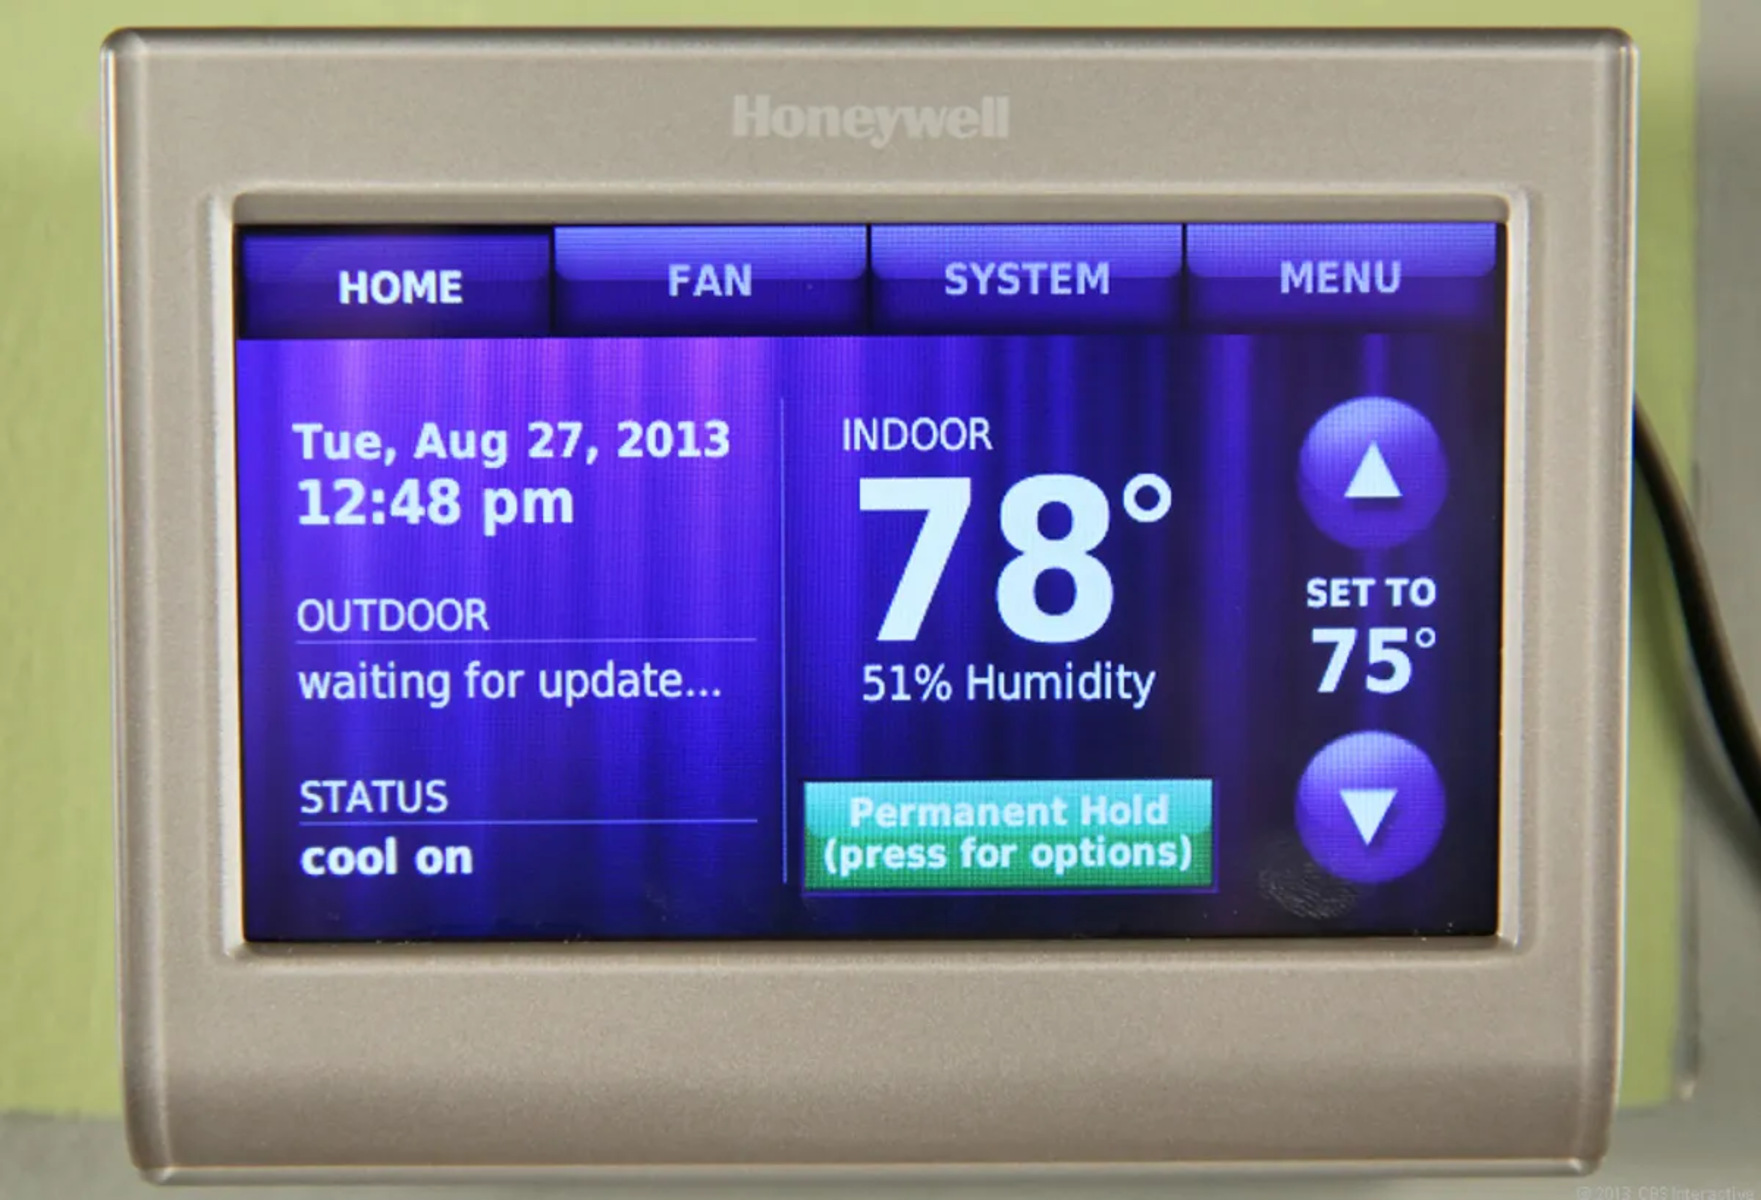
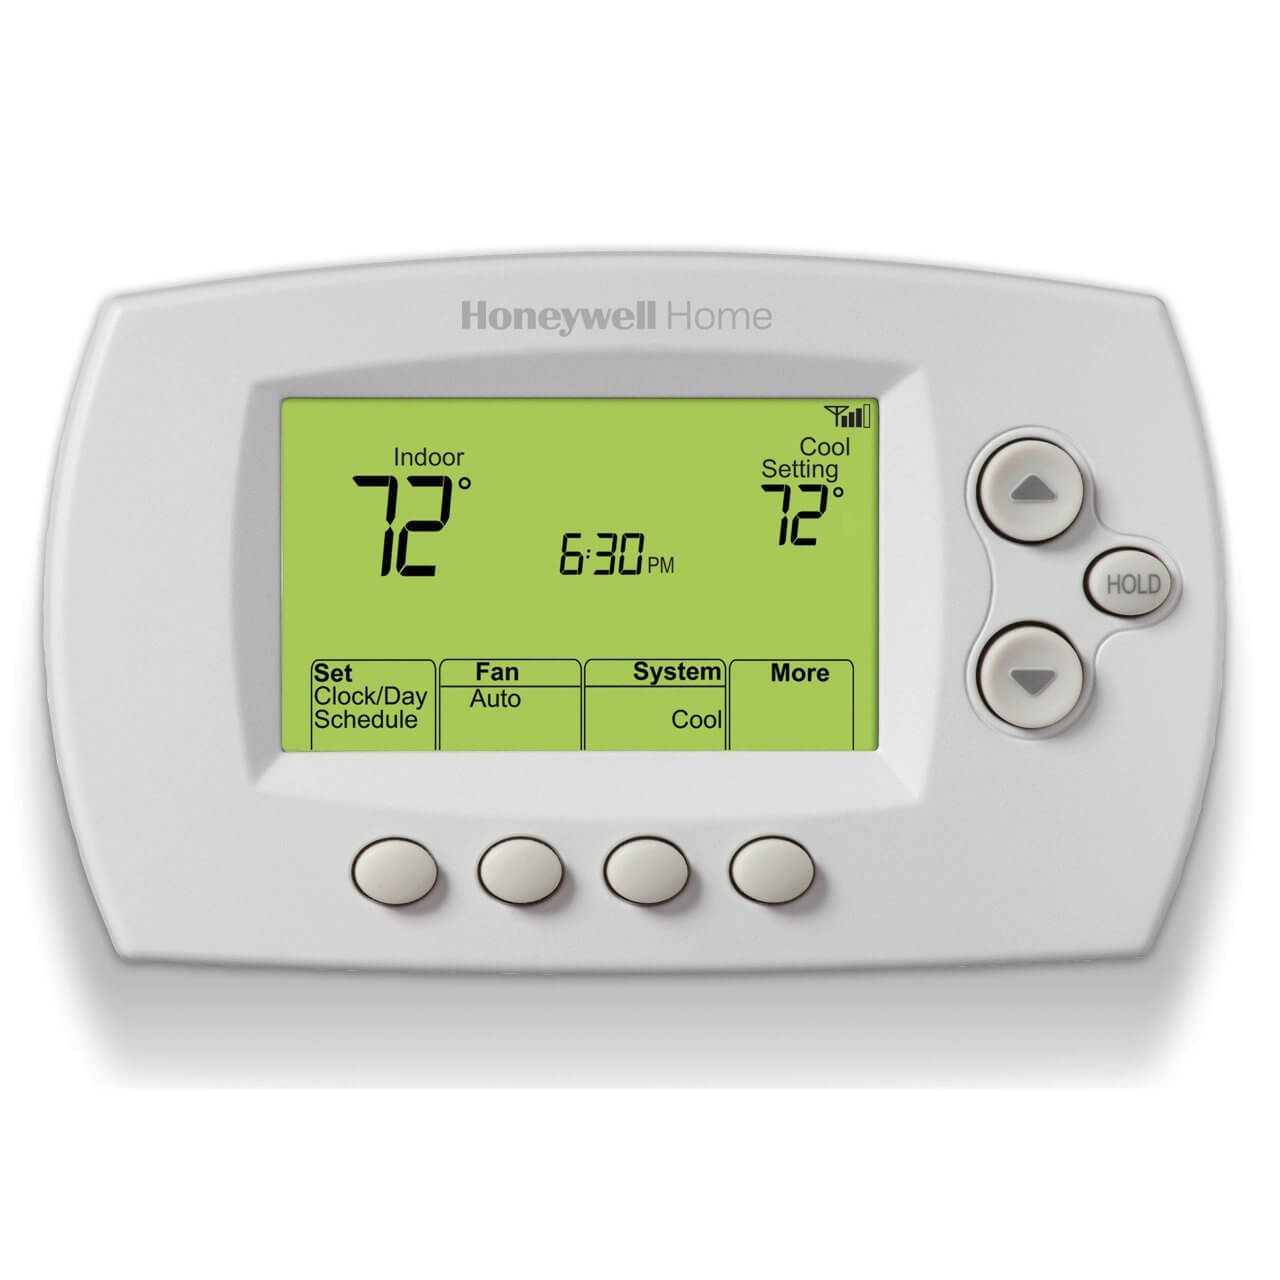
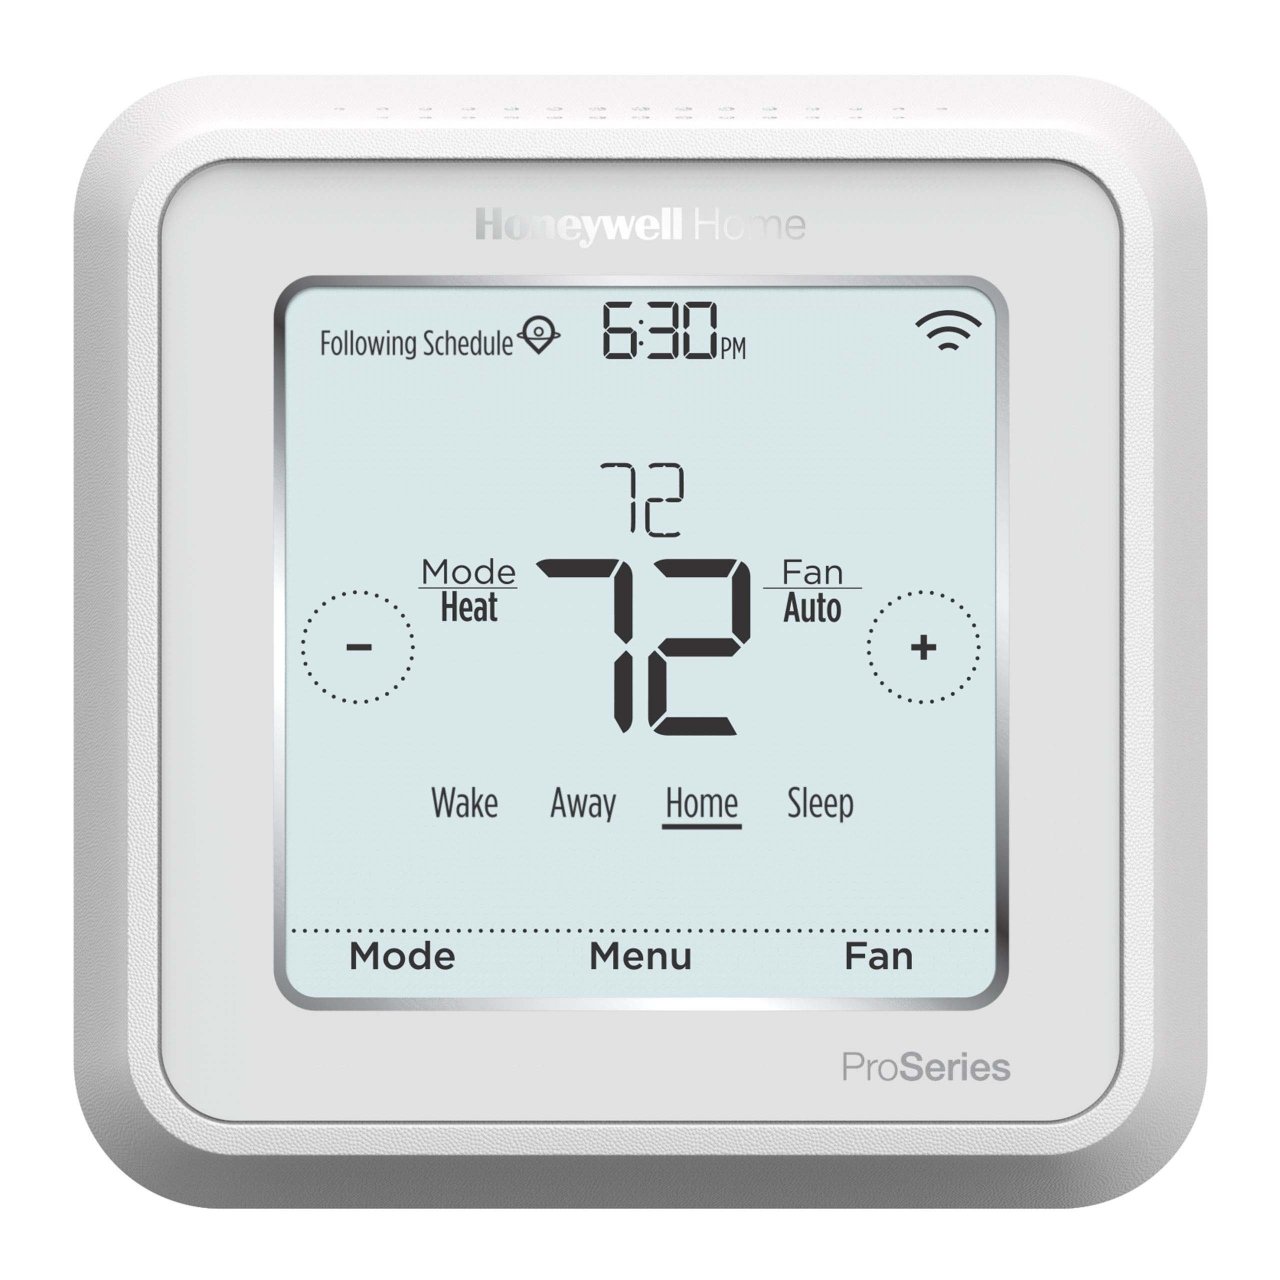
The first step in setting the time on your Honeywell Smart Thermostat is to access the thermostat settings menu. To do this, you’ll need to locate the main control panel on your thermostat.
Start by pressing the menu button, which is usually located in the center or at the bottom of the control panel. On some models, it may be labeled as “Settings” or represented by an icon with three horizontal lines.
Once you’ve pressed the menu button, you’ll see a list of options displayed on the screen. Scroll through the options using the up and down buttons until you find “Date & Time” or a similar option related to time settings.
Select the “Date & Time” option by pressing the corresponding button on your thermostat. This will take you to a new screen where you can make changes to the time and date settings.
Now that you’ve accessed the thermostat settings, you’re ready to move on to the next step and set the date and time to ensure accurate functionality.
Step 2: Setting the Date and Time
Now that you’ve accessed the thermostat settings menu on your Honeywell Smart Thermostat, it’s time to set the date and time accurately. Follow these simple steps to ensure that your thermostat displays the correct date and time:
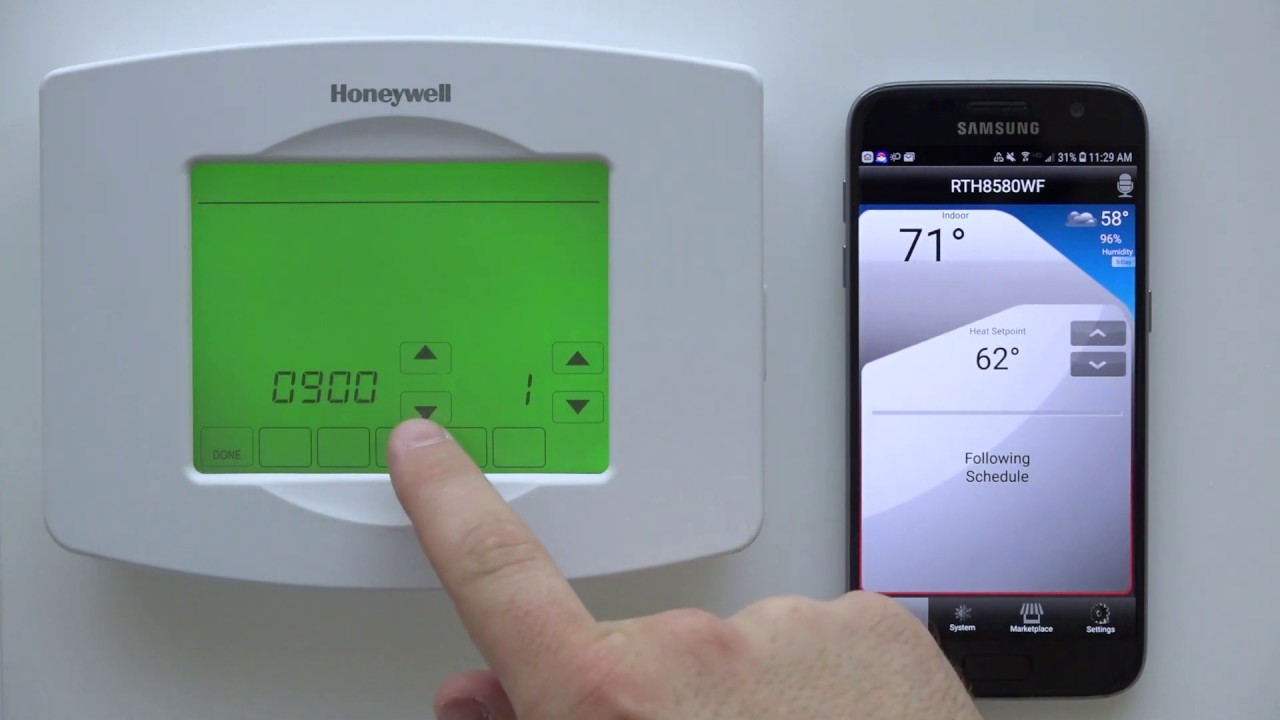
- On the “Date & Time” screen, you’ll typically see the current date and time displayed. If they are incorrect, select the option to edit them.
- Use the up and down buttons or the arrow keys on your thermostat to adjust the date and time. Take note of the format (e.g., MM/DD/YYYY for the date and HH:MM AM/PM for the time) to ensure that your changes follow the correct format.
- Once you’ve made the necessary adjustments, double-check the displayed date and time on the screen to verify that everything is correct.
- If your thermostat has a “Set” or “Save” button, press it to confirm the changes. In some cases, the changes may be automatically saved once you exit the settings menu.
That’s it! You’ve successfully set the date and time on your Honeywell Smart Thermostat. The thermostat will now display the updated date and time, ensuring accurate performance for temperature control and scheduling.
Now that you’ve set the date and time, you may want to adjust the time format to your preference. Continue to the next step to learn how to do this.
Step 3: Adjusting Time Formats
Every Honeywell Smart Thermostat allows you to customize the time format according to your preference. Whether you prefer a 12-hour format with AM/PM indicators or a 24-hour format, follow these steps to adjust the time format on your thermostat:
- Access the thermostat settings menu by pressing the menu button or navigating to the settings options as mentioned in the previous steps.
- Look for an option related to time format. This option may be labeled as “Time Format,” “Clock Format,” or something similar.
- Select the desired time format by using the up and down buttons or arrow keys on your thermostat. Choose between a 12-hour format (e.g., 7:00 PM) or a 24-hour format (e.g., 19:00).
- Once you’ve selected the desired format, review the displayed time on the screen to ensure that it reflects the chosen time format.
- Press the “Set” or “Save” button, if applicable, to confirm the changes. Alternatively, the changes may be automatically saved when you exit the settings menu.
Great job! You’ve successfully adjusted the time format on your Honeywell Smart Thermostat. The thermostat will now display the time according to your preferred format, adding a personalized touch to your user experience.
Now, let’s move on to the next step and learn how to enable or disable Daylight Saving Time on your thermostat.
Step 4: Enabling or Disabling Daylight Saving Time
If you live in an area that observes Daylight Saving Time, you’ll want to ensure that your Honeywell Smart Thermostat automatically adjusts for the time change. Follow these steps to enable or disable Daylight Saving Time on your thermostat:
- Access the thermostat settings menu by pressing the menu button or navigating to the settings options, as mentioned in the previous steps.
- Look for an option related to Daylight Saving Time. This option may be labeled as “DST,” “Daylight Saving,” or something similar.
- Select the option to enable or disable Daylight Saving Time, depending on your preference or the current time of year.
- If enabling Daylight Saving Time, you may need to specify the start and end dates for the time change. Follow the on-screen prompts or refer to the thermostat’s user manual for guidance on entering the correct dates.
- Once you’ve made the necessary adjustments, review the settings to ensure that Daylight Saving Time is either enabled or disabled, depending on your preference.
- Press the “Set” or “Save” button, if applicable, to confirm the changes. Alternatively, the changes may be automatically saved when you exit the settings menu.
Great work! You’ve successfully enabled or disabled Daylight Saving Time on your Honeywell Smart Thermostat. With this feature configured correctly, your thermostat will automatically adjust for the time change, making it even more convenient to maintain accurate temperature control throughout the year.
Now, let’s move on to the final step and learn how to confirm and save the changes you’ve made to your thermostat settings.
Step 5: Confirming and Saving the Changes
After making adjustments to the date, time, time format, and Daylight Saving Time settings on your Honeywell Smart Thermostat, it’s important to confirm and save the changes to ensure they take effect. Follow these steps to complete the process:
- Review all the changes you’ve made on the settings screen of your thermostat. Ensure that the date, time, time format, and Daylight Saving Time settings are accurate and reflect your desired preferences.
- If you notice any errors or want to make further adjustments, navigate back to the respective settings and modify them accordingly.
- Once you’re satisfied with the changes, press the “Set” or “Save” button, if available, to confirm and save the settings. Alternatively, the changes may be automatically saved when you exit the settings menu.
- After saving the changes, exit the settings menu and return to the main display of your thermostat. Take note of the updated date and time that is now reflecting your desired settings.
- Double-check the thermostat’s display periodically to ensure that the date and time are continuously accurate. If you notice any discrepancies or need to make further adjustments, simply follow the steps outlined in the previous sections to modify the settings as needed.
Congratulations! You’ve successfully confirmed and saved the changes you made to the settings on your Honeywell Smart Thermostat. By doing so, you’ve ensured that your thermostat functions accurately and aligns with your desired date, time, and time format preferences.
Now that you’re familiar with the process of setting the time on your Honeywell Smart Thermostat, you can enjoy the benefits of accurate temperature control and scheduling tailored to your specific needs.
Conclusion
Setting the time on your Honeywell Smart Thermostat is a straightforward process that ensures accurate functionality and synchronization with your daily routines. By following the step-by-step instructions outlined in this guide, you can easily access the thermostat settings, set the date and time, adjust time formats, enable or disable Daylight Saving Time, and confirm and save the changes made.
With the correct time set on your thermostat, you can rely on precise temperature control, efficient scheduling, and seamless integration with other time-dependent features. Whether you’re adapting to a time change, adjusting for Daylight Saving Time, or simply want to personalize the time format on your thermostat, these easy steps can help you achieve your desired settings.
Remember, periodically reviewing and updating the date and time settings on your Honeywell Smart Thermostat will ensure that it continues to display accurate information as time goes on.
We hope this guide has been helpful in assisting you with setting the time on your Honeywell Smart Thermostat. Enjoy the convenience and efficiency that comes with a properly configured thermostat, tailored to your specific needs and preferences.
Thank you for choosing Honeywell for your home’s comfort needs!