Introduction
Resetting an iPhone 4 without a SIM card can be a necessary process in various scenarios. Whether you're preparing to sell or give away your device, encountering persistent software issues, or simply seeking a fresh start, performing a reset without a SIM card is a straightforward procedure. This comprehensive guide will walk you through the essential steps, ensuring that you can reset your iPhone 4 seamlessly and efficiently.
By following the steps outlined in this article, you can reset your iPhone 4 to its factory settings, effectively erasing all personal data and customized settings. It's important to note that resetting your device without a SIM card does not require any specialized technical knowledge. With clear instructions and a systematic approach, you can confidently navigate through the process, safeguarding your privacy and preparing your device for its next chapter.
Whether you're a seasoned iPhone user or a newcomer to the iOS ecosystem, understanding how to reset your device without a SIM card is a valuable skill. This knowledge empowers you to maintain control over your personal data and ensures that your iPhone 4 can be reset and repurposed without any unnecessary complications. From safeguarding your privacy to optimizing the performance of your device, the ability to perform a SIM card-free reset is a fundamental aspect of managing your iPhone 4 effectively.
As we delve into the step-by-step instructions, it's important to approach the process with a clear understanding of its implications. Resetting your iPhone 4 without a SIM card is a significant decision, as it effectively wipes all data and settings from the device. Therefore, it's crucial to back up any important information before proceeding with the reset. By adhering to the guidelines provided in this article, you can ensure that the reset process is executed smoothly and that your device is ready to be set up anew.
With the groundwork laid out, let's embark on this journey to reset your iPhone 4 without a SIM card. By following the subsequent steps with attentiveness and precision, you'll be equipped to navigate the process seamlessly, ensuring that your device is reset to its factory state, free from any personal data or settings. Let's dive into the essential steps to reset your iPhone 4 without a SIM card and prepare it for a fresh start.
Step 1: Back Up Your iPhone
Before embarking on the process of resetting your iPhone 4 without a SIM card, it's crucial to safeguard your valuable data by creating a comprehensive backup. This proactive step ensures that your personal information, photos, contacts, and settings are securely preserved, allowing for seamless restoration after the reset.
Why Backing Up Is Essential
Backing up your iPhone 4 is a fundamental precautionary measure that mitigates the risk of data loss during the reset process. By creating a backup, you can preserve your cherished memories, important documents, and personalized settings, thereby preventing any potential loss or inconvenience. Additionally, this safeguard enables you to seamlessly transfer your data to a new device or restore it to your reset iPhone 4, ensuring continuity and peace of mind.
How to Back Up Your iPhone 4
Using iCloud:
-
Connect to Wi-Fi: Ensure that your iPhone 4 is connected to a stable Wi-Fi network to facilitate the backup process.
-
Access iCloud Settings: Navigate to "Settings" on your iPhone 4, tap on your name, and select "iCloud."
-
Initiate Backup: Scroll down and tap on "iCloud Backup." Toggle the switch to enable iCloud Backup. Tap "Back Up Now" to initiate the backup process. Ensure that your device remains connected to Wi-Fi and power until the backup is completed.
Using iTunes:
-
Connect to Computer: Use a USB cable to connect your iPhone 4 to a computer with the latest version of iTunes installed.
-
Launch iTunes: Open iTunes on your computer and select your iPhone 4 when it appears in the application.
-
Initiate Backup: Click on "Back Up Now" within the device summary screen. Ensure that the backup process is completed before proceeding to the next steps.
Verifying Your Backup
After completing the backup process, it's advisable to verify that your data has been successfully preserved. This can be done by accessing your iCloud account or iTunes and confirming the latest backup date and time. Verifying your backup instills confidence and reassurance, ensuring that your valuable data is securely archived and ready for restoration if needed.
By diligently backing up your iPhone 4, you can proceed with the reset process knowing that your important information is safeguarded. This conscientious approach empowers you to reset your device without the burden of potential data loss, setting the stage for a smooth and worry-free experience.
Now that your iPhone 4 is securely backed up, we can progress to the next step in the reset process, ensuring that you can navigate the entire procedure with confidence and clarity.
Step 2: Turn Off Find My iPhone
Turning off Find My iPhone is a crucial preparatory step before resetting your iPhone 4 without a SIM card. This feature, designed to enhance the security of Apple devices, must be disabled to ensure a smooth and successful reset process.
Understanding Find My iPhone
Find My iPhone is a built-in feature that enables users to locate, lock, or erase their device remotely in the event of loss or theft. This functionality relies on the device's GPS and internet connectivity to provide accurate location information. While immensely valuable for safeguarding personal data and preventing unauthorized access, Find My iPhone must be deactivated before initiating a reset to avoid potential complications.
Disabling Find My iPhone
To turn off Find My iPhone on your iPhone 4, follow these steps:
-
Access Settings: Open the "Settings" app on your iPhone 4 and tap on your Apple ID at the top of the screen.
-
Select iCloud: Scroll down and tap on "iCloud" to access the iCloud settings.
-
Turn Off Find My iPhone: Within the iCloud settings, locate "Find My iPhone" and toggle the switch to disable this feature. You will be prompted to enter your Apple ID password to confirm the action.
Once Find My iPhone is successfully turned off, your device is now ready for the next stage of the reset process. This essential step ensures that the reset can be executed seamlessly, without any hindrance from active security features.
Verifying Find My iPhone Status
After disabling Find My iPhone, it's advisable to verify that the feature has been deactivated. This can be done by revisiting the iCloud settings and confirming that Find My iPhone is indeed turned off. Verifying this status provides reassurance that the security feature has been successfully disabled, setting the stage for a successful reset.
By diligently turning off Find My iPhone, you are actively preparing your iPhone 4 for the subsequent steps in the reset process. This proactive measure ensures that the reset can proceed without any impediments, allowing you to navigate the process with confidence and clarity.
With Find My iPhone successfully disabled, your iPhone 4 is now primed for the next critical phase of the reset process. Let's proceed to the following step, where we will delve into the essential process of erasing all content and settings from your device, ensuring a thorough and effective reset.
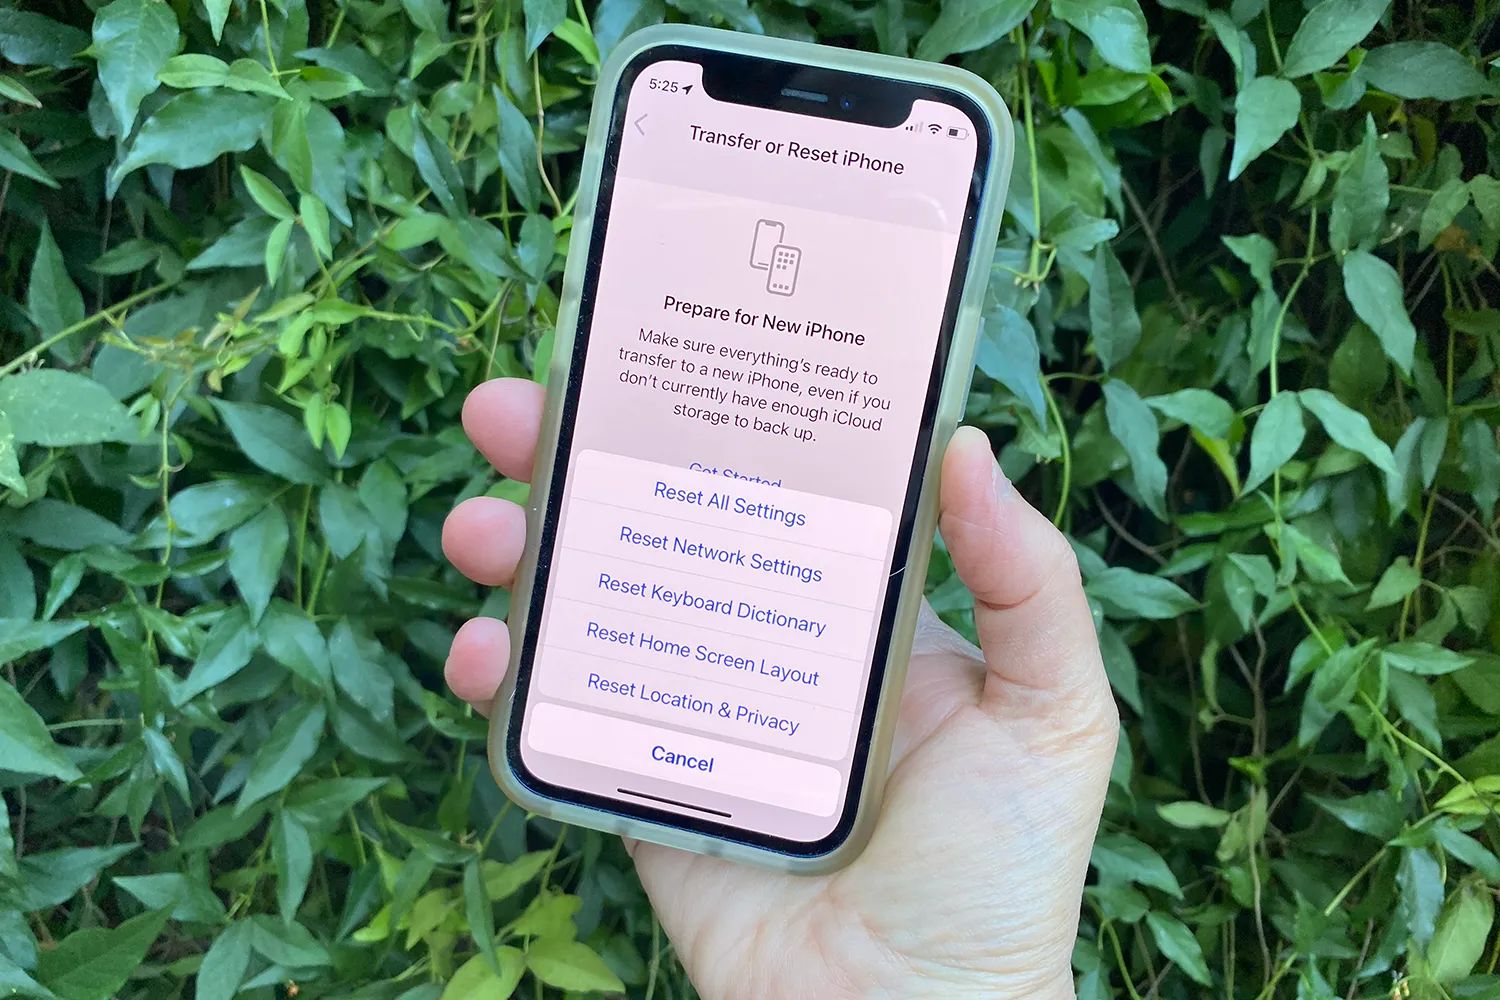
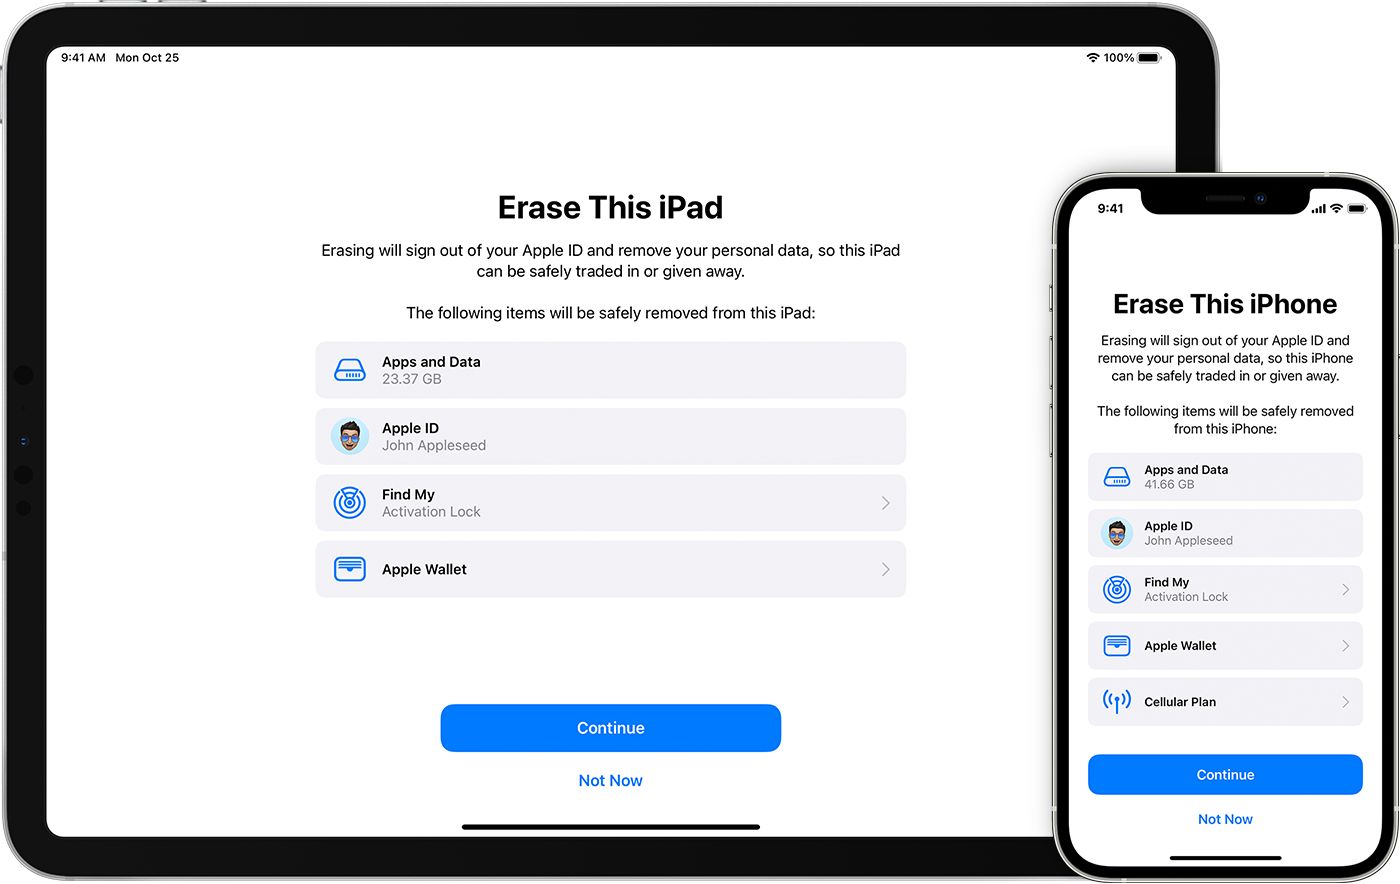
Step 3: Erase All Content and Settings
Eradicating all content and settings from your iPhone 4 is a pivotal phase in the reset process, ensuring that your device is restored to its original factory state. This comprehensive reset eliminates all personalized data, configurations, and applications, effectively returning your device to a pristine condition.
Understanding the Implications
Eradicating all content and settings from your iPhone 4 is a significant decision that warrants careful consideration. This process irreversibly removes all data, including photos, messages, contacts, and installed apps, from your device. Therefore, it is imperative to proceed with caution and certainty, acknowledging that this action is irreversible and will result in the complete restoration of your device to its default state.
How to Erase All Content and Settings
To initiate the process of erasing all content and settings from your iPhone 4, follow these steps:
-
Access Settings: Open the "Settings" app on your iPhone 4 and navigate to "General."
-
Reset Options: Within the "General" settings, tap on "Reset" to access the reset options.
-
Erase All Content and Settings: Select "Erase All Content and Settings" from the available reset options. You may be prompted to enter your device passcode and Apple ID password to confirm the action.
-
Confirmation: A confirmation prompt will appear, emphasizing the irreversible nature of this action. Confirm your decision to proceed with the reset.
Patience and Vigilance
Once the reset process is initiated, it is essential to exercise patience, as the erasure of all content and settings may take some time to complete. It is crucial to ensure that your device remains powered and undisturbed throughout this process to prevent any potential interruptions.
Verifying the Reset
After the reset process is completed, your iPhone 4 will reboot and present the initial setup screen, indicating that all content and settings have been successfully erased. This serves as confirmation that your device has been restored to its factory state, free from any personal data or customized configurations.
By conscientiously eradicating all content and settings from your iPhone 4, you are preparing your device for a fresh start, free from any lingering personal information or customized preferences. This meticulous approach ensures that your device is reset comprehensively, setting the stage for a seamless and efficient setup without a SIM card.
With the reset process successfully executed, your iPhone 4 is now poised for the final step in this journey: setting up the device without a SIM card. Let's proceed to the next step, where we will guide you through the essential process of configuring your iPhone 4 for operation without a SIM card.
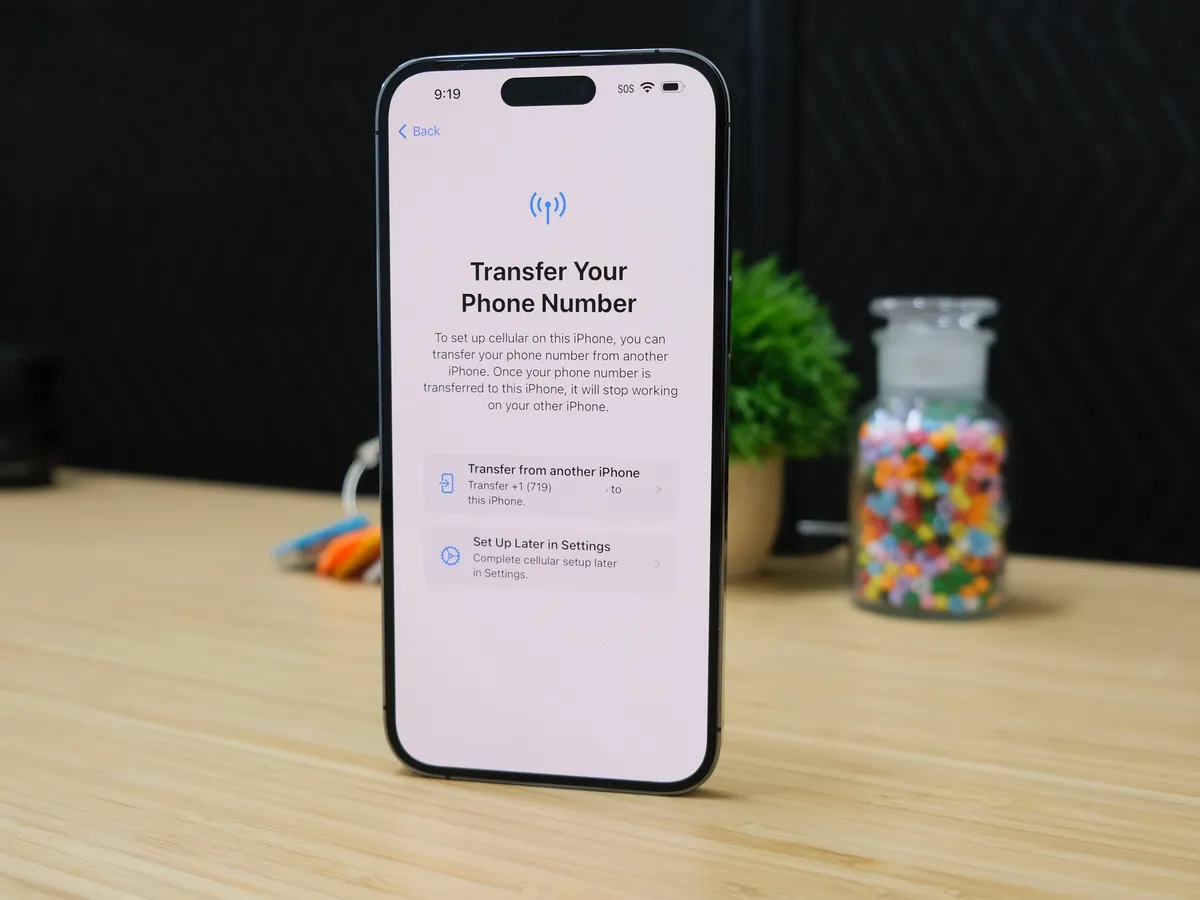
Step 4: Set Up Your iPhone without a SIM Card
Setting up your iPhone 4 without a SIM card is a straightforward process that enables you to utilize the device for various purposes, such as accessing Wi-Fi, using apps, and enjoying the array of features offered by iOS. While a SIM card is traditionally associated with cellular connectivity, configuring your iPhone 4 without one allows you to harness its capabilities in a Wi-Fi-centric capacity.
Understanding the Significance
Setting up your iPhone 4 without a SIM card extends its functionality beyond traditional cellular usage, presenting a versatile platform for internet-based activities, app usage, and multimedia consumption. This approach is particularly valuable for repurposing the device as a dedicated media player, gaming device, or portable productivity tool, leveraging its robust hardware and software capabilities without the need for cellular connectivity.
Wi-Fi Connectivity
Upon completing the reset process and reaching the initial setup screen, proceed as follows to set up your iPhone 4 without a SIM card:
-
Select Language and Region: Choose your preferred language and region settings to personalize your iPhone 4 according to your preferences.
-
Connect to Wi-Fi: Ensure that your device is within the range of a Wi-Fi network and select the network to establish a connection. This enables your iPhone 4 to access the internet and perform essential functions without a SIM card.
-
Set Up as New iPhone or Restore: Opt to set up your iPhone 4 as a new device or restore it from a previous backup, depending on your specific requirements.
Apple ID and iCloud
-
Sign in with Apple ID: Enter your Apple ID credentials to access the full suite of Apple services, including the App Store, iCloud, and Apple Music, enhancing the functionality of your iPhone 4.
-
Enable iCloud Services: Choose to enable iCloud services such as iCloud Drive, Photos, and Find My iPhone to seamlessly integrate your device with Apple's cloud ecosystem.
App Installation and Customization
-
Explore the App Store: Browse the App Store to discover and install a diverse range of apps tailored to your interests and requirements, expanding the capabilities of your iPhone 4.
-
Customize Settings: Navigate through the settings menu to personalize your device according to your preferences, adjusting display, sound, privacy, and security settings to optimize your user experience.
Seamless Functionality
By following these steps, you can effectively set up your iPhone 4 without a SIM card, transforming it into a versatile and functional device tailored to your specific needs. Whether it's for entertainment, productivity, or exploration, configuring your iPhone 4 without a SIM card empowers you to leverage its capabilities in a Wi-Fi-centric context, ensuring a seamless and enriching user experience.
With these steps completed, your iPhone 4 is now fully operational without a SIM card, ready to serve as a dynamic and adaptable tool in various facets of your digital lifestyle.