Introduction
Removing the SIM card from an iPhone 8 is a straightforward process that allows you to switch to a new SIM card or troubleshoot connectivity issues. Whether you're upgrading to a new device or simply need to access the SIM card, understanding the steps involved can make the process seamless and hassle-free.
By following the easy steps outlined in this guide, you can confidently navigate through the process of removing the SIM card from your iPhone 8. With the right tools and a clear understanding of the device's components, you'll be able to complete this task efficiently and without any unnecessary complications.
The SIM card, or Subscriber Identity Module, plays a crucial role in enabling cellular connectivity for your iPhone 8. It stores essential information such as your phone number, carrier details, and other pertinent data necessary for making calls, sending messages, and accessing mobile data. Understanding how to safely remove and reinsert the SIM card can be valuable knowledge for any iPhone 8 user.
Whether you're a seasoned iPhone user or new to the iOS ecosystem, this guide will provide you with the necessary insights to carry out this task with confidence. With a few simple steps, you'll be able to access the SIM card slot, remove the SIM card, and reinsert the tray without any unnecessary stress or confusion.
Now, let's delve into the step-by-step process of removing the SIM card from your iPhone 8, ensuring that you have the necessary tools and a clear understanding of the device's layout before proceeding.
Step 1: Gather necessary tools
Before embarking on the process of removing the SIM card from your iPhone 8, it's essential to gather the necessary tools to ensure a smooth and efficient experience. The tools required for this task are minimal, and having them readily available will streamline the process.
Tools Required:
-
SIM Card Eject Tool: This small, metal tool is specifically designed for ejecting the SIM card tray from your iPhone 8. It typically comes with the device at the time of purchase, enclosed within the packaging. The SIM card eject tool is essential for safely accessing the SIM card tray without causing any damage to the device.
-
Microfiber Cloth: While not directly involved in the removal of the SIM card, a microfiber cloth can be useful for cleaning the SIM card tray and the area surrounding it. This ensures that the SIM card slot is free from any dust or debris, allowing for a secure and reliable connection when the SIM card is reinserted.
By ensuring that you have the SIM card eject tool and a microfiber cloth at your disposal, you'll be well-prepared to proceed with the subsequent steps of removing the SIM card from your iPhone 8. These basic tools are integral to the process and will contribute to a successful and hassle-free experience.
With the necessary tools in hand, you're now ready to move on to the next step, which involves powering off your iPhone 8 in preparation for accessing the SIM card tray. This simple yet crucial step sets the stage for the subsequent actions required to safely remove the SIM card from your device.
Now that you've gathered the essential tools, let's proceed to the next step in the process of removing the SIM card from your iPhone 8.
Step 2: Turn off the iPhone 8
Before delving into the intricacies of removing the SIM card from your iPhone 8, it's imperative to power off the device. This simple yet crucial step ensures the safety of both the device and the SIM card, allowing for a seamless and risk-free SIM card removal process.
To power off your iPhone 8, follow these simple steps:
-
Begin by locating the Side button, which is situated on the right side of the device. This button serves multiple functions, including the activation of Siri, taking screenshots, and powering off the device.
-
Press and hold the Side button along with either the Volume Up or Volume Down button simultaneously. This action will prompt the "slide to power off" slider to appear on the screen.
-
Once the "slide to power off" slider is displayed, swipe the slider from left to right using your finger. This gesture effectively powers down the iPhone 8, initiating a graceful shutdown process.
-
After swiping the slider, the device will commence the shutdown sequence, and the screen will gradually fade to black, indicating that the iPhone 8 is successfully powered off.
By diligently following these steps, you have effectively powered off your iPhone 8, setting the stage for the subsequent task of accessing the SIM card tray. This essential preparatory step ensures that the device is in a safe and dormant state, minimizing the risk of any potential damage during the SIM card removal process.
With your iPhone 8 now powered off, you're well-equipped to proceed to the next step, which involves locating the SIM card tray within the device. This foundational step paves the way for a smooth and hassle-free SIM card removal process, allowing you to confidently navigate through the subsequent actions with ease and precision.
Now that your iPhone 8 is powered off, let's move on to the next step, where we'll delve into the process of locating the SIM card tray, an essential component in the journey of removing the SIM card from your device.
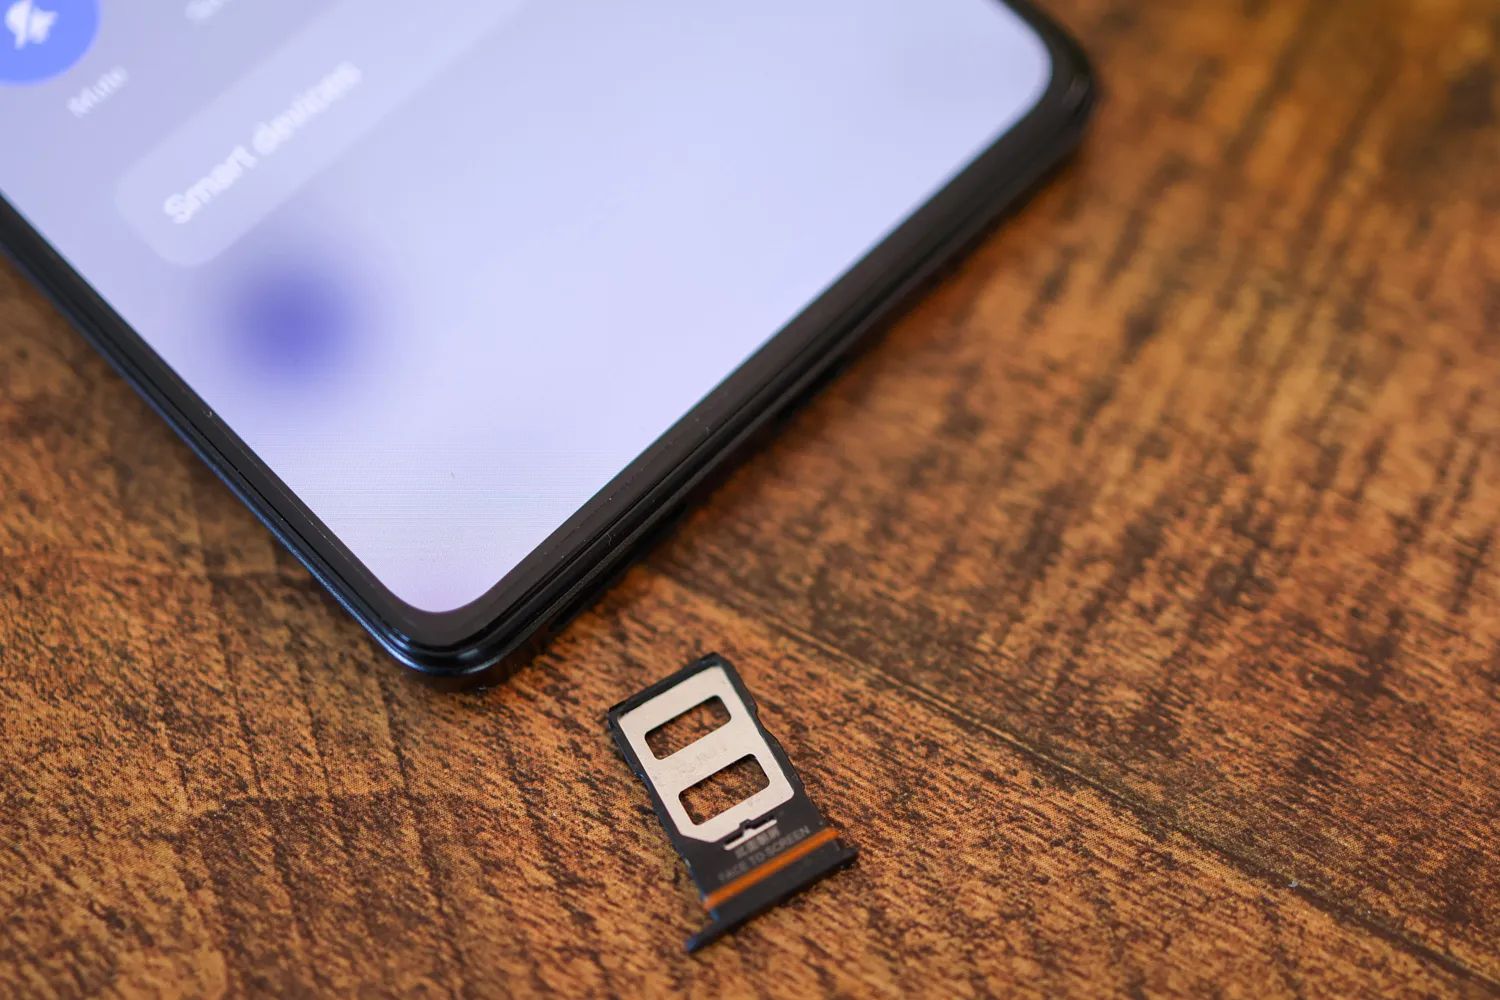
Step 3: Locate the SIM card tray
With your iPhone 8 powered off, the next step in the process of removing the SIM card is to locate the SIM card tray. The SIM card tray is a small, discreet component of the iPhone 8, designed to securely house the SIM card while ensuring easy access for insertion and removal.
To locate the SIM card tray on your iPhone 8, follow these simple steps:
-
Position of the SIM card tray: The SIM card tray is typically situated on the right-hand side of the device. It is important to note that the exact location may vary depending on the specific model and design of the iPhone 8. However, for most iPhone 8 models, the SIM card tray is located on the right-hand side, adjacent to the device's exterior edge.
-
Identifying the SIM card tray: The SIM card tray is a small, rectangular slot with a pinhole located adjacent to it. This pinhole is designed to accommodate the SIM card eject tool, allowing for the safe ejection of the SIM card tray from the device. The presence of the pinhole serves as a visual indicator, aiding in the identification of the SIM card tray amidst the device's sleek and minimalistic design.
-
Ensuring a clear view: Before proceeding further, it is advisable to ensure that the area surrounding the SIM card tray is free from any obstructions or debris. This ensures unencumbered access to the SIM card tray, allowing for a smooth and uncomplicated removal process.
By carefully following these steps, you can effectively locate the SIM card tray on your iPhone 8, setting the stage for the subsequent task of ejecting the SIM card tray in preparation for removing the SIM card.
With the SIM card tray now identified, you are well-positioned to proceed to the next step, which involves the safe and controlled ejection of the SIM card tray using the designated SIM card eject tool. This pivotal step marks a significant milestone in the process of removing the SIM card from your iPhone 8, bringing you one step closer to successfully completing this task with confidence and precision.
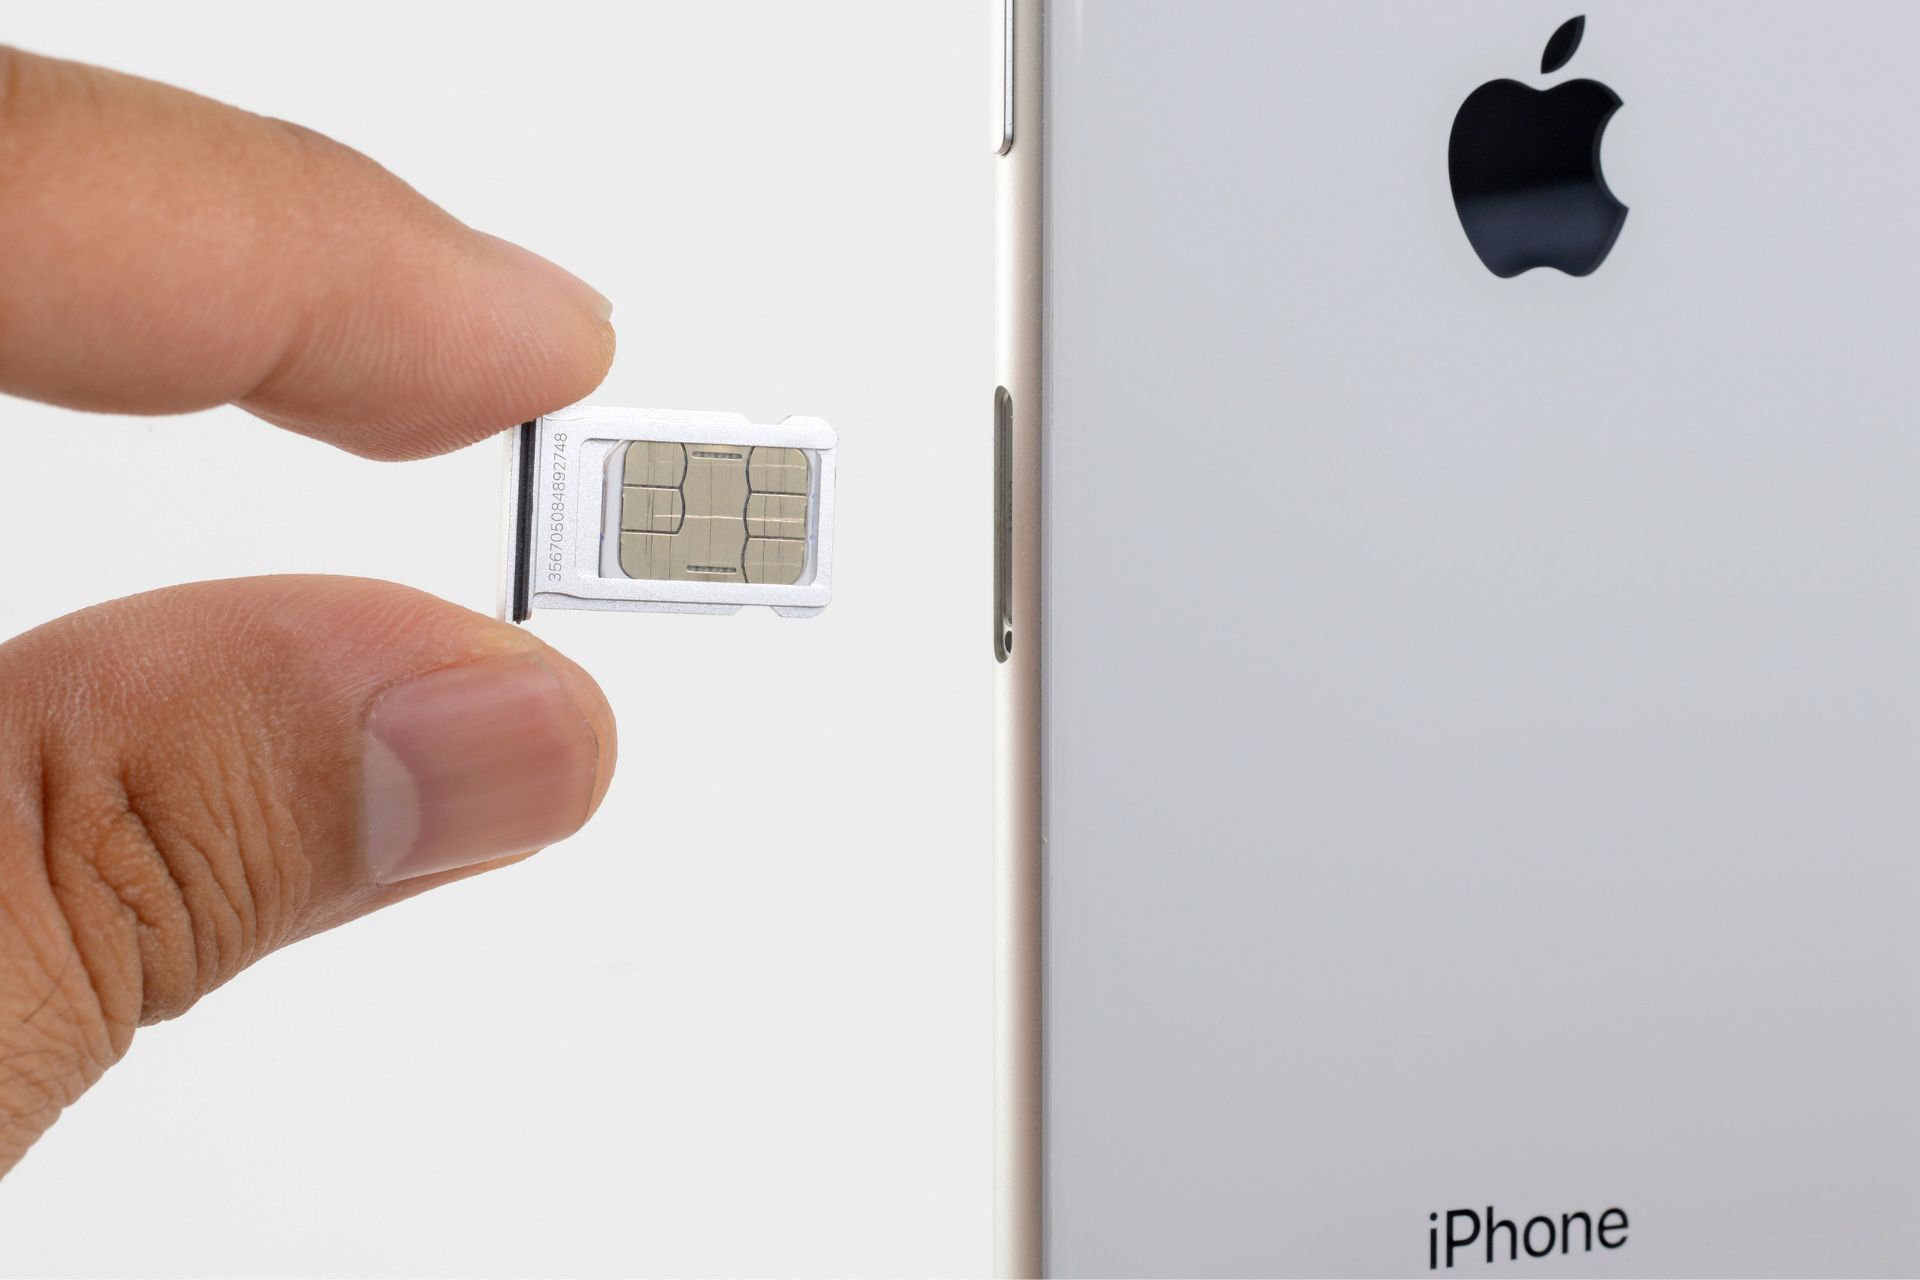
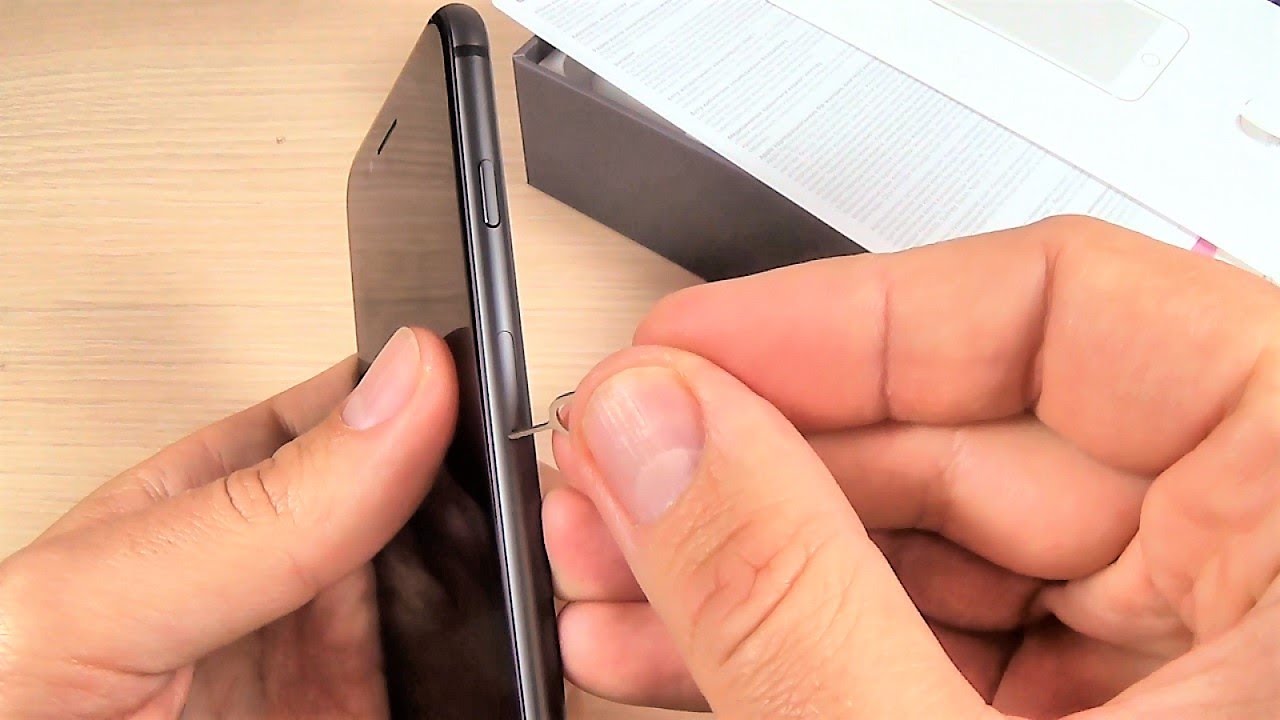
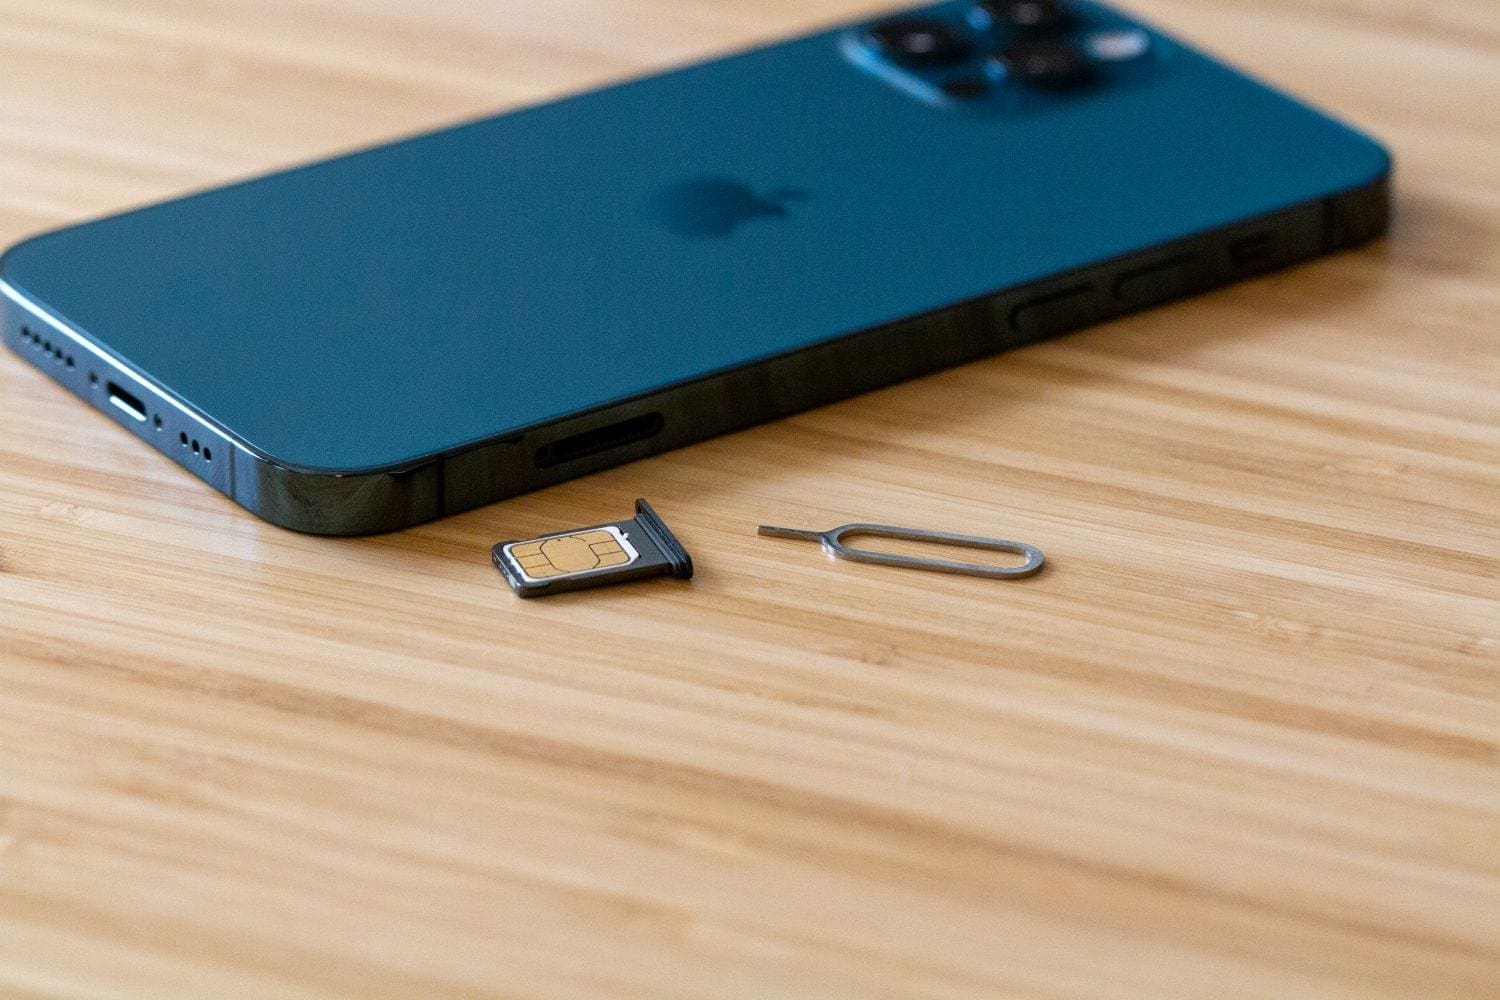
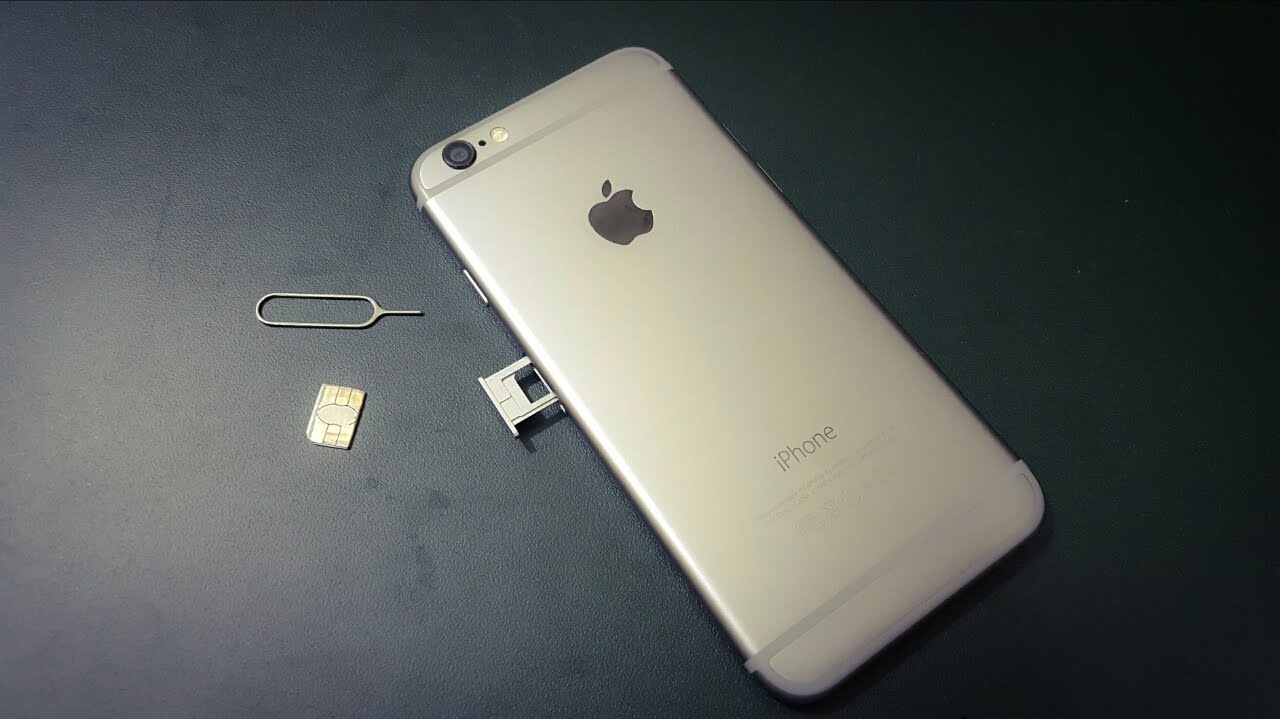
Step 4: Eject the SIM card tray
Ejecting the SIM card tray from your iPhone 8 is a crucial step in the process of removing the SIM card. This action allows you to safely access the SIM card, facilitating its seamless removal from the device. By following the steps outlined below, you can confidently proceed with the controlled ejection of the SIM card tray, ensuring a smooth and hassle-free experience.
To eject the SIM card tray from your iPhone 8, adhere to the following steps:
-
Retrieve the SIM Card Eject Tool: Ensure that you have the SIM card eject tool readily available. This small, metal tool is specifically designed for ejecting the SIM card tray and is essential for safely accessing the SIM card slot without causing any damage to the device.
-
Insert the SIM Card Eject Tool: Locate the pinhole adjacent to the SIM card tray. Insert the pointed end of the SIM card eject tool into the pinhole with gentle pressure. The tool is designed to fit snugly into the pinhole, allowing for a secure grip and controlled ejection of the SIM card tray.
-
Apply Even Pressure: Once the SIM card eject tool is inserted into the pinhole, apply even pressure to gently push into the pinhole. This action triggers the release mechanism within the device, causing the SIM card tray to protrude slightly from the exterior of the iPhone 8.
-
Carefully Remove the SIM Card Tray: With the SIM card tray partially ejected, carefully grasp the exposed edge of the tray and gently pull it outwards. Exercise caution to ensure a smooth and controlled removal, avoiding any abrupt or forceful movements that may lead to damage.
By diligently following these steps, you can effectively eject the SIM card tray from your iPhone 8, marking a significant milestone in the process of removing the SIM card. This pivotal action sets the stage for the subsequent task of safely removing the SIM card from the tray, allowing you to proceed with confidence and precision.
With the SIM card tray now successfully ejected, you are well-prepared to move on to the next step, which involves the careful removal of the SIM card from the tray. This essential task brings you one step closer to completing the process of removing the SIM card from your iPhone 8, enabling you to navigate through the subsequent actions with ease and assurance.
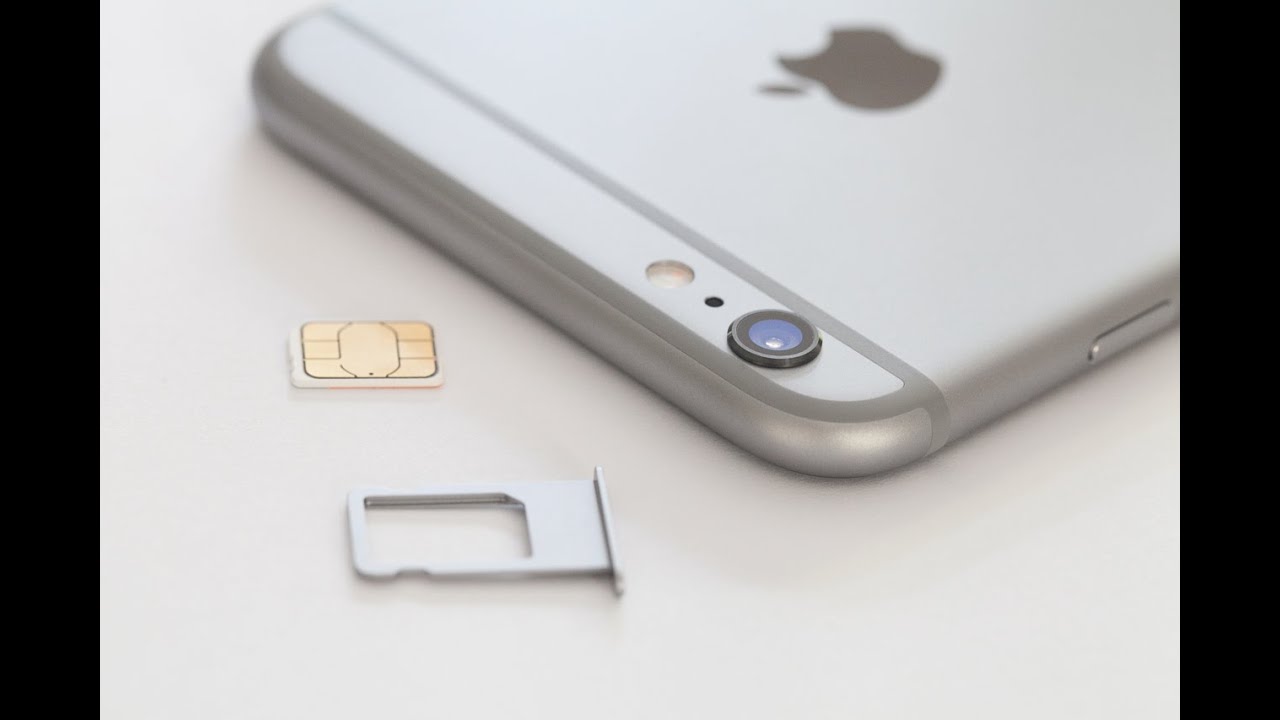
Step 5: Remove the SIM card
With the SIM card tray successfully ejected from your iPhone 8, the next pivotal step in the process involves the careful removal of the SIM card from the tray. This task requires attention to detail and a gentle touch to ensure the safe extraction of the SIM card without causing any damage.
To remove the SIM card from the tray, follow these precise steps:
-
Inspect the SIM Card: As the SIM card tray is now accessible, take a moment to visually inspect the SIM card. The SIM card is a small, rectangular chip that fits snugly within the tray. Ensure that there are no visible signs of damage or irregularities on the SIM card, such as cracks or bends.
-
Gently Remove the SIM Card: Using your fingertips, delicately grasp the SIM card and carefully slide it out of the tray. Exercise caution to avoid applying excessive force or bending the SIM card during this process. The SIM card should glide smoothly out of the tray with minimal resistance.
-
Handle with Care: As you remove the SIM card, handle it with care to prevent any accidental drops or mishandling. The SIM card is a delicate component that contains vital information related to your cellular connectivity, and any damage to it may compromise its functionality.
-
Inspect the Tray and SIM Card Slot: After removing the SIM card, take a moment to inspect the SIM card tray and the SIM card slot within the device. Ensure that both components are free from any dust, debris, or foreign particles that may hinder the reinsertion of the SIM card or affect the device's connectivity.
By following these meticulous steps, you can effectively remove the SIM card from your iPhone 8 with precision and care. This essential action brings you closer to completing the process of SIM card removal, setting the stage for the subsequent task of reinserting the SIM card tray into the device.
With the SIM card now safely removed from the tray, you are well-prepared to proceed to the next step, which involves the seamless reinsertion of the SIM card tray into your iPhone 8. This pivotal task marks a significant milestone in the overall process, allowing you to navigate through the subsequent actions with confidence and assurance.
Step 6: Reinsert the SIM card tray
With the SIM card safely removed from your iPhone 8, the subsequent step involves the seamless reinsertion of the SIM card tray into the device. This pivotal task is essential for restoring cellular connectivity and ensuring that the SIM card is securely positioned within the device, ready to facilitate calls, messages, and data usage.
To reinsert the SIM card tray into your iPhone 8, follow these precise steps:
-
Position the SIM Card Tray:
Orient the SIM card tray in the correct position, ensuring that the metal contacts on the SIM card align with the corresponding contacts within the tray. The SIM card tray is designed to fit snugly into the designated slot within the device, and proper alignment is crucial for a secure and reliable connection. -
Carefully Insert the SIM Card Tray:
With the SIM card tray positioned correctly, gently guide it back into the SIM card slot within the device. Exercise caution to avoid applying excessive force during this process, ensuring that the tray smoothly and seamlessly slots back into place without any resistance. -
Verify Secure Placement:
Once the SIM card tray is reinserted, verify that it is securely positioned within the device. The tray should sit flush with the exterior of the iPhone 8, with no protrusions or misalignments. A secure placement ensures that the SIM card remains firmly seated within the device, enabling uninterrupted cellular connectivity. -
Power On the iPhone 8:
After reinserting the SIM card tray, power on your iPhone 8 by pressing and holding the Side button until the Apple logo appears on the screen. The device will undergo the startup sequence, and upon successful initialization, it will be ready to utilize the reinserted SIM card for cellular communication.
By following these meticulous steps, you can effectively reinsert the SIM card tray into your iPhone 8 with precision and care. This essential action marks the culmination of the SIM card removal and reinsertion process, ensuring that the device is equipped to harness the connectivity provided by the SIM card.
With the SIM card tray securely reinserted, you have successfully completed the process of removing and reinserting the SIM card in your iPhone 8. This accomplishment underscores your ability to navigate through essential device maintenance tasks with confidence and precision, empowering you to optimize the functionality of your iPhone 8.
Conclusion
Congratulations! You have successfully navigated through the comprehensive process of removing and reinserting the SIM card in your iPhone 8. By following the step-by-step guide outlined in this article, you have gained valuable insights into the essential tasks involved in managing the SIM card, a critical component that underpins the cellular connectivity of your device.
The journey began with the initial step of gathering the necessary tools, emphasizing the importance of having the SIM card eject tool and a microfiber cloth at your disposal. These basic yet indispensable tools set the stage for a smooth and efficient SIM card removal process, ensuring that you were well-prepared to embark on the subsequent steps.
Powering off the iPhone 8 was the next pivotal task, underscoring the significance of ensuring the safety and stability of the device before accessing the SIM card tray. This foundational step laid the groundwork for the subsequent actions, facilitating a controlled and risk-free SIM card removal process.
Locating the SIM card tray within the device was a crucial milestone, highlighting the significance of understanding the layout and components of the iPhone 8. By identifying the SIM card tray and ensuring a clear view of its surroundings, you set the stage for the controlled ejection of the tray using the designated SIM card eject tool.
Ejecting the SIM card tray marked a significant progression in the process, enabling you to safely access the SIM card and proceed with its meticulous removal. By exercising caution and precision, you successfully removed the SIM card from the tray, ensuring its integrity and safeguarding its functionality.
The subsequent task of reinserting the SIM card tray into the device underscored your ability to seamlessly restore cellular connectivity, culminating in the successful completion of the SIM card removal and reinsertion process. By verifying the secure placement of the tray and powering on your iPhone 8, you reaffirmed your adeptness in managing essential device maintenance tasks with confidence and precision.
As you reflect on this journey, you have not only acquired practical knowledge but also demonstrated your capability to navigate through fundamental device maintenance procedures with ease. Your proficiency in managing the SIM card in your iPhone 8 empowers you to optimize the device's functionality and ensure uninterrupted cellular connectivity.
Armed with the insights gained from this experience, you are well-equipped to tackle similar tasks and confidently manage the essential components of your iPhone 8. Whether it involves SIM card maintenance, device troubleshooting, or routine upkeep, your newfound expertise positions you as a capable steward of your iPhone 8, ready to harness its full potential.
With the SIM card securely reinserted and your iPhone 8 powered on, you are now poised to leverage the seamless connectivity provided by the SIM card, enabling you to stay connected, communicate effortlessly, and explore the myriad possibilities offered by your device.
Well done on successfully completing the process of removing and reinserting the SIM card in your iPhone 8. Your adeptness and proficiency in managing essential device maintenance tasks are a testament to your commitment to optimizing the functionality of your iPhone 8.