Introduction
Inserting a SIM card into your iPhone 8 is a fundamental step in setting up your device for calls, texts, and mobile data usage. Whether you're activating a new iPhone 8 or replacing an existing SIM card, this process is essential for seamless connectivity. With the advancement of technology, the iPhone 8 has streamlined the SIM card insertion process, making it user-friendly and efficient. In this comprehensive guide, we will walk you through the step-by-step procedure to ensure a smooth and successful SIM card installation.
The SIM card serves as the key to unlocking your iPhone 8's cellular capabilities, enabling it to connect to your mobile carrier's network. By following this guide, you will gain valuable insights into the intricacies of your device's hardware, empowering you to confidently manage your iPhone 8's SIM card-related tasks. It's important to note that the SIM card not only facilitates communication but also plays a vital role in accessing mobile data, making it an indispensable component of your iPhone 8 setup.
Understanding the significance of this process, we have meticulously crafted this guide to cater to both new iPhone 8 users and those seeking to replace their SIM cards. By the end of this tutorial, you will have a clear understanding of how to access the SIM card tray, utilize the SIM eject tool, and securely insert the SIM card into your iPhone 8. This knowledge will equip you with the necessary skills to manage your device's connectivity features with confidence and ease.
As we embark on this journey of SIM card insertion, let's embrace the opportunity to delve into the intricacies of iPhone 8's hardware, fostering a deeper connection with our devices. So, without further ado, let's dive into the step-by-step process of inserting a SIM card into your iPhone 8 and unlock the full potential of your device.
Step 1: Power Off Your iPhone 8
Before embarking on the process of inserting a SIM card into your iPhone 8, it is crucial to power off the device. This initial step ensures the safety of both the device and the SIM card during the insertion process. By powering off the iPhone 8, you minimize the risk of potential damage to the hardware components and create a conducive environment for handling the SIM card tray.
To power off your iPhone 8, simply press and hold the side button located on the right side of the device. As you press and hold the side button, a slider will appear on the screen, prompting you to slide it from left to right to power off the device. Once the slider is moved to the right and the screen goes dark, your iPhone 8 is successfully powered off.
By powering off your iPhone 8, you ensure that the device is in a dormant state, reducing the likelihood of any electronic interference or accidental activation during the SIM card insertion process. This precautionary measure aligns with the best practices for handling electronic devices and sets the stage for a seamless and secure SIM card installation.
As you power off your iPhone 8, take a moment to appreciate the elegance of its design and the intuitive interface that simplifies the power-off procedure. This brief pause allows you to engage with your device on a deeper level, fostering a sense of familiarity and confidence as you proceed with the SIM card insertion process.
With your iPhone 8 now powered off, you are ready to proceed to the next step, where we will delve into the intricacies of locating the SIM card tray and initiating the SIM card insertion process. This foundational step sets the stage for a smooth and successful SIM card installation, ensuring that your iPhone 8 is equipped with the necessary components to connect to your mobile carrier's network seamlessly.
Step 2: Locate the SIM Card Tray
As we delve into the process of inserting a SIM card into your iPhone 8, the next crucial step is to locate the SIM card tray. The SIM card tray is a small, discreet compartment designed to securely house your SIM card within the iPhone 8's sleek and compact frame. This component plays a pivotal role in facilitating the seamless integration of the SIM card, ensuring that it is positioned correctly for optimal functionality.
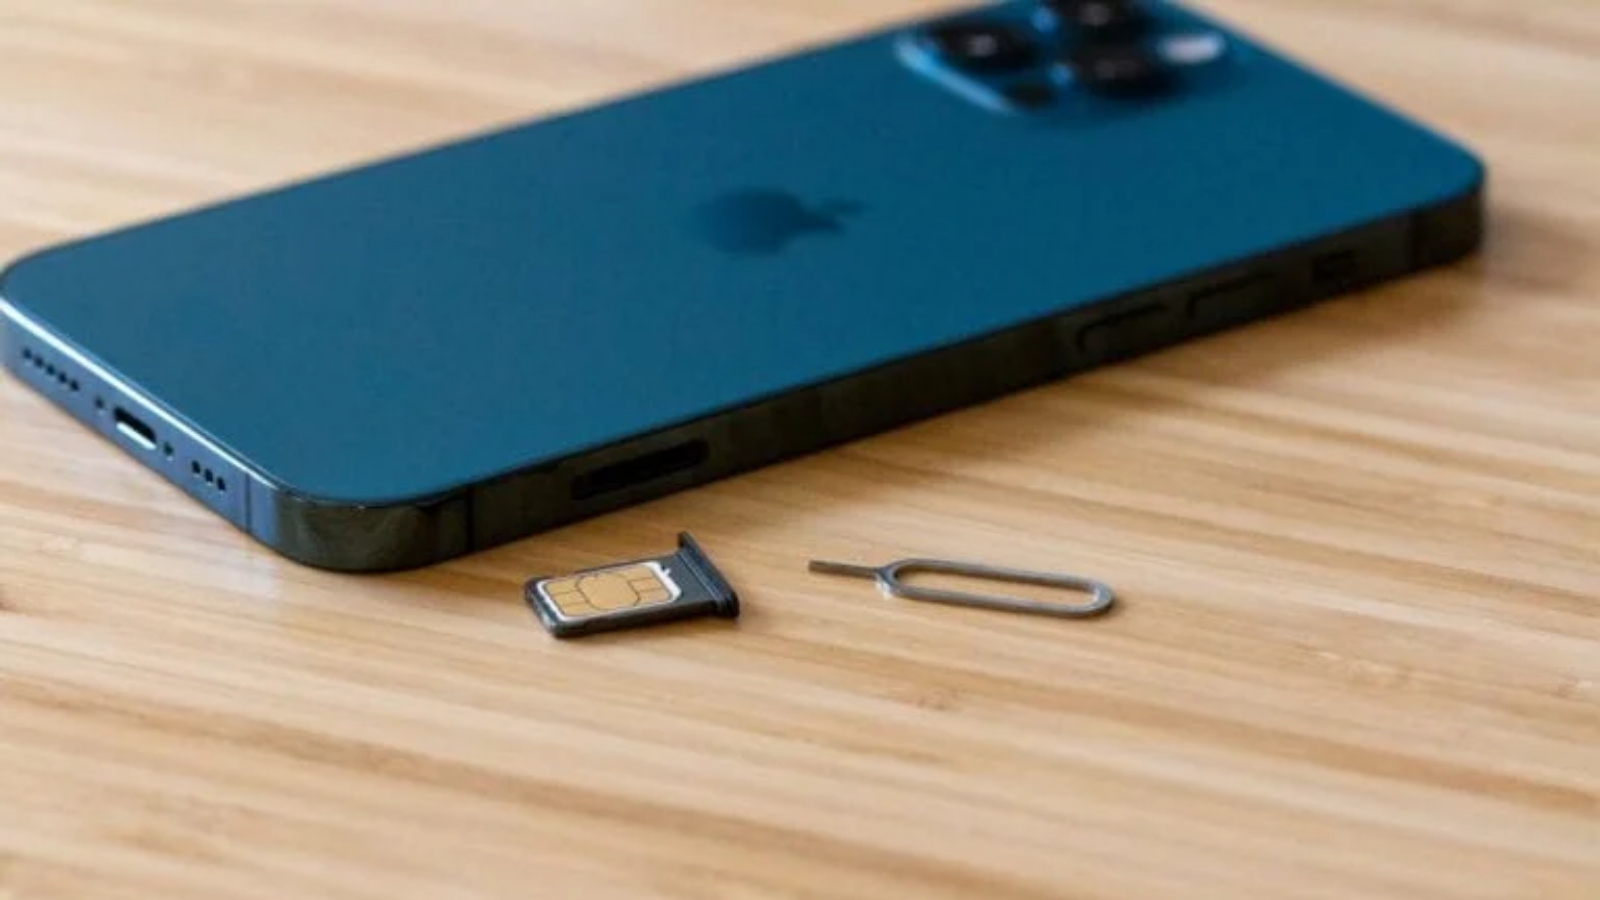
To locate the SIM card tray, you will first need to identify the specific design elements of the iPhone 8 that house this essential component. Positioned along the right side of the device, you will notice a small, recessed slot, typically situated below the side button. This slot is the entry point to the SIM card tray and serves as the access point for initiating the SIM card insertion process.
Upon identifying the slot, you will notice a tiny pinhole adjacent to it. This pinhole is strategically positioned to accommodate the SIM eject tool, a specialized instrument included with your iPhone 8 for the purpose of accessing the SIM card tray. The presence of this pinhole signifies the meticulous attention to detail in the iPhone 8's design, ensuring that the SIM card insertion process is both user-friendly and secure.
As you familiarize yourself with the location of the SIM card tray, take a moment to appreciate the thoughtful integration of this feature within the iPhone 8's aesthetic and functional design. The seamless blending of form and function exemplifies the commitment to user experience and accessibility, underscoring the device's intuitive nature.
By locating the SIM card tray, you have taken a significant stride towards mastering the intricacies of your iPhone 8's hardware, enhancing your understanding of its internal components. This newfound familiarity with the device's physical layout fosters a deeper connection with your iPhone 8, empowering you to navigate its features with confidence and ease.
With the SIM card tray now within your sights, you are poised to embark on the next phase of the SIM card insertion process. This pivotal step sets the stage for the seamless integration of the SIM card into your iPhone 8, paving the way for enhanced connectivity and functionality.
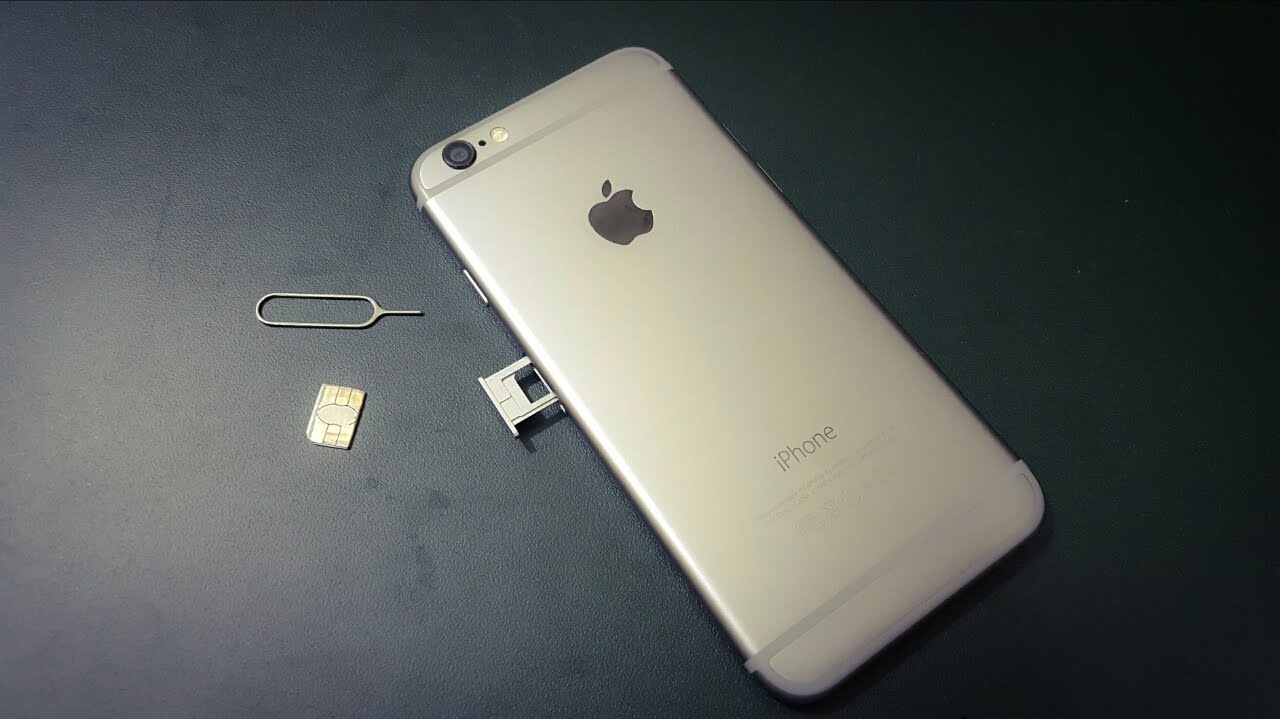
Step 3: Insert the SIM Eject Tool
With the SIM card tray located, the next step in the process of inserting a SIM card into your iPhone 8 involves the precise insertion of the SIM eject tool. This specialized tool, provided with your iPhone 8, is designed to effortlessly access the SIM card tray, ensuring a seamless and secure insertion process.
The SIM eject tool, often crafted from durable metal or high-quality plastic, features a slender and elongated design, culminating in a small, pointed tip. This distinctive shape enables the tool to navigate the pinhole located adjacent to the SIM card slot with precision and ease, initiating the release of the SIM card tray from its housing within the iPhone 8.
To initiate the insertion of the SIM eject tool, firmly grasp the tool between your thumb and index finger, ensuring a steady grip to facilitate precise maneuvering. Position the pointed tip of the tool into the pinhole adjacent to the SIM card slot, exerting gentle pressure to engage the internal mechanism.
As you insert the SIM eject tool into the pinhole, you will sense a subtle resistance, indicative of the tool making contact with the internal release mechanism. This tactile feedback underscores the deliberate design of the SIM eject tool, aligning with the iPhone 8's commitment to user-friendly functionality.
Upon encountering this resistance, continue to apply steady pressure, allowing the pointed tip of the SIM eject tool to engage with the internal mechanism. As the tool navigates this mechanism, you will feel a slight give, signifying the successful initiation of the SIM card tray's release.
The deliberate and meticulous design of the SIM eject tool, coupled with its seamless integration into the iPhone 8's hardware ecosystem, underscores the device's commitment to user-centric innovation. By seamlessly accessing the SIM card tray, the tool empowers users to navigate the intricacies of their device's hardware with confidence and ease.
With the SIM eject tool successfully inserted and the SIM card tray primed for release, you are now poised to embark on the subsequent steps of the SIM card insertion process. This pivotal milestone brings you one step closer to seamlessly integrating the SIM card into your iPhone 8, unlocking its full potential for connectivity and communication.
Step 4: Remove the SIM Card Tray
As we progress through the process of inserting a SIM card into your iPhone 8, the next crucial step involves delicately removing the SIM card tray from its housing within the device. This pivotal maneuver sets the stage for the seamless integration of the SIM card, ensuring that it is securely positioned within the tray for optimal functionality.
With the SIM eject tool firmly inserted into the pinhole adjacent to the SIM card slot, gently exert pressure to initiate the release of the SIM card tray. As the internal mechanism responds to the precise maneuvering of the SIM eject tool, you will feel a subtle give, indicating that the SIM card tray is disengaging from its resting position within the iPhone 8.
As the SIM card tray begins to emerge from the device, exercise caution and maintain a steady grip on the SIM eject tool to guide the tray's smooth extraction. The deliberate and ergonomic design of the SIM eject tool enables you to navigate this process with precision, ensuring that the SIM card tray is released seamlessly without any undue force or resistance.
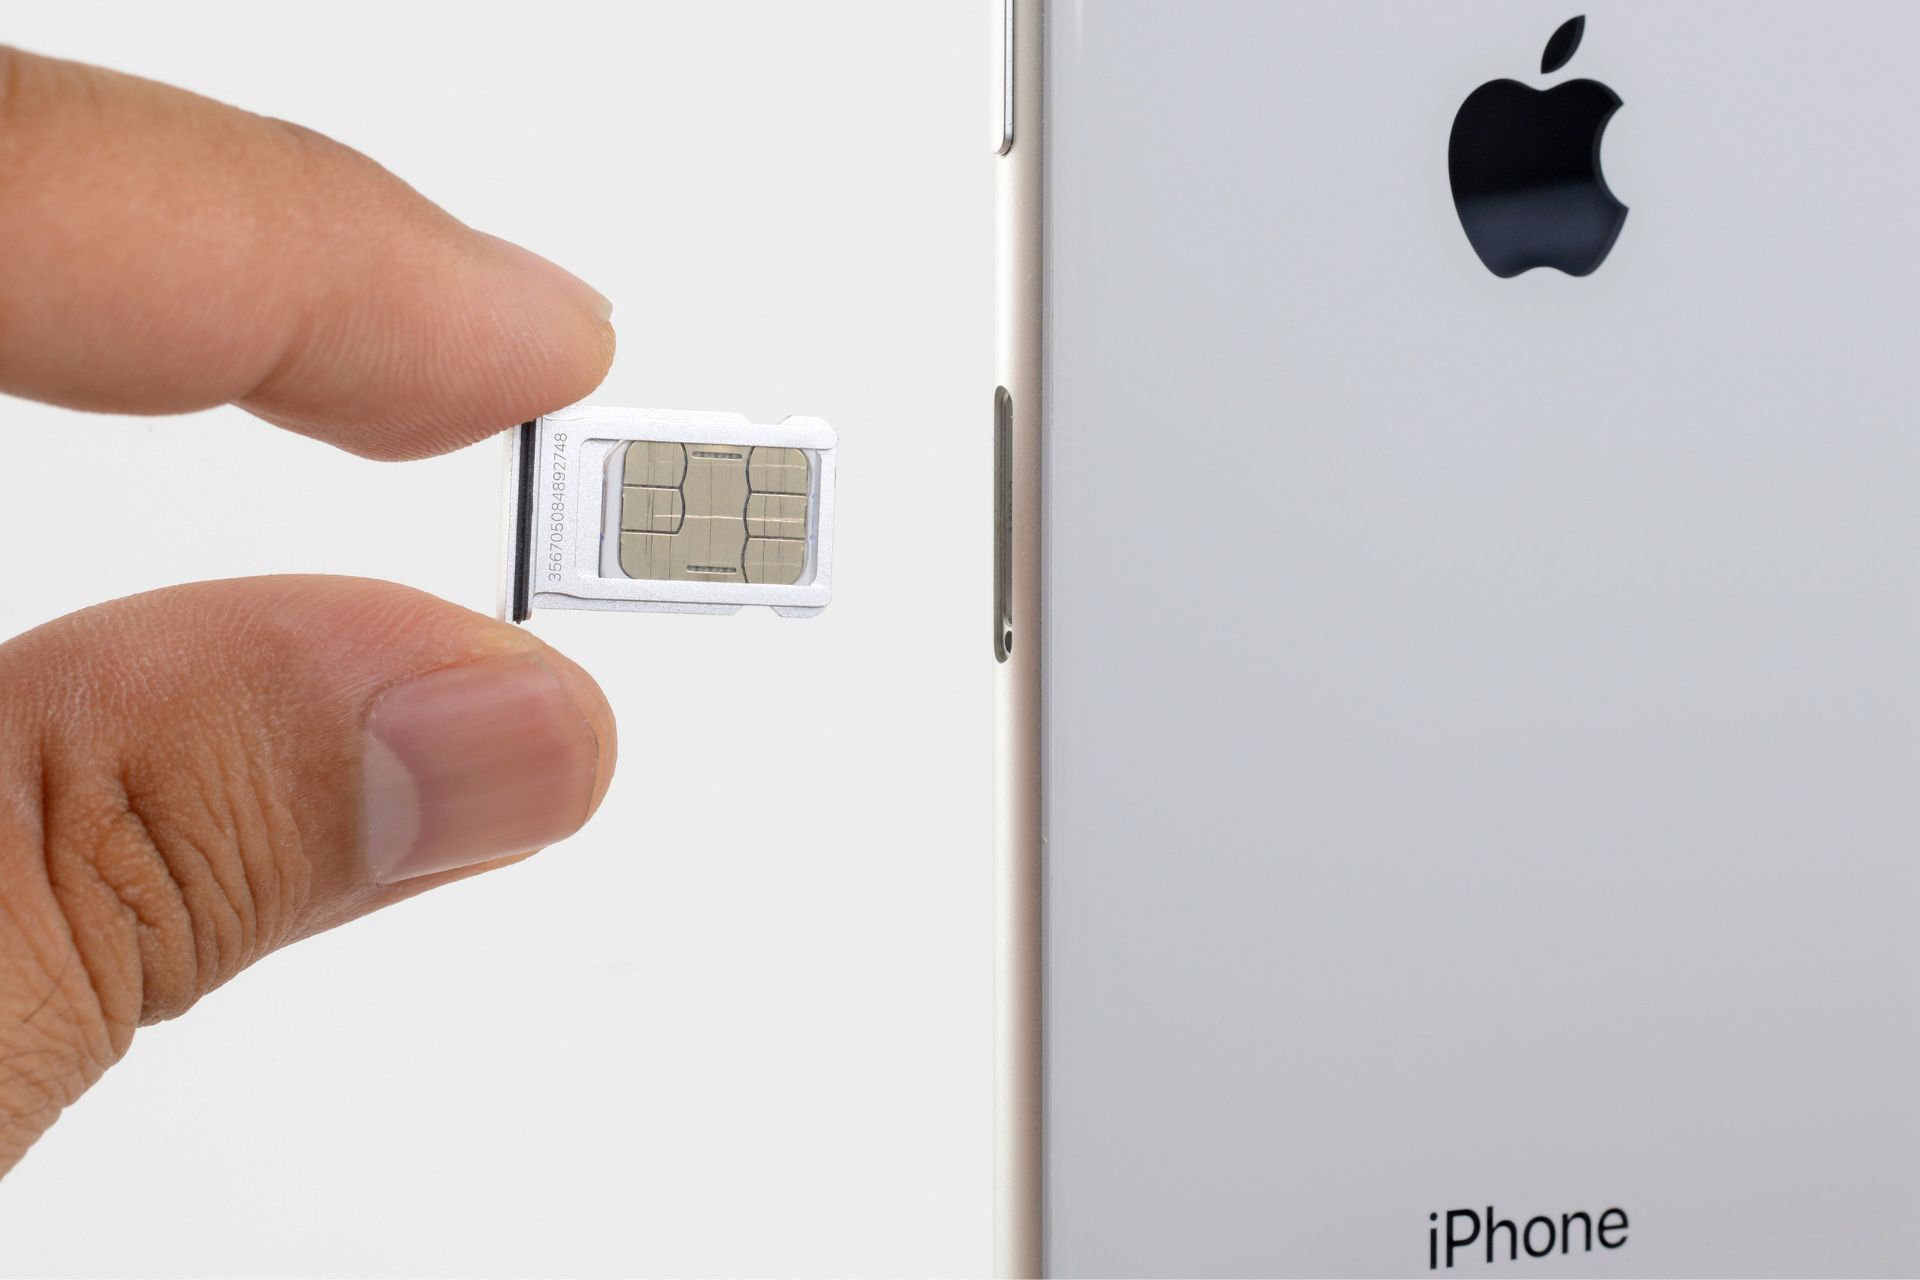
With the SIM card tray now accessible, delicately withdraw it from the iPhone 8, taking care to handle it with the utmost care and precision. The compact and lightweight nature of the SIM card tray underscores the need for gentle handling, safeguarding it from any potential damage during the removal process.
As you carefully extract the SIM card tray, take a moment to appreciate the seamless integration of this component within the iPhone 8's design. The intuitive accessibility of the SIM card tray reflects the device's commitment to user-centric functionality, ensuring that essential tasks such as SIM card insertion and removal are effortless and efficient.
With the SIM card tray now in your possession, you have successfully navigated the crucial step of removing it from your iPhone 8, paving the way for the next phase of the SIM card insertion process. This milestone brings you closer to securely placing the SIM card within the tray and reaping the benefits of seamless connectivity and communication on your iPhone 8.
Step 5: Place the SIM Card in the Tray
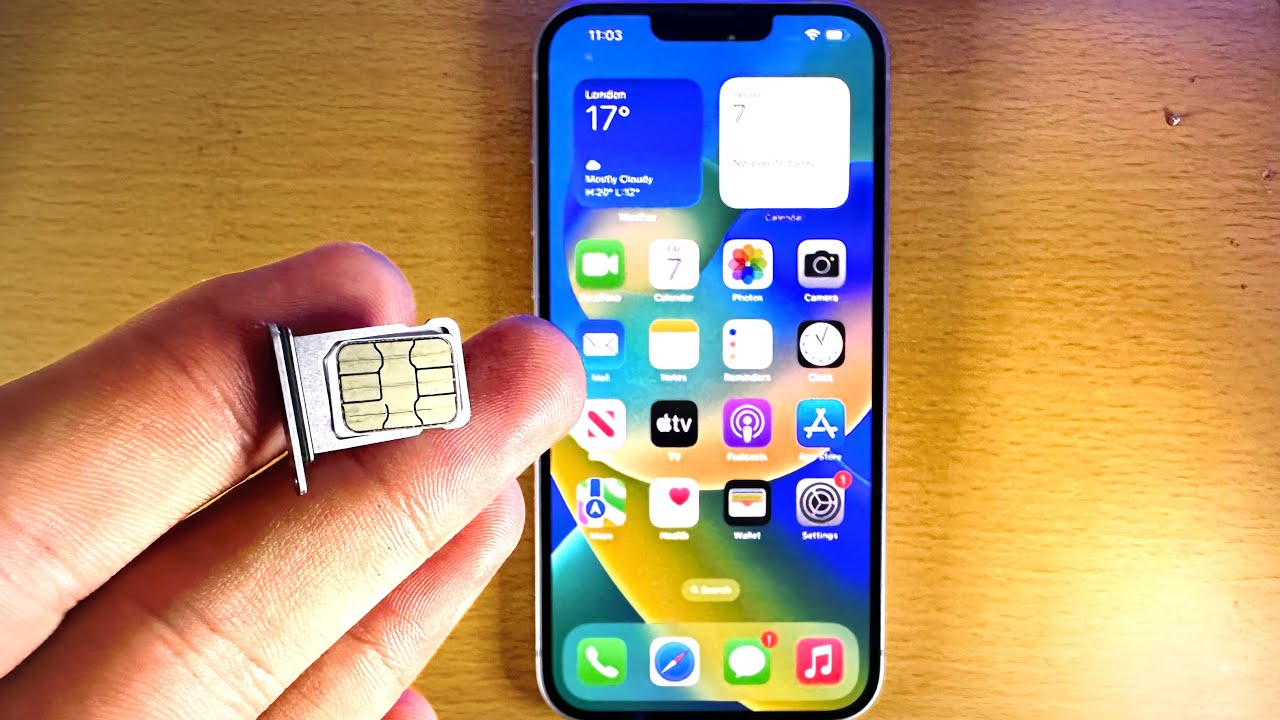
With the SIM card tray now in your possession, the next pivotal step in the process of inserting a SIM card into your iPhone 8 involves securely placing the SIM card within the tray. This step is crucial in ensuring that the SIM card is positioned correctly for seamless integration with your iPhone 8, enabling it to connect to your mobile carrier's network and access essential communication and data services.
Before proceeding, carefully inspect the SIM card tray to identify the designated slot where the SIM card will be placed. Positioned within the tray, you will notice a small, discreet compartment with a shape and size that aligns with the dimensions of the SIM card. This compartment is specifically designed to accommodate the SIM card, ensuring a snug fit that prevents any movement or dislodgment during regular device usage.
With the designated slot identified, gently position the SIM card within it, aligning the notched corner of the SIM card with the corresponding notch within the slot. This precise alignment ensures that the SIM card is inserted in the correct orientation, facilitating a seamless connection with your mobile carrier's network upon completion of the insertion process.
As you delicately place the SIM card within the designated slot, take note of the subtle resistance encountered, signifying the secure positioning of the card within the tray. This tactile feedback underscores the snug fit of the SIM card within the compartment, affirming that it is correctly seated and ready for the subsequent steps of the insertion process.
The meticulous placement of the SIM card within the tray reflects the attention to detail in the iPhone 8's design, ensuring that essential hardware components are seamlessly integrated for optimal functionality. By adhering to the precise alignment and secure placement of the SIM card, you are poised to harness the full potential of your iPhone 8's connectivity features with confidence and ease.
With the SIM card now securely positioned within the tray, you have successfully navigated this pivotal step in the insertion process, setting the stage for the seamless reinsertion of the SIM card tray into your iPhone 8. This milestone brings you one step closer to activating your device for communication, data usage, and connectivity, unlocking its full capabilities for your everyday needs.
Step 6: Reinsert the SIM Card Tray
With the SIM card securely placed within the designated slot of the SIM card tray, the next crucial step in the process of inserting a SIM card into your iPhone 8 is to delicately reinsert the SIM card tray into the device. This pivotal maneuver not only safeguards the SIM card within its housing but also ensures that the iPhone 8 is fully equipped to establish seamless connectivity with your mobile carrier's network.
As you prepare to reinsert the SIM card tray, take a moment to appreciate the streamlined and ergonomic design of this component. The compact and lightweight nature of the SIM card tray underscores the device's commitment to user-friendly functionality, enabling effortless handling and insertion.
Position the SIM card tray in alignment with the corresponding slot within the iPhone 8, taking care to orient it correctly to facilitate a smooth reintegration. The precise positioning of the tray ensures that it seamlessly meshes with the device, aligning with the iPhone 8's meticulous design for optimal functionality.
Gently guide the SIM card tray into the designated slot, exercising caution to avoid any undue force or resistance during the reinsertion process. The deliberate and ergonomic design of the SIM card tray, coupled with the iPhone 8's intuitive hardware ecosystem, facilitates a seamless reintegration, underscoring the device's commitment to user-centric innovation.
As the SIM card tray seamlessly slides back into its housing within the iPhone 8, take note of the satisfying click that signifies its secure repositioning. This tactile feedback reaffirms the successful reinsertion of the tray, ensuring that the SIM card is safeguarded within the device for uninterrupted connectivity and communication.
With the SIM card tray now securely reinserted, you have adeptly navigated this pivotal step in the SIM card insertion process, setting the stage for the final phase of activating your iPhone 8. This milestone brings you one step closer to harnessing the full potential of your device's cellular capabilities, paving the way for seamless communication, data usage, and connectivity in your everyday endeavors.
Step 7: Power On Your iPhone 8
With the SIM card tray securely reinserted into your iPhone 8, the final step in the process of inserting a SIM card is to power on the device. This pivotal maneuver marks the culmination of the SIM card insertion process, setting the stage for the seamless activation of your iPhone 8's cellular capabilities.
To power on your iPhone 8, press and hold the side button located on the right side of the device. As you exert gentle pressure on the side button, the familiar Apple logo will illuminate the screen, signaling the device's activation. As the iPhone 8 springs to life, take a moment to appreciate the seamless integration of the SIM card within the device, a testament to the meticulous design and user-centric functionality of the iPhone 8.
As the device powers on, the SIM card initiates its connection to your mobile carrier's network, laying the foundation for uninterrupted communication, data usage, and connectivity. This pivotal moment underscores the significance of the SIM card as the gateway to your iPhone 8's cellular capabilities, enabling it to seamlessly integrate with your mobile carrier's services.
As the device completes its power-on sequence, the vibrant display and familiar interface of the iPhone 8 come to life, signaling its readiness for everyday use. With the SIM card securely in place and the device powered on, you are now poised to harness the full potential of your iPhone 8, leveraging its cellular features for communication, data access, and connectivity.
The successful power-on of your iPhone 8 marks the culmination of the SIM card insertion process, affirming your adept navigation of the device's hardware intricacies. By seamlessly integrating the SIM card, you have unlocked the device's cellular capabilities, paving the way for a seamless and connected experience in your daily endeavors.
With the iPhone 8 now powered on and ready for use, you are equipped to embark on a journey of seamless communication, data access, and connectivity, leveraging the device's cellular features to enrich your digital experiences. This milestone underscores the seamless integration of the SIM card within the iPhone 8, fostering a deeper connection with the device and empowering you to navigate its features with confidence and ease.
Conclusion
In conclusion, the process of inserting a SIM card into your iPhone 8 is a fundamental step in unlocking the device's cellular capabilities, enabling seamless communication, data usage, and connectivity. This comprehensive guide has provided invaluable insights into the intricacies of navigating the SIM card insertion process, empowering you to confidently manage your device's hardware components with precision and ease.
By meticulously detailing each step, from powering off the device to securely reinserting the SIM card tray and powering on the iPhone 8, this guide has equipped you with the knowledge and skills to seamlessly integrate the SIM card into your device. The deliberate and user-centric design of the iPhone 8's hardware components, including the SIM card tray and the SIM eject tool, reflects the device's commitment to intuitive functionality and user-friendly accessibility.
As you embarked on this journey of SIM card insertion, you gained a deeper understanding of the iPhone 8's physical layout, fostering a sense of familiarity and confidence in navigating its hardware features. The seamless integration of the SIM card within the device underscores the meticulous attention to detail in the iPhone 8's design, ensuring that essential tasks such as SIM card insertion and removal are effortless and efficient.
With the SIM card securely in place and the iPhone 8 powered on, you are now poised to harness the full potential of the device's cellular capabilities, leveraging its seamless connectivity for communication, data access, and everyday endeavors. The successful completion of the SIM card insertion process marks a significant milestone in your journey with the iPhone 8, underscoring your adept navigation of the device's hardware intricacies.
As you embrace the seamless integration of the SIM card within your iPhone 8, take a moment to appreciate the device's commitment to user-centric innovation and intuitive functionality. This newfound familiarity with the device's hardware components empowers you to navigate its features with confidence, fostering a deeper connection with your iPhone 8 and enriching your digital experiences.
In essence, the process of inserting a SIM card into your iPhone 8 transcends a mere hardware task; it embodies the seamless fusion of technology and user experience, unlocking the device's full potential for connectivity and communication. By mastering this fundamental process, you have embarked on a journey of seamless integration and empowered usage, setting the stage for enriched digital experiences and seamless connectivity with your iPhone 8.