Introduction
Inserting a SIM card into your iPhone is a fundamental step in setting up your device for cellular connectivity. Whether you have a new iPhone or need to replace your existing SIM card, understanding the process is crucial. This guide will walk you through the steps, ensuring that you can effortlessly insert a SIM card into your iPhone without any hassle.
The SIM (Subscriber Identity Module) card serves as the key to accessing your mobile network. It contains essential information, such as your phone number, carrier details, and security authentication. By inserting a SIM card into your iPhone, you enable it to make calls, send messages, and connect to the internet through your cellular network.
Understanding the significance of the SIM card and the steps involved in its insertion will empower you to take control of your iPhone's connectivity. Whether you're a first-time iPhone user or simply need a refresher, this guide will equip you with the knowledge and confidence to complete the process seamlessly.
Next, we will delve into the step-by-step instructions for inserting a SIM card into your iPhone, ensuring that you are well-prepared and informed before embarking on this essential task. Let's begin by gathering the necessary tools for the process.
Step 1: Gather necessary tools
Before embarking on the process of inserting a SIM card into your iPhone, it's essential to gather the necessary tools to ensure a smooth and efficient experience. Here are the items you will need:
-
iPhone: Ensure that you have your iPhone readily available. This is the device into which you will be inserting the SIM card. It's crucial to have your iPhone powered off before beginning the process to prevent any potential damage to the device or the SIM card.
-
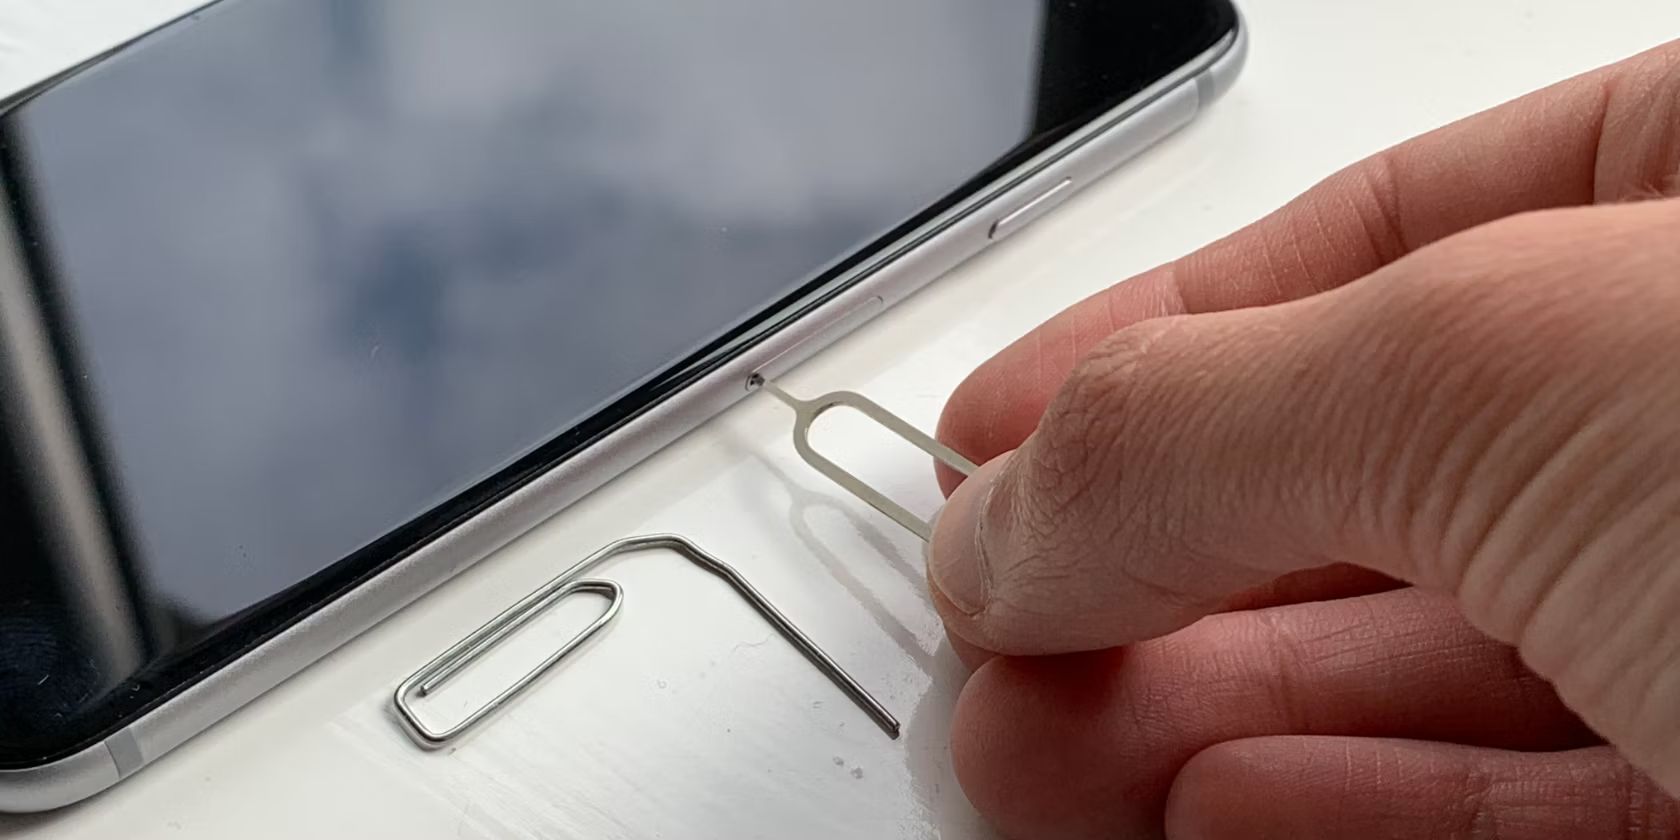
SIM card ejector tool or paperclip: To access the SIM card tray, you will need a SIM card ejector tool or a paperclip. This tool is typically provided by the iPhone manufacturer and can also be purchased separately. If you don't have a SIM card ejector tool, a straightened paperclip will serve as a suitable alternative.
-
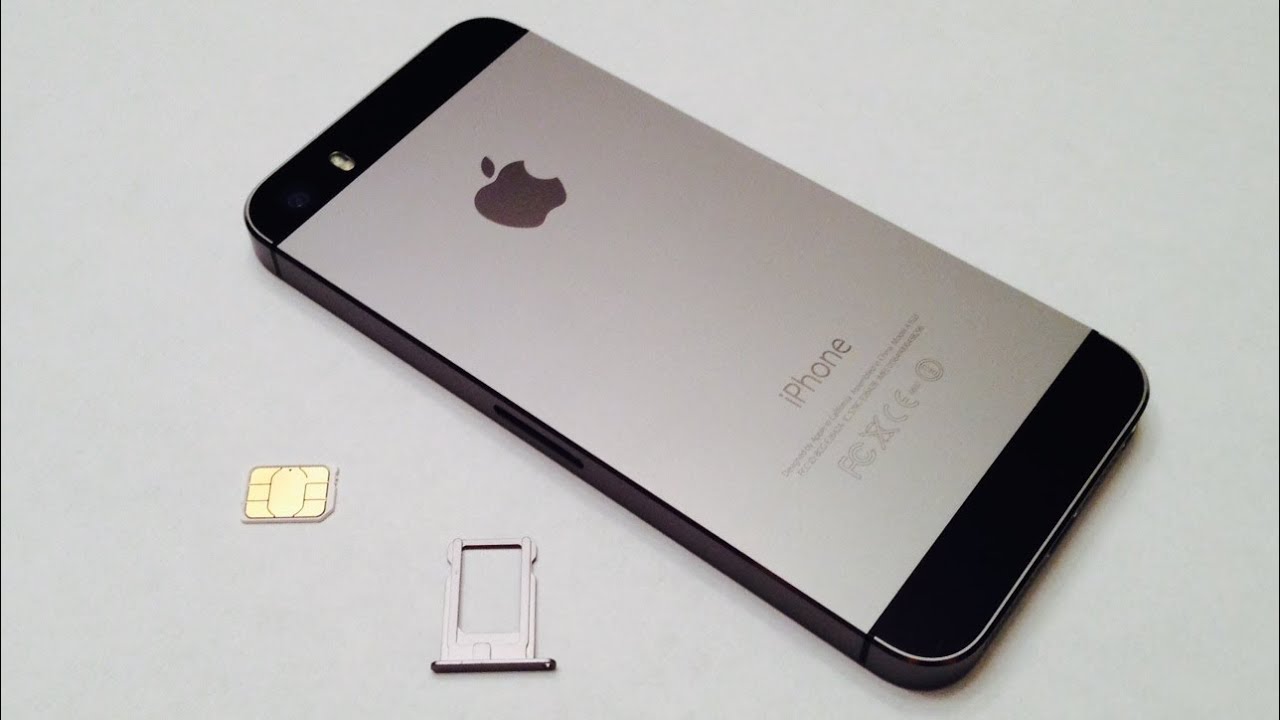
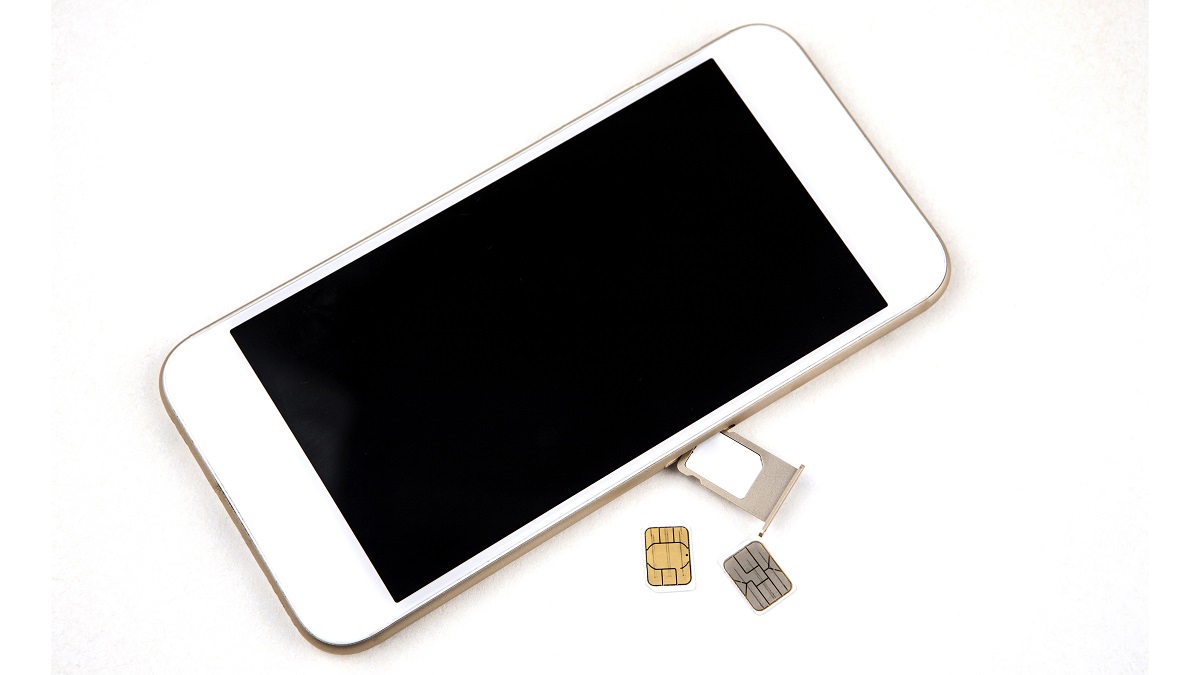
SIM card: Of course, you will need the SIM card that you intend to insert into your iPhone. Whether it's a new SIM card from your mobile carrier or a replacement for your existing one, ensure that it is readily available and easily accessible.
By ensuring that you have these essential tools at hand, you can proceed with confidence to the next step of the process, which involves locating the SIM card tray on your iPhone. With the necessary tools in place, you are well-prepared to complete the SIM card insertion process seamlessly and effectively.
Step 2: Locate the SIM card tray
Locating the SIM card tray on your iPhone is the crucial first step in the process of inserting or replacing a SIM card. The SIM card tray is designed to securely hold the SIM card within your device, ensuring a stable connection to your mobile network. Here's how to locate the SIM card tray on various iPhone models:
iPhone with a Home Button (e.g., iPhone 8 and earlier models)
-
Identify the SIM Card Tray: On the right side of the device, you will find the SIM card tray. It is typically located just below the power (sleep/wake) button.
-
Use the SIM Card Ejector Tool: Insert the SIM card ejector tool or a straightened paperclip into the small pinhole located next to the SIM card tray. Apply gentle pressure to eject the tray from the device.
iPhone without a Home Button (e.g., iPhone X and later models)
-
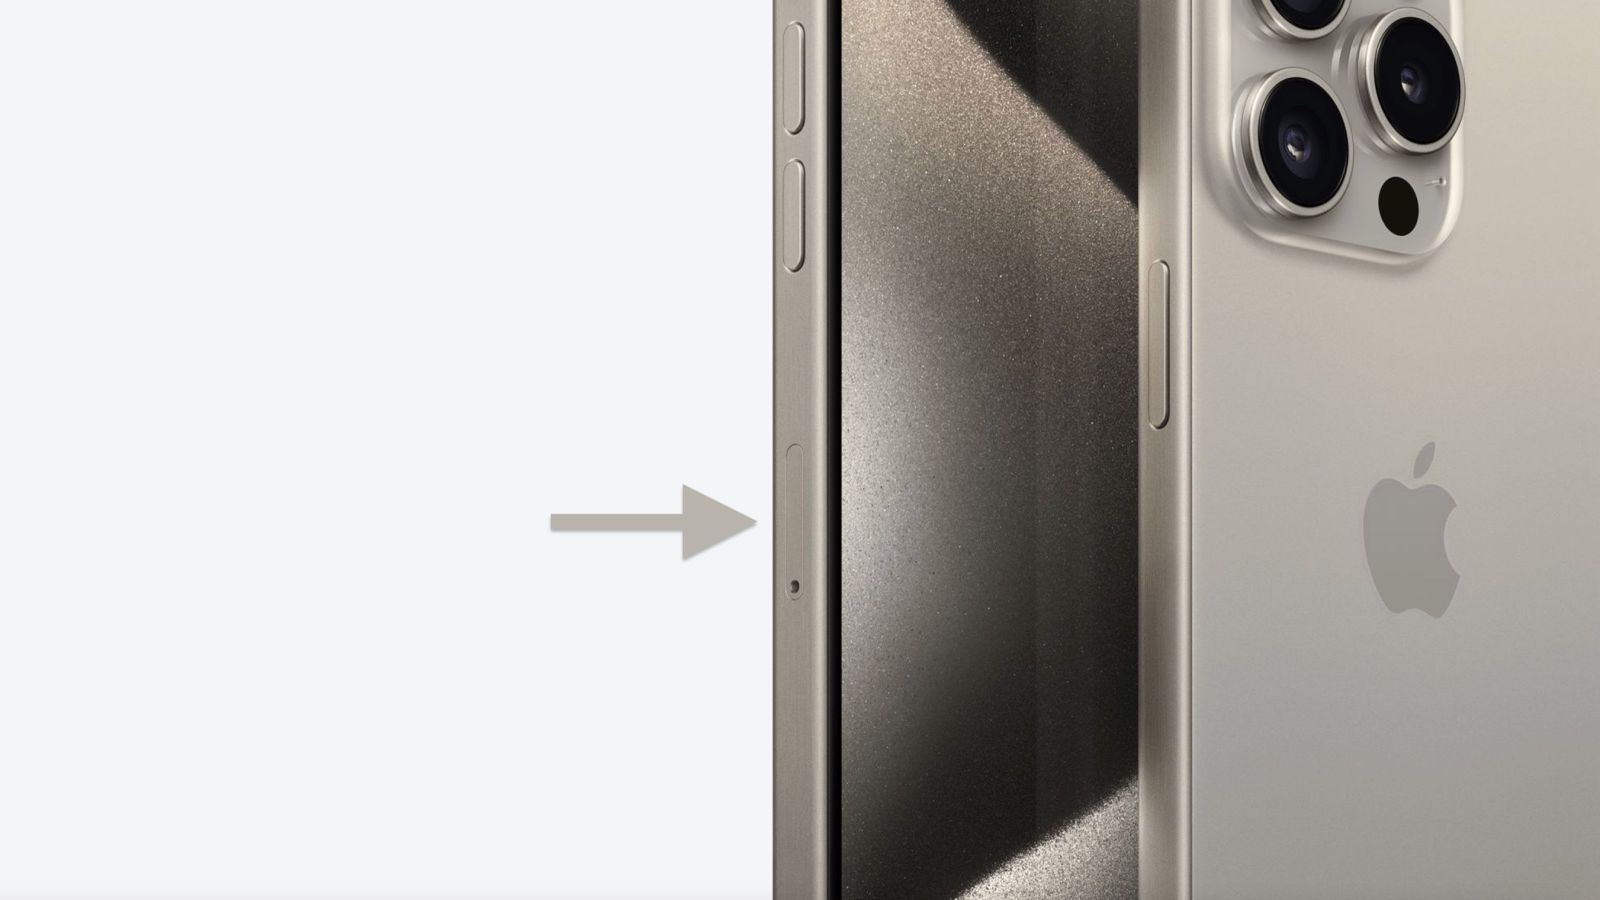
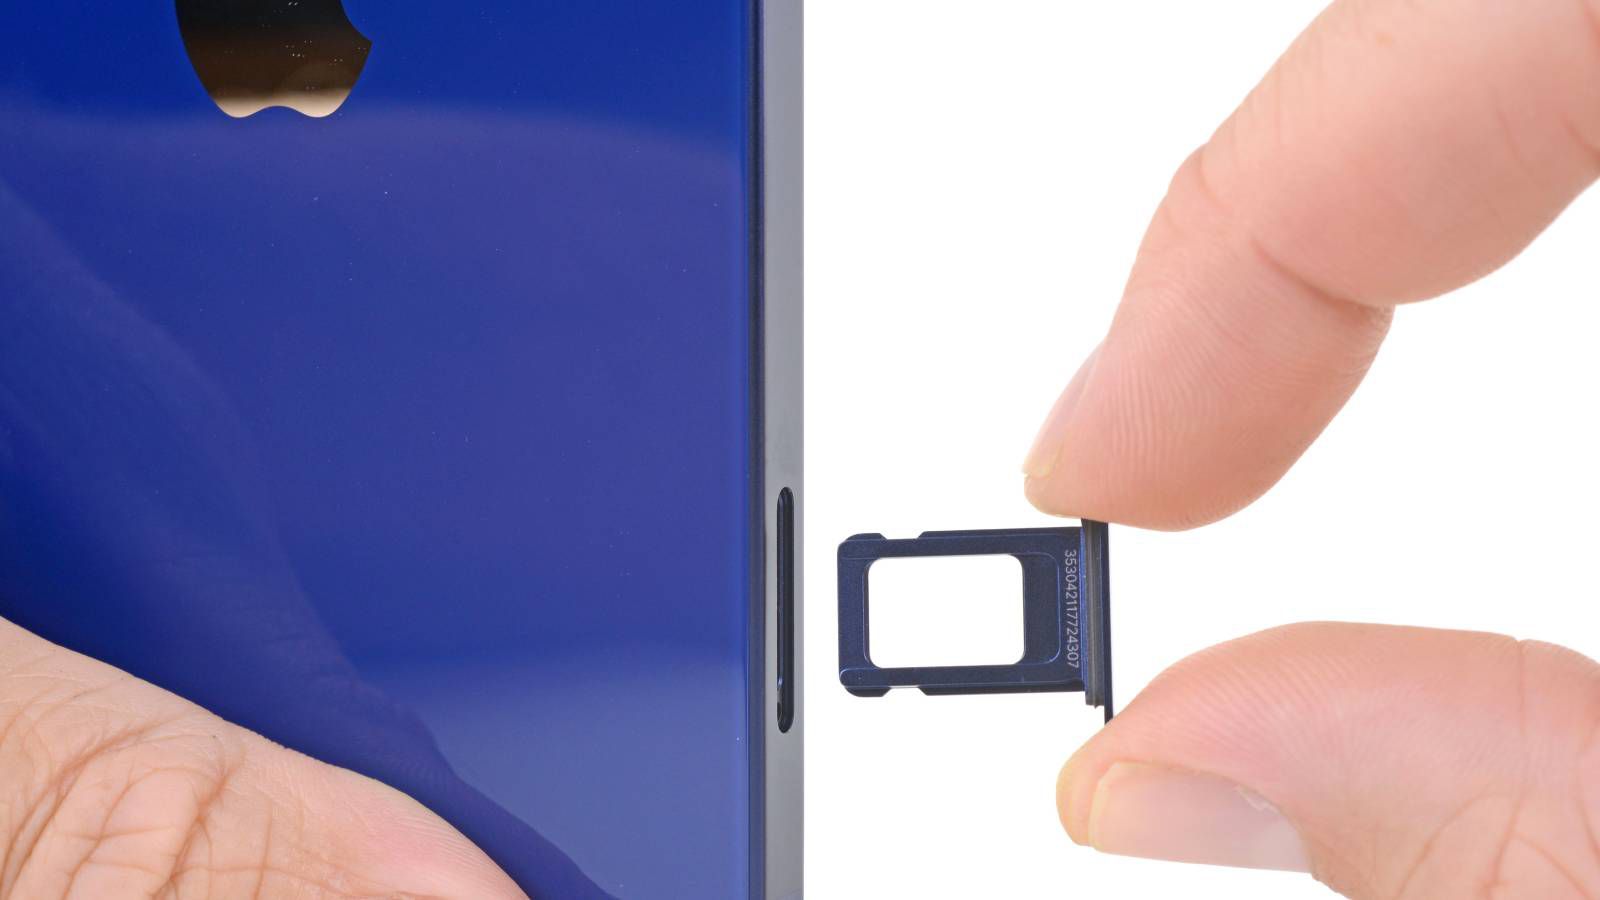
Locate the SIM Card Tray: On these models, the SIM card tray is usually located on the right side of the device. It may be situated slightly lower than the side button.
-
Use the SIM Card Ejector Tool: Insert the SIM card ejector tool or a paperclip into the small pinhole near the SIM card tray. Apply gentle pressure to eject the tray from the device.
iPhone SE (2nd generation)
-
Find the SIM Card Tray: On the right side of the device, just below the power button, you will find the SIM card tray.
-
Eject the Tray: Use the SIM card ejector tool or a paperclip to gently press into the small pinhole next to the SIM card tray, releasing it from the device.
By carefully following these instructions and identifying the location of the SIM card tray on your specific iPhone model, you will be well-prepared to proceed to the next step of the process, which involves ejecting the SIM card tray from your device. This foundational knowledge will enable you to navigate the SIM card insertion process with confidence and precision.
Step 3: Eject the SIM card tray
Ejecting the SIM card tray from your iPhone is a crucial step in the process of inserting or replacing a SIM card. Properly ejecting the tray ensures that you can securely place the SIM card within your device, enabling seamless connectivity to your mobile network. Here's a detailed guide on how to eject the SIM card tray from various iPhone models:
Ejecting the SIM Card Tray on iPhone with a Home Button (e.g., iPhone 8 and earlier models)
-
Use the SIM Card Ejector Tool: Take the SIM card ejector tool or a straightened paperclip and gently insert it into the small pinhole located next to the SIM card tray. Apply slight pressure to engage the internal mechanism, causing the tray to pop out from the device.
-
Carefully Remove the Tray: Once the tray is partially ejected, carefully pull it out of the device using your fingers. Ensure a steady grip on the tray to prevent any accidental drops or damage.
Ejecting the SIM Card Tray on iPhone without a Home Button (e.g., iPhone X and later models)
-
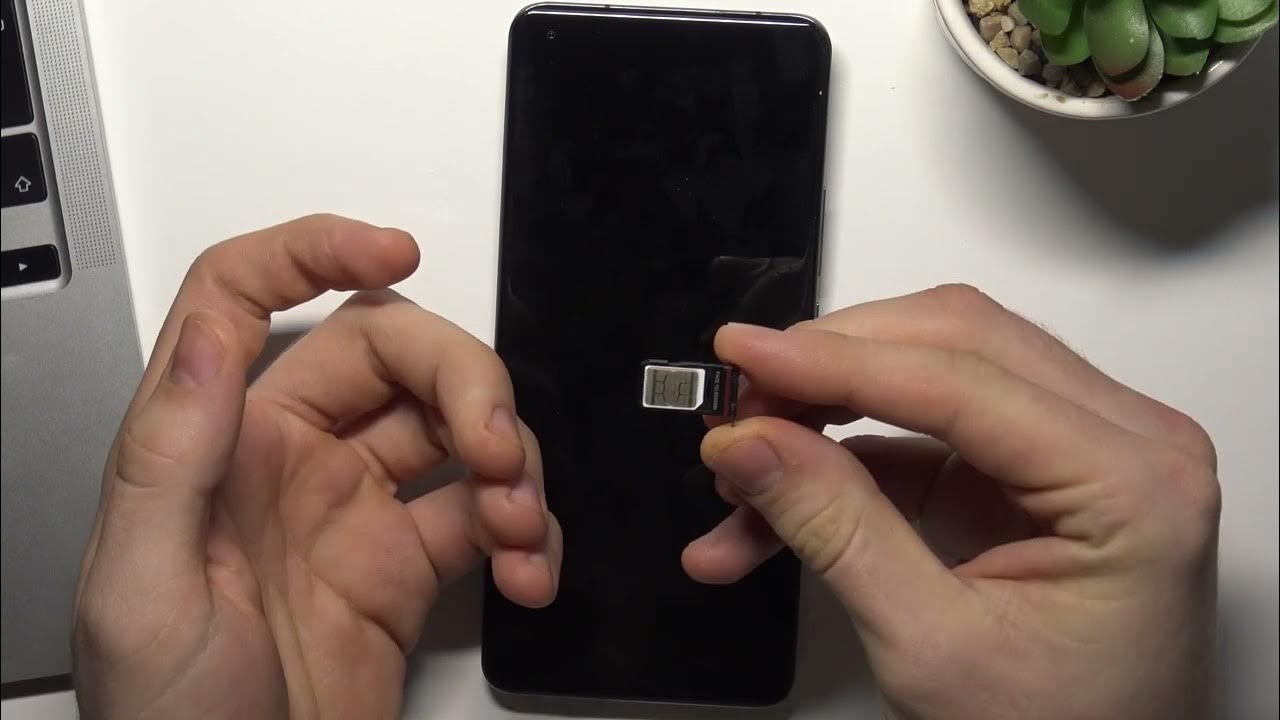
Utilize the SIM Card Ejector Tool: Insert the SIM card ejector tool or a paperclip into the small pinhole near the SIM card tray. Apply gentle pressure to activate the release mechanism, causing the tray to protrude from the device.
-
Retrieve the Tray: Once the tray is partially ejected, gently pull it out of the device using your fingers. Exercise caution to maintain a firm hold on the tray, preventing any mishaps during the removal process.
Ejecting the SIM Card Tray on iPhone SE (2nd generation)
-
Engage the SIM Card Ejector Tool: Take the SIM card ejector tool or a paperclip and carefully insert it into the small pinhole adjacent to the SIM card tray. Apply light pressure to trigger the release mechanism, prompting the tray to emerge from the device.
-
Withdraw the Tray: Once the tray is partially released, delicately pull it out of the device using your fingers. Handle the tray with care to avoid any unintended slips or damage.
By following these detailed instructions tailored to your specific iPhone model, you can confidently proceed to the next step of the process, which involves inserting the SIM card into the tray. With a clear understanding of how to eject the SIM card tray from your device, you are well-equipped to navigate this essential phase of the SIM card insertion process with precision and ease.
Step 4: Insert the SIM card
With the SIM card tray successfully ejected from your iPhone, the next pivotal step is to insert the SIM card into the tray. This process ensures that your iPhone is equipped with the necessary components for seamless connectivity to your mobile network. Here's a comprehensive guide on how to insert the SIM card into the tray, tailored to various iPhone models:
Inserting the SIM Card on iPhone with a Home Button (e.g., iPhone 8 and earlier models)
-
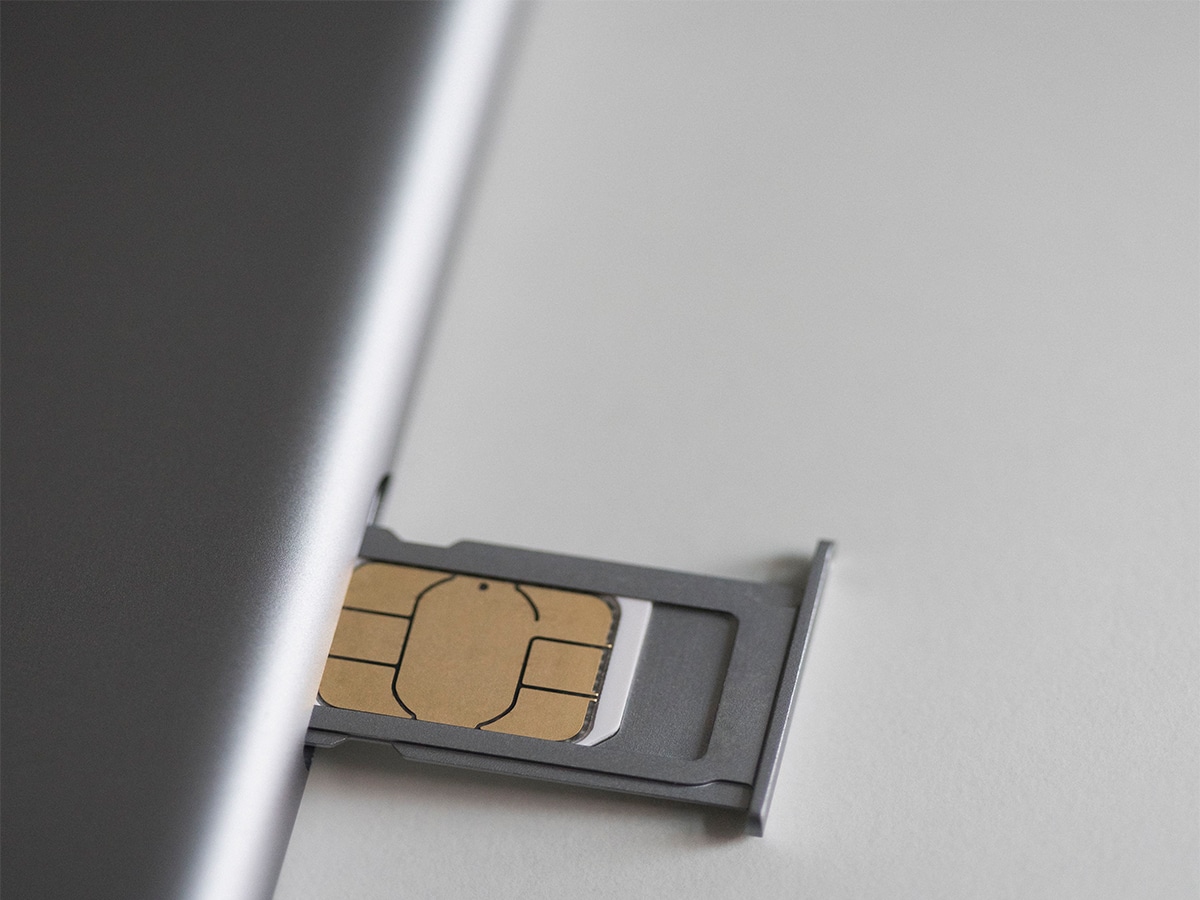
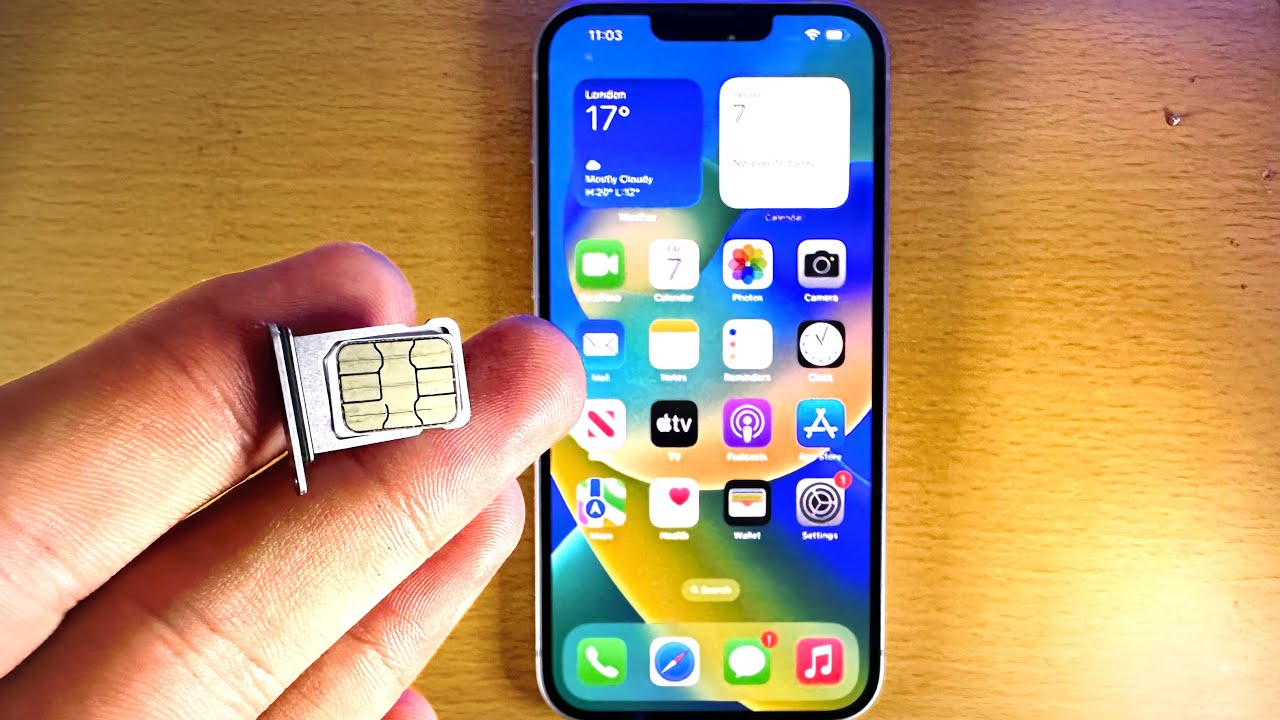
Prepare the SIM Card: Take your SIM card and ensure that it is positioned correctly. Most SIM cards are designed with a notched corner that aligns with the SIM card tray, allowing for a proper fit within the device.
-
Place the SIM Card: Carefully position the SIM card on the designated area within the SIM card tray. Ensure that the notched corner of the SIM card aligns with the corresponding notch within the tray, facilitating a secure and accurate placement.
-
Reinsert the Tray: Once the SIM card is positioned correctly within the tray, gently slide the tray back into the device. Ensure that the tray is inserted in the same orientation and alignment as when it was removed, maintaining a steady and controlled movement to prevent any potential damage to the SIM card or the device.
Inserting the SIM Card on iPhone without a Home Button (e.g., iPhone X and later models)
-
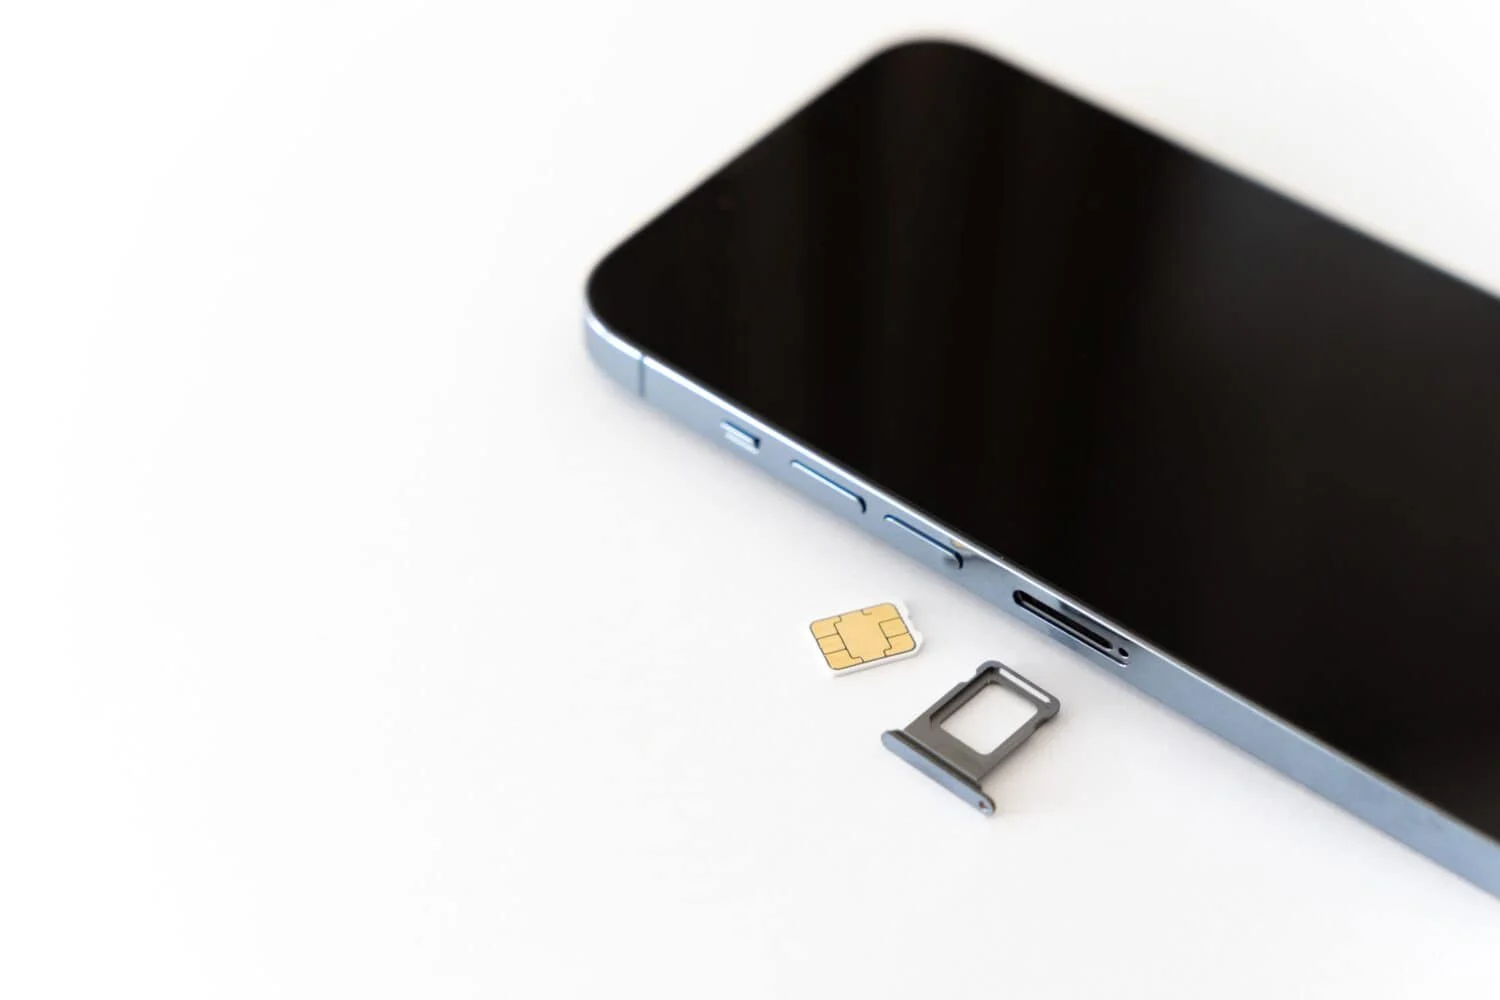
Prepare the SIM Card: Verify that your SIM card is oriented correctly, with the notched corner aligning with the designated area within the SIM card tray. This alignment ensures that the SIM card fits seamlessly into the tray without any issues.
-
Position the SIM Card: Place the SIM card onto the allocated space within the SIM card tray, ensuring that the notched corner of the SIM card aligns precisely with the corresponding notch within the tray. This precise alignment is crucial for the proper functioning of the SIM card within your device.
-
Reinsert the Tray: Once the SIM card is securely positioned within the tray, carefully slide the tray back into the device. Maintain a steady and controlled movement to ensure that the tray is reinserted in the same orientation as when it was removed, preventing any potential disruptions to the SIM card's functionality.
Inserting the SIM Card on iPhone SE (2nd generation)
-
Prepare the SIM Card: Confirm that your SIM card is correctly oriented, with the notched corner aligning with the designated area within the SIM card tray. This alignment facilitates a seamless fit and functionality within your device.
-
Position the SIM Card: Place the SIM card within the allocated space in the SIM card tray, ensuring that the notched corner aligns precisely with the corresponding notch within the tray. This precise alignment is essential for the optimal performance of the SIM card in your device.
-
Reinsert the Tray: After securely placing the SIM card within the tray, gently slide the tray back into the device. Maintain a controlled and deliberate movement to ensure that the tray is reinserted in the same orientation as when it was removed, safeguarding the integrity of the SIM card and the device.
By following these detailed instructions tailored to your specific iPhone model, you can confidently proceed with inserting the SIM card into the tray, ensuring a seamless and secure connection to your mobile network. With a clear understanding of the precise steps involved in this crucial phase of the process, you are well-equipped to complete the SIM card insertion with confidence and precision.
Step 5: Reinsert the SIM card tray
Once the SIM card has been securely placed within the tray, the final step is to carefully reinsert the tray into your iPhone. This critical phase of the process ensures that the SIM card is properly integrated into the device, allowing for seamless connectivity to your mobile network. Here's a detailed guide on how to reinsert the SIM card tray, tailored to various iPhone models:
Reinserting the SIM Card Tray on iPhone with a Home Button (e.g., iPhone 8 and earlier models)
-
Align the Tray: Position the SIM card tray in alignment with the corresponding slot on the side of your iPhone. Ensure that the tray is oriented correctly to facilitate a smooth insertion process.
-
Gently Insert the Tray: Carefully slide the SIM card tray back into the device, maintaining a steady and controlled movement. Avoid applying excessive force to prevent any potential damage to the tray or the device.
-
Verify the Fit: Once the tray is partially inserted, gently press it into place until it sits flush with the side of the device. Ensure that the tray is securely positioned, indicating a successful reinsertion process.
Reinserting the SIM Card Tray on iPhone without a Home Button (e.g., iPhone X and later models)
-
Align the Tray: Ensure that the SIM card tray is aligned with the designated slot on the side of your iPhone, maintaining the correct orientation for seamless insertion.
-
Carefully Slide the Tray: With precision, slide the SIM card tray back into the device, ensuring a smooth and controlled movement. Avoid hurried motions to prevent any potential disruptions to the tray or the device.
-
Confirm Secure Placement: Once the tray is partially inserted, gently press it into the device until it sits securely in place. Verify that the tray is flush with the side of the device, indicating a successful reinsertion process.
Reinserting the SIM Card Tray on iPhone SE (2nd generation)
-
Align the Tray: Position the SIM card tray in alignment with the corresponding slot on the side of your iPhone SE, ensuring the correct orientation for a seamless insertion process.
-
Delicately Slide the Tray: With care, slide the SIM card tray back into the device, maintaining a controlled and deliberate movement. Avoid abrupt actions to prevent any potential damage to the tray or the device.
-
Ensure Proper Fit: Once the tray is partially inserted, gently press it into place until it sits flush with the side of the device. Confirm that the tray is securely positioned, signifying a successful reinsertion process.
By following these detailed instructions tailored to your specific iPhone model, you can confidently complete the process of reinserting the SIM card tray. This final step ensures that the SIM card is seamlessly integrated into your device, allowing for uninterrupted access to your mobile network. With a clear understanding of the precise steps involved in this crucial phase of the process, you are well-equipped to finalize the SIM card insertion with confidence and precision.
Conclusion
Congratulations! You have successfully completed the process of inserting or replacing a SIM card in your iPhone. By following the step-by-step instructions tailored to your specific iPhone model, you have gained valuable insights into the fundamental aspects of managing the connectivity of your device. The knowledge and skills acquired through this guide empower you to take control of your iPhone's cellular connectivity, ensuring a seamless and reliable experience.
Understanding the significance of the SIM card and its role in enabling access to your mobile network is essential for every iPhone user. With the ability to confidently locate the SIM card tray, eject it from the device, insert or replace the SIM card, and reinsert the tray, you have demonstrated a comprehensive understanding of this vital aspect of iPhone functionality.
By gathering the necessary tools, including your iPhone, SIM card ejector tool or paperclip, and the SIM card itself, you have exhibited preparedness and attention to detail. This level of readiness is crucial in ensuring a smooth and efficient process, minimizing the potential for errors or complications.
The seamless integration of the SIM card into your iPhone paves the way for uninterrupted communication, access to mobile data, and the utilization of cellular services. Whether you are setting up a new iPhone, switching to a new SIM card, or replacing an existing one, the knowledge and proficiency you have acquired through this guide position you as a capable and informed iPhone user.
As you reflect on the completion of this essential task, take pride in your ability to navigate the intricacies of your iPhone's hardware with confidence and precision. The practical skills you have honed through this process serve as a testament to your capability as a proficient iPhone user, equipped to manage and optimize the functionality of your device.
Moving forward, the knowledge gained from this guide will continue to serve you in effectively managing the connectivity of your iPhone, ensuring that you can harness its full potential for communication, productivity, and entertainment. With a solid foundation in SIM card management, you are well-prepared to make the most of your iPhone's capabilities, empowered by a deeper understanding of its essential components.
As you embark on your journey with your iPhone, may the confidence and proficiency you have gained serve as a testament to your ability to navigate and optimize the functionality of this remarkable device. Embrace the seamless connectivity and boundless possibilities that your iPhone offers, knowing that you have mastered the fundamental process of SIM card insertion with finesse and expertise.