Introduction
Transferring your SIM card to a new iPhone is a crucial step when upgrading to a new device. Your SIM card contains essential information, including your phone number, carrier details, and contacts. By seamlessly transferring your SIM card, you can ensure that your new iPhone is fully operational and connected to your cellular network. This tutorial will guide you through the process, ensuring that you can effortlessly transition to your new device without any hiccups.
Moving to a new iPhone is an exciting experience, but it's essential to ensure that all your data and settings are seamlessly transferred. By following the steps outlined in this tutorial, you can avoid potential disruptions and seamlessly enjoy the features of your new iPhone.
The process of transferring your SIM card involves backing up your old iPhone to preserve all your data, removing the SIM card from your old device, inserting it into your new iPhone, and setting up the new device. Each step plays a crucial role in ensuring a smooth transition to your new iPhone, allowing you to retain your contacts, messages, and cellular connectivity.
With the rapid advancements in mobile technology, upgrading to a new iPhone presents an opportunity to explore enhanced features, improved performance, and a sleek design. However, the process of transferring your SIM card should not be overlooked, as it forms the foundation for a seamless transition to your new device.
By following this tutorial, you can confidently navigate the process of transferring your SIM card to your new iPhone, empowering you to make the most of your upgraded device without any hassle. Let's dive into the step-by-step guide to ensure that your transition to a new iPhone is smooth and stress-free.
Step 1: Back up your old iPhone
Before transferring your SIM card to a new iPhone, it's crucial to back up your old device to ensure that none of your valuable data is lost in the process. Creating a backup will preserve your settings, apps, photos, messages, and other important information, allowing for a seamless transition to your new device.
Using iCloud:
- Connect your old iPhone to a Wi-Fi network.
- Open the "Settings" app and tap on your name at the top of the screen.
- Select "iCloud" and then "iCloud Backup."
- Toggle the "iCloud Backup" switch to enable it.
- Tap "Back Up Now" and ensure that the process is completed successfully.
Using iTunes:
- Connect your old iPhone to your computer using a USB cable.
- Open iTunes and select your device.
- Click "Back Up Now" to initiate the backup process.
By backing up your old iPhone, you can rest assured that all your important data is securely stored and ready to be transferred to your new device. This step is essential in preserving your personalized settings, app data, and other valuable information, ensuring a smooth transition to your new iPhone.
Creating a backup also provides a safety net in case of any unforeseen issues during the SIM card transfer process. It's a proactive measure that safeguards your data and settings, allowing you to seamlessly pick up where you left off on your new iPhone.
Once your old iPhone is successfully backed up, you can proceed with confidence to the next step of transferring the SIM card to your new device. This ensures that all your data, preferences, and settings are preserved, making the transition to your new iPhone a hassle-free experience.
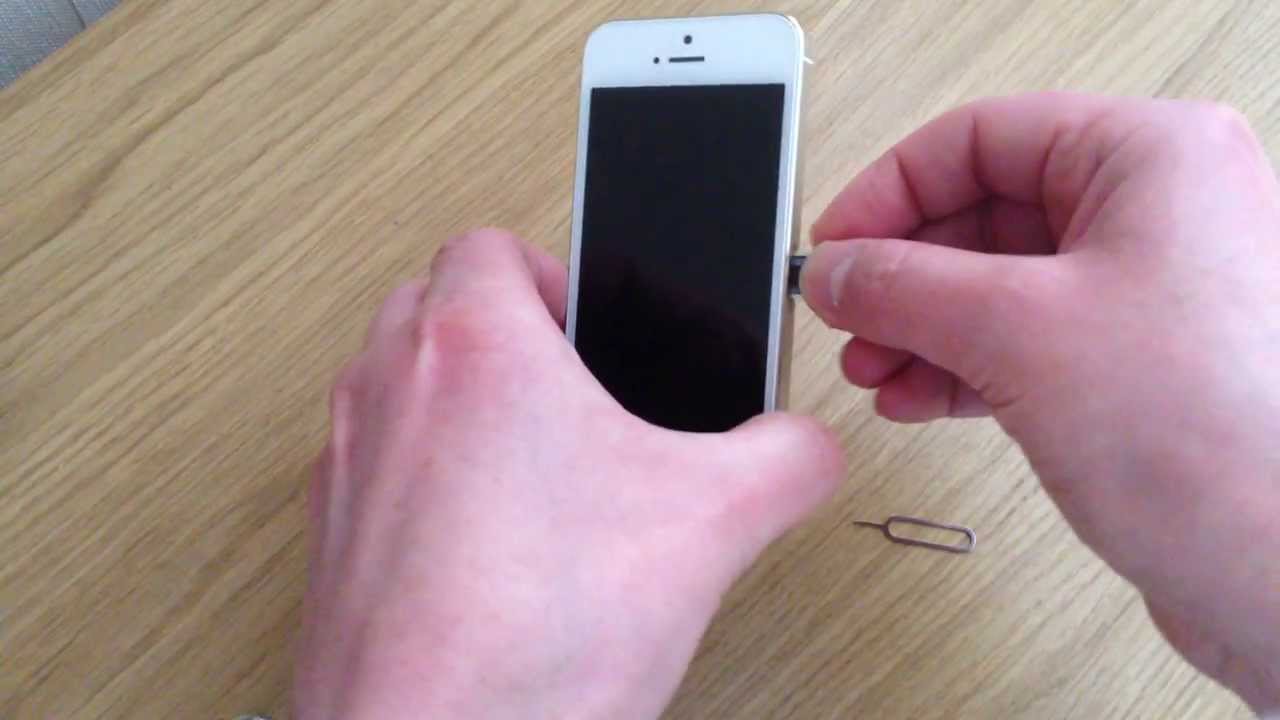
Step 2: Remove the SIM card from your old iPhone
Removing the SIM card from your old iPhone is a straightforward yet crucial step in the process of transitioning to a new device. The SIM card, which stands for Subscriber Identity Module, is a small, removable card that stores crucial information such as your phone number, carrier details, and contacts. Here's a detailed guide on how to safely remove the SIM card from your old iPhone:
-
Power Off Your Old iPhone: Before removing the SIM card, ensure that your old iPhone is powered off. This prevents any potential disruptions during the removal process and safeguards the device and SIM card from any unexpected issues.
-
Locate the SIM Card Tray: The SIM card tray is usually located on the side of the iPhone. The exact location may vary depending on the iPhone model. For example, on the iPhone 12 and 13 series, the SIM card tray is located on the left side of the device, near the bottom. On older models, such as the iPhone 8 and earlier, the SIM card tray is typically located on the right side of the device.
-
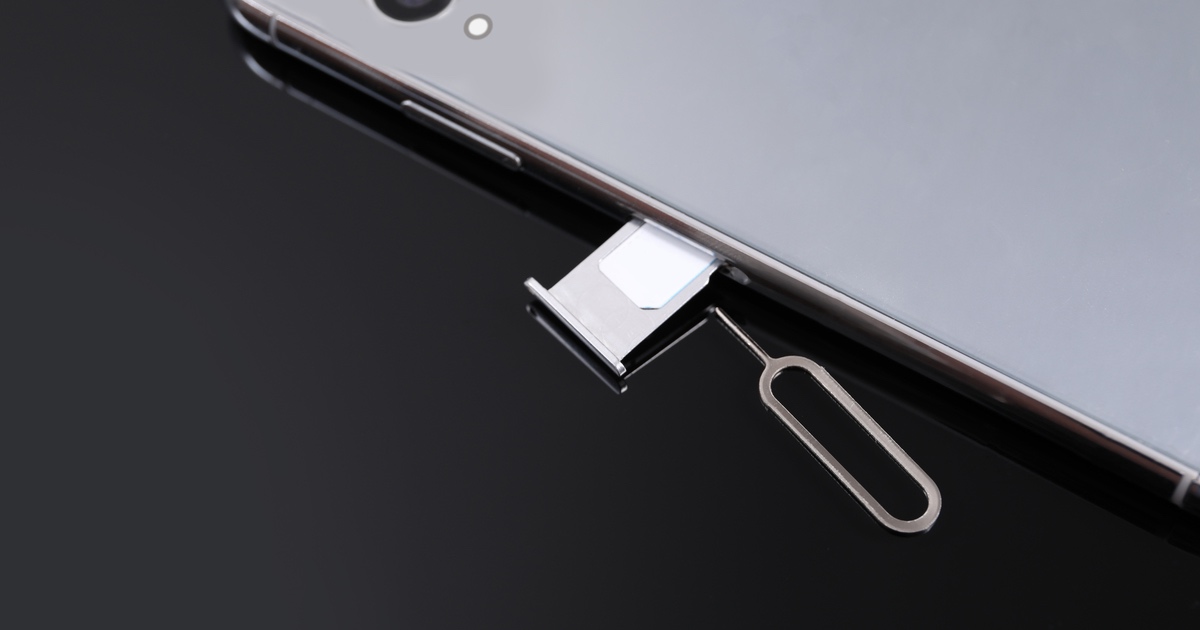
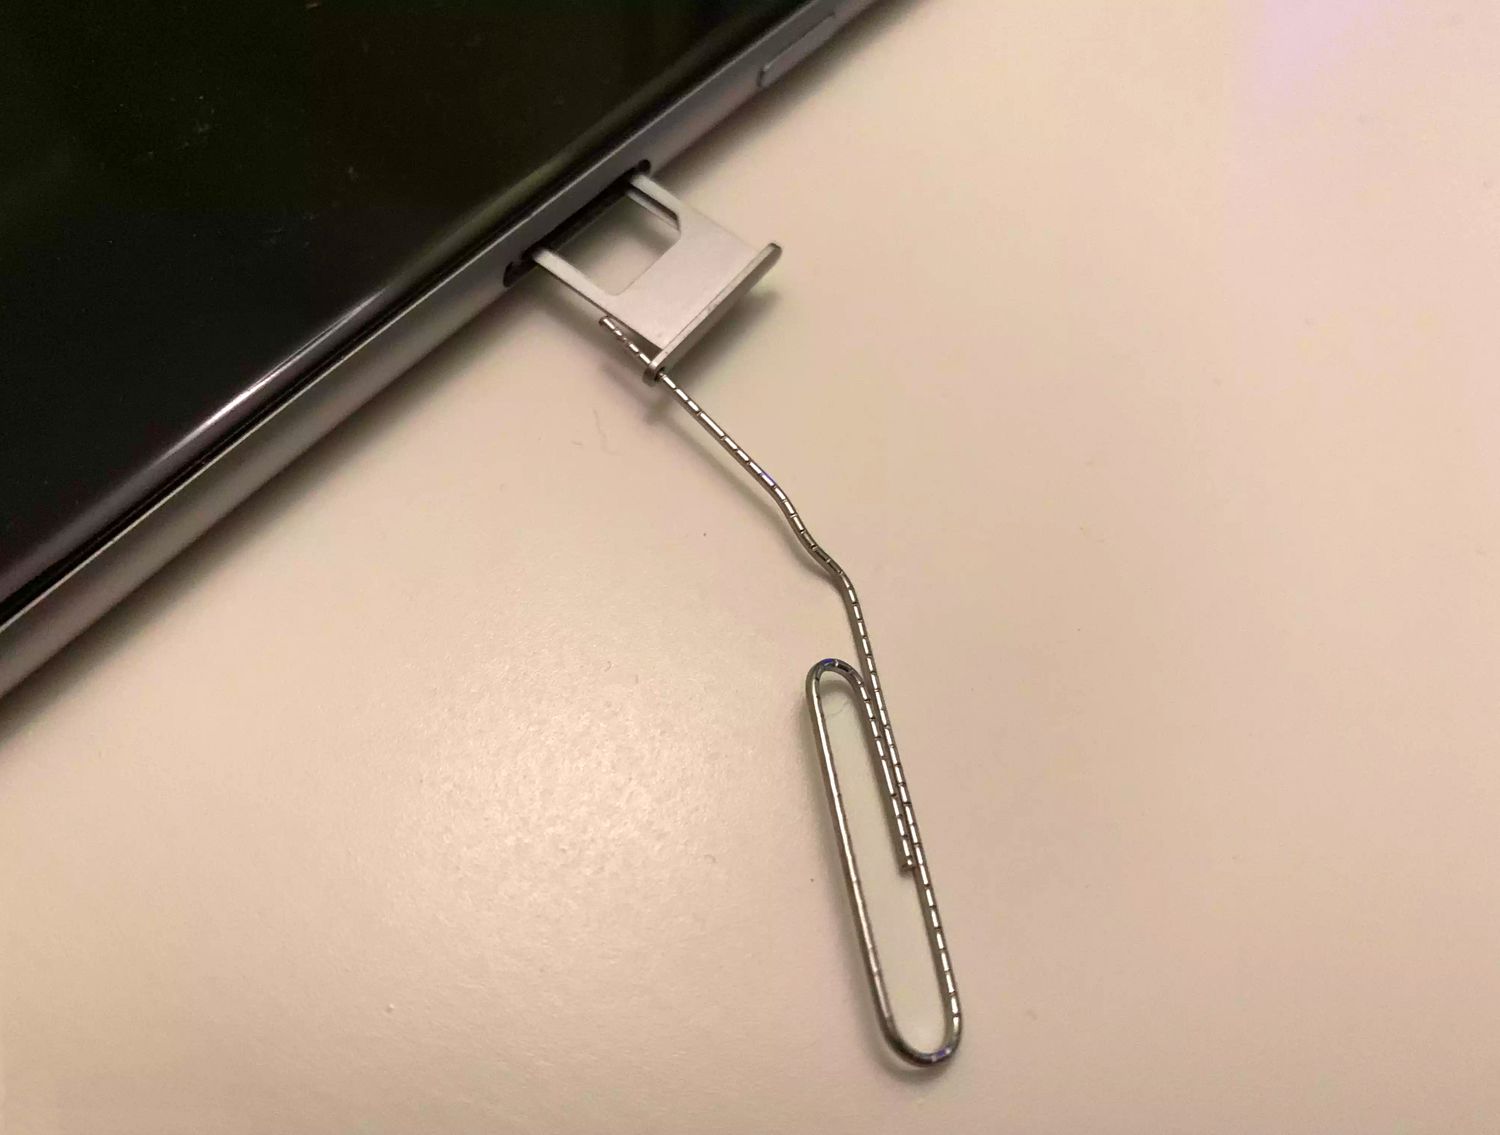
Eject the SIM Card Tray: To access the SIM card tray, you will need to use a SIM card ejector tool or a small paperclip. Insert the tool into the small pinhole next to the SIM card tray and gently apply pressure. This will cause the SIM card tray to pop out slightly.
-
Remove the SIM Card Tray: Once the SIM card tray is partially ejected, carefully pull it out of the iPhone. The SIM card will be inserted into the tray. Take note of the orientation of the SIM card within the tray, as you will need to ensure the same orientation when inserting it into your new iPhone.
-
Remove the SIM Card: Gently remove the SIM card from the tray by pushing it out from the side. Handle the SIM card with care to avoid any damage to the delicate components.
By following these steps, you can safely remove the SIM card from your old iPhone, ensuring that it is ready to be inserted into your new device. Taking the time to perform this task meticulously will help prevent any potential damage to the SIM card or the iPhone itself, setting the stage for a smooth transition to your new iPhone.
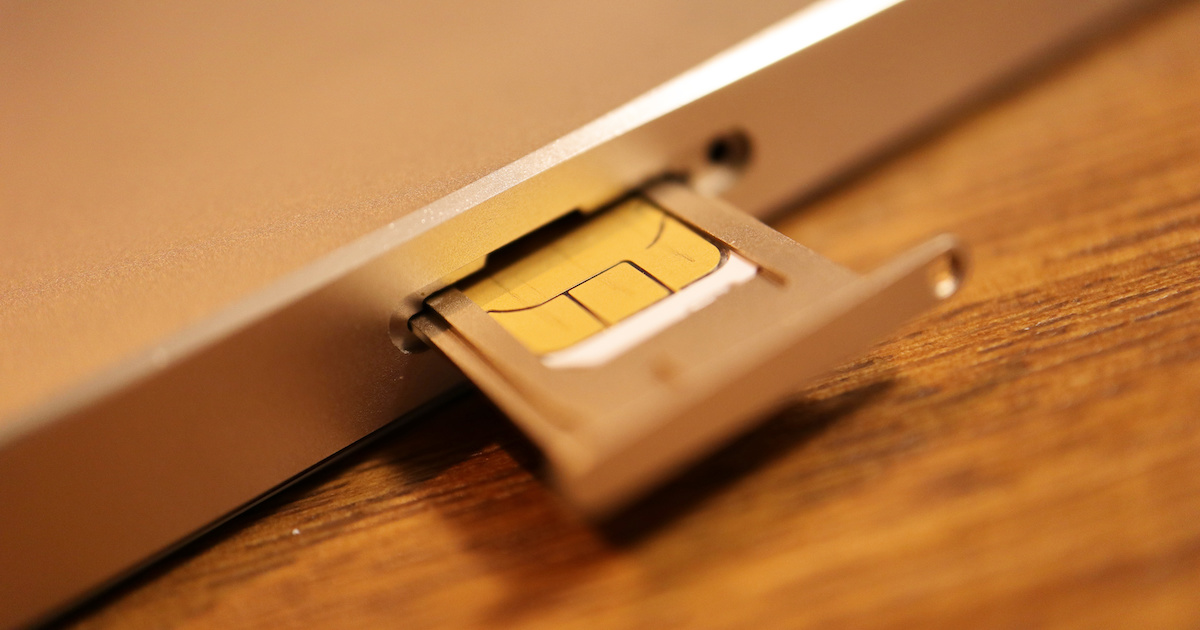
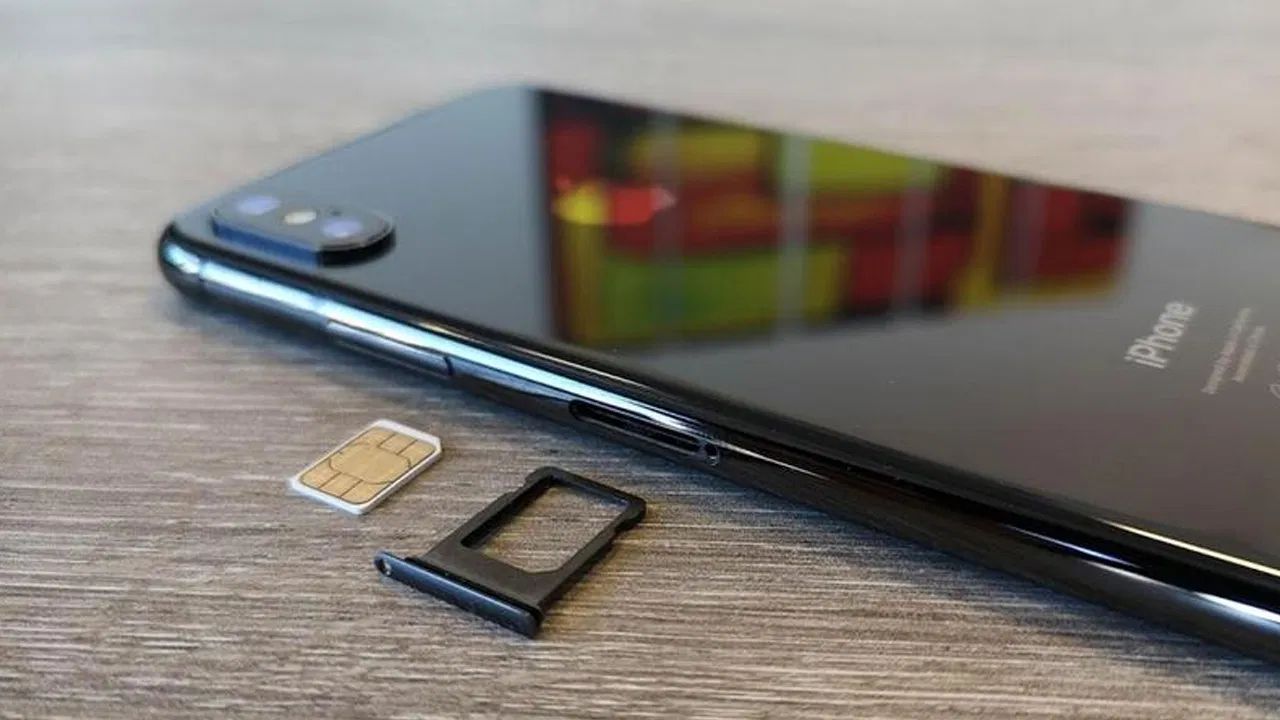
Step 3: Insert the SIM card into your new iPhone
After successfully removing the SIM card from your old iPhone, the next crucial step is to insert it into your new device. This process ensures that your new iPhone is seamlessly connected to your cellular network and retains crucial information such as your phone number and carrier details. Here's a detailed guide on how to effectively insert the SIM card into your new iPhone:
-
Power Off Your New iPhone: Before proceeding with the SIM card insertion, ensure that your new iPhone is powered off. This precautionary step prevents any potential issues during the insertion process and safeguards both the device and the SIM card.
-
Locate the SIM Card Tray on Your New iPhone: The SIM card tray on your new iPhone is typically located on the side of the device. The exact location may vary depending on the iPhone model. For instance, on the iPhone 12 and 13 series, the SIM card tray is situated on the left side of the device, near the bottom. On older models, such as the iPhone 8 and earlier, the SIM card tray is usually located on the right side of the device.
-
Insert the SIM Card Ejector Tool: To access the SIM card tray, use the SIM card ejector tool provided with your new iPhone or a small paperclip. Insert the tool into the small pinhole next to the SIM card tray and apply gentle pressure. This will cause the SIM card tray to pop out slightly, allowing you to access it.
-
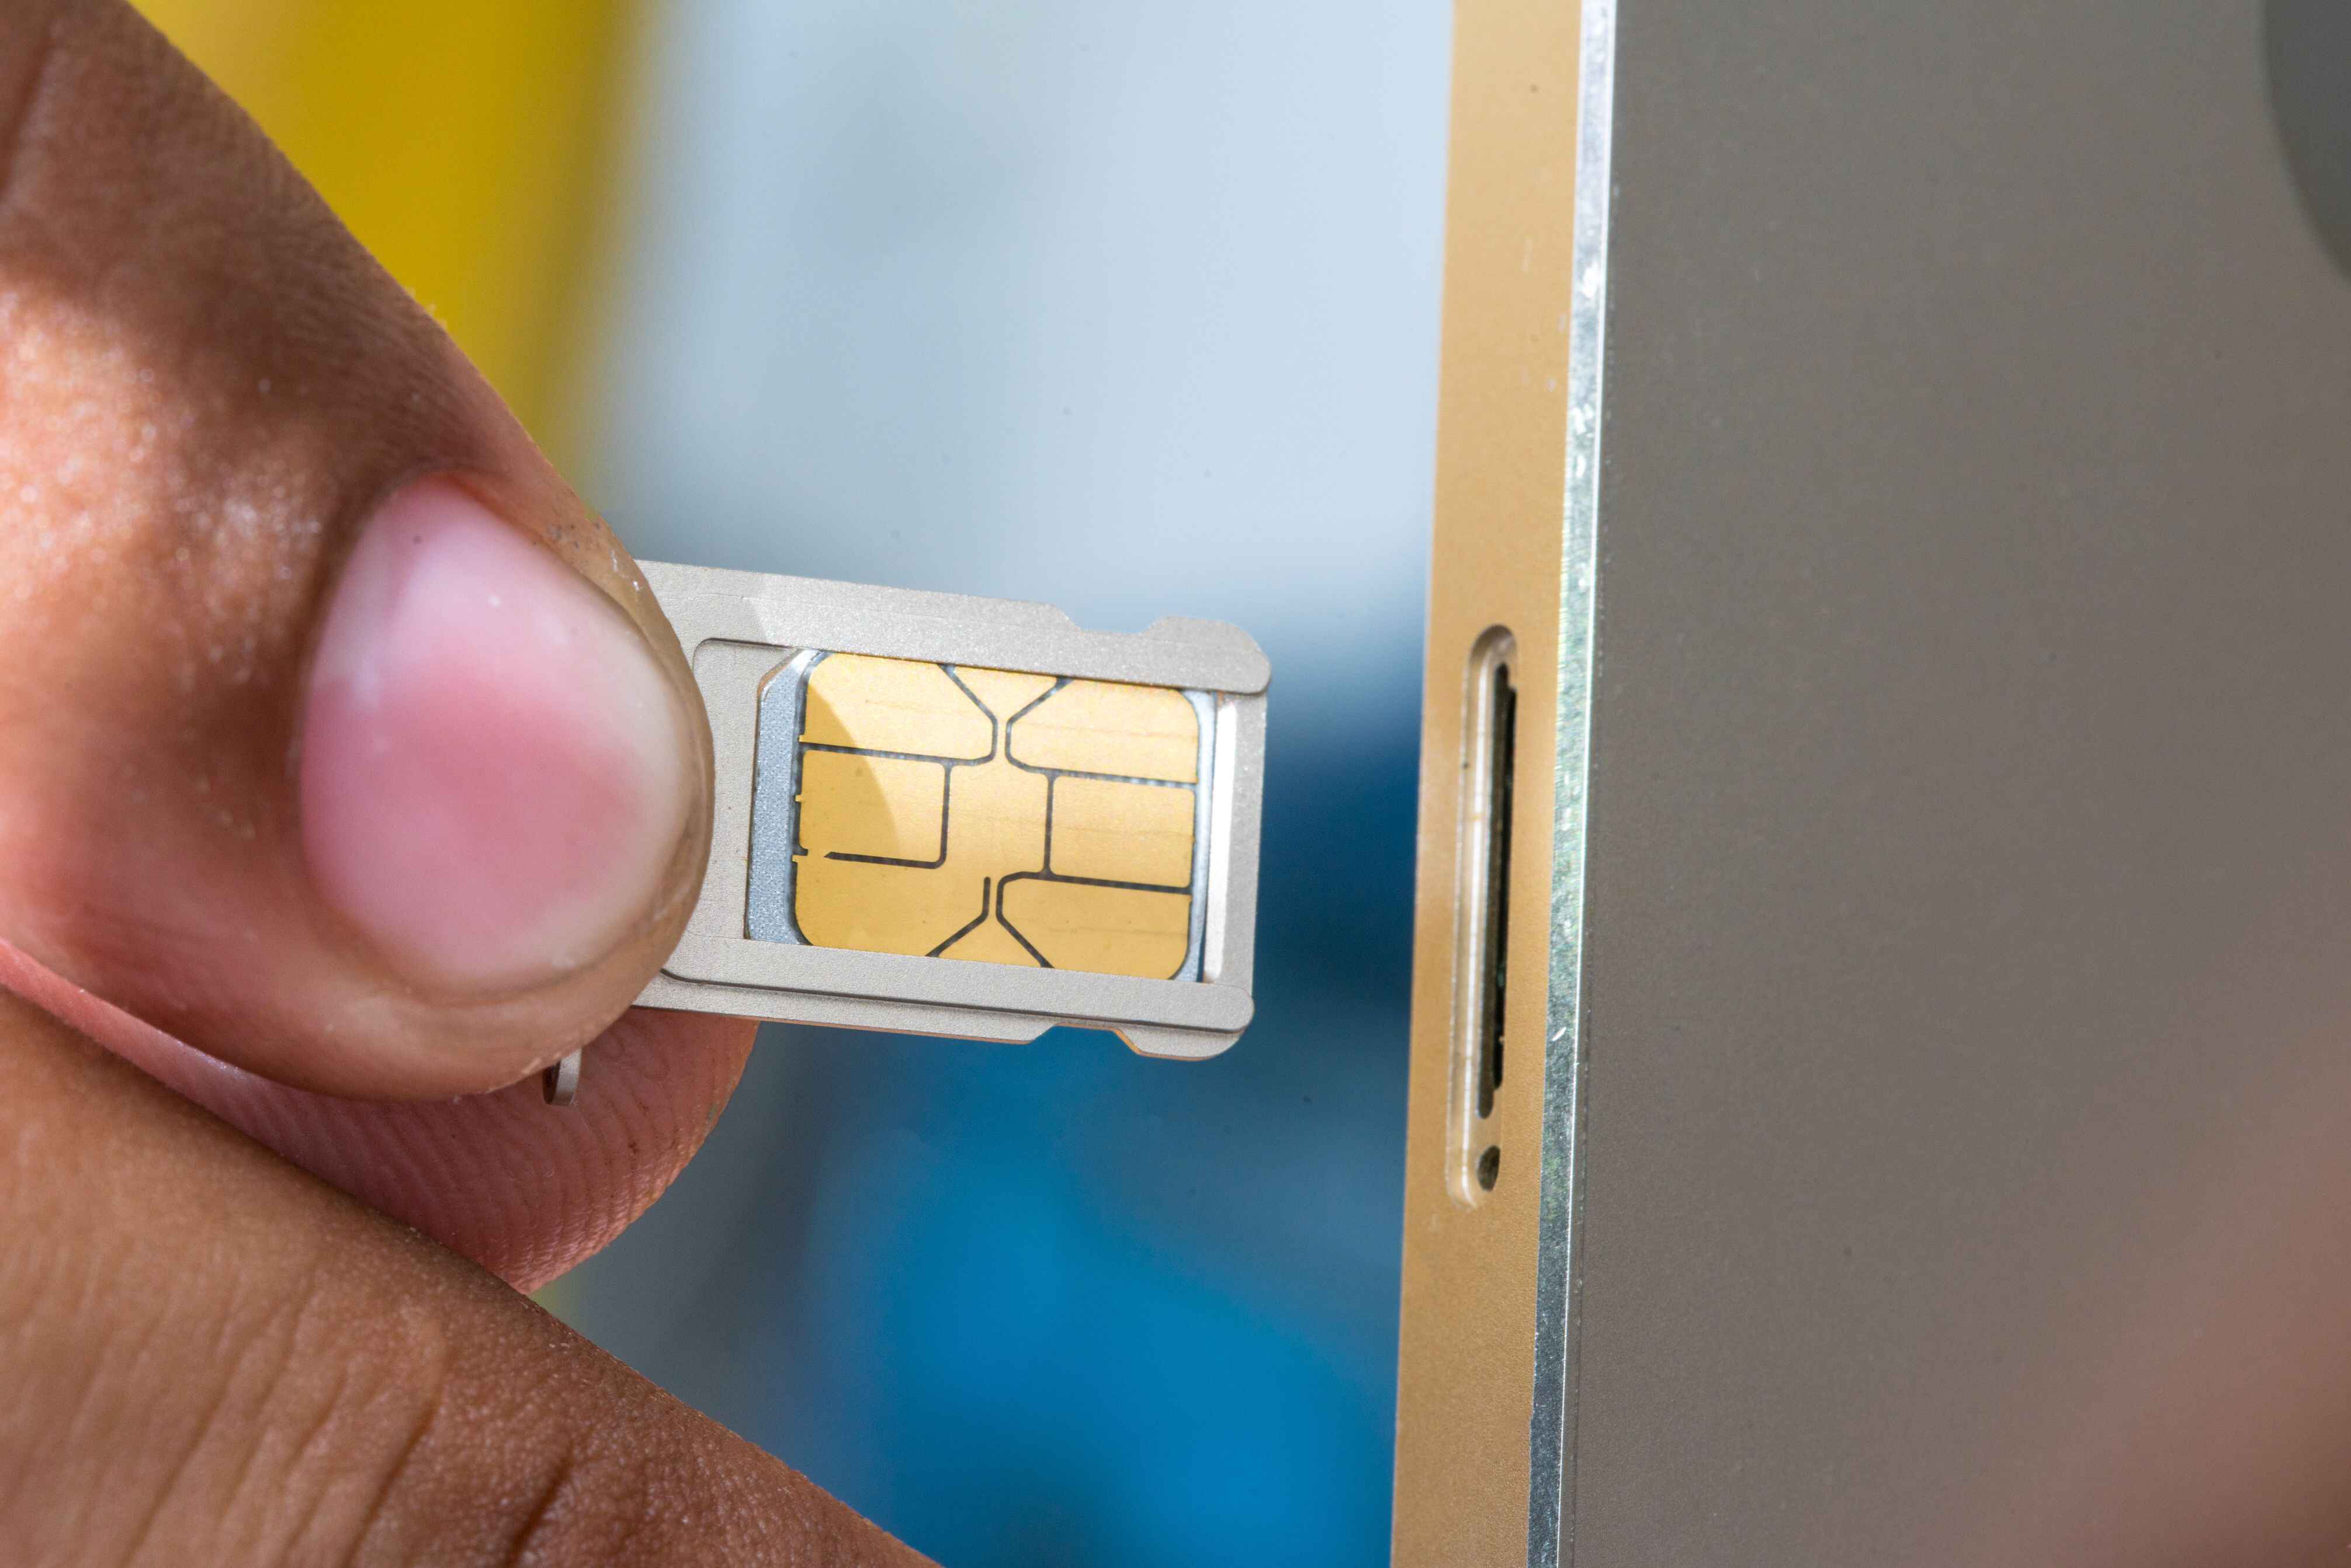
Place the SIM Card into the Tray: Carefully place the SIM card into the SIM card tray, ensuring that it aligns with the corresponding slot. The SIM card has a notched corner, which should match the orientation indicated on the tray. It's essential to position the SIM card correctly to avoid any potential connectivity issues.
-
Insert the SIM Card Tray into Your iPhone: Once the SIM card is securely placed in the tray, carefully insert the tray back into the iPhone. Ensure that it fits snugly and aligns with the device's frame. Avoid applying excessive force during this step to prevent any damage to the SIM card or the iPhone.
By following these steps, you can effectively insert the SIM card into your new iPhone, ensuring that it is seamlessly connected to your cellular network. Taking the time to perform this task meticulously sets the stage for a smooth transition to your new device, allowing you to enjoy uninterrupted connectivity and access to your phone number and carrier details.
This meticulous approach ensures that your new iPhone is fully operational and ready to use, with the SIM card seamlessly integrated to provide cellular connectivity and access to your essential information.
Step 4: Set up your new iPhone
Setting up your new iPhone is the final step in the process of transitioning to a new device. This pivotal phase ensures that your new iPhone is personalized to your preferences, seamlessly integrates with your existing data, and is ready for immediate use. Here's a comprehensive guide on how to effectively set up your new iPhone:
-
Power On Your New iPhone: Press and hold the power button until the Apple logo appears on the screen. This signifies that your new iPhone is booting up and initializing the setup process.
-
Select Your Language and Region: Upon powering on your new iPhone, you will be prompted to select your preferred language and region. Choose the options that best suit your preferences and location to ensure a personalized experience.
-
Connect to Wi-Fi or Cellular Network: To proceed with the setup, connect your new iPhone to a Wi-Fi network or insert a compatible SIM card to establish a cellular connection. This step is essential for downloading updates and accessing online services during the setup process.
-
Set Up Touch ID or Face ID: Depending on your iPhone model, you may have the option to set up Touch ID or Face ID for secure and convenient device access. Follow the on-screen instructions to register your fingerprint or facial features to enable biometric authentication.
-
Restore from iCloud or iTunes Backup: If you created a backup of your old iPhone, you can seamlessly transfer your data to your new device. Choose the "Restore from iCloud Backup" or "Restore from iTunes Backup" option and follow the prompts to initiate the data transfer process.
-
Sign in with Your Apple ID: Enter your Apple ID and password to sign in or create a new Apple ID if you don't have one. Your Apple ID is essential for accessing the App Store, iCloud, and other Apple services.
-
Set Up Siri and Privacy Preferences: Customize your Siri settings and review your privacy preferences to ensure that your new iPhone aligns with your privacy and data usage preferences.
-
Enable iCloud Services: Opt to enable iCloud services such as iCloud Drive, Photos, and Find My iPhone to ensure that your data is seamlessly synced across your devices and securely backed up.
-
Customize Display and Accessibility Settings: Adjust display settings, including text size, brightness, and wallpaper, to personalize your iPhone's appearance. Additionally, explore accessibility options to tailor your device to your specific needs.
-
Explore App Store and Install Essential Apps: Access the App Store to download and install essential apps that cater to your interests and lifestyle. This step allows you to tailor your new iPhone with the apps you rely on for productivity, entertainment, and communication.
By following these steps, you can effectively set up your new iPhone, ensuring that it is personalized to your preferences and seamlessly integrated with your existing data. This meticulous approach ensures that your new iPhone is fully operational and ready for immediate use, allowing you to explore its features and capabilities without any hindrances.
Conclusion
In conclusion, the process of transferring your SIM card to a new iPhone is a pivotal aspect of upgrading to a new device. By following the comprehensive steps outlined in this tutorial, you can seamlessly transition to your new iPhone while retaining crucial data, contacts, and cellular connectivity. The journey begins with backing up your old iPhone, ensuring that all your valuable information is securely preserved. This proactive measure serves as a safety net, allowing for a smooth transition to your new device and providing peace of mind throughout the process.
The meticulous process of removing the SIM card from your old iPhone and inserting it into your new device ensures that your new iPhone is seamlessly connected to your cellular network. This step is essential for maintaining access to your phone number, carrier details, and contacts, allowing you to stay connected without any interruptions. By carefully following the steps outlined in this tutorial, you can avoid potential issues and ensure that your SIM card is safely transferred to your new iPhone.
Setting up your new iPhone marks the final phase of the transition process, allowing you to personalize your device, seamlessly integrate your existing data, and explore the features of your new iPhone. From selecting your language and region to restoring from a backup and customizing display settings, each step contributes to a personalized and hassle-free experience with your new device.
The journey of transferring your SIM card to a new iPhone embodies the excitement of embracing advanced technology while preserving the familiarity of your existing data and settings. It represents a seamless bridge between the past and the future, empowering you to embark on a new chapter with your upgraded iPhone without sacrificing the essential elements that define your digital experience.
As you embark on this journey, remember that the process of transferring your SIM card is not just a technical task; it's a pivotal step in ensuring a smooth and uninterrupted transition to your new iPhone. By following this tutorial, you can navigate the process with confidence, knowing that your data, settings, and connectivity are seamlessly preserved throughout the transition.
Embrace the possibilities that come with your new iPhone, knowing that the foundation of your digital experience is securely transferred and ready to fuel your exploration of enhanced features, improved performance, and a sleek design. With your SIM card seamlessly integrated, your new iPhone is primed for a seamless and uninterrupted experience, allowing you to make the most of your upgraded device from the moment you power it on.