Introduction
Changing the SIM card in your iPhone is a straightforward process that allows you to switch to a new carrier or replace a damaged SIM card. Whether you're upgrading to a new iPhone model or simply need to change your mobile service provider, knowing how to replace the SIM card is a valuable skill for any iPhone user. This comprehensive guide will walk you through the step-by-step process, ensuring that you can perform the task with ease and confidence.
By following these instructions, you'll be equipped to handle this essential aspect of iPhone maintenance without the need for professional assistance. Whether you're a tech-savvy individual or someone who's new to the world of mobile devices, this guide is designed to provide clear and accessible instructions for changing the SIM card in your iPhone.
Understanding the process of changing the SIM card empowers you to take control of your mobile connectivity. It allows you to seamlessly transition between different carriers or replace a faulty SIM card, ensuring that you can stay connected without any interruptions. With the right tools and a basic understanding of your iPhone's components, you can effortlessly complete this task in just a few simple steps.
As we delve into the step-by-step process, you'll gain valuable insights into the inner workings of your iPhone and learn how to navigate its components with confidence. Through this guide, you'll discover that changing the SIM card in your iPhone is not only practical but also an empowering experience that enhances your understanding of your device.
So, let's embark on this journey together and delve into the easy steps of changing the SIM card in your iPhone. Get ready to unlock the potential of your iPhone's connectivity and gain the knowledge to manage your mobile services with ease.
Step 1: Gather the necessary tools
Before embarking on the process of changing the SIM card in your iPhone, it's essential to gather the necessary tools to ensure a smooth and efficient transition. By assembling the required items, you can streamline the entire process and minimize the risk of encountering any complications. Here's a comprehensive list of the essential tools you'll need:
-
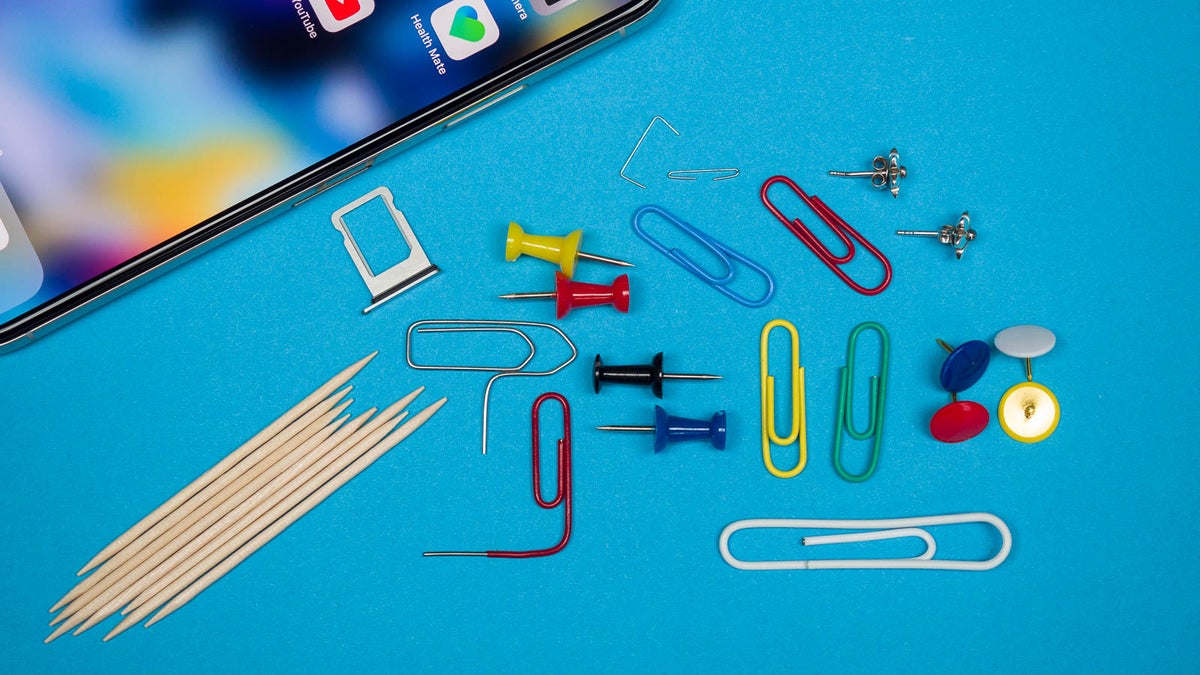
SIM Card Ejector Tool: This small, metal tool is specifically designed for ejecting the SIM card tray from your iPhone. It typically comes with your iPhone packaging, but if it's misplaced, you can easily acquire one from a local electronics store or online retailer. The SIM card ejector tool is instrumental in safely removing the SIM card tray without causing any damage to your device.
-
New SIM Card: If you're replacing the existing SIM card with a new one, ensure that you have the new SIM card provided by your mobile service provider. The new SIM card should be compatible with your iPhone model and the mobile network you intend to use. It's crucial to handle the new SIM card with care, avoiding any physical damage or exposure to moisture.
-
Clean, Lint-Free Cloth: To maintain the integrity of your iPhone and ensure a clean installation of the new SIM card, having a lint-free cloth is essential. This cloth can be used to gently wipe the SIM card tray and the new SIM card, removing any dust or debris that may hinder the proper functioning of the SIM card.
By gathering these essential tools, you'll be well-prepared to initiate the process of changing the SIM card in your iPhone. With the SIM card ejector tool, new SIM card, and a lint-free cloth at your disposal, you can proceed with confidence, knowing that you have everything you need to successfully complete this task. This proactive approach sets the stage for a seamless transition and underscores the importance of being well-equipped before delving into the intricacies of iPhone maintenance.
Step 2: Power off your iPhone
Before proceeding with the SIM card replacement, it's crucial to power off your iPhone to ensure the safety of the device and prevent any potential damage. By following these simple steps, you can safely power off your iPhone in preparation for the SIM card replacement process.
-
Locate the Power Button: The power button is typically located on the right side of the iPhone for models without a home button, such as the iPhone X and later versions. For iPhones with a home button, the power button is located on the top or right side of the device. Familiarize yourself with the location of the power button to proceed with the power-off process.
-
Press and Hold the Power Button: To initiate the power-off sequence, press and hold the power button until the "slide to power off" option appears on the screen. This action prompts the iPhone to begin the shutdown process, ensuring that all functions and processes are safely terminated before the SIM card replacement.
-
Slide to Power Off: Once the "slide to power off" option appears on the screen, use your finger to slide the power icon from left to right. This gesture serves as a confirmation of your intent to power off the iPhone and initiates the shutdown sequence.
-
Wait for the Shutdown: Allow the iPhone to complete the shutdown process, indicated by the screen turning black and all activity ceasing. It's essential to wait for the device to fully power off before proceeding to the next step, ensuring that the iPhone is in a safe state for the SIM card replacement.
By following these steps to power off your iPhone, you can ensure that the device is safely prepared for the SIM card replacement process. This proactive approach minimizes the risk of potential damage and sets the stage for a smooth transition as you proceed with the subsequent steps. With your iPhone safely powered off, you're now ready to proceed with the next phase of the SIM card replacement process.
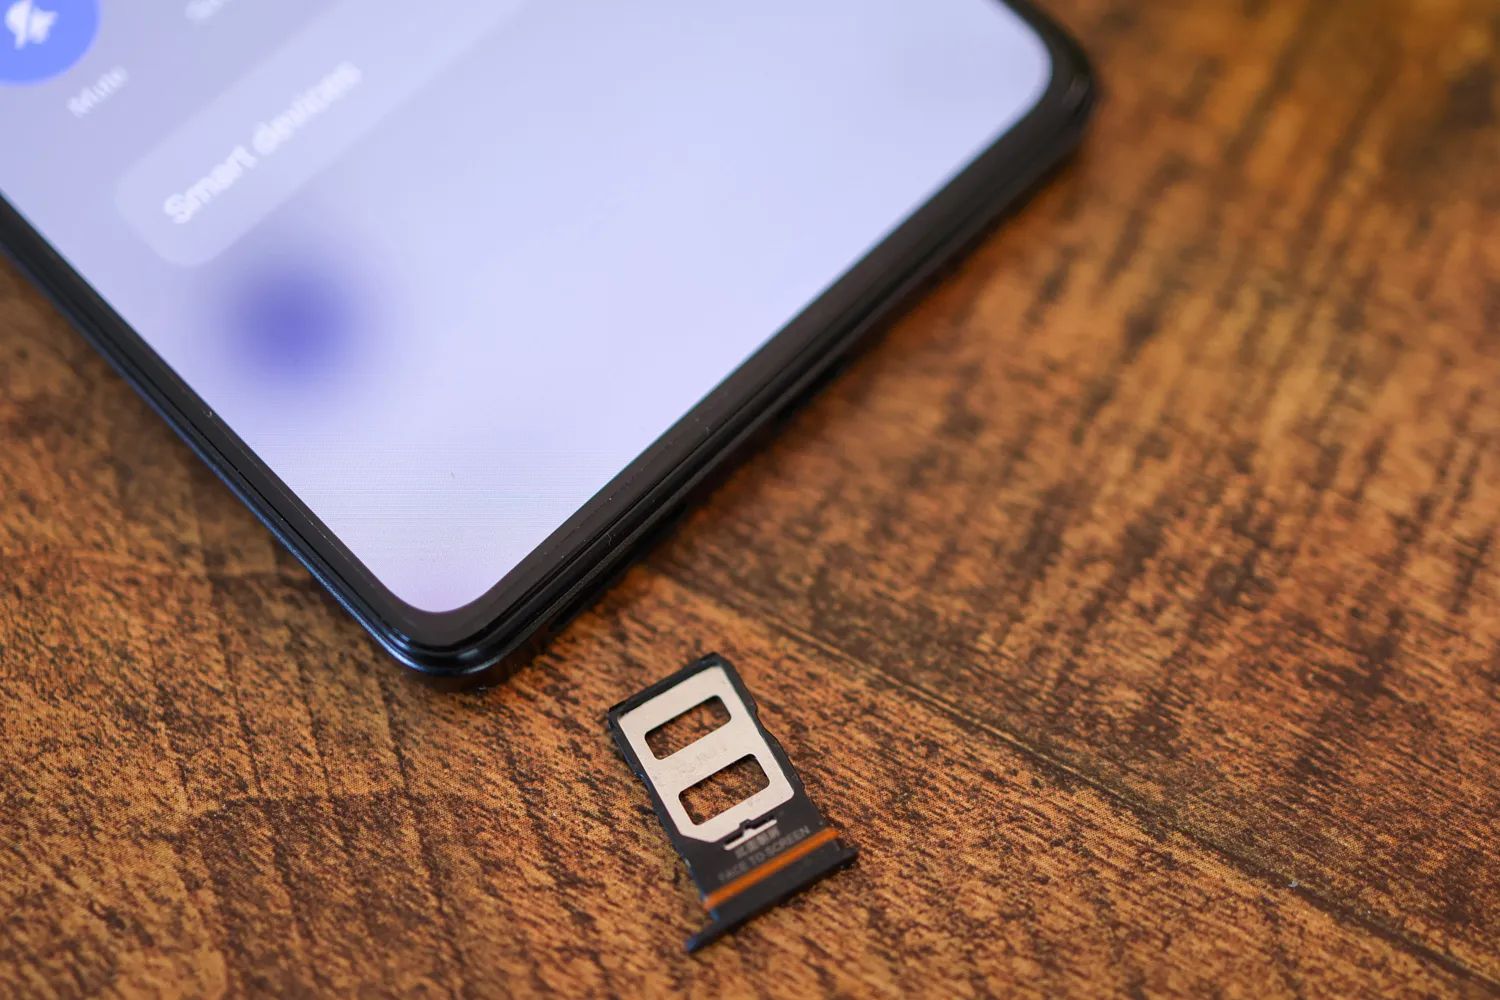
Step 3: Locate the SIM card tray
Locating the SIM card tray is a pivotal step in the process of changing the SIM card in your iPhone. The SIM card tray houses the SIM card and is designed to facilitate easy access for removal and replacement. To successfully locate the SIM card tray, follow these steps:
-
Identify the SIM Card Tray Slot: Depending on your iPhone model, the location of the SIM card tray may vary. For iPhones with a home button, such as the iPhone 8 and earlier versions, the SIM card tray is typically located on the right side of the device. In contrast, for newer iPhone models without a home button, such as the iPhone X and later versions, the SIM card tray is situated on the left side of the device. Take a moment to visually inspect the sides of your iPhone to pinpoint the precise location of the SIM card tray slot.
-
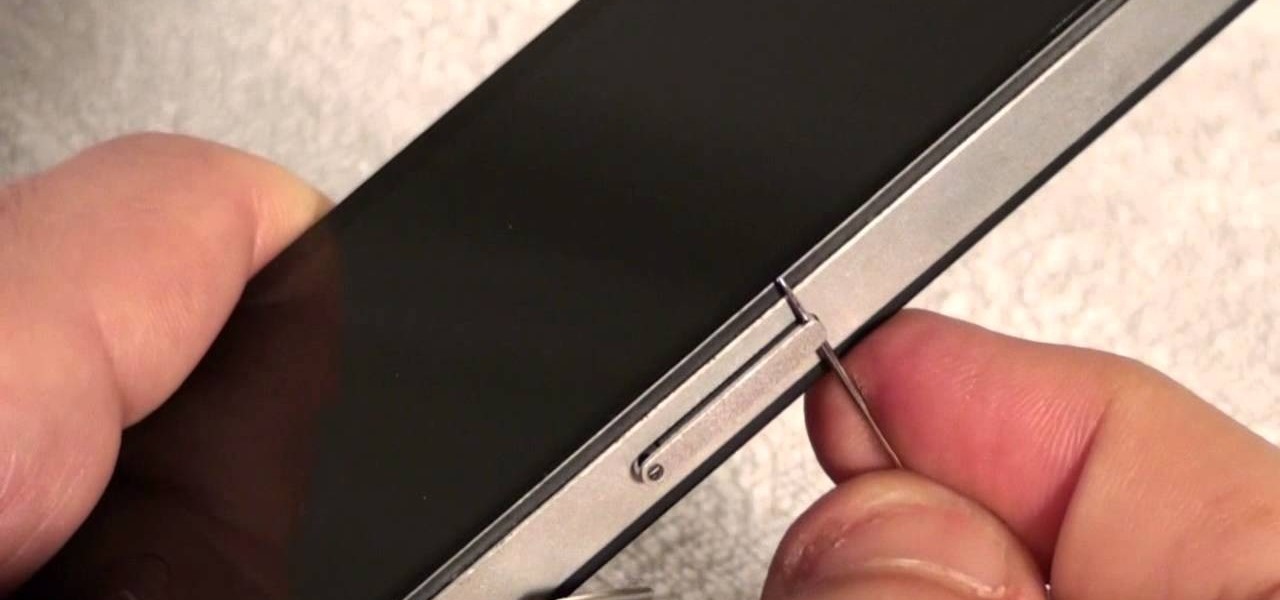
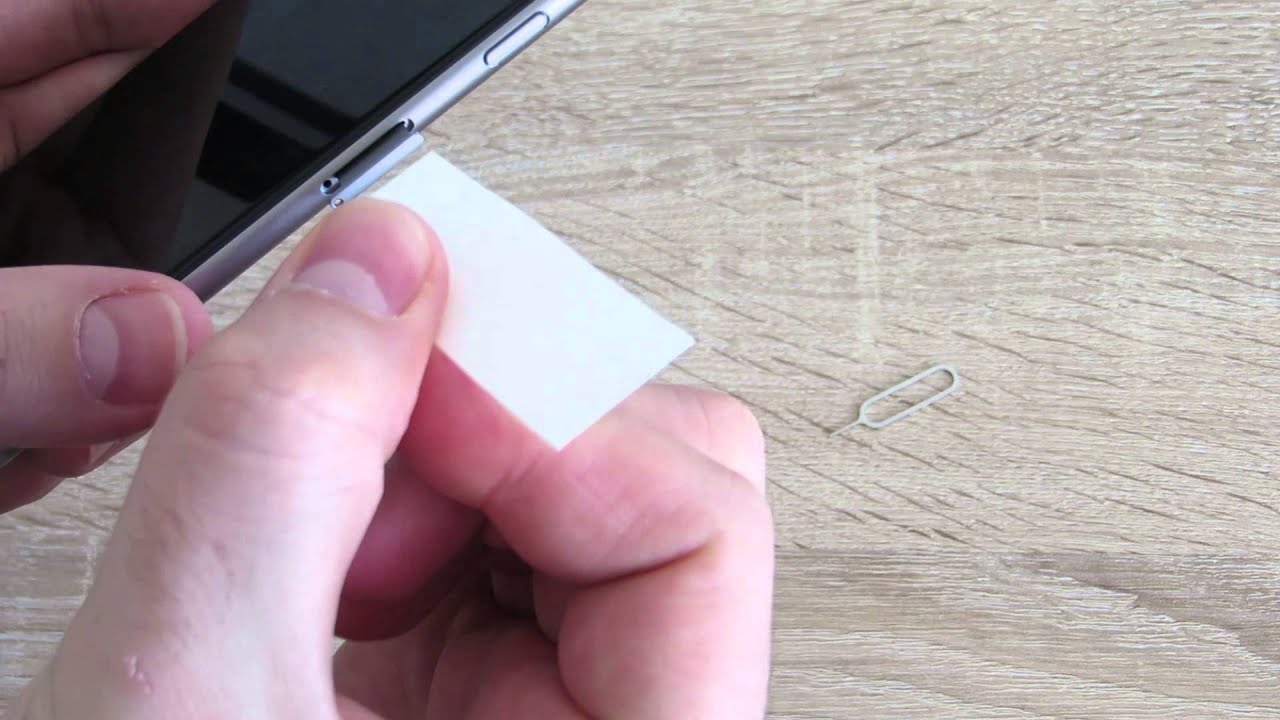
Use the SIM Card Ejector Tool: Once you've identified the location of the SIM card tray, it's time to utilize the SIM card ejector tool. This small, metal tool is specifically designed to eject the SIM card tray from your iPhone. Insert one end of the SIM card ejector tool into the small pinhole located adjacent to the SIM card tray slot. Apply gentle pressure to engage the internal mechanism, which will cause the SIM card tray to protrude slightly from the device.
-
Exercise Caution and Precision: When using the SIM card ejector tool, it's essential to exercise caution and precision to avoid causing any damage to the device. Apply steady and even pressure to the tool, ensuring that it aligns with the pinhole and effectively triggers the release mechanism. By maintaining a steady hand and a deliberate approach, you can safely and effectively access the SIM card tray without encountering any complications.
By successfully locating the SIM card tray, you've taken a crucial step towards changing the SIM card in your iPhone. This foundational step sets the stage for the subsequent actions, enabling you to proceed with confidence as you navigate the process of SIM card replacement. With the SIM card tray now accessible, you're ready to move on to the next phase of the SIM card replacement process.
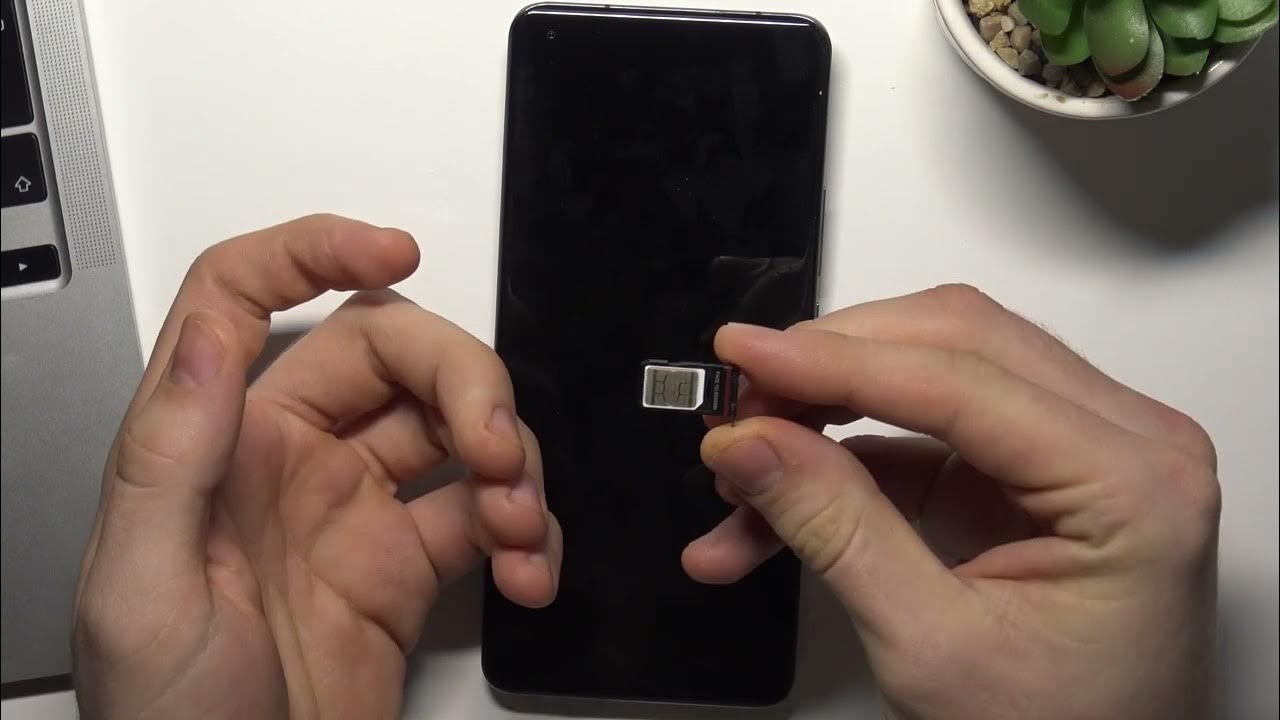
Step 4: Remove the SIM card tray
With the SIM card tray now accessible, the next crucial step in changing the SIM card in your iPhone is to carefully remove the SIM card tray. This process requires a delicate approach to ensure the safe extraction of the SIM card tray without causing any damage to the device.
To successfully remove the SIM card tray, follow these detailed steps:
-
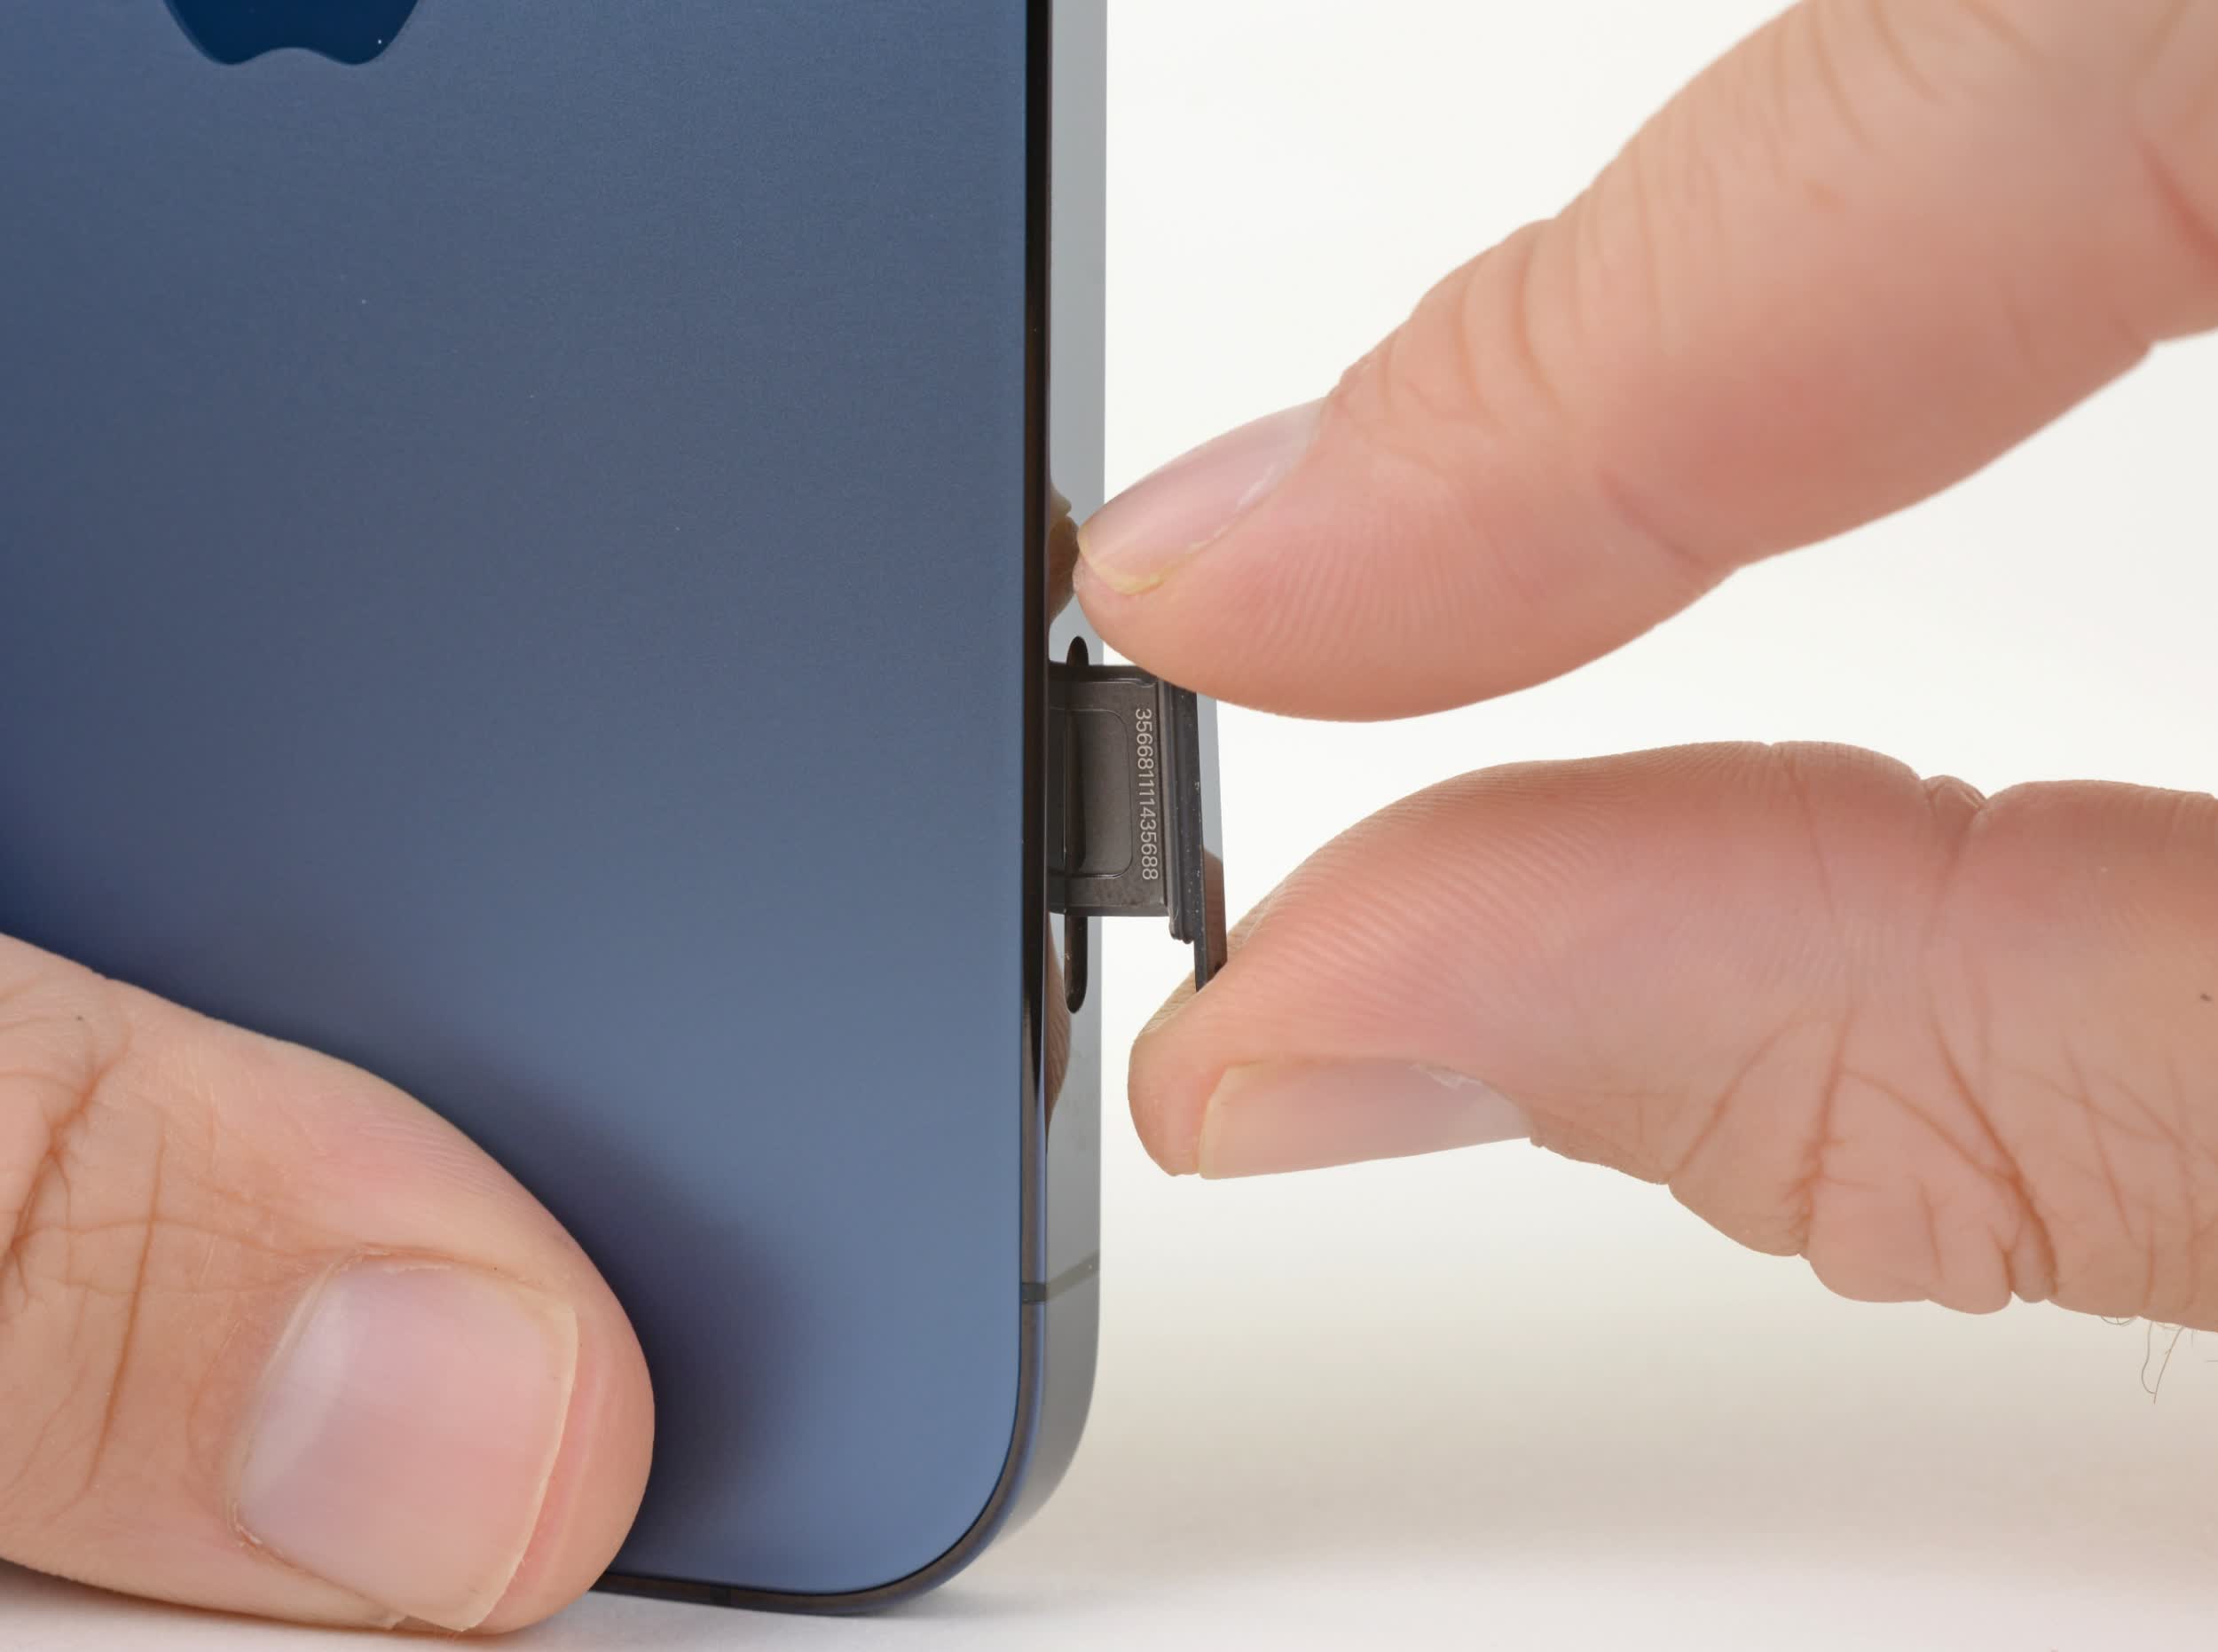
Gently Pull Out the SIM Card Tray: Using the SIM card ejector tool, apply gentle pressure to the protruding section of the SIM card tray. The SIM card tray should slide out smoothly from the device, facilitated by the slight protrusion caused by the SIM card ejector tool. Exercise patience and precision as you carefully pull out the SIM card tray, ensuring that you maintain a steady grip on the tray to prevent any accidental slippage.
-
Handle the SIM Card Tray with Care: As the SIM card tray emerges from the device, handle it with the utmost care to avoid any unnecessary jostling or abrupt movements. The SIM card tray is designed to securely hold the SIM card and should be treated delicately to prevent any damage to the internal components. By maintaining a gentle touch and a steady grip on the SIM card tray, you can ensure that it remains intact as you proceed with the SIM card replacement process.
-
Inspect the SIM Card Tray and Slot: Upon removing the SIM card tray, take a moment to inspect both the tray and the vacant slot within the iPhone. Check for any signs of debris or foreign particles that may have accumulated in the vicinity of the SIM card tray slot. Additionally, visually examine the SIM card tray to ensure that it is free from any damage or irregularities that could hinder the proper installation of the new SIM card.
By meticulously following these steps, you can successfully remove the SIM card tray from your iPhone, setting the stage for the subsequent phase of the SIM card replacement process. With the SIM card tray now in your possession, you're ready to proceed with the pivotal step of removing the old SIM card and initiating the installation of the new SIM card.
Step 5: Remove the old SIM card
With the SIM card tray in hand, the next critical step in the process of changing the SIM card in your iPhone is to carefully remove the old SIM card. This step requires precision and attention to detail to ensure the safe extraction of the old SIM card without causing any damage to the delicate components.
To successfully remove the old SIM card, follow these detailed steps:
-
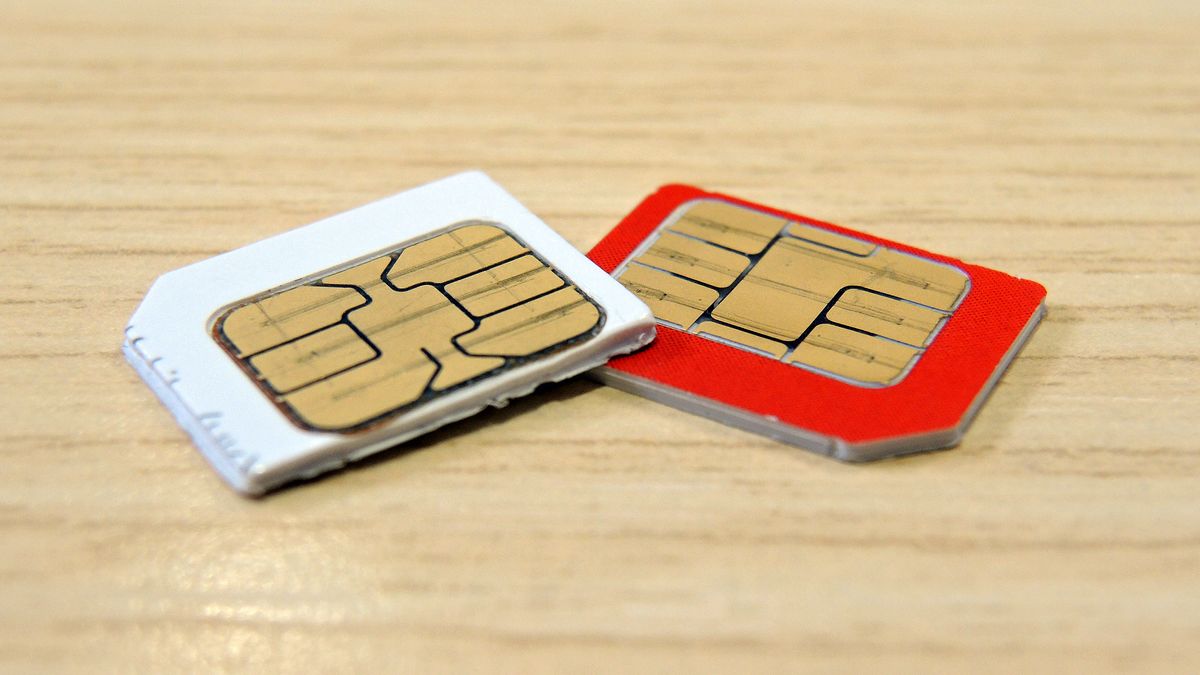
Identify the Old SIM Card: As you inspect the SIM card tray, locate the old SIM card positioned within the designated slot. The SIM card is a small, rectangular chip that contains your mobile network information. Take note of its orientation within the tray to facilitate the smooth removal process.
-
Gently Extract the Old SIM Card: Using your fingertips or a gentle, non-abrasive tool, carefully extract the old SIM card from its position within the SIM card tray. Exercise caution to avoid bending or damaging the SIM card during the removal process. Apply even pressure to gradually dislodge the SIM card from the tray, ensuring that it is handled with care throughout the extraction.
-
Inspect the Old SIM Card: Once the old SIM card has been removed, take a moment to inspect it for any signs of physical damage or wear. Check for any visible scratches, dents, or irregularities that may indicate potential issues with the old SIM card. Additionally, ensure that the metal contacts on the SIM card remain clean and free from any debris that could impede its functionality.
By meticulously following these steps, you can successfully remove the old SIM card from the SIM card tray, paving the way for the subsequent phase of the SIM card replacement process. With the old SIM card now safely extracted, you're ready to proceed with the pivotal step of inserting the new SIM card into the SIM card tray.
Step 6: Insert the new SIM card
With the old SIM card safely removed from the SIM card tray, the next crucial step in the process of changing the SIM card in your iPhone is to insert the new SIM card. This step marks a pivotal transition, as it involves integrating the new SIM card into the SIM card tray with precision and care.
To successfully insert the new SIM card, follow these detailed steps:
-
Prepare the New SIM Card: Prior to insertion, ensure that the new SIM card provided by your mobile service provider is free from any physical damage or irregularities. Handle the new SIM card with care, avoiding any contact with the metal contacts or exposure to moisture. Verify that the new SIM card is compatible with your iPhone model and the mobile network you intend to use.
-
Align the New SIM Card: Position the new SIM card within the designated area of the SIM card tray, aligning it according to the orientation of the tray. The SIM card features a notched corner, which corresponds to a specific alignment within the tray. Carefully place the new SIM card into the designated slot, ensuring that it fits snugly without any forceful insertion.
-
Secure the New SIM Card: Once the new SIM card is positioned within the tray, gently press it down to ensure that it is securely seated in place. Exercise caution to avoid applying excessive pressure, as the delicate nature of the SIM card requires a gentle touch. Verify that the new SIM card sits flush within the tray, with no protrusions or misalignments.
-
Inspect the Installation: After inserting the new SIM card, visually inspect the tray to confirm that the SIM card is properly seated and aligned. Check for any signs of misplacement or irregularities, ensuring that the new SIM card is securely integrated into the SIM card tray. Additionally, verify that the metal contacts on the new SIM card remain clean and free from any debris.
By meticulously following these steps, you can successfully insert the new SIM card into the SIM card tray, completing a crucial phase of the SIM card replacement process. With the new SIM card seamlessly integrated into the tray, you're ready to proceed with the final steps of re-inserting the SIM card tray into your iPhone and powering on the device.
This proactive approach ensures that the new SIM card is installed with precision and care, setting the stage for a seamless transition as you progress through the remaining steps of the SIM card replacement process.
Step 7: Re-insert the SIM card tray
After successfully inserting the new SIM card into the designated slot within the SIM card tray, the next pivotal step in the process of changing the SIM card in your iPhone is to re-insert the SIM card tray into the device. This step serves as the final phase of the SIM card replacement process, marking the culmination of your efforts to seamlessly transition to a new SIM card or mobile service provider.
To effectively re-insert the SIM card tray, follow these detailed steps:
-
Position the SIM Card Tray: With the new SIM card securely seated within the tray, align the SIM card tray with the corresponding slot on the side of your iPhone. Take care to orient the tray correctly, ensuring that it aligns seamlessly with the designated area for insertion.
-
Gently Slide In the SIM Card Tray: Holding the iPhone securely in one hand, use your other hand to gently slide the SIM card tray back into the device. Apply even pressure to ensure a smooth and controlled insertion, avoiding any abrupt movements that could potentially dislodge the tray.
-
Verify the Secure Fit: Once the SIM card tray is fully inserted into the device, take a moment to verify that it sits flush with the exterior of the iPhone. Ensure that the tray is securely positioned without any protrusions or misalignments, indicating a successful re-insertion.
-
Power on Your iPhone: With the SIM card tray securely re-inserted, proceed to power on your iPhone by pressing and holding the power button. Allow the device to complete the startup sequence, facilitating the recognition and activation of the new SIM card within the iPhone.
By meticulously following these steps, you can successfully re-insert the SIM card tray into your iPhone, completing a crucial phase of the SIM card replacement process. This proactive approach ensures that the new SIM card is seamlessly integrated into the device, setting the stage for a smooth transition as you power on the iPhone and initiate connectivity with the new SIM card.
With the SIM card tray securely re-inserted and the iPhone powered on, you've successfully navigated the process of changing the SIM card in your iPhone, empowering you to seamlessly transition between mobile service providers or replace a faulty SIM card with confidence and precision.
Step 8: Power on your iPhone
After securely re-inserting the SIM card tray and completing the physical aspect of the SIM card replacement process, the final step involves powering on your iPhone. This pivotal action initiates the device's startup sequence, allowing it to recognize and activate the new SIM card. By seamlessly transitioning from the physical installation to the activation phase, you can ensure a smooth and uninterrupted connectivity experience with your new SIM card.
To power on your iPhone, follow these simple yet essential steps:
-
Press and Hold the Power Button: Located on the side or top of your iPhone, depending on the model, the power button serves as the gateway to initiating the device's startup process. Press and hold the power button until the familiar Apple logo appears on the screen, indicating that the iPhone is powering on.
-
Wait for the Startup Sequence: As the iPhone powers on, it undergoes a brief startup sequence during which the device's internal components are initialized and the operating system is loaded. Allow the iPhone to complete this process, ensuring that it transitions smoothly to the home screen.
-
Verify Connectivity: Once the iPhone has powered on and reached the home screen, verify that the new SIM card is recognized and that the device establishes connectivity with the mobile network. Check for the signal bars or network indicator at the top of the screen, confirming that the iPhone has successfully activated the new SIM card.
-
Test Call and Data Functions: To further ensure the seamless integration of the new SIM card, consider placing a test call or accessing mobile data to confirm that the device is fully operational. By engaging in these basic functions, you can validate that the new SIM card enables connectivity without any issues.
By following these steps to power on your iPhone, you complete the comprehensive process of changing the SIM card with confidence and precision. This final step signifies the successful transition to a new SIM card, allowing you to enjoy uninterrupted mobile connectivity and the benefits of a seamlessly integrated mobile service provider.
With the new SIM card activated and your iPhone fully operational, you've harnessed the knowledge and skills to navigate the SIM card replacement process with ease. This empowering experience equips you to manage your mobile connectivity effectively, ensuring that you can adapt to new carriers or address SIM card-related issues with confidence and proficiency.
Conclusion
Congratulations! You've successfully navigated the process of changing the SIM card in your iPhone, equipping yourself with the knowledge and skills to seamlessly transition between mobile service providers or replace a faulty SIM card. By following the comprehensive steps outlined in this guide, you've demonstrated the ability to manage your iPhone's connectivity with confidence and precision.
As you reflect on the journey of changing the SIM card in your iPhone, it's essential to recognize the empowering nature of this experience. By understanding the intricacies of your device and its components, you've taken a proactive step towards enhancing your technological proficiency. The ability to handle essential maintenance tasks, such as replacing the SIM card, underscores your capacity to engage with your iPhone at a deeper level, fostering a sense of ownership and empowerment.
Furthermore, the process of changing the SIM card serves as a testament to your adaptability and resourcefulness. Whether you've transitioned to a new mobile service provider or replaced a damaged SIM card, you've exemplified the ability to navigate changes and address technical challenges effectively. This adaptability is a valuable skill in today's dynamic technological landscape, enabling you to embrace new opportunities and overcome obstacles with resilience.
By mastering the process of changing the SIM card, you've unlocked the potential to optimize your mobile connectivity according to your preferences and needs. Whether it's exploring different mobile service offerings, leveraging international SIM cards for travel, or addressing connectivity issues, you now possess the foundational knowledge to manage these aspects with confidence. This newfound capability empowers you to tailor your iPhone's connectivity to align with your lifestyle and requirements, ensuring a seamless and personalized experience.
As you embark on your continued journey with your iPhone, the knowledge and skills gained from changing the SIM card serve as a testament to your ongoing growth and adaptability in the realm of mobile technology. Embrace this experience as a stepping stone towards a deeper understanding of your device and its capabilities, and remain open to further exploration and learning.
In closing, the successful completion of the SIM card replacement process signifies your ability to engage with your iPhone in a meaningful and impactful manner. Embrace this accomplishment as a testament to your technical acumen and readiness to navigate the ever-evolving landscape of mobile connectivity. With this newfound expertise, you're well-equipped to harness the full potential of your iPhone's connectivity and embark on a seamless and personalized mobile experience.