Introduction
The iPhone 5 is a remarkable piece of technology that has revolutionized the way we communicate, work, and entertain ourselves. One of the essential components of the iPhone 5 is the SIM (Subscriber Identity Module) card, which is crucial for connecting to a cellular network and accessing voice, text, and data services. Properly placing the SIM card in the iPhone 5 is fundamental for ensuring seamless connectivity and uninterrupted usage of the device.
In this guide, we will walk through the step-by-step process of locating the SIM card tray, ejecting the tray, inserting the SIM card, and reinserting the tray into the iPhone 5. Following these instructions will enable you to set up your iPhone 5 for cellular connectivity, allowing you to make calls, send messages, and access the internet on the go.
Understanding the significance of the SIM card and its placement in the iPhone 5 is essential for any user. Whether you are setting up a new device, replacing a SIM card, or troubleshooting connectivity issues, knowing how to properly handle the SIM card is crucial for a smooth user experience.
Now, let's delve into the process of locating the SIM card tray on your iPhone 5 and ensuring that the SIM card is correctly inserted for optimal functionality.
Step 1: Locate the SIM card tray
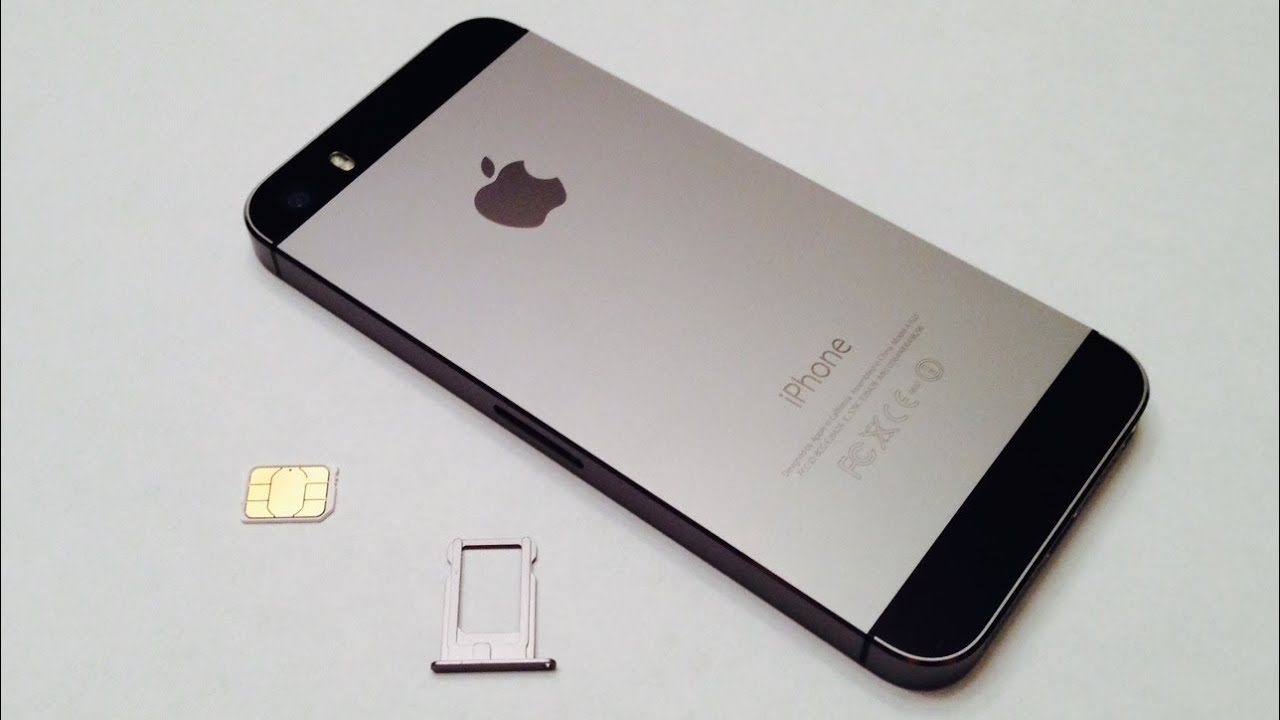
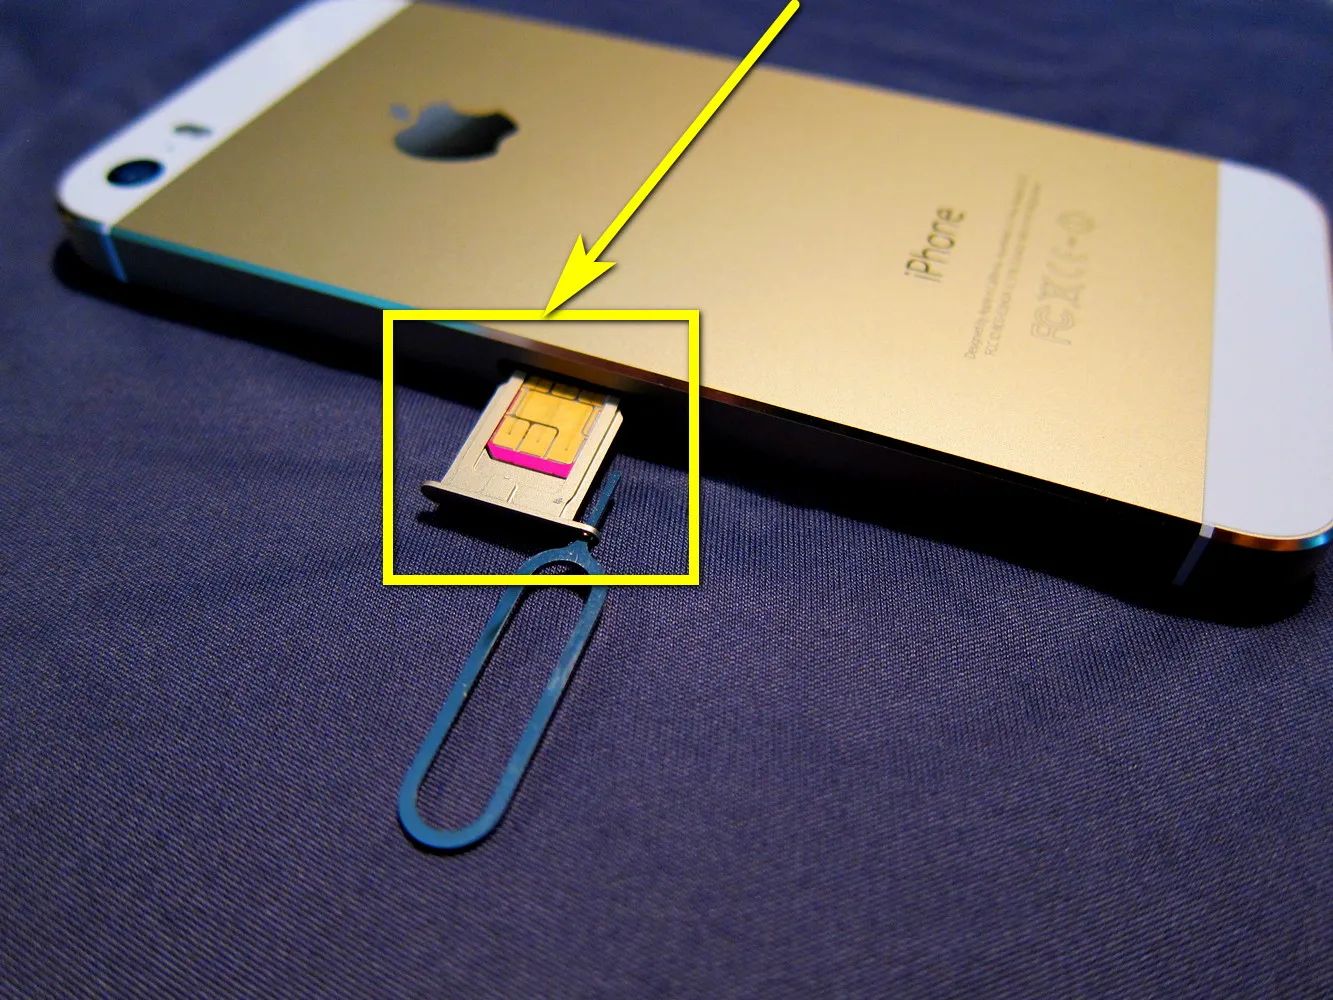
The first step in properly placing the SIM card in your iPhone 5 is to locate the SIM card tray. The SIM card tray is a small, rectangular slot typically found on the side of the iPhone 5. To locate the SIM card tray, hold your iPhone 5 securely and examine the sides of the device. Depending on the model, the SIM card tray is usually located on the right-hand side of the phone, near the top or middle section.
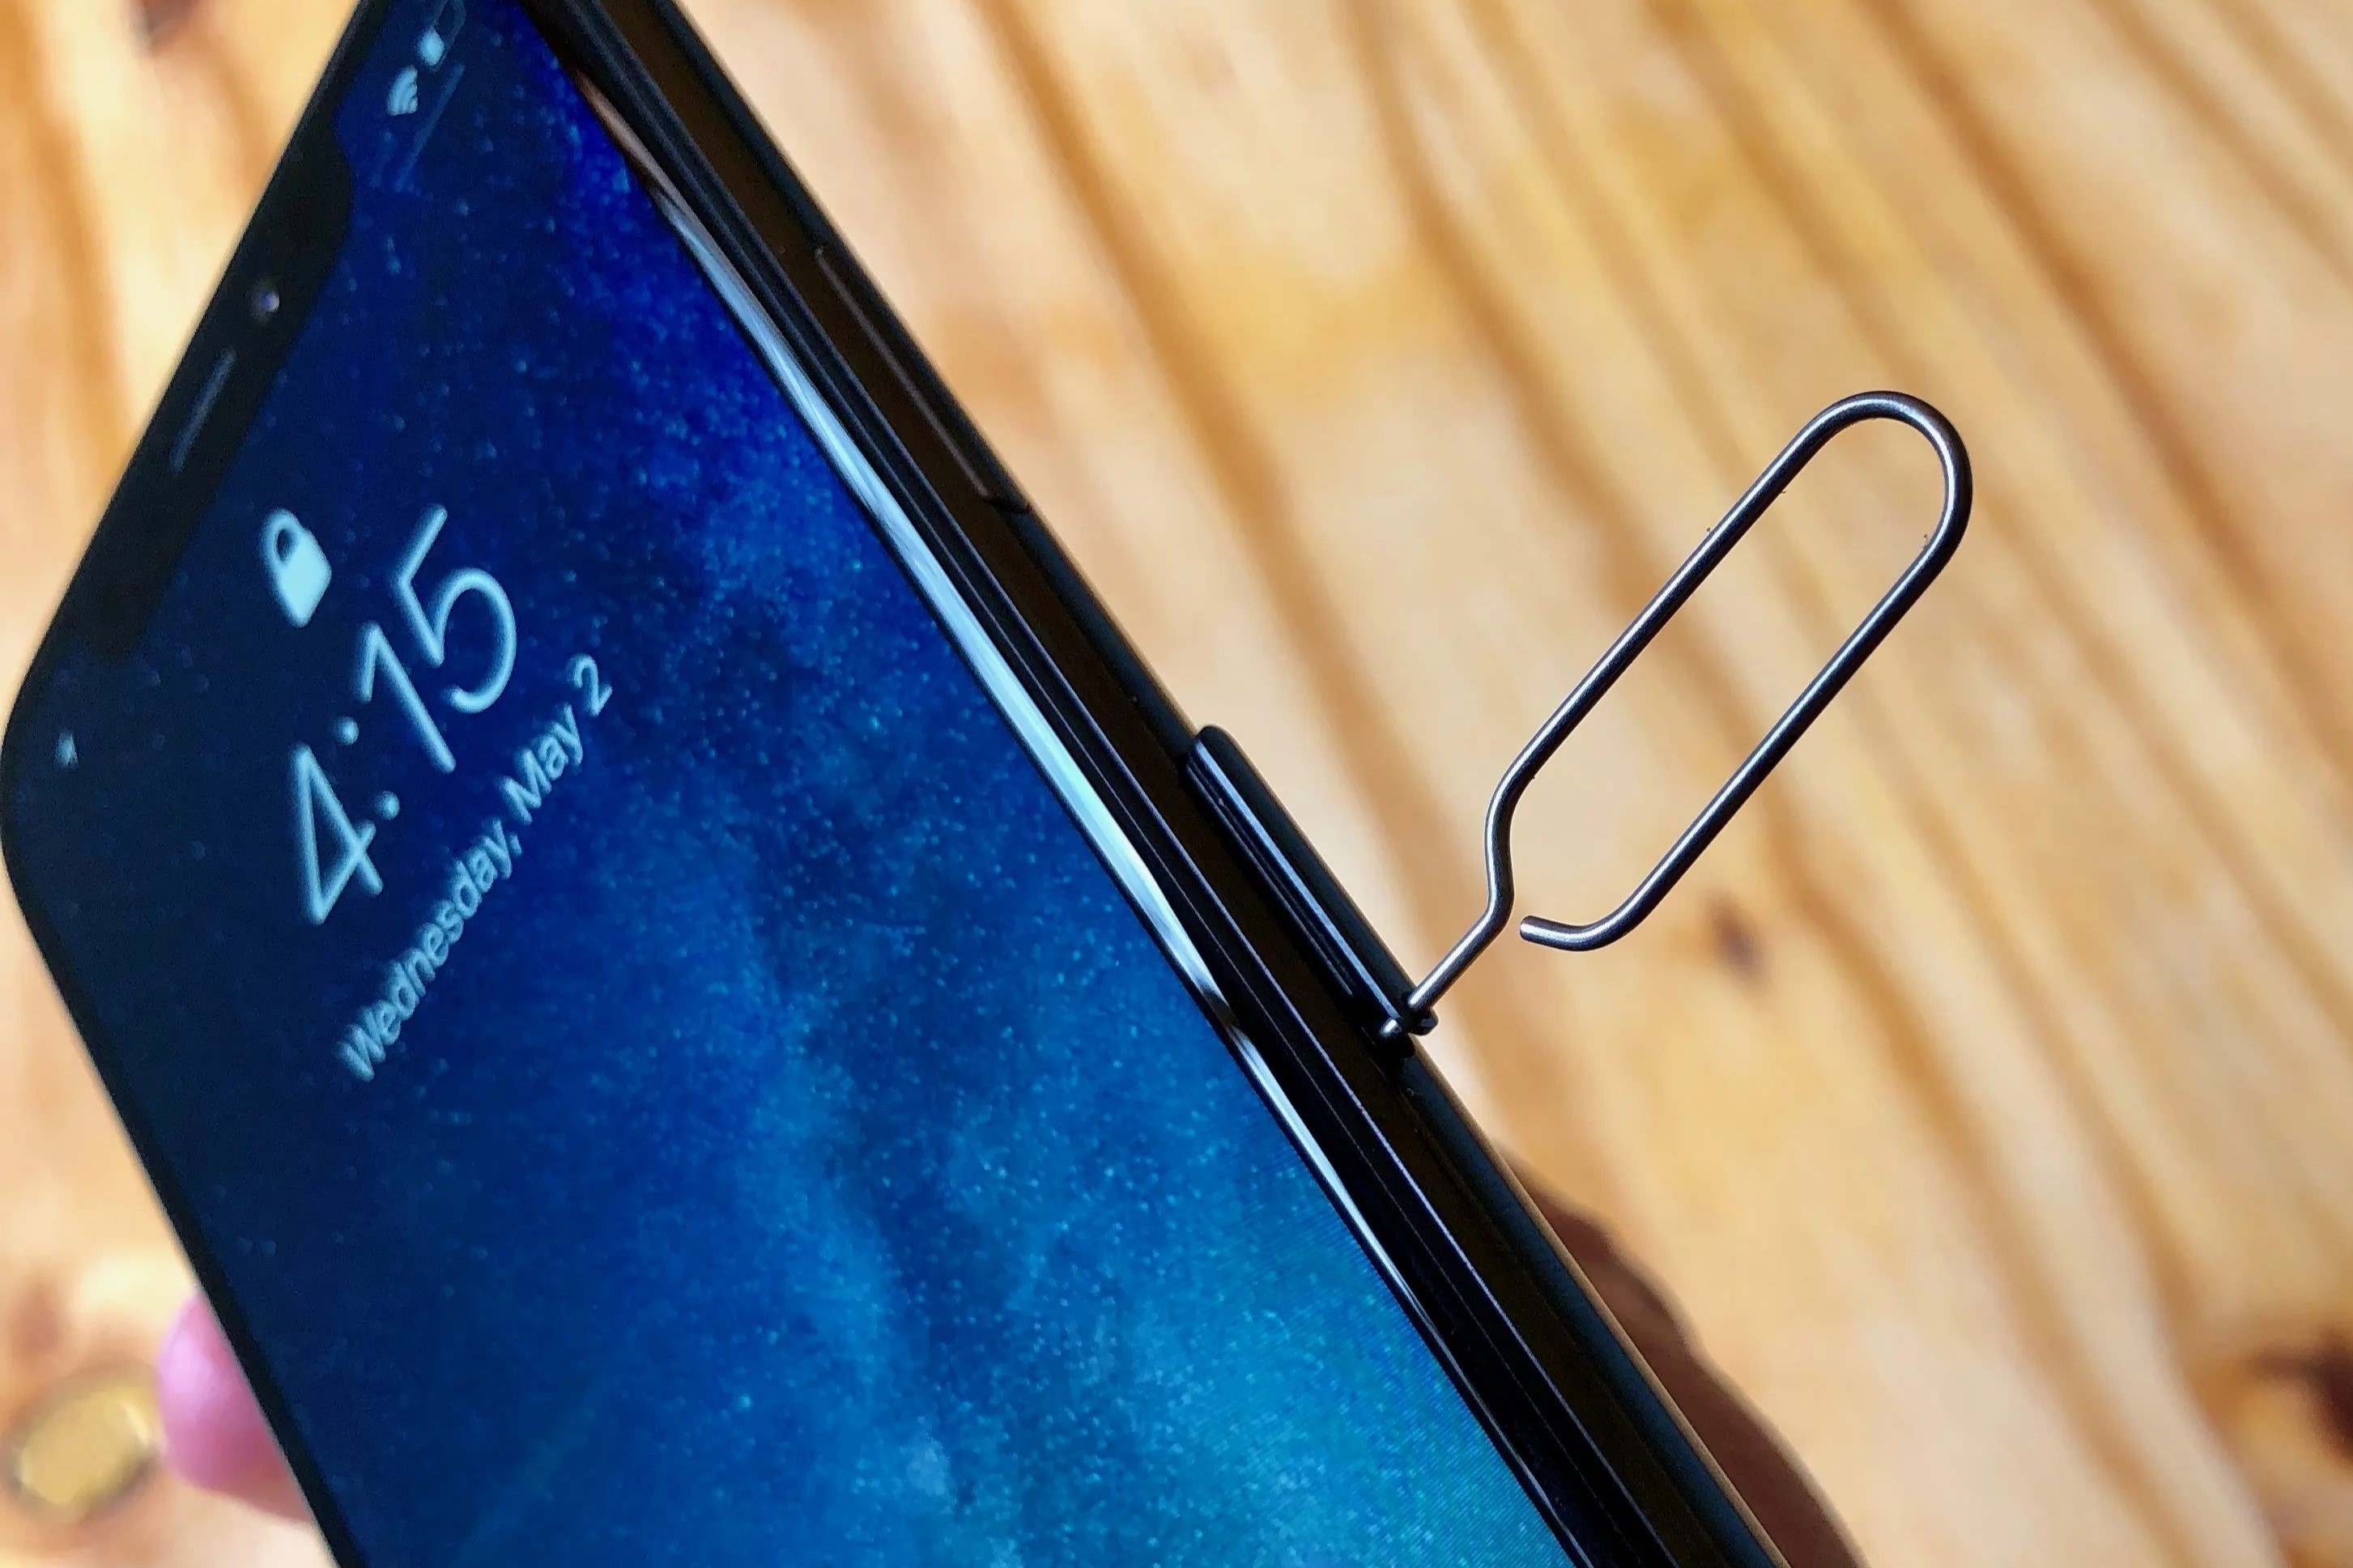
Once you have identified the location of the SIM card tray, you can proceed to prepare the necessary tools for ejecting the tray. To access the SIM card tray, you will need a SIM card removal tool or a small, pointed object such as a paperclip. These tools are designed to safely eject the SIM card tray without causing damage to the device.
It's important to handle the iPhone 5 with care during this process, ensuring that you have a stable grip on the device to prevent accidental drops or slips. Take a moment to familiarize yourself with the location of the SIM card tray and the surrounding features of the iPhone 5 to avoid any confusion when proceeding to the next steps.
Locating the SIM card tray is the initial step in the process of setting up or replacing the SIM card in your iPhone 5. By taking the time to identify the tray's position and gather the necessary tools, you are laying the groundwork for a smooth and efficient SIM card placement experience. Once you have located the SIM card tray and prepared the required tools, you are ready to move on to the next step of ejecting the tray to access the SIM card slot.
Step 2: Eject the SIM card tray
Ejecting the SIM card tray is a crucial step in the process of placing or replacing the SIM card in your iPhone 5. This step requires precision and attention to detail to ensure that the SIM card tray is safely and properly removed from the device.
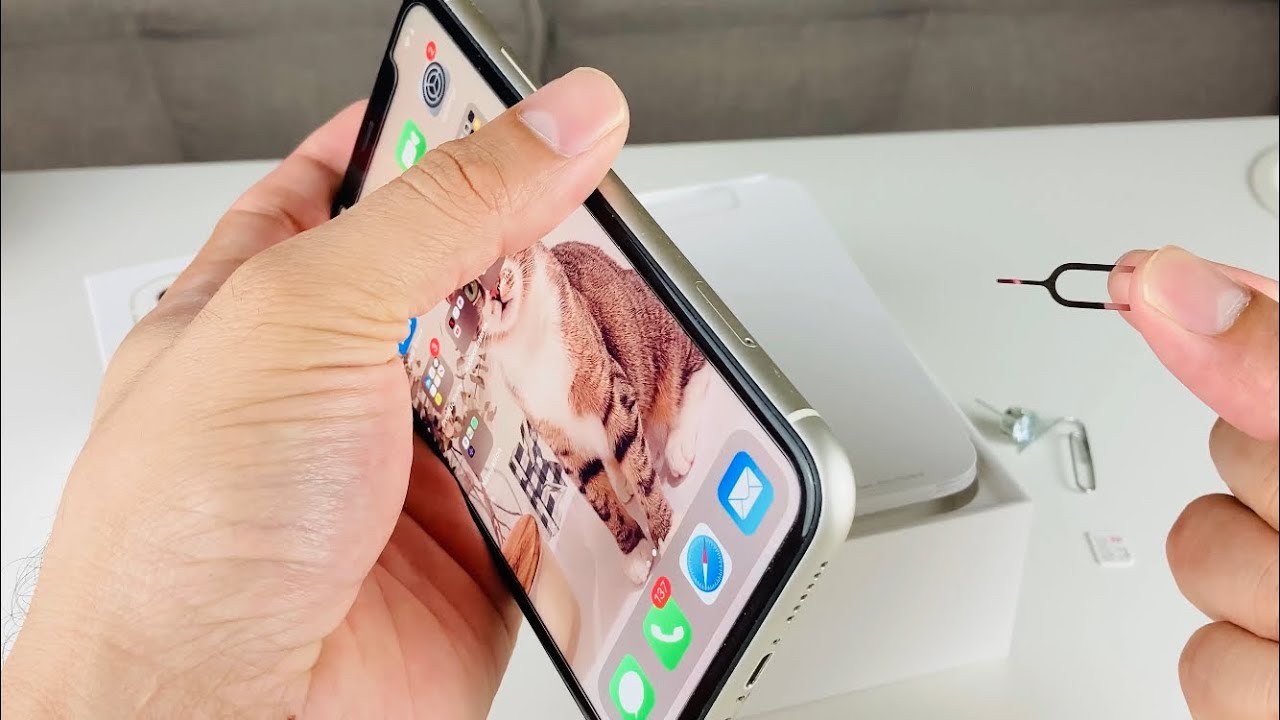
To begin, locate the small pinhole on the SIM card tray. This pinhole is designed to accommodate the SIM card removal tool or a suitable substitute, such as a paperclip. Insert the tool into the pinhole, applying gentle pressure until you feel a slight resistance. It is important to exert steady and even pressure to avoid damaging the SIM card tray or the surrounding components of the iPhone 5.
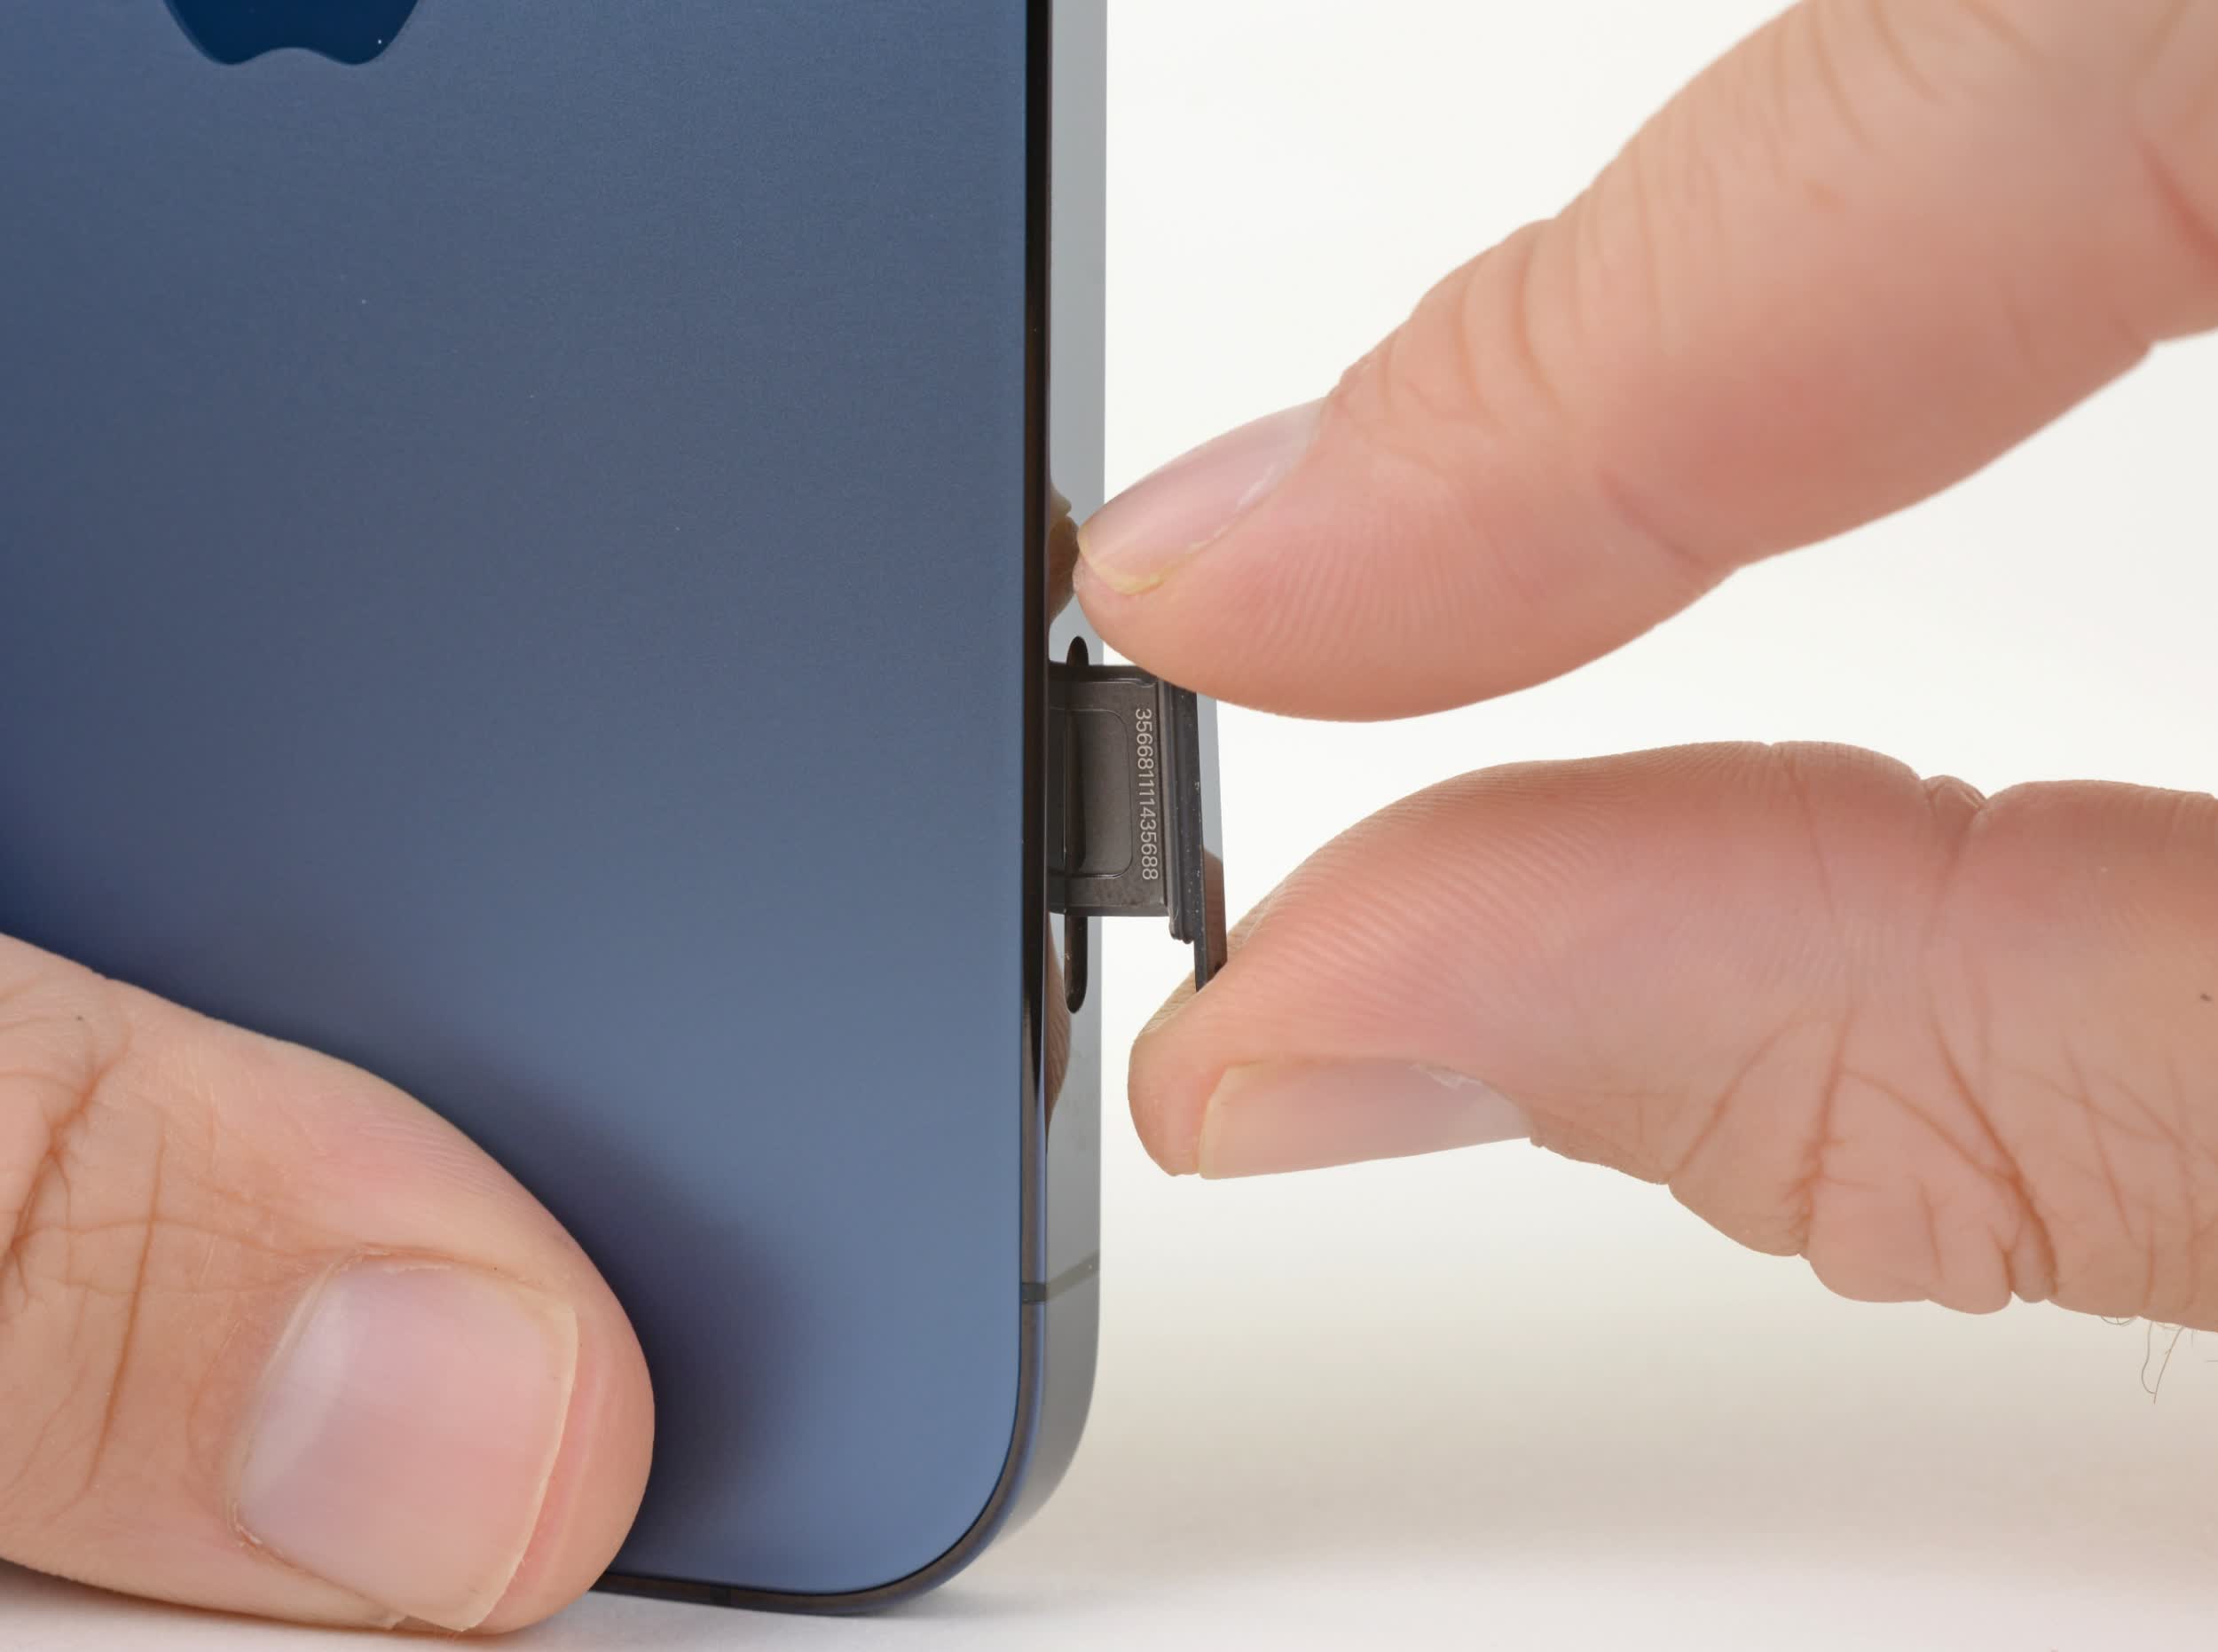
As you apply pressure to the pinhole, you will notice the SIM card tray gradually protruding from the device. Once the tray is partially ejected, carefully grasp the exposed edge and gently pull the tray out of the iPhone 5. Take care to maintain a firm grip on the tray to prevent it from slipping or falling during the removal process.
As the SIM card tray is fully ejected, inspect the tray and the SIM card slot for any dust, debris, or foreign objects that may hinder the insertion of the SIM card. Use a soft, dry cloth or compressed air to gently clean the tray and the surrounding area, ensuring that the SIM card can be inserted smoothly and securely.
Ejecting the SIM card tray from your iPhone 5 requires patience and precision. By following these steps, you can safely remove the tray without causing any damage to the device. Once the SIM card tray is successfully ejected, you are ready to proceed to the next step of inserting the SIM card into the designated slot.
Ejecting the SIM card tray is a pivotal stage in the process of setting up or replacing the SIM card in your iPhone 5. By carefully following these instructions, you can ensure that the SIM card tray is safely removed, allowing for the seamless insertion of the SIM card. With the tray now ejected, you are prepared to move on to the next step of inserting the SIM card into your iPhone 5.
Step 3: Insert the SIM card
After successfully ejecting the SIM card tray from your iPhone 5, the next crucial step is to insert the SIM card into the designated slot. Properly placing the SIM card ensures that your iPhone 5 can establish a connection with the cellular network, enabling you to make calls, send messages, and access mobile data.
To begin the insertion process, carefully remove the SIM card from its packaging or the previous SIM card tray. The SIM card is a small, rectangular chip that contains vital information for identifying your device on the network. Take a moment to inspect the SIM card, ensuring that it is free from any visible damage or deformities that may impede its functionality.
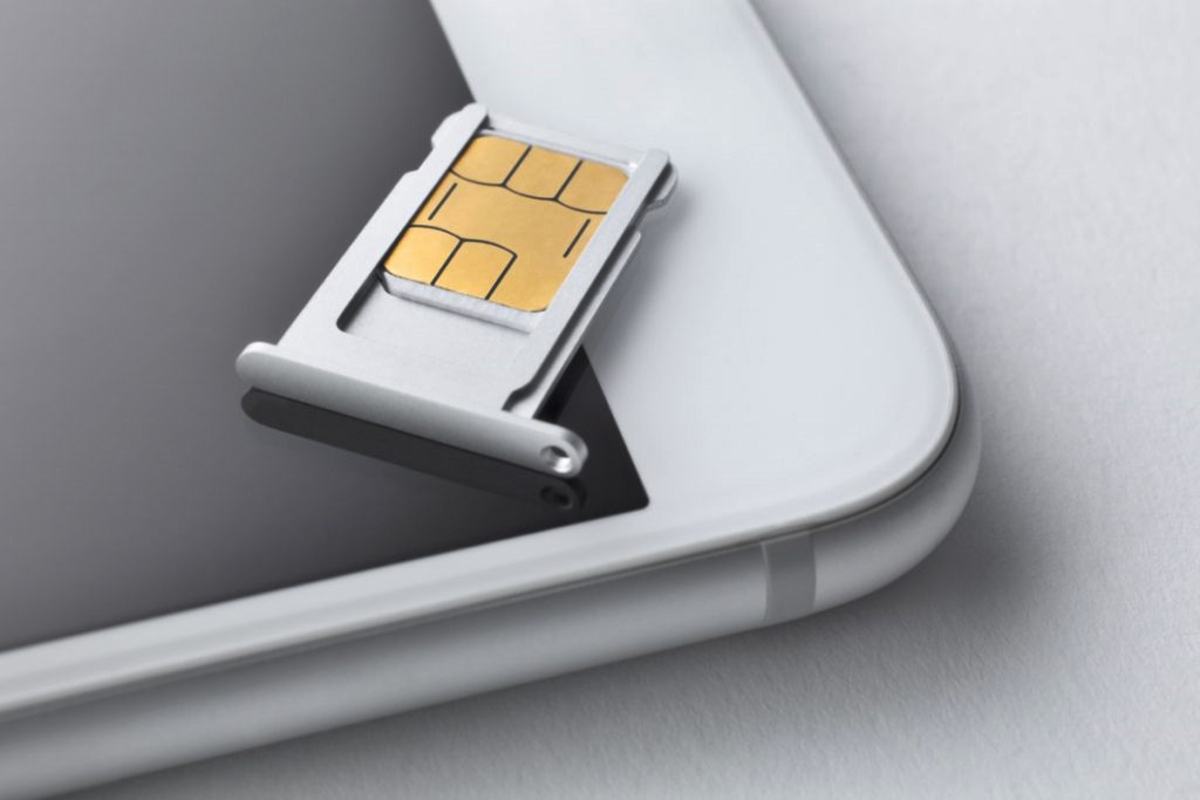
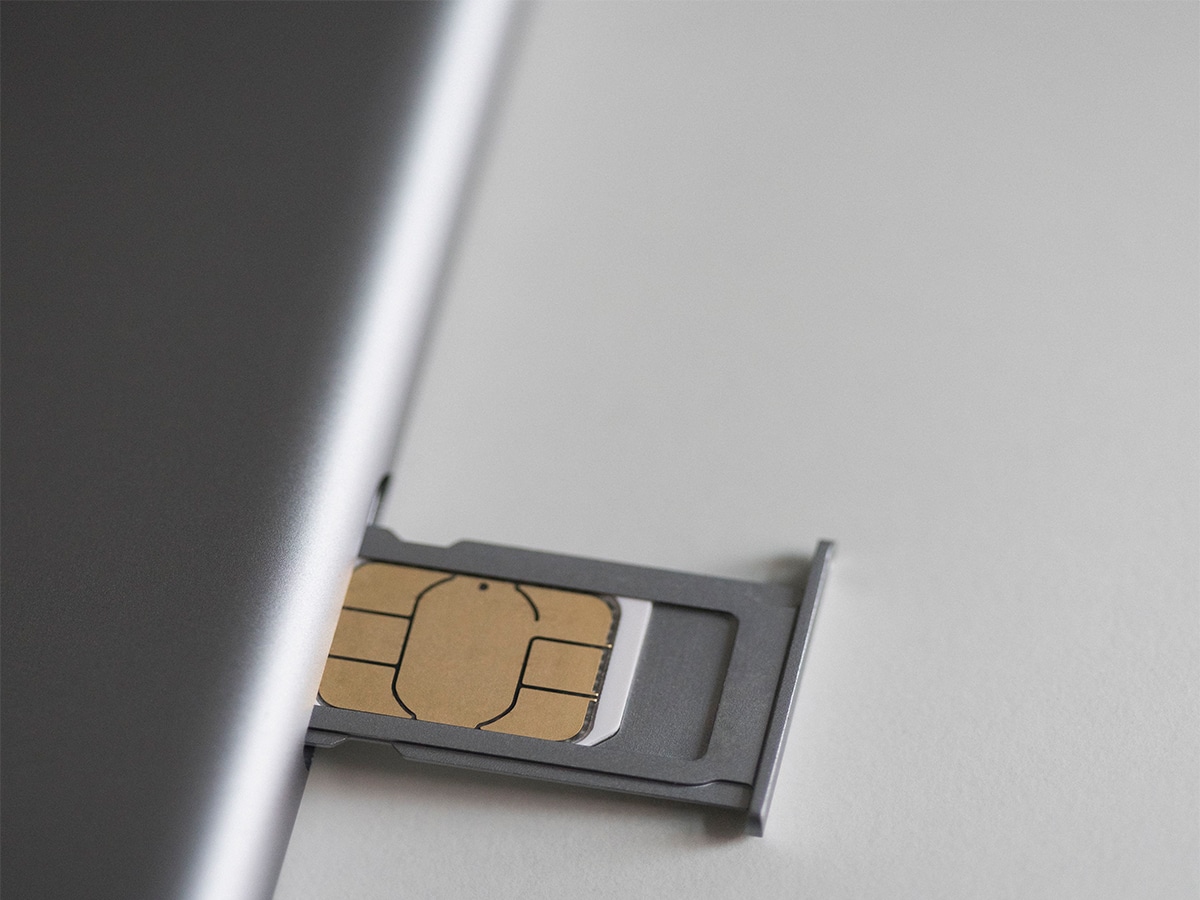
Next, orient the SIM card with the tray in the correct position. The SIM card and the tray are designed with specific grooves and notches to ensure proper alignment. Align the notched corner of the SIM card with the corresponding notch in the SIM card tray, ensuring that the gold contacts on the SIM card are facing downward and in contact with the metal contacts in the tray.
Gently place the SIM card into the designated slot on the SIM card tray, taking care to avoid applying excessive force or pressure. The SIM card should fit snugly into the slot, with the notched corner aligned as designed. It is essential to handle the SIM card with care, as any rough handling or improper alignment may damage the card or the tray, impacting the functionality of your iPhone 5.
Once the SIM card is securely in place, carefully slide the SIM card tray back into the iPhone 5. Ensure that the tray is inserted in the correct orientation, aligning it with the slot in the device. Apply gentle pressure to the tray, pushing it back into the iPhone 5 until it sits flush with the device's exterior.
With the SIM card now inserted and the tray securely repositioned, you have completed the critical step of setting up or replacing the SIM card in your iPhone 5. The proper placement of the SIM card ensures that your device can seamlessly connect to the cellular network, allowing you to enjoy the full range of communication and data services offered by your iPhone 5.
Step 4: Reinsert the SIM card tray
After successfully inserting the SIM card into your iPhone 5, the final step is to reinsert the SIM card tray into the device. This step is essential for securing the SIM card in place and ensuring that the tray is properly aligned within the iPhone 5.
To begin, carefully position the SIM card tray, aligning it with the slot on the side of the iPhone 5. It is crucial to orient the tray correctly, matching the shape and size of the tray with the slot to prevent any potential damage to the device or the tray itself.
Once the SIM card tray is aligned with the slot, gently guide it back into the iPhone 5, ensuring that it slides in smoothly and effortlessly. Take care to apply even pressure to the tray, avoiding any sudden or forceful movements that may cause damage to the device or the tray.
As the tray is reinserted, listen for a subtle clicking sound, indicating that the tray has securely locked into place within the iPhone 5. This clicking sound signifies that the tray is properly seated and that the SIM card is securely housed within the device, ready to facilitate cellular connectivity and communication services.
After reinserting the SIM card tray, take a moment to visually inspect the device, ensuring that the tray sits flush with the exterior of the iPhone 5. The tray should seamlessly blend with the device's design, with no protrusions or misalignments that may indicate an improper insertion.
With the SIM card tray securely repositioned, you have completed the final step in the process of placing or replacing the SIM card in your iPhone 5. The successful reinsertion of the tray ensures that the SIM card is safely housed within the device, ready to enable seamless connectivity and communication capabilities.
By following these steps, you have effectively set up or replaced the SIM card in your iPhone 5, ensuring that the device is ready to connect to the cellular network and provide you with reliable voice, text, and data services. Properly placing the SIM card and reinserting the tray are essential for maximizing the functionality and usability of your iPhone 5, allowing you to stay connected and productive in today's mobile-centric world.
Conclusion
Properly placing the SIM card in your iPhone 5 is a fundamental aspect of ensuring seamless connectivity and uninterrupted usage of the device. From locating the SIM card tray to securely reinserting it into the device, each step in this process plays a crucial role in enabling your iPhone 5 to establish a connection with the cellular network.
By following the step-by-step instructions outlined in this guide, you have gained valuable insights into the intricacies of handling the SIM card and the SIM card tray. Understanding the significance of these components and their proper placement is essential for any iPhone 5 user, whether setting up a new device, replacing a SIM card, or troubleshooting connectivity issues.
The initial step of locating the SIM card tray sets the stage for a smooth SIM card placement experience. By identifying the tray's position and preparing the necessary tools for ejecting it, you establish a solid foundation for the subsequent steps. Ejecting the SIM card tray with precision and care ensures that the tray is safely removed from the device, allowing for the seamless insertion of the SIM card.
Inserting the SIM card into the designated slot demands attention to detail and gentle handling to guarantee proper alignment and secure placement. By carefully orienting the SIM card and sliding the tray back into the iPhone 5, you ensure that the SIM card is securely housed within the device, ready to facilitate cellular connectivity and communication services.
The final step of reinserting the SIM card tray completes the process, securing the SIM card in place and aligning the tray within the iPhone 5. A successful reinsertion signifies that the SIM card is safely housed within the device, poised to enable seamless connectivity and communication capabilities.
By mastering the proper placement of the SIM card in your iPhone 5, you have equipped yourself with the knowledge and skills to effectively manage your device's connectivity. Whether activating a new SIM card or replacing an existing one, the ability to handle the SIM card and tray with confidence empowers you to maintain a reliable and efficient connection to the cellular network.
As you navigate the intricacies of SIM card placement in your iPhone 5, remember that attention to detail and gentle handling are key to ensuring a smooth and successful experience. With the SIM card securely in place, your iPhone 5 is primed to deliver the full range of communication and data services, keeping you connected and productive in today's fast-paced digital landscape.