Introduction
The iPhone 13 is a remarkable device, equipped with advanced features and cutting-edge technology. Whether you're setting up a new iPhone 13 or replacing the SIM card, knowing how to locate and access the SIM card tray is essential. In this comprehensive guide, we will delve into the process of locating the SIM card on the iPhone 13, providing step-by-step instructions and valuable insights to ensure a seamless experience.
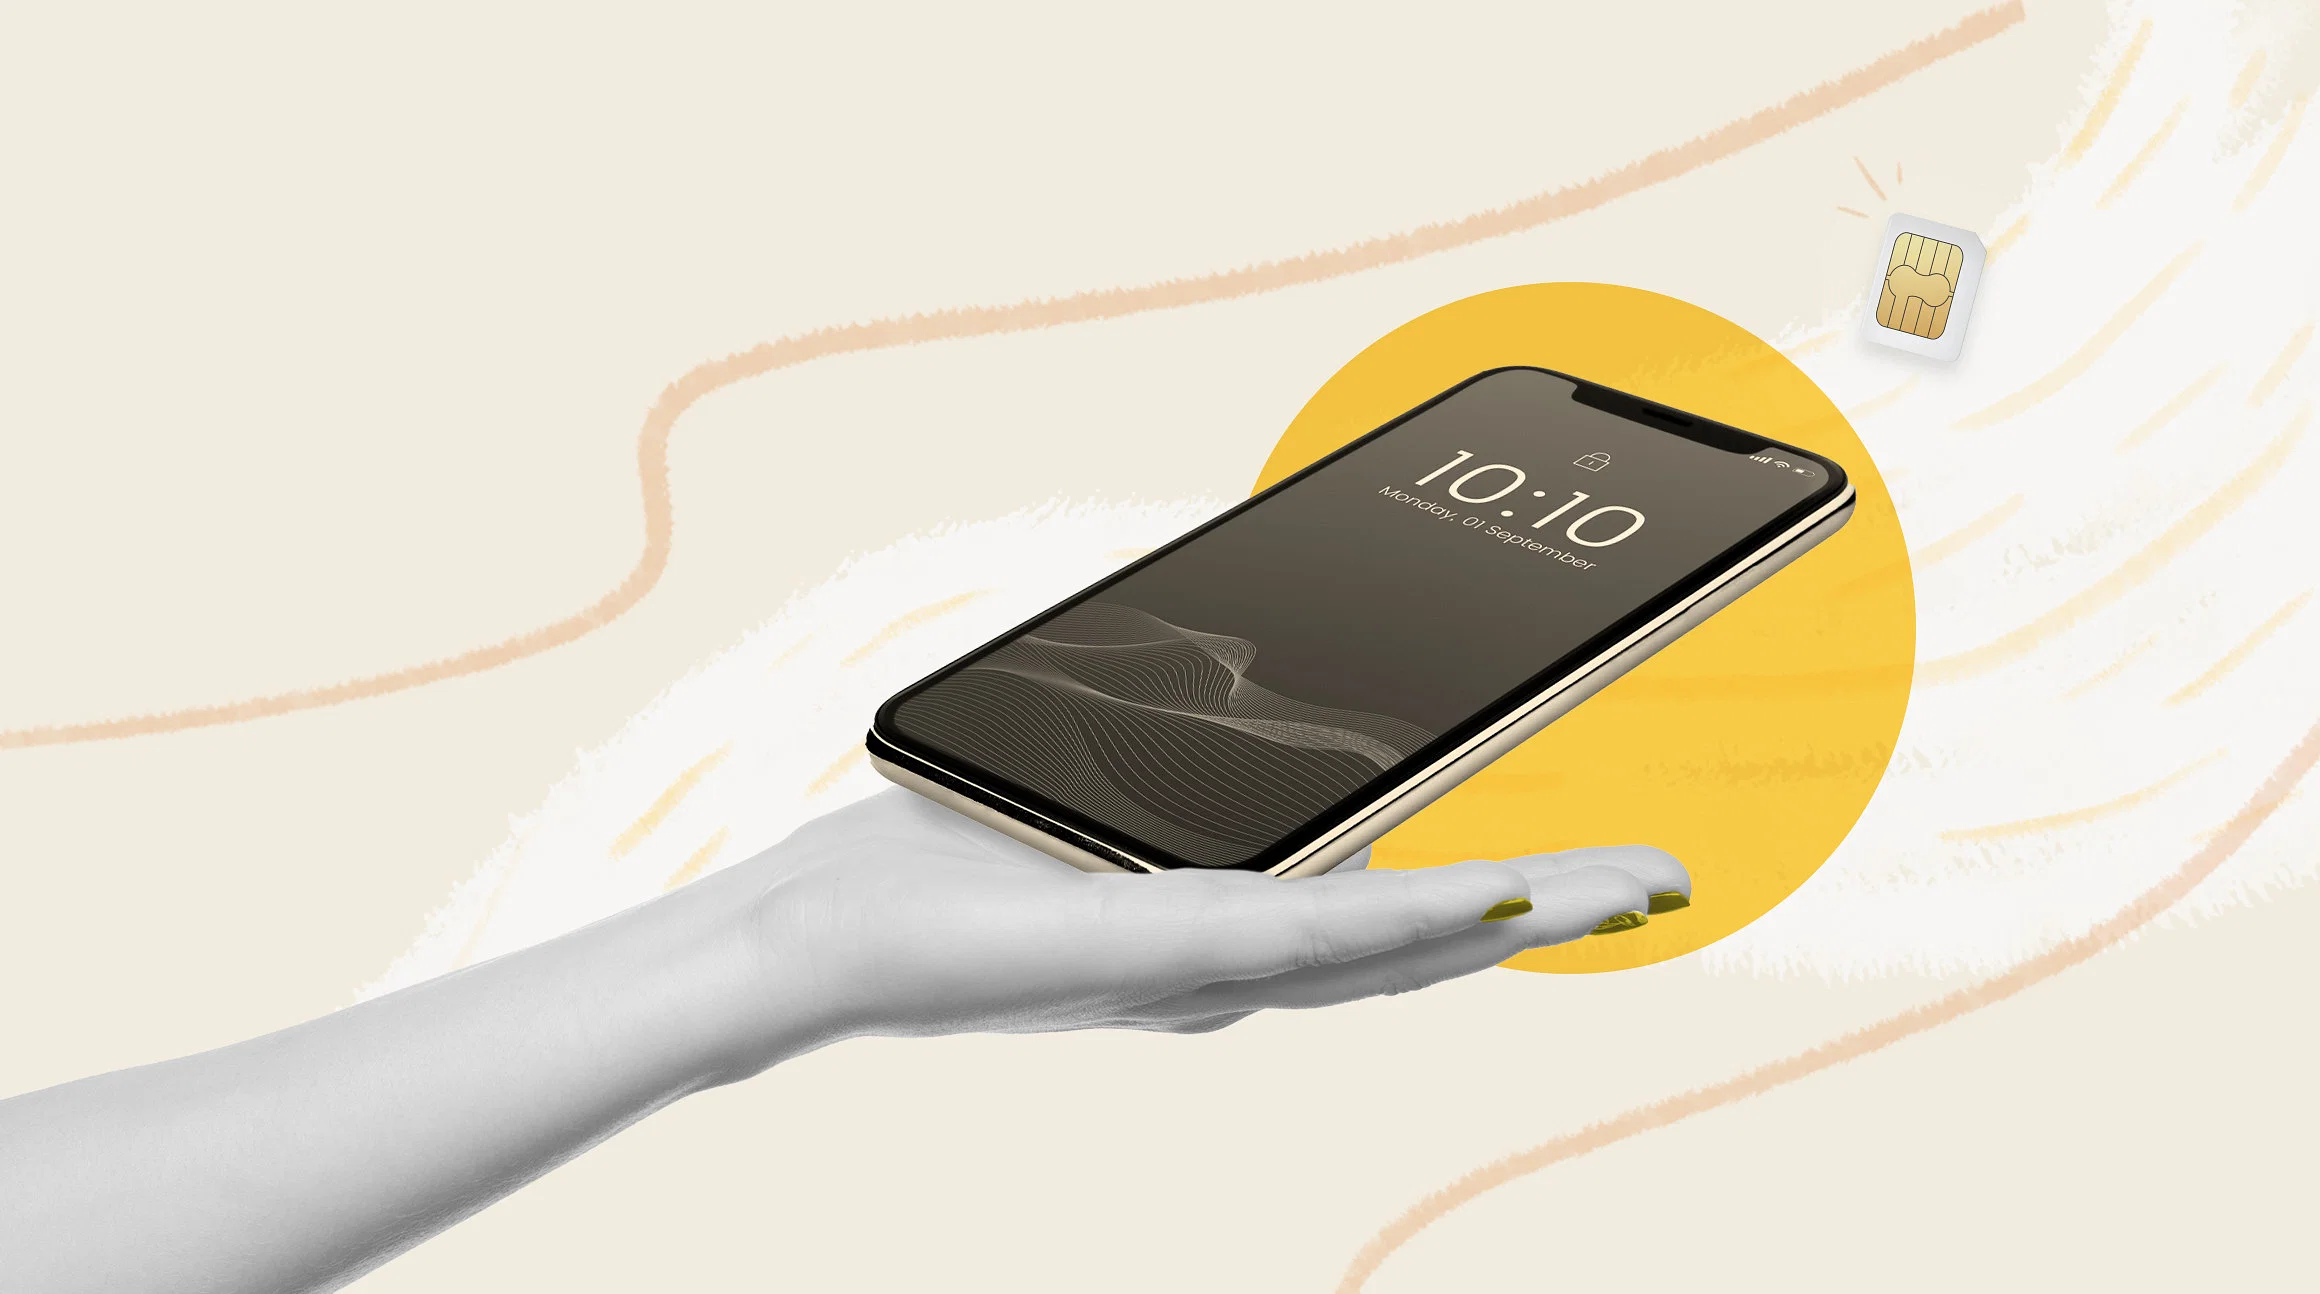
The SIM card, short for Subscriber Identity Module, plays a pivotal role in enabling cellular connectivity on your iPhone 13. It stores crucial information such as your phone number, carrier details, and other pertinent data essential for making calls, sending text messages, and accessing mobile data. Understanding the location of the SIM card tray and the steps involved in accessing it empowers you to manage your device's connectivity with confidence and ease.
By familiarizing yourself with the process of locating the SIM card on the iPhone 13, you gain the ability to troubleshoot connectivity issues, switch carriers, or upgrade to a new SIM card effortlessly. This knowledge not only enhances your overall iPhone 13 user experience but also equips you with the necessary skills to adapt to various mobile network requirements.
Join us as we embark on this journey to uncover the intricacies of the iPhone 13's SIM card location. Whether you're a seasoned iPhone user or a newcomer to the iOS ecosystem, this guide will equip you with the knowledge and expertise needed to navigate the world of SIM cards on the iPhone 13. Let's dive in and unlock the potential of your device by mastering the art of locating the SIM card tray.
Why Locate the SIM Card on iPhone 13
Locating the SIM card on your iPhone 13 is a fundamental aspect of understanding and managing your device's connectivity. Whether you're a tech enthusiast, a frequent traveler, or simply someone who values seamless communication, knowing the whereabouts of the SIM card tray is essential. Here's why locating the SIM card on your iPhone 13 holds significant importance:
-
Manage Cellular Connectivity: The SIM card is the linchpin of cellular connectivity on your iPhone 13. By knowing how to access the SIM card tray, you gain the ability to manage your device's connectivity more effectively. Whether you need to troubleshoot network issues, switch carriers, or upgrade to a new SIM card, understanding the SIM card's location empowers you to take control of your iPhone 13's connectivity.
-
Ensure Uninterrupted Communication: In today's fast-paced digital landscape, seamless communication is paramount. Locating the SIM card on your iPhone 13 ensures that you can swiftly address any connectivity-related concerns that may arise. Whether you're traveling abroad and need to switch to a local SIM card or simply want to upgrade to a new carrier, knowing how to access the SIM card tray guarantees uninterrupted communication on your iPhone 13.
-
Optimize Network Performance: Understanding the SIM card's location on the iPhone 13 enables you to optimize network performance. By being able to access the SIM card tray, you can easily swap SIM cards, troubleshoot signal issues, or implement carrier-specific settings to enhance your device's network performance. This level of control over your iPhone 13's connectivity ensures that you can tailor the device to suit your specific network requirements.
-
Empowerment and Flexibility: Knowing how to locate the SIM card on your iPhone 13 empowers you with the flexibility to adapt to diverse network scenarios. Whether you need to use a different SIM card for international travel, switch carriers for better coverage, or simply replace a damaged SIM card, the ability to access the SIM card tray grants you the freedom to customize your device's connectivity according to your needs.
In essence, locating the SIM card on your iPhone 13 is not just about physical access; it represents the gateway to managing, optimizing, and customizing your device's cellular connectivity. By mastering this fundamental aspect of iPhone 13 ownership, you gain the confidence and expertise needed to navigate the dynamic landscape of mobile networks and communication.
Tools Needed for Locating the SIM Card
To successfully locate the SIM card on your iPhone 13, you'll need a few essential tools to facilitate the process. These tools are readily available and are designed to simplify the task of accessing the SIM card tray with precision and ease. Here's a breakdown of the tools needed for locating the SIM card on your iPhone 13:
-
SIM Eject Tool: This small, specialized tool is indispensable for accessing the SIM card tray on the iPhone 13. Often included in the original packaging of your iPhone 13, the SIM eject tool is a slender, metallic instrument designed specifically for ejecting the SIM card tray from the device. Its slim profile and precise tip allow for seamless insertion into the SIM card tray's eject hole, enabling you to effortlessly retrieve the tray and access the SIM card.
-
Good Lighting: While not a physical tool, good lighting is essential for locating the SIM card on your iPhone 13. Adequate illumination ensures that you can clearly identify the location of the SIM card tray, minimizing the risk of any mishaps during the process. Whether you're indoors or outdoors, ensuring sufficient lighting will enhance the visibility of the SIM card tray and facilitate a smooth and efficient retrieval of the SIM card.
-
Stable Work Surface: Having a stable work surface is crucial for performing the task of locating the SIM card on your iPhone 13. Whether it's a table, desk, or any flat surface, a stable platform provides the necessary support for your device and allows you to work with precision and confidence. A stable work surface minimizes the risk of accidental drops or slips during the SIM card retrieval process, ensuring a secure and controlled environment for accessing the SIM card tray.
By ensuring that you have the SIM eject tool, good lighting, and a stable work surface at your disposal, you'll be well-equipped to navigate the process of locating the SIM card on your iPhone 13 with ease and precision. These tools are designed to streamline the task, empowering you to manage your device's connectivity efficiently and confidently. With the right tools at your fingertips, you can embark on the journey to uncover the SIM card tray on your iPhone 13 and harness the full potential of your device's cellular connectivity.
Step 1: Power off the iPhone 13
Before embarking on the task of locating the SIM card on your iPhone 13, it is crucial to initiate the process by powering off the device. This preliminary step ensures that you can safely access the SIM card tray without the risk of disrupting the device's functionality or causing any potential damage. Powering off the iPhone 13 sets the stage for a controlled and secure environment in which to proceed with locating the SIM card.
To power off your iPhone 13, follow these simple yet essential steps:
-
Locate the Side Button: The side button, located on the right side of the iPhone 13, serves as the primary control for powering off the device. It is essential to identify this button before proceeding with the power-off sequence.
-
Press and Hold the Side Button: Press and hold the side button along with either the volume up or volume down button until the "slide to power off" slider appears on the screen. The volume buttons are located on the left side of the iPhone 13. Holding both the side button and either volume button simultaneously initiates the power-off sequence.
-
Slide to Power Off: Once the "slide to power off" slider is displayed on the screen, use your finger to slide the on-screen control from left to right. This action confirms your intention to power off the iPhone 13.
-
Wait for the Device to Power Off: After sliding the on-screen control, wait for the iPhone 13 to complete the power-off process. The screen will turn black, indicating that the device is powered off and ready for the next steps in locating the SIM card.
By meticulously following these steps to power off your iPhone 13, you create a safe and controlled environment in which to proceed with accessing the SIM card tray. This foundational step sets the stage for a seamless and secure SIM card retrieval process, ensuring that you can navigate the subsequent steps with confidence and precision. With the iPhone 13 powered off, you are now ready to move on to the next phase of locating the SIM card and uncovering the gateway to seamless cellular connectivity on your device.
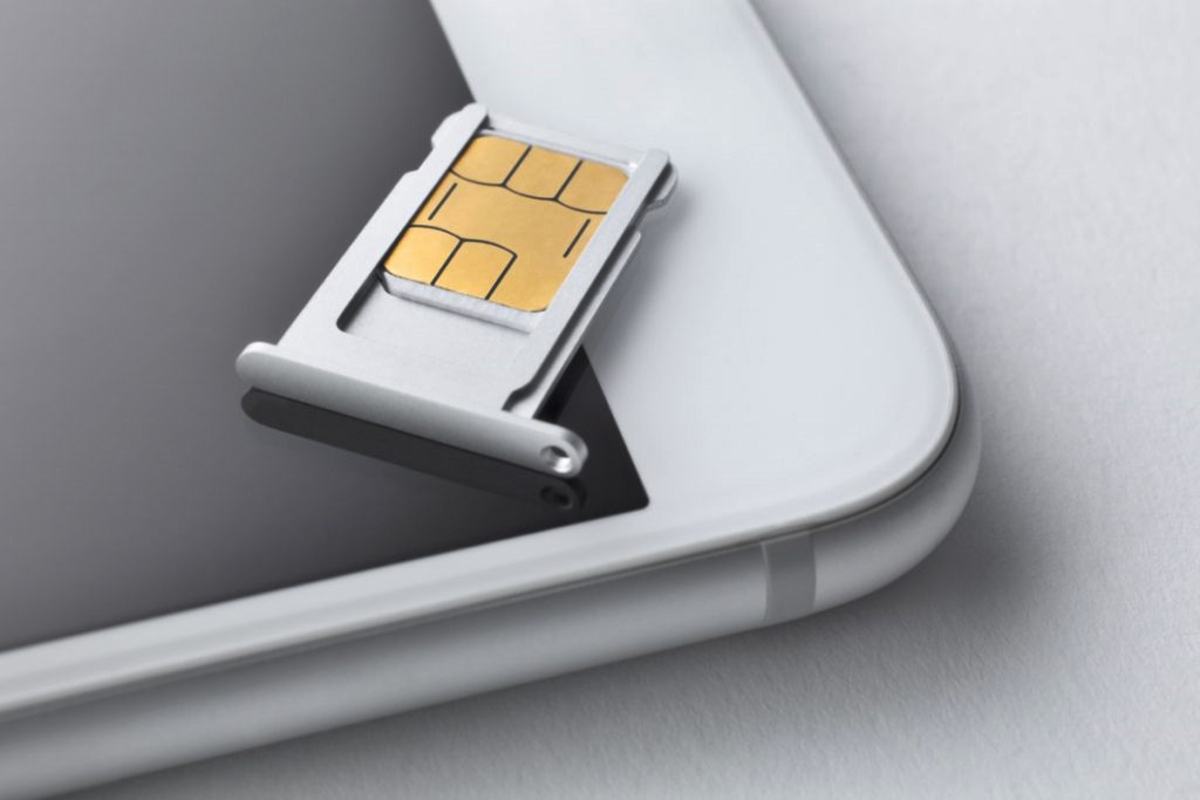
Step 2: Locate the SIM Card Tray
After powering off your iPhone 13, the next crucial step is to locate the SIM card tray. The SIM card tray houses the SIM card and is designed to be easily accessible for insertion, removal, or replacement of the SIM card. To locate the SIM card tray on your iPhone 13, follow these detailed steps:
-
Identify the SIM Card Tray Slot: The SIM card tray slot is typically located on the right side of the iPhone 13. It is essential to familiarize yourself with the physical layout of the device to pinpoint the exact location of the SIM card tray slot. The slot is discreetly integrated into the device's frame and is designed to blend seamlessly with the overall aesthetic of the iPhone 13.
-
Inspect the Right Side of the Device: Turn your iPhone 13 to the right side and visually inspect the area for a small, symmetrical slot. The SIM card tray slot is usually accompanied by a tiny pinhole, which serves as the entry point for the SIM eject tool. This pinhole allows for the insertion of the SIM eject tool to initiate the release of the SIM card tray.
-
Ensure Adequate Lighting: As you inspect the right side of your iPhone 13, ensure that you have adequate lighting to clearly identify the SIM card tray slot. Good lighting is crucial for this step, as it enhances visibility and minimizes the risk of overlooking the slot. Position the device in a well-lit environment or use an external light source if necessary.
-
Take Note of the Tray's Position: The SIM card tray slot is positioned in close proximity to the device's volume buttons on the right side. By taking note of its relative position to the volume buttons, you can accurately pinpoint the location of the SIM card tray and prepare to access it with precision.
By meticulously following these steps, you can successfully locate the SIM card tray on your iPhone 13. This foundational step paves the way for accessing the SIM card tray with confidence and sets the stage for the subsequent steps in the process. With the SIM card tray identified, you are now ready to proceed to the next phase of the SIM card retrieval process and continue on the journey to unlock the full potential of your iPhone 13's connectivity.
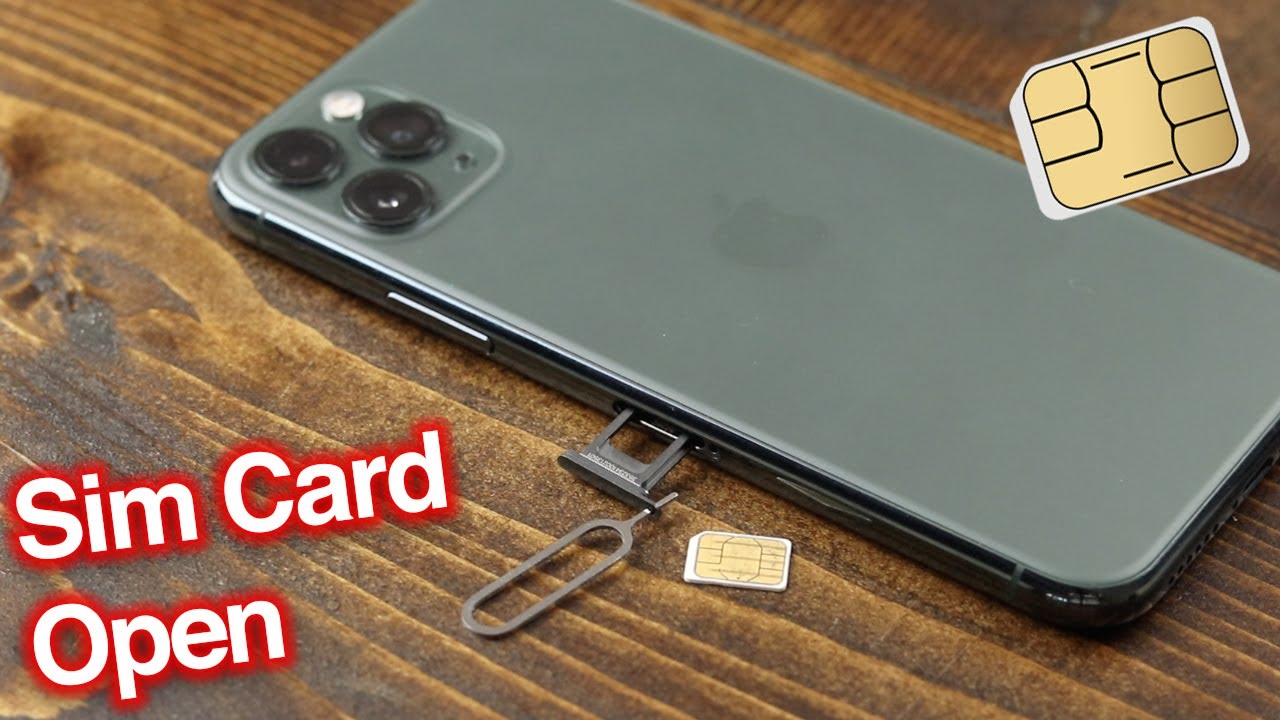
Step 3: Insert the SIM Eject Tool
With the SIM card tray located on your iPhone 13, the next crucial step is to insert the SIM eject tool into the designated pinhole, initiating the release of the SIM card tray. This step requires precision and care to ensure that the SIM card tray is safely ejected from the device. Here's a detailed walkthrough of the process:
-
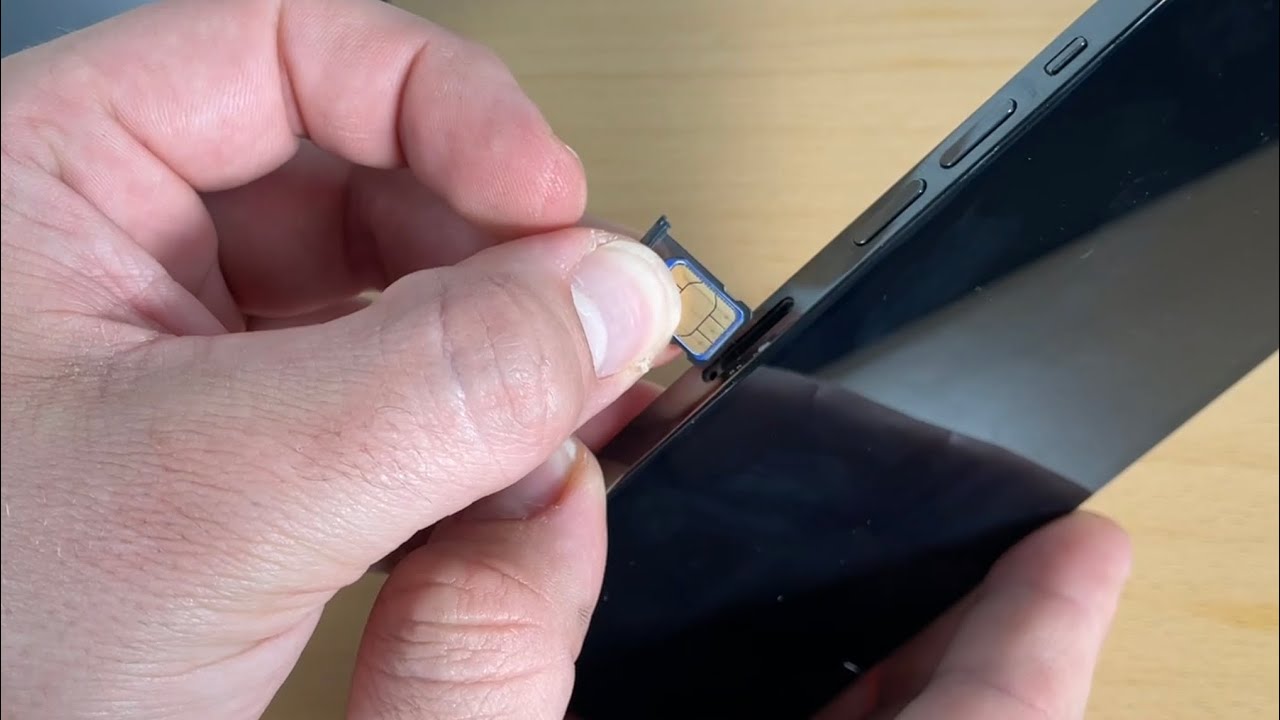
Retrieve the SIM Eject Tool: Begin by retrieving the SIM eject tool, a slender metallic instrument that is typically included in the original packaging of your iPhone 13. The SIM eject tool features a fine, pointed tip designed to fit into the pinhole adjacent to the SIM card tray slot. Ensure that you have the SIM eject tool readily available before proceeding with this step.
-
Align the SIM Eject Tool: Hold the iPhone 13 securely in one hand, and with the other hand, carefully align the pointed tip of the SIM eject tool with the pinhole located near the SIM card tray slot. It's essential to align the tool perpendicular to the device's frame to ensure a smooth and controlled insertion.
-
Insert the SIM Eject Tool: Gently insert the pointed tip of the SIM eject tool into the pinhole until you feel a slight resistance. This indicates that the tool has engaged with the internal mechanism responsible for releasing the SIM card tray. Exercise caution and avoid applying excessive force to prevent any damage to the device.
-
Apply Even Pressure: Once the SIM eject tool is inserted into the pinhole, apply even pressure to depress the internal mechanism. This action triggers the release of the SIM card tray, causing it to protrude slightly from the device. Exercise patience and maintain steady pressure to ensure a controlled ejection of the SIM card tray.
-
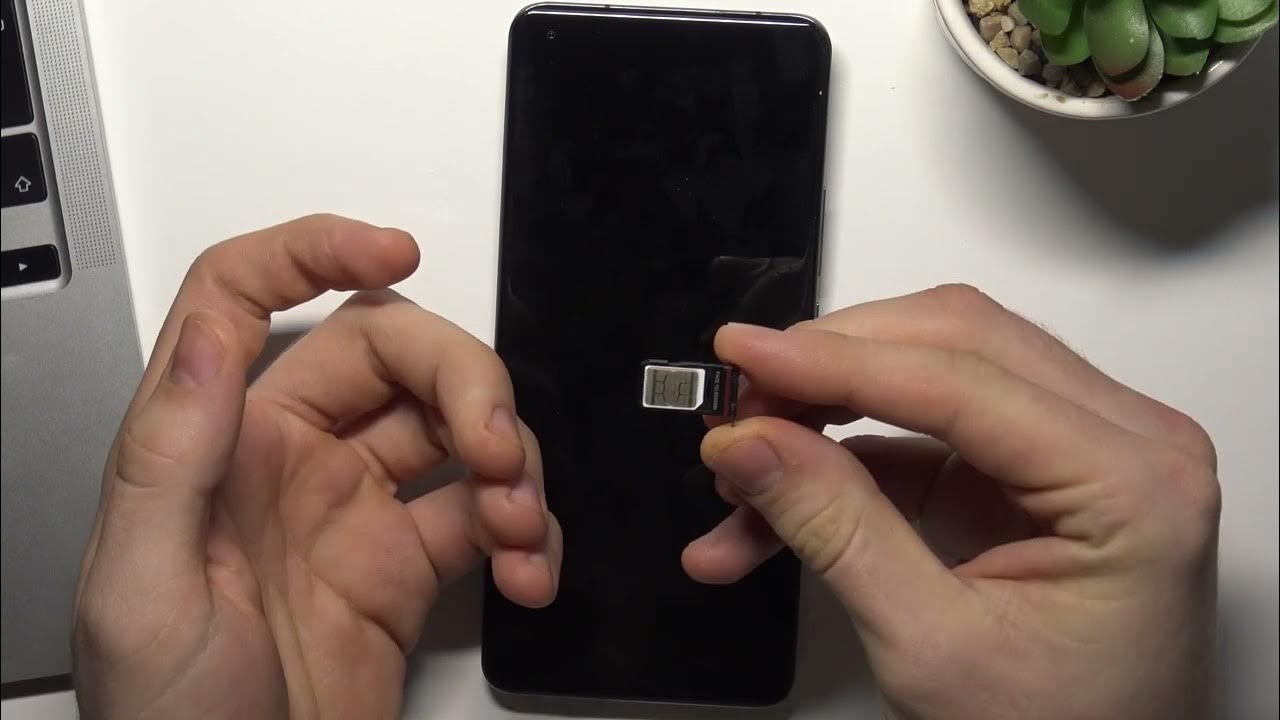
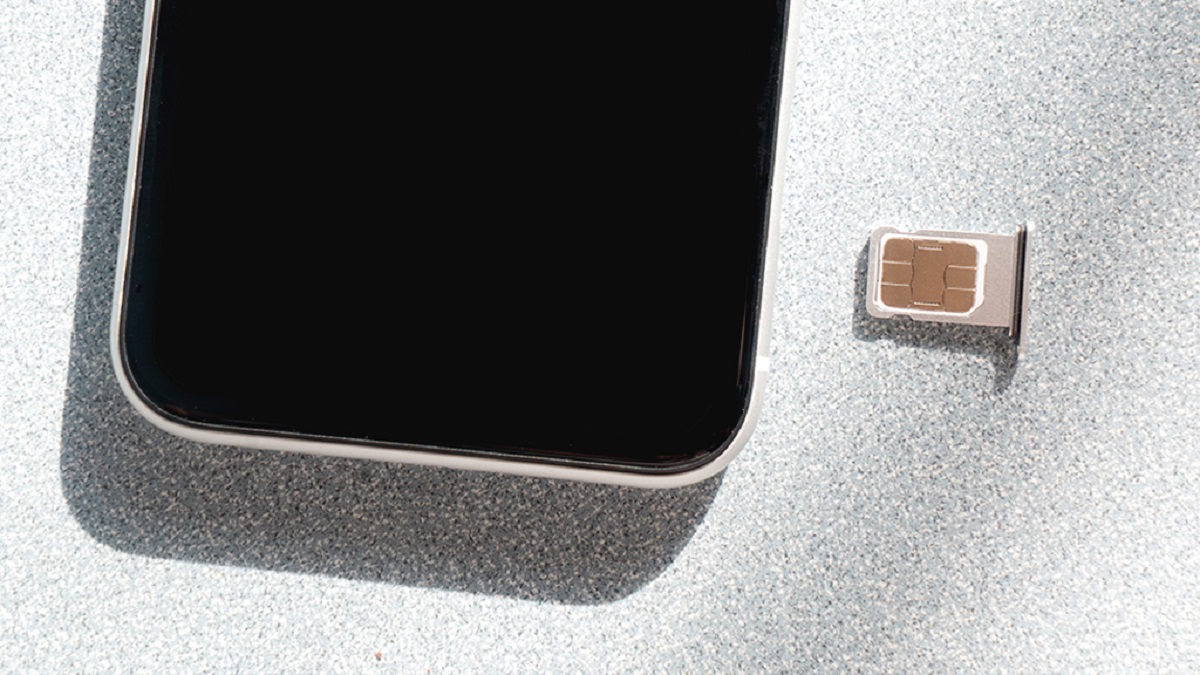
Retrieve the SIM Card Tray: As the SIM card tray protrudes from the device, carefully grasp it with your fingers and pull it out gently. The SIM card tray is designed to slide out smoothly, revealing the compartment where the SIM card is housed. Exercise care to prevent any accidental drops or mishandling of the SIM card tray.
By meticulously following these steps to insert the SIM eject tool and release the SIM card tray, you can navigate this essential phase of the process with precision and confidence. With the SIM card tray successfully ejected from the device, you are now ready to proceed to the subsequent steps and continue the journey to access and manage the SIM card on your iPhone 13.
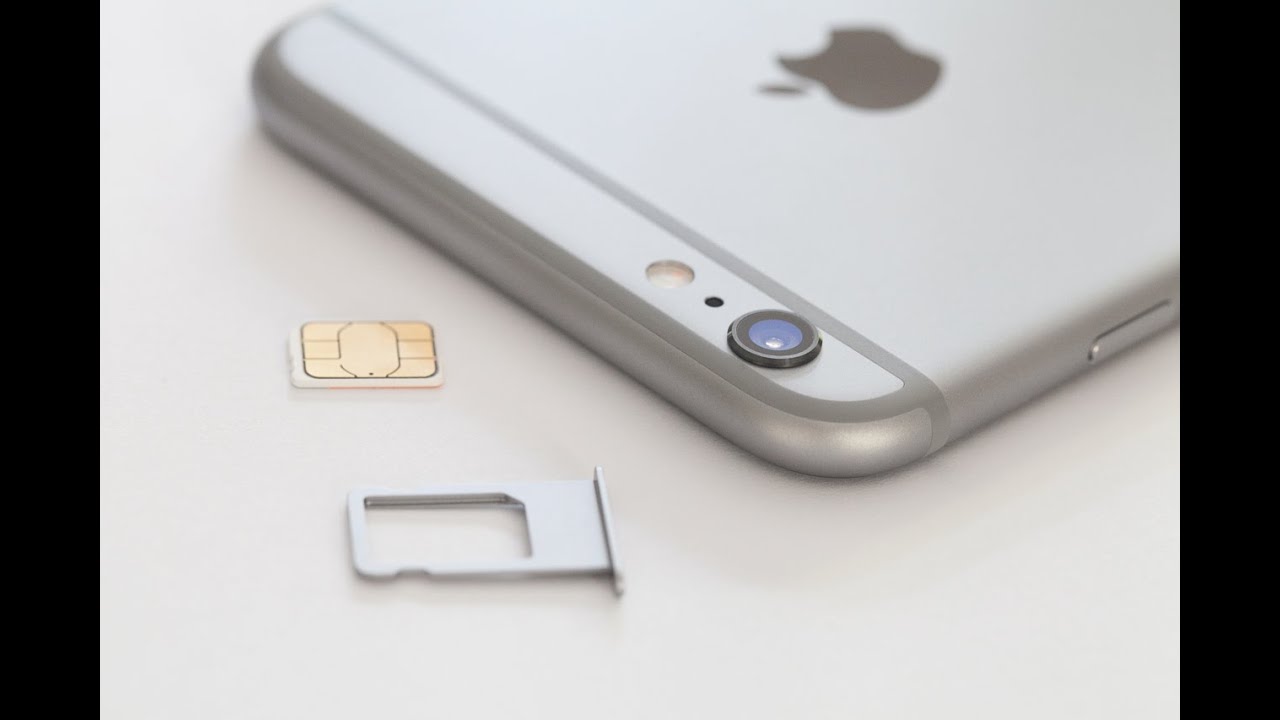
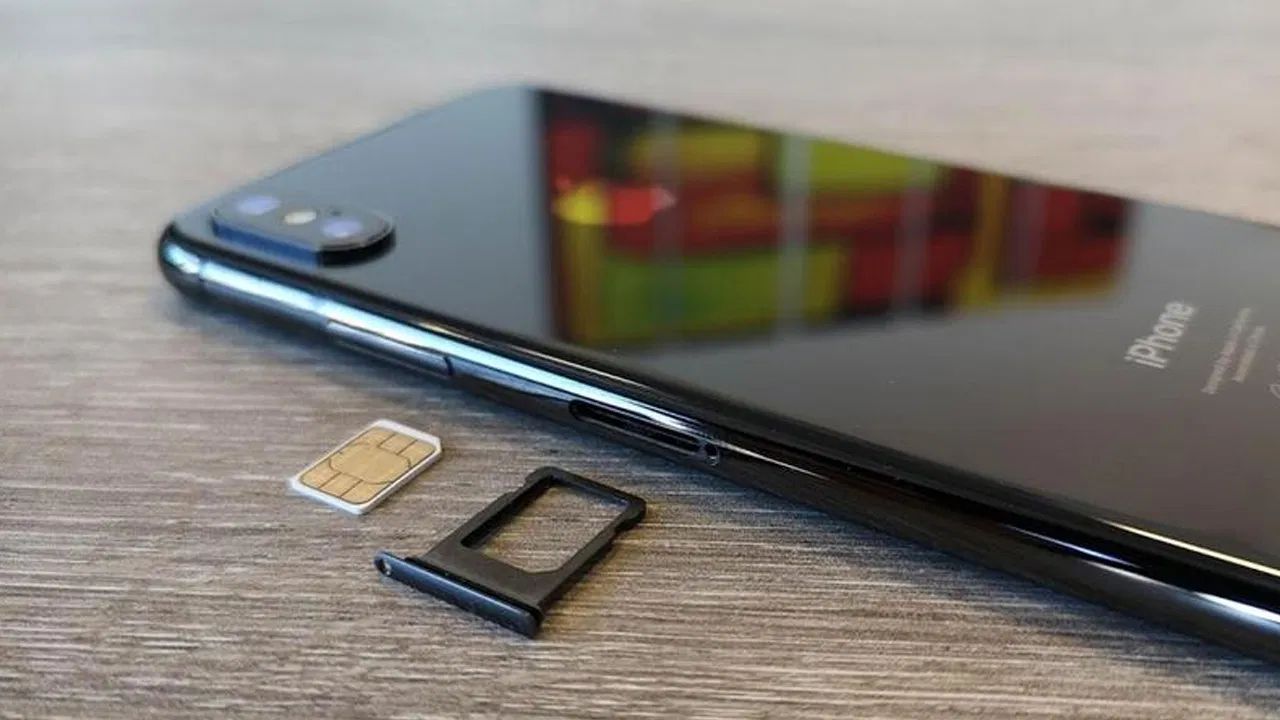
Step 4: Remove the SIM Card Tray
With the SIM card tray successfully ejected from your iPhone 13, the next crucial step is to carefully remove the SIM card tray from the device. This step requires precision and attentiveness to ensure the safe handling and extraction of the SIM card tray. Here's a detailed walkthrough of the process:
-
Inspect the SIM Card Tray: Before proceeding with the removal, take a moment to inspect the SIM card tray and familiarize yourself with its design. The tray features a small compartment where the SIM card is securely placed. It's essential to visually identify the SIM card within the tray and take note of its positioning.
-
Gently Extract the SIM Card Tray: With the SIM card tray protruding from the device, gently grasp the tray with your fingers, ensuring a secure and controlled grip. Exercise caution as you carefully slide the SIM card tray out of the device. It's important to maintain a steady and deliberate motion to prevent any jarring movements that may dislodge the SIM card.
-
Retrieve the SIM Card: As the SIM card tray is fully removed from the device, inspect the compartment to locate the SIM card. The SIM card is typically nestled within a small holder or slot within the tray. Carefully extract the SIM card from the tray, ensuring that it remains securely positioned within its designated space.
-
Handle the SIM Card with Care: Once the SIM card is extracted from the tray, handle it with care to avoid any damage to the delicate components. Avoid touching the metallic contacts on the SIM card and refrain from bending or scratching it. The SIM card houses vital information and must be handled with the utmost care and precision.
-
Set the SIM Card Tray Aside: After removing the SIM card, set the SIM card tray aside in a secure location. Keeping track of the tray ensures that it remains readily accessible when it's time to reinsert the SIM card or replace it with a new one. Placing the tray in a safe and designated spot minimizes the risk of misplacement.
By meticulously following these steps to remove the SIM card tray and extract the SIM card, you can navigate this essential phase of the process with precision and confidence. With the SIM card securely in your possession and the SIM card tray set aside, you are now prepared to proceed to the subsequent steps and continue the journey to manage the SIM card on your iPhone 13.
Step 5: Insert or Replace the SIM Card
With the SIM card tray in hand and the SIM card extracted, you are now ready to proceed with the pivotal step of inserting or replacing the SIM card in your iPhone 13. Whether you are setting up your device for the first time, switching to a new SIM card, or replacing an existing one, this step is essential for establishing seamless cellular connectivity. Here's a detailed guide on how to insert or replace the SIM card in your iPhone 13:
-
Prepare the SIM Card: Before proceeding with the insertion or replacement, take a moment to inspect the SIM card. Ensure that it is free from any visible damage, such as scratches or bends. The SIM card houses crucial information, and a pristine condition is essential for optimal functionality.
-
Position the SIM Card Tray: With the SIM card tray in hand, carefully align the SIM card within the designated slot in the tray. The SIM card is designed to fit securely within the slot, ensuring proper alignment and contact with the device's internal components.
-
Gently Insert the SIM Card: Once the SIM card is positioned within the tray, gently slide the SIM card tray back into the device. Exercise caution and ensure a smooth and controlled insertion to prevent any potential damage to the SIM card or the device's SIM card slot.
-
Verify Secure Placement: After inserting the SIM card tray, verify that it is securely positioned within the device. The tray should fit snugly into the slot, with no protrusions or misalignments. This ensures that the SIM card makes proper contact with the device's internal components.
-
Replace the SIM Card Tray: With the SIM card securely inserted, carefully push the SIM card tray back into the device until it sits flush with the iPhone 13's frame. Ensure that the tray is aligned properly and that it seamlessly integrates with the device's design.
By following these steps with precision and care, you can successfully insert or replace the SIM card in your iPhone 13. This crucial phase sets the stage for establishing seamless cellular connectivity and enables you to harness the full potential of your device's communication capabilities. With the SIM card securely in place, you are now ready to proceed to the final steps and power on your iPhone 13, embarking on a journey of uninterrupted connectivity and communication.
Step 6: Reinsert the SIM Card Tray
After successfully inserting or replacing the SIM card in your iPhone 13, the next crucial step is to reinsert the SIM card tray back into the device. This step is essential for securing the SIM card within the iPhone 13 and ensuring seamless connectivity. Here's a detailed guide on how to reinsert the SIM card tray with precision and care:
-
Align the SIM Card Tray: Hold the SIM card tray securely, ensuring that the SIM card is positioned within the designated slot. Take a moment to verify that the SIM card is securely placed within the tray, with no protrusions or misalignments.
-
Position the Tray Correctly: With the SIM card tray in hand, align it carefully with the SIM card slot on the right side of your iPhone 13. The tray is designed to fit seamlessly into the device, ensuring a secure and flush integration with the iPhone 13's frame.
-
Gently Slide the Tray In: Once aligned, gently slide the SIM card tray back into the device, ensuring a smooth and controlled insertion. Exercise caution to prevent any jarring movements that may dislodge the SIM card or damage the device's SIM card slot.
-
Verify Secure Placement: After reinserting the SIM card tray, verify that it is securely positioned within the device. The tray should fit snugly into the slot, with no gaps or inconsistencies. This ensures that the SIM card remains securely housed within the iPhone 13.
-
Test the Tray: Once the SIM card tray is reinserted, perform a gentle test by pressing on the tray to ensure that it sits flush with the device's frame. A secure fit indicates that the SIM card tray has been successfully reinserted and is ready to facilitate seamless connectivity.
By meticulously following these steps to reinsert the SIM card tray, you can navigate this essential phase of the process with precision and confidence. With the SIM card securely housed within the iPhone 13 and the tray seamlessly integrated into the device, you are now prepared to proceed to the final step and power on your iPhone 13, embarking on a journey of uninterrupted connectivity and communication.
Step 7: Power on the iPhone 13
After successfully completing the intricate process of accessing and managing the SIM card on your iPhone 13, the final step involves powering on the device to initiate seamless connectivity and communication. This pivotal phase marks the culmination of the SIM card retrieval and insertion process, setting the stage for you to experience the full spectrum of your device's capabilities. Here's a detailed guide on how to power on your iPhone 13 and embark on a journey of uninterrupted connectivity:
-
Press and Hold the Side Button: To power on your iPhone 13, locate the side button on the right side of the device. Press and hold this button until the Apple logo appears on the screen. The side button serves as the primary control for initiating the power-on sequence, and holding it down activates the device's internal systems, preparing it for operation.
-
Wait for the Apple Logo: As you hold down the side button, keep a watchful eye on the screen for the iconic Apple logo to make its appearance. The appearance of the Apple logo indicates that the device is powering on and initializing its various components, including the SIM card, to establish connectivity with your mobile network.
-
Release the Side Button: Once the Apple logo appears on the screen, release the side button. This action signifies that the iPhone 13 has successfully powered on and is ready for use. The device undergoes a series of internal checks and configurations to ensure that all systems are operational and that the SIM card is recognized for seamless connectivity.
-
Unlock the Device: After the iPhone 13 has powered on, you'll be prompted to unlock the device using your preferred method, such as Face ID, Touch ID, or a passcode. This step ensures that the device's security features are engaged, providing you with secure access to its functionalities and enabling you to explore its array of communication and connectivity options.
-
Experience Seamless Connectivity: With the iPhone 13 powered on and unlocked, you are now poised to experience seamless connectivity and communication. The device is ready to leverage the capabilities of the SIM card, enabling you to make calls, send messages, and access mobile data with ease. Whether you're connecting with loved ones, conducting business, or exploring the digital realm, the iPhone 13 stands ready to empower your communication endeavors.
By meticulously following these steps to power on your iPhone 13, you culminate the process of locating the SIM card and embark on a journey of uninterrupted connectivity and communication. With the device powered on and ready to serve as your communication hub, you can explore its myriad features and capabilities, leveraging the power of the SIM card to stay connected in today's dynamic digital landscape.
Conclusion
In conclusion, the process of locating the SIM card on the iPhone 13 is a fundamental aspect of managing and optimizing the device's cellular connectivity. By following the comprehensive guide outlined in this article, you have gained valuable insights and practical knowledge to navigate the intricacies of accessing and managing the SIM card on your iPhone 13 with confidence and precision.
Understanding the significance of locating the SIM card on your iPhone 13 empowers you to take control of your device's connectivity, ensuring uninterrupted communication, optimized network performance, and the flexibility to adapt to diverse network scenarios. Whether you are setting up a new iPhone 13, troubleshooting connectivity issues, or switching to a new SIM card, the ability to access and manage the SIM card tray equips you with the necessary skills to tailor your device's connectivity according to your specific needs.
The journey to uncover the SIM card tray on the iPhone 13 has provided you with a deeper understanding of the device's internal mechanisms and has equipped you with the expertise needed to handle the SIM card retrieval and insertion process with ease. By leveraging the right tools, exercising precision, and following the step-by-step instructions, you have successfully accessed, managed, and secured the SIM card within your iPhone 13, setting the stage for seamless communication and connectivity.
As you power on your iPhone 13 and embark on a journey of uninterrupted connectivity, remember that the knowledge and skills you have acquired through this guide empower you to harness the full potential of your device's communication capabilities. The ability to manage the SIM card on your iPhone 13 positions you as a confident and informed user, ready to adapt to diverse network scenarios and embrace the dynamic landscape of mobile communication.
With the SIM card securely in place and the iPhone 13 powered on, you are now poised to explore the myriad features and capabilities of your device, leveraging the power of the SIM card to stay connected, communicate effortlessly, and navigate the digital realm with confidence and ease.