Introduction
Facebook Pay is a convenient and secure payment feature that allows users to make payments, send money, and shop within the Facebook platform. It enables you to link your debit or credit cards to your Facebook account, making it easy to make transactions on the platform without the need to repeatedly enter your card details. However, there may come a time when you want to delete a card from your Facebook Pay account. Whether you’ve lost the card, got a new one, or simply want to remove an old card for security reasons, the process is straightforward.
In this guide, we will walk you through the step-by-step process of how to delete a card from Facebook Pay. We’ll cover everything from accessing your Facebook Pay settings to confirming the deletion of the card. So, whether you’re using Facebook Pay for the first time or you’re already familiar with the feature, read on to discover how to remove a card from Facebook Pay effortlessly.
Step 1: Go to Facebook Pay settings
To begin the process of deleting a card from Facebook Pay, you need to access your Facebook Pay settings. Follow these simple steps to get started:
- Open the Facebook app on your mobile device or visit the Facebook website on your computer and log in with your account credentials.
- On the Facebook homepage, locate the menu icon (three horizontal lines) on the top right corner of the screen.
- Tap or click on the menu icon to expand the menu options.
- Scroll down the menu and find the “Settings & Privacy” section. Tap or click on it to expand the subsection.
- Within the “Settings & Privacy” section, locate and tap or click on “Settings.”
- On the “Settings” page, look for the “Facebook Pay” option. Tap or click on it to access your Facebook Pay settings.
Once you’ve reached the Facebook Pay settings page, you’re ready to proceed to the next step of removing the card from your account. It’s important to note that Facebook Pay settings may vary slightly depending on the device and app version you’re using. However, the general navigation remains the same.
Step 2: Select the payment method
After accessing your Facebook Pay settings, the next step is to select the payment method you want to remove. Here’s what you need to do:
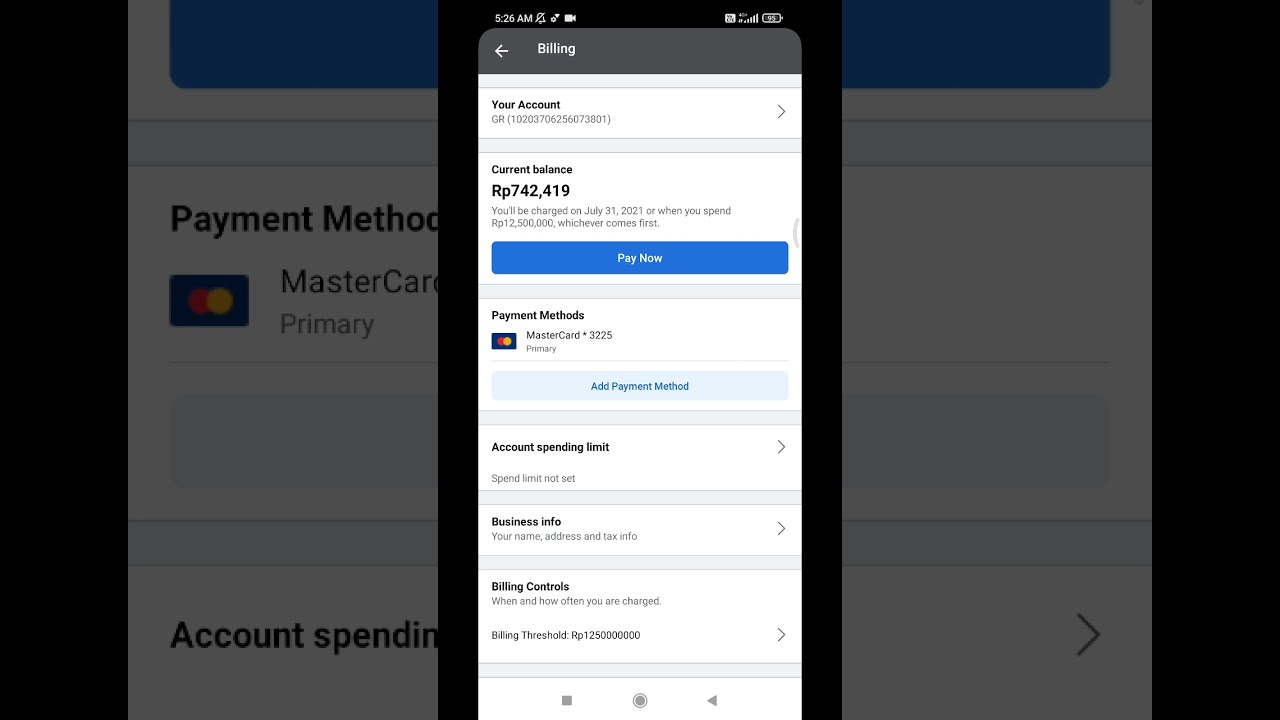
- On the Facebook Pay settings page, you’ll see a list of the payment methods currently linked to your account. These can include debit cards, credit cards, and other payment options.
- Review the list of payment methods and identify the card you wish to delete. Take note of the card’s name and the last few digits of its number to ensure you select the correct one.
- Tap or click on the card you want to remove. This will open the card details and additional options.
- Within the card details section, you may see options such as “Edit” or “Remove.” Tap or click on the relevant option to remove the card.
It’s important to double-check the card details before proceeding to ensure you’re selecting the correct card for removal. Facebook Pay allows you to have multiple payment methods linked to your account, so it’s crucial to choose the right one to delete. Additionally, the options and layout may vary slightly depending on your device and Facebook app version.
Step 3: Remove the card from Facebook Pay
Now that you have selected the payment method you want to delete, it’s time to remove the card from Facebook Pay. Follow these steps to complete the process:
- Once you’ve opened the card details, you will find the option to remove the card. It may be labeled as “Remove Card,” “Delete Card,” or a similar variation. Tap or click on this option to proceed.
- You may be prompted to confirm your decision to remove the card. This is an added security measure to ensure you don’t accidentally delete a card. If prompted, review the confirmation message and tap or click “Confirm,” “Yes,” or a similar option.
- Facebook will then proceed to remove the selected card from your Facebook Pay account. Depending on your device and internet connection, it may take a few moments to complete the removal process.
During this step, it’s crucial to be confident in your decision to delete the card. Once the card is removed from Facebook Pay, you won’t be able to use it for future transactions on the platform unless you link it again. Take your time to ensure you’re removing the correct card and that you have any alternative payment methods available if needed.
Step 4: Confirm the card deletion
After initiating the card removal process, Facebook will ask you to confirm your decision to delete the card from your Facebook Pay account. Follow these final steps to confirm the card deletion:
- Once the card removal process is complete, you will receive a confirmation message on your screen. This message will typically include details about the card that was deleted, such as the card name or last few digits of its number.
- Review the confirmation message carefully to ensure that the correct card has been removed. It’s crucial to double-check this information to avoid any unintended deletions.
- If you’re satisfied with the confirmation details, you can proceed by tapping or clicking “OK,” “Done,” or a similar option to complete the process.
By confirming the card deletion, you have successfully removed the selected card from your Facebook Pay account. You can now rest assured that the card will no longer be associated with your Facebook transactions. However, it’s important to note that any pending or recurring payments linked to the deleted card may need to be updated or canceled separately to avoid any disruptions in your payments.
If you have multiple cards linked to your Facebook Pay account and wish to remove additional cards, you can simply repeat the steps outlined above for each card you want to delete. Facebook Pay offers the flexibility to manage your payment methods and ensure that you have full control over your transactions within the platform.
Conclusion
Deleting a card from your Facebook Pay account is a simple process that can be done in just a few steps. By accessing your Facebook Pay settings, selecting the payment method, removing the card, and confirming the deletion, you can easily manage and update your linked payment methods. Whether you need to remove an expired card, replace a lost card, or simply declutter your payment options, Facebook Pay provides the flexibility to do so.
Remember, when deleting a card from Facebook Pay, it’s important to double-check that you’re removing the correct card. Take your time to review the card details and confirmation messages to ensure accuracy and avoid any unintended deletions. Additionally, keep in mind that any pending or recurring payments associated with the deleted card may need to be updated or canceled separately.
Now that you’re familiar with the process of deleting a card from Facebook Pay, you have the control and flexibility to manage your payment methods within the platform. Whether you’re using Facebook Pay for personal transactions or business purposes, removing an unwanted card is a simple way to keep your payment options up to date and secure.
So, the next time you want to delete a card from Facebook Pay, follow the steps outlined in this guide, and enjoy a streamlined payment experience on the Facebook platform.