Introduction
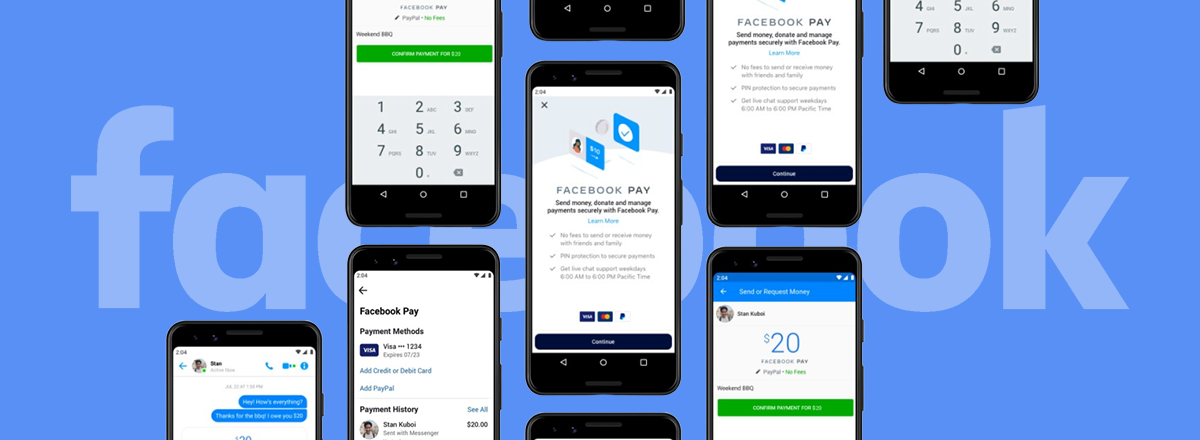
Setting up Facebook Pay on your iPhone allows you to make easy and secure payments for various services within the Facebook ecosystem. Whether you want to donate to a cause, purchase items from the Facebook Marketplace, or send money to friends, Facebook Pay provides a convenient and hassle-free way to handle transactions.
By integrating your preferred payment method, such as a credit or debit card, Facebook Pay streamlines the payment process and eliminates the need for entering your payment details each time you make a purchase. Additionally, Facebook Pay ensures that your financial information is protected with advanced security measures, giving you peace of mind while conducting transactions.
In this guide, we will walk you through the step-by-step process of setting up Facebook Pay on your iPhone. From accessing the settings to adding and verifying your payment method, we will cover everything you need to know to get started with Facebook Pay.
Whether you’re a seasoned Facebook user or just getting started with the platform, this guide will help you navigate the process with ease. So, grab your iPhone, follow along, and let’s get your Facebook Pay set up in no time.
Step 1: Open the Settings app
The first step in setting up Facebook Pay on your iPhone is to open the Settings app. This is where you can access the various settings and configurations for your device.
To open the Settings app, locate the app icon on your iPhone’s home screen. The icon resembles a gear or cogwheel. Tap on the icon to launch the Settings app.
Once you’re in the Settings app, you will see a list of different categories and options. This is where you can customize your iPhone’s settings according to your preferences.
If you’re having trouble finding the Settings app on your home screen, you can use the Spotlight Search feature. Swipe down on the home screen to reveal the search bar at the top. Type in “Settings” and the app icon should appear in the search results. Tap on it to open the Settings app.
Alternatively, you can also use Siri to open the Settings app. Simply activate Siri by pressing and holding the home button or using the “Hey Siri” voice command. Then say “Open Settings” and Siri will launch the app for you.
Once you have successfully opened the Settings app, you have taken the first step towards setting up Facebook Pay on your iPhone. Now, it’s time to move on to the next step in the process.
Step 2: Tap on your name at the top
Now that you have opened the Settings app on your iPhone, the next step is to tap on your name at the top of the screen. This will take you to your Apple ID settings, where you can manage various aspects of your Apple account.
When you tap on your name, you will be directed to a new page that displays your Apple ID information. Here, you can access settings related to your iCloud, iTunes & App Store, Family Sharing, and more.
The option to tap on your name is located at the topmost section of the Settings app, just below the search bar. It is important to note that the exact placement of your name may vary slightly depending on the version of iOS you are using.
By tapping on your name, you are essentially accessing the hub for managing your Apple ID and associated settings. This is where you can make changes to your account, view purchase history, and update your personal information.
If you are using iOS 14 or later, you may see a personalized profile picture or an Animoji associated with your Apple ID. This adds a touch of personalization to your device and makes it easier to identify your account.
Once you have successfully tapped on your name, you have completed the second step of the Facebook Pay setup process. Now, it’s time to move on to the next step and proceed further with configuring your payment settings.
Step 3: Select “Payment & Shipping”
After tapping on your name in the Settings app, you will be directed to your Apple ID settings page. Scroll down until you see the “Payment & Shipping” option and tap on it to proceed with configuring your payment settings.
The “Payment & Shipping” section houses all the necessary options for managing your payment methods, including credit or debit cards, Apple Pay, and now, Facebook Pay. This section allows you to add, modify, and remove payment methods that you have associated with your Apple ID.
Upon selecting “Payment & Shipping,” you will be presented with a list of your currently saved payment methods. The primary method associated with your Apple ID, usually a credit or debit card, will be displayed at the top of the list. Additional payment methods, if any, will be listed below.
If you haven’t added any payment methods to your Apple ID yet, you will see an option to add one. Tap on this option to proceed with adding your preferred payment method.
It’s worth noting that the option to select “Payment & Shipping” may vary slightly depending on the version of iOS you are using. In iOS 14 and later, it may be labeled as “Payment & Method” instead.
By selecting “Payment & Shipping,” you have reached a crucial step in configuring your payment settings on your iPhone. Now, you’re ready to move on to the next step and add the Facebook Pay payment method to your Apple ID.
Step 4: Tap on “Add Payment Method”
Once you have accessed the “Payment & Shipping” section in your Apple ID settings, it’s time to add the Facebook Pay payment method to your account. To do this, locate and tap on the “Add Payment Method” option.
The “Add Payment Method” option is typically found at the top of the list of payment methods on the “Payment & Shipping” page. It is usually represented by a plus symbol (+), indicating the action to add a new payment method.
After tapping on “Add Payment Method,” you will be presented with a list of available payment options. Since we are setting up Facebook Pay, scroll down the list until you find the “Facebook Pay” option and select it.
By selecting “Facebook Pay,” you are indicating that you want to link your Facebook account to your Apple ID for convenient and secure payments within the Facebook ecosystem.
If you don’t see the “Facebook Pay” option listed, make sure you have the latest version of the Facebook app installed on your iPhone. If you have not installed the app, visit the App Store and download it before proceeding.
It’s important to note that Facebook Pay is currently only available in certain countries and regions. If you don’t see the option to add Facebook Pay, it may not be supported in your location. In this case, you will need to use alternative payment methods or consult with Facebook support for further assistance.
Once you have successfully tapped on “Add Payment Method” and selected “Facebook Pay,” you have completed the fourth step in the setup process. Now, let’s move forward and continue configuring your Facebook Pay settings.
Step 5: Choose “Facebook Pay”
After tapping on “Add Payment Method,” you will be presented with a list of available payment options. Scroll down until you find the “Facebook Pay” option and choose it to proceed with setting up Facebook Pay on your iPhone.
Choosing “Facebook Pay” indicates your intention to link your Facebook account to your Apple ID for seamless and secure payments within the Facebook ecosystem.
Upon selecting “Facebook Pay,” you will be prompted to enter your Facebook password to authenticate the connection between your Facebook account and your Apple ID. This is an essential security measure to ensure that only you can access and use your Facebook Pay account.
It’s worth noting that if you haven’t already signed in to your Facebook account on your iPhone, you will be prompted to do so before proceeding with Facebook Pay setup. Ensure you have your Facebook login credentials ready to complete this step.
Once you have entered your Facebook password and authenticated the connection, you will be directed to the next step in the setup process, where you can add your card details to use with Facebook Pay.
With the selection of “Facebook Pay,” you have successfully indicated your desire to link your Facebook account with your Apple ID for convenient and secure payments. Now, it’s time to move forward and complete the next steps to finalize the setup of your Facebook Pay on your iPhone.
Step 6: Enter your Facebook password
After selecting “Facebook Pay” as your preferred payment method, you will be prompted to enter your Facebook password. This step ensures the security and authentication of your Facebook account while connecting it to your Apple ID for seamless transactions.
To proceed, type your Facebook password carefully into the password field. Make sure to pay attention to uppercase and lowercase letters, as passwords are case-sensitive. If you’re unsure of your password or have forgotten it, you can tap on the “Forgot Password?” link to initiate the password recovery process.
Entering your Facebook password is a critical step to ensure that only authorized users can access and utilize your Facebook Pay account. This added layer of security helps protect your personal and financial information from unauthorized access and potential misuse.
If you’ve previously enabled two-factor authentication (2FA) for your Facebook account, you may also need to provide the additional verification code sent to your registered mobile device or email address.
Once you have successfully entered your Facebook password and any additional verification codes, your Facebook account will be securely connected to your Apple ID for use with Facebook Pay.
It is important to note that this password entry step occurs during the initial setup of Facebook Pay on your iPhone. For future transactions or when using Facebook Pay within the Facebook app, you will not need to enter your password again unless you log out and log back in.
By entering your Facebook password, you have successfully completed another important step in the setup process. Now, let’s move forward and proceed to the next step to add your card details to Facebook Pay.
Step 7: Add your card details
Once you have entered your Facebook password and authenticated your account, you can proceed with adding your card details to Facebook Pay. This step allows you to link a valid credit or debit card that will be used for your transactions within the Facebook ecosystem.
To add your card details, you will be prompted to provide the necessary information, including the card number, expiration date, and the security code (CVV/CVC) on the back of your card. Make sure to double-check the accuracy of the information before proceeding.
On the card details page, you will find fields to enter the required information. The card number typically consists of a series of digits embossed on the front of the card. The expiration date represents the month and year when your card will expire. The security code, also known as the CVV or CVC, is a three-digit number usually located on the back of the card.
It’s important to note that Facebook Pay supports a wide range of major credit and debit card providers. However, availability may vary depending on your location and the specific terms and conditions set by your financial institution.
Rest assured that Facebook takes security seriously and implements various measures to protect your card information. Your card details are encrypted and securely stored, ensuring that your financial data remains confidential and protected from unauthorized access.
By providing your card details, you are allowing Facebook Pay to securely associate your selected card with your Facebook account. This enables quick and convenient payments within the Facebook platform, whether it’s for purchases, donations, or peer-to-peer transactions.
Once you have entered your card details, you have completed another significant step in the setup process. Now, it’s time to move forward and verify your card to ensure its successful integration with Facebook Pay.
Step 8: Verify your card
After adding your card details to Facebook Pay, the next step is to verify your card. Verification is necessary to ensure that the card you have linked to your account is legitimate and belongs to you. This additional security measure helps safeguard your financial information and prevents unauthorized use of your card.
The verification process may vary depending on your card provider and the specific requirements set by Facebook Pay. Typically, the verification involves a small charge or pre-authorization on your card, which requires you to check your bank statement and enter the specific transaction amount or code provided by Facebook.
To verify your card, follow the instructions provided by Facebook Pay. This might include checking your bank statement, contacting your financial institution, or using a verification code or transaction amount provided by Facebook Pay.
It’s important to note that the verification process is crucial for the successful integration of your card with Facebook Pay. Without verification, you may encounter difficulties in using your card for payments within the Facebook platform.
Once your card is successfully verified, it will be ready for use with Facebook Pay. You can then proceed to make transactions, including purchases, donations, or person-to-person payments conveniently and securely within the Facebook ecosystem.
Remember to regularly check your bank statements or transaction history to ensure the accuracy and security of your payments. If you notice any suspicious activity, contact your financial institution immediately.
By verifying your card, you have completed an essential step in the Facebook Pay setup process. Now, let’s move on to the final step, where you can set your card as the default payment method for Facebook Pay.
Step 9: Set the card as your default payment method
Once you have successfully added and verified your card, the final step in setting up Facebook Pay on your iPhone is to designate it as the default payment method. This ensures that whenever you make a purchase or transaction within the Facebook platform, your chosen card will be automatically selected for payment.
To set your card as the default payment method, navigate to the Facebook Pay settings within your Facebook account. This can usually be done by accessing the payment settings or payment methods section within the Facebook app or website.
Once you’re in the Facebook Pay settings, locate the section where you can manage your payment methods. Here, you will see a list of the cards you have added to your Facebook Pay account.
To set your card as the default payment method, simply select the option to make it the default. This may involve toggling a switch, marking a checkbox, or confirming your selection. It’s important to follow the instructions provided by Facebook Pay to ensure the correct card is set as the default.
By setting your card as the default payment method, you streamline the payment process and eliminate the need to manually select your preferred card for each transaction. This convenient feature saves you time and hassle, especially when making frequent or repetitive purchases on Facebook.
It’s important to regularly review and update your default payment method as needed. If you want to change your default card or add a new one, simply follow the same steps and select the desired card as your new default.
With your card set as the default payment method, you have successfully completed the setup of Facebook Pay on your iPhone. Now, you can enjoy seamless and secure transactions within the Facebook ecosystem using your chosen card as the default.
Congratulations! You’re now ready to make purchases, donate, and conduct various transactions with ease, all while enjoying the convenience and security of Facebook Pay.
Conclusion
Setting up Facebook Pay on your iPhone provides you with a convenient and secure way to make payments within the Facebook platform. By following the step-by-step process outlined in this guide, you can easily configure Facebook Pay on your device and link it to your Apple ID.
Throughout the setup process, we covered important steps such as opening the Settings app, tapping on your name, selecting “Payment & Shipping,” adding the Facebook Pay payment method, entering your Facebook password, adding your card details, verifying your card, and setting it as the default payment method.
Facebook Pay offers a seamless and streamlined payment experience, allowing you to make purchases, donate to organizations, and send money to friends, all within the Facebook ecosystem. With the added security measures in place, you can trust that your financial information is protected during transactions.
Remember to regularly review your payment settings, update your default payment method if necessary, and monitor your bank statements or transaction history for any irregularities. If you encounter any issues or have further questions, it’s recommended to reach out to Facebook support for assistance.
With Facebook Pay set up on your iPhone, you can now enjoy the convenience of making payments while using the various features and services offered by Facebook. Whether it’s shopping on the Facebook Marketplace, contributing to a cause you care about, or simply sending money to friends, Facebook Pay simplifies the process.
Thank you for following this guide to set up Facebook Pay on your iPhone. We hope you find this feature to be a valuable addition to your digital payments repertoire, making your online transactions on Facebook even more effortless and secure.