Introduction
Sending photos from an iPhone to an Android device may seem like a daunting task, especially if you’re new to the world of smartphones. However, there are several methods that can help you easily transfer your cherished photos from your iPhone to an Android device. Whether you want to share vacation pictures with friends or simply backup your precious memories, this article will guide you through five effective methods for sending photos across different platforms.
While the specific steps may vary slightly depending on the models and operating systems of your devices, these methods can be applied to most iPhone and Android smartphones. Whether you prefer to use email, messaging apps, cloud storage apps, or even Bluetooth, there’s a solution that suits your needs.
Each method has its own advantages and disadvantages, so it’s important to choose the one that suits your preferences and requirements. Some methods may be more suitable for sending a few photos at a time, while others are better suited for transferring large albums.
Now, let’s explore the methods and find the one that works best for you, whether you’re a tech-savvy individual or a beginner in the world of smartphones. With these methods in your arsenal, you’ll be able to effortlessly share your treasured photos between different devices, without losing any quality or compromising your privacy. So, without further ado, let’s dive into the world of photo sharing across different platforms.
Methods for Sending Photos from iPhone to Android
When it comes to transferring photos from an iPhone to an Android device, there are several methods you can choose from. Each method has its own advantages and can be used in different scenarios. Here are five methods that will help you easily send photos from your iPhone to an Android device:
- Email: One of the simplest and most straightforward methods is to use email. You can simply select the photos you want to send, attach them to an email, and send them to your own email address. Then, access your email account on your Android device, download the attachments, and save the photos to your device’s gallery.
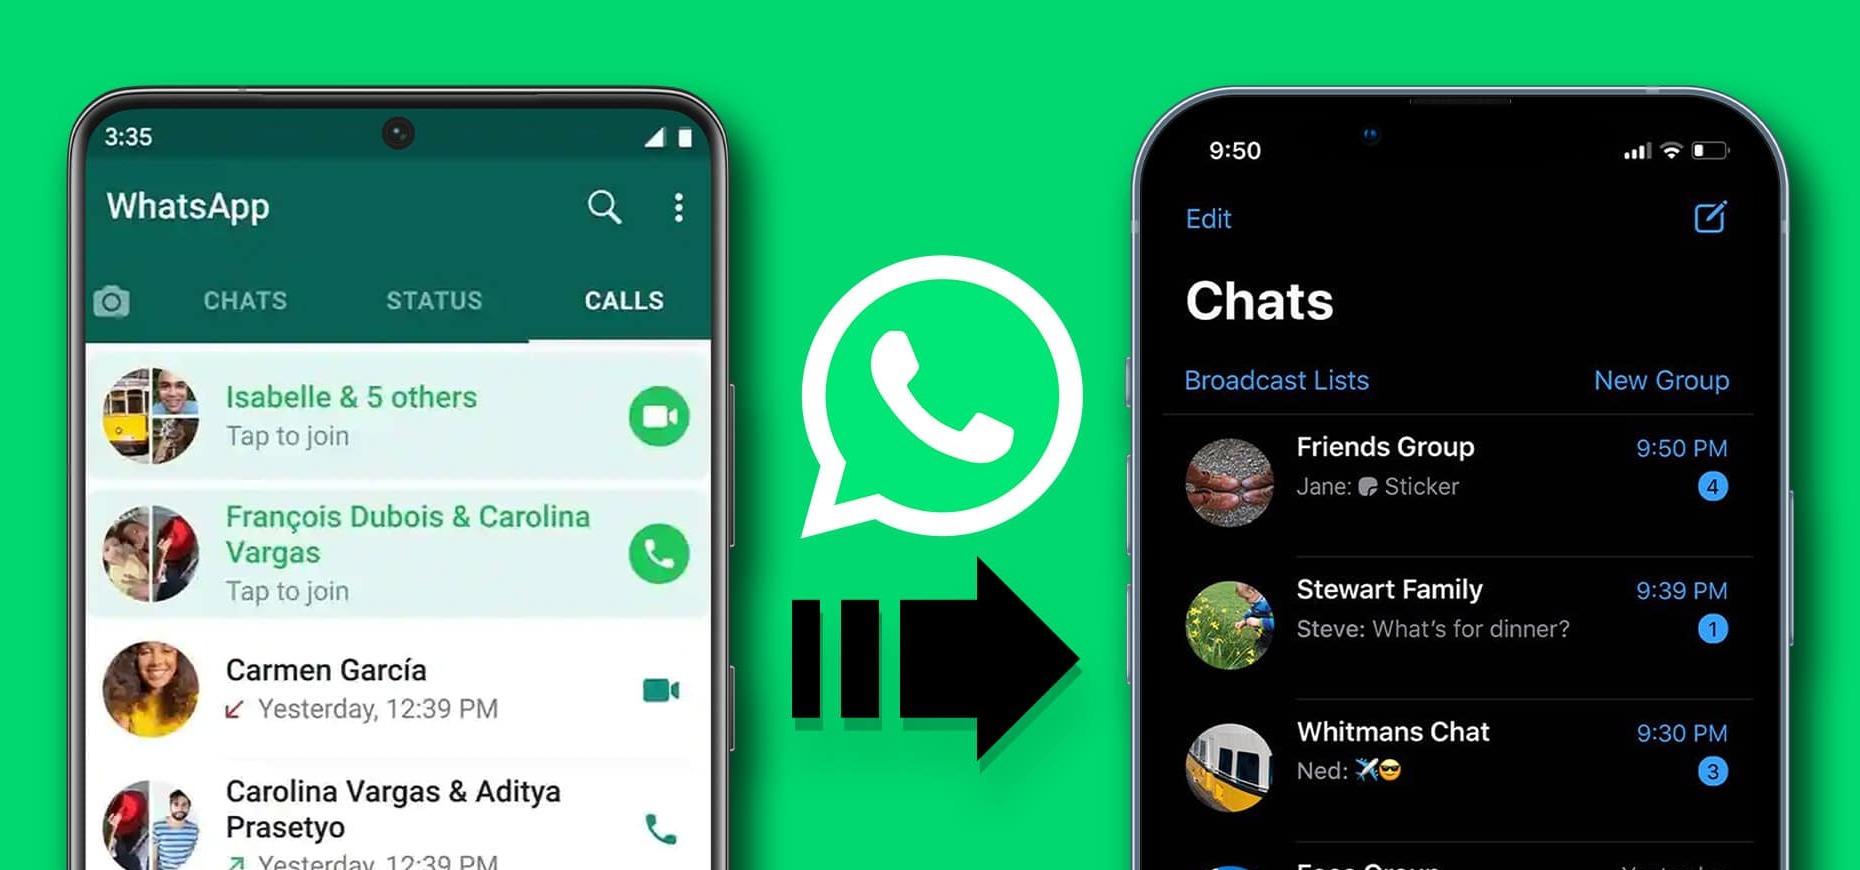
- Messaging Apps: Another popular option is to utilize messaging apps such as WhatsApp, Telegram, or Facebook Messenger. Simply create a new conversation with yourself, attach the desired photos, and send them. Then, open the conversation on your Android device, download the photos, and save them to your gallery.
- Cloud Storage Apps: If you prefer a more organized approach and want to have access to your photos across multiple devices, using cloud storage apps like Google Drive or Dropbox is a great choice. Upload the photos from your iPhone to the cloud storage app, and then sign in to the same app on your Android device to download the photos.
- Bluetooth: For those who want to transfer photos offline without relying on Wi-Fi or mobile data, Bluetooth can be a convenient option. Ensure that both your iPhone and Android device have Bluetooth enabled, pair them, and then use the sharing feature to send the photos from your iPhone to your Android device.
- Third-Party Apps: If you prefer a dedicated app for transferring photos, there are several third-party apps available on the App Store and Google Play Store. Apps like SHAREit, Xender, or Send Anywhere allow you to easily send photos between different platforms with just a few taps.
These methods provide a range of options for you to choose from, depending on your specific needs and preferences. Whether you’re looking for simplicity, convenience, offline transfer, or an organized cloud storage solution, there’s a method that fits your requirements. Now, let’s dive into each method in more detail to understand the steps involved and how to successfully send photos from your iPhone to an Android device.
Method 1: Using Email
Email is a widely accessible and straightforward method for sending photos from your iPhone to an Android device. Follow these steps to transfer your photos:
- Open the Photos app on your iPhone.
- Select the photos you want to send by tapping on them. You can tap and drag your finger to select multiple photos.
- Tap the Share button, usually represented by a square with an arrow pointing upwards.
- Scroll through the options and select Mail.
- Enter your email address in the recipient field.
- Add a subject to the email if desired, and include any additional message you want to send.
- Tap the Send button to send the email containing the photos.
Once you’ve sent the email, access your email account on your Android device by using any email app or through a web browser. Open the email you sent, and you’ll find the attached photos. Simply download the attachments and save the photos to your Android device’s gallery.
This method is advantageous as it utilizes a widely available and widely used platform. Email is accessible on both iPhones and Android devices, making it a convenient option, especially if you’re already familiar with sending emails. However, keep in mind that this method may not be suitable for sending a large number of photos due to file size restrictions imposed by email service providers.
Make sure to compress the photos or reduce their size before attaching them to the email if you’re sending a large number of high-resolution photos. This will help ensure that the email is not too large, making it easier to send and download on the recipient’s end.
Using email is an efficient and reliable way to send photos from an iPhone to an Android device. Now that you know the steps involved, you can easily share your memorable moments with friends and family, regardless of the type of smartphone they use.
Method 2: Using Messaging Apps
Another popular method for sending photos from an iPhone to an Android device is by utilizing messaging apps. These apps, such as WhatsApp, Telegram, or Facebook Messenger, provide a convenient way to share photos with others. Here’s how you can use messaging apps to transfer your photos:
- Open the messaging app of your choice on your iPhone. If you don’t have the app installed, you can download it from the App Store.
- Create a new conversation or open an existing conversation with the recipient or yourself.
- Tap on the attachment icon (usually a paperclip or plus sign) to open the media library.
- Select the photos you want to send from your iPhone’s gallery. You can tap and hold on a photo to bring up additional options for selecting multiple photos.
- After selecting the photos, tap the Send or Share button to send them in the chat.
Once you’ve sent the photos, you can access the messaging app on your Android device. Open the conversation where you sent the photos and download them to your Android device’s gallery. The exact steps may vary depending on the messaging app you’re using, but the process is generally similar across different apps.
Using messaging apps to share photos offers several advantages. Firstly, these apps are widely used and available on both iOS and Android platforms, allowing seamless communication between different devices. Additionally, messaging apps often have features like end-to-end encryption, ensuring the security and privacy of your shared photos.
It’s important to keep in mind that some messaging apps may compress the photos to save bandwidth or storage space. This compression might result in a slight degradation of image quality. If you’re concerned about preserving the original quality of your photos, consider using other methods like email or cloud storage apps.
With the popularity and versatility of messaging apps, you can easily share your favorite moments captured on your iPhone with friends and family who use Android devices. Take advantage of these apps to keep your memories alive and keep everyone connected regardless of their smartphone choice.
Method 3: Using Cloud Storage Apps
Cloud storage apps provide a convenient and organized way to transfer photos from an iPhone to an Android device. By utilizing apps such as Google Drive, Dropbox, or OneDrive, you can seamlessly upload and download your photos. Here’s how you can use cloud storage apps to transfer your photos:
- Install the cloud storage app of your choice on your iPhone from the App Store.
- Launch the app and create an account if you don’t already have one.
- Sign in to the app using your account credentials.
- Navigate to the option to upload files or photos within the app. This is usually denoted by a “+” or an upload icon.
- Select the photos you want to upload from your iPhone’s gallery and initiate the upload process.
Once the upload is complete, you can access the cloud storage app on your Android device by downloading it from the Google Play Store and signing in with the same account. Locate the uploaded photos within the app and download them to your Android device’s gallery.
Using cloud storage apps to transfer photos offers several benefits. Firstly, it allows you to store your photos securely in the cloud, providing a backup for your valuable memories. Moreover, it allows you to access your photos from multiple devices, making it convenient for viewing and sharing your photos across platforms.
However, keep in mind that uploading and downloading photos using cloud storage apps requires an internet connection. If you have limited mobile data or don’t have access to Wi-Fi, it may not be the ideal method for transferring a large number of photos. Additionally, the upload and download times will depend on the speed of your internet connection.
With cloud storage apps, you can ensure that your photos are safely stored in the cloud and easily accessible across different devices. Embrace this method to enjoy the convenience and peace of mind that comes with securely transferring and storing your precious photos.
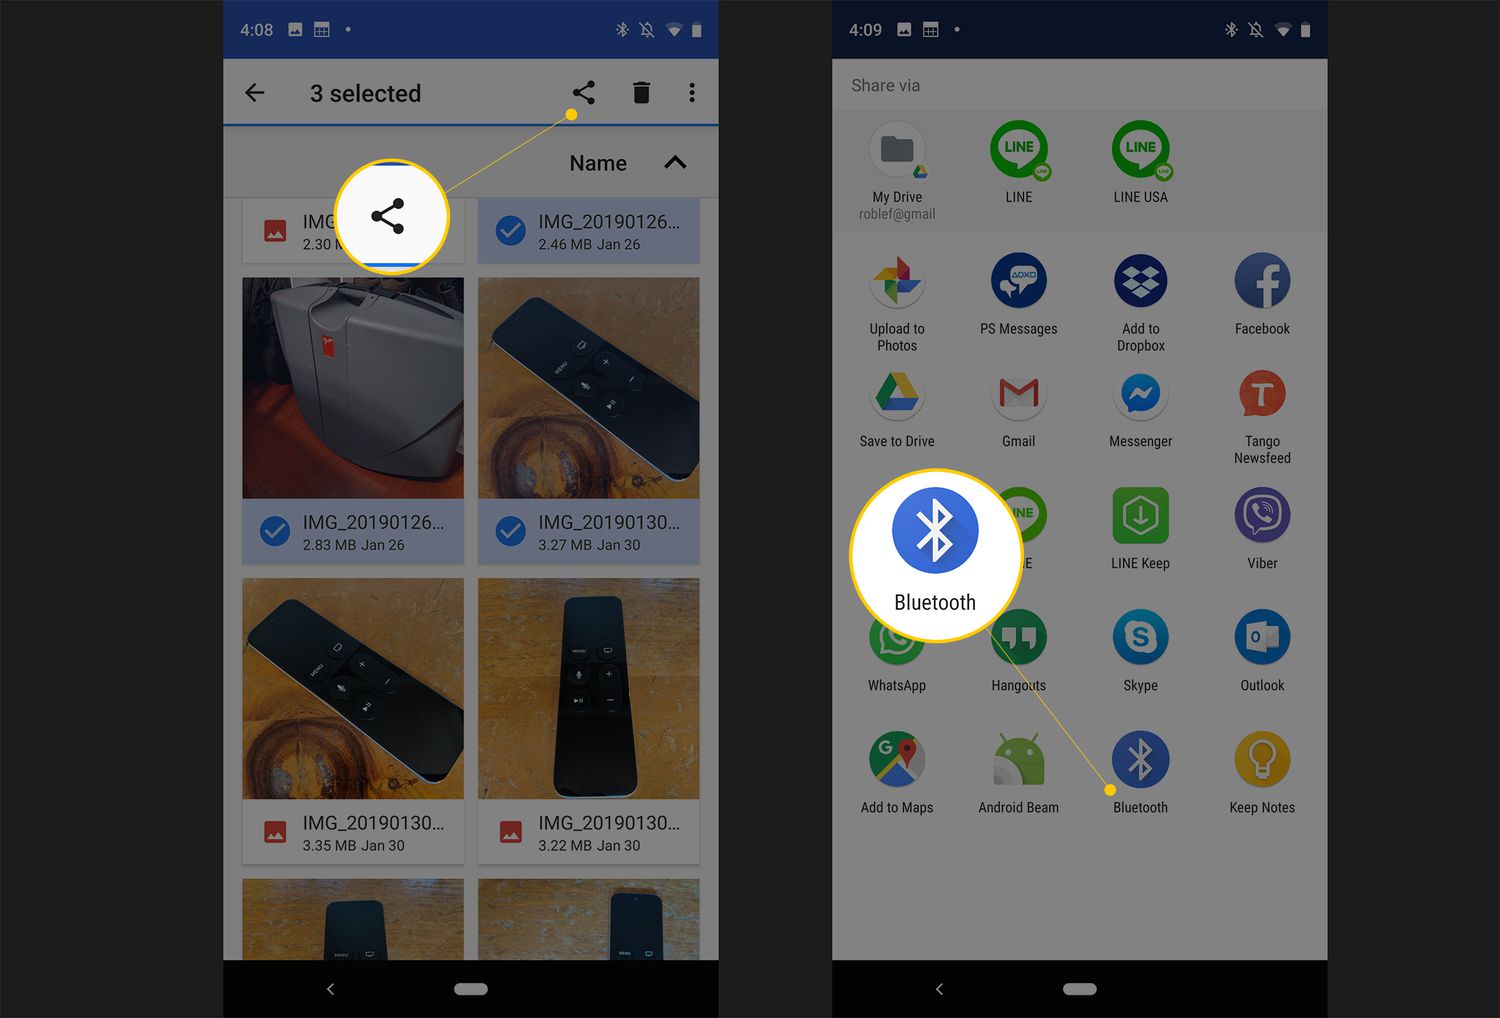
Method 4: Using Bluetooth
Transferring photos from an iPhone to an Android device using Bluetooth provides an offline and direct method for sharing your pictures. By utilizing the Bluetooth feature on both devices, you can easily send photos without the need for an internet connection. Here’s how you can use Bluetooth to transfer your photos:
- Enable Bluetooth on both your iPhone and Android device. You can usually find this option in the Settings menu.
- On your iPhone, open the Photos app and select the photos you want to send.
- Tap the Share button, usually represented by a square with an arrow pointing upwards.
- Scroll through the options and select the Bluetooth option. If it’s not visible, tap the “More” button to reveal additional sharing options.
- Choose your Android device from the list of available Bluetooth devices.
- On your Android device, a notification will appear, prompting you to accept the incoming Bluetooth transfer. Tap accept to initiate the transfer.
Once the transfer is complete, the photos will be saved to your Android device’s gallery. Please note that the exact steps and options may vary slightly depending on the models and operating systems of your devices.
Using Bluetooth for photo transfer provides the advantage of being offline and not dependent on an internet connection. This can be beneficial when you’re in a location with limited or no internet access. Moreover, the direct connection between the two devices ensures a faster transfer speed compared to methods that rely on network connections.
However, Bluetooth has its limitations. The transfer speed may not be as fast as other methods, especially when sending multiple photos or larger files. Additionally, Bluetooth can only be used for device-to-device transfers, so it may not be suitable for sharing photos with multiple people simultaneously.
Nevertheless, utilizing Bluetooth for transferring photos ensures a hassle-free and direct transfer process, making it a viable option when you want to quickly share photos between your iPhone and Android device.
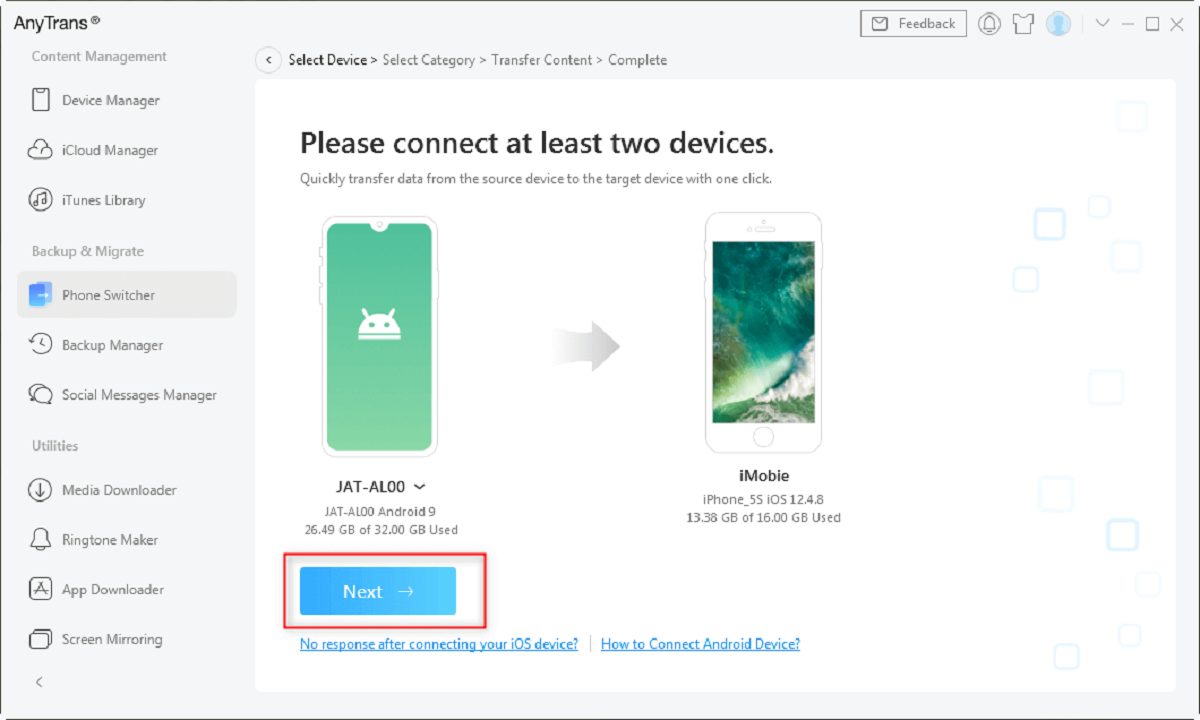
Method 5: Using Third-Party Apps
If you prefer a dedicated app specifically designed for transferring photos between different platforms, using third-party apps can be a convenient option. Apps like SHAREit, Xender, or Send Anywhere offer seamless and efficient photo transfer capabilities. Here’s how you can use third-party apps to send photos from your iPhone to an Android device:
- Download and install a reliable third-party app from the App Store that supports cross-platform photo transfer.
- Open the app on both your iPhone and Android device.
- Follow the instructions within the app to establish a connection between the two devices. This is typically done by scanning a QR code or creating a hotspot.
- Once the connection is established, navigate to the photo transfer section of the app on your iPhone.
- Select the photos you want to send and tap the send or share button.
- On your Android device, accept the transfer request from the iPhone.
The app will handle the transfer process, and the photos will be saved to your Android device’s gallery once the transfer is complete. These third-party apps usually offer fast transfer speeds, allowing you to send multiple photos or even entire albums effortlessly.
Using third-party apps for photo transfer provides advantages such as ease of use and dedicated functionality. These apps are specifically designed to simplify the process of sharing files and photos across different platforms. Additionally, some apps offer additional features like file compression to save storage space, direct sharing to social media platforms, and compatibility with various file formats.
However, it’s essential to choose a reputable and trustworthy app from a reliable source to ensure the security and privacy of your photos. Pay attention to user reviews and ratings before downloading and using any third-party app.
Utilizing third-party apps for transferring photos between your iPhone and Android device offers a seamless and specialized approach. Explore the options available and find the app that suits your preferences and requirements to effortlessly share your photos with friends, family, or colleagues.
Conclusion
Transferring photos from an iPhone to an Android device may seem daunting, but with the right methods, it can be a simple and hassle-free process. In this article, we explored five effective methods for sending photos across different platforms.
Using email allows for easy and straightforward transfers, although it may not be suitable for sending large amounts of photos due to file size restrictions. Messaging apps provide a convenient option for sharing photos with friends and family, offering features like end-to-end encryption for added security.
Cloud storage apps offer a secure and organized way to transfer and store your photos, allowing access across multiple devices. Utilizing Bluetooth allows for offline transfers and direct connections, making it ideal for quick sharing without internet access. Third-party apps cater specifically to cross-platform transfers, providing dedicated features and fast transfer speeds.
Each method has its own advantages and drawbacks, so choose the one that suits your preferences and requirements. Whether you prioritize simplicity, security, convenience, or offline transfer, there’s a method that will meet your needs.
Remember to consider factors such as file size limitations, internet connectivity, and the reliability of third-party apps when selecting a method. Additionally, always take into account the specific steps and processes involved in transferring the photos between your iPhone and Android device.
Now that you have a comprehensive understanding of these methods, you can effortlessly send your cherished photos from your iPhone to an Android device. Share your memorable moments with loved ones, backup your valuable memories, and keep everyone connected, regardless of the smartphone they use.
Embrace these methods and enjoy the convenience of seamlessly transferring photos between different platforms, preserving your precious memories for years to come.