Introduction
Welcome to the world of Ethereum, a decentralized, open-source blockchain platform that has gained immense popularity in recent years. As an Ethereum user and investor, you may have reached a point where you want to cash out your Ethereum holdings and convert them into fiat currency or other cryptocurrencies. In this guide, we will walk you through the process of cashing out Ethereum using Metamask, a popular Ethereum wallet and browser extension.
Metamask is a user-friendly and secure wallet that allows you to store, send, and receive Ethereum and other ERC-20 tokens. It also acts as a gateway to the Ethereum network, enabling you to interact with decentralized applications (DApps) and decentralized finance (DeFi) protocols.
If you’re ready to access the funds in your Metamask wallet and convert them into real-world value, this guide is for you. We will provide step-by-step instructions on how to cash out Ethereum using Metamask and provide helpful tips along the way.
It’s important to note that the process of cashing out Ethereum may vary depending on the specific exchange or wallet you choose to use. However, the general steps outlined in this guide should provide you with a solid foundation to start the cash-out process.
Before we dive into the steps, it’s crucial to ensure you have a few prerequisites in place:
- A verified Metamask wallet with Ethereum funds
- An account on a reputable cryptocurrency exchange or wallet that supports Ethereum
- An understanding of how to navigate through the Metamask extension and the exchange platform
- Basic knowledge of how to initiate transfers and execute trades
- Patience and caution, as the process may involve some waiting periods and market fluctuations
With these prerequisites met, let’s now proceed to the first step: connecting Metamask to an exchange or wallet.
Step 1: Connect Metamask to an Exchange or Wallet
Before you can cash out your Ethereum, you’ll need to establish a connection between your Metamask wallet and an exchange or wallet that supports Ethereum transactions. This will allow you to transfer your Ethereum funds from Metamask to the exchange or wallet where you can later sell or trade them.
Here are the steps to connect Metamask to an exchange or wallet:
- Open your web browser and navigate to the website of your chosen exchange or wallet. Ensure that the platform supports Ethereum transactions and has a good reputation in the cryptocurrency community.
- Create an account on the exchange or wallet platform if you haven’t done so already. This usually involves providing your email address, creating a password, and completing any necessary verification procedures.
- Once your account is set up, log in to the exchange or wallet platform.
- In a separate tab or window, open your Metamask wallet by clicking on the Metamask icon in your browser toolbar.
- On the Metamask interface, click on the account selection dropdown menu, usually located in the top-right corner. Select the account that holds the Ethereum you wish to cash out.
- Click on the “…” (three dots) button next to the selected account and choose the option to export the private key or seed phrase. Take note of the private key or seed phrase, as you will need it to import your Metamask wallet into the exchange or wallet platform.
- Go back to the exchange or wallet platform and look for the option to connect or import a wallet. This may be found under the “Wallet” or “Account” section, but the location can vary depending on the platform.
- Select the option to import a wallet and choose the Metamask option if available. Otherwise, select the option that allows you to enter your private key or seed phrase.
- Enter your Metamask private key or seed phrase into the designated field. Review the terms and conditions, if provided, and accept them.
- After verifying the connection, you should see your Metamask wallet balance reflected on the exchange or wallet platform. This indicates that the connection has been successfully established.
By connecting Metamask to an exchange or wallet, you have paved the way for transferring your Ethereum funds and initiating the cash-out process. In the next step, we will discuss how to set up an account on the exchange.
Step 2: Set Up an Account on an Exchange
In order to cash out your Ethereum, you’ll need to have an account on a reputable cryptocurrency exchange that supports Ethereum transactions. The exchange will serve as the intermediary platform for selling or trading your Ethereum for fiat currency or other cryptocurrencies. Here’s how you can set up an account on an exchange:
- Research and choose a cryptocurrency exchange that aligns with your preferences and requirements. Factors to consider include security measures, user interface, supported countries, trading fees, and customer support.
- Visit the website of the chosen exchange and look for the “Sign Up” or “Register” button. Click on it to initiate the account creation process.
- Provide the required information, including your email address, full name, and password. Make sure to create a strong and unique password to protect your account.
- Complete any additional verification procedures that may be necessary, such as providing identification documents or linking a valid bank account.
- Read and agree to the terms and conditions of the exchange. It’s crucial to understand the platform’s policies regarding fees, trading limits, and security measures.
- Verify your email address by clicking on the verification link sent to your registered email.
- Set up two-factor authentication (2FA) for added security. This involves linking your account to a 2FA app or receiving 2FA codes via SMS.
- Once your account is fully set up, log in to the exchange platform using your credentials.
- Take some time to explore the platform’s interface and familiarize yourself with its features. Look for the sections related to account settings, depositing funds, and trading options.
- Make sure to review the available deposit methods and check if the exchange supports deposits in Ethereum.
By setting up an account on a reputable cryptocurrency exchange, you have created the foundation for cashing out your Ethereum holdings. In the next step, we will discuss how to transfer your Ethereum from Metamask to the exchange.
Step 3: Transfer Ethereum from Metamask to the Exchange
Now that you have connected your Metamask wallet to the exchange and set up an account, it’s time to transfer your Ethereum funds from Metamask to the exchange. This will enable you to have the Ethereum available on the platform for selling or trading purposes. Follow these steps to complete the transfer:
- Log in to your chosen exchange platform using your account credentials.
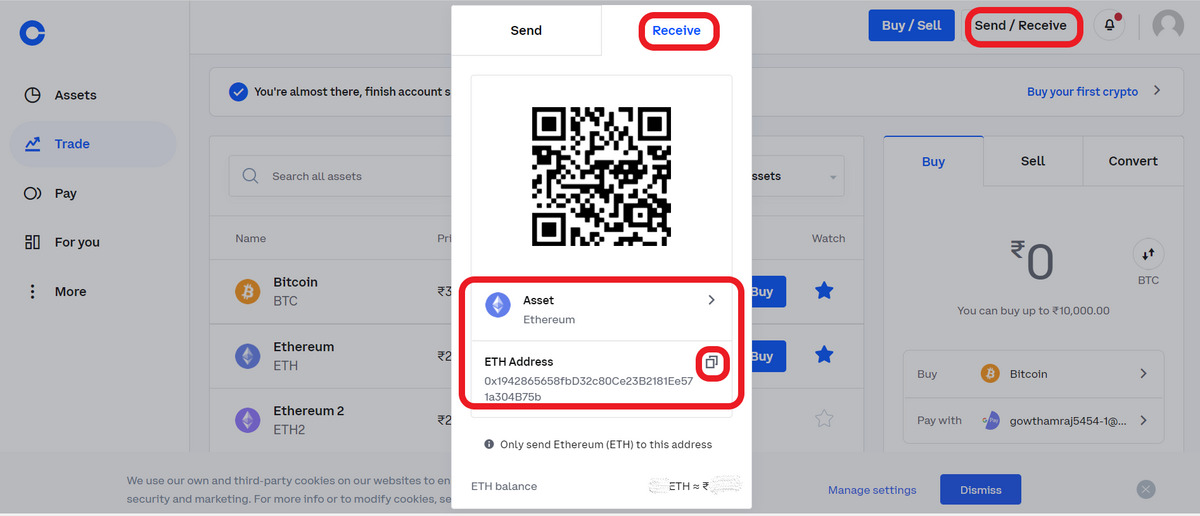
- Locate the “Deposit” or “Wallet” section of the exchange platform. This is usually found in the main navigation menu.
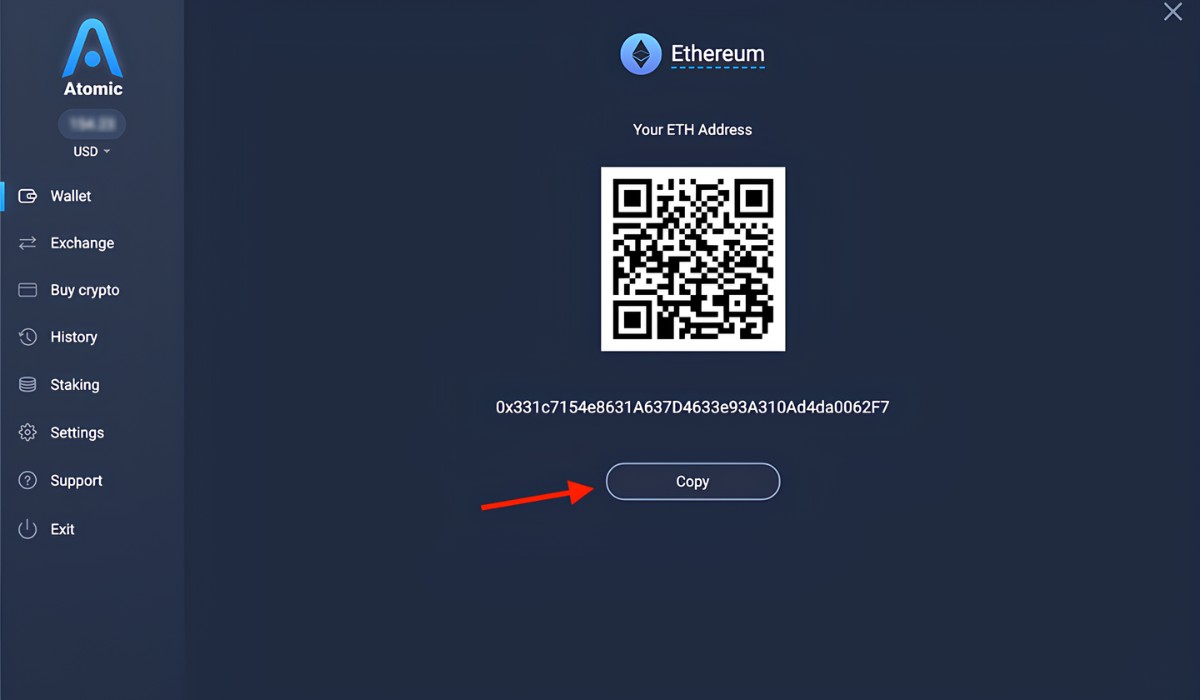
- Within the “Deposit” or “Wallet” section, search for the Ethereum (ETH) option or a similar token that represents Ethereum on the platform. Click on it to reveal your Ethereum deposit address.
- Open a new tab or window and access your Metamask wallet by clicking on the Metamask icon in your browser toolbar.
- On the Metamask interface, ensure that the account with the Ethereum funds you wish to transfer is selected.
- Click on the “Send” or “Transfer” button in the Metamask interface. This will bring up the transfer window.
- In the transfer window, paste the Ethereum deposit address from the exchange platform into the recipient address field.
- Enter the amount of Ethereum you wish to transfer to the exchange. Make sure the amount is within your available balance.
- Double-check the recipient address and the amount to ensure accuracy.
- Review the gas fee estimation provided by Metamask. This fee covers the cost of processing the Ethereum transaction on the Ethereum network. You can adjust the gas fee if desired, but keep in mind that a higher fee generally results in faster transaction confirmation.
- Click on the “Confirm” or “Send” button to initiate the transfer.
- Wait for the transaction to be confirmed on the Ethereum network. This process may take a few minutes or longer, depending on network congestion.
- Once the transaction is confirmed, you should see the transferred Ethereum funds reflected in your exchange account.
By successfully transferring your Ethereum from Metamask to the exchange, you can now proceed to the next step of selling or trading your Ethereum for fiat currency or other cryptocurrencies. In the following step, we will discuss how to sell Ethereum on the exchange.
Step 4: Sell Ethereum for Fiat Currency or Other Cryptocurrencies
With your Ethereum funds successfully transferred to the exchange, you can now sell them for fiat currency or other cryptocurrencies. The process of selling Ethereum may slightly differ from one exchange to another, but the general steps outlined below will guide you through the process:
- Access your account on the exchange platform using your login credentials.
- Navigate to the “Trading” or “Exchange” section of the platform. This is where you can initiate trades and sell your Ethereum.
- Choose the trading pair that matches your desired trade, such as ETH/USD for selling Ethereum for US dollars, or ETH/BTC for trading Ethereum for Bitcoin.
- Specify the amount of Ethereum you wish to sell in the appropriate field. Take note of any minimum trading amounts or order size restrictions.
- Review the current market price and trading parameters before proceeding.
- Select the type of order you want to place. Market orders execute immediately at the prevailing market price, while limit orders allow you to set a specific price at which your Ethereum will be sold.
- If placing a limit order, enter the desired selling price in the appropriate field.
- Review the transaction details, including any trading fees or commissions that may apply.
- Confident with your choice, click on the “Sell” or “Place Order” button to execute the trade.
- Wait for the order to be processed and filled by the exchange. This may take a few moments or longer, depending on market liquidity.
- Once the order is successfully executed, you should see the proceeds of the sale reflected in your account balance on the exchange.
It’s important to note that the value you receive for selling Ethereum can vary based on market conditions and any associated trading fees. You should consider monitoring market trends and choosing an opportune moment to sell your Ethereum to maximize your returns.
With Ethereum sold for fiat currency or other cryptocurrencies, you’re almost ready to cash out and transfer the funds to your bank account or another wallet. In the final step, we will discuss how to withdraw your funds from the exchange.
Step 5: Withdraw Funds to Your Bank Account or Wallet
After successfully selling your Ethereum on the exchange, the final step is to withdraw the funds to your bank account or an external wallet. Depending on the exchange and your preferences, you have different options for cashing out your funds:
Option 1: Withdraw to a Bank Account:
- Log in to your exchange account using your credentials.
- Navigate to the “Withdraw” or “Funds” section of the platform.
- Select the option to withdraw funds to a bank account.
- Enter the required details, including your bank account number, account holder name, and any other relevant information.
- Review the withdrawal details, including any applicable fees or processing timeframes.
- Initiate the withdrawal request by clicking on the “Withdraw” or “Submit” button.
- Wait for the withdrawal to be processed by the exchange. This may take a few days depending on the exchange’s policies and your bank’s processing times.
- Once the withdrawal is successful, you should receive the funds in your bank account.
Option 2: Withdraw to an External Wallet:
- If you prefer to store your funds in an external wallet, such as a hardware wallet or a software wallet, log in to your exchange account.
- Navigate to the “Withdraw” or “Funds” section of the platform.
- Choose the option to withdraw funds to an external wallet.
- Enter the wallet address of your external wallet in the designated field.
- Double-check the wallet address to ensure its accuracy.
- Review the withdrawal details, including any applicable fees or processing timeframes.
- Initiate the withdrawal request by clicking on the “Withdraw” or “Submit” button.
- Wait for the withdrawal to be processed by the exchange. The time it takes can vary depending on the exchange’s policies and network congestion.
- Once the withdrawal is successful, you will see the funds in your external wallet.
It’s important to note that different exchanges have varying withdrawal policies, including minimum withdrawal amounts and applicable fees. Make sure to review these details before initiating the withdrawal to avoid any surprises.
By following the appropriate withdrawal process, you can safely cash out your Ethereum funds and either transfer them to your bank account or securely store them in an external wallet.
Conclusion
Cashing out your Ethereum using Metamask and an exchange is a straightforward process that can be accomplished by following the steps outlined in this guide. From connecting your Metamask wallet to an exchange, setting up an account, transferring Ethereum, selling it, and finally withdrawing the funds, each step brings you closer to accessing the real-world value of your Ethereum holdings.
Throughout the process, it’s important to be mindful of security measures, such as using strong passwords, enabling two-factor authentication, and ensuring you’re using reputable exchanges and wallets. Additionally, keep track of any fees associated with the transactions and consider the current market conditions when selling your Ethereum.
By cashing out your Ethereum, you have the opportunity to convert your digital assets into traditional currency or explore other investment opportunities within the cryptocurrency space. Whether you’re looking to cover expenses, diversify your portfolio, or simply access your funds, this guide serves as a starting point on your journey from Ethereum to tangible value.
Remember to stay informed about the latest developments in the cryptocurrency landscape, as regulations, exchange policies, and market trends can impact the cash-out process. As always, exercise caution and due diligence to ensure the safety of your funds.
Now that you’re equipped with the knowledge of how to cash out your Ethereum, it’s time to put it into action. Start by connecting your Metamask wallet to an exchange or wallet, and follow the subsequent steps to successfully cash out your Ethereum for fiat currency or other cryptocurrencies.
Good luck and happy cashing out!