Introduction
Having a functional HDMI port on your motherboard is essential for connecting your computer to an external display such as a monitor or TV. However, there may be instances where you encounter issues with your motherboard’s HDMI not working. This can be frustrating and limit your ability to use multiple displays or enjoy high-quality visuals.
There are several possible causes for this problem, ranging from simple cable connection issues to more complex hardware or software-related problems. In this article, we will explore some common causes and provide troubleshooting steps to help you resolve the issue.
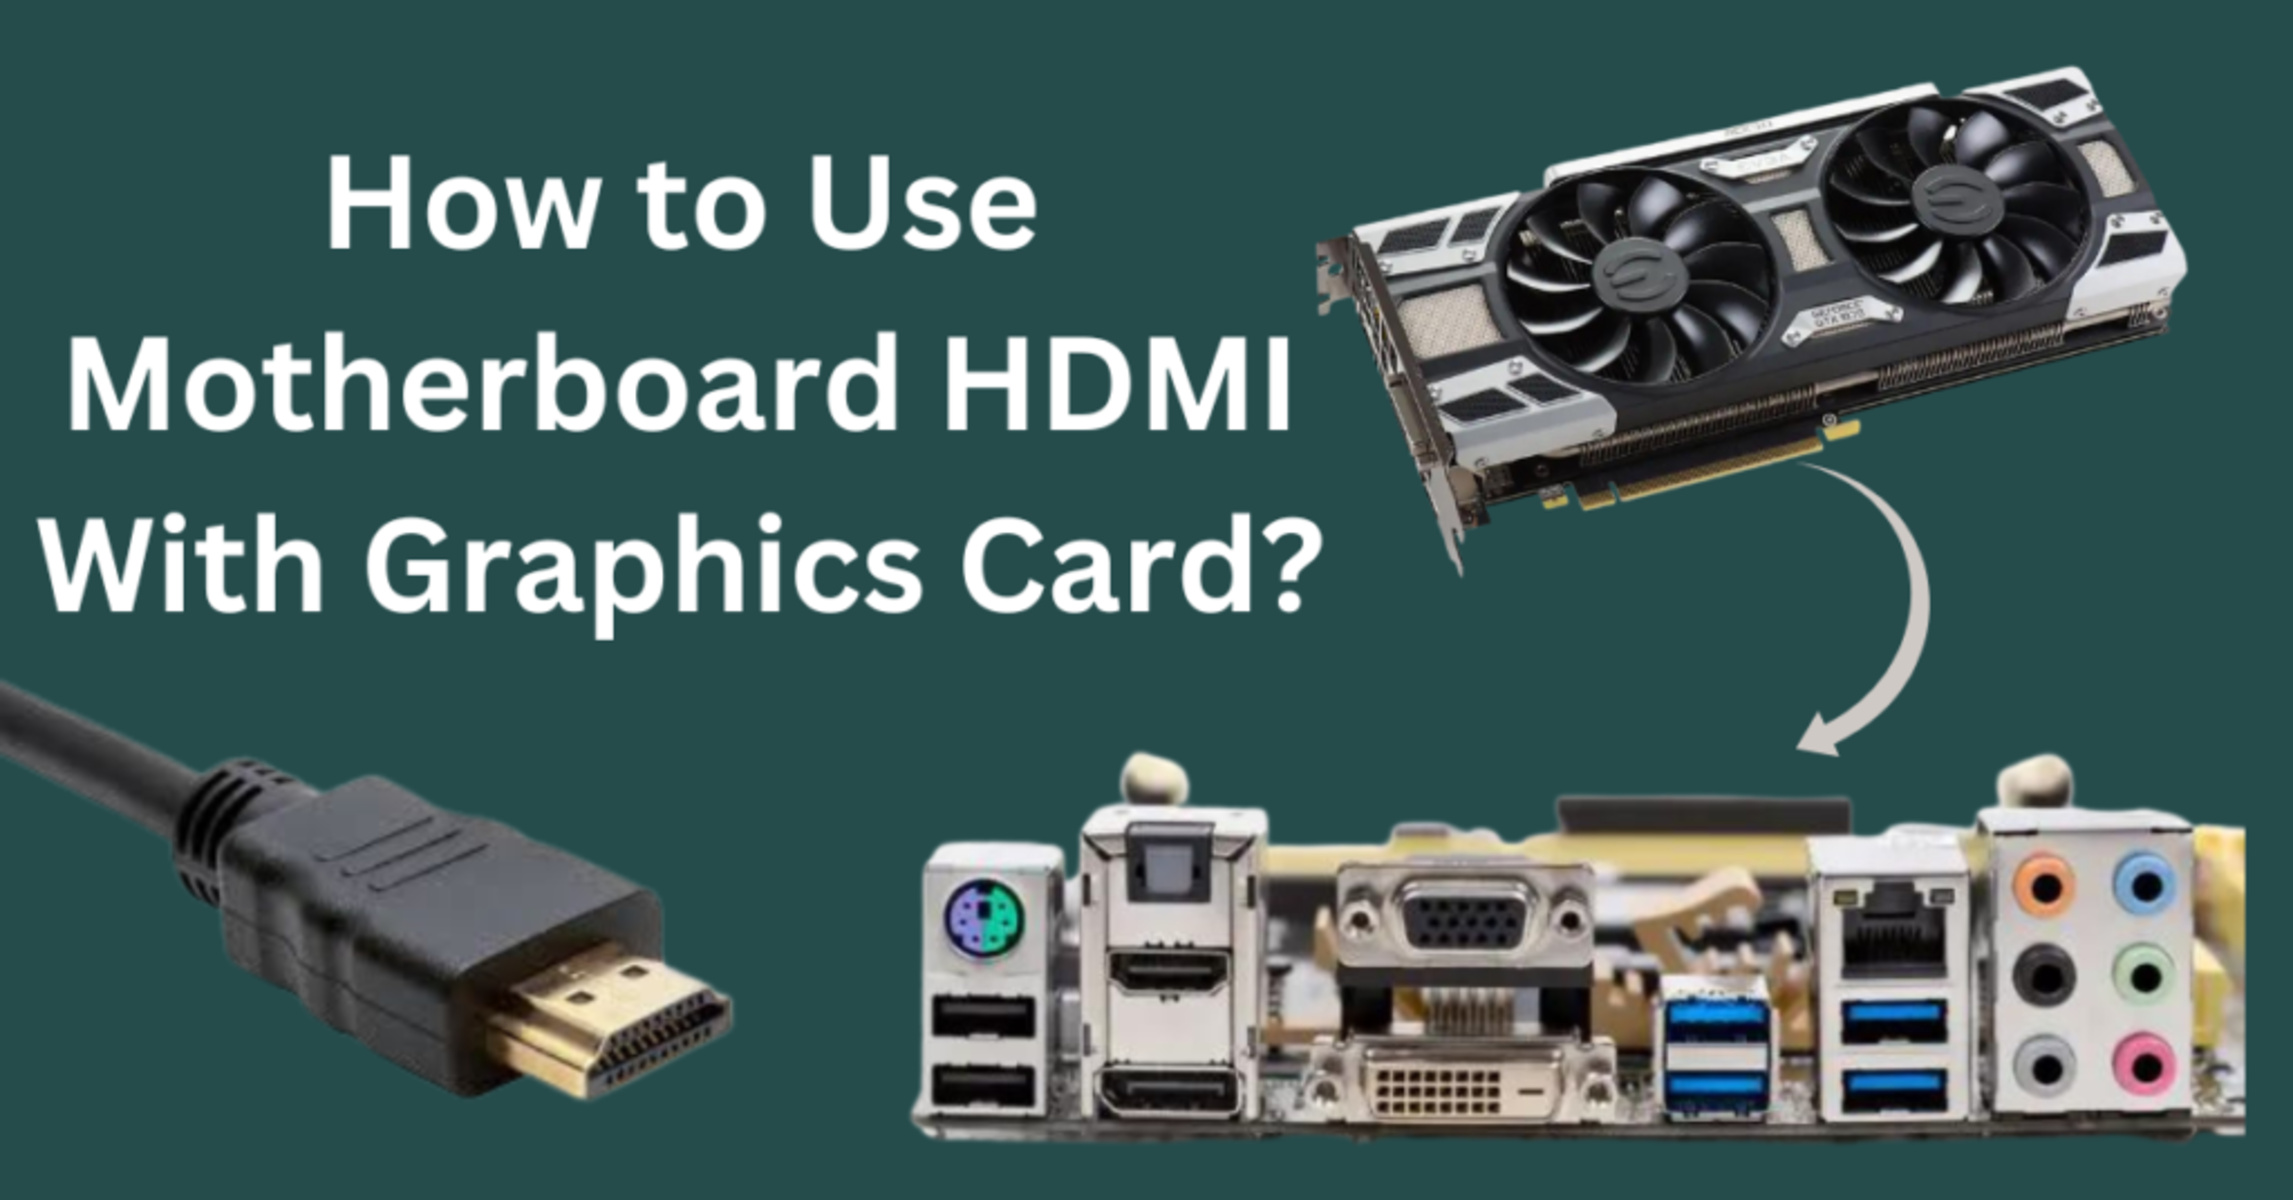
Before we delve into the troubleshooting methods, it is important to note that not all motherboards come with onboard HDMI ports. Some models require a dedicated graphics card for HDMI output. Therefore, if your motherboard does not have an HDMI port, you will need to check if you have a compatible graphics card installed in your system.
Now, let’s discuss some of the possible causes for HDMI not working on your motherboard and the steps you can take to fix it. By following these troubleshooting methods, you can hopefully get your HDMI port up and running smoothly again.
Possible Causes for HDMI Not Working on Motherboard
There can be multiple reasons why your motherboard’s HDMI port is not functioning properly. Understanding the potential causes will help you diagnose and address the issue effectively. Here are some common culprits:
- Loose or faulty HDMI cable: The first thing to check is the HDMI cable used to connect your motherboard to the display device. Ensure that the cable is securely connected at both ends and hasn’t been damaged or worn out. Switching to a different HDMI cable can also help determine if the problem lies with the cable itself.
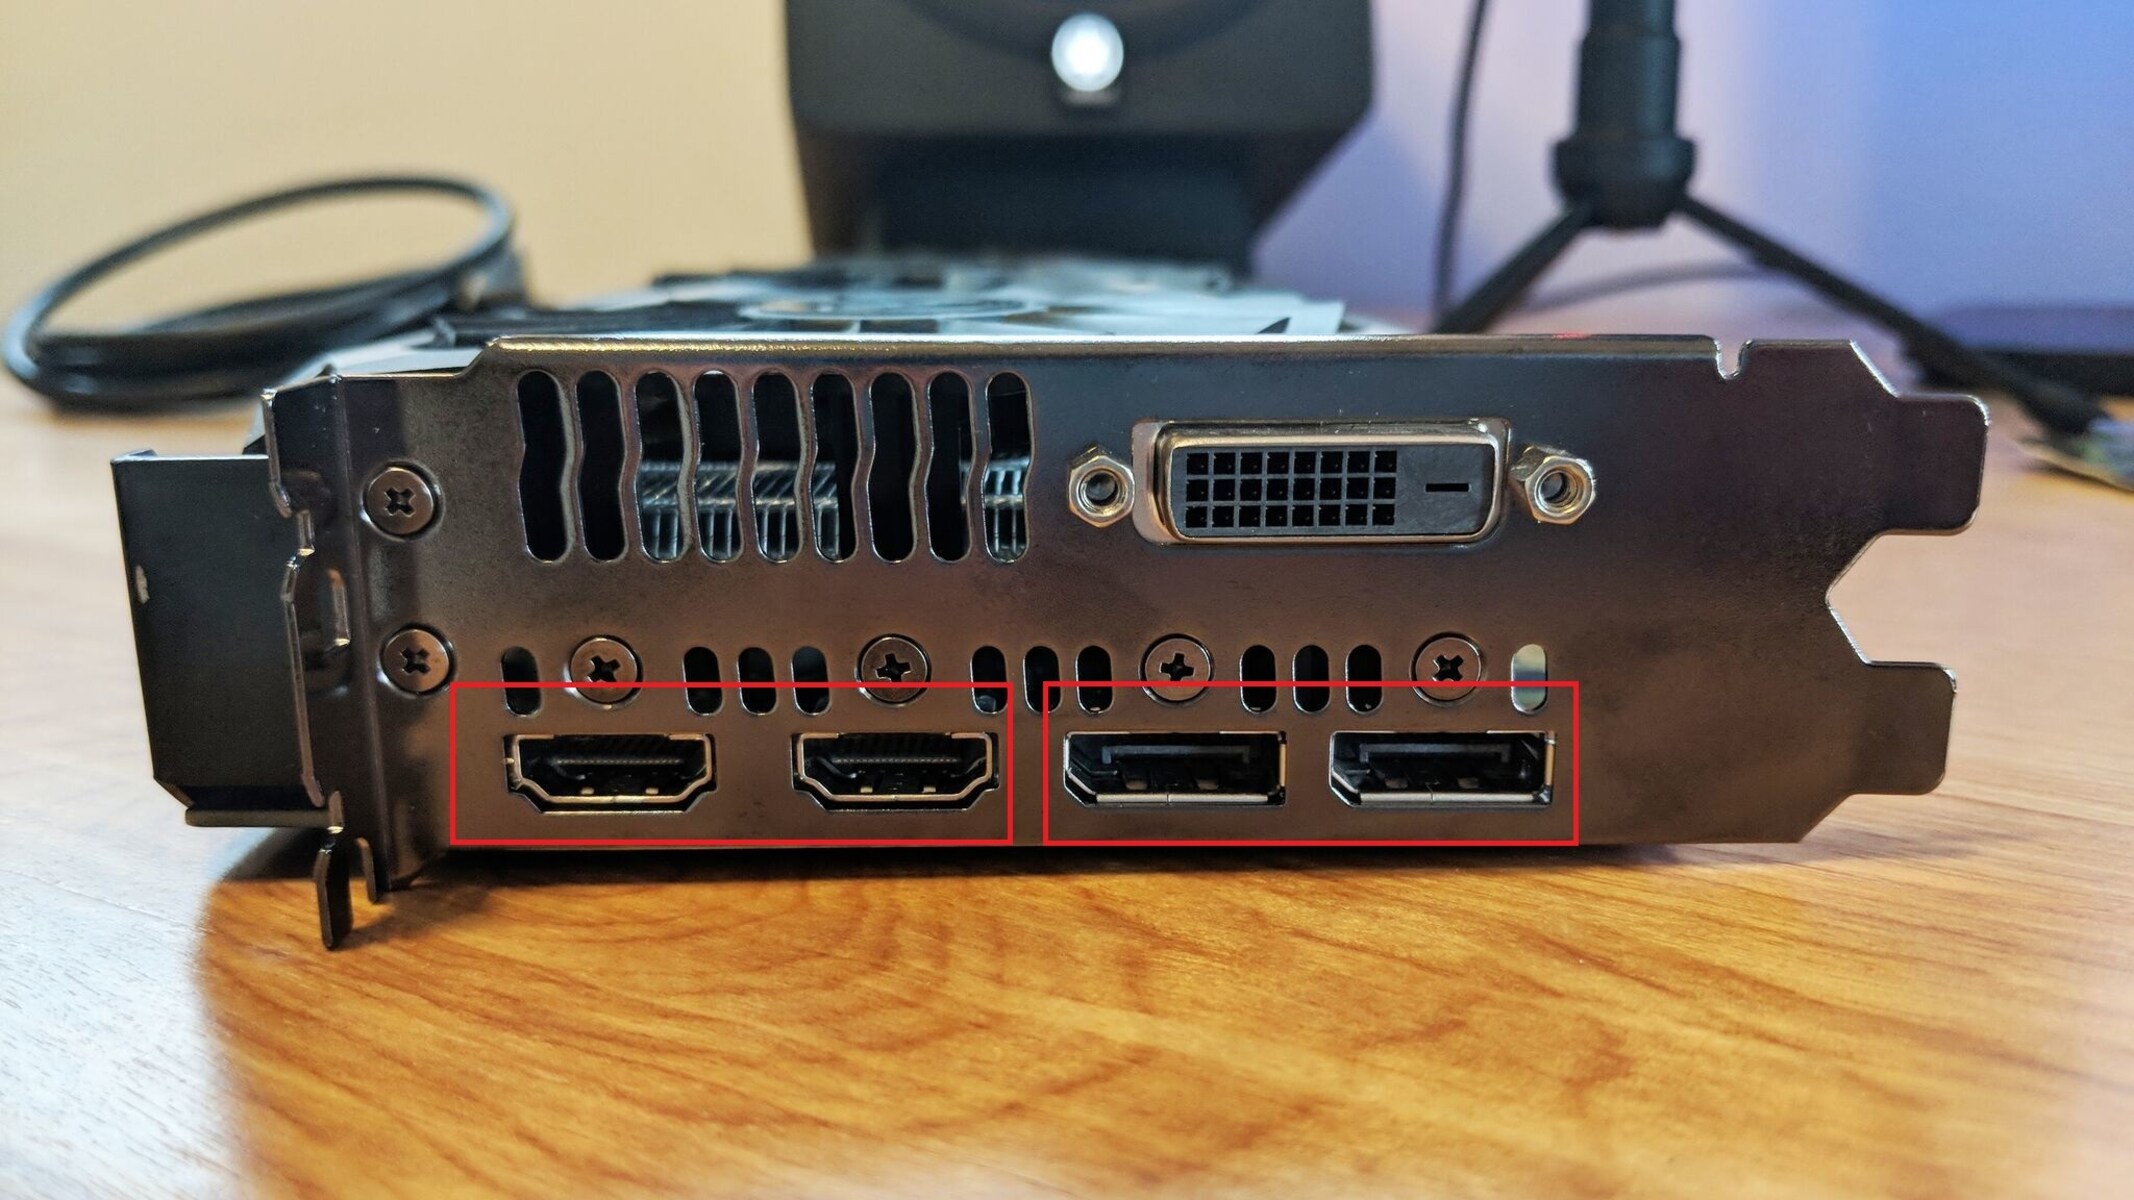
- Compatibility issues with graphics card: If you have a dedicated graphics card installed in your system, it is necessary to ensure that it supports HDMI output. Some older graphics cards may not have an HDMI port or may require a specific adapter. Check the specifications of your graphics card and verify its compatibility with HDMI.
- Outdated graphics drivers: Graphics drivers play a crucial role in enabling HDMI output on your motherboard. Outdated or incompatible drivers can cause the HDMI port to malfunction. Make sure to check for driver updates from the manufacturer’s website or through a reliable driver update tool.
- BIOS settings: Sometimes, improper BIOS settings can interfere with the functionality of the HDMI port. Access your motherboard’s BIOS settings and confirm that the HDMI port is enabled. Additionally, ensure that the primary display output is set to the HDMI port.
- Hardware issues on the motherboard: In some cases, physical problems with the motherboard can prevent the HDMI port from working correctly. Inspect the HDMI port for any visible damage or loose connections. If you identify any issues, it might be necessary to consult a professional technician or consider replacing the motherboard.
- Incorrect Windows display settings: Incorrect display settings within the Windows operating system can cause the HDMI port to appear non-functional. Navigate to the display settings and ensure that the HDMI output is selected as the primary display. You may also need to adjust the screen resolution and refresh rate to match the capabilities of your display.
These are just a few possible causes for HDMI not working on your motherboard. By identifying the specific cause related to your situation, you can proceed to the appropriate troubleshooting methods outlined in the following sections.
Checking the HDMI Cable and Connection
When troubleshooting HDMI issues on your motherboard, it’s essential to start by examining the HDMI cable and its connection. Here’s what you need to do:
- Inspect the HDMI cable: Check the HDMI cable for any physical damage, such as frayed wires or bent pins. If you notice any issues, replace the cable with a new one. Ensure that the cable is of high quality and capable of transmitting audio and video signals.
- Reconnect the HDMI cable: Disconnect the HDMI cable from both your motherboard and the display device. Then, reconnect it firmly to ensure a secure connection at both ends. Avoid excessively tight or loose connections, as these can affect the signal transmission.
- Try a different HDMI port and display device: If possible, test the HDMI port using a different port on your motherboard and a different display device. This will help determine whether the issue lies with the port or the original display. If the HDMI port works with another device, the problem may be with the previous display device.
- Check for HDMI adapter compatibility: If you are using an HDMI adapter, ensure it is compatible with your motherboard and the display device you are using. Some adapters may require additional settings or drivers to function correctly. Consult the manufacturer’s instructions or website for guidance.
- Restart your system: Sometimes, a simple system restart can resolve temporary glitches or conflicts that may be affecting the HDMI functionality. Restart your computer after confirming a secure HDMI connection to see if the issue persists.
By following these steps, you can ensure that the HDMI cable and connection are in proper working order. If the problem persists, proceed to the next troubleshooting step to investigate other potential causes.
Ensuring the Graphics Card and Drivers are Compatible and Updated
If you have a dedicated graphics card installed in your system, it is important to confirm its compatibility with HDMI output and ensure that the corresponding drivers are up to date. Here’s what you need to do:
- Verify the graphics card’s HDMI compatibility: Check the specifications of your graphics card to ensure it supports HDMI output. Some older or lower-end models may not have an HDMI port or require a specific adapter for HDMI connectivity. If your graphics card is not compatible, you may need to consider upgrading to a card that supports HDMI.
- Update the graphics drivers: Outdated or incompatible graphics drivers can cause issues with HDMI functionality. Visit the manufacturer’s website for your graphics card and look for the latest drivers available for your specific model. Download and install the updated drivers following the provided instructions.
- Use a reliable driver update tool: If manually searching for and updating drivers seems overwhelming, you can use a reliable driver update tool. These tools scan your system and automatically update drivers, including the graphics card drivers, to the latest compatible versions. Ensure that you choose a trustworthy tool from a reputable source.
- Perform a clean installation of graphics drivers: If you are upgrading or changing the graphics card, it is recommended to perform a clean installation of the drivers. This involves uninstalling the previous drivers completely before installing the new ones. Consult the manufacturer’s instructions or website for specific guidelines on performing a clean driver installation.
- Restart your system: After updating or installing new graphics drivers, restart your computer to allow the changes to take effect. This can help resolve any conflicts or issues that may have been present before the driver update.
Ensuring that your graphics card is compatible with HDMI output and keeping the drivers up to date plays a crucial role in maintaining the proper functioning of the HDMI port on your motherboard. If the issue persists, proceed to the next troubleshooting step to further investigate potential causes.
Troubleshooting BIOS Settings
The BIOS (Basic Input/Output System) settings on your motherboard control various hardware functions, including the HDMI port. Incorrect settings within the BIOS can lead to HDMI not working. Here’s how you can troubleshoot the BIOS settings:
- Access the BIOS: Restart your computer and enter the BIOS settings by pressing the designated key during the boot process. The key to access the BIOS may vary depending on your motherboard manufacturer (common keys include Del, F2, F10, or Esc). If you’re unsure which key to press, refer to your motherboard’s manual or the manufacturer’s website.
- Check HDMI port settings: Once in the BIOS settings, navigate to the section related to onboard graphics or display settings. Look for an option that pertains to the HDMI port or onboard graphics output. Ensure that the HDMI port is enabled and set as the primary display output. Save any changes made in the BIOS and exit.
- Restore BIOS default settings: If you’re unsure about the changes made in the BIOS or suspect that incorrect settings are causing the issue, you can restore the default BIOS settings. Look for an option in the BIOS to reset or load the default settings. This will revert any changes made and may resolve the HDMI problem.
- Update the BIOS: If a newer version of the BIOS is available for your motherboard, consider updating it. Check the manufacturer’s website for the latest BIOS version and follow the provided instructions to perform the update. However, be cautious when updating the BIOS, as any mistakes or interruptions during the process can cause severe system issues. Read and follow the instructions carefully.
- Restart your system: After making any changes to the BIOS settings or updating the BIOS, restart your computer to allow the changes to take effect. This will help determine if the HDMI port is functioning properly with the updated settings.
Troubleshooting the BIOS settings is essential in resolving HDMI-related issues on your motherboard. If the issue persists, continue to the next troubleshooting step to explore other potential causes.
Checking for Hardware Issues on the Motherboard
If you have followed the previous troubleshooting steps and are still experiencing HDMI issues on your motherboard, it is crucial to investigate possible hardware problems. Here’s what you can do to check for hardware-related issues:
- Inspect the HDMI port: Carefully examine the HDMI port on your motherboard for any physical damage, such as bent pins or misalignment. Dirt or debris inside the port can also cause connection issues. Use compressed air or a soft brush to clean out any dirt or debris. If you notice damage or the port appears loose, it may require professional repair or a replacement.
- Test with a different HDMI cable and display device: Connect your motherboard to a different display device using a known working HDMI cable. This will help determine if the issue lies with the motherboard or the original display device. If the problem persists with multiple cables and devices, there may be an underlying hardware issue with the motherboard.
- Check the motherboard’s documentation: Consult the user manual or official documentation of your motherboard for any specific troubleshooting steps or known issues related to HDMI functionality. The manufacturer’s website or support forums can also provide valuable information or firmware updates that address HDMI problems.
- Seek professional assistance: If you have tried all the above steps and cannot pinpoint the cause of the HDMI issue, it may be necessary to seek professional help. Contact the manufacturer’s support team or a trusted computer technician to diagnose and repair any hardware issues that are affecting the HDMI port on your motherboard.
Identifying and resolving hardware issues can be challenging without the necessary expertise or tools. If none of the troubleshooting steps have resolved the HDMI problem, it’s best to seek professional assistance to avoid further damage to your motherboard or other components.
Troubleshooting Windows Display Settings
If you’re still encountering issues with the HDMI port on your motherboard, it is worth examining the Windows display settings. Incorrect settings within the operating system can sometimes cause HDMI problems. Here’s how you can troubleshoot the Windows display settings:
- Access the Display Settings: Right-click on the desktop and select “Display settings” from the context menu. Alternatively, you can open the Start menu, type “display settings” in the search bar, and click on the corresponding result.
- Select HDMI as the primary display: In the Display Settings window, navigate to the “Multiple displays” section. Verify that HDMI is selected as the primary display. If it is not the primary display, click on the drop-down menu and choose the HDMI option.
- Adjust screen resolution and refresh rate: Scroll down in the Display Settings window to the “Display resolution” section. Ensure that the screen resolution is set to the recommended value for your display device. Additionally, click on the “Advanced display settings” link and check if the refresh rate is set to the recommended value. Incorrect resolution or refresh rate settings can affect HDMI functionality.
- Update graphics drivers: In some cases, outdated or incompatible graphics drivers can cause conflicts with the HDMI port. Refer to the previous section on ensuring the graphics card drivers are compatible and updated. Updating the graphics drivers can help resolve any compatibility issues and improve HDMI functionality.
- Restart your system: After making any changes in the Windows display settings or updating the graphics drivers, restarting your computer allows the changes to take effect. This can help determine if the HDMI port is now working properly with the updated settings.
By troubleshooting the Windows display settings, you can address any configuration issues that may be affecting the HDMI functionality on your motherboard. If the issue persists, it is advisable to move on to the next troubleshooting step or seek further assistance.
Seeking Professional Help or Warranty Support
If you have followed all the troubleshooting steps mentioned earlier and are still unable to resolve the HDMI issue with your motherboard, it is recommended to seek professional help or take advantage of any available warranty support. Here are a few options to consider:
- Contact the manufacturer’s support: Reach out to the manufacturer’s customer support team for assistance. Provide them with detailed information about the problem you are experiencing and the troubleshooting steps you have already taken. They may be able to provide further guidance or recommend specific solutions based on their expertise.
- Consult a computer technician: If you are unable to resolve the issue on your own or with the manufacturer’s support, consider seeking help from a professional computer technician. They have the knowledge and tools to diagnose and repair hardware-related problems. Look for reputable computer repair shops or technicians who specialize in motherboard issues.
- Utilize warranty services: If your motherboard is still under warranty, check the terms and conditions of the warranty. If the HDMI issue is covered, contact the manufacturer to initiate a warranty claim. They may offer repair services or provide a replacement motherboard, depending on the circumstances. Be sure to follow the guidelines and procedures outlined by the manufacturer for warranty support.
- Consider a motherboard replacement: If all else fails and the HDMI issue persists, it may be necessary to consider replacing the motherboard. This option should only be pursued after exhausting all other troubleshooting steps and seeking professional advice. Consult with a technician or the manufacturer for recommendations on compatible motherboard models that would meet your needs.
Seeking professional help or utilizing warranty support can provide you with expert assistance and ensure that you explore all available avenues to resolve the HDMI issue on your motherboard. Remember to provide detailed information and follow the recommended procedures to increase your chances of a successful resolution.
Conclusion
Encountering HDMI issues on your motherboard can be frustrating, but with the right troubleshooting steps, you can often diagnose and resolve the problem. In this article, we explored several possible causes for HDMI not working on your motherboard and provided various methods to troubleshoot the issue.
We started by checking the HDMI cable and connection to ensure they are secure and in good condition. We then moved on to verifying the compatibility of the graphics card and updating the drivers to ensure proper HDMI functionality. Troubleshooting the BIOS settings helped identify any incorrect configurations that might be affecting the HDMI port.
Next, we looked into potential hardware issues on the motherboard and discussed the importance of inspecting the HDMI port and testing with different HDMI cables and display devices. Additionally, we examined the Windows display settings and highlighted the significance of selecting HDMI as the primary display and adjusting the resolution and refresh rate correctly.
Lastly, we explored the option of seeking professional help or utilizing warranty support if all the troubleshooting steps failed to resolve the issue. Contacting the manufacturer’s support, consulting a computer technician, or exploring warranty services can provide further assistance and guidance.
Remember, each troubleshooting step mentioned in this article should be attempted in the order provided, as some solutions may depend on the successful completion of previous steps. By following these steps and seeking the necessary help, you can increase the chances of resolving the HDMI issue on your motherboard and enjoy the benefits of a functioning HDMI port.