Introduction
Have you ever wondered why your webcam image appears grainy or blurry? In an age where video calls and online meetings have become the norm, a clear and sharp webcam image is essential for effective communication. Understanding the factors that contribute to grainy webcam images can help you troubleshoot and improve your video quality.
Webcam resolution plays a significant role in determining the clarity of your image. The resolution refers to the number of pixels the camera sensor can capture, typically measured in megapixels. The higher the resolution, the more detailed and crisp the image will appear. However, resolution alone is not the sole factor affecting image quality. Other factors, such as lighting conditions, webcam settings, lens quality, camera placement, and even your internet connection, can contribute to grainy webcam images.
In this article, we will delve into the various factors that affect webcam image quality and explore ways to enhance the clarity of your webcam image. By understanding these factors and implementing some simple adjustments, you can improve the overall quality of your video calls and online meetings.
Understanding Webcam Resolution
Webcam resolution refers to the number of pixels that a camera sensor can capture. It determines the level of detail and clarity in your webcam image. Resolution is typically measured in megapixels (MP), with higher numbers representing a higher resolution.
Most webcams on the market offer resolutions ranging from 720p (1280×720 pixels) to 4K (3840×2160 pixels) or even higher. However, it’s important to note that higher resolution doesn’t always guarantee better image quality. The sensor’s pixel size and the camera’s image processing capabilities also play a crucial role in determining image quality.
When it comes to webcam resolution, there is a tradeoff between detail and file size. Higher resolutions capture more detail but also result in larger file sizes. This can impact bandwidth usage during video calls and may cause lag or buffering issues if your internet connection is not robust enough.
It’s worth considering your specific needs when choosing a webcam resolution. If you primarily use your webcam for video calls and online meetings, a 720p or 1080p resolution should suffice. These resolutions offer a good balance between image quality and file size. However, if you require exceptional detail, such as for content creation or broadcasting, opting for a higher resolution like 4K may be beneficial.
Keep in mind that the resolution of your webcam also depends on the specifications of the software you’re using. Some applications may only support lower resolutions, so it’s essential to check the compatibility before investing in a high-resolution webcam.
Understanding webcam resolution is the first step in improving your webcam image quality. In the following sections, we will explore other factors that can affect the clarity of your webcam image and provide solutions to enhance its overall quality.
Factors That Affect Webcam Image Quality
While webcam resolution is an important factor in determining image quality, it is not the only element that affects how clear and sharp your webcam image appears. Several other factors come into play, and understanding them can help you troubleshoot and enhance your webcam image quality:
- Lighting Conditions: The lighting in your environment can significantly impact your webcam image quality. Insufficient lighting can result in a grainy or dim image, while harsh or direct lighting can cause overexposure and wash out the image. It’s best to have even, diffused lighting to ensure optimal image quality.
- Webcam Settings: Most webcams come with adjustable settings that allow you to fine-tune the image quality. These settings can include brightness, contrast, saturation, and white balance. Experimenting with these settings can help you find the optimal levels for your specific environment and preferences.
- Webcam Sensor and Pixel Size: The sensor size and pixel density of your webcam play a crucial role in image quality. Larger sensors and larger pixel sizes tend to capture more light, resulting in clearer and sharper images. When purchasing a webcam, consider opting for models with larger sensor sizes and pixel sizes for better image quality.
- Webcam Lens Quality: The quality of the lens also contributes to the overall image quality. A high-quality lens can produce sharper and more detailed images compared to a lower quality lens. When choosing a webcam, consider models with high-quality lenses to ensure better image clarity.
- Web Camera Placement and Stability: The position and stability of your webcam can affect image quality. Ensure that your webcam is securely positioned and stable to prevent any movements or shaking that may result in blurry images. Additionally, make sure to position your webcam at eye level for the most flattering and natural-looking image.
- The Role of Internet Connection: Your internet connection plays a vital role in the quality of your webcam image during video calls and online meetings. A slow or unstable internet connection can lead to pixelation, buffering, and overall poor image quality. To improve the clarity of your webcam image, ensure a stable and high-speed internet connection.
Recognizing these factors and implementing appropriate adjustments can greatly enhance the quality of your webcam image. In the next sections, we will explore specific solutions and techniques to optimize your webcam settings and improve image quality.
Lighting Conditions and Webcam Image Quality
The lighting conditions in your environment have a significant impact on the quality of your webcam image. Proper lighting can enhance clarity and detail, while poor lighting can result in a grainy or dim image. Here are some tips to optimize lighting conditions for better webcam image quality:
- Use Natural Light: Whenever possible, utilize natural light from windows or doors. Natural light creates a soft and even illumination that is flattering and conducive to clear webcam images. Position yourself facing the light source to avoid shadows on your face.
- Avoid Harsh Direct Light: Direct sunlight or bright artificial lights can cause overexposure and wash out your image. If you have harsh lighting in your environment, try using curtains, blinds, or diffusers to soften the light and create a more balanced illumination.
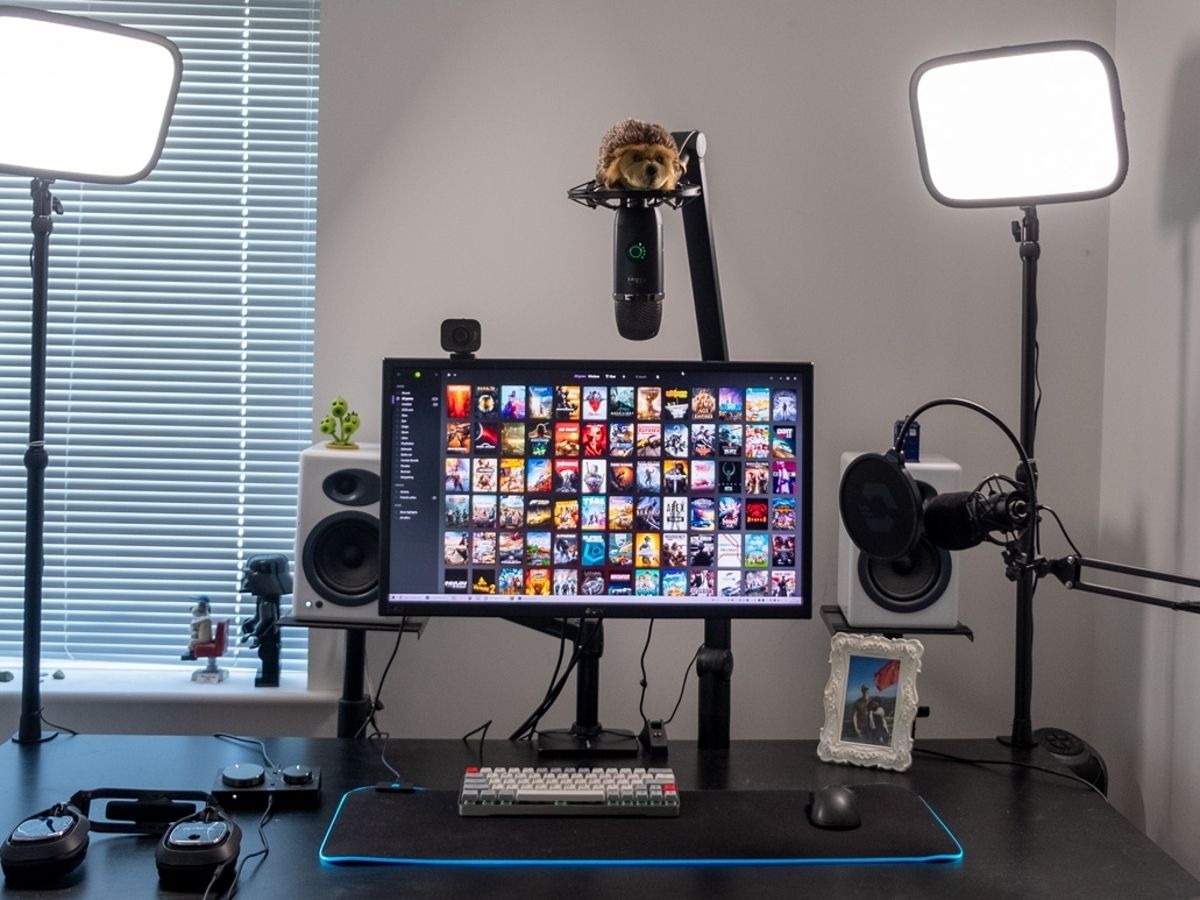
- Supplement with Artificial Lighting: If natural light is limited or inadequate, consider using artificial or supplementary lighting sources. Softbox lights, ring lights, or desk lamps with adjustable intensity can help create a well-lit environment for your webcam. Position the lights at a slight angle to reduce shadows and provide a more flattering appearance.
- Avoid backlit situations: Avoid sitting with a bright light source directly behind you, as this can create a silhouette effect and darken your face. Position yourself with the light in front of you or to the side for better illumination on your face.
- Adjust your Computer Display: The brightness and color temperature of your computer display can affect how your webcam image appears. Calibrate your monitor settings to ensure accurate color reproduction and avoid extreme brightness that may impact how you perceive your image during video calls.
Experiment with different lighting setups and find what works best for your specific environment and webcam. Remember to maintain a well-lit and evenly illuminated space to ensure the best possible webcam image quality. With appropriate lighting conditions, you can significantly improve the clarity and detail of your webcam image.
Webcam Settings for Better Image Quality
Adjusting your webcam settings can greatly enhance the image quality during video calls and online meetings. Here are some key settings to consider:
- Brightness and Contrast: Adjusting the brightness and contrast settings can help improve the overall clarity and balance of your webcam image. Increase the brightness if the image appears too dark and adjust the contrast to add depth and saturation.
- Saturation and Color Balance: Saturation determines the intensity of colors in your image. Increase or decrease the saturation to find a level that makes your image appear natural and vibrant. Color balance settings allow you to adjust the overall warmth or coolness of the image.
- Sharpness: The sharpness setting controls the level of detail in your image. Avoid setting it too high as it can create unnatural and exaggerated edges. Find a balance that makes the image clear and defined without introducing artifacts.
- Zoom and Framing: Zoom and framing settings allow you to adjust the field of view of your webcam. Experiment with zoom to frame yourself properly within the camera view without appearing too close or too far. Ensure that you maintain a natural and comfortable distance from the camera.
- White Balance: Adjust the white balance setting to ensure accurate color reproduction. This helps to eliminate any unwanted color casts caused by different lighting conditions. Use the auto white balance setting or manually adjust it based on the lighting in your environment.
Access your webcam settings through the software or application you are using for video calls. Different software may have varying options and interfaces, so familiarize yourself with the settings specific to your webcam. Make incremental adjustments while observing the changes in your image until you achieve the desired clarity and quality.
Remember to consider the specific requirements of each video call or meeting. For example, if you are presenting slides or sharing your screen, adjust the framing and positioning of your webcam to accommodate the additional content without overshadowing your image.
By fine-tuning your webcam settings, you can optimize the image quality and ensure a more professional and engaging appearance during video calls and online meetings.
Webcam Sensor and Pixel Size
The webcam sensor and pixel size play a crucial role in determining the image quality of your webcam. Let’s take a closer look at these factors:
Webcam Sensor: The sensor is the component responsible for capturing the light and converting it into digital signals. It’s important to choose a webcam with a high-quality sensor, as it directly impacts the level of detail and clarity in your image. Larger sensors tend to capture more light, resulting in brighter and sharper images.
Pixel Size: The pixel size refers to the physical size of each individual pixel on the webcam sensor. In general, larger pixels are more capable of capturing light, which leads to better image quality, especially in low-light conditions. A larger pixel size allows for more sensitivity and less noise in the image.
When comparing webcam specifications, you may come across terms like “2-micron pixel size” or “1.4-micron pixel size.” The smaller the pixel size, the less capable it is in capturing light, which can result in a grainier image. Opting for a webcam with a larger pixel size can greatly enhance image quality, particularly in low-light environments.
When shopping for a webcam, pay attention to the specifications provided by the manufacturer. Look for webcams with larger sensors and pixel sizes for better image quality. Higher-end webcams often prioritize sensor quality, allowing for more light capture and improved image clarity.
It’s important to note that webcam sensor and pixel size are just two factors among many that determine overall image quality. Other factors such as lighting conditions, lens quality, and webcam settings also play significant roles. A combination of these factors working together will yield the best results.
By considering the webcam sensor and pixel size, you can make an informed decision when purchasing a webcam, ensuring that you have a device capable of delivering the level of image quality you desire.
Webcam Lens Quality
The quality of the lens on your webcam is a vital factor in determining the overall image quality. A high-quality lens can significantly enhance the sharpness, clarity, and detail of your webcam image. Here are some key aspects to consider regarding webcam lens quality:
Optical Elements: A quality webcam lens is typically composed of multiple optical elements. These elements work together to correct aberrations, minimize distortion, and ensure optimal light transmission. More advanced webcam models may feature specialized lens coatings that reduce glare and improve color accuracy.
Aperture: The aperture refers to the size of the lens opening. A wider aperture allows more light to enter the camera, making the image brighter and improving low-light performance. A larger aperture also allows for shallower depth of field, which can create a pleasing background blur effect, often referred to as bokeh.
Focal Length: The focal length determines the field of view and the perceived distance between the camera and the subject. Webcam lenses with adjustable focal lengths allow you to choose between a wide-angle view for group video calls or a narrower view for focused individual conversations. A lens with a fixed focal length, commonly known as a prime lens, can offer superior image quality due to its simpler optical design.
Avoid Plastic Lenses: Some low-quality webcams may feature plastic lenses, which can result in reduced image quality. Plastic lenses are more prone to distortion and may lack the sharpness and clarity that glass lenses provide. When purchasing a webcam, prioritize models that feature glass lenses for optimal image quality.
It’s worth noting that the lens quality alone does not guarantee excellent image quality. Factors like lighting conditions, webcam sensor, and pixel size also contribute to the final image. However, investing in a webcam with a high-quality lens will significantly improve the overall image sharpness and clarity.
Before purchasing a webcam, consider researching the lens specifications provided by the manufacturer. Look for models with glass lenses, adjustable focal lengths, and a wide aperture to ensure the best possible image quality for your video calls and online meetings.
Web Camera Placement and Stability
The placement and stability of your web camera can have a significant impact on the quality of your webcam image. Proper positioning and stability ensure that your image remains clear and steady throughout video calls and online meetings. Here are some key considerations for webcam placement and stability:
- Positioning: Ideally, position your web camera at eye level or slightly above. This helps create a more natural perspective and prevents unflattering angles. If your camera is below eye level, it can create an unflattering view and make you appear larger and distorted.
- Camera Distance: Maintain an optimal distance between yourself and the camera. Being too close to the camera can create a distorted and unprofessional appearance, while being too far can make it challenging for others to see you clearly. Find a balance where your face and upper body are visible and well-framed.
- Stability: It’s crucial to ensure that your webcam is stable and stationary. Unintentional movements or vibrations can result in a blurry image or distractions during video calls. Consider using a tripod or a stable surface to securely position your webcam and minimize any movements.
- Avoid Handheld Placement: Holding the webcam in your hand while video calling can lead to shaky and unstable footage. It’s best to find a fixed position for your camera to maintain a steady image. If a fixed position is not possible, you can explore mounting options that will provide stability.
- Clean the Lens: Regularly clean the lens of your webcam to remove any dust, smudges, or fingerprints that can affect image quality. Use a soft, lint-free cloth or lens cleaning solution to gently wipe the lens and ensure a clean and clear view.
By carefully considering the placement and stability of your web camera, you can ensure that your webcam image remains clear, steady, and professional during video calls and online meetings. Take the time to find an optimal position and consider investing in additional accessories like tripods or mounts to enhance stability.
The Role of Internet Connection
Your internet connection plays a crucial role in the quality of your webcam image during video calls and online meetings. A stable and high-speed internet connection is essential for optimal image clarity and smooth video streaming. Here are some important factors to consider regarding the role of your internet connection:
Bandwidth: Sufficient bandwidth is necessary to transmit and receive data during video calls. A higher bandwidth allows for smoother video streaming and clearer images. Make sure your internet plan provides enough bandwidth to support video conferencing without lag or buffering issues.
Upload and Download Speeds: Both upload and download speeds are critical for video calls. While download speed affects how quickly you can receive data, upload speed determines how quickly you can send your video and audio feed. A balanced and high-speed connection in both directions is essential for a seamless video conferencing experience.
Stability: A stable internet connection ensures a consistent and uninterrupted video stream. Fluctuations in connectivity can result in pixelation, frozen frames, or dropped calls. Consider using a wired connection instead of relying solely on Wi-Fi, as wired connections tend to be more reliable and consistent.
Connection Type: The type of internet connection you have can also impact your webcam image quality. Fiber-optic and cable connections often offer higher speeds and greater stability compared to DSL or satellite connections. If possible, opt for a connection type that provides the best possible speeds and reliability in your area.
Network Congestion: Network congestion, especially during peak usage times, can affect your internet connection and, subsequently, your webcam image quality. Avoid scheduling important video calls during times when internet usage is high, as it may result in slower speeds and reduced video performance.
When experiencing issues with your webcam image, such as pixelation or blurriness, it’s worth examining your internet connection as a possible cause. Run a speed test to check your upload and download speeds and ensure they meet the recommended requirements for smooth video conferencing.
If you consistently encounter poor webcam image quality due to your internet connection, consider upgrading your internet plan, switching providers, or reaching out to your ISP for assistance in resolving any connectivity issues.
By ensuring a stable and high-speed internet connection, you can maximize the clarity and smoothness of your webcam image, allowing for more productive and engaging video calls and online meetings.
Software Solutions for Grainy Webcam Images
If you’re experiencing grainy webcam images, there are several software solutions available that can help improve the quality of your video feed. Here are some key software-based approaches to consider:
- Video Enhancement Software: There are various video enhancement software available that utilize advanced algorithms to enhance the quality of your webcam image. These software solutions can reduce noise, sharpen the image, and improve overall clarity. Look for reputable video enhancement software and explore their features and settings to adjust and optimize your webcam image quality.
- Noise Reduction Filters: Many video conferencing applications offer built-in noise reduction filters that can help minimize grainy images caused by low-light conditions or other factors. These filters analyze the video feed and reduce noise and grain, resulting in a smoother and clearer image.
- Adjust Webcam Settings: Most video conferencing software allows you to adjust webcam settings. Take advantage of these settings to fine-tune the brightness, contrast, saturation, and sharpness of your webcam image. Experimenting with different settings can help you find the optimal configuration for your specific environment and lighting conditions.
- Update Webcam Drivers: Outdated webcam drivers can sometimes lead to subpar image quality. Ensure that you have the latest drivers installed for your webcam by visiting the manufacturer’s website or using driver update software. Updated drivers often include performance improvements and bug fixes that can enhance the overall image quality.
- Upgrade Video Conferencing Software: If you are using outdated or older versions of video conferencing software, consider upgrading to the latest version. Newer software often includes improvements in video encoding algorithms and image processing, leading to better image quality.
Remember that the effectiveness of these software solutions may vary depending on your specific webcam model and software application. It’s advisable to research and experiment with various software options to find the best solution that works for your setup.
It’s also important to note that software solutions can only do so much in enhancing image quality. Physical factors like lighting conditions, webcam hardware, and internet connection also play significant roles in the overall clarity of your webcam image.
By utilizing software solutions, updating drivers, and optimizing webcam settings, you can significantly improve the quality of your webcam image, resulting in more professional and engaging video calls and online meetings.
Conclusion
Having a clear and sharp webcam image is essential for effective communication in today’s digital world. By understanding the various factors that affect webcam image quality and implementing appropriate solutions, you can greatly enhance your video calls and online meetings.
We explored the importance of webcam resolution, factors like lighting conditions, webcam settings, lens quality, web camera placement, and the role of your internet connection. Each of these factors contributes to the overall clarity and sharpness of your webcam image.
Adjusting your webcam settings, optimizing lighting conditions, and choosing a webcam with high-quality lens and sensor can significantly improve image quality. Additionally, ensuring a stable and high-speed internet connection helps to prevent issues such as pixelation and lag during video calls.
Furthermore, we discussed some software solutions that can help enhance grainy webcam images. Video enhancement software, noise reduction filters, and updating webcam drivers are some effective ways to improve image quality through software optimization.
In conclusion, achieving a clear and sharp webcam image involves a combination of hardware considerations, software solutions, and environmental factors. By paying attention to these elements, you can elevate the quality of your webcam image and communicate more effectively during video calls and online meetings. Remember to experiment, adjust settings as needed, and adapt to your specific lighting and environment for the best possible image quality.


