Introduction
Welcome to the world of webcam settings! Whether you’re using your webcam for video conferences, online streaming, or simply keeping in touch with loved ones, understanding how to optimize your webcam’s settings can greatly enhance your video quality and overall experience.
Webcams come with a variety of settings and controls that allow you to customize and adjust various aspects of your video output. By fine-tuning these settings, you have the power to improve clarity, brightness, color accuracy, and much more.
In this article, we will guide you through the process of adjusting your webcam settings to achieve the best possible video quality. We will cover everything from basic adjustments like brightness and contrast to more advanced settings like white balance and frame rate. Whether you’re a beginner or a tech-savvy individual, this guide will provide valuable insights to help you get the most out of your webcam.
Before we dive into the nitty-gritty of adjusting webcam settings, it’s important to note that the availability and range of settings may vary depending on the make and model of your webcam. However, the concepts and techniques discussed in this article should apply to most webcams, allowing you to optimize your video output regardless of the specific device you are using.
So, if you’re ready to take your webcam experience to the next level, let’s jump right in and start exploring the wonderful world of webcam settings!
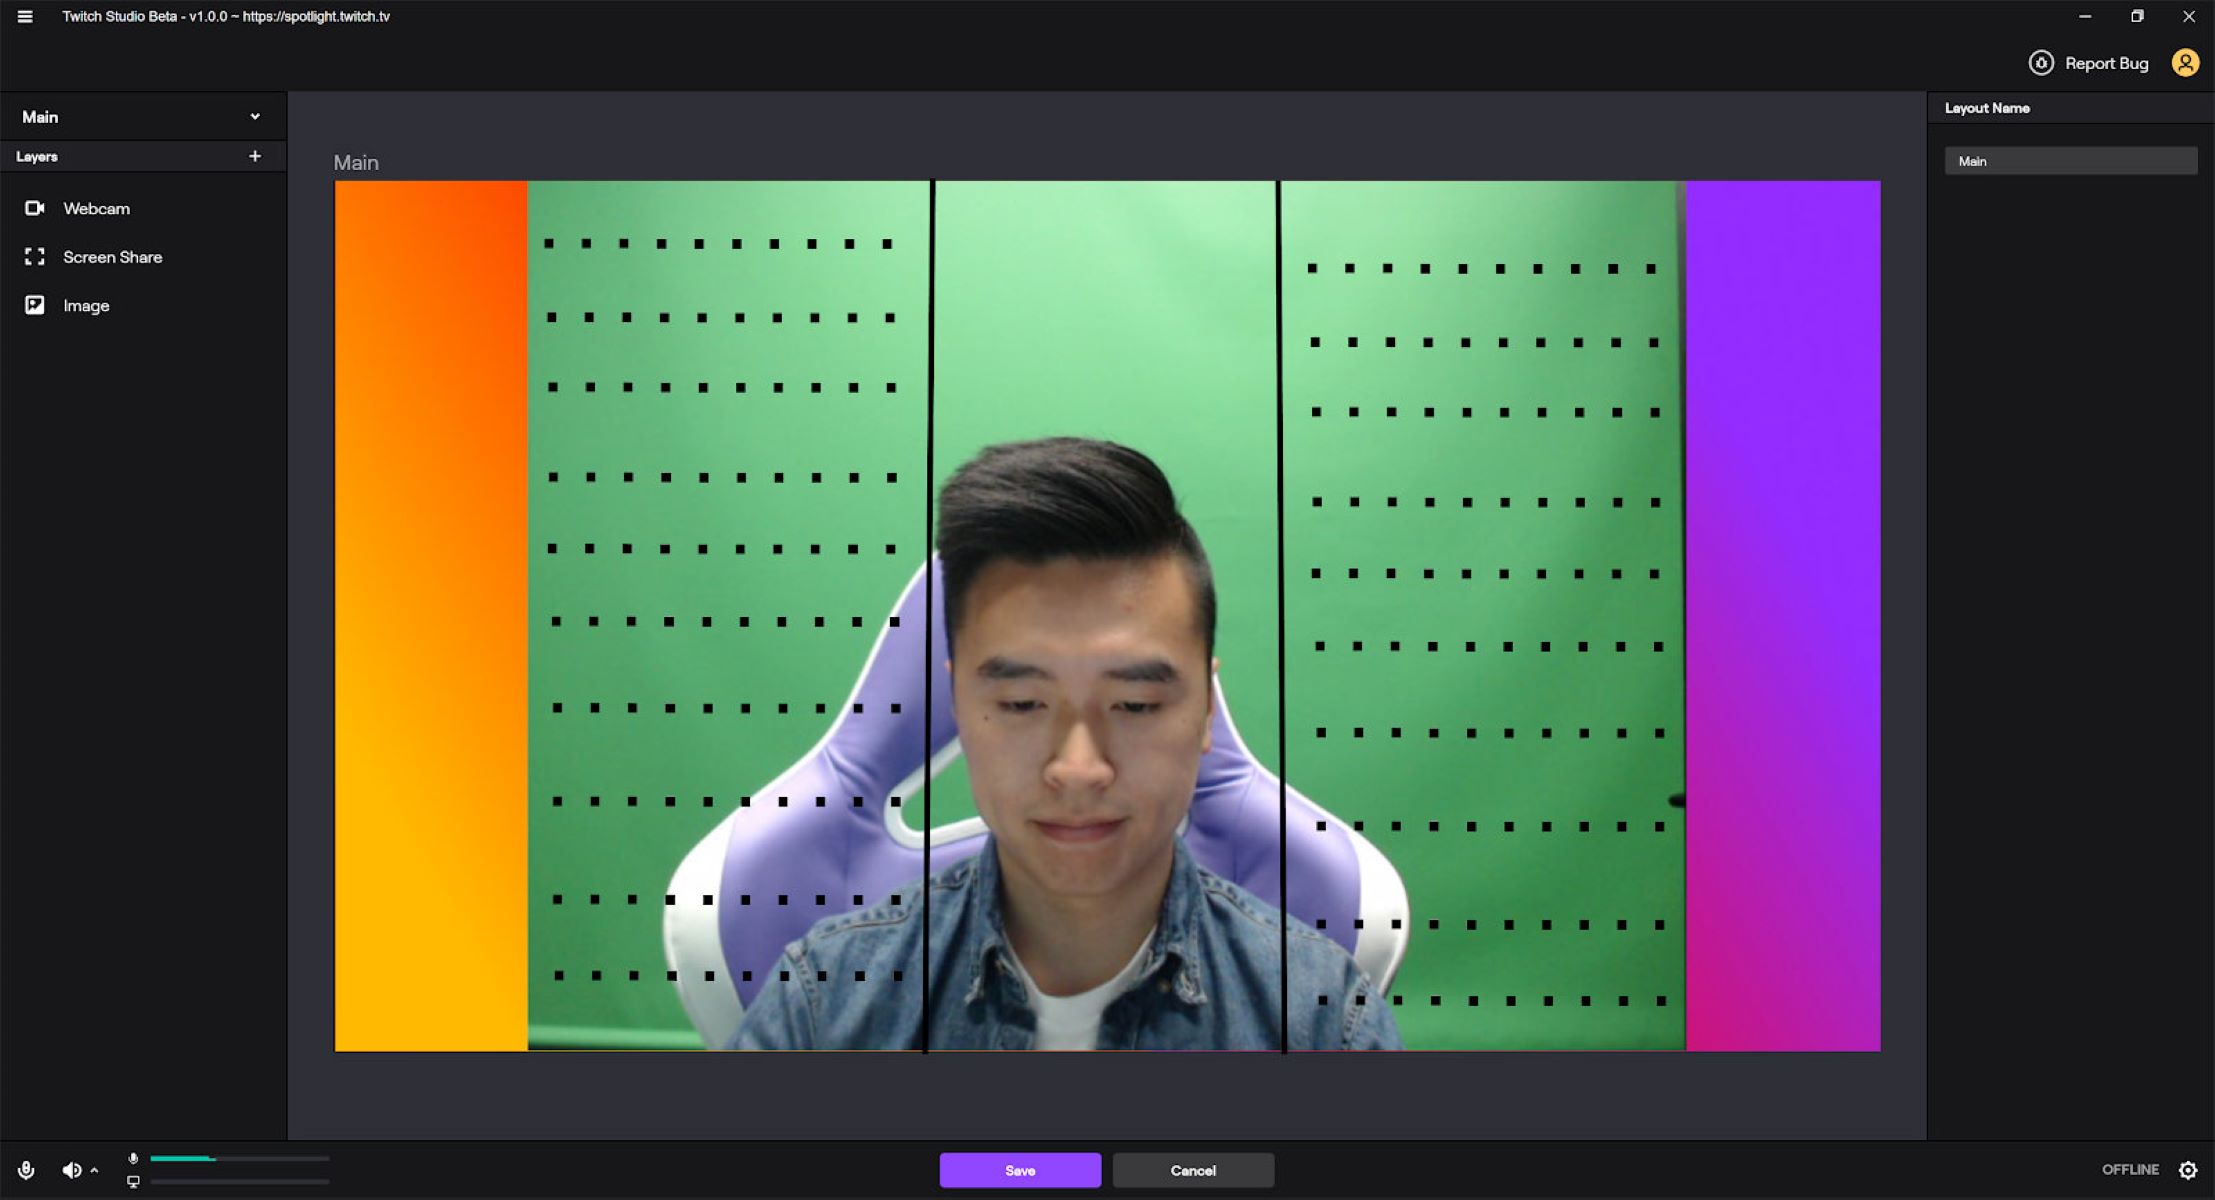
Understanding Webcam Settings
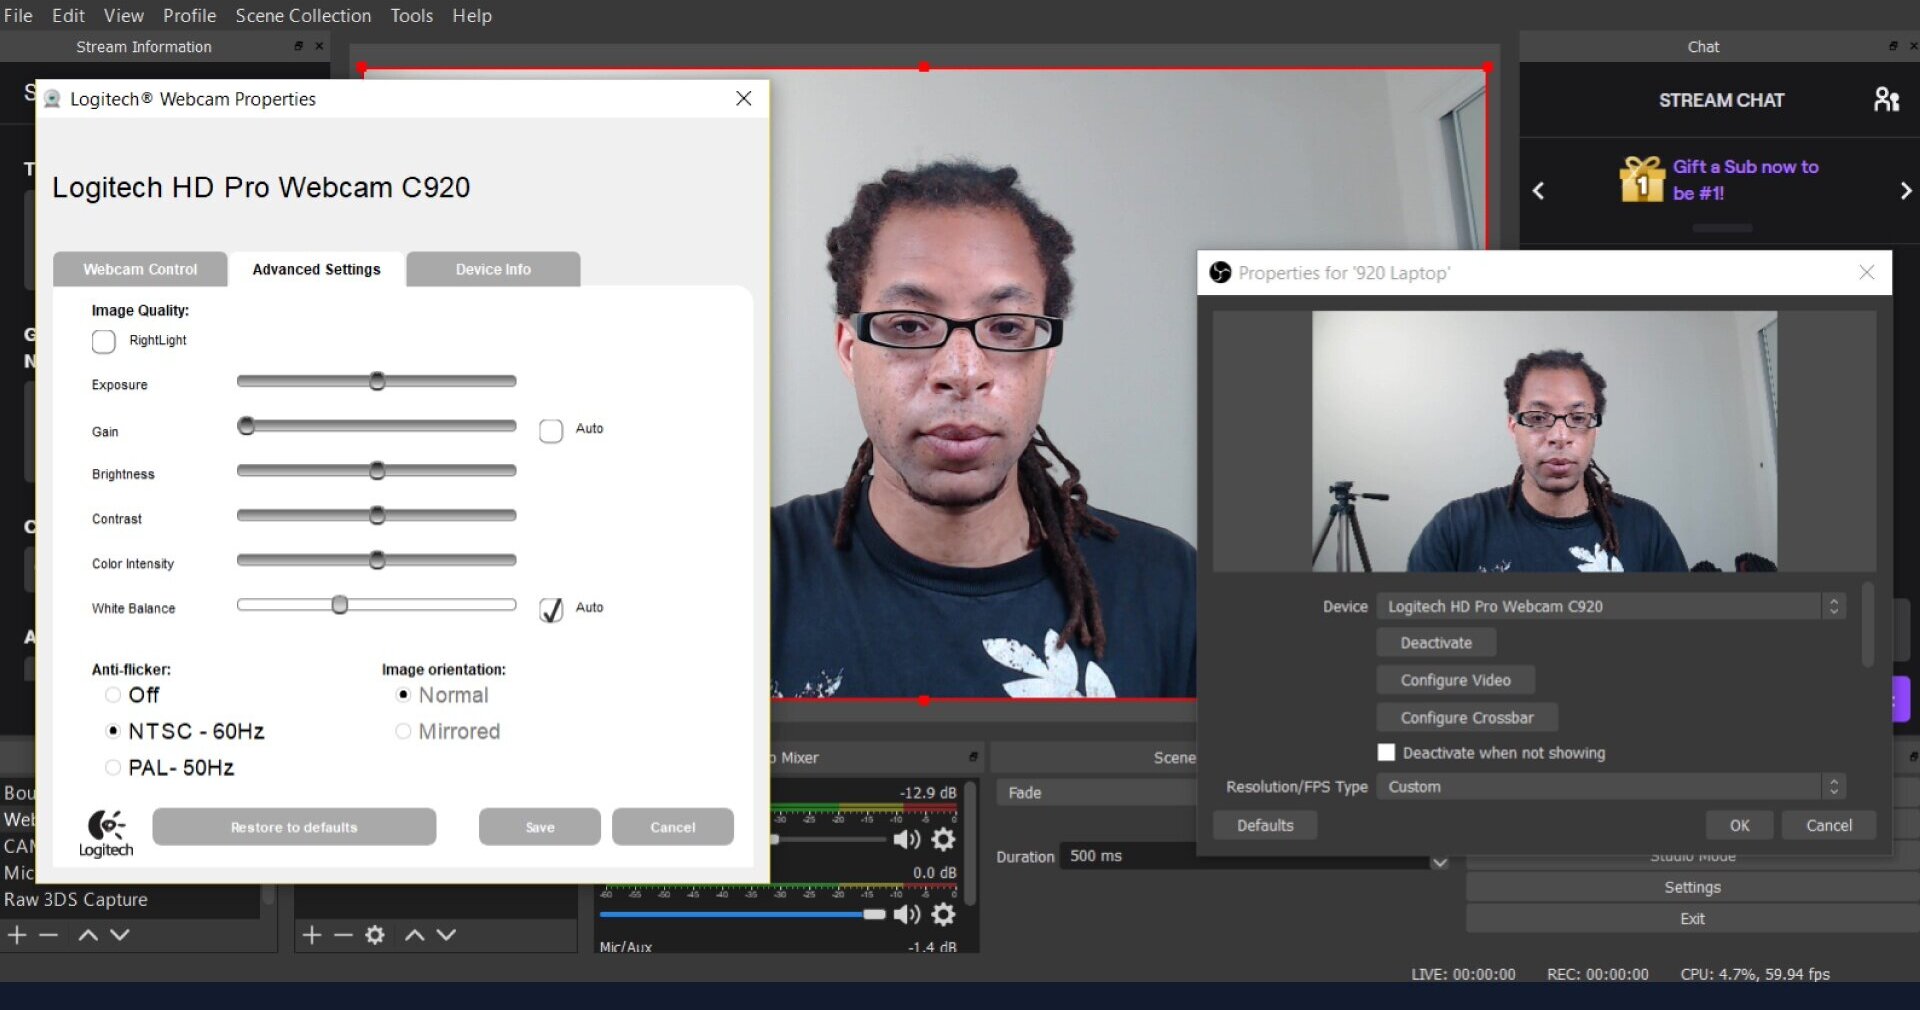
Before diving into adjusting your webcam settings, it’s important to understand the various options available to you. Webcam settings can vary depending on the software or application you’re using, but there are a few common settings you’re likely to encounter.
Resolution: The resolution setting determines the number of pixels in your video output. Higher resolutions result in clearer and more detailed video, but can also require more processing power. Common resolutions include 720p, 1080p, and 4K.
Brightness and Contrast: These settings control the overall lightness and darkness of your video. Adjusting the brightness ensures that your video is neither too dark nor too bright, while contrast helps to distinguish different shades and details.
Zoom and Focus: Zoom allows you to get closer or further away from the subject in your video, while focus ensures that the image is sharp and clear. Some webcams have a physical zoom ring and focus dial, while others provide digital controls within the software.
White Balance: White balance adjusts the color temperature of your video to ensure that white objects appear white and that colors are accurately represented. This is particularly important when dealing with different lighting conditions.
Color Saturation: Color saturation controls the intensity and vibrancy of the colors in your video. Increasing saturation can make colors appear more vivid, while decreasing it may result in a more muted look.
Noise and Graininess: Sometimes, webcams can produce a grainy or noisy image, especially in low-light conditions. Noise reduction settings can help minimize these unwanted artifacts and produce a cleaner video.
Auto-Exposure and Auto-Focus: These settings allow your webcam to automatically adjust exposure and focus based on the lighting conditions. While auto-settings can be convenient, manually controlling these settings can offer more control over your video output.
Frame Rate: The frame rate determines the number of frames per second in your video. Higher frame rates result in smoother and more fluid video, but can also require more bandwidth and processing power. Common frame rates include 30, 60, and 120 frames per second.
By familiarizing yourself with these webcam settings, you’ll be better equipped to understand their impact on your video quality and make informed adjustments to optimize your webcam experience.
Adjusting Brightness and Contrast
One of the most fundamental webcam settings to adjust is the brightness and contrast. These settings directly affect the overall lighting and clarity of your video. Here’s how you can optimize these settings:
1. Adjusting Brightness: If your video appears too dark, increasing the brightness can help brighten up the image. On the other hand, if the video appears washed out or overexposed, decreasing the brightness can improve the overall quality. Look for brightness controls within your webcam software or video conferencing application and make gradual adjustments until you achieve the desired brightness level.
2. Fine-tuning Contrast: Contrast determines the difference between the light and dark areas of your video. Increasing the contrast can make the image appear sharper and more defined, while decreasing it can create a softer, more muted look. Similar to brightness, check for contrast controls in your webcam software and experiment with different levels until you find the right balance.
It’s essential to strike a balance between brightness and contrast to ensure that your video is neither too dark nor too washed out. Aim for a well-balanced image that maintains detail in both the shadows and highlights.
If you prefer a more automated approach, some webcam software or applications offer automatic brightness and contrast adjustments. While convenient, keep in mind that they may not always produce the desired results, especially in challenging lighting conditions. Manual adjustments often provide greater control and allow you to tailor the settings to your specific needs.
Remember to consider the environment in which you are using your webcam. Factors such as ambient lighting, natural light sources, and the positioning of artificial lighting can affect the appearance of your video. It may require some trial and error to find the optimal brightness and contrast settings for different lighting situations.
By taking the time to adjust the brightness and contrast settings of your webcam, you can significantly enhance the visual quality of your video, making it more engaging and professional-looking.
Managing Zoom and Focus
Zoom and focus are essential webcam settings that allow you to control the framing and sharpness of your video. By mastering these settings, you can ensure that your subject is properly composed and that the image remains crisp and clear. Here’s how to manage zoom and focus on your webcam:
1. Zooming In and Out: Most webcams offer the option to zoom in or out, allowing you to adjust the field of view and bring your subject closer or further away. If you want a close-up shot, zoom in, but be mindful not to zoom in too much and lose image quality. If you want to capture a wider scene, zoom out. Some webcams have a physical zoom ring, while others have digital controls within the webcam software or application. Experiment with different zoom levels to find the right framing for your video.
2. Focusing the Image: Proper focus is crucial for a clear and sharp video. Many webcams have built-in autofocus capabilities, automatically adjusting the focus based on the distance between the camera and the subject. However, in some cases, autofocus may not work optimally, particularly in low-light conditions or when there are multiple objects at varying distances. In such situations, switching to manual focus and adjusting it yourself can help ensure that the subject remains in sharp focus. Look for the focus controls in your webcam software or application and refine the focus until you achieve the desired clarity.
When managing zoom and focus, it’s important to be mindful of the depth of field. The depth of field refers to the range of distances that appear sharp in your video. A shallow depth of field means that only a narrow range of distances will be in focus, while a deeper depth of field ensures that a larger portion of the scene is in focus. The depth of field can be affected by factors such as aperture size, sensor size, and lens type, but understanding how your webcam performs in this regard can help you make informed decisions about zoom and focus settings.
Remember that zooming in too much or attempting to focus on subjects that are too close can lead to a loss of image quality or a blurry video. Additionally, ensure that your webcam is positioned at a suitable distance from your subject to achieve the desired framing and focus.
By effectively managing the zoom and focus settings of your webcam, you can capture well-composed videos with crisp and clear images, creating a more captivating and professional video experience.
Controlling White Balance
Controlling the white balance of your webcam is crucial for ensuring accurate color representation in your videos. White balance refers to the adjustment of color temperature to make white objects appear truly white and to maintain color accuracy throughout your video. Here’s how you can effectively control white balance:
1. Auto White Balance: Many webcams offer an auto white balance feature, which automatically adjusts the color temperature based on the lighting conditions. This setting can be convenient, especially when moving between different lighting environments. However, keep in mind that relying on auto white balance may not always produce the desired results, particularly in challenging or mixed lighting situations. It’s always a good idea to have more control over your white balance settings.
2. Preset White Balance: Some webcams provide preset white balance options, such as daylight, cloudy, incandescent, fluorescent, or custom settings. These presets optimize the color temperature for specific lighting conditions. For example, selecting the daylight preset when recording in natural sunlight can help ensure that the colors appear accurate. Consider using these presets when the lighting conditions are consistent and align with the available options.
3. Manual White Balance: For more precise control over the white balance, you can manually adjust it in your webcam software or application. This typically involves selecting a reference point for white in your video (such as a white piece of paper or a white balance card) and calibrating the color temperature based on that reference. This method allows you to customize the white balance to your specific lighting situation, resulting in more accurate and pleasing colors.
It’s important to note that the optimal white balance setting may vary depending on the lighting conditions and personal preference. For example, some individuals may prefer a warmer or cooler look in their videos. Experimenting with different white balance settings can help you achieve the desired color temperature and overall aesthetic.
Keep in mind that changes in lighting throughout the day or in different environments may require you to adjust the white balance settings accordingly. Continuously monitoring and adjusting the white balance can help maintain color accuracy and ensure that your videos look their best.
By taking control of the white balance settings on your webcam, you can ensure that the colors in your videos are true-to-life, enhancing the overall quality and visual experience.
Enhancing Color Saturation
Color saturation plays a significant role in enhancing the visual appeal of your webcam videos. Adjusting the color saturation helps make your videos more vibrant and captivating. Here’s how you can enhance the color saturation of your webcam:
1. Increasing Saturation: If your video appears dull or lacking in color, increasing the saturation can help intensify the colors and make them more vivid. Look for saturation controls in your webcam software or application and gradually increase the saturation level until you achieve the desired effect. Be mindful not to overdo it, as excessive saturation can result in unrealistic and unnatural colors.
2. Finding the Balance: It’s crucial to strike the right balance when adjusting color saturation. The goal is to enhance the colors without compromising their accuracy or looking overly saturated. Experiment with different levels of saturation and evaluate the results to find the optimal balance that suits your preferences and the content of your videos.
3. Consideration for Skin Tones: When enhancing color saturation, pay special attention to skin tones. Over-saturating skin tones can result in an unnatural or unflattering appearance. It’s important to find a balance that enhances the vibrancy of the colors while maintaining a natural and realistic look, particularly when capturing videos that involve people.
4. Lighting Conditions: The lighting conditions in your recording environment can impact color saturation. With proper lighting techniques, you can enhance the colors naturally. Soft and diffused lighting can result in more vibrant colors, while harsh or uneven lighting may dampen the saturation. Consider optimizing your lighting setup to maximize color richness.
5. Editing Software: If you require further control over color saturation, you can make adjustments during the editing process using video editing software. This gives you more flexibility to fine-tune the colors exactly as you envision them. However, it’s always advisable to achieve the desired saturation as accurately as possible during the recording stage to minimize the need for extensive editing afterwards.
Enhancing color saturation can help make your webcam videos visually engaging and captivating. By carefully adjusting the saturation levels, finding the right balance, considering skin tones, and optimizing your lighting, you can create videos that are vibrant and aesthetically appealing.
Remember that color preferences can vary, so it’s important to consider the content of your videos and the intended audience when making adjustments. Whether you’re recording a vibrant vlog or conducting professional video conferences, adjusting color saturation can bring a new level of visual impact to your webcam videos.
Reducing Noise and Graininess
Noise and graininess can often degrade the quality of webcam videos, especially in low-light conditions. However, there are ways to minimize these unwanted artifacts and ensure a cleaner, more professional-looking video. Here’s how you can reduce noise and graininess in your webcam footage:
1. Improve Lighting: Inadequate lighting is a common culprit behind noisy and grainy video. By improving the lighting conditions in your recording environment, you can minimize noise and produce a cleaner video. Ensure that the room is well-lit, preferably with soft and diffused lighting sources. Avoid harsh, direct lighting, as it can create unnecessary shadows and exacerbate noise issues.
2. Adjust Exposure: Proper exposure can help reduce noise in dark areas of the video. Experiment with the exposure settings in your webcam software or application to find the optimal balance. Avoid overexposing the video as it can wash out the colors and contribute to noise. Adjust the exposure until you achieve a well-balanced and noise-free video.
3. Decrease ISO Sensitivity: ISO sensitivity determines how sensitive your webcam’s sensor is to light. Higher ISO settings can capture more light but can introduce more noise. By lowering the ISO sensitivity, you can reduce noise at the expense of capturing less light. Strike a balance between lowering ISO sensitivity and maintaining sufficient lighting to achieve a clean video with minimal noise.
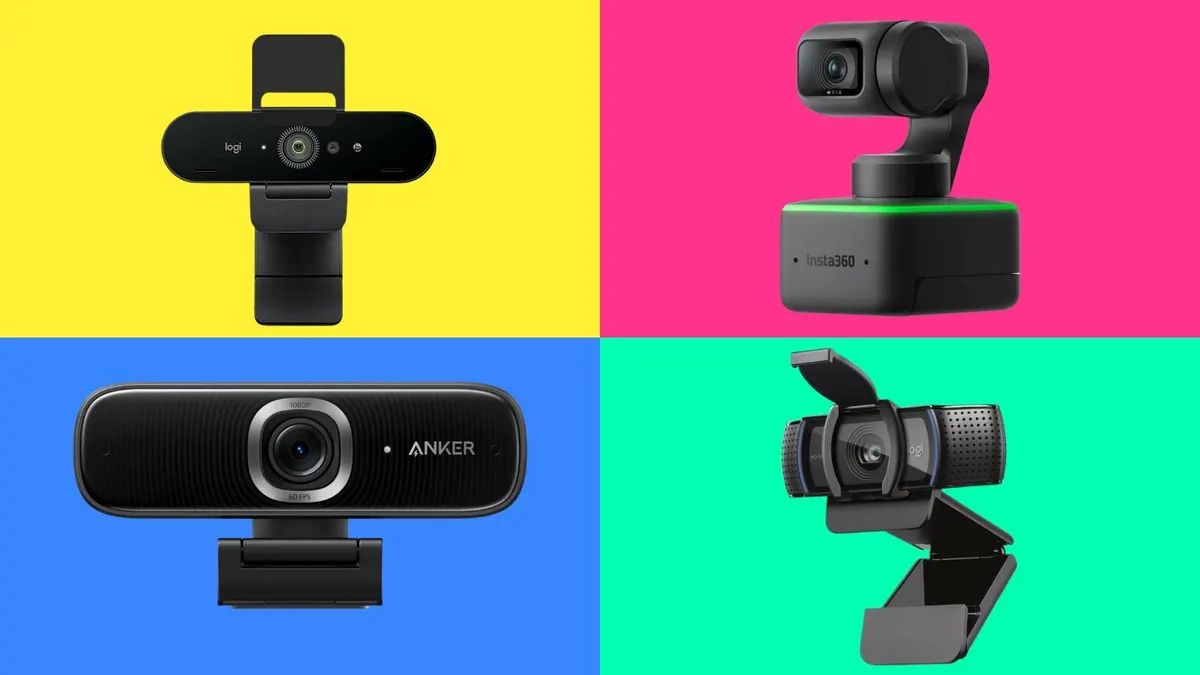
4. Use a Quality Webcam: Investing in a higher-quality webcam can significantly reduce noise and graininess. The sensors and image processing capabilities of premium webcams tend to be superior, resulting in cleaner and more professional-looking videos. If you frequently rely on your webcam for important video conferences or content creation, a better-quality webcam can make a noticeable difference.
5. Apply Noise Reduction Filters: Many webcam software and video editing tools offer noise reduction filters or plugins. These filters can help reduce noise and graininess during the post-processing stage. Experiment with different noise reduction settings to find the right balance between noise reduction and preserving image details. Be cautious not to overuse noise reduction filters, as it can lead to a loss of sharpness and a plastic-looking effect.
6. Maintain a Stable Internet Connection: A stable internet connection is crucial for minimizing noise and maintaining video quality during online video calls. Instabilities in the connection can result in pixelation and increased video noise. Ensure that you have a reliable internet connection to reduce these issues.
By implementing these strategies, you can significantly reduce noise and graininess in your webcam videos. Remember that some level of noise may be unavoidable in certain situations, but with careful adjustments and considerations, you can achieve a cleaner and more professional-looking video.
Managing Auto-Exposure and Auto-Focus
Auto-exposure and auto-focus are important features that come built-in with many webcams, allowing them to automatically adjust exposure levels and focus based on the current lighting conditions. While these automatic settings can be convenient, they may not always produce the desired results. Therefore, it’s essential to understand how to manage auto-exposure and auto-focus to ensure optimal video quality.
1. Evaluating Lighting Conditions: Before relying on auto-exposure and auto-focus, assess the lighting conditions in your recording environment. If the lighting is consistent and there are no sudden changes, enabling the automatic settings may provide satisfactory results. However, in challenging or changing lighting situations, manual adjustments often yield superior outcomes.
2. Switching to Manual Mode: Many webcams offer manual control over exposure and focus settings. By switching to manual mode, you can take full control of these parameters and fine-tune them according to your specific requirements. This is particularly useful when dealing with dynamic lighting conditions or subjects that require precise focus.
3. Adjusting Exposure Settings: In manual mode, adjust the exposure settings to properly expose the image. Increase the exposure if the video appears too dark, and reduce it if it’s overexposed. Finding the right exposure level may require some trial and error, but the goal is to achieve a well-balanced image with accurate colors and details.
4. Refining Focus: Manual focus allows you to ensure that the subject remains sharp and clear. Use the focus controls to adjust the focus until your subject is in perfect focus. This is particularly crucial when capturing close-ups or when the subject is at varying distances from the camera.
5. Continuous Monitoring: Auto-exposure and auto-focus settings may still be useful in certain situations, such as when the lighting conditions remain constant or during fast-paced video conferences. Nonetheless, it’s important to continuously monitor and reassess the performance of these automatic settings to ensure that they are maintaining the desired video quality throughout your recording or video call.
6. Multiple Subject Considerations: If you have multiple subjects in your video, it’s advisable to consider manual adjustments over auto-settings. Automatically adjusting exposure and focus may prioritize one subject over the others, resulting in inconsistent video quality. By manually controlling these settings, you can evenly expose and focus on all subjects, ensuring a balanced and professional-looking video.
Managing auto-exposure and auto-focus can greatly improve the quality and control you have over your webcam videos. By evaluating lighting conditions, switching to manual mode when necessary, adjusting exposure and focus settings, and continuously monitoring your video quality, you can achieve consistent and visually appealing results in all your recorded or live video sessions.
Adjusting Frame Rate
The frame rate of your webcam video plays a crucial role in determining its smoothness and fluidity. The frame rate refers to the number of frames captured and displayed per second. Adjusting the frame rate can have a significant impact on the visual quality and overall viewing experience. Here’s how you can effectively adjust the frame rate of your webcam:
1. Consider your Purpose: The ideal frame rate depends on the purpose of your video. For most general videos, a frame rate of 30 frames per second (fps) is commonly used, as it delivers smooth and natural-looking motion. If your content involves fast-paced action or gaming, higher frame rates like 60 fps or even 120 fps may be preferable to capture more detail and reduce motion blur.
2. Check Webcam Capabilities: Not all webcams support higher frame rates, so it’s important to check the specifications of your webcam. Some budget-friendly webcams may be limited to lower frame rates, while higher-end models may offer more flexibility. Review the technical specifications or consult the manufacturer’s guidelines to determine the supported frame rates.
3. Adjusting Frame Rate in Software: Most webcam software or applications provide options to adjust the frame rate. Look for the frame rate settings and select the desired value. Keep in mind that increasing the frame rate will require more processing power and may lead to larger file sizes. Ensure that your computer or device can handle the selected frame rate without significant performance issues.
4. Bandwidth Considerations: If you’re using your webcam for online streaming or video conferencing, it’s important to consider bandwidth limitations. Higher frame rates require more bandwidth to transmit the video data in real-time. If your internet connection is not sufficient or you’re experiencing buffering issues, consider lowering the frame rate to optimize the streaming quality.
5. Quality versus Performance: While higher frame rates can deliver smoother videos, they can also put a strain on your computer resources. Lower-end systems may struggle to record or stream at higher frame rates, leading to dropped frames or reduced overall performance. Strike a balance between the desired frame rate and your system’s capabilities to ensure a smooth and enjoyable experience.
6. Test and Evaluate: After adjusting the frame rate, it’s important to test and evaluate the results. Record a sample video or conduct a test video call to assess the smoothness of the video playback. Pay attention to any visible stuttering or lag, which may indicate that the frame rate is too high for your system to handle. Make necessary adjustments until you achieve the desired balance between smoothness and performance.
By adjusting the frame rate of your webcam video, you can optimize the visual smoothness and enhance the overall viewing experience. Consider your purpose, check your webcam’s capabilities, adjust settings in software, be mindful of bandwidth limitations, and find the right balance between quality and performance. With the right frame rate, your webcam videos will be much more engaging and enjoyable to watch.
Optimizing Image Resolution
The image resolution of your webcam refers to the number of pixels that make up the video frame. The resolution greatly impacts the clarity and detail of your video. By optimizing the image resolution, you can ensure that your webcam videos appear sharp and visually appealing. Here’s how you can effectively optimize the image resolution:
1. Consider the Purpose: The optimal image resolution depends on the intended use of your webcam videos. For general video calls or casual recordings, a resolution of 720p (1280×720 pixels) is often sufficient, providing a balance between video quality and bandwidth usage. If you’re creating professional content or streaming high-definition gameplay, you may prefer higher resolutions like 1080p (1920×1080 pixels) or even 4K (3840×2160 pixels).
2. Evaluate Webcam Capabilities: Not all webcams support high resolutions. Check the specifications of your webcam to determine the maximum supported resolution. Keep in mind that older or budget-friendly models may have lower resolution capabilities. If you require higher resolutions, consider investing in a webcam that can meet your specific needs.
3. Adjust Resolution in Software: Most webcam software or applications provide options to adjust the resolution. Locate the resolution settings and select the desired value. Be aware that increasing the resolution will require more processing power and may result in larger file sizes. Ensure that your computer or device can handle the selected resolution without sacrificing performance.
4. Bandwidth Considerations: If you’re using your webcam for online streaming or video conferencing, it’s crucial to consider bandwidth limitations. Higher resolutions require more bandwidth to transmit the video data in real-time. If your internet connection is not sufficient or you’re experiencing buffering issues, consider lowering the resolution to optimize the streaming quality.
5. Lighting and Background: Keep in mind that higher resolutions can reveal more details, including imperfections in lighting and background. Ensure that your recording environment is well-lit and free from clutter or distracting elements. Pay attention to framing and composition to present a clean and professional-looking video.
6. Test and Evaluate: After adjusting the resolution, it’s important to test and evaluate the results. Record a sample video or conduct a test video call to assess the clarity and detail of the video playback. Monitor the performance of your computer or device to ensure it can handle the selected resolution without any significant issues.
By optimizing the image resolution of your webcam videos, you can enhance the clarity and detail, improving the overall visual quality. Consider the purpose of your videos, evaluate your webcam’s capabilities, adjust the resolution in software, be mindful of bandwidth limitations, and pay attention to lighting and background. With the right image resolution, your webcam videos will have a more professional and visually appealing look.
Customizing Audio Settings
While video quality is essential, audio quality is equally important when it comes to webcam videos. Customizing your audio settings can greatly enhance the sound clarity and overall audio experience. Here are some tips on how to optimize your webcam’s audio settings:
1. Microphone Selection: If your webcam has an integrated microphone, ensure that it’s positioned properly and not obstructed. Depending on your recording environment and requirements, you may want to consider using an external microphone for improved audio quality. USB microphones or headset microphones typically offer better sound capture and clarity than built-in webcam microphones.
2. Adjust Input Volume: It’s important to find the right balance for your microphone’s input volume. Adjust the input volume settings in your webcam software or operating system’s sound settings to ensure that your voice is clear and easily audible without distorting or clipping. Test your audio levels by recording a sample video or conducting a test video call to ensure optimal sound quality.
3. Background Noise Reduction: Webcams often pick up background noise, such as fans, keyboard clicks, or room ambiance. To reduce background noise, consider using noise cancellation features available in your webcam software or use external audio software plugins. Positioning your microphone closer to your mouth and away from sources of noise can also help minimize unwanted sounds and improve the clarity of your voice.
4. Audio Equalization: Customizing the equalization settings can help optimize the audio frequencies for a more balanced sound. Many webcam software or audio editing tools offer built-in equalizer functions that allow you to adjust specific frequency ranges. Experiment with equalization settings to emphasize clarity and reduce any audio frequencies that may cause muddiness or distortion.
5. Test and Monitor Audio Quality: Regularly test and monitor your audio quality while recording or during video calls. Pay attention to any background noise, distortion, or audio artifacts that may affect the overall clarity and understanding of your voice. Adjust the settings as needed to achieve the best audio quality possible.
6. Consider External Audio Devices: For even better audio quality, consider investing in external audio devices, such as audio interfaces or high-quality microphones. These devices offer more advanced controls and capture capabilities, resulting in professional-grade audio. However, choosing external audio devices may involve additional setup and cost.
Remember that audio quality is just as crucial as video quality when it comes to webcam videos. By customizing your webcam’s audio settings, selecting the appropriate microphone, adjusting input volume, reducing background noise, equalizing the audio frequencies, and regularly monitoring audio quality, you can significantly enhance the overall audio experience and ensure that your voice is clear and easily understood in your webcam videos.
Troubleshooting Common Webcam Issues
While webcams are essential for video communication and content creation, they can encounter various issues from time to time. Understanding and troubleshooting common webcam problems can help you overcome hurdles and ensure a smoother experience. Here are some common webcam issues and their potential solutions:
1. Webcam Not Detected: If your webcam is not being recognized by your computer or application, ensure that it is properly connected to the USB port or other designated connection. Restarting your computer or reconnecting the webcam may also resolve detection issues. Additionally, make sure that you have the latest drivers installed for your webcam by checking the manufacturer’s website.
2. Poor Video Quality: If your video appears blurry, pixelated, or lacks clarity, ensure that the lens of your webcam is clean and free from smudges or debris. Adjust the focus settings, if available, to enhance the sharpness. If bandwidth is limited, reducing the resolution or frame rate may improve video quality. Experiment with different lighting conditions to find the optimal setup for your webcam.
3. Choppy or Laggy Video: If your video playback is choppy or experiences delays, it may be due to insufficient processing power or limited bandwidth. Close any unnecessary applications or processes that may be using resources. Check your internet connection for stability and consider pausing any bandwidth-heavy tasks while using your webcam. Lowering the resolution or frame rate can also help alleviate choppiness in video playback.
4. Audio Sync Issues: If the audio and video are not in sync, it can be frustrating for viewers. Ensure that you have the latest audio drivers installed for your computer. Adjusting the audio and video synchronization settings in your webcam software or video editing tool may also help resolve sync issues. When conducting video calls, consider the possibility of network latency and adjust the settings accordingly for better synchronization.
5. Webcam Freezing or Crashing: If your webcam freezes or crashes during operation, ensure that you have adequate system resources available. Close unnecessary applications and restart your computer. Update your webcam drivers to the latest version to resolve compatibility issues. If the problem persists, consider contacting the webcam manufacturer’s support for further assistance.
6. Privacy and Security: Webcam privacy is an important consideration. To protect your privacy and security, ensure that your webcam is not unintentionally activated. Covering the lens with a physical cover or using software-based privacy controls can help prevent unauthorized access to your webcam. Regularly update your webcam software and operating system to ensure the latest security patches are in place.
Should you encounter any other specific issues with your webcam, consult the user manual or search for troubleshooting resources provided by the webcam manufacturer. Online forums and communities can also be valuable sources of information and support for resolving webcam problems.
By understanding and troubleshooting common webcam issues, you can overcome technical challenges and enjoy a smoother and more reliable webcam experience.
Conclusion
Optimizing your webcam settings is crucial for achieving the best possible video quality and overall experience. By understanding and adjusting various aspects such as brightness and contrast, zoom and focus, white balance, color saturation, noise reduction, frame rate, image resolution, audio settings, and troubleshooting common issues, you can significantly improve the clarity, sharpness, and overall professionalism of your webcam videos.
Remember that while automatic settings can be convenient, manual adjustments often provide greater control and customization. Experimenting with different settings, considering the lighting conditions, and evaluating the results will help you fine-tune your webcam settings to suit your preferences and requirements.
Whether you’re using your webcam for video conferences, online streaming, or simply keeping in touch with others, taking the time to optimize your webcam settings will elevate your video quality and enhance the viewing experience for your audience.
Keep in mind the specific capabilities of your webcam and any limitations it may have. Invest in external devices or consider upgrading your webcam if necessary to unlock additional features and achieve even higher video and audio quality.
Regularly monitor and adjust your webcam settings based on changes in your recording environment and the specific needs of your videos. This ongoing attention to detail will ensure that you consistently produce videos that are visually appealing, professional-looking, and engaging.
With the knowledge and mastery of webcam settings, you are now equipped to make the most out of your webcam and create videos that truly stand out. So, go ahead, optimize your settings, and let your creativity shine through in your webcam videos!