Introduction
Welcome to our comprehensive guide on how to zoom in your webcam. With the widespread use of video conferencing and online communication platforms, having a clear and properly framed webcam view has become more important than ever. Whether you are attending virtual meetings, recording videos, or live streaming, being able to zoom in on your webcam can greatly enhance your visual presence and make your content more engaging.
In this article, we will explain the benefits of zooming in your webcam and provide you with a step-by-step guide on how to do it. We will also share some useful tips to optimize your zoomed-in webcam experience. So, let’s dive in and discover how you can make the most out of your webcam.
Why Zoom In Your Webcam?
Zooming in your webcam offers several advantages that can greatly improve your video quality and user experience. Here are a few key reasons why you might want to consider zooming in:
- Enhanced Visual Focus: By zooming in, you can highlight specific details, objects, or areas of your face, allowing viewers to better engage with your content and easily follow along with what you are presenting or demonstrating.
- Improved Video Quality: Zooming in can help eliminate unnecessary background distractions and bring more emphasis to your facial expressions, gestures, or visual aids, resulting in a clearer and more professional-looking video.
- Better Frame Composition: Zooming in allows you to achieve a more aesthetically pleasing composition by placing yourself in the ideal position within the webcam frame, creating a balanced and visually appealing presentation.
- Increased Engagement: A well-zoomed webcam view can capture your audience’s attention and make your content more captivating, encouraging active participation and boosting overall engagement during live presentations or recorded videos.
Now that you understand the benefits of zooming in your webcam, let’s explore the step-by-step process of how you can achieve this.
Why Zoom In Your Webcam?
Zooming in your webcam offers numerous advantages that can greatly enhance your video quality and user experience. Let’s delve into the key reasons why you should consider zooming in:
1. Enhanced Visual Focus: When you zoom in your webcam, you can draw attention to specific details, objects, or areas of your face. This ability helps your viewers better engage with your content and follow along with what you are presenting or demonstrating. By highlighting important visual elements, you can make your message more impactful and memorable.
2. Improved Video Quality: Zooming in can eliminate unnecessary background distractions and bring more emphasis to your facial expressions, gestures, or visual aids. By reducing visual clutter, you create a cleaner and more professional-looking video that captures your audience’s attention. Clear, focused visuals contribute to better communication and comprehension of the content you are sharing.
3. Better Frame Composition: Zooming in your webcam allows you to position yourself strategically within the frame. This technique helps you achieve a more aesthetically pleasing composition by creating a balanced and visually appealing presentation. By framing yourself properly, you can ensure that you are the focal point of the webcam view, enhancing your on-screen presence.
4. Increased Engagement: A well-zoomed webcam view has the power to captivate your audience. It can make your content more visually stimulating, encouraging viewers to actively participate and remain engaged throughout your presentation or video. When viewers feel involved and connected to the content, they are more likely to retain information and have a positive overall experience.
5. Customization and Personalization: Zooming in your webcam provides you with an opportunity to personalize your video communication. By adjusting the zoom level, you can highlight specific areas or features that align with your branding or presentation style. This customization helps create a cohesive and professional image, reinforcing your unique identity and leaving a lasting impression on your audience.
By understanding the reasons to zoom in your webcam, you can leverage this feature to elevate your video presence and effectively communicate your message. In the following section, we will guide you through the step-by-step process of zooming in your webcam.
How to Zoom In Your Webcam: Step-by-Step Guide
Now that you understand the benefits of zooming in your webcam, let’s explore the step-by-step process of how you can achieve this:
Step 1: Check your webcam software: Start by opening the software or application that controls your webcam. This can be the built-in software that comes with your computer or a third-party webcam application. Make sure your webcam is connected and recognized by the software before proceeding.
Step 2: Adjust the zoom settings: Once you’re in the webcam software, locate the settings or preferences menu. Look for an option that allows you to adjust the zoom level or magnification. Depending on the software, this option may be labeled as “Zoom,” “Scale,” or “Magnification.”
Step 3: Test the zoom and make fine adjustments: After you’ve found the zoom settings, test it out by adjusting the zoom level. Depending on your webcam software, you may be able to use a slider or enter a specific zoom percentage. As you adjust the zoom, observe the changes in your webcam view to ensure the desired framing and level of magnification.
Step 4: Save or apply the changes: Once you are satisfied with the zoom level, save or apply the changes in your webcam software. This will store the zoom settings for future use and allow you to maintain the desired zoom level whenever you use your webcam.
Remember that the process of zooming in your webcam may vary depending on the software or application you are using. It’s always a good idea to consult the user manual or online documentation for specific instructions related to your webcam software.
By following these simple steps, you can easily zoom in your webcam and start enjoying the benefits of a more focused and visually engaging video presence. However, to make the most out of your zoomed-in webcam, consider the following tips.
Step 1: Check your webcam software
The first step in zooming in your webcam is to ensure that your webcam software is properly set up and functioning. Here’s a detailed guide on how to check your webcam software:
1. Open the webcam software: Locate and open the software or application that controls your webcam. This can be the default camera app that comes pre-installed with your computer or a third-party webcam application that you have installed.
2. Connect your webcam: Ensure that your webcam is properly connected to your computer via USB or any other appropriate connection method. Make sure that the webcam is securely plugged in and recognized by your computer.
3. Check for software updates: It’s a good practice to check for any available software updates for your webcam. Software updates often include bug fixes, performance improvements, and new features that can enhance your webcam experience. Visit the manufacturer’s website or check the software settings for any available updates.
4. Configure webcam settings: Once you have opened the webcam software, navigate to the settings or preferences menu. This menu is typically represented by a gear icon or labeled as “Settings,” “Preferences,” or something similar. Click on the menu to access the webcam settings.
5. Test your webcam: In the settings menu, look for an option to test your webcam. It may be labeled as “Test Webcam,” “Camera Preview,” or similar. Click on the option to open a preview of your webcam feed. Ensure that the webcam is capturing video and that you can see a clear image on the screen.
6. Adjust camera settings: Explore the camera settings within the software. Depending on the webcam software, you may have options to adjust various parameters such as brightness, contrast, exposure, and white balance. Adjust these settings as needed to improve the overall video quality and ensure a clear and balanced image.
By following these steps, you can check your webcam software and ensure that it is properly set up for zooming in. Once you have confirmed that your webcam software is functioning correctly, you can proceed with adjusting the zoom settings, which we will cover in the next step.
Step 2: Adjust the zoom settings
Once you have checked your webcam software and confirmed that it is functioning properly, you can proceed to adjust the zoom settings. Here’s a step-by-step guide on how to adjust the zoom settings:
1. Locate the zoom option: In the webcam software, navigate to the settings or preferences menu. Look for an option specifically labeled as “Zoom” or “Zoom Settings.” This option may be located under a “Camera” or “Video” section, depending on the software.
2. Adjust the zoom level: Once you have located the zoom option, you will typically see a slider or numerical input field to control the zoom level. Drag the slider or enter a specific zoom percentage to adjust the level of magnification. Experiment with different zoom levels to find the one that best suits your needs.
3. Preview the zoomed image: As you adjust the zoom level, a preview window or live feed should update in real-time to display the zoomed image. Pay close attention to how the image changes as you zoom in. Ensure that the subject, whether it’s your face or an object, remains clearly visible and well-framed within the webcam view.
4. Fine-tune the zoom: If the zoom level is not perfect on the first attempt, make fine adjustments by slightly increasing or decreasing the zoom level until you achieve the desired framing and magnification. Take your time to find the balance that best showcases the subject while maintaining a clear and professional-looking image.
5. Verify the zoomed image: After making adjustments, carefully inspect the zoomed image to ensure that it meets your requirements. Look for any potential issues such as image distortion, loss of clarity, or unwanted cropping. Adjust the zoom level as needed to address any observed issues.
By following these steps, you can easily adjust the zoom settings in your webcam software. Once you are satisfied with the zoom level, you can proceed to the next step, where you will test the zoom and make any necessary fine adjustments.
Step 3: Test the zoom and make fine adjustments
After adjusting the zoom settings in your webcam software, it’s essential to test the zoomed image and make any necessary fine adjustments to ensure optimal framing and visual quality. Follow these steps to test the zoom and make fine adjustments:
1. Start a test recording or video call: Open a video recording software or initiate a video call with a trusted contact. This allows you to see how the zoomed image appears in a real-time scenario and make any necessary adjustments.
2. Evaluate the zoomed image: Take a close look at the zoomed image during the test recording or video call. Check if the subject, whether it’s your face or an object, is centered and visible within the frame. Pay attention to any distortion or loss of visual clarity that might occur due to the zoom level.
3. Make fine adjustments: If the zoomed image does not meet your desired requirements, go back to the webcam software settings and make fine adjustments to the zoom level. Small increments or decrements can help achieve the optimal framing and magnification without compromising image quality.
4. Repeat the test: After making adjustments, repeat the test recording or video call to evaluate the impact of the fine adjustments. Continue this process until you are satisfied with the zoomed image’s framing, clarity, and overall visual quality.
5. Consider environmental factors: Keep in mind that lighting conditions, background elements, and other environmental factors might affect how the zoomed image appears. Adjust these factors if necessary to ensure the subject remains clear and prominent within the frame.
6. Seek feedback: If available, seek feedback from trusted individuals or colleagues who can provide an objective opinion on the zoomed image. Their insights might help identify any potential improvements or adjustments that can enhance the overall visual presentation.
By following these steps and actively testing the zoomed image, you can fine-tune the zoom settings to achieve the desired framing and visual quality in your webcam footage. Once you are satisfied with the results, you can move on to the final step of saving or applying the changes.
Step 4: Save or apply the changes
After you have successfully adjusted the zoom settings and fine-tuned the zoomed image, it’s time to save or apply the changes in your webcam software. Here’s what you should do in the final step:
1. Locate the save or apply button: In the webcam software settings, look for a button that allows you to save or apply the changes you have made to the zoom settings. This button may be labeled as “Save,” “Apply,” or something similar.
2. Click on the save or apply button: Once you have located the save or apply button, click on it to save your newly adjusted zoom settings. This action ensures that the changes you have made are stored and will be applied whenever you use your webcam in the future.
3. Confirm the changes: After clicking on the save or apply button, you may receive a confirmation message indicating that the changes have been saved successfully. This confirmation assures you that the zoom settings are ready for use and will be applied as intended.
4. Test the zoom settings: To double-check that the changes were applied correctly, initiate another test recording or video call. Verify that the zoom level remains consistent with the adjustments you made and that the zoomed image continues to meet your desired framing and visual quality.
5. Make further adjustments if necessary: During the test, if you find that the zoom level needs further refinement, return to the webcam software settings and make additional adjustments. Repeat the process of testing and fine-tuning until you are satisfied with the zoomed image.
6. Save settings as default (optional): Some webcam software allows you to save your adjusted zoom settings as the default option. This means that whenever you open the webcam software, it will automatically apply the zoom level you have set, saving you time and effort in future usage.
By saving or applying the changes to the zoom settings, you ensure that your preferred zoom level is maintained and ready for use whenever you need to use your webcam. With the adjustments in place, you are now equipped to make the most of your zoomed-in webcam experience.
Tips for Zooming In Your Webcam
Now that you have learned the step-by-step process of zooming in your webcam, it’s time to explore some additional tips and best practices to optimize your zoomed-in webcam experience. Consider the following suggestions:
1. Find the right balance: When zooming in your webcam, it’s important to find the right balance between being visually engaging and maintaining a professional appearance. Avoid excessive zoom that may result in a pixelated or distorted image and instead aim for a level of magnification that enhances your presentation without sacrificing image quality.
2. Test various zoom levels: Don’t be afraid to experiment with different zoom levels to see what works best for your specific use case. Test the zoomed image under different lighting conditions and backgrounds to ensure that the subject remains clear and well-framed. Find the zoom level that flatters your appearance and effectively delivers your message.
3. Consider your background: Pay attention to the background while zooming in your webcam. Ensure that it remains clean, uncluttered, and free from any potentially distracting elements. A well-chosen background can help maintain focus on you while adding a professional touch to your video presence.
4. Optimize lighting conditions: Good lighting is crucial for a quality webcam image. Ensure that there is adequate and even lighting on your face. Avoid harsh shadows or overly bright spots that may create unflattering or distracting effects. Experiment with different lighting setups to achieve the best results.
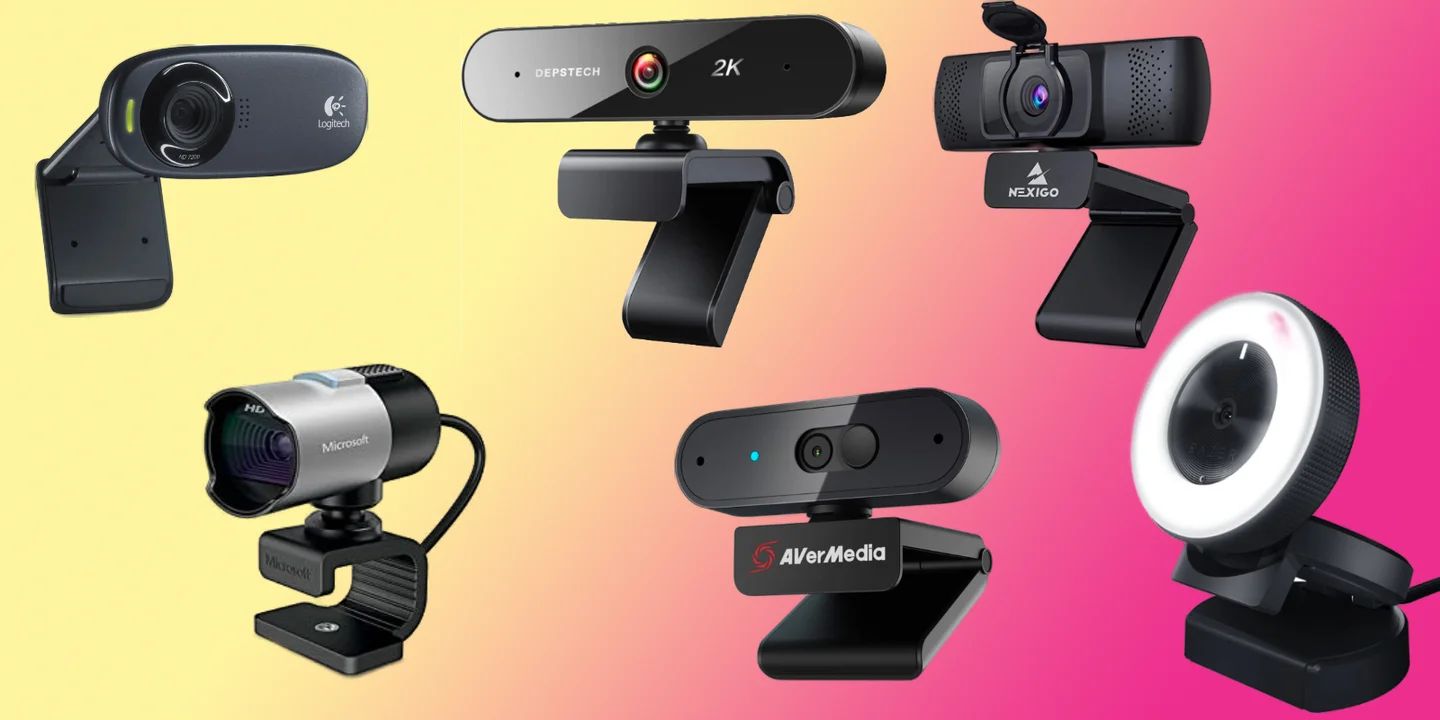
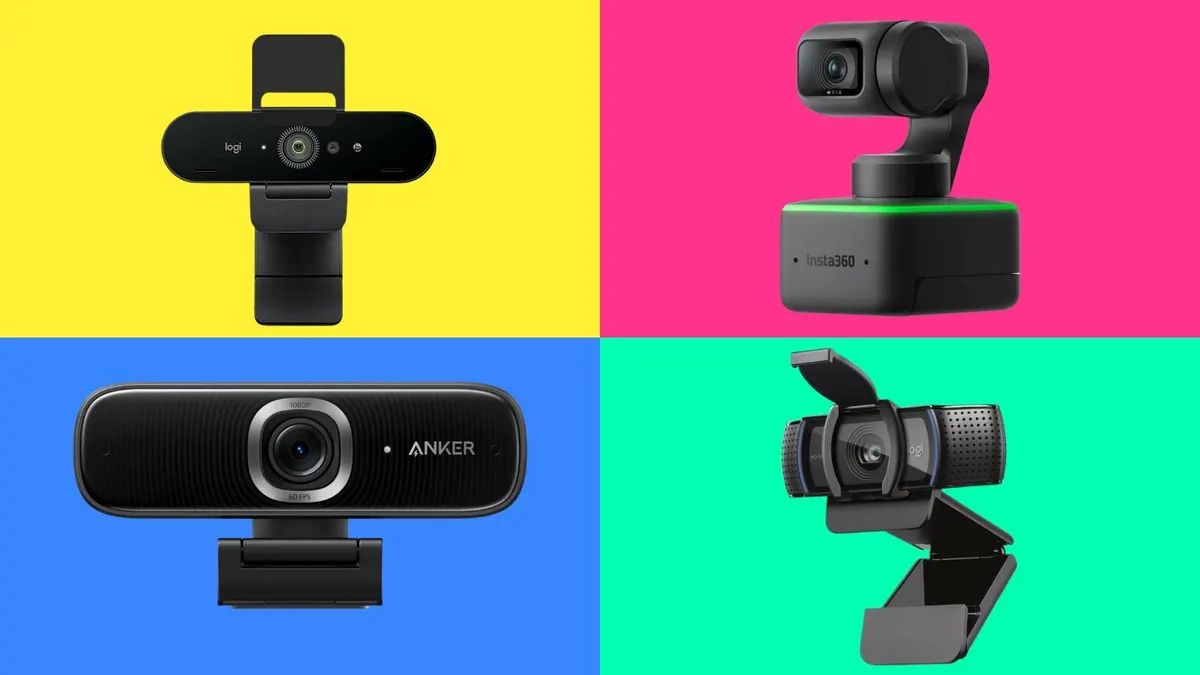
5. Use external webcams if needed: If the built-in webcam on your device does not provide the desired zoom capabilities or image quality, consider investing in an external webcam. External webcams often offer more advanced features, including adjustable zoom levels, superior image sensors, and higher resolutions, allowing you to achieve better results.
6. Practice and rehearse: Before important video presentations or meetings, practice using the zoomed-in webcam setup. Familiarize yourself with the framing and ensure that you feel comfortable and confident on camera. Practice will help you deliver your message effectively and make the most of the zoomed-in visual experience.
7. Record and review: Record a few test videos with the zoomed-in webcam to review your performance, framing, and overall video quality. This allows you to spot any areas for improvement or potential adjustments needed in your setup. Use the feedback to refine your approach and ensure that you consistently deliver high-quality video content.
8. Keep your software up to date: Regularly check for software updates for your webcam software. Updates often include bug fixes, performance enhancements, and new features that can improve your overall webcam experience. Staying up to date ensures that you have the latest improvements and fixes for your zoomed-in webcam setup.
By following these tips, you can make the most out of your zoomed-in webcam experience and deliver visually captivating and professional video content.
Conclusion
Zooming in your webcam can significantly enhance your video quality and user experience. By following the step-by-step guide provided in this article, you have learned how to adjust the zoom settings, fine-tune the zoomed image, and save or apply the changes. These steps empower you to achieve a visually engaging and professional webcam presentation.
Throughout the process, it’s important to find the right balance between zoom levels that highlight important details without compromising image quality. Testing various zoom levels, considering your background, optimizing lighting conditions, and practicing your presentation will help you optimize your zoomed-in webcam experience.
Remember to regularly check for software updates for your webcam software to ensure that you have the latest improvements and features. In some cases, using an external webcam might be necessary to achieve the desired zoom capabilities and image quality.
By utilizing the tips and best practices provided, you can confidently deliver clear, focused, and visually captivating video content. Whether you are attending virtual meetings, recording videos, or live streaming, mastering the art of zooming in your webcam will help you make a stronger impact and engage your audience more effectively.
So go ahead, experiment with the zoom settings, find your optimal framing, and confidently present yourself with a zoomed-in webcam that enhances your video communication.