Introduction
Welcome to the world of streaming and content creation, where webcam usage has become an essential tool for connecting with your audience. Whether you’re a gamer, vlogger, or online educator, having a clear and high-quality webcam can significantly enhance the viewer’s experience.
In this article, we’ll guide you through the process of setting up, configuring, and maximizing the potential of your webcam using OBS (Open Broadcaster Software). OBS is a popular and powerful streaming software that allows you to customize your content and create professional-looking videos.
With the increasing demand for engaging visual content, the webcam has become an integral part of any streaming setup. It allows your audience to connect with you on a personal level, seeing your reactions and expressions in real-time.
Whether you’re using OBS for streaming on platforms like Twitch or Youtube, or simply recording videos for your blog, mastering the use of your webcam can make a significant difference in the quality of your content.
Throughout this article, we’ll cover various aspects of webcam usage, including choosing the right webcam, connecting it to your computer, adjusting settings, positioning it correctly, and configuring OBS to optimize your webcam feed.
Furthermore, we’ll explore ways to enhance your webcam display by adding filters and effects, troubleshoot common webcam issues, and provide valuable tips and tricks to ensure a seamless streaming experience.
So, whether you’re just starting your streaming journey or looking to improve your current setup, let’s dive in and discover the wonders of using a webcam on OBS!
Setting up your webcam
Before you start using your webcam with OBS, it’s important to ensure that it is properly set up and connected to your computer. Here are the steps to get you started:
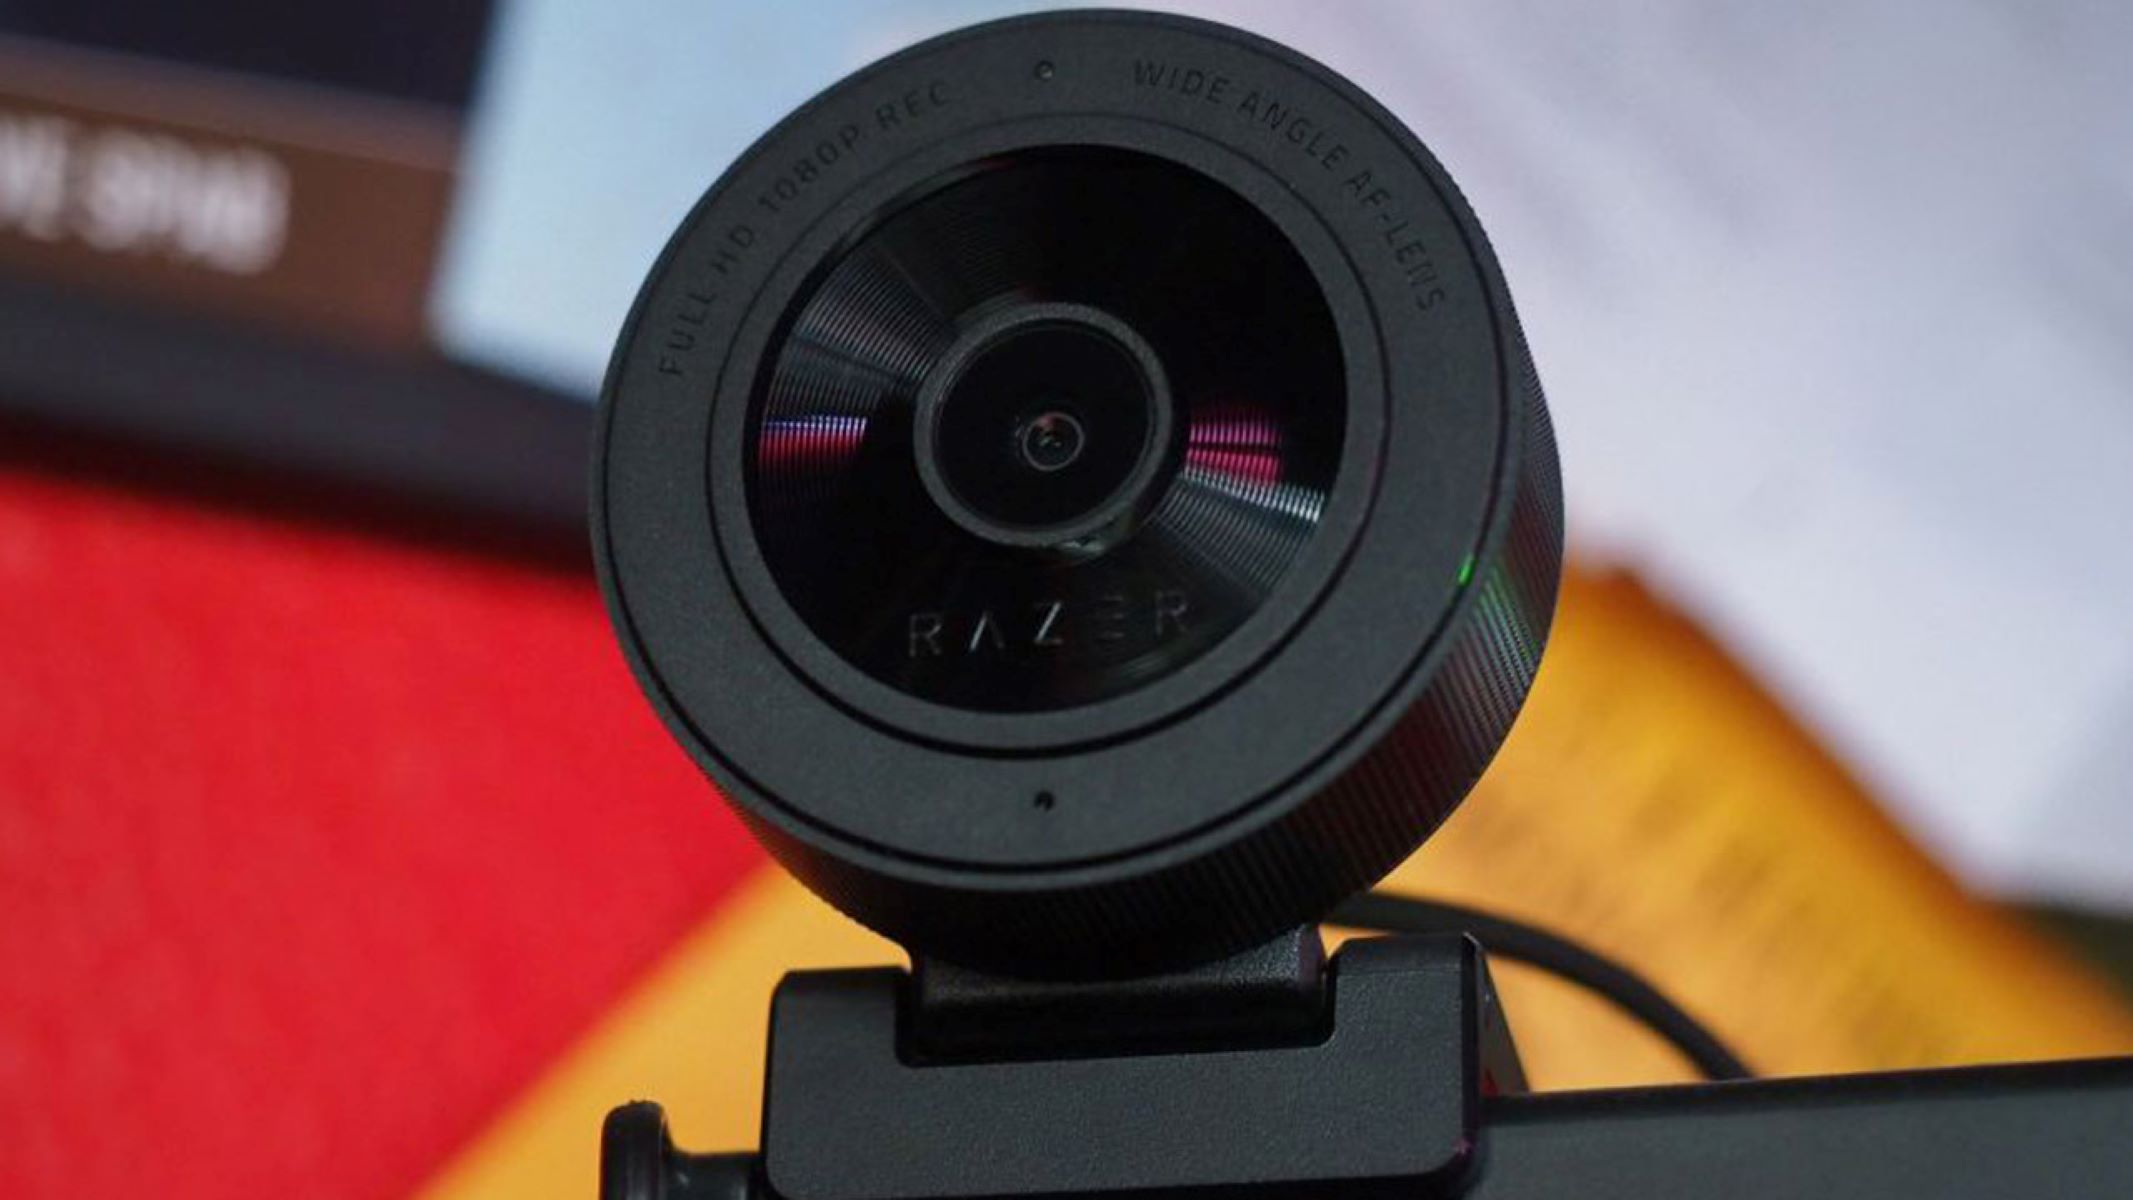
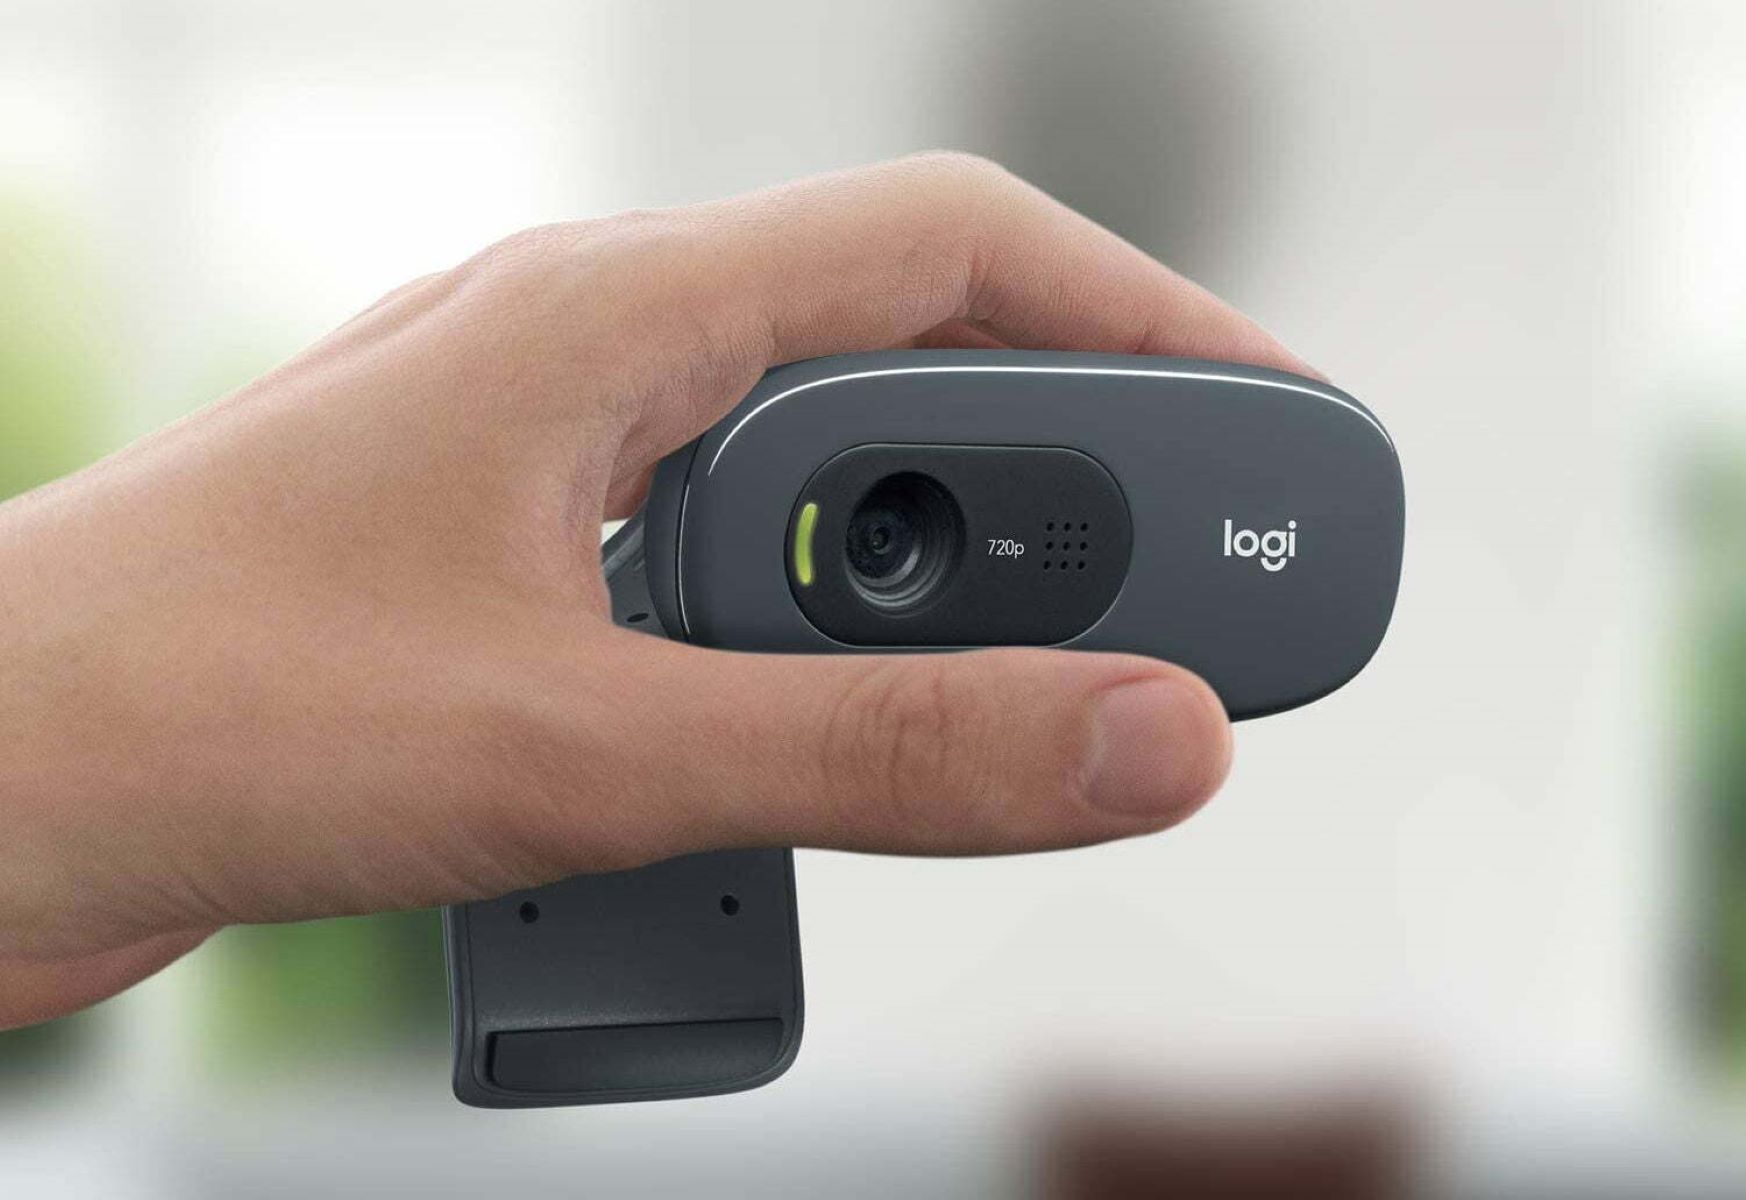
- Choose the right webcam: The first step is to invest in a webcam that suits your needs. Look for a webcam with high resolution and good low-light performance. Consider factors like frame rate, autofocus, and compatibility with your computer’s operating system.
- Connect your webcam: Once you have the webcam, connect it to your computer using the appropriate cable. Most webcams are plug-and-play, which means they will be automatically recognized by your computer. If the webcam requires specific drivers, make sure to install them before proceeding.
- Adjust webcam settings: After connecting your webcam, access its settings through the software provided by the manufacturer or your computer’s settings. Adjust parameters like brightness, contrast, saturation, and exposure to achieve the desired image quality.
After completing these initial steps, you are now ready to integrate your webcam into OBS and start streaming or recording your content. OBS provides a range of features and customization options to enhance your webcam feed and create professional-looking videos.
In the following sections, we will guide you through the process of configuring OBS to optimize your webcam’s performance. We’ll cover topics such as positioning your webcam, adding filters and effects, troubleshooting common issues, and more. So, let’s move on to the next section and explore the exciting possibilities with OBS and your webcam!
Choosing the right webcam
When it comes to choosing a webcam, there are several factors to consider to ensure you have the best possible video quality and performance. Here are some key considerations to keep in mind:
- Resolution: Look for a webcam with a high resolution, preferably 1080p or higher. This will ensure that your video feed is sharp and detailed, providing a professional look to your streams or recordings.
- Frame rate: A higher frame rate, typically 30 frames per second (fps) or higher, will ensure smooth video playback and reduce motion blur. This is particularly important if you’re involved in fast-paced activities like gaming.
- Low-light performance: Consider a webcam with good low-light performance, especially if you plan on streaming or recording in dimly lit environments. Look for features like low-light correction or built-in LED lights to enhance image quality.
- Autofocus and exposure: Having autofocus and exposure control on your webcam can significantly improve the overall video quality. These features help ensure that your image remains clear and well-exposed, even when you move or the lighting conditions change.
- Compatibility: Check the compatibility of the webcam with your computer’s operating system. Most webcams are compatible with both Windows and macOS, but it’s always a good idea to double-check before making a purchase.
In addition to these key factors, you may also want to consider features like built-in microphones, adjustable mounts, and software compatibility. Assess your specific needs and budget to make a well-informed decision.
Research different webcam models, read reviews, and compare specifications to find the webcam that meets your requirements. It’s worth investing in a high-quality webcam, as it will greatly enhance the visual experience for your audience.
Now that you have a good understanding of what to look for in a webcam, the next step is to connect it to your computer and configure it to work with OBS. In the following sections, we will guide you through the process of connecting your webcam, adjusting its settings, and integrating it into OBS to create engaging content.
Connecting your webcam
Now that you’ve chosen the right webcam for your streaming or recording needs, it’s time to connect it to your computer. Follow these steps to ensure a proper and secure connection:
- Check the connections: Review the ports available on your computer and the corresponding cable or connection type required for your webcam. Common connection types include USB-A, USB-C, and HDMI. Ensure that your computer has the necessary port and cable to connect your webcam.
- Plug it in: Once you have identified the appropriate cable and port, plug in one end of the cable into your webcam and the other end into the corresponding port on your computer. Make sure the connection is secure to avoid any interruptions during usage.
- Install drivers: In most cases, modern webcams are plug-and-play, meaning they are automatically recognized by your computer’s operating system. However, if your webcam requires specific drivers for full functionality, check the manufacturer’s instructions and download the drivers from their official website.
- Testing the connection: After connecting your webcam, it’s a good idea to test the connection and ensure that everything is working correctly. Open OBS or your preferred software and check if the webcam feed is being captured properly.
If you encounter any issues during the connection process, make sure to consult the webcam’s user manual or visit the manufacturer’s support website for troubleshooting steps. They may have specific instructions or software updates that will help resolve any compatibility or connection difficulties.
Remember, a stable and reliable connection is crucial to ensure that your webcam functions optimally during your streams or recordings. Take your time to carefully connect your webcam and double-check all connections before proceeding to the next steps.
Now that your webcam is successfully connected to your computer, we can move on to the next step: adjusting the webcam settings. In the following section, we will guide you through the process of optimizing the image quality and fine-tuning the settings to suit your preferences.
Adjusting webcam settings
After connecting your webcam to your computer, it’s important to adjust its settings to ensure optimal image quality. Most webcams come with dedicated software or settings that allow you to fine-tune various parameters. Here are some key adjustments you can make:
- Brightness: Adjust the brightness level to ensure that your video feed is neither too dark nor too bright. This will help viewers see you clearly without straining their eyes.
- Contrast: Set the contrast level to achieve a balanced ratio between light and dark areas in your video. This will enhance the overall clarity and definition of your image.
- Saturation: Saturation controls the intensity of colors in your video. Adjust this setting to achieve vibrant and realistic colors that accurately represent your surroundings.
- Exposure: Exposure determines the amount of light that enters your webcam’s sensor. Adjust this setting to avoid overexposed or underexposed areas and maintain a well-balanced image.
- Focus: If your webcam has autofocus capabilities, ensure that it is enabled. This will allow the webcam to automatically adjust the focus based on your distance from the camera.
Access the webcam settings either through the software provided by the manufacturer or through your computer’s settings. Explore the various options available and make adjustments according to your preferences and the lighting conditions in your recording environment.
It’s a good idea to test and fine-tune the settings in OBS or your preferred streaming software to ensure that the adjustments you make are accurately reflected in your video feed. Pay attention to how the changes affect the overall quality and visual appeal of your content.
Additionally, keep in mind that the optimal settings may vary depending on the specific webcam model and your personal preferences. Experiment with different settings until you achieve the desired look and feel for your streams or recordings.
Now that you have adjusted the settings of your webcam, it’s time to consider its positioning. In the next section, we will guide you through the process of positioning your webcam in the ideal location to capture the best angles and perspectives.
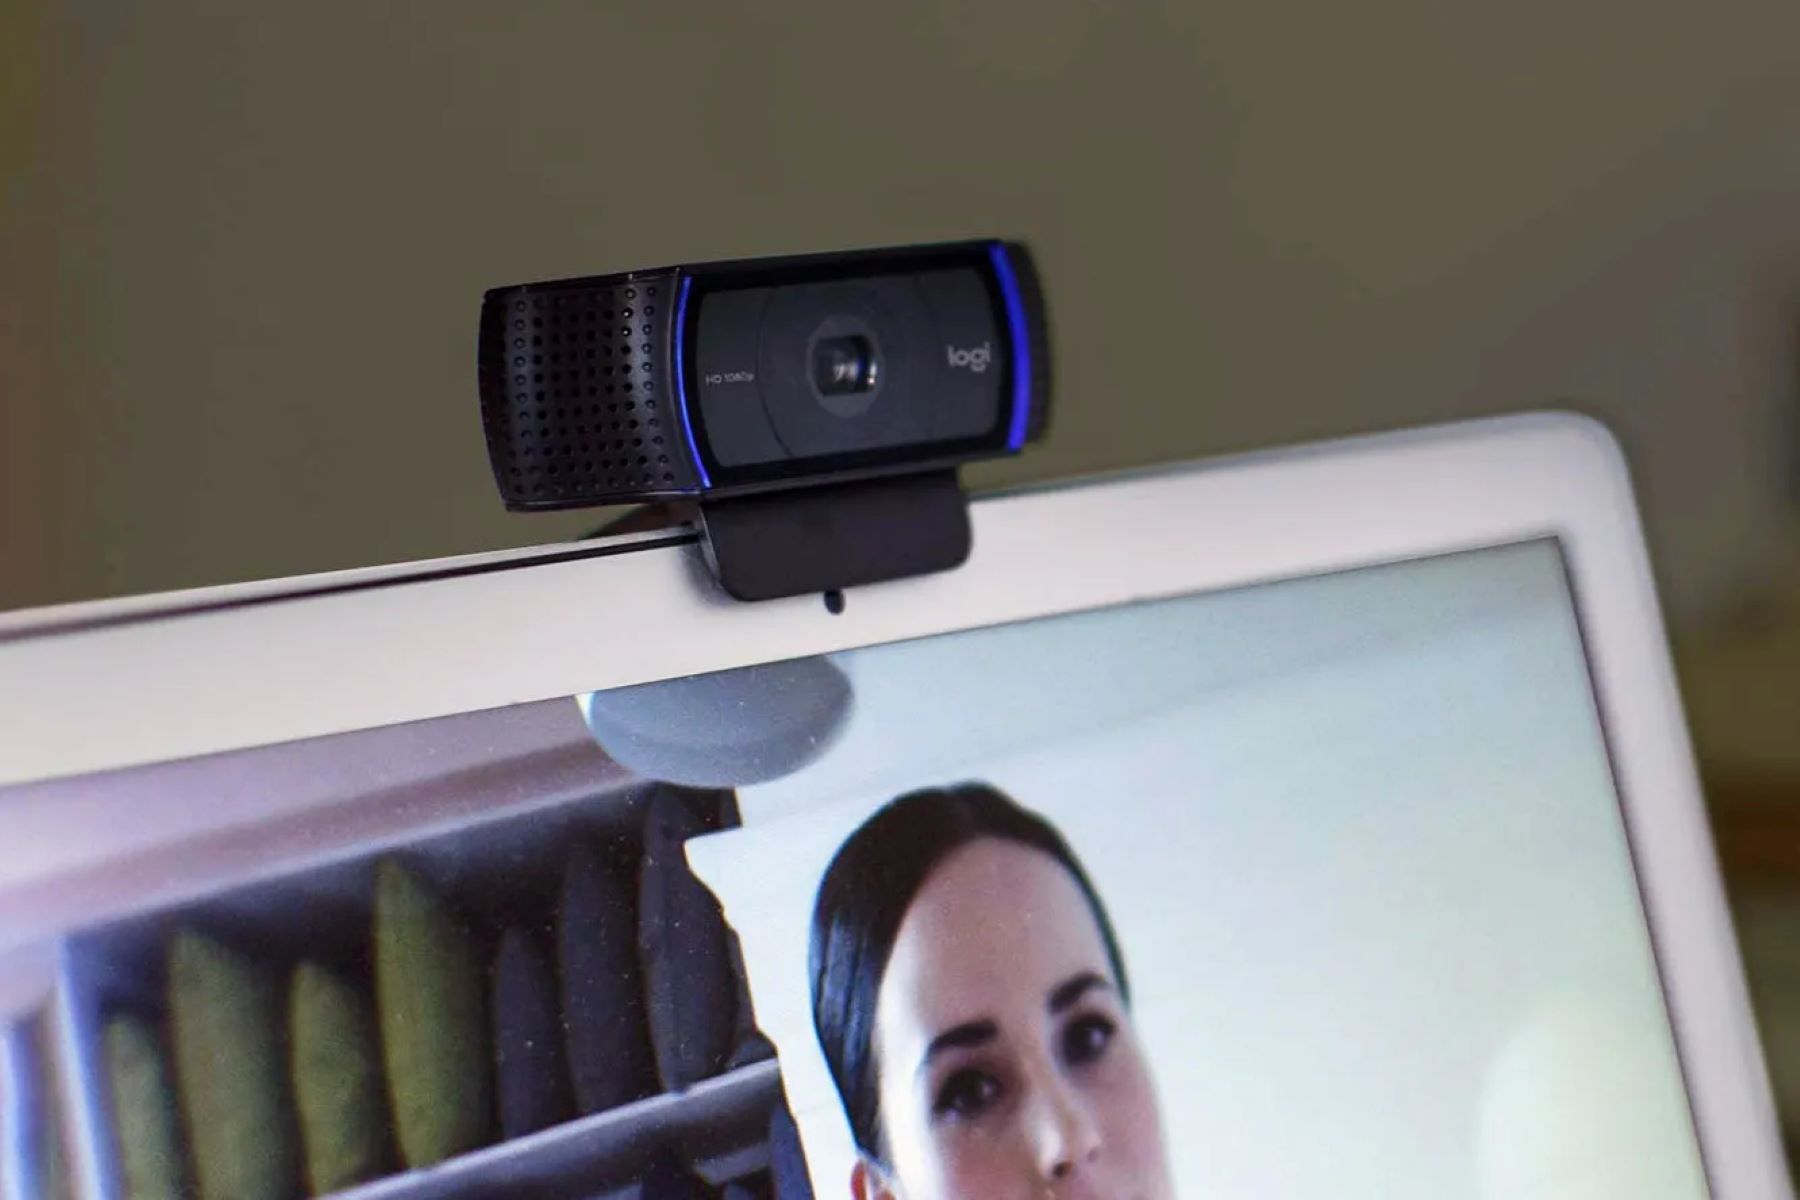
Positioning your webcam
The position of your webcam plays a crucial role in capturing the best angles and perspectives for your streams or recordings. Consider the following tips to ensure optimal positioning:
- Eye-level placement: Position your webcam at eye level or slightly above. This creates a more natural and engaging view for your audience, as they can make eye contact with you. Avoid placing the webcam too low, as it can create unflattering angles.
- Stable support: Use a stable and secure support system, such as a tripod or webcam stand, to hold your webcam in place. This minimizes any shaky or unstable footage during your streams or recordings.
- Distance from the subject: Find the right distance between you and your webcam for optimal framing. Experiment to strike a balance between capturing your facial expressions and including a suitable amount of background or workspace in the frame.
- Background considerations: Pay attention to the background behind you. Remove any clutter or distractions that may divert attention from you. Consider adding some elements or decorations that align with your branding or intended atmosphere.
- Lighting: Position your webcam in a well-lit area to ensure that your face is clearly visible. Avoid backlighting, as it can create shadows on your face. Experiment with natural light or invest in artificial lighting solutions like ring lights or softboxes.
Once you’ve positioned your webcam, test the framing and composition within OBS or your preferred software. Make any necessary adjustments to ensure that the final output is visually appealing and captures your desired vision.
Remember, positioning your webcam is a subjective process, and it may require some trial and error to find the perfect setup for your specific environment and content. Take the time to experiment and find what works best for you and your audience.
Now that you’ve positioned your webcam correctly, it’s time to configure OBS for optimal webcam usage. In the next section, we will guide you through the process of setting up OBS and adding your webcam to your scene.
Configuring OBS for webcam
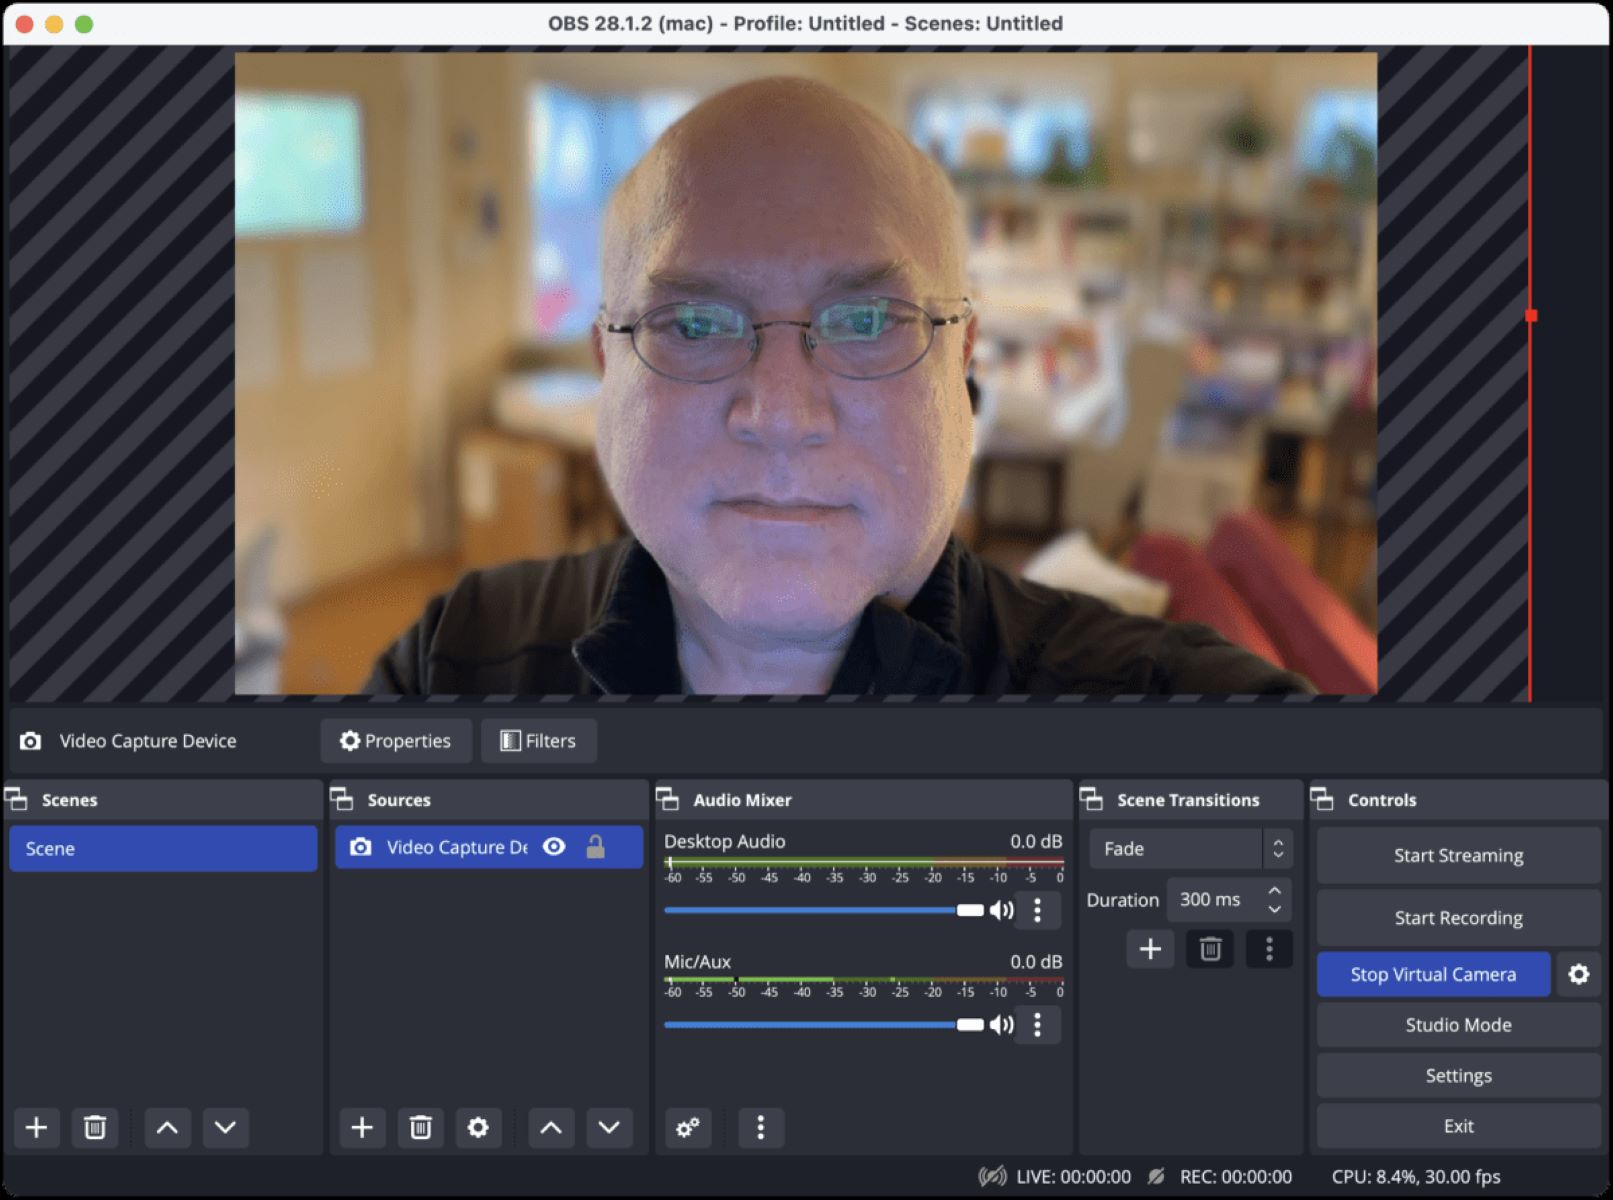
Now that you have your webcam connected and positioned, it’s time to configure OBS (Open Broadcaster Software) to fully utilize its capabilities. Follow these steps to set up OBS for your webcam:
- Download and install OBS: If you haven’t already, visit the OBS website and download the software. Follow the installation instructions to set it up on your computer.
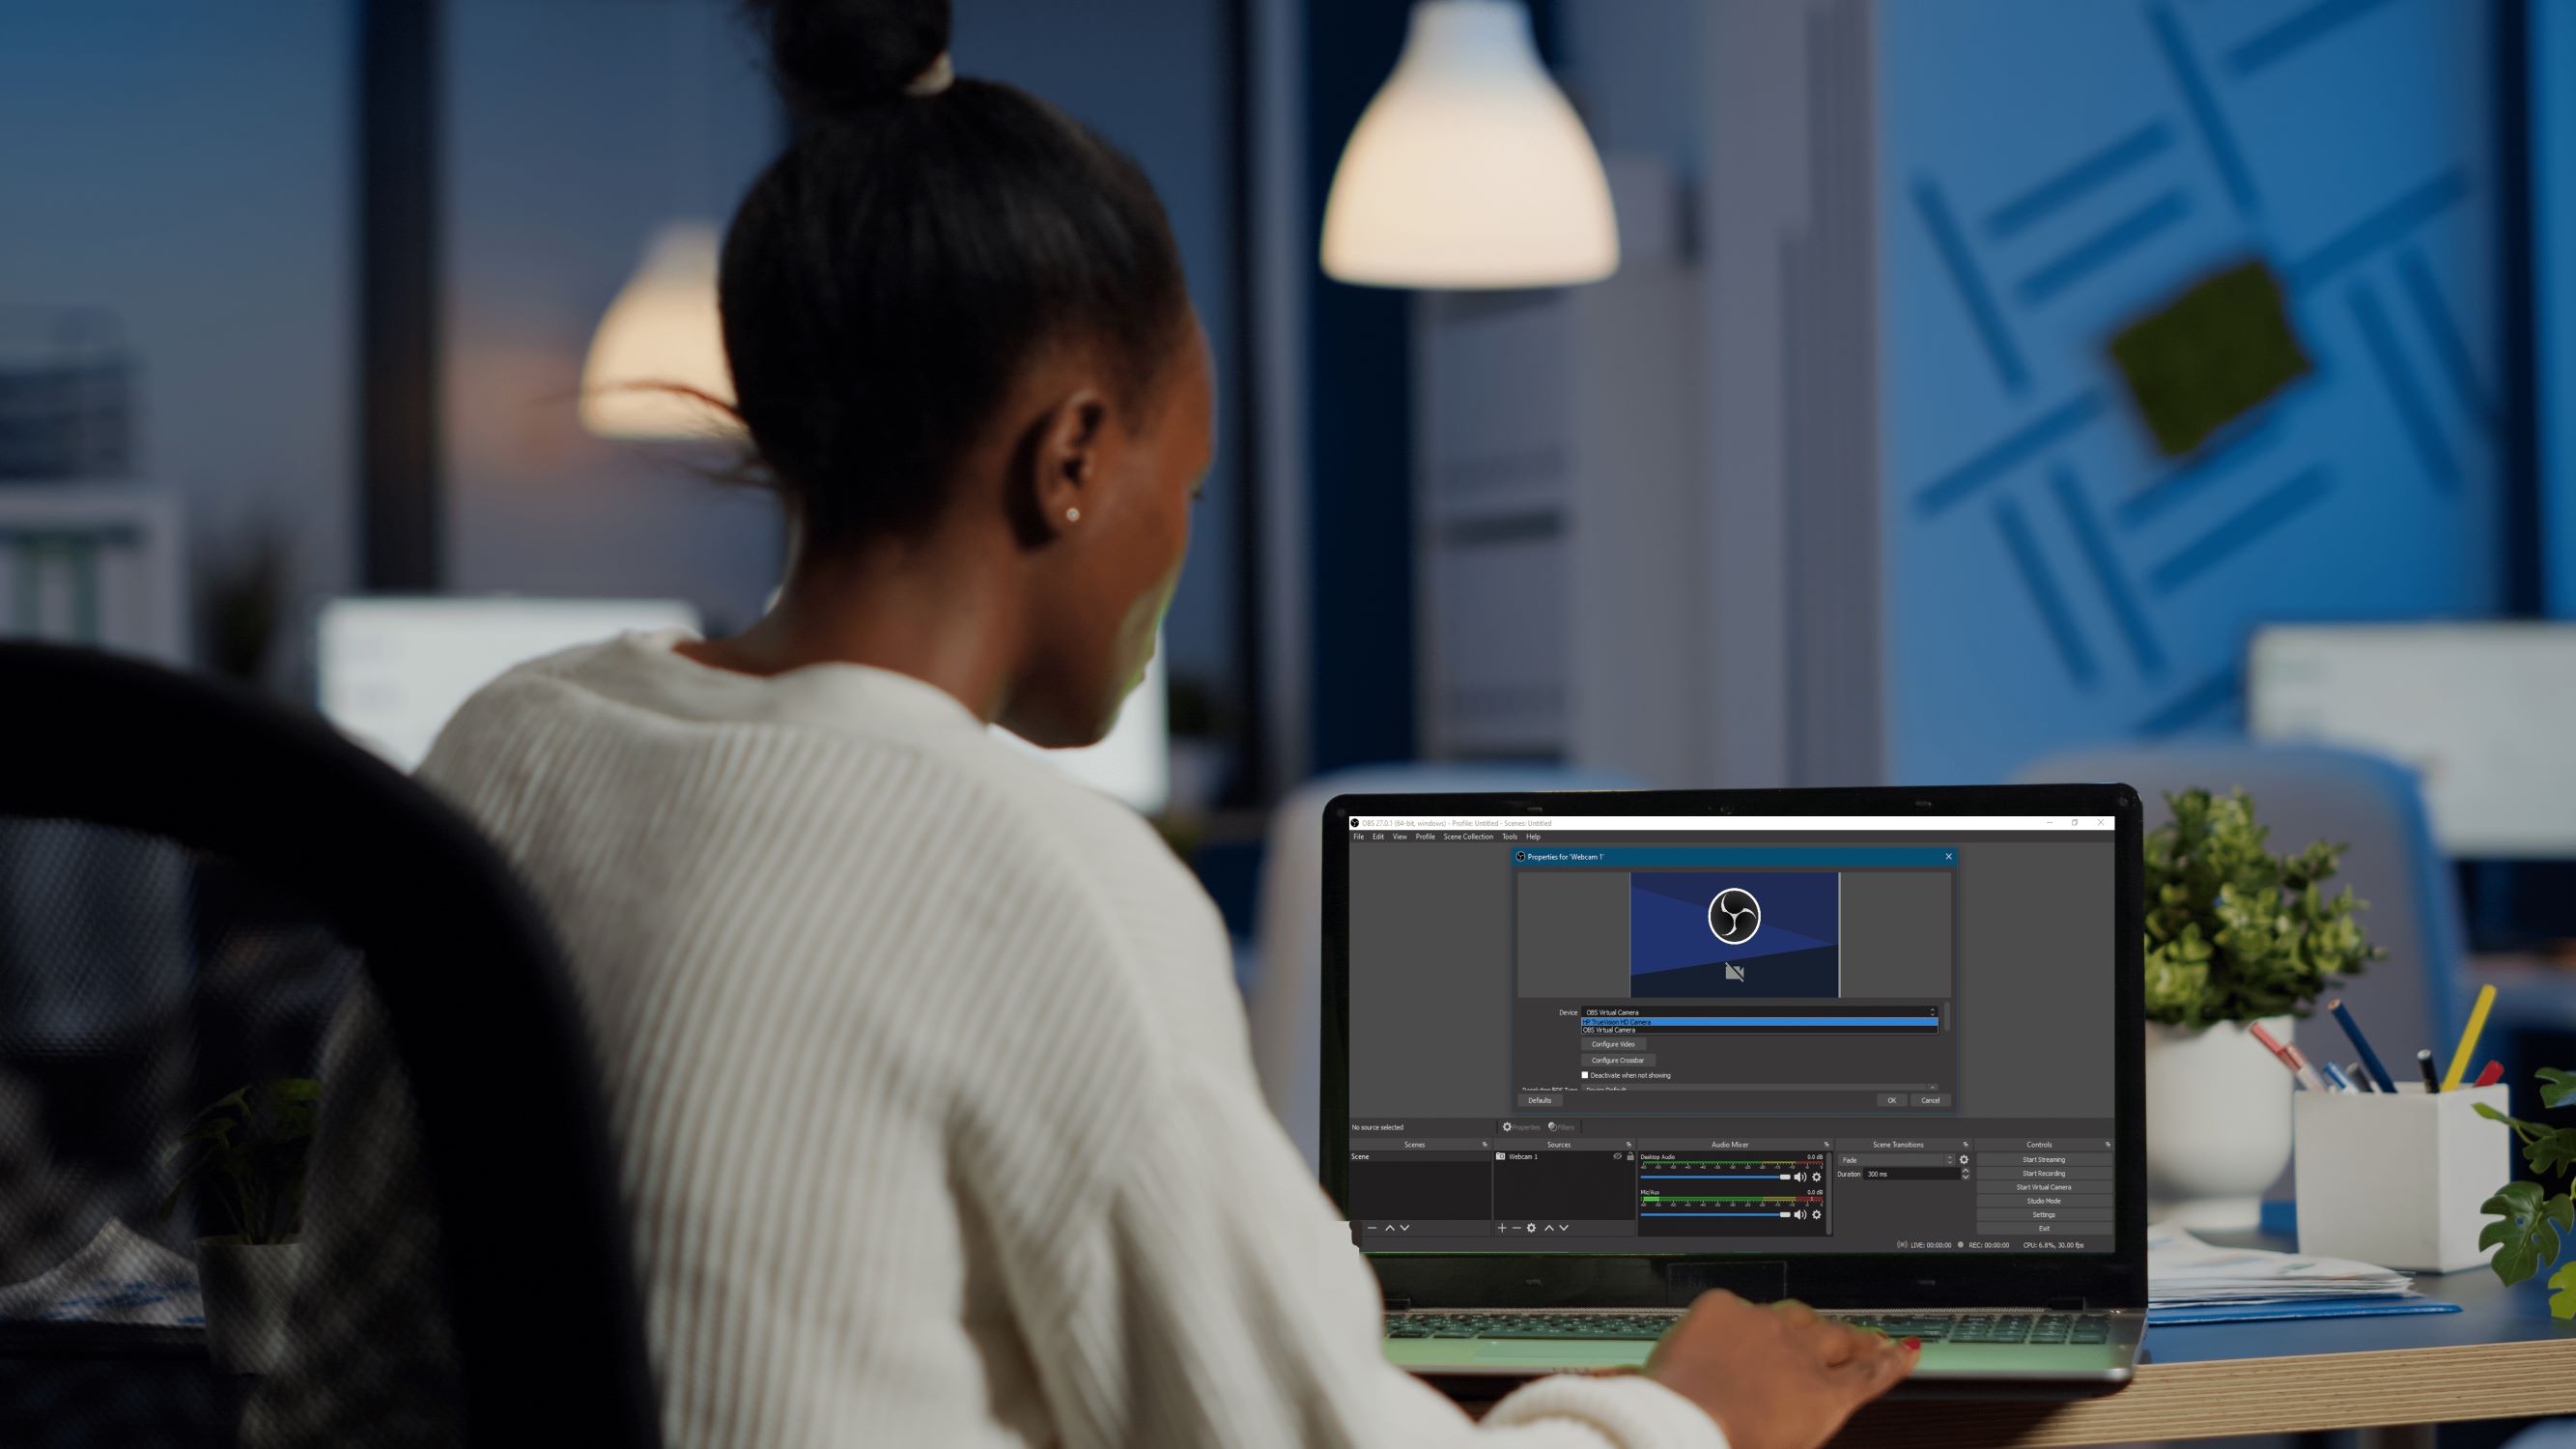
- Create a new scene: Open OBS and create a new scene by clicking on the plus icon in the Scenes box. Give your scene a descriptive name.
- Add your webcam as a source: In the Sources box, click on the plus icon and select “Video Capture Device.” Give your source a name and choose your webcam from the dropdown menu. Adjust any additional settings, such as resolution or frame rate, as needed.
- Position and resize your webcam source: Click on the properties of your webcam source and drag it to the desired position within your scene. You can also resize the source by clicking and dragging the edges.
- Configure webcam settings: Within the properties of your webcam source, you can further adjust settings specific to your webcam. This may include brightness, contrast, saturation, and more. Experiment with these settings to achieve the desired look.
- Preview and adjust: Use the preview function in OBS to see how your webcam feed appears. Make any additional adjustments to the positioning or settings until you are satisfied with the output.
After configuring OBS for your webcam, you are now ready to start streaming or recording with your perfectly optimized webcam feed. OBS offers a range of additional features and customization options that you can explore to enhance your content further.
Take your time to familiarize yourself with OBS and its various functions, such as scene transitions, overlays, and audio mixing. These features can greatly enhance the overall production value of your streams or recordings.
Now that you’ve successfully configured OBS for your webcam, it’s time to add the webcam to your scene. In the next section, we will guide you through the process of adding your webcam to your scene and adjusting webcam sources for a more dynamic display.
Adding webcam to your scene
Now that you have configured OBS for your webcam, it’s time to add it to your scene and make it an integral part of your streaming or recording setup. Follow these steps to add your webcam to your scene:
- Select your scene: In OBS, choose the scene where you want to add your webcam. If you haven’t created a scene yet, you can create one by clicking on the plus icon in the Scenes box and giving it a name.
- Add a source: In the Sources box, click on the plus icon and select “Video Capture Device.” Give your source a descriptive name.
- Choose your webcam: In the properties of your video capture device source, select your webcam from the dropdown menu. Adjust any additional settings, such as resolution or frame rate, to fit your needs.
- Position and resize: Drag and drop your webcam source within your scene to position it where you want it to appear. You can also resize the source by clicking and dragging the edges.
- Preview your scene: Use the preview function in OBS to see how your webcam feed appears within your scene. Make any necessary adjustments to the positioning or size to achieve the desired look.
By adding your webcam to your scene, you can create a more engaging and interactive experience for your viewers. They can now see your reactions, expressions, and any other visual elements you wish to include in your content.
Aside from positioning and resizing, you can also explore other options to enhance the appearance of your webcam feed. OBS offers a variety of filters and effects that you can apply to your webcam source. This includes chroma keying (greenscreen), color correction, and more. Experiment with these features to add your personal touch and elevate the visual quality of your streams or recordings.
Remember to regularly preview your scene and make adjustments as needed. Pay attention to the composition and overall aesthetics, ensuring that your webcam feed harmonizes with the rest of your content in terms of placement and visual appeal.
Now that you’ve added your webcam to your scene, it’s time to dive deeper and explore ways to enhance and customize your webcam display. In the next section, we will discuss adding filters and effects to your webcam for added visual flair.
Adjusting webcam sources
Once you have added your webcam to your scene in OBS, you can further customize and enhance the appearance of your webcam feed by adjusting various settings and applying filters. Here’s how you can modify your webcam sources in OBS:
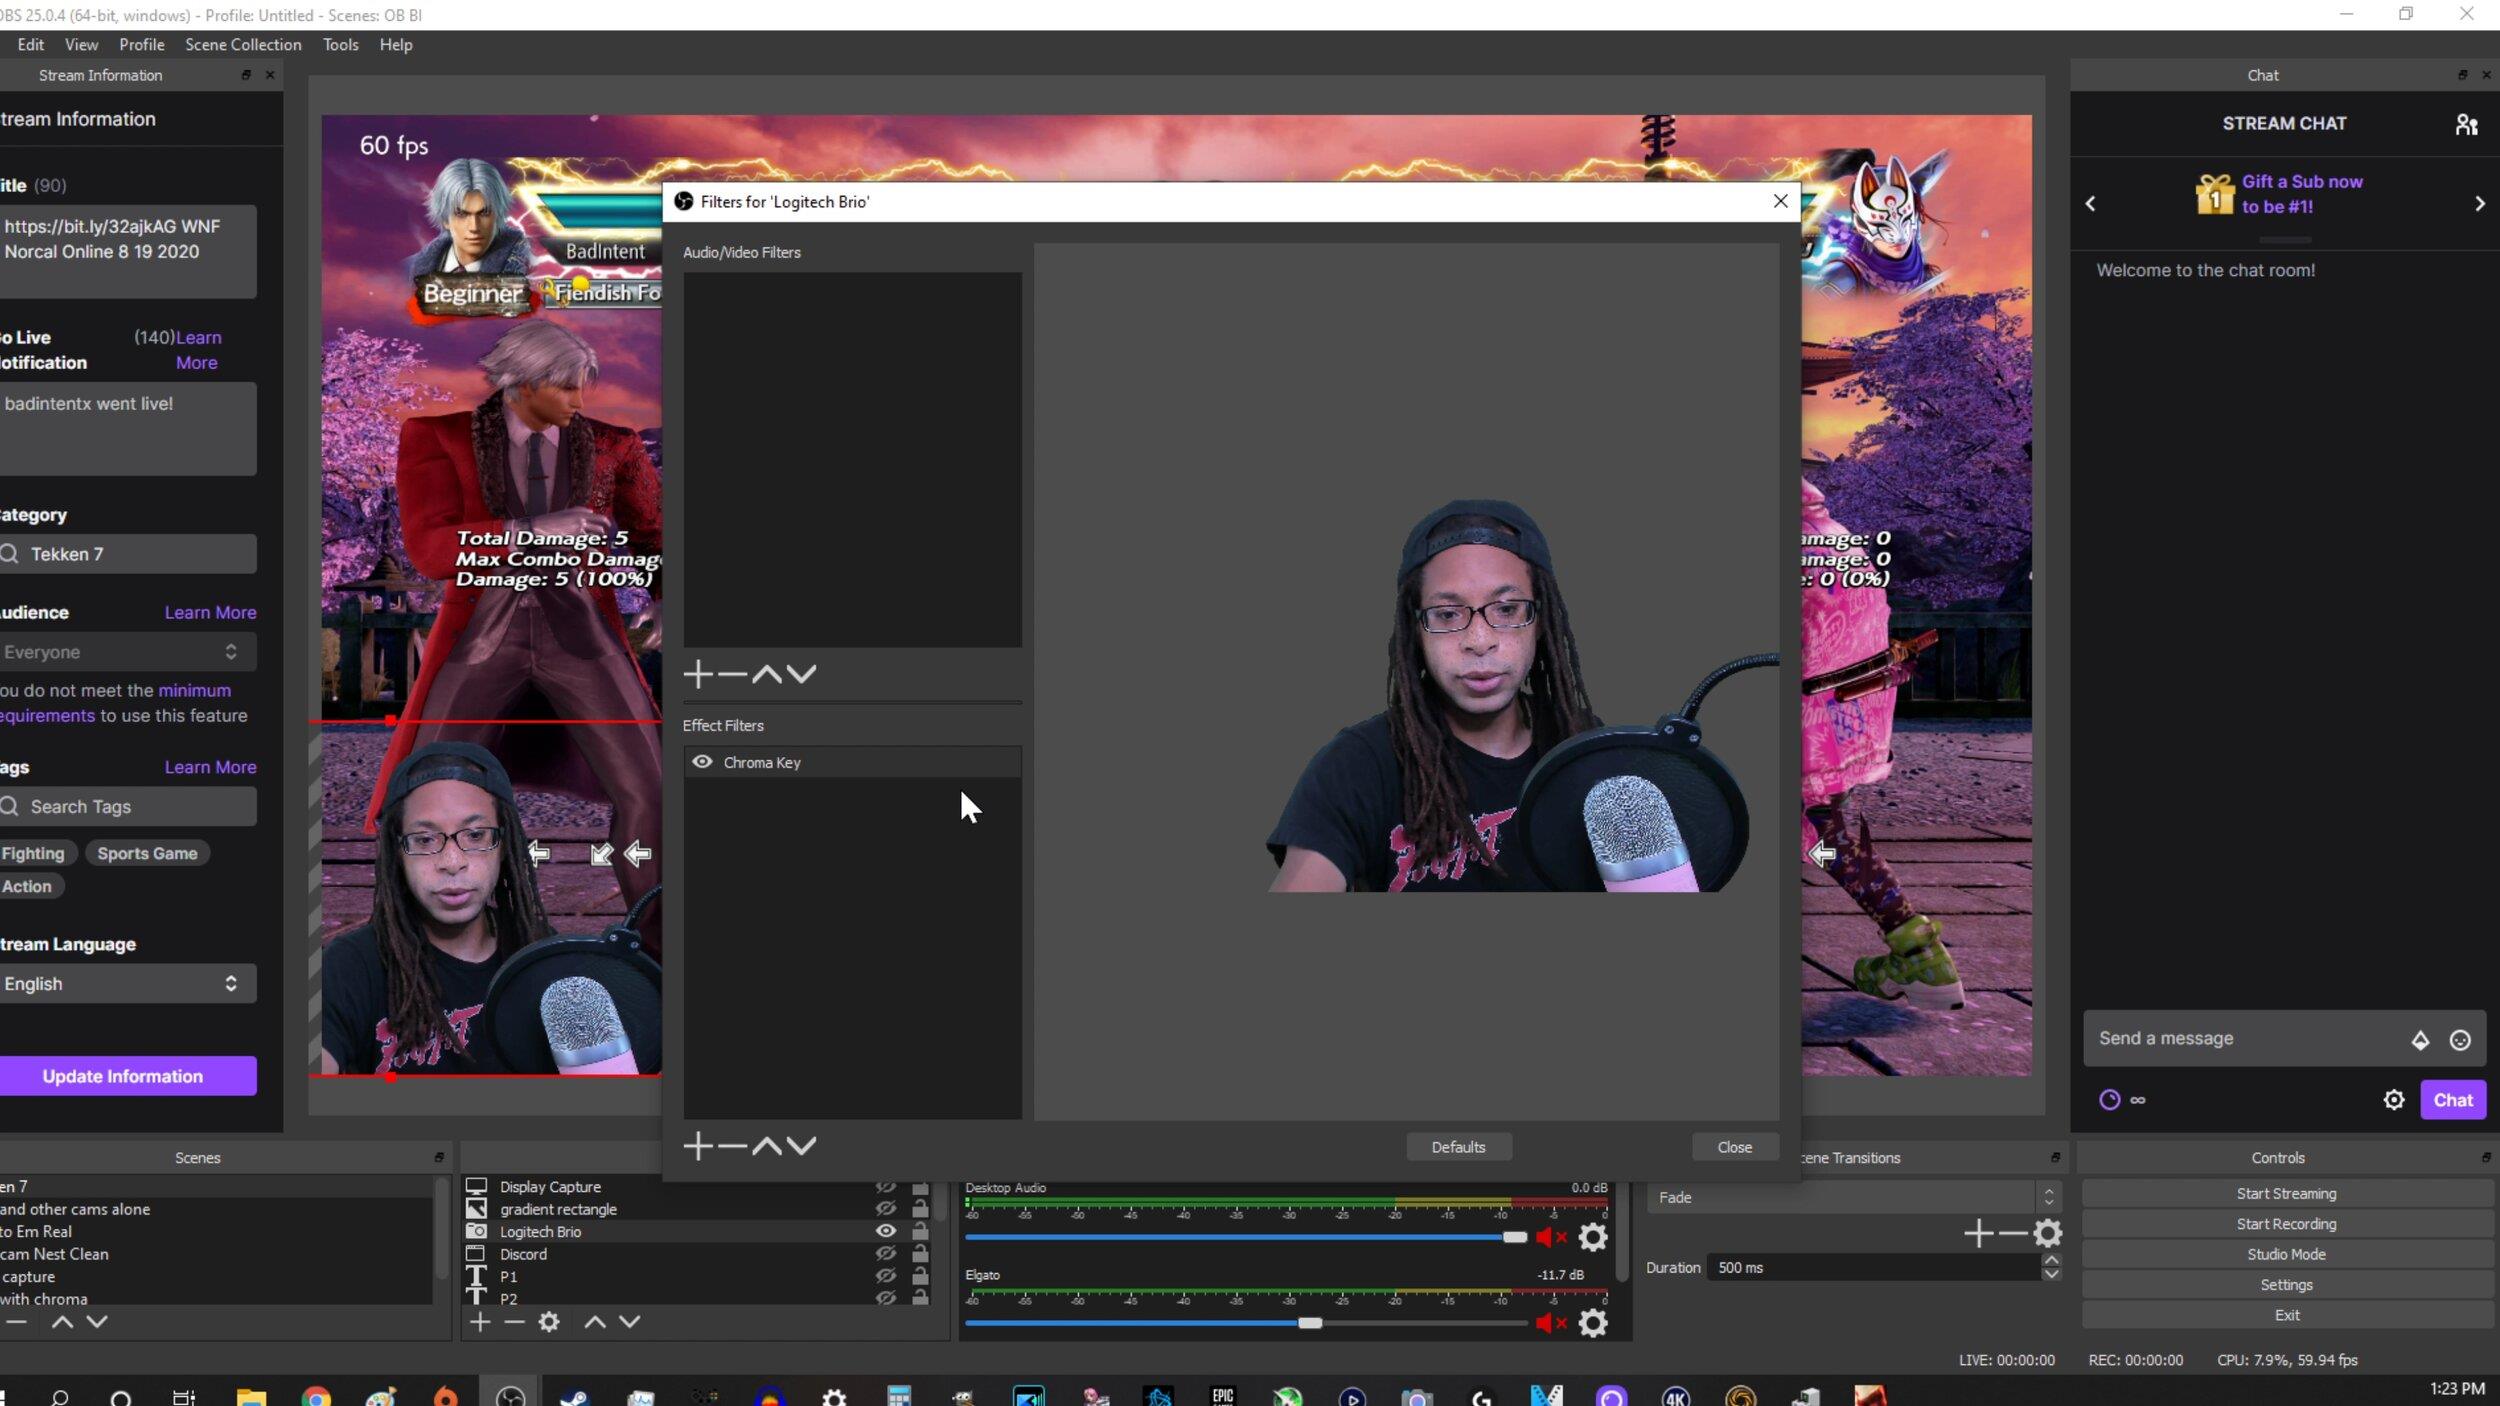
- Access source properties: Right-click on your webcam source within the Sources box and select “Properties” to access the settings specific to your webcam.
- Adjust image settings: Within the webcam source properties, you can fine-tune settings such as brightness, contrast, saturation, and more. Experiment with these settings to achieve the desired visual effect.
- Apply filters: OBS provides a range of filters that can be applied to your webcam source. These include chroma key (greenscreen), color correction, sharpening, and more. Explore these filters and experiment with their settings to enhance the overall look of your webcam feed.
- Add effects: In addition to filters, OBS also allows you to add effects to your webcam source. These effects can include overlays, borders, and animations. Use these to add a personal touch or branding elements to your webcam display.
- Preview and fine-tune: As you make adjustments to your webcam source, utilize the preview function in OBS to observe how the changes affect your video feed. Make any necessary tweaks to achieve the desired visual quality.
Remember to strike a balance between enhancing your webcam feed and maintaining a natural appearance. While filters and effects can add visual flair, it’s important to ensure that your image remains clear, realistic, and in line with the style of your content.
Regularly preview your stream or recording to ensure that your adjusted webcam source harmonizes with the overall composition of your scene. Pay attention to how your webcam interacts with other elements, such as overlays or gameplay footage, to create a visually cohesive and engaging experience for your viewers.
By adjusting and customizing your webcam sources in OBS, you can elevate the visual quality of your streams or recordings and create a more professional and captivating presentation of yourself.
Now that you understand how to adjust your webcam sources, let’s move on to the next section where we will discuss techniques to further enhance your webcam display by adding filters and effects.
Enhancing your webcam display
Adding filters and effects to your webcam feed can significantly enhance the visual appeal of your streams or recordings. Here are some techniques to help you enhance and customize your webcam display:
- Chroma key (greenscreen): Use a greenscreen background behind you and apply chroma keying to remove the green color, allowing you to replace it with any image or video of your choice. This creates a polished and professional look and opens up endless creative possibilities.
- Color correction: Adjust the colors of your webcam feed to make them more vibrant and visually appealing. Play around with the hue, saturation, and color balance settings to achieve the desired look for your specific content.
- Sharpening: Apply a sharpening filter to enhance the details and crispness of your webcam feed. Be cautious not to overdo it, as excessive sharpening can create an unnatural and pixelated appearance.
- Overlays and animations: Add graphic overlays, animations, or logos to your webcam display to personalize your brand and make it more visually engaging. This could include social media handles, chat boxes, or countdown timers.
- Virtual backgrounds: Some webcams and software offer the option to apply virtual backgrounds without the need for a physical greenscreen. This allows you to place yourself in various virtual environments or settings, adding a touch of creativity to your streams or recordings.
- Third-party plugins: Explore the wide range of plugins available for OBS that offer additional filters, effects, and customizations for your webcam. From real-time facial animation to virtual makeup options, these plugins can take your webcam display to the next level.
While these techniques can enhance your webcam display, it’s important to strike a balance and ensure that your enhancements do not distract from the main content or overpower your presence. Always consider the context and purpose of your streams or recordings, and make adjustments accordingly.
Experiment with different effects and filters to find the perfect combination that aligns with your personal style and the atmosphere you want to create. Regularly review and preview your webcam display within OBS to ensure that it complements the overall aesthetics of your scene.
Remember that the purpose of enhancing your webcam display is to captivate your audience and create a more immersive viewing experience. Be creative, explore new ideas, and continually refine your webcam setup to make a lasting impact on your viewers.
Now that you have learned techniques to enhance your webcam display, let’s address common webcam issues and troubleshoot them in the next section.
Adding filters and effects to your webcam
One way to elevate the visual quality and add a unique touch to your webcam display is by adding filters and effects. These options allow you to customize the appearance of your webcam feed and make it more engaging for your viewers. Here are some ways to enhance your webcam using filters and effects:
- Color correction: Adjust the color balance, contrast, saturation, and other parameters to enhance the overall look of your webcam feed. You can make subtle adjustments to match the lighting conditions or create a specific mood for your content.
- Blur or background replacement: Apply a blur effect to your webcam background or replace it altogether with a virtual background. This can help minimize distractions and keep the focus on you, creating a cleaner and more professional appearance.
- Facial effects: Some software allows you to add fun facial effects, such as virtual masks, emojis, or stickers. These can add an element of playfulness or uniqueness to your webcam feed, making it more engaging and entertaining for your audience.
- Filters and overlays: Experiment with filters and overlays to create a specific visual style or theme for your webcam display. These can range from vintage film effects to futuristic overlays, adding a visually captivating element to your streams or recordings.
- Virtual makeup: If you’re interested in enhancing your appearance on-screen, consider using virtual makeup effects. These filters can subtly retouch your skin, add makeup, or adjust skin tones to create a polished and professional look.
- Custom graphics: Utilize overlays or custom graphics to include your logo, social media handles, or other branding elements directly on your webcam display. This not only helps with branding but also adds a professional touch to your content.
When applying filters and effects, it’s important to strike a balance. The aim is to enhance the visual appeal without overdoing it, so as to maintain the authenticity and clarity of your webcam feed. Regularly preview your stream or recording to ensure that the applied filters and effects complement the overall aesthetics of your content.
Experiment with different filters and effects to find the ones that align with your personal style and the atmosphere you wish to create. Keep in mind that consistency is key when using these enhancements to ensure a professional and cohesive visual experience for your viewers.
Now that you have learned various ways to add filters and effects to your webcam, let’s move on to the next section and address some common webcam issues that you may encounter during your streams or recordings.
Troubleshooting common webcam issues
While webcams are a valuable tool for streaming and content creation, they can sometimes encounter technical issues that disrupt the quality of your streams or recordings. Here are some common webcam issues and their troubleshooting steps:
- Poor video quality: If your webcam is producing low-quality video, check its settings to ensure that the resolution and frame rate are set to optimal values. Additionally, poor lighting conditions or a dirty lens can affect video quality. Adjust the lighting in your recording space or clean the lens to improve the image.
- No video or connection issues: If your webcam is not displaying any video or is experiencing connection issues, first check the physical connections. Ensure that the webcam is properly connected to your computer and that the cable is not damaged. Restart your computer and try a different USB port if necessary. If the issue persists, update the webcam drivers or reinstall the webcam software.
- Audio synchronization: If the audio is out of sync with the video feed from your webcam, it may be due to a processing delay. To fix this, try adjusting the audio delay settings in OBS or your streaming software. Make small adjustments until the audio is in sync with the video.
- Excessive background noise: If your webcam’s microphone picks up unwanted background noise, consider using a separate microphone or a noise-canceling microphone to improve audio quality. Additionally, adjusting microphone sensitivity settings can help reduce background noise.
- Compatibility issues: Check the compatibility of your webcam with your computer’s operating system and the streaming software you’re using. Ensure both the webcam drivers and the software are up to date. If the compatibility issue persists, reach out to the webcam manufacturer’s support for further assistance.
- Freezing or lagging: If your webcam feed freezes or lags during streams or recordings, it could be due to insufficient resources on your computer. Close any unnecessary applications or processes that may be using up system resources. Ensure that your computer meets the minimum system requirements for streaming or recording. Lowering the webcam resolution or frame rate can also help alleviate performance issues.
Regularly updating your webcam drivers and software, as well as keeping your streaming software up to date, can help prevent and resolve many common webcam issues. It’s also important to maintain a clean and well-organized recording space, optimize lighting conditions, and conduct regular equipment maintenance.
If you encounter any persistent issues or need further assistance with troubleshooting, consult the webcam’s user manual or contact the manufacturer’s support for specialized guidance.
By troubleshooting and addressing these common webcam issues, you can ensure a smooth and high-quality streaming or recording experience for yourself and your viewers.
Now that you have learned how to troubleshoot webcam issues, let’s conclude our discussion and summarize the key points in the final section.
Conclusion
Using a webcam on OBS can greatly enhance the quality and engagement of your streams or recordings. Throughout this guide, we’ve covered the essential steps to help you make the most of your webcam setup, from choosing the right webcam to troubleshooting common issues.
We started by discussing the importance of choosing a high-resolution webcam with good low-light performance and autofocus capabilities. Properly connecting your webcam to your computer and adjusting its settings were emphasized as crucial steps to ensure optimal image quality.
Moreover, we explored the significance of positioning your webcam at eye level, using stable support, and carefully considering the background and lighting conditions. These factors contribute to a visually pleasing and well-framed webcam display.
Configuring OBS played a central role in maximizing the potential of your webcam. We walked through the process of creating scenes, adding webcam sources, and adjusting their properties and positions within the scene.
Furthermore, we delved into the exciting realm of enhancing your webcam display through the addition of filters, effects, overlays, and virtual backgrounds. These visual enhancements allow you to personalize your streams or recordings and create a captivating viewing experience for your audience.
Lastly, we addressed common webcam issues that may arise, such as poor video quality, connection problems, audio synchronization issues, background noise, compatibility concerns, and freezing or lagging. Troubleshooting steps were outlined to help you resolve these issues efficiently.
By following these guidelines and continuously experimenting with different settings and effects, you can master the art of using a webcam with OBS to produce high-quality and engaging content that captivates your audience.
Remember, your webcam is not just a tool but a gateway for connecting with your viewers on a personal level. Pay attention to the details, maintain a professional setup, and let your personality shine through your webcam.
So, go forth and create captivating streams or recordings with your newly optimized webcam setup. Good luck, and happy content creation!