Introduction
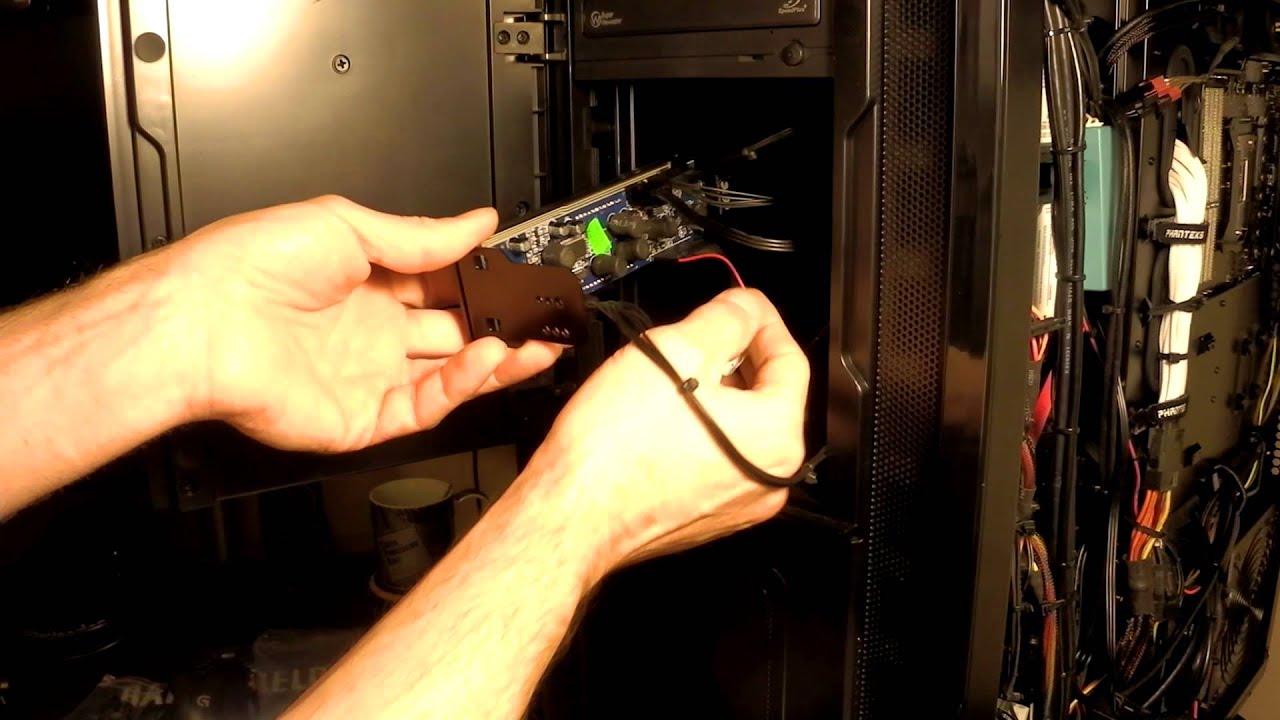
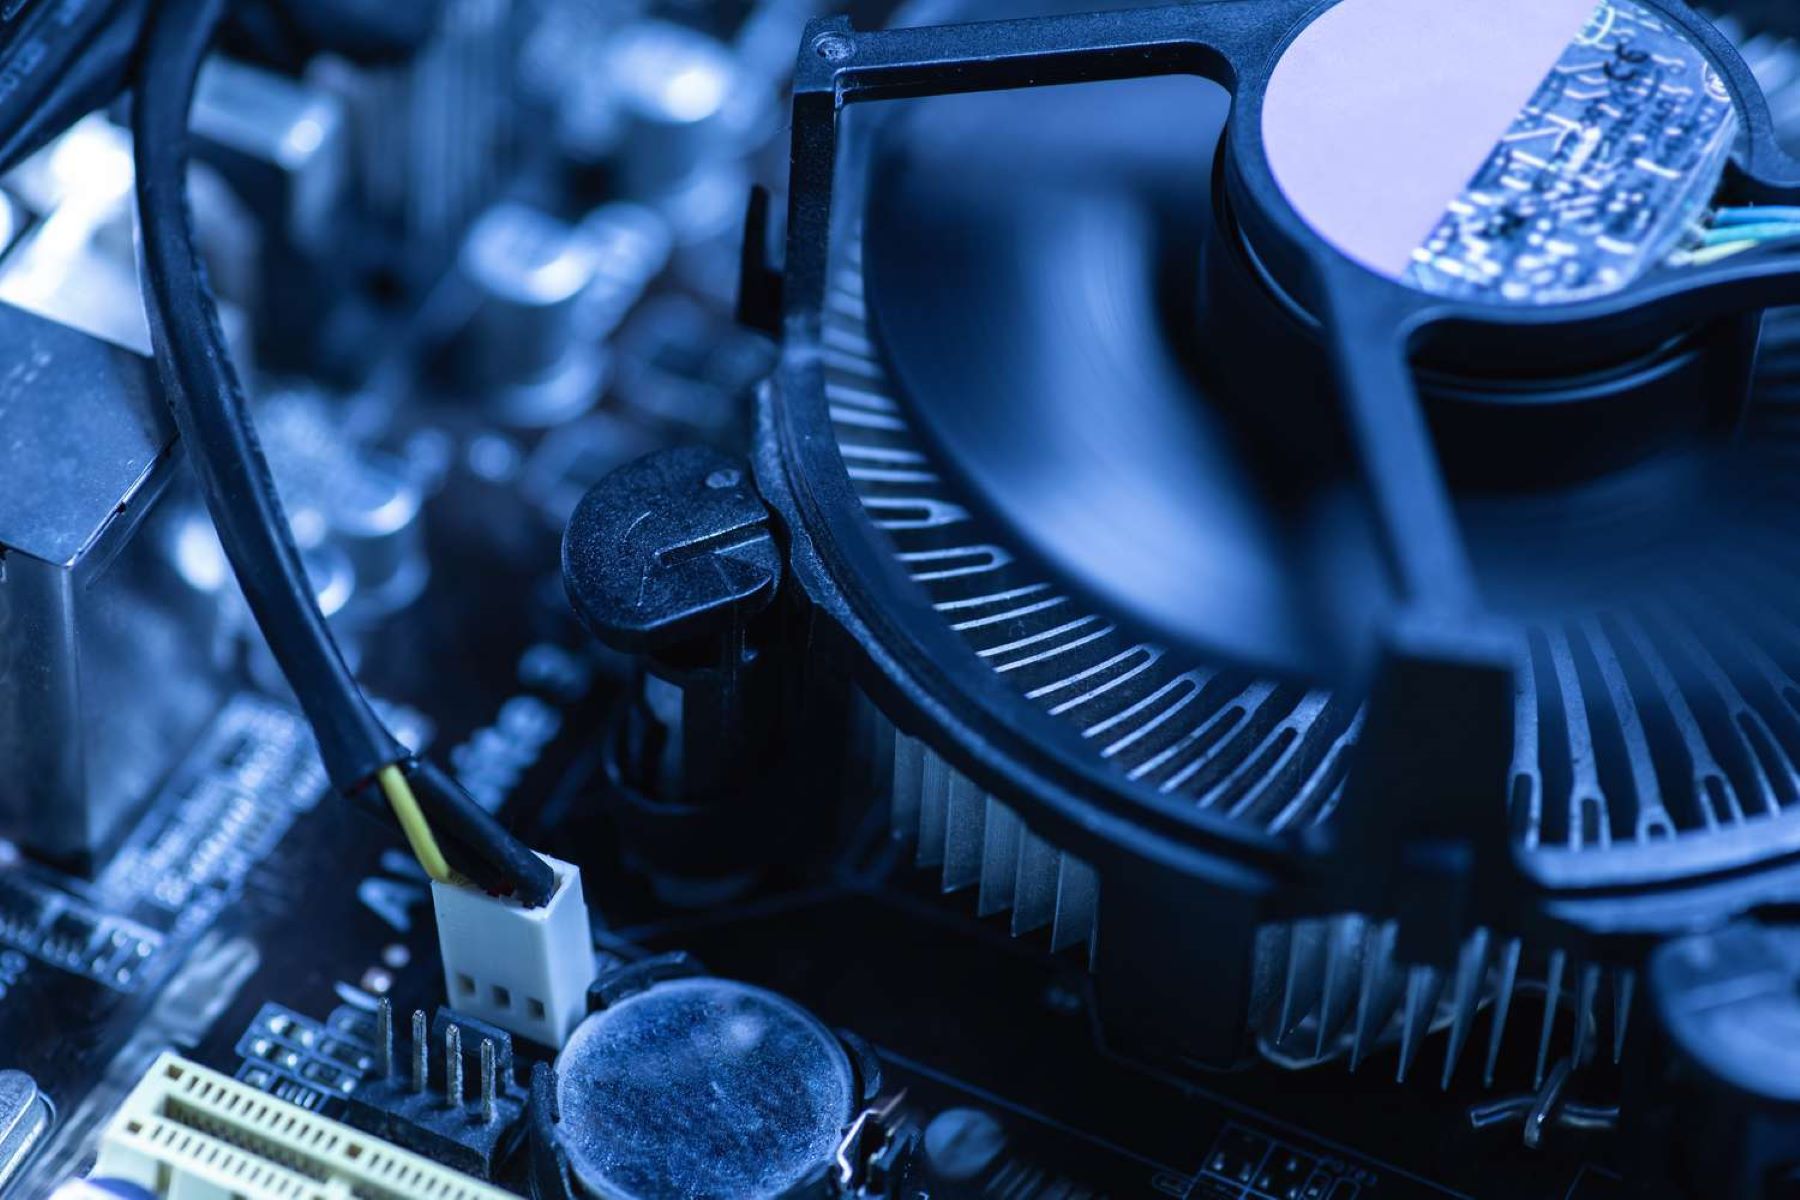
When it comes to cooling your computer, fans play a crucial role in maintaining optimal performance and preventing overheating. To effectively connect and control the fans, your motherboard provides various fan headers. These connectors allow you to attach and power system, chassis, and CPU fans directly to the motherboard. Understanding the different types of fan connectors available and knowing where to plug in your fans can greatly impact the cooling efficiency and overall stability of your system.
In this article, we will explore the various fan headers found on a motherboard and guide you on where to plug in your fans. Whether you are building a new PC or upgrading your existing system, having a clear understanding of fan connectors is essential to optimize cooling and ensure the longevity of your components.
So, let’s dive in and discover the different types of fan connectors that you may find on your motherboard, and how to determine the correct headers to connect your fans for effective cooling.
Types of Fan Connectors on a Motherboard
A motherboard typically comes with a variety of fan connectors, each designed for specific types of fans. Understanding the different types of fan connectors will help you determine compatibility and ensure proper functionality. Let’s take a closer look at the main types of fan connectors you may encounter:
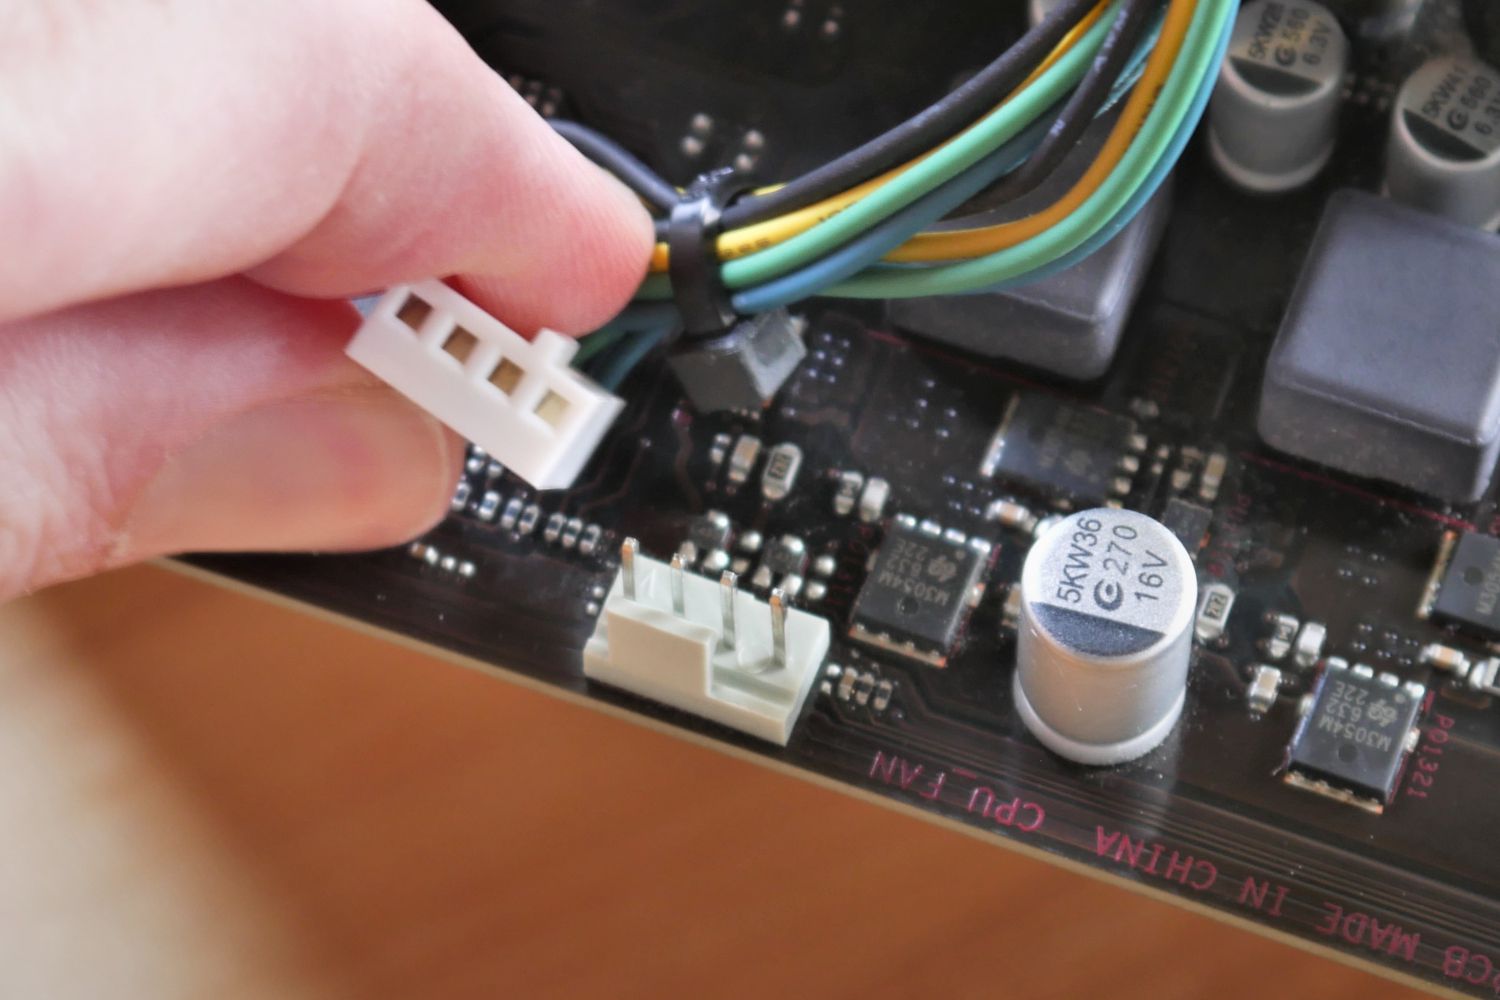
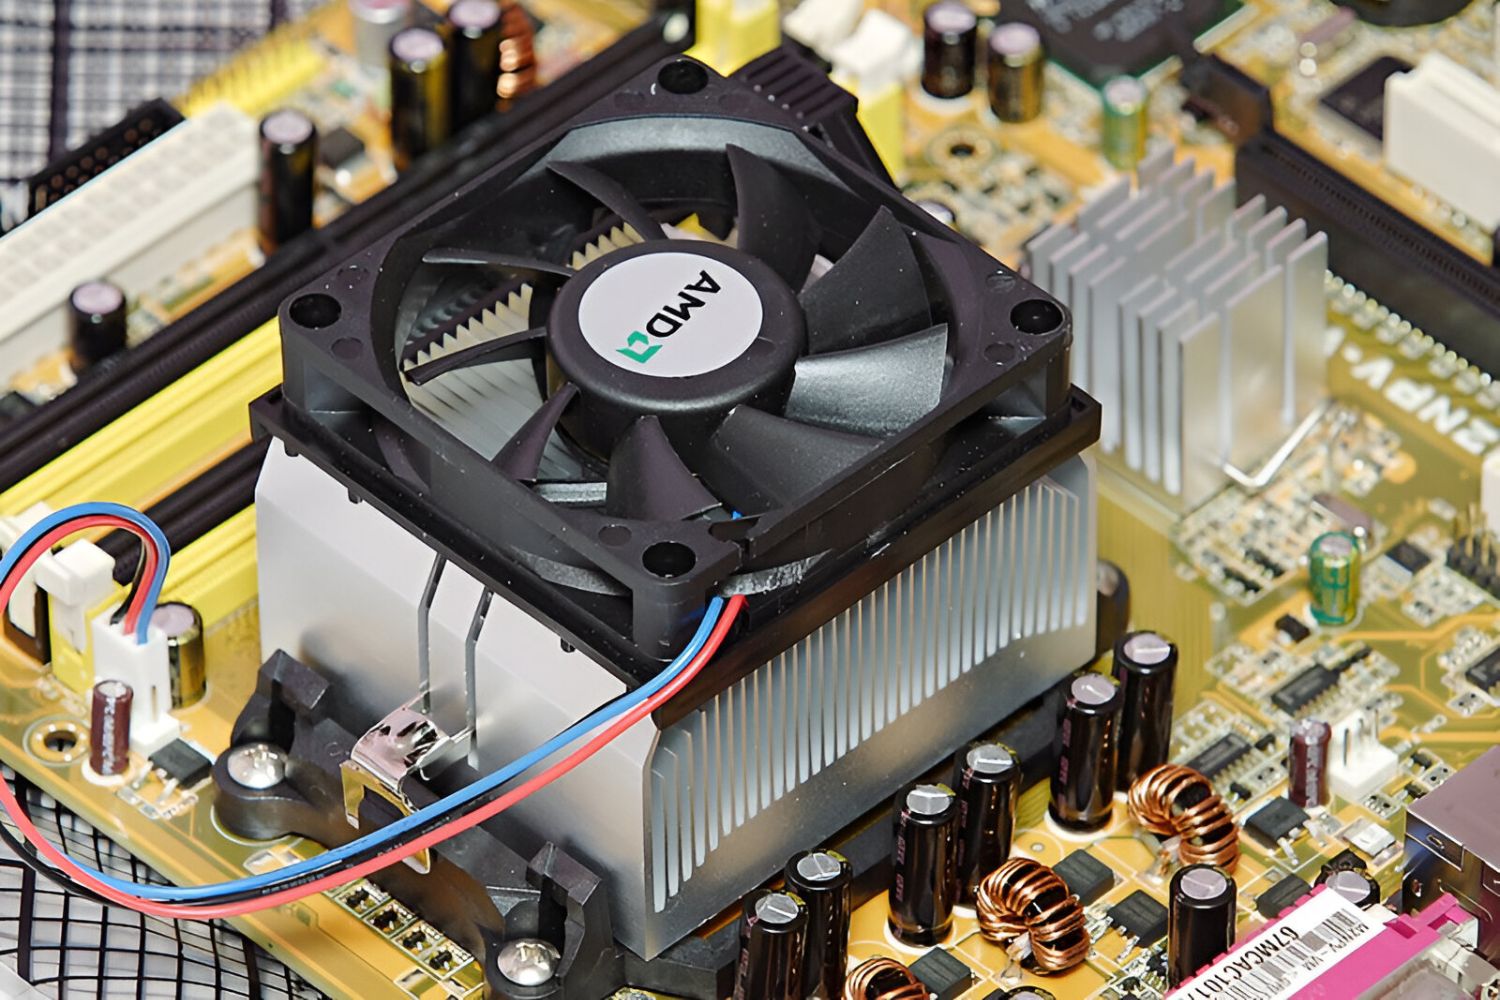
- CPU Fan Header: The CPU fan header is specifically dedicated to cooling the central processing unit (CPU) of your computer. It is usually located near the CPU socket and is essential for maintaining the CPU’s temperature within safe limits. The CPU fan header is typically a 4-pin connector, although older motherboards may have 3-pin connectors. This header provides essential features like PWM (Pulse Width Modulation) control to adjust the fan speed based on CPU temperature.
- System Fan Headers: System fan headers are used to connect fans that provide general airflow and cooling within your computer case. These headers are commonly labeled as “SYS_FAN” or “CHA_FAN” and can be found in various locations on the motherboard. They are usually 4-pin connectors, supporting both PWM and voltage control to regulate fan speed.
- Chassis Fan Headers: Chassis fan headers, similar to system fan headers, are designed to connect fans that cool specific components or areas within your computer case. These headers are typically labeled as “CHA_FAN” or “CHASSIS_FAN” and are often 4-pin connectors. Some motherboards may also offer 3-pin chassis fan headers. Chassis fan headers can be used for fans mounted on the front, rear, or side panels of the case.
- AIO Pump/Header: For liquid cooling solutions, many motherboards now come with a dedicated AIO (All-in-One) pump/header. This header is specific to AIO coolers and provides power and control for the integrated pump. It is usually a 3-pin or 4-pin connector, depending on the type of AIO cooler.
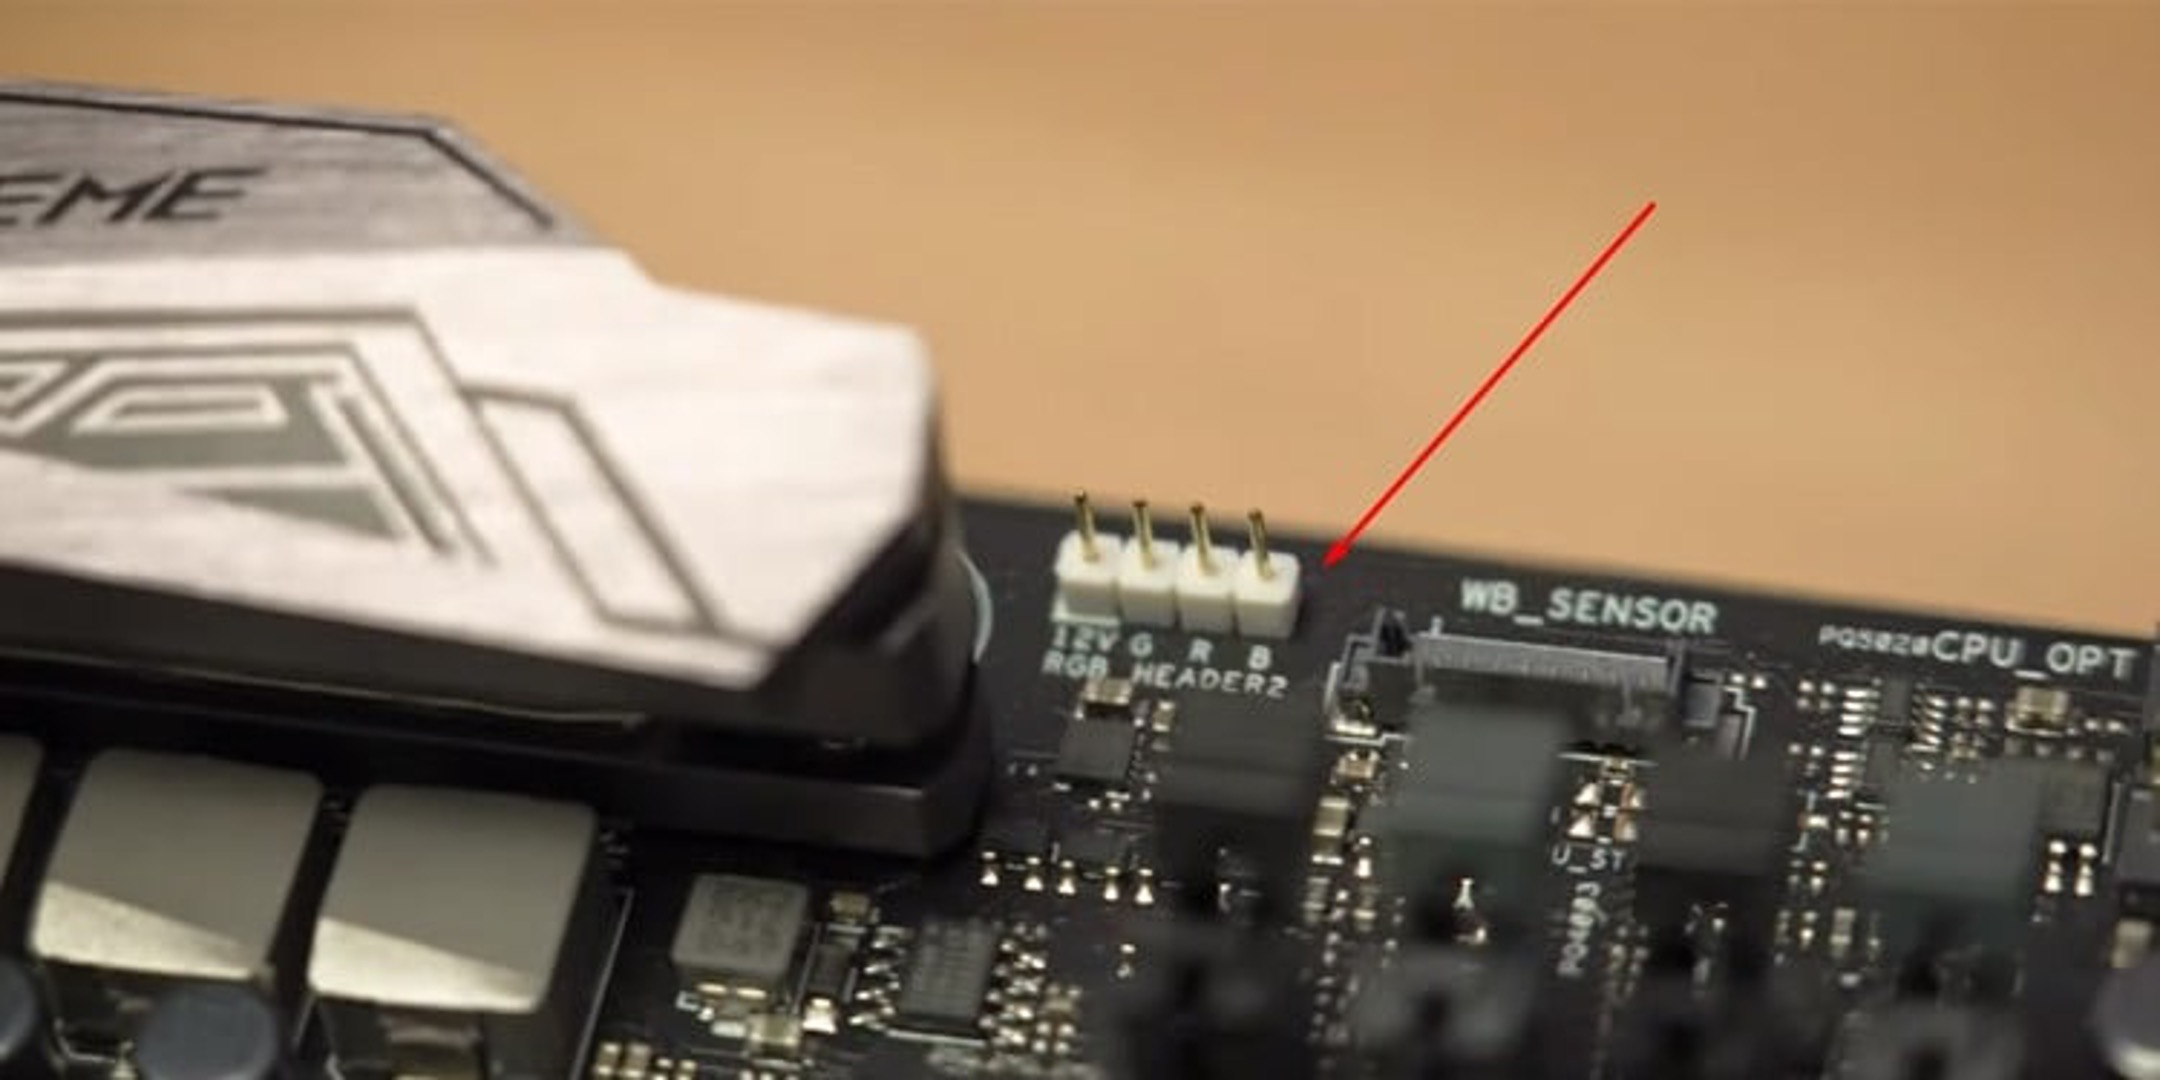
- Additional Fan Headers: Some motherboards may have additional fan headers, depending on the model and form factor. These headers can be labeled differently, such as “PWR_FAN,” “OPT_FAN,” or “PUMP_FAN,” and serve various purposes, such as powering additional fans or connecting additional cooling devices.
Understanding the different types of fan connectors will help you identify the appropriate headers for your fans and ensure optimal cooling efficiency. In the next section, we will discuss how to determine the correct fan header on your motherboard.
CPU Fan Header
The CPU fan header, as the name suggests, is specifically designed to connect the fan that cools the central processing unit (CPU). This fan plays a critical role in maintaining the CPU’s temperature within safe operating limits and preventing it from overheating.
The CPU fan header is typically located near the CPU socket on the motherboard. It is usually a 4-pin connector, although older motherboards may have 3-pin connectors. The additional pin on the 4-pin connector is used for PWM (Pulse Width Modulation) control, allowing for more precise fan speed adjustment based on CPU temperature.
When connecting a fan to the CPU fan header, it is important to ensure that it is the correct type of fan. CPU fans are specifically designed for cooling the CPU and are often equipped with features like heatsinks and heat pipes. It is recommended to use the fan that comes with the CPU cooler provided by the manufacturer, as it is specifically designed for optimal cooling performance.
In addition to providing power to the CPU fan, the header also allows the motherboard to monitor the fan’s speed. This enables the system to adjust the fan speed dynamically based on the CPU’s temperature, ensuring efficient cooling without excessive noise.
It is worth noting that some high-end motherboards may offer multiple CPU fan headers. This allows for the connection of additional CPU cooling solutions, such as liquid coolers or dual-fan heatsinks. Each CPU fan header on these motherboards will typically have its own control and monitoring capabilities, allowing for independent control of each connected fan.
Overall, the CPU fan header is crucial for maintaining the CPU’s temperature and ensuring the system’s stability. Properly connecting and configuring the CPU fan is essential for efficient and reliable cooling performance.
System Fan Headers
System fan headers are an important component of a motherboard, as they allow you to connect and control fans that provide general airflow and cooling within your computer case. These fans help dissipate heat generated by other components and ensure optimal system temperatures.
System fan headers are typically labeled as “SYS_FAN” or “CHA_FAN” (short for chassis fan) and can be found in various locations on the motherboard. They are designed to accommodate 4-pin connectors, although some older motherboards may have 3-pin headers as well. The 4-pin connectors offer PWM (Pulse Width Modulation) control, allowing for automatic adjustment of fan speeds based on system temperatures.
When connecting fans to the system fan header, it is important to consider the fan’s power requirements. Most modern fans operate at 12 volts, so ensure your fans are compatible with this voltage. Additionally, pay attention to the fan’s power consumption to ensure it falls within the header’s power output capabilities. Exceeding the power limits of the system fan header may result in the header being unable to adequately power the fan or even damage the motherboard.
One advantage of system fan headers is their ability to monitor fan speeds. This allows the motherboard to adjust the fan speed dynamically based on the system’s temperature, ensuring a balance between cooling performance and noise levels. Some motherboards even offer software utilities or BIOS settings that enable you to customize fan curves and create personalized cooling profiles.
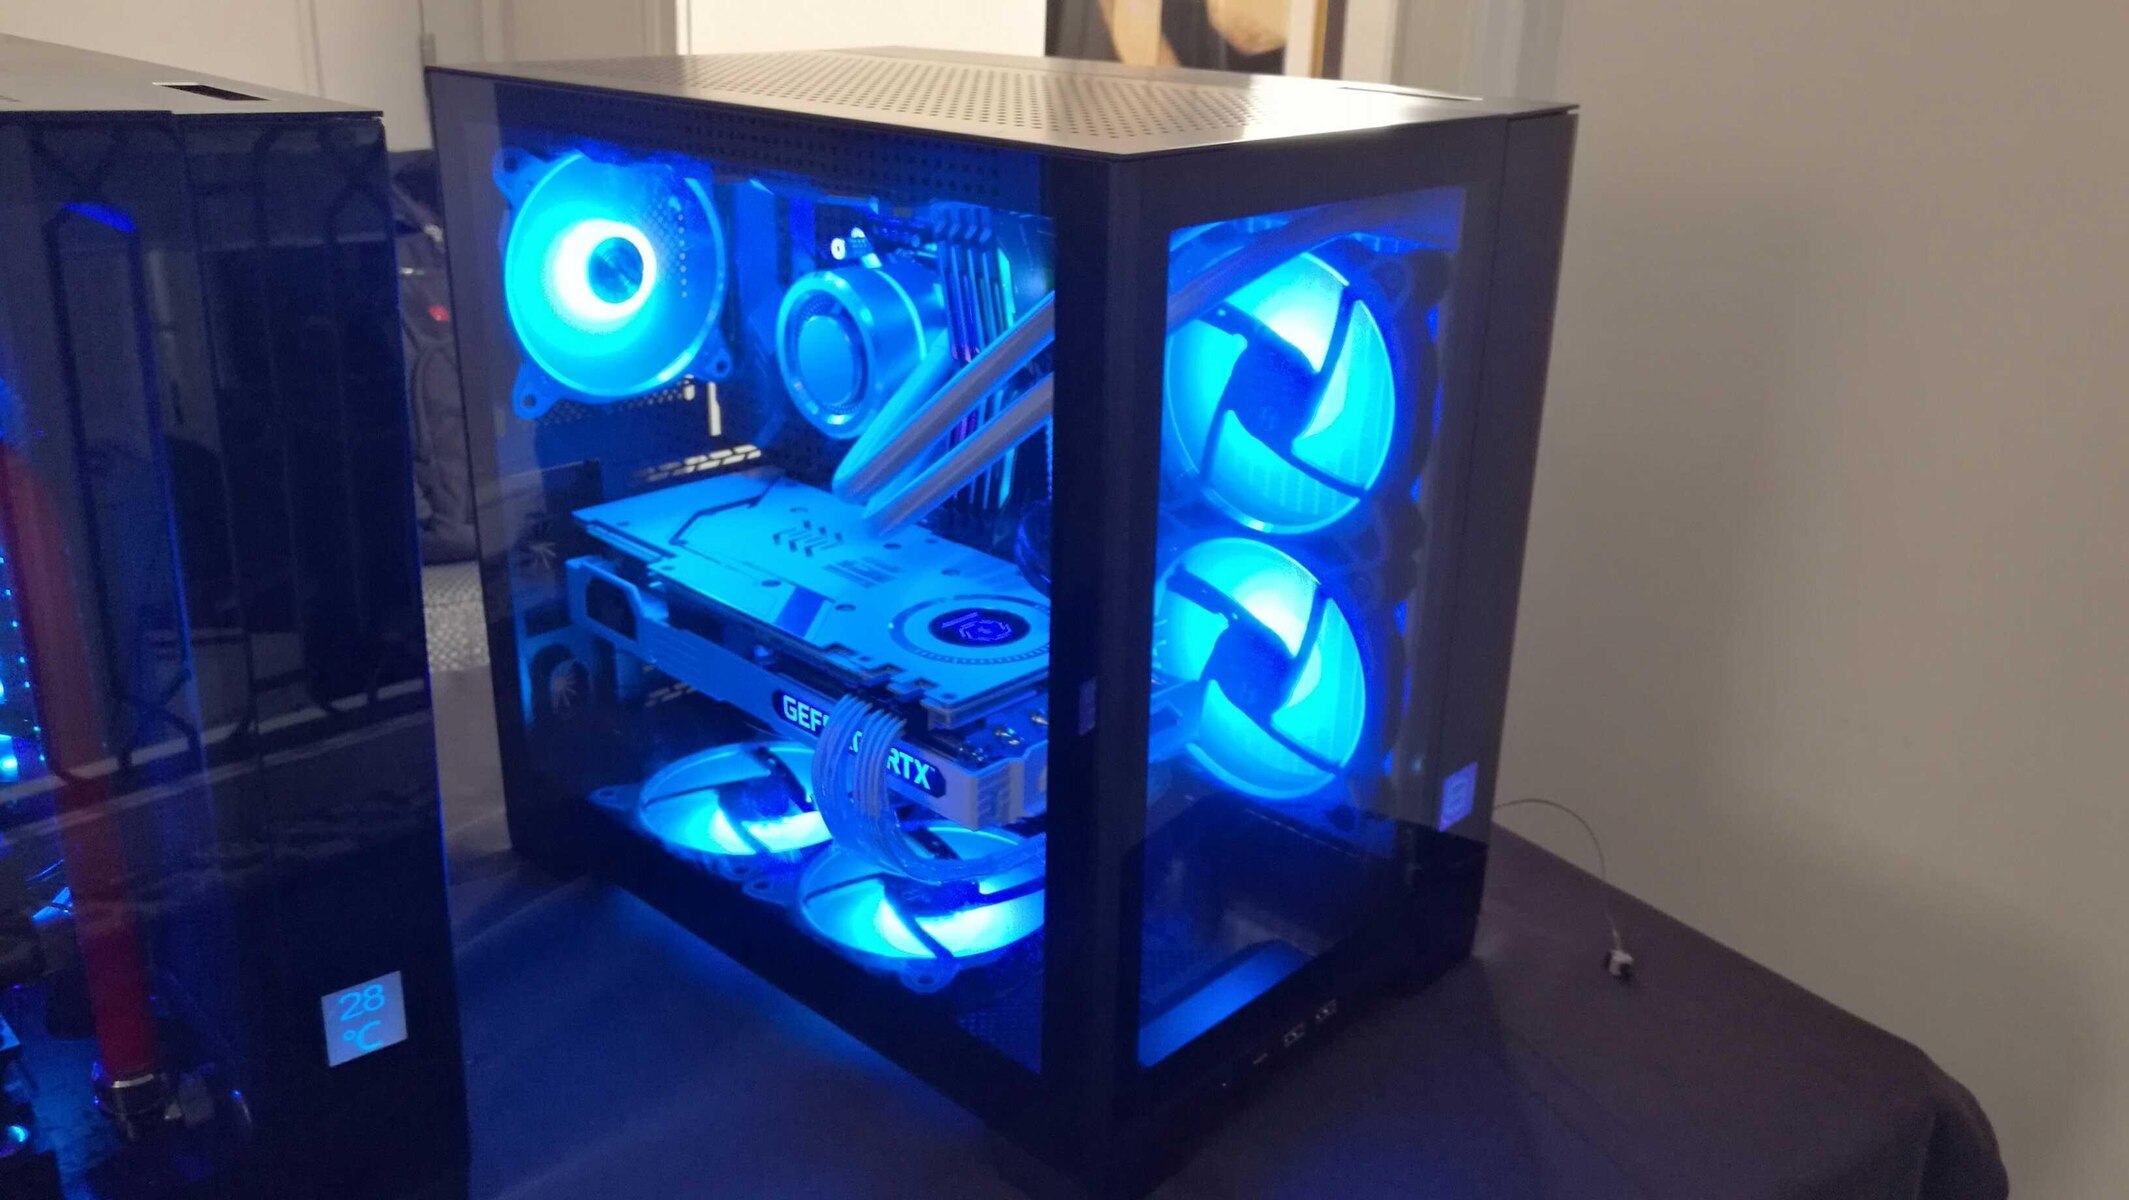
In terms of fan placement, system fan headers are typically used to connect fans mounted in various locations within the computer case. These could include intake fans at the front of the case, exhaust fans at the rear, or even side panel fans for additional airflow. By strategically placing fans and utilizing the system fan headers, you can achieve optimal cooling for your system.
Overall, system fan headers are essential for maintaining proper airflow and cooling performance in your computer. By connecting fans to these headers and leveraging the available monitoring and control features, you can ensure a well-regulated and efficient cooling solution for your system.
Chassis Fan Headers
Chassis fan headers are another type of fan connector found on motherboards, specifically designed to connect fans that provide cooling to specific components or areas within your computer case. These fans help maintain optimal temperatures for various components, such as the graphics card, hard drives, and other internal hardware.
Chassis fan headers are typically labeled as “CHA_FAN” or “CHASSIS_FAN” and are often located near specific areas of the motherboard where additional cooling is required. Like system fan headers, they are typically designed to accommodate 4-pin connectors, offering both PWM (Pulse Width Modulation) control and voltage control options. However, some older motherboards may have 3-pin chassis fan headers.
When connecting fans to chassis fan headers, it is important to consider the specific cooling requirements of the associated components. For example, if you have a graphics card that tends to run hot, you may want to connect a fan to the chassis fan header near the PCIe slot to provide extra cooling to the card. Alternatively, you can connect fans to headers near hard drive bays to keep your storage devices cool.
One advantage of chassis fan headers is the ability to control individual fan speeds. This means you can adjust the speed of each connected fan based on the specific cooling needs of the associated components. For example, you can set a higher fan speed for a graphics card while keeping other fans at a lower speed, maintaining a balance between cooling and noise levels.
It is worth noting that some high-end motherboards may offer additional features for chassis fan headers, such as dedicated headers for water pump control or high-amperage headers for more powerful fans. These advanced features can provide greater flexibility and customization for cooling options.
When planning the placement of fans and connecting them to chassis fan headers, it is important to consider the airflow direction and create a balanced cooling setup. This involves a combination of intake and exhaust fans strategically placed to efficiently remove hot air and bring in fresh, cool air.
Overall, chassis fan headers offer flexibility in cooling various components within your computer case. By connecting fans to these headers and utilizing the control options available, you can create an effective and tailored cooling solution for your specific hardware configuration.
AIO Pump/Header
For liquid cooling enthusiasts, many motherboards now come equipped with a dedicated AIO (All-in-One) pump/header. This header is designed specifically for connecting and controlling AIO coolers, which provide efficient and effective cooling for high-performance systems.
The AIO pump/header is typically a 3-pin or 4-pin connector, depending on the type of AIO cooler you have. It provides both power and control signals to the integrated pump of the AIO cooler. The pump is responsible for circulating the cooling liquid, ensuring efficient heat dissipation from the CPU or other components.
When connecting an AIO cooler, it is crucial to follow the manufacturer’s instructions and connect the pump to the designated AIO pump/header on the motherboard. The AIO pump/header may have additional capabilities, such as increased power delivery or specialized controls, to meet the demands of liquid cooling systems.
The AIO pump/header allows the motherboard to regulate the pump’s speed based on the CPU or system temperatures. This ensures that the cooling liquid flows at an optimal rate to keep the CPU or other components at safe operating temperatures. Some motherboards also provide software utilities, BIOS settings, or dedicated controller modules to further customize the pump speed and performance.
It is worth noting that some AIO coolers may require an additional fan header connection for the radiator fans. These fans work in conjunction with the AIO pump/header to expel heat from the radiator. Therefore, when installing an AIO cooler, ensure that both the AIO pump/header and the fan headers for the radiator fans are connected to the motherboard.
AIO coolers offer efficient cooling performance while maintaining a compact form factor. They are an excellent option for users who want to achieve better CPU cooling without the hassle and complexity of custom water cooling setups. The dedicated AIO pump/header on compatible motherboards simplifies the installation and control of these coolers.
Overall, the AIO pump/header on a motherboard provides a dedicated and convenient solution for connecting and controlling AIO coolers. By properly connecting and configuring the AIO cooler to the designated header, you can enjoy superior cooling performance and maintain optimal temperatures for your CPU or other components.
Additional Fan Headers
Aside from the CPU fan header, system fan headers, and chassis fan headers, some motherboards may offer additional fan headers to accommodate more fans or specialized cooling devices. These additional headers provide flexibility and customization options for enhancing the cooling performance of your system.
The labeling of additional fan headers may vary depending on the motherboard manufacturer and model. Some common designations for these headers include “PWR_FAN,” “PUMP_FAN,” or “OPT_FAN,” among others. Each of these headers may serve a specific purpose or have unique features tailored to different cooling requirements.
Additional fan headers can be useful for powering extra fans that do not fit into the main categories of CPU, system, or chassis fans. These could include fans on additional heatsinks, fans cooling specific components like voltage regulators or RAM modules, or even dedicated fans for water cooling setups.
It is important to consult the motherboard’s user manual or specifications to understand the specific capabilities and power output of each additional fan header. This information will help ensure that you connect fans and cooling devices that are compatible with the available power and control features of these headers.
Some advanced motherboard models may also offer specialized headers for high-amperage fans, such as those used in large CPU coolers or gaming-oriented cases. These headers are specifically designed to accommodate more power-hungry fans and provide a sufficient power supply for their optimal operation.
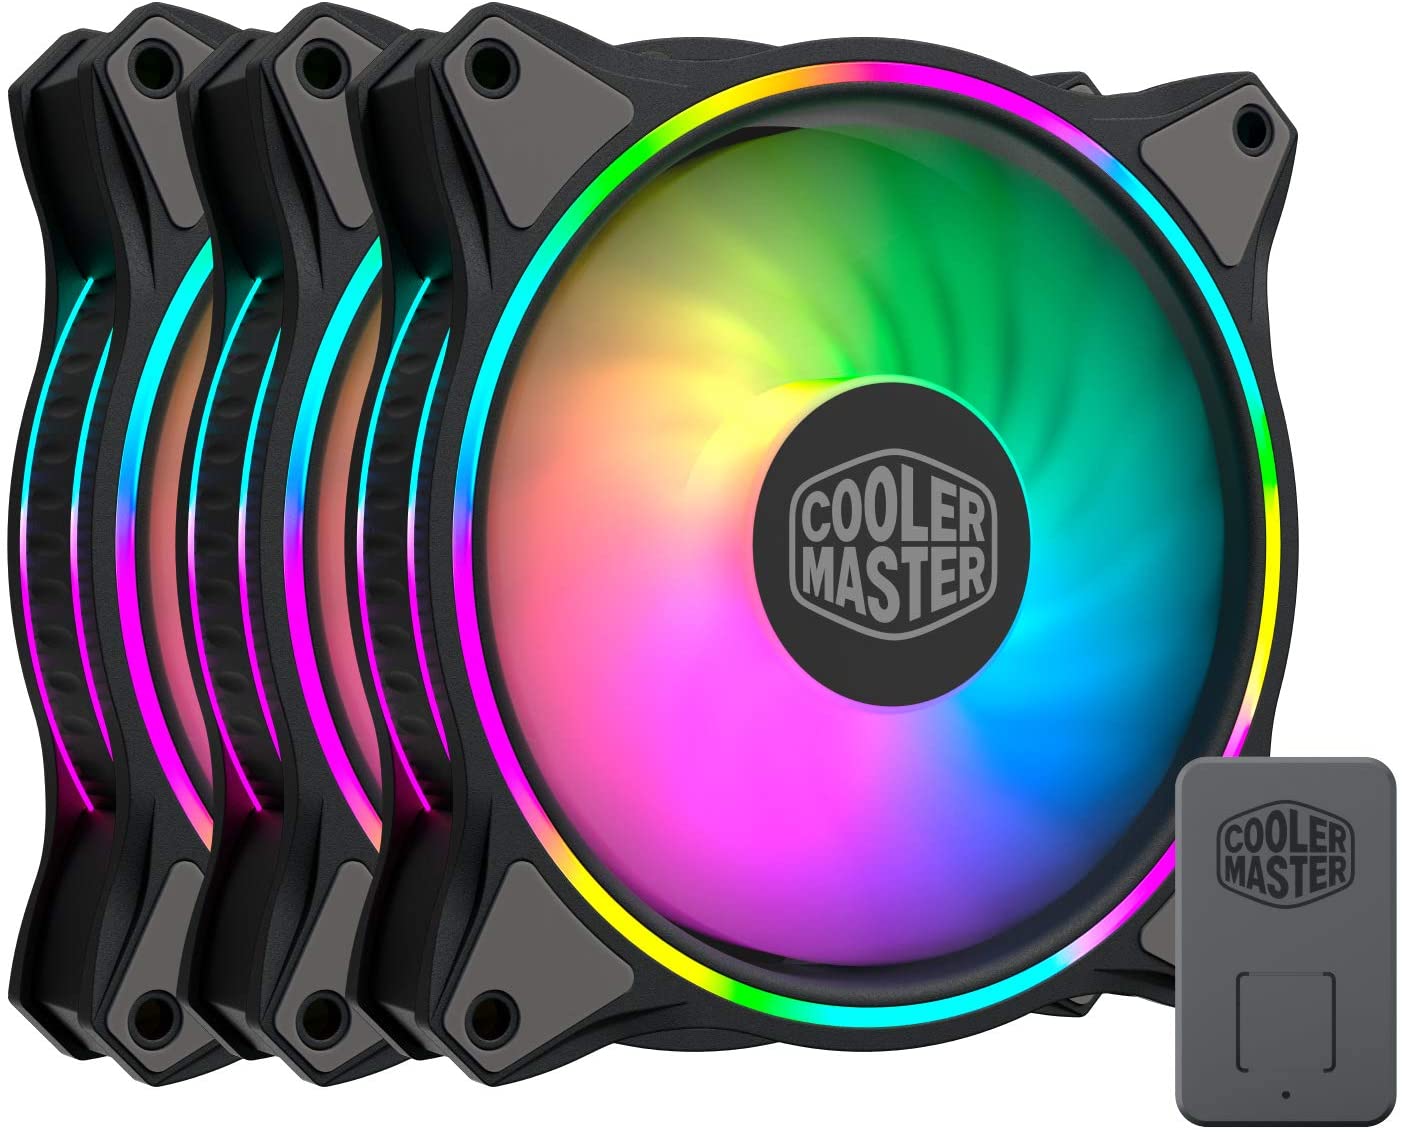
In addition to powering extra fans, some additional fan headers may offer unique features for specialized cooling devices. For example, you may find specialized headers designed for connecting liquid cooling pumps or controlling fans with RGB lighting. These headers can enhance the visual appeal and performance of your cooling setup.
It is important to note that the availability and features of additional fan headers can vary significantly between motherboard models. Some budget or entry-level motherboards may have limited or no additional fan headers, while high-end or gaming-oriented motherboards may offer a greater number and variety of headers.
Overall, additional fan headers on a motherboard provide flexibility and customization options for expanding your cooling setup. By utilizing these headers to their full potential, you can achieve optimal cooling performance and tailor your system’s airflow to meet your specific needs.
Fan Power Splitter
When connecting multiple fans to your motherboard, you may encounter a situation where you have more fans than available fan headers. This is where a fan power splitter can come in handy. A fan power splitter allows you to connect multiple fans to a single fan header, effectively multiplying the number of fans you can connect.
A fan power splitter is a cable that has one end with a male connector that plugs into the motherboard’s fan header, and multiple female connectors on the other end for connecting the fans. These splitters come in various configurations, such as 1-to-2, 1-to-3, or even 1-to-4, allowing you to connect multiple fans to a single fan header.
When using a fan power splitter, it is important to consider the power draw of the connected fans. Each fan header on a motherboard has a maximum power output capacity, and exceeding this limit can cause the header to be unable to power all the connected fans properly. Therefore, ensure that the combined power consumption of the fans connected via the splitter does not exceed the specified limits of the fan header.
Another factor to consider when using a fan power splitter is the control and monitoring of the connected fans. Since multiple fans are connected to a single header, they will all run at the same speed determined by the header. This means that any fan speed control or monitoring features that are available for individual headers will apply to all the fans connected via the splitter.
It is also important to note that using a fan power splitter may limit the ability to control each fan’s speed independently. If you require individual control over each fan, it is better to connect them to separate fan headers on the motherboard.
When choosing a fan power splitter, make sure to purchase one that is compatible with the connector type of your fans and motherboard. Most fan power splitters are designed to work with standard 3-pin or 4-pin connectors commonly found on fans and motherboards.
Overall, a fan power splitter can be a convenient solution for connecting multiple fans when the number of available fan headers is limited. However, it is important to consider the power limits and potential limitations in fan control when using a fan power splitter. Properly managing power consumption and considering your fan control preferences will help ensure optimal performance and functionality for your cooling setup.
Fan Controller/Hub
A fan controller or hub is a device that allows you to manage and control multiple fans simultaneously. It provides a centralized solution for fan control, offering additional features beyond what the motherboard’s fan headers can provide.
A fan controller/hub typically comes in the form of a separate hardware unit that is connected to a power source and the motherboard. It provides multiple fan headers or ports where fans can be connected. Some fan controllers also include additional features such as temperature sensors, touchscreen displays, or software interfaces for advanced customization.
One of the key advantages of a fan controller/hub is the ability to independently control the speed and performance of each connected fan. This provides greater flexibility in managing fan profiles, allowing you to balance between cooling performance and noise levels according to your preferences.
It’s important to note that fan controllers and hubs can support both 3-pin and 4-pin fans, ensuring compatibility with a wide range of fan types. This means you can connect both voltage-controlled and PWM-controlled fans to the controller/hub without any issues.
In addition to fan speed control, some fan controllers/hubs also offer features like fan speed monitoring, fan failure alerts, and even RGB lighting control for fans equipped with customizable lighting. These features can enhance the aesthetics and functionality of your cooling setup.
When selecting a fan controller/hub, it’s important to consider the number of fan headers or ports it provides, as well as the power output capacity. Make sure to choose a controller/hub that can support the number of fans you plan to connect, while also considering the power requirements of those fans.
Installing a fan controller or hub is relatively straightforward. It typically involves connecting the controller/hub to a power source, such as the PSU (Power Supply Unit), and then connecting the fans to the appropriate ports on the controller/hub. Some controllers may require additional software installation or configuration for advanced control and customization options.
Overall, a fan controller or hub provides a centralized and customizable solution for managing multiple fans in your system. With independent control over fan speeds and additional features like monitoring and lighting control, a fan controller/hub can help optimize the cooling performance and aesthetics of your PC.
How to Determine the Correct Fan Header on Your Motherboard
Determining the correct fan header on your motherboard for connecting fans can seem daunting, especially if you are new to PC building or customization. However, it’s a relatively straightforward process that involves a few simple steps. Here’s a guide to help you determine the correct fan header on your motherboard:
- Refer to the motherboard documentation or user manual: The first step is to consult the documentation that comes with your motherboard. The user manual will typically provide detailed information about the different fan headers and their locations on the motherboard.
- Identify the labels or markings: Look for labels or markings near the fan headers on your motherboard. These labels often indicate the type of fan header, such as “CPU_FAN,” “SYS_FAN,” or “CHA_FAN.” By matching these labels with the intended purpose of the fan, you can determine the appropriate header.
- Consider the pin configuration: Take note of the pin configuration of the fan header. Most modern motherboards have 4-pin headers, which support both PWM (Pulse Width Modulation) control and voltage control. However, older motherboards may have 3-pin headers, which offer voltage control only.
- Think about fan placement and cooling needs: Consider the location of the fan within your system and its intended cooling purpose. For example, if you have a fan dedicated to cooling the CPU, look for the CPU fan header near the CPU socket. If you’re connecting fans for general system cooling, the system or chassis fan headers are ideal.
- Check the power output and control options: If you are using powerful or specialty fans, such as high-amperage fans or fans with RGB lighting, check the power output and control options of the fan headers. Ensure that the header can provide sufficient power for the fan and any additional features.
By following these steps and referring to the documentation provided with your motherboard, you can identify the correct fan header for connecting your fans. Properly connecting fans to the appropriate headers ensures optimal performance, control, and compatibility with your cooling setup.
Tips for Connecting Fans to the Motherboard
When it comes to connecting fans to your motherboard, there are a few tips to keep in mind to ensure a smooth and effective installation. These tips will help you avoid common pitfalls and maximize the cooling performance of your system:
- Refer to the motherboard manual: Always consult the motherboard manual for specific instructions and recommendations regarding fan installation. The manual will provide details on the different fan headers, their capabilities, and any specific requirements for connecting fans.
- Consider fan placement and airflow: Strategically plan the placement of your fans to optimize airflow within your computer case. Consider factors such as intake and exhaust, as well as the direction of airflow. Proper airflow ensures efficient cooling and helps maintain lower overall temperatures.
- Choose the right fan headers: Identify the appropriate fan headers on your motherboard to connect your fans. Use the specific headers designated for CPU cooling, system cooling, or chassis cooling, depending on the fan’s intended purpose. This ensures proper power delivery and control signals for the connected fans.
- Check for compatibility: Ensure that your fans are compatible with the fan headers on your motherboard. Check for matching connector types (3-pin or 4-pin) and ensure the voltage requirements of the fan align with the power output capabilities of the header.
- Use fan splitters or hub for multiple fans: If you have more fans than available fan headers, consider using fan splitters or a fan hub to connect multiple fans to a single header. However, be mindful of the power limitations of the header and ensure the combined power consumption of the connected fans does not exceed the header’s capacity.
- Manage cable routing: Proper cable management is essential for maintaining a clean and organized build. Ensure that the fan cables are neatly routed and secured, away from any potentially obstructive components or fans. This helps improve airflow and prevents cable interference.
- Configure fan control: Take advantage of any fan control options available in the motherboard BIOS or through software utilities. Adjust fan curves, set target temperatures, or choose preset profiles based on your cooling preferences. This allows you to achieve a balance between performance and noise levels.
- Regular maintenance: Periodically clean the fans to remove dust and debris that may affect their performance. Dust buildup can hinder airflow and increase noise levels. Use compressed air or a soft brush to gently clean the fan blades and ensure optimal performance.
By following these tips, you can effectively connect fans to your motherboard, optimize the cooling performance of your system, and maintain a well-balanced and efficient airflow.
Conclusion
Properly connecting fans to your motherboard plays a crucial role in maintaining optimal cooling performance and preventing overheating of your system components. Understanding the different types of fan connectors, such as the CPU fan header, system fan headers, chassis fan headers, and additional fan headers, allows you to make informed decisions when connecting various fans.
By referencing the motherboard documentation and considering factors like fan placement, power requirements, and control options, you can determine the correct fan headers on your motherboard for each fan. Additionally, utilizing tools such as fan power splitters or fan controllers/hubs can expand the number of fans you can connect.
When connecting fans, be mindful of cable management to maintain an organized and efficient airflow within the computer case. Configuring fan control through BIOS settings or software utilities enables you to customize fan curves and optimize cooling performance based on your preferences.
Regular maintenance, such as cleaning dust from the fans, ensures long-term functionality and efficiency. Keeping your fans clean and well-maintained minimizes the risk of heat buildup and reduces noise levels.
By following the tips and guidelines provided in this article, you can confidently connect and control fans on your motherboard, creating an effective cooling system for your PC. Properly cooled components not only extend their lifespan but also allow for better performance and overall stability of your system.