Introduction
Plugging in the CPU cooler to the motherboard is a crucial step in ensuring optimal cooling performance and preventing damage to your CPU. The CPU cooler plays a vital role in dissipating the heat generated by the processor, allowing it to operate efficiently. Without proper cooling, the CPU can overheat, leading to performance issues, instability, and potentially even permanent damage.
In this guide, we will explore the process of connecting the CPU cooler to the motherboard. We’ll cover the different types of CPU coolers available, provide a basic understanding of the motherboard, and walk you through the steps of locating and plugging in the CPU cooler header. Whether you’re using an air cooler or a liquid cooler, this article will guide you through the necessary steps to properly connect your CPU cooler to the motherboard.
Understanding how to connect the CPU cooler to the motherboard is essential for both beginners and experienced PC builders alike. It ensures that the cooler is correctly installed, allowing it to function efficiently and maintain the processor’s temperature within safe limits.
Follow along as we demystify the process and provide you with the knowledge and confidence to connect your CPU cooler accurately. Whether you’re building a new PC, upgrading your existing system, or troubleshooting cooling issues, this guide will equip you with the necessary understanding to successfully connect your CPU cooler to the motherboard.
Why is the CPU cooler important?
The CPU cooler is a critical component of any computer system, responsible for keeping the central processing unit (CPU) cool during operation. Here are a few reasons why the CPU cooler is essential:
Preventing overheating: The CPU generates a significant amount of heat while processing instructions. Without a proper cooling system, the temperature of the CPU can rise rapidly, potentially exceeding safe operating limits. Overheating can cause the CPU to throttle and reduce performance or even lead to system crashes.
Ensuring long-term stability: Consistently high temperatures can degrade the longevity and reliability of the CPU. Over time, exposure to excessive heat can cause the CPU to malfunction or fail prematurely, leading to costly repairs or replacements.
Optimizing performance: When the CPU operates at higher temperatures, it can enter a state called thermal throttling. This occurs when the processor slows down its clock speed to cool down and protect itself from overheating. As a result, the overall performance of the system is reduced. By keeping the CPU cool, the cooler ensures that the processor can maintain its maximum clock speed, providing smooth performance for demanding tasks such as gaming or content creation.
Noise reduction: While not directly related to performance, an efficient CPU cooler can help reduce the noise generated by the system. When the CPU runs hot, the cooling fans have to work harder, causing them to spin faster and produce more noise. By keeping the CPU cool, the fans can operate at lower speeds, resulting in a quieter computing experience.
In summary, the CPU cooler is of utmost importance in maintaining the stability, performance, and longevity of your computer system. It prevents overheating, optimizes CPU performance, and reduces noise levels. Whether you’re a casual user or a hardcore gamer, investing in a reliable CPU cooler is vital to ensure the overall health and efficiency of your PC.
Different types of CPU coolers
When it comes to CPU coolers, there are various options available in the market, each with its own advantages and disadvantages. Here are the main types of CPU coolers:
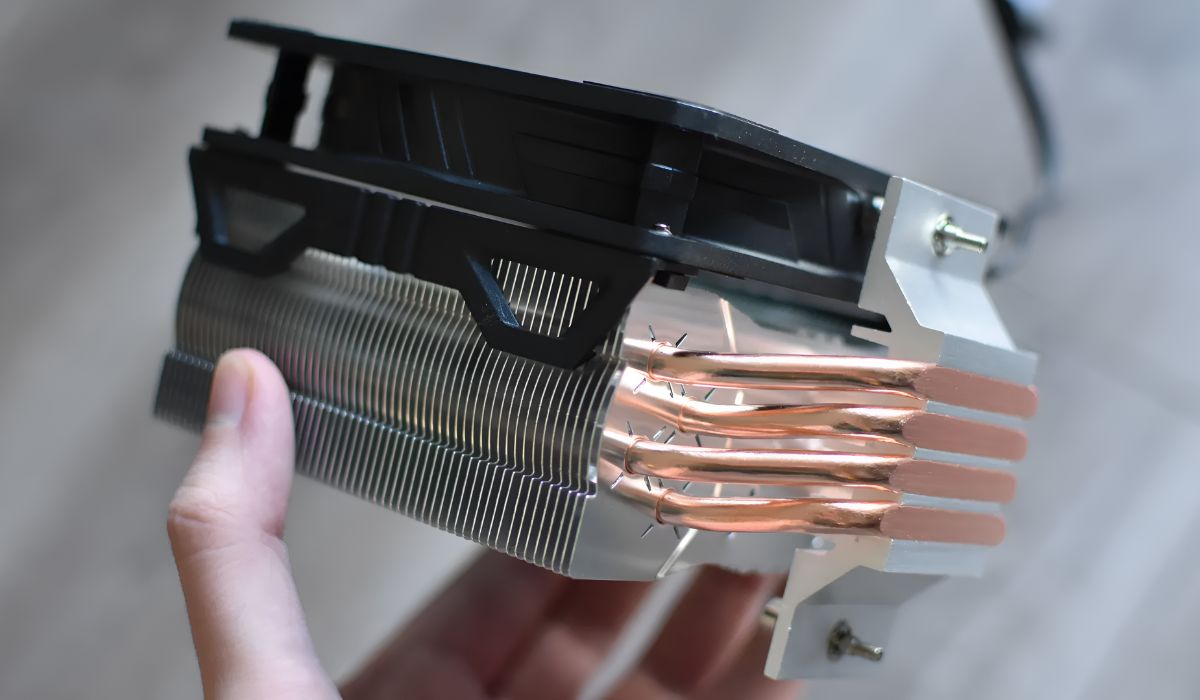
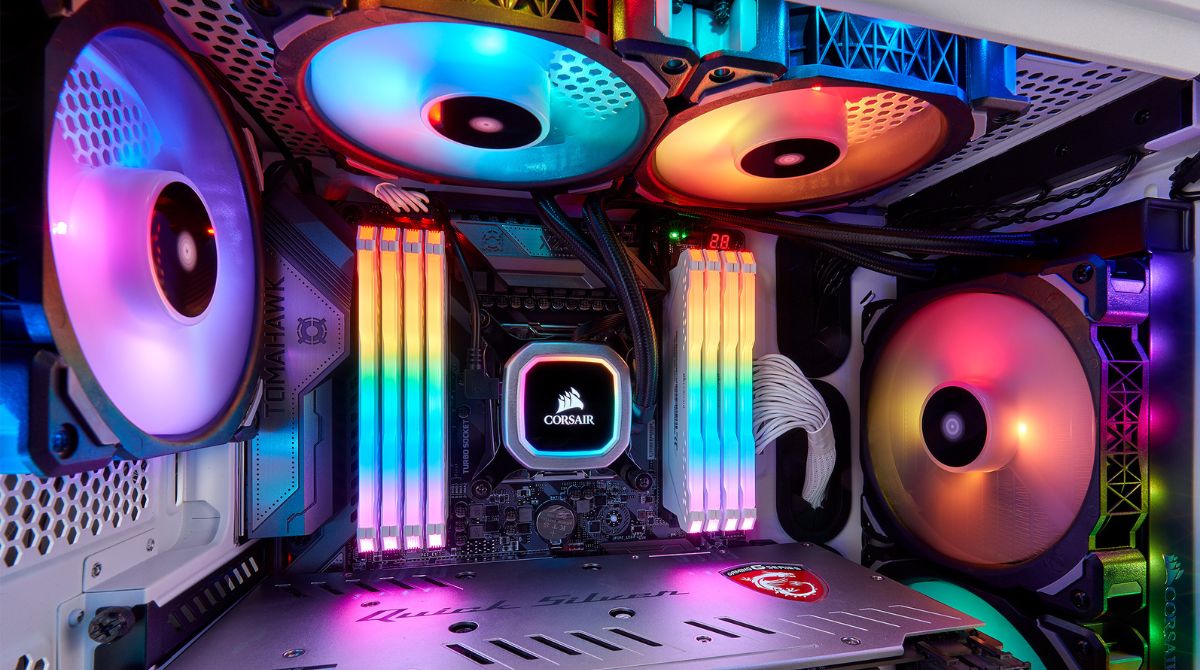
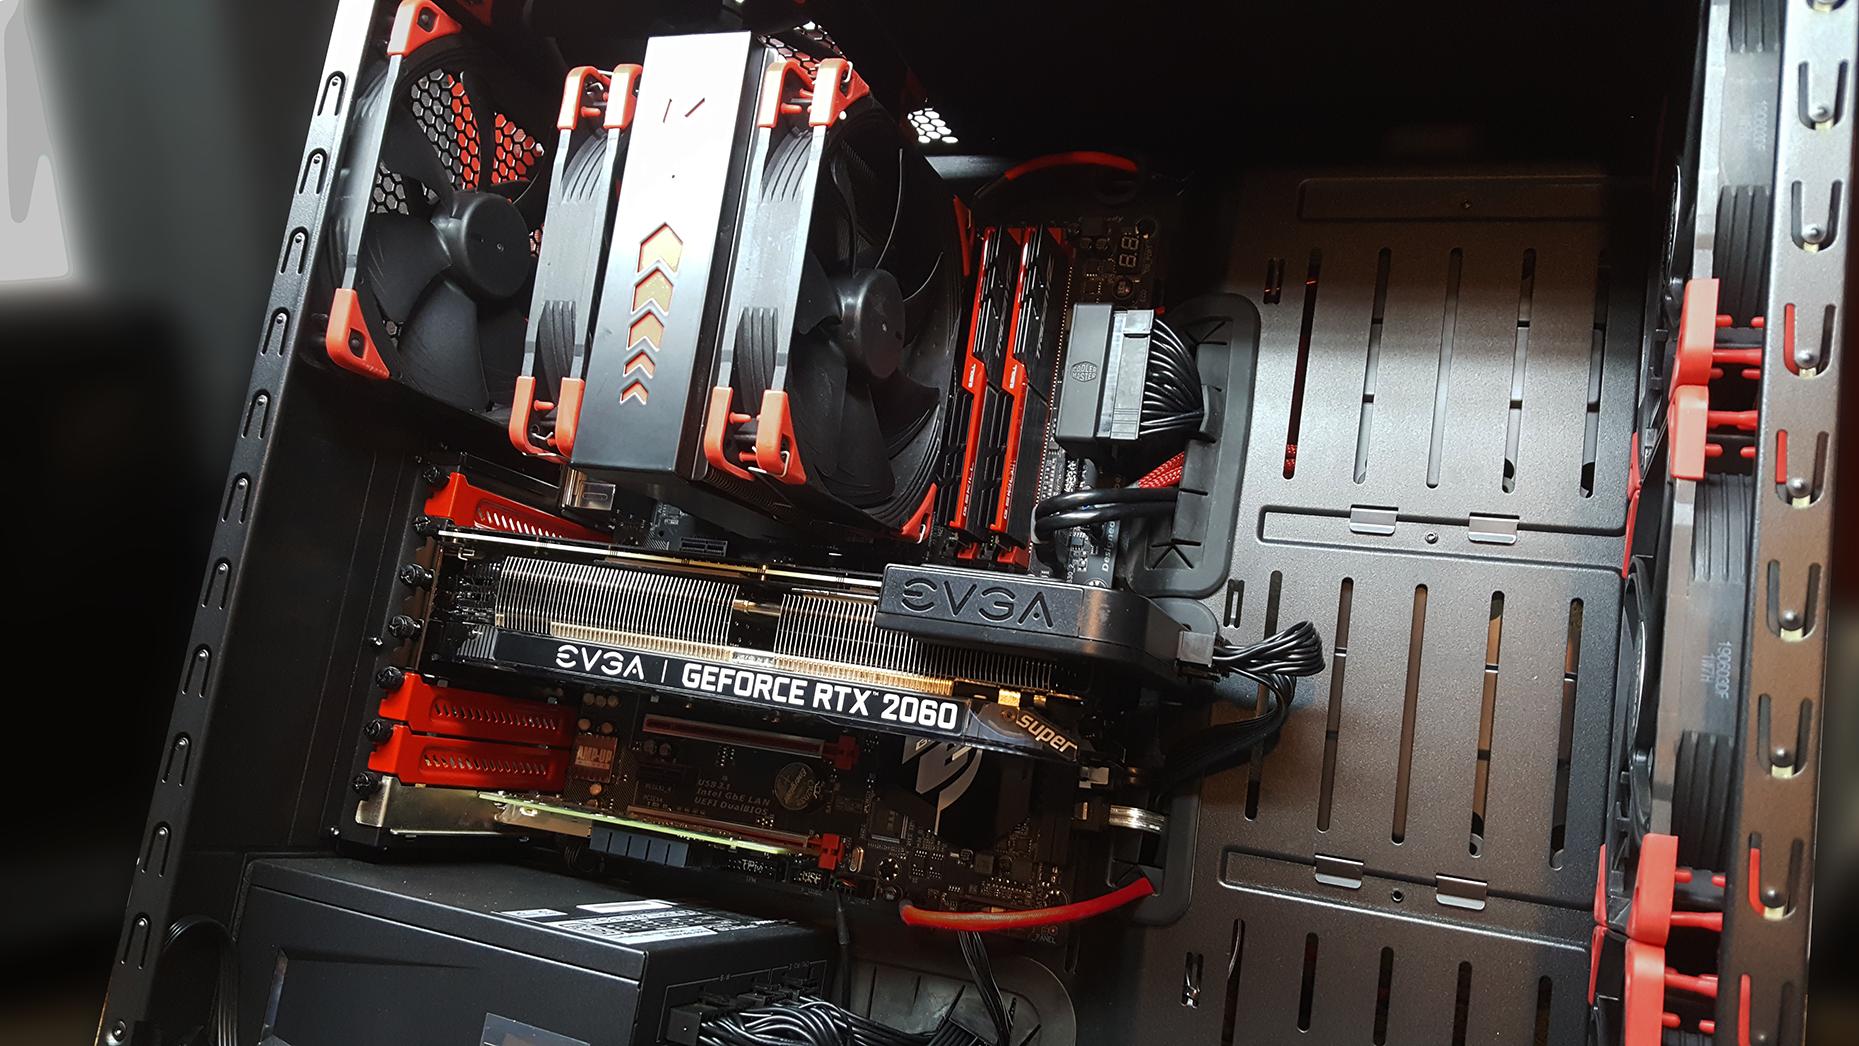
Air coolers: Air coolers are the most common and affordable type of CPU coolers. They consist of a heatsink with fins and a fan that blows air across the fins to dissipate heat. These coolers are relatively easy to install and provide adequate cooling for most CPUs. Air coolers come in different sizes, with larger ones offering better cooling performance at the expense of increased size and weight.
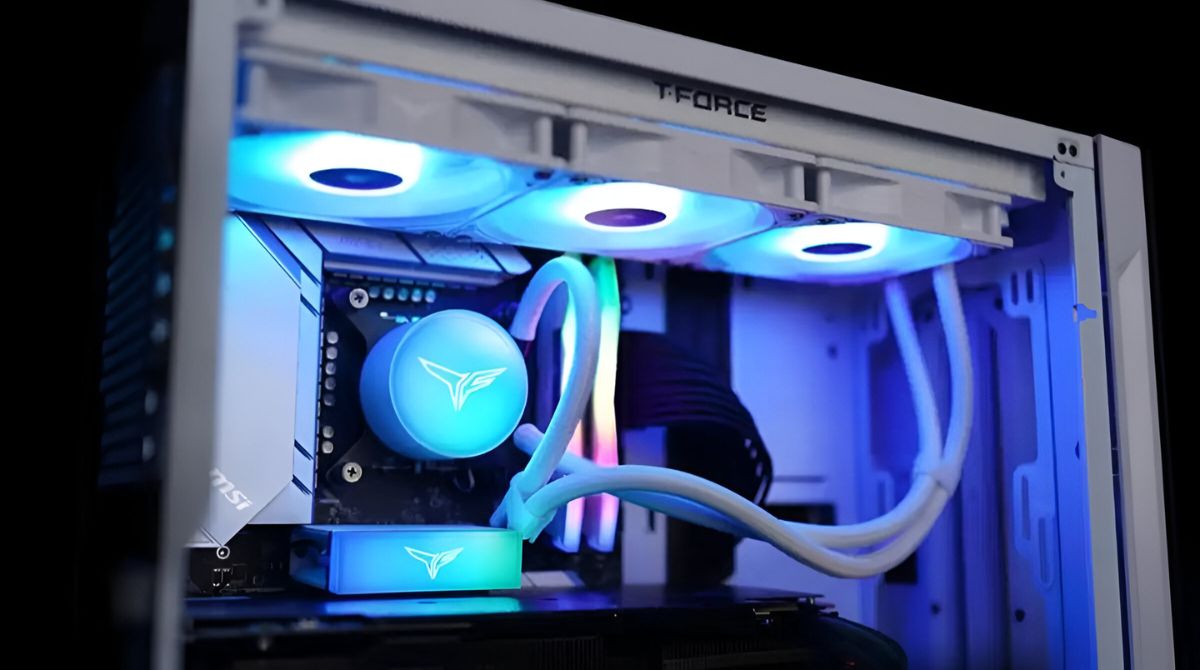
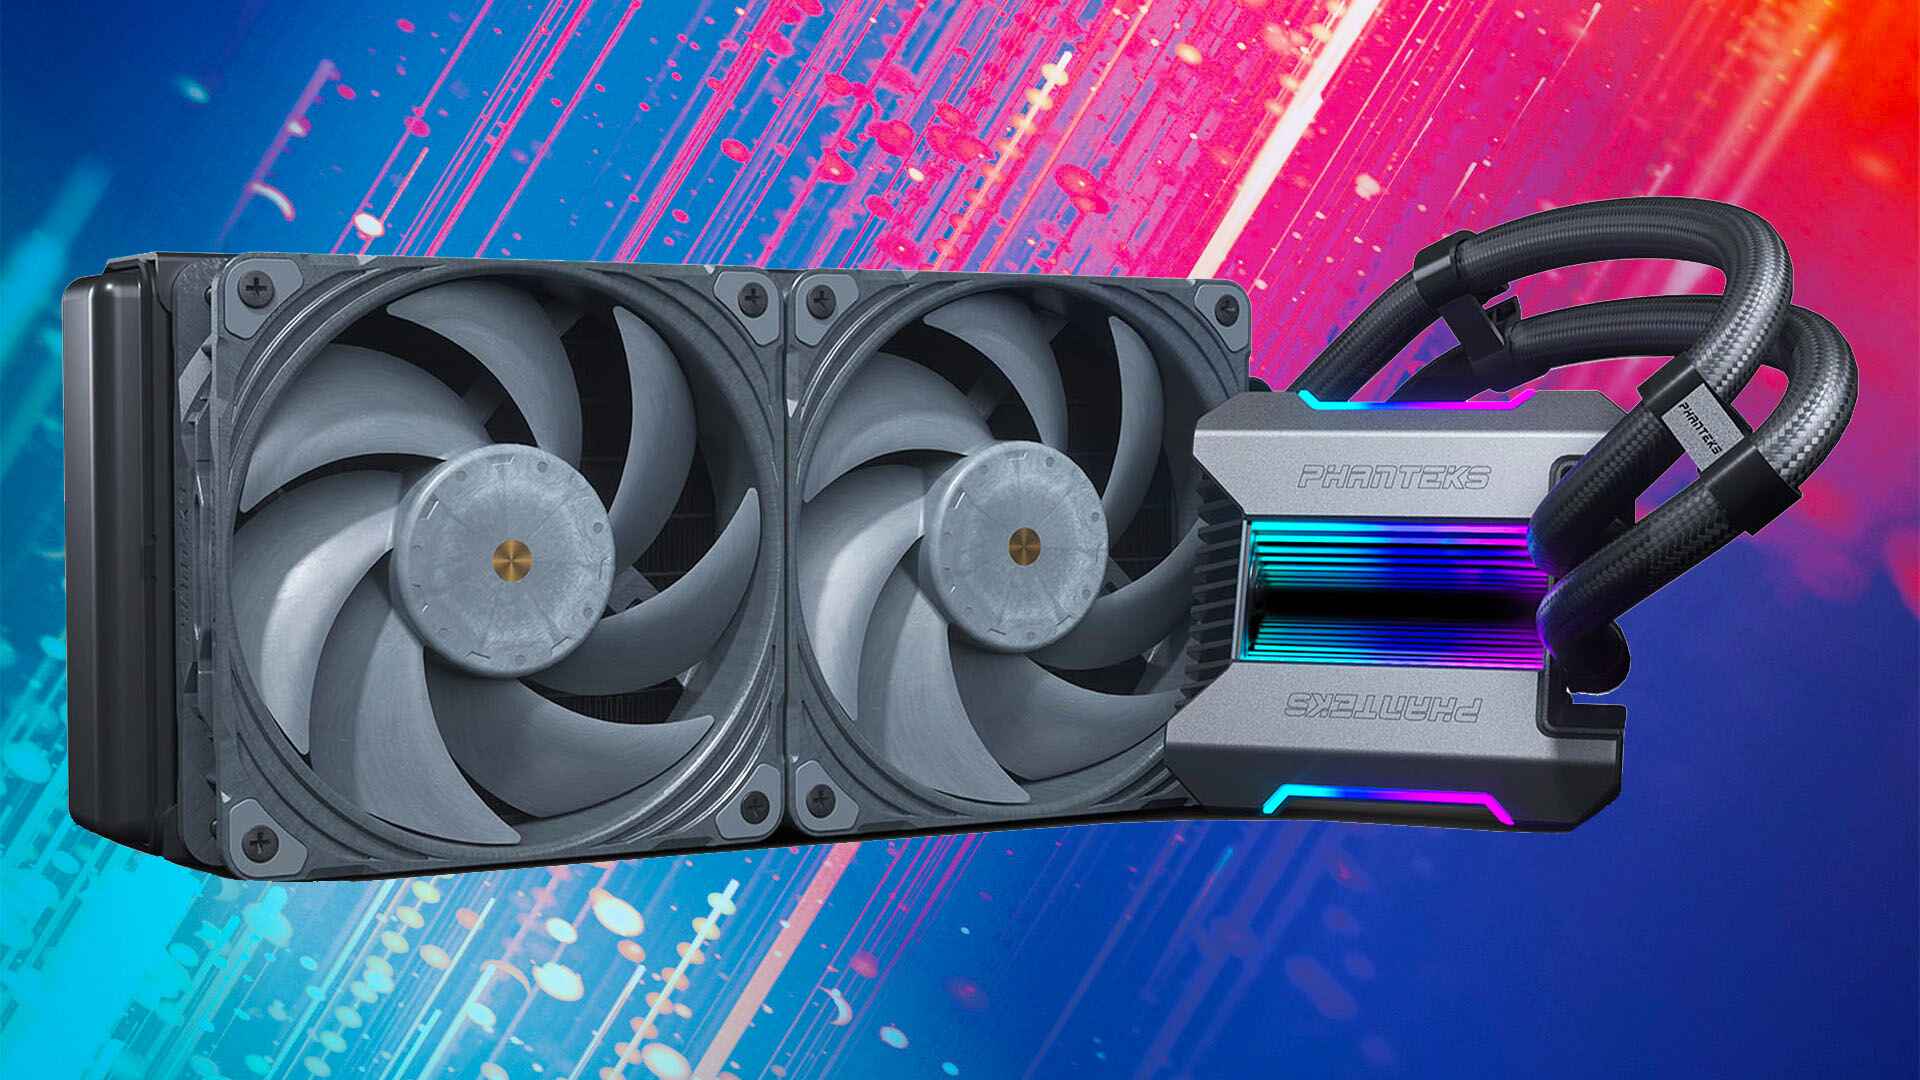
Liquid coolers: Liquid coolers, also known as all-in-one (AIO) coolers, use coolant or liquid to transfer heat away from the CPU. They consist of a water pump, radiator, and a fan or fans. Liquid coolers are more efficient than air coolers and can effectively cool high-end CPUs, providing better overclocking potential. They also tend to be quieter. However, liquid coolers are typically more expensive and can be more complicated to install.
Passive coolers: Passive coolers rely solely on the design of the heatsink to dissipate heat without the need for a fan. These coolers are completely silent since there are no moving parts. However, their cooling performance is generally not as effective as air or liquid coolers. Passive coolers are suitable for low-power CPUs or systems where noise reduction is a priority.
Hybrid coolers: Hybrid coolers combine the best of both air and liquid cooling technologies. They feature a combination of a heatsink and a liquid cooling loop that helps dissipate heat more efficiently. Hybrid coolers offer improved cooling performance compared to air coolers but are typically more expensive.
Custom loop coolers: Custom loop cooling systems are the most advanced and customizable solution. They involve a separate pump, radiator, reservoir, tubing, and CPU water block. Custom loop coolers provide excellent cooling performance and allow for extensive customization and expansion. However, they are more expensive, require more maintenance, and are typically reserved for enthusiasts and overclockers.
It is essential to consider factors such as CPU compatibility, system requirements, budget, and personal preferences when choosing a CPU cooler. Each type of cooler has its own benefits and drawbacks, so it’s important to find one that suits your specific needs.
Understanding the motherboard
To properly plug in the CPU cooler, it’s crucial to have a basic understanding of the motherboard and its components. The motherboard is the main circuit board that connects all the hardware components of a computer. It provides the foundation for communication between the CPU, memory, storage devices, and other peripherals.
Here are some key components of the motherboard that are relevant to connecting the CPU cooler:
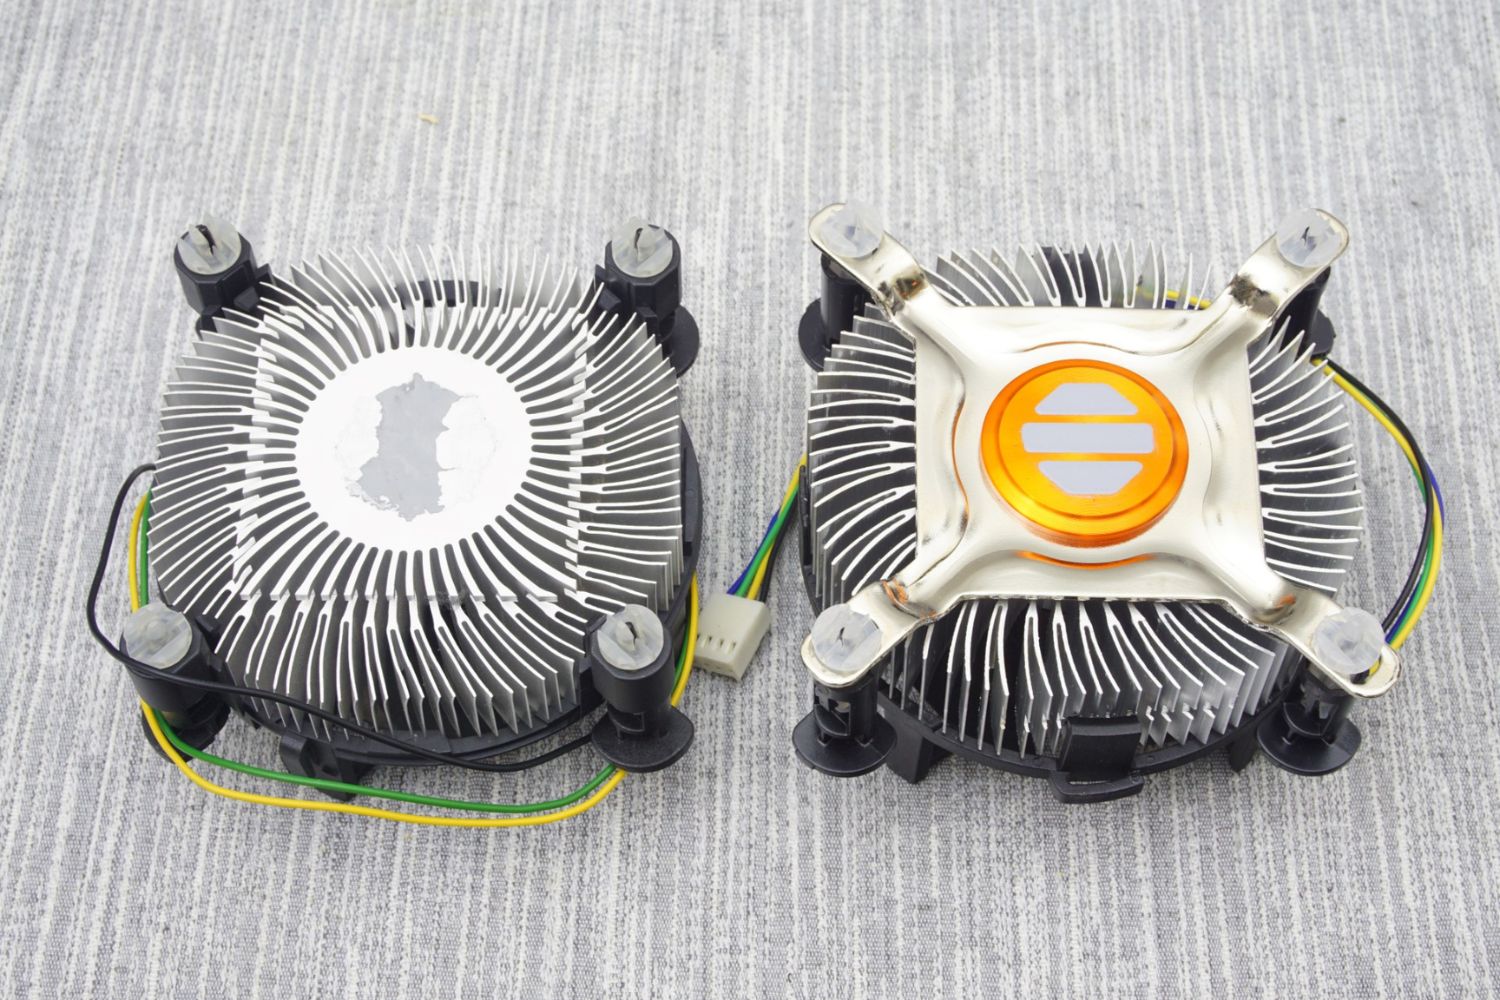
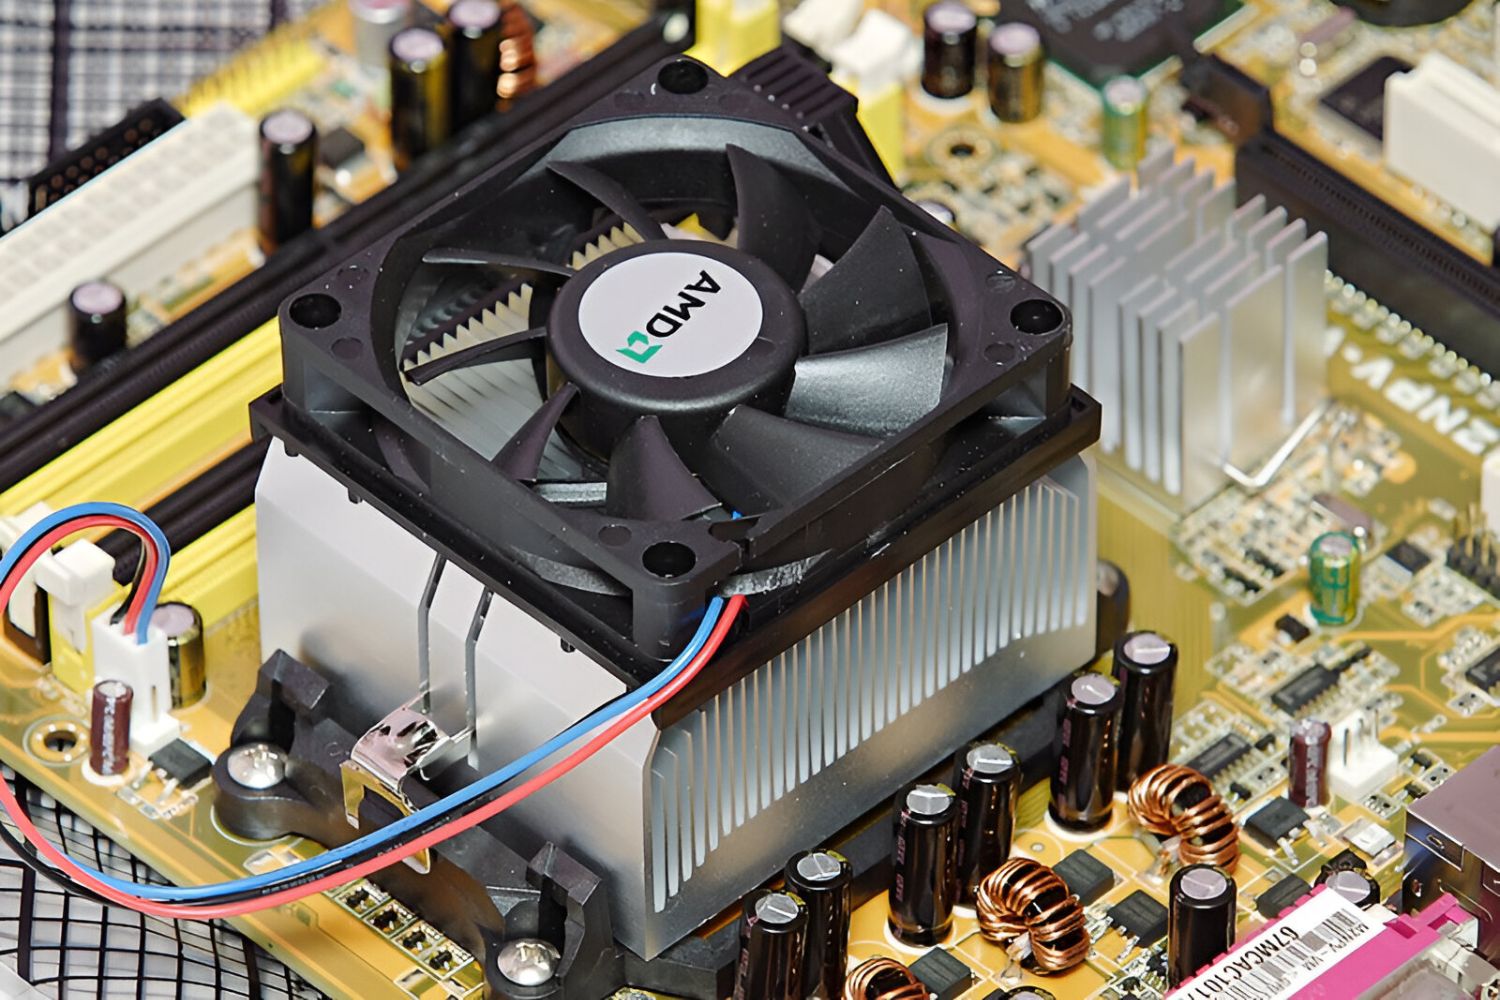
CPU socket: The CPU socket is a specialized slot on the motherboard where the CPU is installed. It provides the electrical and physical connections necessary for the CPU to function. When plugging in the CPU cooler, it will be connected to the CPU socket.
Power connectors: The motherboard has various power connectors that provide electricity to the CPU and other components. The primary power connector for the CPU is usually a 4-pin or 8-pin connector located near the CPU socket. This connector supplies power to the CPU and sometimes to the CPU cooler fan.
Fan headers: Fan headers are connectors on the motherboard used to power and control the cooling fans. These headers provide power and allow you to control the fan speed through the BIOS or software. It’s important to identify the appropriate fan header for connecting the CPU cooler fan.
System fan headers: In addition to the CPU fan header, there are usually several system fan headers on the motherboard. These headers are used to connect additional case fans or other cooling components.
It’s crucial to consult the motherboard manual to locate these components and understand their specific configuration on your particular motherboard model. The manual will also provide information on the layout and labeling of the various headers and connectors on the motherboard.
In summary, understanding the motherboard and its components is essential when plugging in the CPU cooler. By familiarizing yourself with the CPU socket, power connectors, fan headers, and system fan headers, you’ll be better equipped to connect the CPU cooler correctly and optimize its performance.
Locating the CPU cooler header on the motherboard
The CPU cooler header on the motherboard is the specific connector where the CPU cooler is connected. This header provides power and controls the speed of the CPU cooler fan. Locating the CPU cooler header may vary depending on the motherboard model, but here are the general steps to find it:
1. Consult the motherboard manual: The motherboard manual is a valuable resource that provides detailed information about the layout and labeling of the various components on the motherboard. Look for a section in the manual specifically dedicated to the CPU header or CPU fan header.
2. Identify the CPU socket: The CPU socket is where the CPU is installed on the motherboard. It is often square or rectangular in shape and usually located near the center of the motherboard. The CPU cooler header is typically found near the CPU socket to ensure a close and efficient connection.
3. Look for the labeling or marking: Once you’ve located the CPU socket, examine the nearby area for any labeling or marking related to the CPU cooler. The CPU cooler header is often labeled as “CPU_FAN” or “CPU_FAN1” on the motherboard. It may also be identified by a small icon representing a fan or be color-coded differently from other headers.
4. Check for the number of pins: The CPU cooler header usually has either 4 pins or 3 pins. 4-pin headers are more common and offer more control over the fan speed through pulse-width modulation (PWM) technology. 3-pin headers, on the other hand, provide a basic voltage-based control for the fan speed.
5. Observe the location: The CPU cooler header is typically located near the top edge of the motherboard, close to the CPU socket. It may be situated on either side of the socket, depending on the motherboard model. Take note of its exact position for easy access during installation.
Remember that the CPU cooler header may vary in appearance and location depending on the motherboard manufacturer and model. Therefore, it’s essential to consult the motherboard manual for precise instructions and illustrations specific to your motherboard.
By following these steps and referring to the motherboard manual, you can easily locate the CPU cooler header on your motherboard and proceed with connecting the CPU cooler for efficient cooling performance.
How to connect an air cooler to the motherboard
Connecting an air cooler to the motherboard is a relatively straightforward process. Here’s a step-by-step guide on how to do it:
1. Prep your motherboard: Before installing the CPU cooler, ensure that your motherboard is properly installed in the PC case and that the CPU socket is free from any thermal paste residue or debris. Clean the surface if necessary.
2. Orient the air cooler: Place the air cooler on top of the CPU, aligning the mounting brackets with the corresponding holes around the CPU socket. Ensure that the fan is facing the desired direction for optimal airflow.
3. Install the mounting brackets: Secure the mounting brackets onto the backplate or directly onto the motherboard around the CPU socket. The method may vary depending on the air cooler model, so refer to the cooler’s manual for specific instructions.
4. Apply thermal paste: Apply a small pea-sized amount of thermal paste onto the center of the CPU. This helps to improve heat transfer between the CPU and the cooler.
5. Attach the air cooler: Lower the air cooler onto the CPU, ensuring that the mounting screws fit into the corresponding holes on the brackets. Gently press down to secure the cooler in place.
6. Fasten the cooler: Using a screwdriver or the provided tool, tighten the screws diagonally in a crisscross pattern. Gradually tighten each screw to ensure even pressure distribution. Be careful not to overtighten, as this can damage the CPU or motherboard.
7. Connect the fan cable: Locate the CPU cooler header on the motherboard, as discussed in the previous section. Connect the fan cable from the air cooler to this header. Ensure that the connection is secure to enable proper control and power supply to the cooler fan.
8. Power up and test: Once everything is securely connected, power on your system and enter the BIOS. Verify that the CPU temperature is within acceptable limits and that the fan speed can be adjusted through the BIOS settings.
By following these steps, you can successfully connect an air cooler to your motherboard. However, it’s essential to refer to the specific instructions provided with your air cooler, as the installation process may vary slightly depending on the model.
Taking the time to properly install the air cooler ensures that it functions effectively, keeping your CPU cool and maintaining optimal performance.
How to connect a liquid cooler to the motherboard
Connecting a liquid cooler, also known as an all-in-one (AIO) cooler, to the motherboard involves a few additional steps compared to an air cooler. Here’s a step-by-step guide on how to connect a liquid cooler to the motherboard:
1. Prep your motherboard: Make sure that your motherboard is properly installed in the PC case and that the CPU socket is clean and free from any thermal paste residue or debris.
2. Mount the radiator: Choose a location in the case to mount the radiator. Common options include the top, front, or rear of the case depending on its design. Secure the radiator using the included brackets or screws provided with the AIO cooler.
3. Install the CPU water block: Place the CPU water block onto the CPU, aligning the mounting holes with the corresponding holes around the CPU socket. Use the appropriate mounting mechanism provided with your liquid cooler to secure the water block in place.
It’s crucial to apply an adequate amount of thermal paste to the CPU before attaching the water block. Follow the manufacturer’s instructions on the recommended application method.
4. Connect the radiator fans: The AIO cooler has one or more fans attached to the radiator. Connect these fans to the motherboard or a fan controller using the provided cables. The number of fans and connector type may vary based on the AIO cooler model, so consult the manual for specific instructions.
5. Connect the pump: The AIO cooler’s pump unit has two cables: one for power and one for controlling the pump speed. Connect the power cable to the CPU fan header on the motherboard, ensuring a secure connection. Connect the speed control cable to the pump connector on the motherboard or to a USB header, depending on the AIO cooler’s design.
6. Secure the cables: Use cable ties or cable management features in your PC case to neatly organize and secure the cables from the AIO cooler. This will help improve airflow and maintain a cleaner appearance.
7. Power up and test: Once everything is connected, power on your system and enter the BIOS. Verify that the CPU temperature is within acceptable limits and that the pump speed and fan speed can be adjusted through the BIOS settings or dedicated software provided by the AIO cooler manufacturer.
By following these steps, you can successfully connect a liquid cooler to your motherboard. However, it’s crucial to consult the specific instructions provided with your AIO cooler, as the installation process may vary slightly depending on the model.
Properly installing the liquid cooler ensures efficient cooling performance for your CPU, allowing it to operate at optimal temperatures while reducing the risk of overheating.
BIOS settings for CPU cooler
Configuring the BIOS settings for your CPU cooler is an important step in ensuring optimal performance and functionality. The BIOS (Basic Input/Output System) is firmware embedded in the motherboard that controls various hardware settings. Here are some key BIOS settings to consider for your CPU cooler:
1. Fan Control: Access the BIOS and navigate to the section related to fan control or monitoring. Some motherboards offer advanced fan control options, allowing you to set custom fan curves, adjust fan speeds based on temperature, or enable silent modes. Configure these settings to ensure efficient cooling and minimize noise levels.
2. Pump Speed: If you have a liquid cooler with a dedicated pump, check if there are settings in the BIOS to control the pump speed. While some AIO coolers have automatic pump speed control, others may allow you to set a fixed speed or adjust it based on CPU temperature. Be sure to configure this setting appropriately to maintain optimal cooling performance.
3. CPU Temperature Monitoring: Check if your BIOS provides real-time CPU temperature monitoring. This allows you to keep an eye on the CPU temperatures and ensure they are within safe operating limits.
4. Overclocking: If you plan to overclock your CPU, the BIOS is where you can adjust the CPU voltage, frequency, and other settings. However, overclocking generates additional heat, so it’s crucial to monitor temperatures closely and ensure your CPU cooler can handle the increased heat output.
5. Thermal Management: Some motherboards offer additional thermal management features, such as thermal throttling or adaptive thermal control. These features help protect your CPU from overheating by reducing performance or adjusting fan speeds based on temperature thresholds.
6. BIOS Updates: Regularly check for BIOS updates from your motherboard manufacturer. BIOS updates often include improvements in fan control, temperature monitoring, and overall system stability. Keeping your BIOS up to date ensures you have the latest features and optimizations for your CPU cooler.
Remember that the BIOS settings interface and options can vary between different motherboard manufacturers and models. Refer to your motherboard’s manual or manufacturer’s website for detailed information about specific BIOS settings available on your motherboard.
Configuring the appropriate BIOS settings for your CPU cooler can help maximize cooling efficiency, reduce noise levels, and maintain stable CPU temperatures. Spend some time familiarizing yourself with the BIOS options and tailor the settings to your specific cooling requirements for optimal performance.
Troubleshooting common issues with CPU cooler connection
While connecting a CPU cooler to the motherboard is generally a straightforward process, some common issues may arise. Here are some troubleshooting tips to help you resolve common problems with CPU cooler connection:
1. Incorrect installation: Double-check that the CPU cooler is properly installed, with the mounting brackets securely fastened and the cooler correctly seated on the CPU. Ensure that the thermal paste is applied correctly and evenly.
2. Loose or unstable cooler: If you notice that the CPU cooler feels loose or unstable, it may not be securely fastened. Check the mounting screws and brackets to ensure they are tightened properly. If the issue persists, consider reinstalling the cooler or seeking assistance.
3. Fan not spinning: If the CPU cooler fan is not spinning, ensure that it is connected to the correct fan header on the motherboard. Check the BIOS settings to verify that the fan is not disabled or set to run at very low speeds.
4. Excessive noise: If the CPU cooler is producing loud or unusual noise, it may indicate a problem with the fan. Ensure that the fan blades are clear of any obstructions and that the cooler is running within acceptable temperature ranges. If the noise persists, consider cleaning or replacing the fan.
5. High temperatures: If you notice that your CPU temperatures are consistently high, it may indicate an issue with the CPU cooler’s installation or functionality. Check for proper contact between the CPU and the cooler, as well as the application of thermal paste. Verify that the fan speeds and cooling settings are appropriately configured in the BIOS.
6. Incompatible cooler: Ensure that the CPU cooler is compatible with your motherboard, CPU socket, and PC case. Check the manufacturer’s specifications for compatibility information. Using an incompatible cooler can lead to installation difficulties or inadequate cooling performance.
7. BIOS settings conflicts: Conflicting or incorrect BIOS settings can affect CPU cooler performance. Double-check the fan control settings, temperature thresholds, and any other related settings in the BIOS. Consider resetting the BIOS to its default settings and reconfiguring them.
If you encounter persistent issues or are unsure about the correct installation of your CPU cooler, it’s advisable to consult the motherboard and cooler manufacturer’s support resources or seek assistance from a professional.
Addressing and resolving these common issues will help ensure that your CPU cooler is properly installed, running efficiently, and maintaining optimal temperatures for your CPU.
Conclusion
Properly connecting the CPU cooler to the motherboard is crucial for maintaining the performance, stability, and longevity of your computer system. Whether you’re using an air cooler or a liquid cooler, understanding the process and following the correct steps ensures optimal cooling and prevents potential issues.
By plugging in the CPU cooler, you enable the efficient dissipation of heat generated by the CPU, preventing overheating and maximizing performance. The CPU cooler plays a vital role in keeping your system running smoothly and protecting your investment.
When connecting the CPU cooler, it is important to have a basic understanding of the motherboard’s components, locate the CPU cooler header, and follow the specific installation instructions provided by the cooler manufacturer. Taking the time to properly install and configure the CPU cooler allows for effective cooling, noise reduction, and performance optimization.
Troubleshooting common issues, such as incorrect installation, loose fittings, fan malfunctions, or high temperatures, can help resolve any problems that arise during the process. Checking BIOS settings, ensuring compatibility, and seeking assistance when needed are key to troubleshooting effectively.
Connecting the CPU cooler to the motherboard is just one step in building and maintaining a high-performance system. Knowing the different types of CPU coolers, understanding the motherboard, and configuring the BIOS settings further contribute to a well-cooled and efficient computer system.
Considering the importance of proper CPU cooling, it is worth investing in a reliable and high-quality CPU cooler that suits your specific needs. Whether you’re a casual user, a gamer, or an overclocking enthusiast, a well-connected and well-functioning CPU cooler is essential for a smooth and stable computing experience.
With the knowledge and guidance provided in this article, you are now equipped to confidently connect your CPU cooler to the motherboard. Follow the recommended steps, refer to the manufacturer’s instructions, and enjoy the benefits of a well-cooled and high-performance computer system.