Why Upgrade to an SSD?
An SSD, or Solid-State Drive, is a storage device that offers significant advantages over traditional Hard Disk Drives (HDDs). Here are several compelling reasons why you should consider upgrading to an SSD:
- Improved Speed: SSDs are much faster than HDDs when it comes to accessing and transferring data. With an SSD, your computer will boot up faster, applications will open quicker, and files will load in the blink of an eye. This means less waiting and more productivity.
- Enhanced Performance: Thanks to their non-mechanical nature, SSDs provide faster read and write speeds, making them ideal for resource-intensive tasks like video editing or running high-performance software. The improved performance will help your computer handle demanding processes more efficiently.
- Reliability: Unlike HDDs, which have moving parts that can wear out over time, SSDs use flash memory technology that is more resistant to shock and vibration. This makes SSDs more reliable and less prone to failure, ensuring your data is safe and secure.
- Energy Efficiency: SSDs consume less power than traditional HDDs, resulting in longer battery life for laptops and lower energy costs for desktop computers. This makes them eco-friendly and wallet-friendly in the long run.
- No Noise: One of the noticeable benefits of SSDs is the absence of noise. Unlike HDDs that make clicking or spinning noises, SSDs operate silently due to their lack of moving parts. This creates a quieter and more peaceful computing experience.
Overall, upgrading to an SSD can greatly enhance your computer’s performance, speed, and reliability. Whether you’re a professional looking for faster data access or a casual user wanting a snappier computing experience, investing in an SSD is a wise choice that will pay off in terms of efficiency and convenience.
Pre-Installation Checklist
Before proceeding with the installation of your new SSD, there are some important steps you should take to ensure a smooth and successful upgrade. Follow this checklist to make sure you’re fully prepared:
- Backup Your Data: Prior to installing any new hardware, it’s crucial to back up all your important files and data. This way, you can avoid the risk of losing any information during the upgrade process.
- Check Compatibility: Verify that your computer is compatible with the SSD you plan to install. Check the specifications of your computer or consult the manufacturer’s documentation to ensure the SSD is compatible with your system.
- Update Firmware: Check if there are any firmware updates available for your computer’s motherboard or SSD. Updating the firmware can improve compatibility, performance, and stability, so it’s worth doing before the installation.
- Gather Tools: Ensure you have all the necessary tools for the installation, such as a screwdriver or any other tools that may be required to open your computer case and secure the SSD in place.
- Clean Your Computer: Take the opportunity to clean your computer thoroughly, especially the interior where the SSD will be installed. Dust and debris can affect the performance and lifespan of your new SSD, so clean the area before proceeding.
- Allocate Sufficient Time: SSD installation can take anywhere from a few minutes to an hour, depending on your computer’s specifications and the complexity of the process. Allocate enough time to complete the installation without rushing.
- Delete Unnecessary Files: Before transferring your data to the new SSD, consider deleting any unnecessary files or programs to free up space and improve overall system performance.
- Download Drivers: If you’re planning to install a fresh operating system on the SSD, make sure you download the necessary drivers and software beforehand. This will ensure a smoother installation process and immediate functionality.
By following this pre-installation checklist, you’ll be well-prepared for the SSD upgrade process. Taking these steps will help you avoid any potential issues and ensure a successful installation, giving you the best possible start with your new SSD.
Physically Installing the SSD
Now that you’ve completed the pre-installation checklist, it’s time to physically install your new SSD. Follow these steps to ensure a smooth installation process:
- Power off Your Computer: Before starting any hardware installation, make sure your computer is powered off and unplugged from the electrical outlet. This is essential for your safety and the safety of your computer components.
- Open the Computer Case: Depending on the type of computer you have, you may need to remove a side panel or unscrew the casing to access the internal components. Refer to your computer’s manual or search online for specific instructions on opening your computer case.
- Locate an Available Storage Bay: Identify an available storage bay where you will install the SSD. It can be an empty drive bay or a space previously occupied by a hard drive or other storage device.
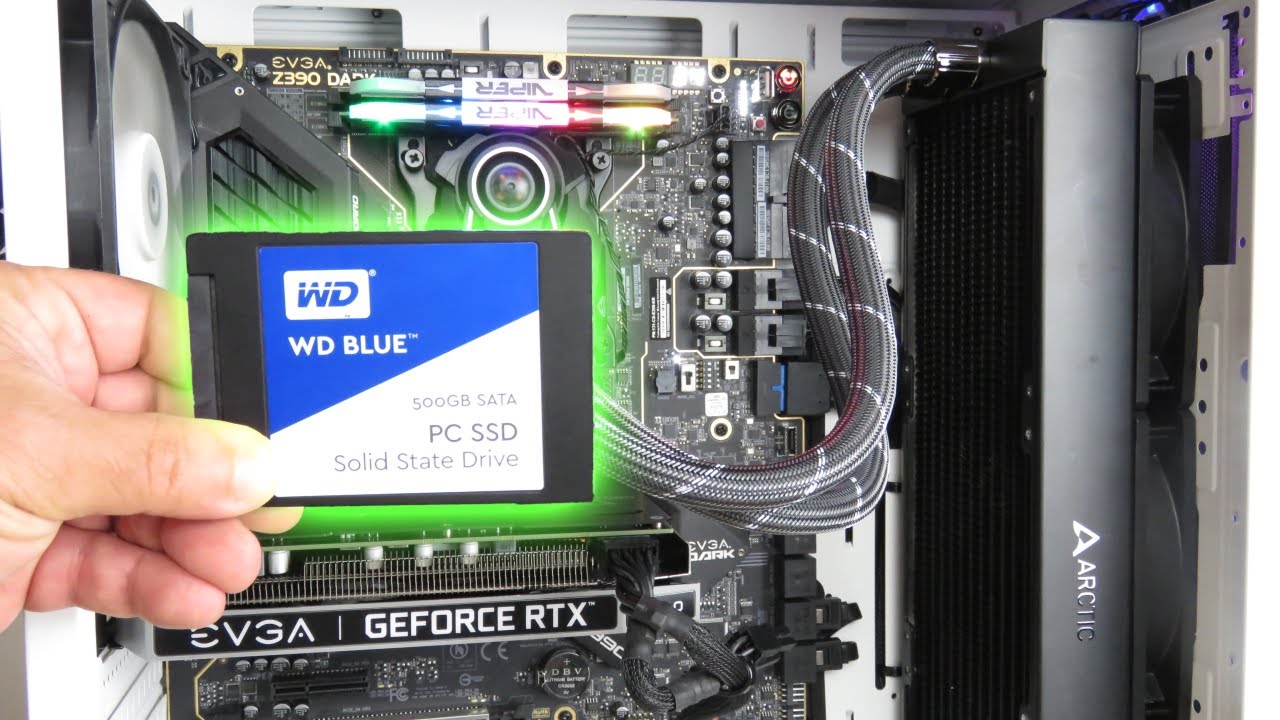
- Connect the SSD: If installing the SSD as a secondary drive, locate an available SATA port on your motherboard and connect one end of the SATA cable to the SSD and the other end to the motherboard. If the SSD requires power, connect a SATA power cable from the power supply to the SSD.
- Secure the SSD: Once connected, secure the SSD in place using screws or any other mounting mechanism provided by your computer case. Make sure the SSD is firmly attached to prevent any movement during operation.
- Close the Computer Case: After ensuring that all connections are secure and the SSD is properly installed, carefully close the computer case and secure it with the appropriate screws or clips.
- Power on Your Computer: With the installation complete, plug in your computer and power it on. Enter your computer’s BIOS settings to verify that the SSD is detected correctly. If necessary, consult your motherboard’s manual for instructions on accessing the BIOS and checking the drive detection.
- Format and Initialize the SSD: If the SSD is not recognized or shows as unallocated in your operating system, you may need to format and initialize it. Follow the instructions provided by your operating system to complete this process. However, exercise caution when formatting, as it will erase any existing data on the SSD.
By following these steps, you can successfully physically install your new SSD. The next steps involve configuring and setting up the SSD, which will be covered in the following sections.
Choosing the Right SSD for Your Needs
When it comes to choosing the right SSD for your needs, there are several factors to consider. The following guidelines will help you make an informed decision:
- Storage Capacity: Determine how much storage space you require. SSDs are available in a wide range of capacities, from smaller ones suitable for basic tasks to larger ones capable of storing large files and applications.
- Performance: Consider the performance requirements for your intended use. Look for SSDs with faster read and write speeds, as they provide better overall performance and deliver a smoother computing experience.
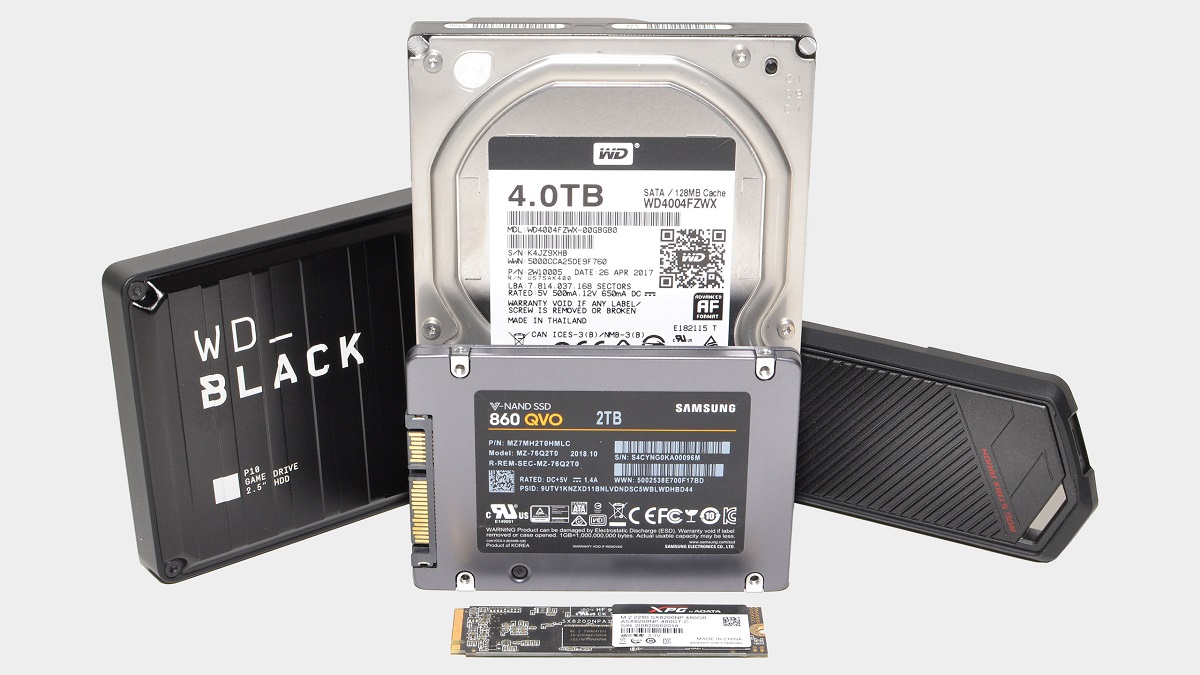
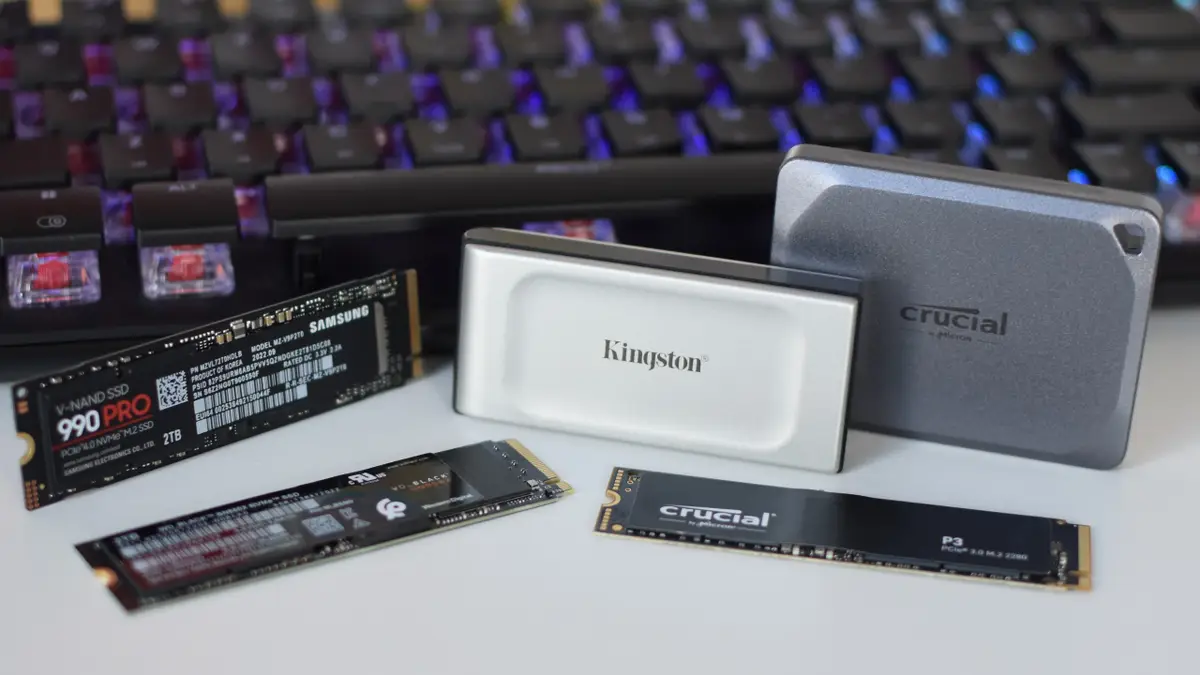
- Form Factor: Check the form factor compatibility with your computer. The most common form factor for SSDs is the 2.5-inch SATA drive, but there are also M.2 and PCIe SSDs that may be more suitable for specific computer models.
- Endurance and Lifespan: Explore the endurance ratings of different SSD models. An SSD’s endurance determines its lifespan and ability to handle constant read/write operations. Consider your usage patterns to ensure you choose an SSD that can withstand your specific needs.
- Reliability and Warranty: Research the reliability and warranty of the SSD brand you are considering. Look for reputable manufacturers that offer solid warranties and have positive customer reviews for their SSDs.
- Price: Set a budget for your SSD purchase. Compare prices and consider the price-to-performance ratio to ensure you get the best value for your money.
- Additional Advanced Features: Some SSDs offer advanced features like hardware encryption, power loss protection, or data recovery tools. Assess whether these features align with your needs and prioritize them accordingly.
It’s important to note that choosing the right SSD involves finding a balance between your specific requirements and your budget. Take the time to research and compare different options, read reviews, and consider your own usage patterns to make an informed decision.
By choosing the right SSD, you can experience faster boot times, improved system performance, and enhanced productivity, all while ensuring your storage needs are met effectively.
Connecting the SSD to Your Computer
Once you have chosen the right SSD for your needs, it’s time to connect it to your computer. Follow these steps to ensure a proper connection:
- Power off Your Computer: Before proceeding with the connection, make sure your computer is powered off and disconnected from the power source to avoid any electrical accidents.
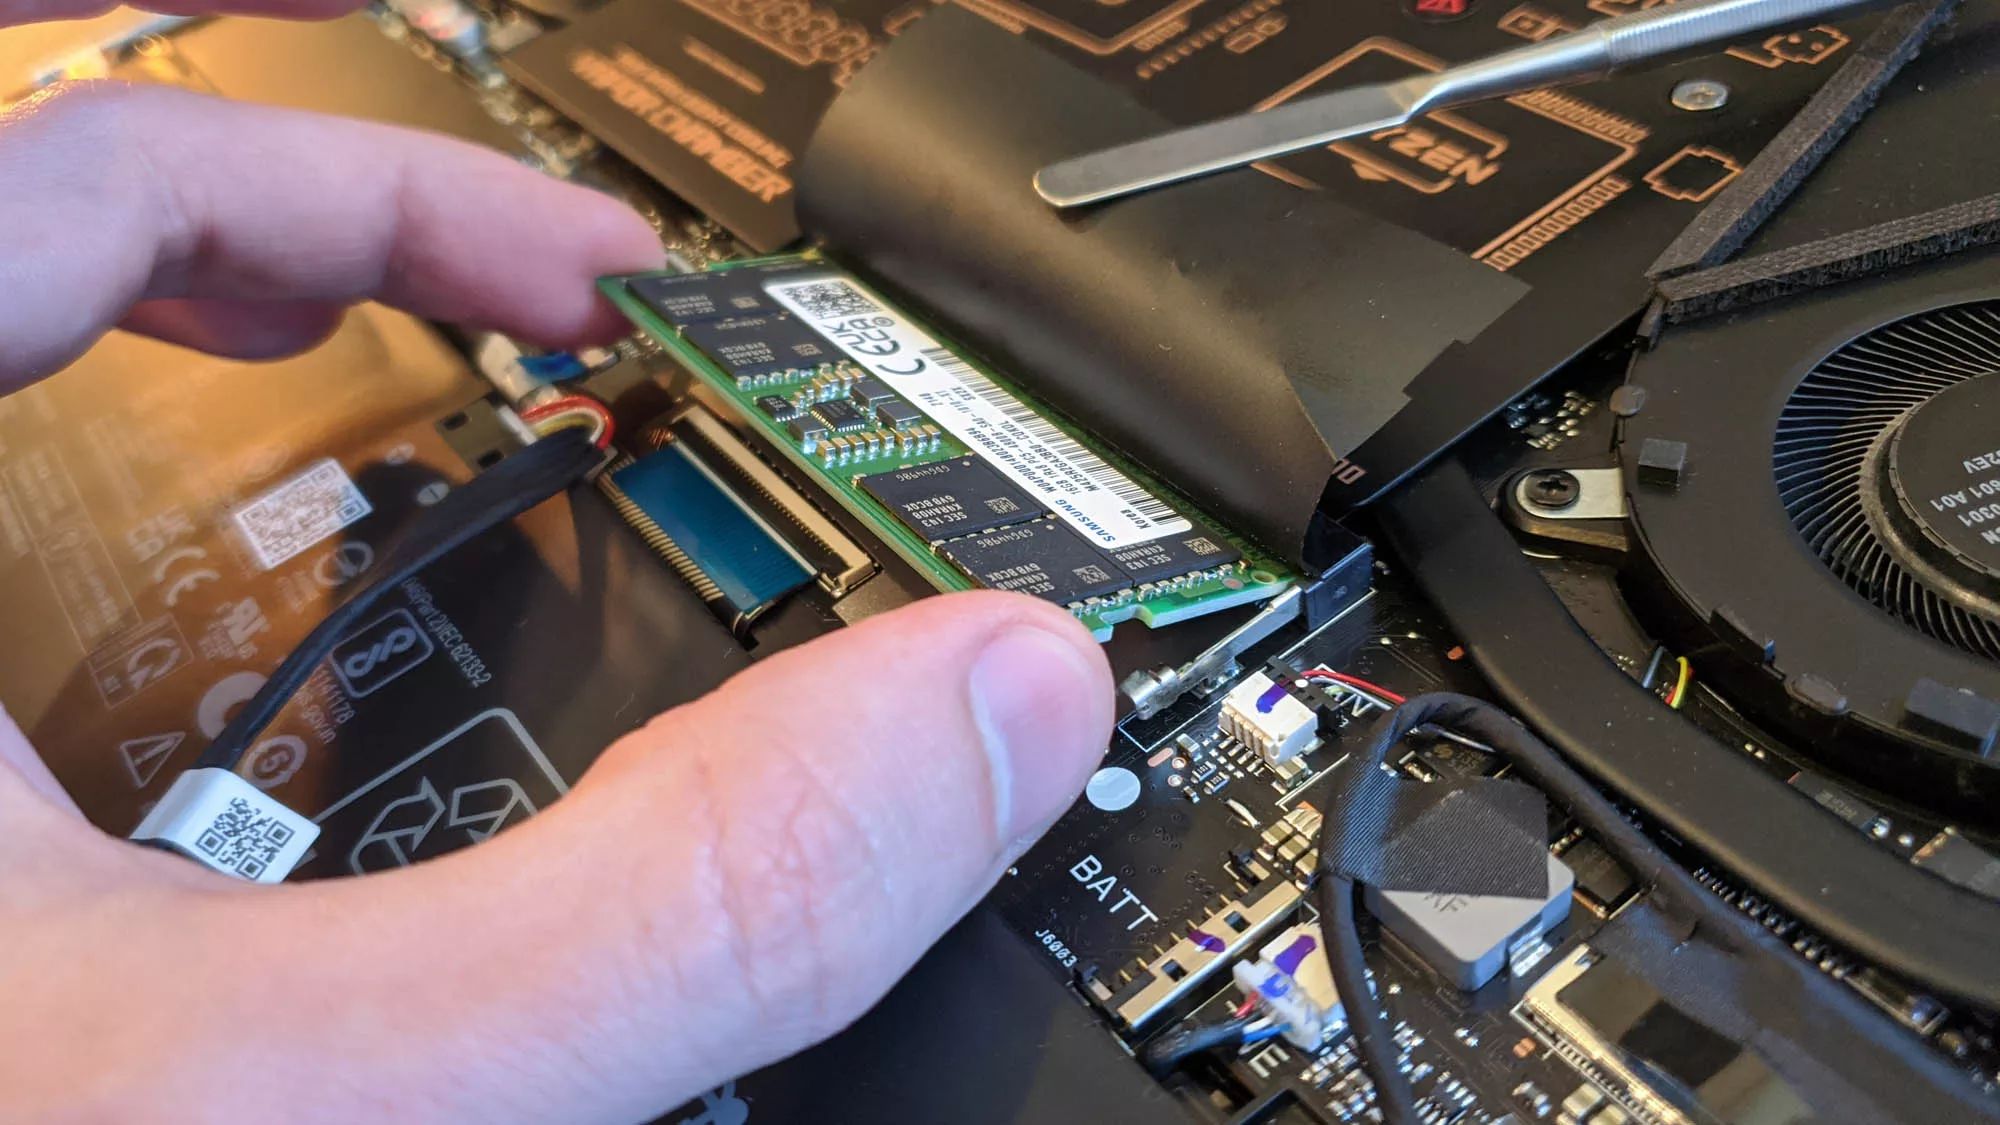
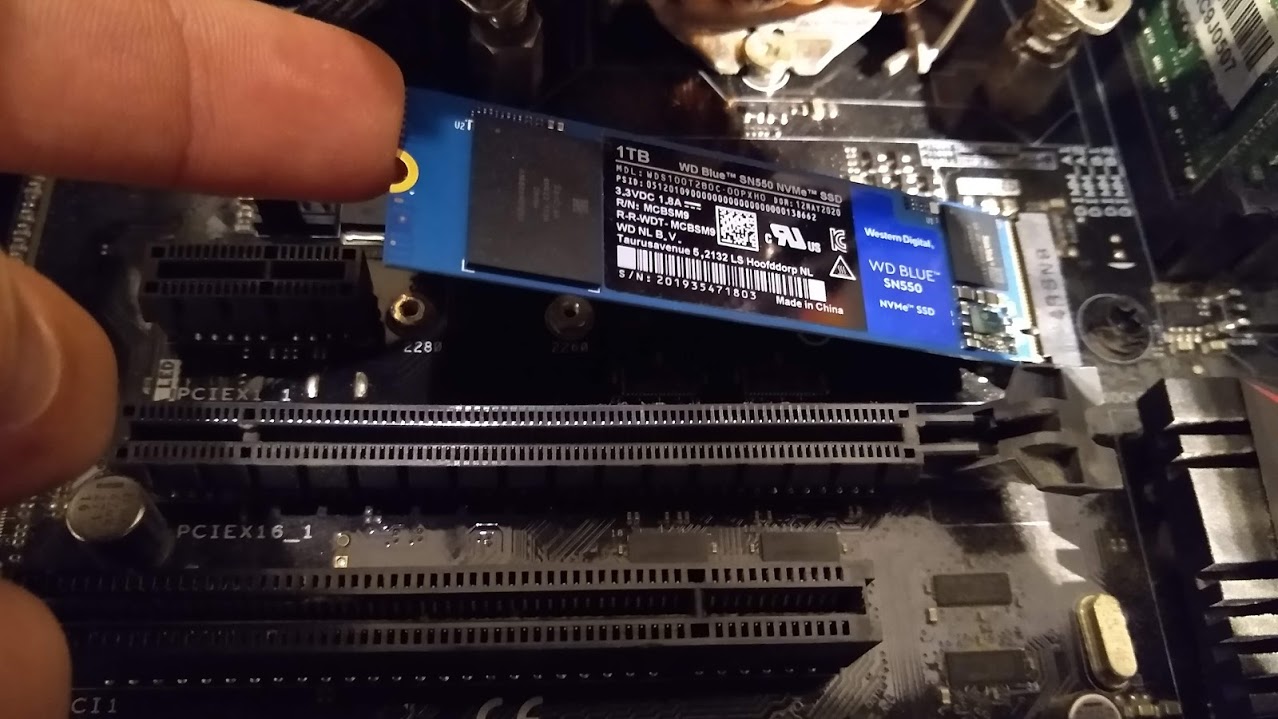
- Select the Connection Type: Determine the connection type required for your SSD based on its form factor. Most SSDs use SATA connectors, but some may require M.2 or PCIe connections. Refer to your SSD and motherboard manuals for specific connection details.
- Locate an Available Port: Identify an available port on your motherboard that matches the connection type of your SSD. For SATA connections, locate an empty SATA port; for M.2 or PCIe connections, identify the corresponding slot on the motherboard.
- Connect the Data Cable: For SATA connections, use a SATA data cable to connect one end to the SSD and the other end to the available SATA port on the motherboard. Ensure a secure connection without applying excessive force.
- Connect the Power Cable (if required): If your SSD requires additional power, connect a SATA power cable from the power supply unit to the SSD. Ensure the cable is aligned properly with the corresponding power connector on the SSD.
- Secure the Cables: Make sure the data and power cables are neatly routed and secured to avoid any accidental disconnections or cable interference with other components in your computer case.
- Close the Computer Case: Once the SSD is properly connected, carefully close the computer case and secure it with the appropriate screws or clips. Double-check that all cables are clear of any moving parts to prevent any damage.
- Power on Your Computer: Plug in your computer and power it on. Enter the BIOS settings to ensure that the SSD is detected correctly. If necessary, consult your motherboard’s manual for instructions on accessing the BIOS and confirming drive detection.
- Format and Initialize the SSD: If the SSD is not automatically recognized by your operating system, you may need to format and initialize it. Follow the instructions provided by your operating system to complete this process. Note that formatting will erase any existing data on the SSD, so ensure you have backed up your important files before proceeding.
By following these steps, you can successfully connect your SSD to your computer. Once the connection is established, you can proceed with formatting, partitioning, and transferring data to the SSD for optimal performance and storage efficiency.
Formatting and Partitioning the SSD
After connecting your SSD to your computer, the next step is to format and partition the drive. This process prepares the SSD for data storage and usage. Follow these steps to effectively format and partition your SSD:
- Access Disk Management: In Windows, press the Windows key + R to open the Run dialog box. Type “diskmgmt.msc” and press Enter. This will open the Disk Management utility.
- Identify the SSD: Locate your SSD in the Disk Management window. It may appear as an unallocated disk with a black bar.
- Initialize the SSD: Right-click on the SSD and select “Initialize Disk.” Choose the appropriate partition style (MBR or GPT) according to your needs and click OK.
- Create a Partition: Right-click on the unallocated space of the SSD and select “New Simple Volume.” Follow the on-screen instructions to create a new partition. Choose the desired size, assign a drive letter, and format the partition with the desired file system (such as NTFS or exFAT).
- Assign a Drive Letter: Right-click on the newly created partition and select “Change Drive Letter and Paths.” Choose an available drive letter from the list and click OK.
- Format the Partition: If the partition is not automatically formatted, right-click on the partition and select “Format.” Choose the file system, allocation unit size, and volume label. Click OK to initiate the formatting process.
- Repeat the Process (Optional): If you wish to create additional partitions on the SSD, repeat steps 4-6. This allows you to divide the SSD into multiple sections to organize your data more efficiently.
- Confirm Formatting: Once the formatting and partitioning processes are complete, verify that the newly formatted partitions are visible and accessible in File Explorer or My Computer.
It’s important to note that formatting and partitioning the SSD will erase any existing data, so ensure you have backed up crucial files before proceeding. By formatting and partitioning the SSD, you optimize its storage capabilities and create organized spaces for storing and managing your data effectively.
Transferring Data to the SSD
Now that your SSD is formatted and partitioned, it’s time to transfer your data from your old storage device to the newly installed SSD. Follow these steps to ensure a smooth and successful data transfer:
- Backup Your Data (if necessary): Before proceeding with the data transfer, it’s important to back up your important files and data. This ensures that your data is safe in case of any unforeseen issues during the transfer process.
- Select the Data to Transfer: Determine which data you want to transfer to the SSD. This may include documents, photos, videos, and other personal files. You can also choose to transfer your entire operating system and applications for a complete migration.
- Use Data Migration Software: For a seamless transfer, consider using data migration software. Such software helps simplify the process by automatically transferring all selected data, including your operating system and applications, from your old storage device to the SSD.
- Follow the Software Instructions: Install the data migration software and follow the instructions provided. Typically, these instructions will guide you through selecting the source drive (your old storage device) and the destination drive (the SSD) for the data transfer.
- Initiate the Data Transfer Process: Once you’ve selected the source and destination drives, start the data transfer process as instructed by the software. This process may take some time, depending on the amount of data being transferred.
- Verify the Data Transfer: After the data transfer is complete, double-check the SSD to ensure that all the transferred data is present and accessible. Open files, run applications, and browse through different folders to confirm the successful transfer of your data.
- Organize and Clean Up: Take the opportunity to organize your data on the SSD. Create new folders, categorize files, and remove any unnecessary files or duplicates. This helps keep your SSD organized and maximizes its storage efficiency.
- Update Your Applications and Settings: If you transferred your operating system and applications, make sure to update any necessary settings or preferences in your applications to reflect the new SSD drive as the primary storage location.
By following these steps, you can successfully transfer your data to the SSD, ensuring that your files, applications, and operating system are now utilizing the faster, more efficient storage solution. With your data on the SSD, you can experience quicker access times and improved overall performance.
Updating Operating System and Drivers
After transferring your data to the SSD, it is important to update your operating system and drivers to ensure optimal compatibility and performance. Here are the steps to update your operating system and drivers:
- Check for Operating System Updates: Go to the settings or control panel of your operating system and look for the option to check for updates. Run a search for available updates and install them. These updates often include bug fixes, security patches, and improved performance enhancements.
- Install Device-Specific Drivers: Visit the websites of your computer manufacturer, motherboard manufacturer, and the manufacturers of any other hardware components to download and install the latest drivers. These drivers ensure that your hardware devices communicate effectively with the operating system and take full advantage of the features offered by the SSD.
- Update Anti-Virus and Security Software: Ensure that your anti-virus and other security software programs are up to date. This ensures that your system is protected from the latest threats and vulnerabilities.
- Restart Your Computer: After installing updates and drivers, it is recommended to restart your computer for the changes to take effect. This ensures that all updates and changes are properly applied and incorporated into the system.
- Verify Operating System Optimization: Confirm that your operating system is optimized for SSD usage. SSDs perform differently from traditional hard drives, and optimizing your operating system settings can further enhance their performance. Consult online resources or SSD manufacturer guidelines for specific optimizations.
- Test System Stability: After updating your operating system and drivers, it’s good practice to test the stability of your computer. Open various applications, perform common tasks, and monitor system performance to ensure that everything is functioning smoothly.
- Maintain Regular Updates: Keep track of future updates for your operating system and drivers. Regularly check for updates and install them promptly to ensure that your computer remains secure and operates at its best performance levels.
By updating your operating system and drivers, you can improve compatibility, enhance security, and optimize performance with your newly installed SSD. Regular updates ensure that your system operates efficiently and takes full advantage of the benefits offered by the SSD, resulting in a seamless computing experience.
Optimizing SSD Performance
To fully maximize the performance of your SSD, there are several optimization techniques you can implement. These measures will enhance speed, prolong lifespan, and ensure the best possible user experience. Here are some tips for optimizing your SSD’s performance:
- Enable TRIM: TRIM is a feature that helps maintain the longevity and performance of an SSD. Ensure that TRIM is enabled on your operating system to allow for efficient garbage collection and proper management of free space on the drive.
- Disable Disk Defragmentation: While disk defragmentation is beneficial for traditional hard drives, it is not required for SSDs. In fact, running disk defragmentation on an SSD can lead to unnecessary wear and tear. Disable automatic defragmentation in the operating system settings to avoid any detrimental effects.
- Disable Superfetch and Prefetch: Superfetch and Prefetch are Windows features that are not necessary for SSDs and can potentially decrease performance. Disable these features by going to the Services menu (services.msc) in Windows and setting them to “Disabled”.
- Adjust Power Settings: Modify your power settings to optimize performance for your SSD. In the power options of your operating system, select a power plan that prioritizes high performance rather than power saving, as SSDs do not benefit from power-saving features like HDDs.
- Regularly Update Firmware: Check for firmware updates from your SSD manufacturer and install them when available. Firmware updates often include bug fixes, feature enhancements, and performance improvements.
- Monitor SSD Health: Use SSD health monitoring software provided by the manufacturer or third-party tools to keep an eye on the health and performance of your SSD. These programs can help detect potential issues and provide insights into the overall health of your SSD.
- Enable AHCI Mode: Ensure that your SSD is running in AHCI (Advanced Host Controller Interface) mode rather than IDE mode in the BIOS settings. AHCI mode allows for better performance and advanced features of your SSD to be utilized.
- Enable Write Caching: Enable write caching to improve the write performance of your SSD. In the Device Manager of your operating system, go to the Properties of your SSD and select the “Policies” tab, then enable write caching.
- Avoid Overfilling the SSD: To maintain optimal performance, it is recommended to leave a portion of your SSD unallocated. Overfilling the SSD can decrease performance and lifespan. Aim to keep approximately 10-20% of the SSD’s capacity free.
- Regularly Backup Data: While SSDs are generally reliable, it’s still important to regularly backup your data to ensure its safety. This way, if any unforeseen issues occur, you can restore your data from the backup without losing any important information.
By implementing these optimization techniques, you can ensure that your SSD performs at its best, providing you with fast and reliable storage for all your data and applications.
Troubleshooting Common Issues
While SSDs are generally reliable, occasionally, you may encounter some common issues. Understanding how to troubleshoot these issues can help you resolve them quickly. Here are some common SSD issues and their troubleshooting steps:
- SSD Not Detected: If your SSD is not being recognized by your computer, check the physical connections to ensure they are secure. Try connecting the SSD to a different SATA port or using a different cable. Also, check if the SSD is properly initialized and formatted in the Disk Management utility.
- Slow Performance: If your SSD is experiencing slow performance, it may be due to background processes or outdated firmware. Make sure your operating system is up to date and install any firmware updates available from the manufacturer. Additionally, check if any unnecessary programs are running in the background and consider disabling them.
- Issues with Sleep or Hibernate: Some SSDs may have compatibility issues with the sleep or hibernate functions of the operating system. Updating your motherboard’s BIOS and SSD firmware to the latest versions may help resolve these issues. You can also try adjusting the power settings to prevent the computer from entering sleep mode when the SSD is in use.
- File Corruption: If you encounter file corruption or data loss, it could be a sign of a failing SSD or improper handling. Ensure that you are handling the SSD properly, avoiding physical shocks or abrupt power interruptions. Regularly back up your data to minimize the risk of data loss.
- Compatibility Issues: In rare cases, SSDs may have compatibility problems with certain hardware configurations. Check the manufacturer’s website for any known compatibility issues and recommended solutions. You may need to update your system’s drivers or consult with technical support for further assistance.
- Excessive Heat: SSDs can generate heat during intense usage. If your SSD is getting too hot, ensure that it has adequate airflow and is not blocked by cables or other components. Consider installing additional cooling solutions, such as fans or heatsinks, if necessary.
- Wear Leveling: Over time, SSDs may experience wear leveling, which can affect their performance and lifespan. However, modern SSDs have built-in wear leveling algorithms to mitigate this issue. If you notice significant degradation in performance or a decline in read/write speeds, it may indicate excessive wear. In such cases, it is recommended to reach out to the manufacturer for further guidance.
- Data Encryption Issues: If you have enabled hardware-based encryption on your SSD and are experiencing issues accessing or recovering data, verify that you have the correct encryption key or password. Consult the manufacturer’s documentation or support services for assistance with data recovery or encryption-related issues.
If you encounter any of these issues with your SSD, it’s important to refer to the manufacturer’s documentation, online forums, or contact their support for specific troubleshooting steps relevant to your SSD model. Taking appropriate measures quickly can help resolve issues and ensure optimal performance and durability of your SSD.
Final Thoughts and Tips
As you wrap up the installation and setup of your new SSD, here are some final thoughts and tips to keep in mind:
- Regularly Back Up Your Data: While SSDs are generally reliable, it’s always a good practice to regularly back up your important data. This ensures that your files are safe in case of any unexpected issues or failures.
- Maintain Proper Space Management: To maintain optimal performance, avoid overfilling your SSD. Leave some free space to allow for wear leveling algorithms and efficient garbage collection. Aim to keep around 10-20% of the SSD capacity free.
- Monitor Drive Health and Performance: Keep an eye on the health and performance of your SSD. Utilize SSD-specific health monitoring tools provided by the manufacturer or third-party software to monitor attributes such as temperature, wear leveling, and overall drive health.
- Update Firmware and Software: Regularly check for firmware updates from the SSD manufacturer and install them when available. Similarly, keep your operating system and drivers up to date to ensure compatibility and optimize performance.
- Securely Dispose of Old Drives: If you have replaced a traditional hard drive with an SSD, make sure to securely erase all data from the old drive before disposing of it or repurposing it.
- Plan for Future Expansion: Consider your future storage needs when selecting an SSD. If you anticipate requiring more storage in the future, choose an SSD with a higher capacity to avoid the need for frequent upgrades.
- Protect Your SSD from Physical Damage: Handle your SSD with care, as it is susceptible to physical damage from drops, shocks, or static electricity. Avoid exposing it to extreme temperatures or moisture, and store it in an anti-static bag when not in use.
- Benefit from SSD-Specific Software: Research and utilize SSD-specific software provided by the manufacturer. These tools can help optimize and fine-tune the performance of your SSD, as well as provide additional features such as secure erase or performance monitoring.
- Seek Professional Assistance if Necessary: If you encounter persistent issues or are unsure about any aspect of the installation or optimization process, seek help from technical support or computer professionals who are experienced with SSDs.
By following these final thoughts and tips, you can make the most out of your SSD investment, ensuring optimal performance, longevity, and data security. Enjoy the speed and efficiency that your new SSD brings to your computing experience!