What Is Root?
In the world of Android devices, “root” refers to the process of gaining administrative access to the core system files and settings of your smartphone or tablet. This allows you to have complete control over your device, giving you the ability to customize, modify, and optimize its performance.
When you purchase a new Android device, it comes with certain limitations imposed by the manufacturer and the operating system. These limitations are put in place to maintain the stability and security of the device. However, rooting your Android device removes these restrictions, giving you a greater level of freedom to personalize your device as per your preferences.
Rooting provides you with the privilege to access and modify the system files, settings, and applications that are otherwise restricted. You can uninstall pre-installed apps, install customized ROMs, overclock the CPU for better performance, and even tweak system-level settings. Rooting unlocks a whole new realm of possibilities and allows you to make the most out of your Android device.
One of the main advantages of rooting is the ability to install and use powerful applications that require root access. These applications, often referred to as root-only apps, provide advanced features and functionalities that are not available to regular users. From complete backup solutions to ad-blockers, root-only apps enhance the overall user experience and make your Android device truly your own.
However, it’s important to note that rooting your Android device also comes with certain risks and drawbacks. It can void your device’s warranty, as it is considered a modification to the original software. Additionally, root access can potentially expose your device to security vulnerabilities if not used responsibly. Therefore, it is crucial to be aware of these risks and take precautions while rooting your device.
In the next sections, we will explore the reasons why you might consider rooting your Android device, the potential risks involved, as well as the different methods and tools available to root your device.
Reasons to Root Your Android Device
Rooting your Android device opens up a world of possibilities and offers several compelling reasons why you might consider taking this step. Here are some of the primary benefits of rooting your Android device:
- Customization: Rooting allows you to customize your device to the fullest extent. You can install custom ROMs, which are modified versions of the Android operating system, to change the look and feel of your device. You can also apply custom themes, fonts, icons, and boot animations to personalize your device according to your style.
- Performance Optimization: By gaining root access, you can optimize your device’s performance. You can remove bloatware and unnecessary system apps that consume resources and slow down your device. Additionally, you can tweak system settings, such as CPU frequency and governor, to overclock or underclock your CPU for better performance or battery life.
- App Management: Rooting gives you more control over app management. With root access, you can uninstall pre-installed apps that are taking up precious storage space or causing performance issues. You can also backup and restore individual apps and their data using root-only backup solutions, offering an additional layer of protection and flexibility.
- Ad-Blocking: Rooting enables you to block ads system-wide on your Android device. By using ad-blocking apps that require root access, you can eliminate intrusive ads within apps, browsers, and games, leading to a cleaner and more enjoyable user experience.
- Wi-Fi Tethering: Rooting allows you to bypass carrier restrictions and enable Wi-Fi tethering on your device without paying extra fees. This means you can share your mobile data connection with other devices, such as laptops or tablets, without incurring additional charges from your network provider.
These are just a few examples of the many benefits you can experience by rooting your Android device. It expands your device’s capabilities and gives you the freedom to fully customize and optimize your Android experience.
However, it’s essential to remember that rooting also carries certain risks and precautions. Let’s discuss these in the next section to ensure you are well-informed before proceeding with the rooting process.
Risks and Precautions of Rooting
While rooting your Android device can offer numerous benefits, it’s crucial to understand the risks and take necessary precautions before proceeding. Here are some of the potential risks associated with rooting:
1. Voiding Warranty: Rooting your device typically voids the manufacturer’s warranty. This means that if something goes wrong during the rooting process or if your device experiences any issues afterward, you may no longer be eligible for free repairs or replacements from the manufacturer.
2. Bricking: Rooting your device incorrectly or using incompatible tools can potentially lead to “bricking” your device, rendering it inoperable. While the risk of bricking a device is relatively low, it’s essential to follow instructions carefully and use trusted rooting methods and tools.
3. Security Vulnerabilities: Rooting exposes your device to potential security risks. Gaining root access allows apps and malware greater access to your device’s system files, potentially compromising your privacy and exposing you to malicious attacks. It’s crucial to be cautious when granting root access to apps and only install trusted sources.
4. Software Instability: Modifying the core system files and installing custom ROMs can introduce software instability. Incompatibilities between the customized software and your device’s hardware can lead to crashes, freezes, or other performance issues. Always research and choose stable and compatible custom ROMs or modifications.
5. Loss of Over-the-Air (OTA) Updates: After rooting your device, you may no longer be able to receive official OTA updates from the device manufacturer. These updates often include security patches and new features. However, there are alternative methods, such as installing custom ROMs or manually flashing firmware updates, to keep your device up-to-date.
Before rooting your Android device, it’s crucial to take the following precautions:
1. Backup Your Data: Before proceeding with any rooting process, ensure that you have a complete backup of your device’s data. This includes contacts, messages, photos, videos, and any other important files. In the event that something goes wrong during rooting, you can restore your device to its original state without losing personal data.
2. Research and Educate Yourself: Understand the rooting process and the specific requirements and risks associated with your device model. Read user experiences, tutorials, and forums to gain insights and tips from others who have successfully rooted their devices.
3. Use Trusted Methods and Tools: Stick to reputable sources and trusted rooting methods and tools. Avoid downloading root packages or tools from unverified websites or developers that may contain malware or cause harm to your device.
4. Keep Security Software Updated: Install and regularly update antivirus and security software on your rooted device to mitigate potential security risks. This will help protect your device from malware and other vulnerabilities.
By understanding the risks associated with rooting and taking proper precautions, you can minimize potential issues and enjoy the benefits of a rooted Android device. In the next section, we will explore different methods and tools available to safely root your Android device.
Different Methods to Root Android
There are several methods available to root your Android device, each with its own set of requirements and procedures. Here are some of the most commonly used methods:
1. One-Click Rooting Apps: One of the easiest ways to root your Android device is by using one-click rooting apps such as KingoRoot, Magisk, or SuperSU. These apps provide a simple and automated process that requires minimal technical knowledge. However, it’s important to note that not all devices are compatible with one-click rooting apps, and success rates may vary.
2. Custom Recovery Method: This method involves installing a custom recovery, such as TWRP (Team Win Recovery Project), and then using it to flash a rooting package or a custom ROM that includes root access. This method requires unlocking the bootloader of your device, which may void your warranty and require additional steps specific to your device model.
3. Manufacturer-Specific Tools: Some device manufacturers provide their own tools or methods for rooting their devices. For example, Samsung devices can be rooted using Odin, an official tool provided by Samsung, which requires a compatible firmware file and specific instructions for your device model. Keep in mind that manufacturer-specific tools may not be available for all devices.
4. Custom ROMs with Root: Some custom ROMs, like LineageOS and Paranoid Android, come pre-rooted, meaning they include root access by default. Flashing a custom ROM requires a compatible custom recovery and careful consideration of device compatibility and stability.
5. ADB and Fastboot: Advanced users can utilize the Android Debug Bridge (ADB) and Fastboot tools to root their devices. This method requires a bit more technical knowledge, as it involves using command-line tools on a computer to communicate and execute commands on the Android device. ADB and Fastboot methods can vary depending on the Android version and device manufacturer.
It’s important to note that the availability and compatibility of methods may vary depending on your device model, Android version, and manufacturer restrictions. Before attempting any rooting method, thoroughly research and verify its compatibility and success rate with your specific device.
Additionally, keep in mind that rooting your device may also require unlocking the bootloader, which can void your warranty and erase all data on your device. Ensure that you have a backup of your important data before proceeding with any rooting method.
In the following section, we will provide a step-by-step guide to help you safely root your Android device using one of the methods mentioned above.
Step-by-Step Guide to Root Android
If you’ve decided to root your Android device, here’s a step-by-step guide to help you through the process:
Step 1: Backup Your Data
Before rooting your Android device, it’s crucial to create a backup of all your important data. This includes contacts, messages, photos, videos, and any other files you want to keep safe. You can use cloud storage services or backup apps available on the Play Store to securely back up your data.
Step 2: Enable USB Debugging
To enable USB debugging, go to “Settings” on your Android device, select “About Phone,” and tap on the “Build Number” several times until you see the message “You are now a developer.” Then, go to “Developer Options” (usually found under “Settings” or “System”), and toggle on the “USB Debugging” option.
Step 3: Choose a Rooting Method
Select the rooting method that is compatible with your device and suits your preferences. You can choose one-click rooting apps like KingoRoot or SuperSU, or opt for custom recoveries like TWRP or manufacturer-specific tools for rooting.
Step 4: Download and Install Required Software
Depending on the chosen rooting method, follow the instructions provided by the software or tool you are using. Download the required software, such as one-click rooting apps or custom recoveries, and install them on your computer if necessary.
Step 5: Connect Your Device to the Computer
Connect your Android device to your computer using a USB cable. Make sure USB debugging is still enabled on your device, as mentioned in Step 2.
Step 6: Follow the Instructions
Launch the rooting software or tool, and follow the on-screen instructions. The process may differ depending on the chosen method, so carefully read and follow the steps provided. This may involve clicking on specific buttons, entering your device information, or executing commands in the command-line interface.
Step 7: Rooting Process
The rooting process will begin once you initiate it from the rooting software or tool. Be patient and avoid disconnecting your device until the rooting process has completed. This can take a few minutes, and your device may reboot multiple times in the process.
Step 8: Verify Root Access
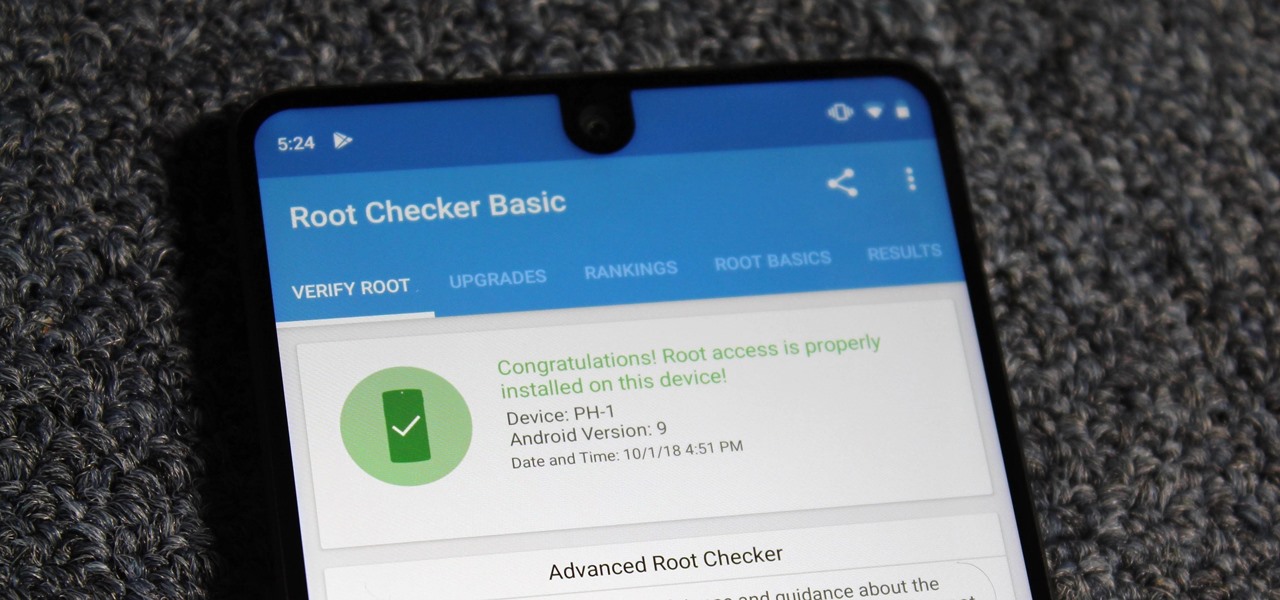
After your device has been successfully rooted, you can verify root access using applications like Root Checker from the Google Play Store. Install the app and follow the instructions to check if your device has been rooted successfully.
Remember that each rooting method may have specific requirements and details, so always consult the instructions and tutorials provided by the rooting software or tool. Be cautious and proceed at your own risk, as rooting can void your warranty and potentially cause issues if not done correctly.
Once your device is rooted, you can explore the various customization options, install root-only apps, and enjoy the enhanced capabilities that come with having full administrative access to your Android device.
In the next section, we will highlight some popular rooting apps and tools that you can consider using for your Android device.
Popular Rooting Apps and Tools
When it comes to rooting your Android device, there are a variety of popular rooting apps and tools that can help simplify the process and provide a seamless experience. Here are some of the most trusted and widely used options:
1. KingoRoot: KingoRoot is a popular one-click rooting app that offers a simple and user-friendly interface. It supports a wide range of Android devices and is known for its high success rate. KingoRoot provides both PC and APK versions, allowing you to choose the method that best suits your needs.
2. SuperSU: SuperSU is one of the most well-known and feature-rich rooting apps available. It provides advanced management of root access permissions and allows you to control which apps have root privileges. SuperSU offers a powerful interface and a wide range of customization options for rooted devices.
3. Magisk: Magisk is a popular rooting tool that allows users to gain root access while still passing SafetyNet checks. It offers systemless root, which means it avoids modifying the system partition, allowing for easy removal and compatibility with OTA updates. Magisk also provides a versatile Magisk Manager app for managing root access and installing modules.
4. TWRP (Team Win Recovery Project): TWRP is a custom recovery that provides a touch-based interface for installing custom ROMs, backing up and restoring device data, and more. It is widely used for customizing and modding Android devices and is often required for flashing root packages or custom ROMs.
5. CF-Auto-Root: CF-Auto-Root is a tool developed by Chainfire that offers a straightforward method to root a wide range of Android devices. It uses a combination of a custom recovery (typically TWRP) and an auto-root file to provide an automated rooting process.
6. Odin: Odin is a Windows-based official tool provided by Samsung for flashing firmware, custom recoveries, and rooting compatible Samsung devices. It is often used for Samsung-specific rooting and firmware installation procedures.
7. Xposed Framework: Xposed Framework is not a rooting app itself but a powerful tool for customizing and modding rooted Android devices. It allows users to install various modules that provide additional features and functionalities, such as system-level tweaks, UI customizations, and app-specific modifications.
These are just a few examples of the many popular rooting apps and tools available for Android devices. Before choosing an app or tool, it’s important to research the compatibility with your specific device model and Android version, as well as user reviews and success rates.
Keep in mind that rooting your device may have risks, and it’s important to proceed with caution and take necessary precautions. Always backup your data and follow the instructions provided by the chosen rooting app or tool. Safety is paramount, and a well-informed approach is key to a successful rooting experience.
In the final section, we will discuss how to check if your Android device is rooted, allowing you to verify the success of the rooting process.
How to Check if Your Android Device Is Rooted
After rooting your Android device, you may want to verify whether the rooting process was successful and if your device truly has root access. Here are a few methods you can use to check if your Android device is rooted:
1. Root Checker Apps: One of the most accessible and convenient ways to check if your device is rooted is by using root checker apps available on the Google Play Store. Apps like “Root Checker” or “Root Status” can quickly determine if your device has root access. Simply install the app, grant the necessary permissions, and run the root verification process. These apps will provide a definitive answer on the rooted status of your device.
2. Using Terminal Emulator: If you are familiar with using a terminal emulator app, you can use it to check root access. Install a terminal emulator app, such as “Termux,” from the Google Play Store. Launch the app and enter the command “su“. If you receive a prompt asking for superuser permission, it indicates that your device has root access. If you receive an error message or a permission denied response, it means your device is not rooted.
3. System Apps: Some apps and settings that require root access are visible only on rooted devices. Check if you have any system apps like “SuperSU” or “Magisk Manager” installed on your device. These apps are used to manage root access and are typically only present on rooted devices. If you find such apps on your device, it indicates that your device is rooted.
4. Checking System Directories: Another method to check if your device is rooted is by examining specific system directories. File managers with root access, like “Solid Explorer” or “ES File Explorer” with root features enabled, allow you to navigate to directories like “/system” or “/system/bin“. If you have access to these directories and can view and modify files within them, it indicates that your device is rooted.
5. Using ADB Commands: Advanced users can use the Android Debug Bridge (ADB) commands to check root access. Connect your device to a computer and enable USB debugging. Open a command prompt or terminal window on your computer and enter the command “adb shell“. Once you have a shell connection, enter “su“. If you receive a # symbol as a response, it means your device has root access. If you receive a $ symbol or any other response, it indicates that your device is not rooted.
By using these methods, you can easily determine if your Android device has root access. Remember, root access provides you with powerful privileges, so always exercise caution and use trusted sources when granting root permission to apps or performing root-related operations.
In this article, we have explored what rooting is, the reasons to root your Android device, the risks and precautions involved, different rooting methods, popular rooting apps and tools, and how to check if your device is rooted. Armed with this information, you can make an informed decision about whether or not rooting is right for you.