Introduction
Welcome to our guide on how to remove bloatware from your Android tablet. If you’ve recently purchased a new Android tablet, you may have noticed that it comes preloaded with a variety of pre-installed applications that you may not necessarily need or want. These pre-installed apps, commonly known as bloatware, can take up valuable storage space, consume system resources, and even affect the overall performance of your device. That’s why many Android users opt to remove or disable these unwanted apps to optimize their tablet’s functionality.
But what exactly is bloatware? Bloatware refers to the preloaded apps that come with your Android tablet from the manufacturer or carrier. These apps can range from games, productivity tools, to trial versions of software. While some of these apps may be useful, most of them are unnecessary and only serve to clutter your device.
So why should you bother removing bloatware from your Android tablet? There are several reasons to consider. Firstly, these pre-installed apps take up valuable storage space on your device, which can be limited in some models. By getting rid of unwanted apps, you free up space for apps and media that are important to you.
Secondly, bloatware can also consume system resources and affect the performance of your Android tablet. Many pre-installed apps run in the background, utilizing CPU power, RAM, and battery life. By removing or disabling these apps, you can improve the overall speed and responsiveness of your device.
Lastly, removing bloatware allows you to have more control over your Android tablet. It enables you to customize your device according to your preferences, rather than being stuck with unwanted applications imposed by the manufacturer or carrier. You can shape your tablet’s user experience and make it more streamlined and efficient.
Before we dive into the methods of removing bloatware, it’s important to take some precautions. Removing system apps can potentially have unintended consequences, such as causing stability issues or making certain features of your tablet unusable. It’s recommended to proceed with caution and follow the steps accurately to avoid any problems. Additionally, it’s advisable to back up your data before making any changes to your device.
In the following sections, we will explore several methods you can use to remove bloatware from your Android tablet. From uninstalling pre-installed apps to disabling them and even rooting your device, we’ll cover various approaches to cater to different preferences and levels of technical expertise.
What is Bloatware?
Bloatware refers to the preinstalled applications that come with your Android tablet from the manufacturer or carrier. These apps are often loaded onto the device to provide additional functionality or partnerships with certain services or brands. However, many users find that these preinstalled apps are unnecessary, take up precious storage space, and can even slow down the performance of their device.
Bloatware can come in various forms, including games, productivity tools, trial versions of software, and even carrier-specific apps. While some of these apps may be useful to certain users, most people prefer to have more control over what is installed on their device. Removing bloatware allows you to personalize your Android tablet to suit your needs and preferences.
It’s important to note that not all preinstalled apps are considered bloatware. Some apps may be essential system services or provide valuable features and functions. These apps are typically referred to as “system apps” and should be approached with caution when considering removal.
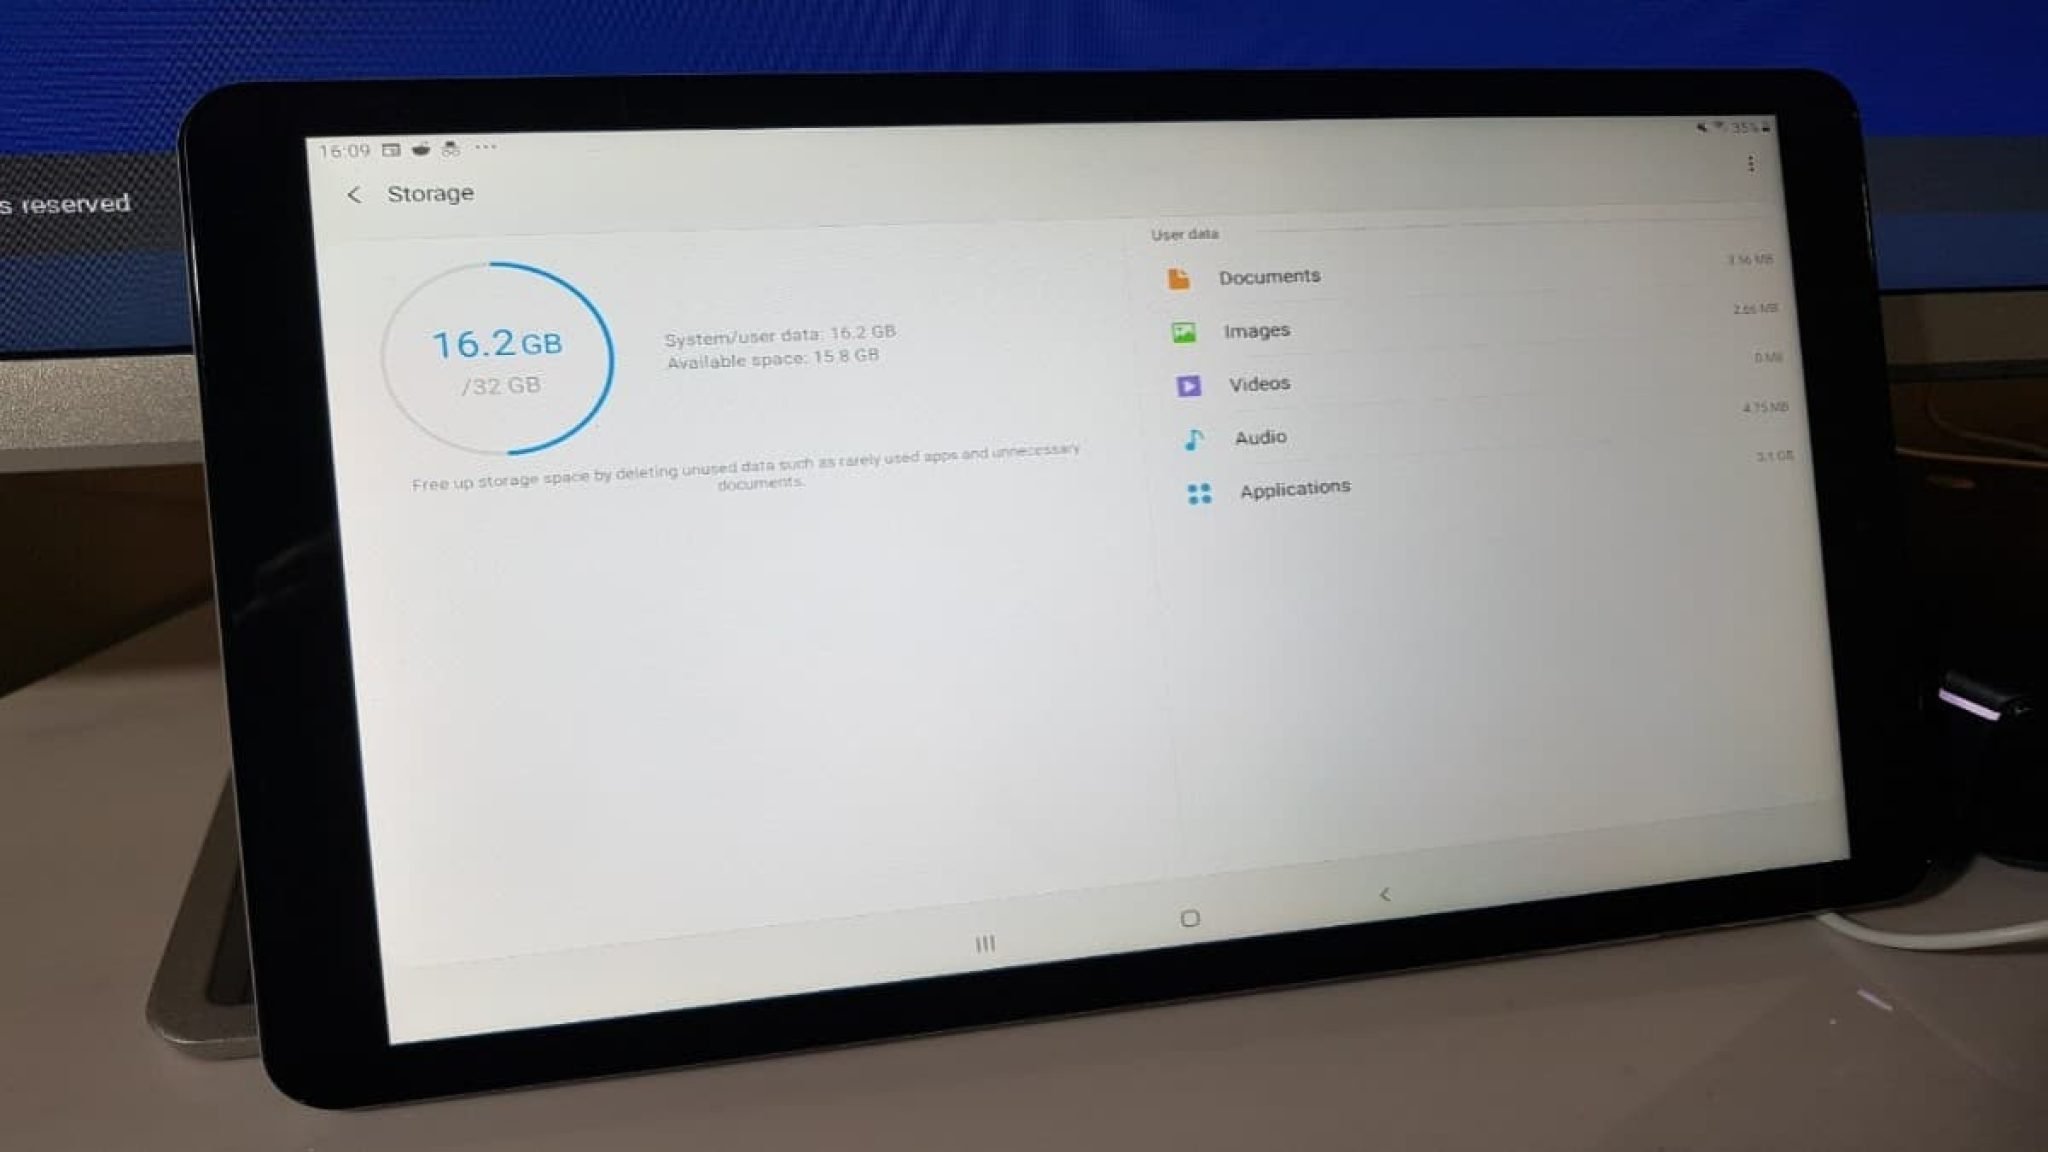
One of the main problems with bloatware is the impact it has on storage space. Many preinstalled apps can take up a significant amount of space, leaving users with limited room for their own apps, photos, videos, and other media. This can be particularly frustrating for users with devices that have limited internal storage capacities.
In addition to storage issues, bloatware can also consume system resources, such as CPU power, RAM, and battery life. Some preinstalled apps may run in the background, even when not actively in use, which can slow down device performance and drain battery life unnecessarily. Removing or disabling these apps can help optimize system resources and improve overall device speed and battery efficiency.
Furthermore, bloatware can clutter the user interface and make it more difficult to find and access the apps that are truly important to you. By removing unwanted apps, you can streamline your device’s interface and focus on the apps that you actually use and need.
In the next sections, we will explore different methods to remove bloatware from your Android tablet, giving you the freedom to declutter your device, free up storage space, and enhance its overall performance. Whether you choose to uninstall, disable, or even root your device, we’ve got you covered with step-by-step instructions.
Why Remove Bloatware?
There are several compelling reasons why you should consider removing bloatware from your Android tablet. Let’s take a closer look at the key benefits:
1. Free up Storage Space: Bloatware consumes valuable storage space on your device. Many preinstalled apps take up a significant amount of storage, leaving you with limited room for your own apps, photos, videos, and other files. By removing bloatware, you can free up storage space and have more room for the things that matter to you.
2. Improve Performance: Bloatware can have a negative impact on your device’s performance. These apps often run in the background, using up system resources like CPU power and RAM. This can result in slower performance, longer app loading times, and decreased responsiveness. By removing or disabling these unnecessary apps, you can optimize your device’s resources and improve its overall performance.
3. Enhance Battery Life: Some preinstalled apps are notorious for consuming battery power in the background. They may have unnecessary background processes or push notifications that constantly keep your device awake. By removing these apps, you can extend your device’s battery life and enjoy longer usage between charges.
4. Optimize Device Customization: Removing bloatware gives you more control and customization options for your Android tablet. Instead of being stuck with apps you don’t need or use, you can personalize your device with the apps that align with your interests and preferences. This allows you to create a more streamlined and personalized user experience.
5. Reduce Clutter: Bloatware can clutter your device’s app drawer, making it harder to find the apps you actually want to use. By removing unwanted apps, you can declutter the interface and make it easier to navigate and access your favorite apps.
It’s important to note that while removing bloatware offers several benefits, there are a few considerations to keep in mind. Removing certain system apps or essential components may cause stability issues or limitations in functionality. It’s recommended to carefully review the apps you plan to remove and proceed with caution.
In the following sections, we’ll explore various methods to remove bloatware from your Android tablet, giving you the flexibility to choose the approach that best suits your needs and technical expertise.
Precautions to Take Before Removing Bloatware
Before you dive into removing bloatware from your Android tablet, it’s important to take some precautions to ensure a smooth and successful process. Here are some essential steps to follow:
1. Backup your Data: Before making any changes to your device, it’s crucial to back up your important data, including contacts, photos, videos, and any other files you don’t want to lose. This step is essential to avoid the risk of accidentally deleting important information during the removal process.
2. Research the Apps: Take the time to research and identify the preinstalled apps on your Android tablet. Not all preinstalled apps are bloatware, and some may be necessary system services or provide valuable functionality. It’s important to understand the purpose and potential consequences of removing specific apps before proceeding.
3. Make a List: Take inventory of the apps you want to remove or disable. Create a list of the apps you consider bloatware or unnecessary, as well as any system apps you’re unsure about. Having a clear list of the apps you want to address will help you stay organized throughout the process.
4. Check for Updates: Before removing any apps, ensure that your Android tablet is up to date with the latest software updates. Manufacturers often release updates that may improve system performance or address known issues with certain apps. Keeping your device updated can prevent compatibility issues or potential conflicts when removing bloatware.
5. Research Removal Methods: Familiarize yourself with the different methods of removing or disabling bloatware on your particular Android tablet model. Each method may have its advantages and limitations, and it’s important to choose the approach that best suits your needs and technical proficiency.
6. Read User Experiences: To gain insights into the removal process and potential risks associated with certain apps, read user experiences and recommendations from forums, online communities, or reputable tech websites. This can help you make informed decisions and avoid unexpected issues during the removal process.
7. Proceed with Caution: When removing bloatware, it’s important to proceed with caution and follow instructions carefully. Removing system apps or essential components can have unintended consequences, such as instability or limited functionality. If you’re unsure about removing a specific app, it’s best to research further or seek guidance from knowledgeable sources.
By taking these precautions, you can minimize the risk of encountering problems or accidentally removing critical components of your Android tablet. Following these steps will help ensure a safe and successful removal of bloatware, allowing you to optimize your device’s performance and customize it according to your needs.
Method 1: Uninstalling Bloatware
One of the simplest and most straightforward methods to remove bloatware from your Android tablet is by uninstalling the unwanted apps. Here’s how you can do it:
1. Open the Settings: Go to your Android tablet’s Settings menu. You can usually find the Settings app in your app drawer or by swiping down from the top of the screen and tapping the gear icon.
2. Select Apps or Applications: In the Settings menu, look for an option called “Apps” or “Applications” and tap on it. This will take you to a list of all the apps installed on your device.
3. Find the Bloatware: Scroll through the list of installed apps and identify the ones you want to remove. Bloatware apps are often preinstalled or have the manufacturer or carrier’s name associated with them.
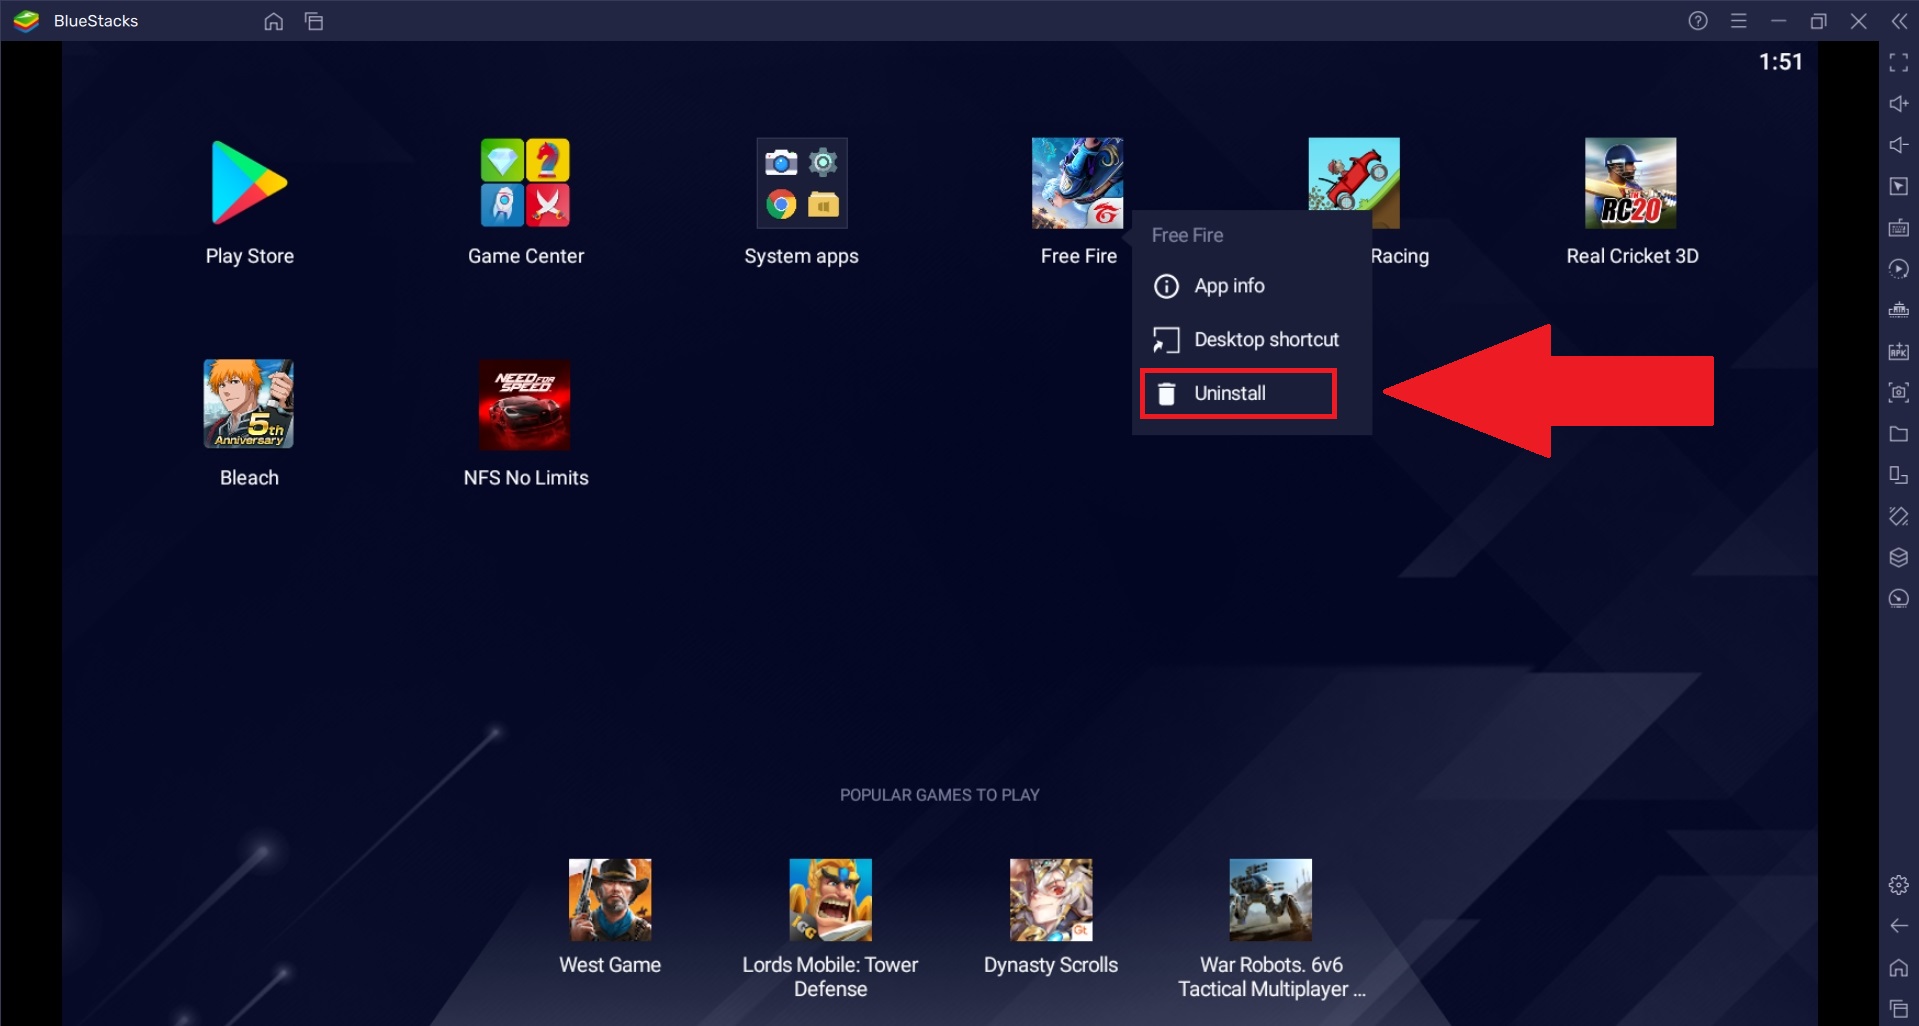
4. Tap on the App: Tap on the app you want to uninstall. This will open the app’s information page.
5. Uninstall the App: On the app’s information page, you should see an option to uninstall the app. Tap on it, then confirm the action when prompted. Keep in mind that some system apps may not have the uninstall option available, as they are essential for the functioning of your device.
6. Repeat: Repeat steps 4 and 5 for each bloatware app you want to remove from your Android tablet.
7. Restart Your Device: Once you have uninstalled the desired bloatware apps, it’s a good idea to restart your Android tablet. This helps ensure that all changes take effect and that your device runs smoothly without any leftover traces of the uninstalled apps.
It’s worth noting that while this method works for most bloatware apps, there may be some system apps that cannot be uninstalled using the standard method. In such cases, you can proceed to the next methods we’ll discuss to either disable or remove those stubborn bloatware apps.
Removing bloatware by uninstalling it not only frees up valuable storage space but also ensures that these apps are completely removed from your device. This method is ideal for users who prefer a clean and clutter-free Android tablet experience.
Now that you’re familiar with the first method, let’s explore additional approaches to removing bloatware from your Android tablet in the following sections.
Method 2: Disabling Bloatware
If you’re unable to uninstall certain system apps or prefer a less permanent method, you can choose to disable bloatware on your Android tablet. Disabling an app prevents it from running in the background and occupying system resources without completely removing it from your device. Follow these steps to disable bloatware:
1. Open the Settings: Go to the Settings menu on your Android tablet. You can usually find it in the app drawer or by swiping down from the top of the screen and tapping the gear icon.
2. Select Apps or Applications: In the Settings menu, look for the option labeled “Apps” or “Applications” and tap on it. This will display a list of all the apps installed on your device.
3. Find the Bloatware: Scroll through the list of installed apps and locate the bloatware apps that you want to disable. These apps are often preinstalled or have the manufacturer or carrier’s name associated with them.
4. Tap on the App: Tap on the app that you want to disable. This will open the app’s information page.
5. Disable the App: On the app’s information page, look for the “Disable” button and tap on it. You will be prompted to confirm the action. Disabling the app will prevent it from running in the background and using system resources.
6. Repeat: Repeat steps 4 and 5 for each bloatware app that you want to disable on your Android tablet.
7. Restart Your Device: It is recommended to restart your Android tablet after disabling bloatware. This helps ensure that the changes take effect and that your device operates smoothly without any leftover traces of the disabled apps.
By disabling bloatware, you can reclaim system resources and prevent these apps from consuming valuable CPU power, RAM, and battery life. Disabling bloatware is a non-permanent method, which means you can easily enable the apps again if needed.
However, it’s important to note that not all system apps can be disabled. Some essential system components may not have the disable option available. In such cases, you can explore the alternative methods we’ll cover to further address bloatware on your Android tablet.
Now that you’re familiar with disabling bloatware, let’s delve into other techniques you can use to remove or manage bloatware on your Android tablet in the upcoming sections.
Method 3: Using a Third-Party App
If the built-in methods of uninstalling or disabling bloatware on your Android tablet are not sufficient, you can turn to third-party apps specifically designed to manage and remove bloatware. These apps provide more advanced features and greater flexibility in dealing with unwanted preinstalled applications. Follow these steps to remove bloatware using a third-party app:
1. Research and Choose a Third-Party App: Start by researching and selecting a reputable third-party app that specializes in bloatware removal. There are several apps available on the Google Play Store, such as “NoBloat Free” and “SD Maid,” which offer advanced bloatware management features.
2. Download and Install the App: Once you’ve chosen a suitable app, download and install it from the Google Play Store. Follow the on-screen instructions to complete the installation process.
3. Launch the App: Open the third-party app that you installed. It will usually have a user-friendly interface with options to manage and remove bloatware.
4. Grant Necessary Permissions: The app may require certain permissions to access system files and remove bloatware effectively. Grant the necessary permissions when prompted to allow the app to perform its functions properly.
5. Select Bloatware Apps: Once you’re inside the app, you’ll typically see a list of installed apps on your Android tablet. Identify the bloatware apps that you want to remove and select them from the list.
6. Remove the Bloatware: Follow the app’s instructions to remove the selected bloatware apps. The app will handle the removal process, ensuring that the apps are completely uninstalled from your device.
7. Restart Your Device: After removing the bloatware apps, it’s a good idea to restart your Android tablet. This helps ensure that any changes made by the third-party app take effect and that your device operates smoothly without any leftover traces of the removed apps.
Third-party apps designed for bloatware removal offer additional features such as batch removal, system app identification, and the ability to freeze or hide apps. These apps can be a powerful tool for managing and optimizing your Android tablet by removing unwanted preinstalled applications.
It’s important to note that using third-party apps to remove bloatware may require root access to your device. Rooting your Android tablet can provide you with elevated permissions, allowing you to make deeper modifications to the system. However, it’s worth considering the potential risks and drawbacks of rooting, such as voiding warranty or compromising device security.
Now that you’re acquainted with using third-party apps to remove bloatware, let’s explore another method that involves rooting your Android tablet in the next section.
Method 4: Rooting Your Android Tablet
If you’re seeking more advanced control over your Android tablet and want to have complete freedom to remove bloatware and make deeper modifications, you can consider rooting your device. Rooting gives you superuser access, allowing you to bypass system restrictions and have full control over your device. Here’s a general overview of the process:
1. Research and Understand Rooting: Before proceeding with rooting, it’s crucial to thoroughly research and understand the implications, benefits, and risks associated with rooting your Android tablet. Various online resources and communities can provide you with valuable information and insights into the rooting process.
2. Backup your Data: Prior to rooting your device, make sure to create a complete backup of your data, including apps, contacts, photos, videos, and any other files you want to preserve. Rooting involves making changes to the device’s system, and there is a risk of data loss during the process.
3. Find a Reliable Rooting Method: Different Android tablets may require specific rooting methods, so it’s essential to find a reliable rooting method that is compatible with your device model and Android version. Reputable websites, forums, and communities for Android enthusiasts can provide you with the necessary guidance and instructions.
4. Enable Developer Options: To proceed with rooting, you usually need to enable “Developer Options” on your Android tablet. This option is usually hidden and can be accessed by going to the Settings menu, tapping on “About Phone” or “About Tablet,” and then finding the “Build Number.” Tap on the “Build Number” multiple times until the device notifies you that you are now a developer.
5. Unlock Bootloader (if necessary): Some Android devices require unlocking the bootloader before rooting. This step varies depending on the device manufacturer and model. Detailed instructions for unlocking the bootloader can usually be found on the manufacturer’s website or in trusted Android forums.
6. Root Your Device: Once you have prepared your device and followed the necessary steps, you can proceed with rooting your Android tablet. This typically involves using specific software, such as KingRoot or SuperSU, to gain superuser access and install a custom recovery onto your device.
7. Remove Bloatware: After successfully rooting your Android tablet, you can utilize various root-enabled apps or file managers to remove bloatware. These tools allow you to uninstall or freeze system apps, including the preinstalled bloatware that was previously unremovable.
It’s important to note that rooting your device has its risks and consequences. Rooting may void your device’s warranty, make your device more vulnerable to security threats if not done cautiously, and certain apps or features may no longer work correctly.
Before proceeding with rooting, carefully weigh the advantages and disadvantages, and ensure you have a good understanding of the process. It may be advisable to consult with experienced users or seek professional help if you’re unsure about the rooting process or its implications for your specific Android tablet model.
Now that you’re familiar with the process of rooting your Android tablet, let’s summarize the various methods we’ve discussed in the concluding section.
Conclusion
Removing bloatware from your Android tablet can significantly improve its performance, storage space, and customization options. Throughout this guide, we explored various methods to address bloatware, catering to different user preferences and technical proficiencies.
We started by introducing bloatware and highlighting the reasons why it’s beneficial to remove it. We discussed how bloatware occupies storage space, consumes system resources, and hinders customization options on your device.
Before diving into the removal methods, we emphasized the importance of taking precautions. Backing up your data, researching the apps, and understanding the potential consequences are vital steps to ensure a smooth process and avoid any unintended issues.
Method 1 focused on the straightforward approach of uninstalling bloatware directly from the Settings menu. This method is ideal for users who prefer a clean and clutter-free Android tablet experience.
Method 2 introduced the option of disabling bloatware, which prevents the apps from running in the background without completely removing them from your device. Disabling apps can help reclaim valuable system resources while allowing for easy re-enabling if needed.
For those looking for more advanced features and flexibility, Method 3 involved using a third-party app specifically designed for bloatware management. These apps offer additional functionality, including batch removal, system app identification, and freezing or hiding apps.
Lastly, Method 4 explored the option of rooting your Android tablet to gain superuser access and have complete control over your device. Rooting allows for removal of system apps and deeper modifications to optimize your tablet’s performance and customization options. However, it’s important to consider the potential risks and consequences associated with rooting.
By employing these methods, you can achieve a more streamlined and personalized Android tablet experience by removing unnecessary apps and reclaiming valuable resources. It’s essential to understand the implications and risks involved with each method, ensuring that they align with your specific needs and technical proficiency.
Remember, as with any modifications made to your device, it’s crucial to proceed with caution, back up your data, research thoroughly, and follow instructions accurately. By doing so, you can successfully remove bloatware and optimize your Android tablet according to your preferences.
We hope this guide has provided useful insights and guidance to help you remove bloatware from your Android tablet effectively. Enjoy a faster, more efficient, and personalized tablet experience!