Introduction
Welcome to the world of Android customization! If you own an Android tablet and want to unlock its full potential, rooting is the way to go. Rooting allows you to gain administrative access to your device, giving you the freedom to customize it even further.
But what exactly is rooting? In simple terms, rooting is the process of obtaining privileged access to the Android operating system. By rooting your Android tablet, you can remove pre-installed applications, install custom ROMs, tweak system settings, and even uninstall bloatware that may be slowing down your device.
Before you dive into the world of rooting, it’s important to understand the benefits and considerations associated with this process. This guide will walk you through everything you need to know to successfully root your Android tablet with a computer.
Keep in mind that rooting your Android tablet comes with both advantages and risks. On one hand, you gain access to advanced customization options and improved performance. On the other hand, you may void your warranty and there is a small risk of damaging your device if the rooting process is not done correctly.
Before we proceed, let’s take a look at the benefits you can enjoy after successfully rooting your Android tablet.
What is Rooting?
Rooting is the process of gaining privileged access to your Android device’s operating system. It grants you administrator-level control and enables you to make changes that are usually restricted by the device manufacturer or mobile carrier.
When you purchase an Android tablet, it comes with a locked operating system that limits certain functionalities and customizations. By rooting your tablet, you effectively unlock its full potential and gain complete control over its software.
Rooting can be compared to jailbreaking in the iOS world, but it’s important to note that the concepts and methods are different.
So, what exactly can you do with a rooted Android tablet?
Remove bloatware: Many Android tablets come with pre-installed applications that you may not use or need. These apps occupy precious storage space and may even run in the background, consuming system resources. Rooting allows you to uninstall or completely remove these unwanted apps, giving you more space and improving overall performance.
Install custom ROMs: After rooting your tablet, you can install custom ROMs. These modified versions of Android OS can offer enhanced features, improved performance, and even a more visually appealing user interface. Custom ROMs also provide the opportunity to experience the latest Android versions on your tablet, even if the manufacturer has stopped releasing official updates.
Tweak system settings: Want to squeeze out more battery life or optimize your tablet’s performance? Rooting gives you access to system-level settings, allowing you to make deep customizations that can significantly enhance your device’s performance and battery efficiency.
Backup and restore: Rooting enables you to use advanced apps that can create full system backups, giving you the ability to restore your tablet to a previous state if anything goes wrong. This is particularly useful if you plan on experimenting with custom ROMs or system modifications.
Use root-only apps: Many apps in the Google Play Store require root access to unlock their full functionality. By rooting your tablet, you can enjoy a wide range of powerful apps that are not available to non-rooted devices.
Now that you have a better understanding of rooting and its capabilities, let’s move on to the benefits you can expect to gain by rooting your Android tablet.
Benefits of Rooting an Android Tablet
Rooting your Android tablet can unlock a world of possibilities and provide several key benefits. While the process may void your warranty and carry some risks, the advantages of rooting far outweigh the drawbacks for many tech-savvy users. Here are some of the main benefits you can expect:
1. Customization: Rooting allows you to fully customize your Android tablet according to your preferences. You can change system fonts, tweak the appearance of the user interface, and even install custom themes to give your tablet a unique look and feel.
2. Increased Performance: Rooting your tablet gives you the ability to remove unnecessary bloatware and system apps that consume resources. This can free up valuable storage space and RAM, resulting in a smoother and faster performance.
3. Access to Root-only Apps: Many powerful apps require root access to unlock their full potential. With a rooted tablet, you can take advantage of these apps and enjoy advanced features that are not available to non-rooted devices. This includes applications for backup and data management, system monitoring, and advanced customization.
4. Enhanced Battery Life: Rooting enables you to fine-tune various system settings, such as CPU frequency and screen-off behavior, to optimize battery performance. With root access, you can install battery-saving apps and mods that can significantly extend your tablet’s battery life.
5. System-Level Tweaks: Rooting grants you access to system files and directories, allowing you to make system-level modifications. From using ad-blockers to implementing performance-boosting tweaks, rooting gives you the flexibility to personalize your tablet’s operating system to meet your specific needs.
6. Android Version Updates: Manufacturers often stop providing software updates for older Android tablets, leaving users stuck with outdated versions. Rooting your tablet opens up the option to install custom ROMs, enabling you to enjoy the latest Android versions and features on your device.
7. Full Backup and Restore: Rooting allows you to create complete system backups using advanced backup apps. This gives you the peace of mind to experiment with different customizations, knowing that you can easily revert to a working state if anything goes wrong.
While rooting your Android tablet offers numerous benefits, it’s important to approach the process with caution and research thoroughly. Understanding the risks involved and following proper rooting procedures will help ensure a successful outcome. Before you proceed, let’s explore some important considerations to keep in mind before rooting your Android tablet.
Things to Consider Before Rooting an Android Tablet
Rooting an Android tablet can provide exciting new possibilities, but it’s important to consider a few key points before diving into the process. Taking the time to understand these considerations will help you make an informed decision and ensure a smooth rooting experience. Here are some things to keep in mind:
1. Warranty Void: Rooting your Android tablet typically voids the device’s warranty. This means that if any issues arise with your tablet after rooting, the manufacturer may refuse to provide support or service. It’s important to weigh the benefits of rooting against the potential risks before proceeding.
2. Security Risks: Rooting bypasses security restrictions put in place by the manufacturer, potentially exposing your tablet to greater security risks. It’s crucial to only download apps and files from trusted sources to minimize the chances of malware or other malicious software affecting your device.
3. Device Compatibility: Not all Android tablets can be easily rooted, as the process may vary depending on the device model and software version. Before attempting to root your tablet, ensure that it is compatible with the rooting method you plan to use. Researching online forums and communities dedicated to Android rooting can provide valuable insights into specific tablet models.
4. Backup Your Data: Rooting can potentially lead to data loss or even bricking your tablet, rendering it unusable. It is crucial to back up all important data, including apps, contacts, photos, and documents, before proceeding with the rooting process. This way, you can restore your tablet to its previous state if anything goes wrong.
5. Research and Preparation: Rooting an Android tablet requires some technical knowledge and preparation. Being familiar with the rooting process, understanding the risks involved, and following step-by-step instructions can greatly increase your chances of success. Research online tutorials, guides, and forums to gather information and ensure that you are well-prepared before starting the rooting process.
6. Unbrick Methods: If your tablet gets stuck in a boot loop or becomes unresponsive during the rooting process, it’s important to have a plan in place to recover it. Researching unbrick methods specific to your tablet model can help you troubleshoot and fix any issues that may arise during or after rooting.
Remember: Rooting your tablet is a one-way process. While some methods offer the ability to unroot your device, it is not always guaranteed. Make sure you are fully committed to the root before proceeding.
By considering these factors and understanding the potential implications of rooting, you can make an informed decision and proceed with confidence. Now that you are aware of the important considerations, let’s move on to the preparation steps required before rooting your Android tablet.
Preparing Your Android Tablet for Rooting
Before diving into the process of rooting your Android tablet, it’s crucial to ensure that you have completed the necessary preparations. Taking these steps will help minimize the risk of encountering issues during the rooting process and maximize your chances of a successful root. Here’s what you need to do to prepare your Android tablet:
1. Verify Compatibility: Make sure that your tablet is compatible with rooting methods. Research online forums and resources to determine if there are any compatibility issues specific to your device model and software version.
2. Charge Your Tablet: Ensure that your tablet has sufficient battery charge before starting the rooting process. It’s recommended to have at least 50% battery charge to prevent any interruptions during the root, which could potentially lead to bricking your device.
3. Enable USB Debugging: To establish a connection between your tablet and computer, you’ll need to enable USB debugging. Go to the “Settings” menu on your tablet, navigate to “Developer options,” and toggle on the USB debugging option.
4. Unlock Bootloader: Some Android tablets have locked bootloaders, which can prevent you from installing custom recoveries or gaining root access. Check if your tablet’s bootloader needs to be unlocked and research the steps specific to your tablet model.
5. Backup Your Data: Before proceeding with the rooting process, it’s essential to back up all your important data. This includes contacts, photos, videos, documents, and any other files you don’t want to lose. Backup options include using cloud storage, connecting your tablet to a computer and transferring files, or using dedicated backup apps from the Play Store.
6. Download Required Files: Research and download the necessary files and tools for rooting your specific tablet model. This may include custom recovery software, root exploit files, and any other resources required for the rooting process.
7. Read and Understand Instructions: Carefully study the rooting instructions provided by trusted sources. Make sure you understand each step before proceeding. Remember, following the correct procedure is crucial to avoid potential pitfalls and complications.
8. Disable Anti-virus and Firewall: Temporarily disable any anti-virus software or firewall on your computer before beginning the rooting process. These security measures could interfere with the root process and cause issues.
9. Familiarize Yourself with Unrooting: Understand the unrooting process for your tablet in case you decide to revert to the original software. Knowing how to unroot can help you recover your device if needed.
By completing these preparation steps, you will be well-equipped to commence the rooting process confidently. Next, we will delve into the installation of the necessary software on your computer to facilitate the rooting process.
Installing Necessary Software on Your Computer
Before you can begin rooting your Android tablet, you need to install specific software on your computer. This software will facilitate the communication between your tablet and the computer, enabling you to execute the rooting process seamlessly. Here’s what you need to do to install the necessary software:
1. USB Drivers: Ensure that the USB drivers for your Android tablet are installed on your computer. These drivers allow your computer to recognize and communicate with your tablet when connected via USB. You can usually find the USB drivers on the manufacturer’s website or through a quick internet search.
2. Android SDK: The Android Software Development Kit (SDK) contains the necessary tools and resources to interact with Android devices. Download the Android SDK from the official Android Developers website and follow the installation instructions provided. This will install the Android Debug Bridge (ADB) and Fastboot utilities, which are essential for the rooting process.
3. ADB and Fastboot Drivers: After installing the Android SDK, you need to set up the ADB and Fastboot drivers. These drivers allow your computer to communicate with your tablet’s bootloader while it’s in the fastboot mode. Follow the instructions specific to your computer’s operating system to install the ADB and Fastboot drivers.
4. Custom Recovery: Depending on the rooting method you choose, you may need to install a custom recovery software such as TWRP (Team Win Recovery Project). Custom recoveries allow you to flash custom ROMs, create backups, and install root packages on your tablet. Visit the official TWRP website or the respective forum for your tablet model to download and install the custom recovery.
5. Root Exploit Tools: Research and download the root exploit tools required for your specific tablet model and rooting method. These tools exploit vulnerabilities in the Android system to gain root access. Make sure you download these tools from trusted sources to avoid any malicious software or viruses.
6. Verify Software Compatibility: Ensure that the software you’ve installed is compatible with your tablet model and Android version. Incompatible software can cause issues during the rooting process and potentially harm your tablet. Verify compatibility by checking the software’s documentation or visiting online forums and communities dedicated to your tablet model.
7. Test Connection: Connect your tablet to the computer using a USB cable and test the connection. Open a command prompt or terminal on your computer and enter the command “adb devices”. If your device is listed, it means the connection is successful and the necessary software is installed correctly.
By installing the required software on your computer, you’re now ready to proceed with the next steps in the rooting process. The following section will guide you on enabling USB debugging on your Android tablet, which is a crucial step before initiating the rooting process.
Enabling USB Debugging on Your Android Tablet
Before you can start the rooting process, it’s essential to enable USB debugging on your Android tablet. USB debugging allows your computer to communicate with your tablet and execute commands through the Android Debug Bridge (ADB) utility. Enabling USB debugging is a straightforward process, and here’s how you can do it:
1. Go to Developer Options: On your Android tablet, open the “Settings” app, and scroll down to find the “About Phone” or “About Tablet” option. Tap on it to access the device information.
2. Locate Build Number: In the device info section, look for the “Build Number” or “Software Version” entry. You may need to tap on “Software Information” to access the build number.
3. Tap on Build Number: Tap on the “Build Number” entry repeatedly (usually about seven times) until you see a message saying, “You are now a developer!” or something similar. This enables the hidden Developer Options on your tablet.
4. Go Back to Settings: Once you have enabled the Developer Options, go back to the main settings menu.
5. Open Developer Options: Scroll down and locate the newly revealed “Developer Options” or “Developer Settings” menu. Tap on it to access the developer settings.
6. Enable USB Debugging: In the Developer Options menu, find the “USB Debugging” option and toggle it on.
7. Confirm USB Debugging: A prompt may appear asking you to confirm USB debugging. Read the prompt carefully, and if you agree, tap “OK” or “Allow” to enable USB debugging. Note that the wording may vary slightly depending on your Android version.
8. Connect Your Tablet to Your Computer: Use a USB cable to connect your tablet to your computer. Ensure that your computer recognizes the tablet and establishes a proper connection. You may be prompted to allow USB debugging on your tablet when connecting it to the computer for the first time.
9. Verify USB Debugging: Open a command prompt or terminal on your computer and enter the command “adb devices”. If your tablet’s device ID is listed, it means that USB debugging is successfully enabled, and your tablet is ready for the rooting process.
Enabling USB debugging is a crucial step in the rooting process as it allows your tablet to establish a connection with your computer, facilitating the execution of commands. With USB debugging enabled, you can proceed to the next steps of connecting your tablet to the computer and backing up your tablet’s data.
Connecting Your Android Tablet to the Computer
Once you have enabled USB debugging on your Android tablet, the next step is to establish a connection between your tablet and the computer. This connection allows you to transfer files, execute commands, and initiate the rooting process. Here’s how you can connect your Android tablet to the computer:
1. Ensure USB Debugging is Enabled: Double-check that USB debugging is enabled on your tablet by following the steps outlined in the previous section. This is a crucial prerequisite for establishing a successful connection.
2. Use a USB Cable: Connect one end of a USB cable to your tablet’s USB port, typically located at the bottom or side of the device. Connect the other end of the cable to an available USB port on your computer.
3. Select Connection Type: On your tablet, when prompted to select a USB connection type, choose “File Transfer” or “MTP” mode. This mode allows your computer to access the storage on your tablet and transfer files.
4. Verify Connection: Once connected, your tablet may display a notification indicating a USB connection. Additionally, your computer should recognize the tablet and may display a notification or make a sound to confirm the successful connection.
5. Test Connection: Open a command prompt or terminal on your computer and enter the command “adb devices”. If your tablet’s device ID is listed, it signifies that the connection has been established successfully. This confirms that your tablet is ready to communicate with the computer during the rooting process.
6. Allow USB Debugging: At times, you may see a prompt on your tablet asking you to allow USB debugging for the specific computer you connected to. If prompted, select “Always allow from this computer” or a similar option to grant permanent access for future connections.
7. Troubleshooting Connection Issues: If your tablet is not recognized by the computer, try the following troubleshooting steps:
- Ensure the USB cable is properly connected on both ends.
- Try using a different USB port on your computer.
- Restart both your tablet and computer.
- Install the latest USB drivers specific to your tablet model on your computer.
Once the connection between your Android tablet and the computer is established, you’re ready to proceed with the next steps, which may include backing up your tablet’s data and unlocking the bootloader. Following a successful connection, you can confidently move forward in the rooting process.
Backing Up Your Android Tablet
Before proceeding with the rooting process, it’s crucial to back up your Android tablet to ensure the safety of your data. While rooting itself doesn’t necessarily erase your data, there is always a small risk of data loss or unforeseen issues during the process. Creating a backup will give you peace of mind knowing that your data is protected. Here’s how you can back up your Android tablet:
1. Use Built-in Backup Options: Most Android tablets come with built-in backup options that allow you to back up your data to your Google account or other cloud storage services. Go to the “Settings” menu on your tablet, navigate to “System” or “Backup & Restore,” and select the backup option that suits your preferences. Ensure that you back up important data such as contacts, app data, photos, videos, and any other files you don’t want to lose.
2. Sync Data with Google Account: Ensure that your tablet is synced with your Google account to back up essential data. This includes contacts, calendar events, app data, and device settings. To sync your tablet with your Google account, go to “Settings,” navigate to “Accounts” or “Cloud & Accounts,” select your Google account, and enable sync for the desired data categories.
3. Use Third-Party Backup Apps: There are several reliable third-party backup apps available on the Google Play Store that offer more advanced backup options. These apps allow you to create a complete backup of your tablet, including apps, app data, system settings, SMS messages, and more. Research and choose a reputable backup app that suits your needs, install it on your tablet, and follow the app’s instructions to create a backup.
4. Transfer Files to Computer: Connect your tablet to your computer using a USB cable and transfer important files, such as photos, videos, documents, and any other data that you want to safeguard. Simply drag and drop the files from your tablet’s storage to a folder on your computer.
5. Check Backup Completeness: Double-check all your backups to ensure that they are complete and include all the data you want to protect. Verify that the backup files are accessible and can be restored if needed.
6. Store Backups Securely: Ensure that your backups are stored in a safe and secure location. If you’re using cloud storage, make sure your account is properly protected with a strong password. If you’re storing backups on your computer, consider encrypting them or keeping them in a separate storage device to protect against data loss or theft.
Backing up your Android tablet is an essential step before proceeding with the rooting process. It guarantees that your important data is safeguarded, allowing you to restore it if something goes wrong during rooting or in case you want to revert to the original software later on. Now that you have a secure backup in place, you’re ready to move on to unlocking the bootloader, which is a necessary step for rooting your tablet.
Unlocking the Bootloader
Before you can proceed with the rooting process, you need to unlock the bootloader on your Android tablet. The bootloader is a piece of software that runs when you power on your device and decides whether to load the Android operating system or enter a recovery mode. Unlocking the bootloader is necessary to gain administrative access and install custom recoveries and ROMs. Follow these steps to unlock the bootloader:
1. Research the Process: Since the process to unlock the bootloader varies between tablet models, it’s important to research and find specific instructions for your tablet model. Visit the official website of your tablet manufacturer, or go to dedicated Android forums and communities to find the necessary instructions.
2. Enable Developer Options: If you haven’t done so already, enable Developer Options on your Android tablet. Go to the “Settings” menu, find the “About Phone” or “About Tablet” section, and tap on the build number multiple times until the Developer Options are unlocked.
3. Enable OEM Unlocking: In the Developer Options menu, look for the “OEM Unlock” or “Enable OEM Unlocking” option and toggle it on. This option allows you to unlock the bootloader on your tablet.
4. Backup Your Data: Before proceeding with unlocking the bootloader, ensure that you have created a backup of all your important data. This backup will protect your data in case anything goes wrong during the bootloader unlocking process.
5. Power Off the Tablet: Turn off your tablet completely by pressing and holding the power button, then select “Power off” from the options menu.
6. Boot into Bootloader/Fastboot Mode: Each tablet has a specific combination of buttons to enter the bootloader or fastboot mode. Consult the instructions for your tablet model to find the correct key combination. Once in bootloader/fastboot mode, a screen with device information and a list of options will appear.
7. Connect Your Tablet to the Computer: Connect your tablet to the computer using a USB cable while still in bootloader/fastboot mode.
8. Open Command Prompt or Terminal: Open a command prompt on your computer (Windows) or a terminal (macOS or Linux) and navigate to the directory where the ADB and Fastboot tools are installed.
9. Unlock the Bootloader: Enter the command specific to your tablet model to unlock the bootloader. The command may vary, but it typically starts with “fastboot oem unlock” followed by additional parameters. Press Enter to execute the command and unlock the bootloader.
10. Confirm Unlocking: On your tablet, you may be prompted to confirm the bootloader unlocking process. Use the volume keys to scroll through the options, and the power button to select “Yes” or “Confirm” to proceed.
11. Reboot: Once the bootloader is unlocked, use the command “fastboot reboot” to restart your tablet. The device will now boot up with an unlocked bootloader.
Unlocking the bootloader is a critical step in the rooting process, allowing you to install custom recoveries and modify the system. Keep in mind that unlocking the bootloader may void your warranty, and it’s important to follow the instructions specific to your tablet model to ensure a successful process. Now that your bootloader is unlocked, you’re ready to proceed with rooting your Android tablet using computer software.
Rooting Your Android Tablet Using Computer Software
Now that you have unlocked the bootloader on your Android tablet, you can proceed with the actual rooting process using computer software. There are various software tools available that simplify the rooting process and provide step-by-step instructions. Here’s a general guideline on how to root your Android tablet using computer software:
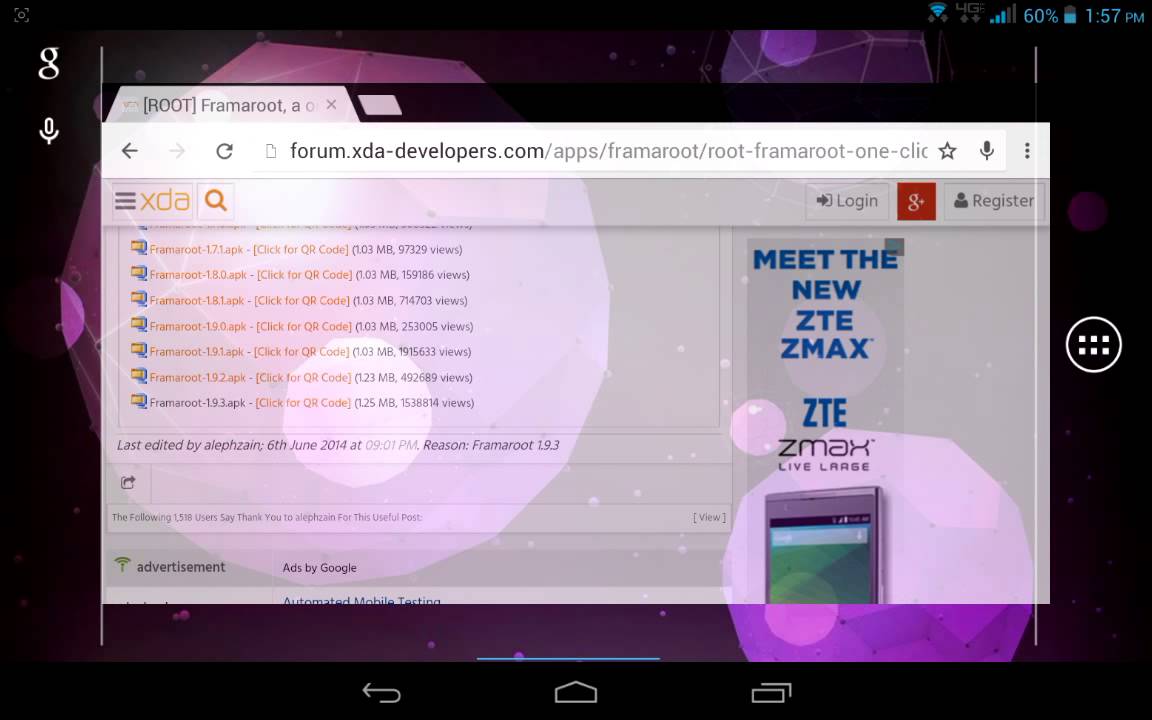
1. Research and Choose Rooting Software: Research different rooting software options that are compatible with your tablet model. Look for trusted and reputable tools that have a track record of successful rooting. Popular options include KingRoot, Magisk, and SuperSU.
2. Download and Install the Software: Go to the official website or trusted sources to download the rooting software onto your computer. Once downloaded, follow the installation instructions provided by the software to install it on your computer.
3. Enable USB Debugging: Ensure that USB debugging is still enabled on your tablet. If not, refer to the earlier section on enabling USB debugging and follow the steps to enable it.
4. Connect Your Tablet to the Computer: Use a USB cable to connect your tablet to the computer. Ensure the connection is secure and stable.
5. Launch the Rooting Software: Open the rooting software on your computer. The software should detect your tablet and provide instructions on how to proceed with the rooting process. Follow the on-screen instructions carefully.
6. Start the Rooting Process: Click on the “Root” or similar button within the rooting software to begin the rooting process. The software will start sending the required commands to your tablet to gain root access.
7. Wait for the Process to Complete: During the rooting process, the software will perform various tasks to gain root access on your tablet. This may take a few minutes, and your tablet may reboot multiple times. Do not disconnect the tablet from the computer during this process.
8. Verify Successful Root Access: Once the rooting process is complete, the software will notify you of successful root access. You can also verify root access by installing a root-checking app from the Google Play Store.
9. Safely Disconnect Your Tablet: After verifying successful root access, you can safely disconnect your tablet from the computer by unplugging the USB cable.
Keep in mind that the rooting process may vary depending on the software you choose and your tablet model. It’s crucial to follow the specific instructions provided by the rooting software and ensure compatibility with your device.
Rooting your Android tablet allows you to unlock its full potential and customize it further. However, it’s important to remember that rooting can void your warranty and may carry some risks. Proceed with caution and research thoroughly to ensure a successful and safe rooting process.
Now that you have rooted your Android tablet, you can explore a whole new world of customization and enjoy the benefits of having full administrative access to your device.
Verifying Successful Root Access
After rooting your Android tablet, it’s essential to verify whether the rooting process was successful and that your device now has root access. Verifying root access ensures that you can fully enjoy the benefits and functionality that come with rooting your tablet. Here are a few methods to verify successful root access:
1. Root Checker Apps: Install a root checker app from the Google Play Store. These apps are specifically designed to detect root access on your Android device. Launch the app, and it will check if your tablet has root privileges and display the result.
2. Access Root-Only Features: Take advantage of apps or features that require root access. Certain functionalities, such as ad-blocking apps, advanced system customizations, or backup apps that require root permissions, can now be utilized. Install root-only apps from the Play Store and see if they function properly.
3. File Explorer: Use a root-enabled file explorer, such as ES File Explorer or Solid Explorer, to access system directories and files that are typically inaccessible on non-rooted devices. If you can browse and modify these system files, it confirms that you have root access.
4. Terminal Emulator: Install a terminal emulator app, such as Termux, and enter root-specific commands. If the terminal emulator executes the commands without any issues and returns results that indicate root access, it confirms that your device is rooted.
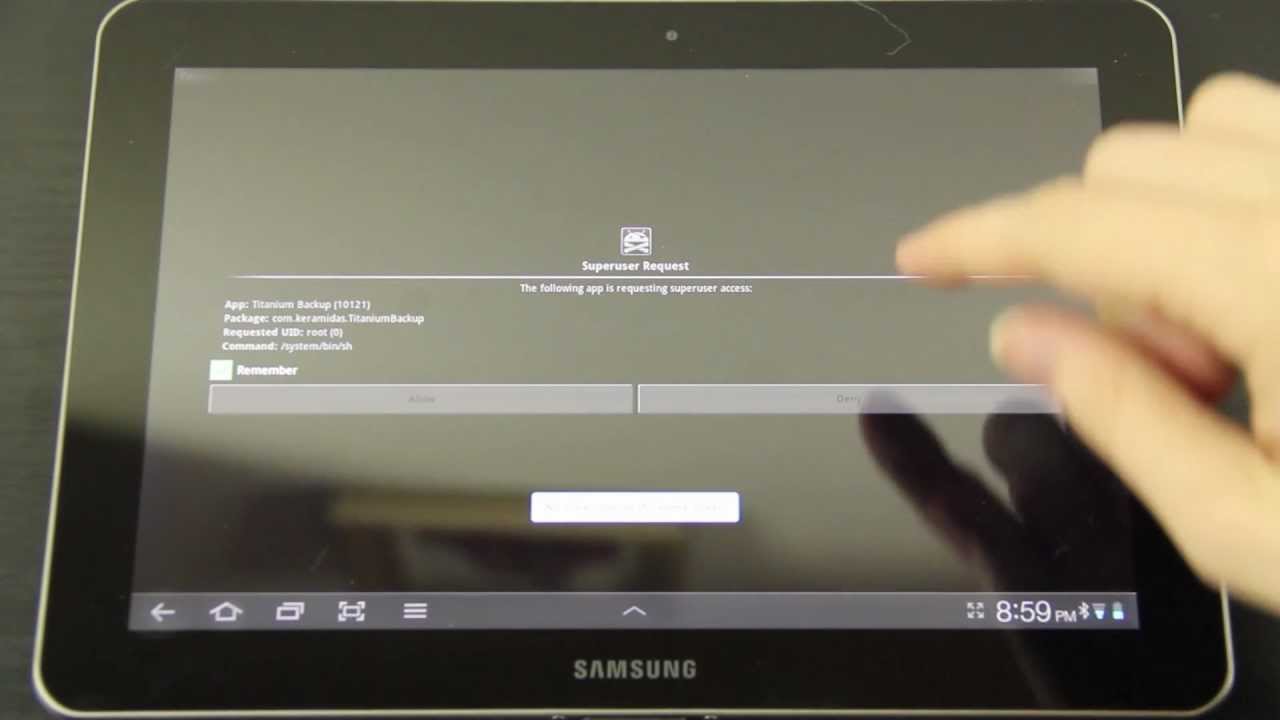
5. Superuser Management App: If you installed SuperSU or Magisk as part of the rooting process, you can use the respective management apps to check if your device has been granted root access. These apps provide control and manage the root permissions for various apps on your tablet.
6. SafetyNet Check: Perform a SafetyNet check using apps like SafetyNet Test or Magisk Manager. SafetyNet verifies the integrity and security of your device. If your tablet passes the SafetyNet check despite being rooted, it indicates that root access has been successfully granted without triggering any flags.
It’s important to note that different methods may provide varying results, depending on the specific tablet model and rooting method used. If one method doesn’t confirm root access, try another method to double-check.
Verifying successful root access will provide reassurance that your Android tablet has been successfully rooted, granting you full control and access to advanced customization options. With root access confirmed, you can confidently explore and maximize the benefits of rooting your tablet.
Troubleshooting Common Issues
While rooting your Android tablet can bring great benefits and customization options, it’s important to be aware of potential issues that may occur during the process. Here are some common issues that you may encounter when rooting your tablet, along with troubleshooting steps to resolve them:
1. Boot Loop: Getting stuck in a boot loop is a common issue after rooting. If your tablet keeps restarting and doesn’t fully boot up, try rebooting into recovery mode and clearing the cache partition. If that doesn’t work, you may need to restore your tablet to its factory settings or use a backup to revert to a previous state.
2. Bricking Your Tablet: Inexperienced rooting attempts or incorrect procedures can potentially brick your tablet, rendering it unusable. Always carefully follow the instructions specific to your tablet model and rooting method. If your tablet becomes bricked, seek help from dedicated Android forums or contact the tablet manufacturer for guidance on recovery methods.
3. Loss of Data: Rooting doesn’t typically erase data, but there’s still a small risk of data loss during the process. To mitigate this risk, create a thorough backup of your tablet’s data before starting the rooting process. This way, you can restore your data if anything goes wrong.
4. Rooting Fails: If the rooting software fails to gain root access or encounters errors during the process, try researching alternative root methods for your tablet model. There may be different approaches or tools available that are better suited for your specific device. Joining dedicated Android forums or seeking assistance from experienced users can also provide valuable troubleshooting insights.
5. System Instability: After rooting, you may experience certain apps crashing, system freezes, or overall system instability. Check if any incompatible apps or modifications are installed and causing the issues. Uninstall or disable them to resolve the problem. Additionally, consider using root management apps like SuperSU or Magisk to carefully manage which apps are granted root permissions.
6. Compatibility Issues: Some custom ROMs or root-specific apps may not be fully compatible with your tablet or specific Android version. Verify compatibility before installing custom ROMs and ensure that you’re using versions that are meant for your device. Research community forums and reviews to gather insights from other users with similar tablet models to ensure a smooth experience.
7. Warranty Void: Keep in mind that rooting your tablet may void the manufacturer’s warranty. If you encounter hardware issues or defects, the manufacturer may refuse to provide support or service. Consider the risks involved and whether the advantages of rooting outweigh the potential loss of warranty coverage.
If you encounter any issues while rooting your Android tablet, it’s crucial to remain calm and seek assistance from reliable sources. Online forums, dedicated Android communities, and experienced users can provide guidance and solutions to help you overcome problems and make the rooting process successful.
Remember, each tablet model and rooting method may have specific troubleshooting steps, so always consult the relevant resources and seek assistance from knowledgeable sources to effectively resolve any issues that arise during the rooting process.
Conclusion
Congratulations! You’ve reached the end of this guide on rooting your Android tablet with a computer. By gaining root access to your tablet, you have unlocked a world of customization and advanced functionality.
Throughout this guide, we have explored the concept of rooting and its benefits, as well as important considerations before embarking on the rooting process. We discussed the necessary preparations, including enabling USB debugging, installing required software on your computer, and backing up your tablet’s data.
We then delved into the steps of unlocking the bootloader, which is a crucial prerequisite for rooting. After unlocking the bootloader, we discussed the process of rooting your tablet using computer software, highlighting the importance of choosing trusted and compatible rooting tools. We also covered how to verify successful root access to ensure that the rooting process was completed successfully.
Additionally, we addressed potential troubleshooting issues that you may encounter while rooting your tablet, providing guidance for resolving common challenges. It’s important to follow proper procedures, exercise caution, and seek assistance from reliable sources to overcome any issues or complications that may arise.
Rooting your Android tablet gives you the power to customize and optimize your device, unleashing its full potential. However, it’s crucial to remember that rooting comes with certain risks, such as voiding your warranty or potential data loss. Always weigh the benefits against these risks before proceeding with the rooting process.
By following the steps and guidance provided in this guide, you are well-equipped to begin your journey into the realm of rooted Android tablets. Remember to stay informed, do thorough research, and proceed with caution to ensure a successful and enjoyable rooting experience.
Now that you have successfully rooted your Android tablet, you have full control over its operating system and can make it truly yours. Enjoy the freedom to customize, optimize, and explore the endless possibilities that rooting brings!