Introduction
Google Authenticator is a popular app that provides an additional layer of security for your online accounts. With the increasing threat of hacking and data breaches, it has become crucial to protect our personal information and sensitive data. Google Authenticator offers a simple and effective solution by generating unique verification codes that are required to log in to your accounts.
In this article, we will explore what the Google Authenticator app looks like and how it can benefit you. We will cover the process of downloading and installing the app, setting it up, and understanding its user interface. Additionally, we will discuss generating verification codes, adding accounts to Google Authenticator, managing and organizing accounts, and customizing the app’s settings. Lastly, we will touch on some common troubleshooting issues that you may encounter.
By the end of this article, you will have a clear understanding of the Google Authenticator app and how it can enhance the security of your online accounts. So, let’s dive in and take a closer look at this powerful authentication tool.
What is Google Authenticator App?
The Google Authenticator app is a two-factor authentication tool developed by Google. It serves as an additional layer of security for your online accounts by requiring a unique verification code in addition to your regular username and password. This verification code is generated directly on your mobile device and changes every few seconds, making it nearly impossible for hackers to gain unauthorized access to your accounts.
The app works by synchronizing with the respective online service or website that you want to secure. Once set up, whenever you log in to your account, you will be prompted to enter a verification code generated by the Google Authenticator app. This code acts as a one-time password and is valid only for a short period, ensuring that even if someone manages to steal your login credentials, they won’t be able to access your accounts without the verification code.
One of the advantages of the Google Authenticator app is that it operates offline, so you can still access your accounts even if you don’t have an internet connection. This feature makes it a reliable and convenient option for securing your accounts, especially when traveling or in areas with limited connectivity.
The Google Authenticator app is compatible with a wide range of online services, including Google, Facebook, Twitter, Dropbox, and many more. This means that you can use the app to secure multiple accounts across different platforms, providing a unified and streamlined approach to two-factor authentication.
Overall, the Google Authenticator app is a reliable and user-friendly tool that significantly enhances the security of your online accounts. By adding an extra layer of verification, it minimizes the risk of unauthorized access and protects your personal information. In the next sections, we will dive deeper into the functionalities and features of the Google Authenticator app.
Why use Google Authenticator?
There are several reasons why you should consider using the Google Authenticator app to secure your online accounts:
1. Enhanced security: Google Authenticator adds an extra layer of security to your accounts by requiring a unique verification code in addition to your regular login credentials. This significantly reduces the risk of unauthorized access, even if someone manages to obtain your username and password.
2. Two-factor authentication: The app implements a two-factor authentication (2FA) process, which is considered one of the most secure methods of protecting online accounts. With 2FA, even if your password is compromised, an attacker will still need the verification code from the Google Authenticator app to gain access.
3. Offline functionality: The Google Authenticator app works offline, which means you can still generate verification codes and access your accounts even without an internet connection. This is particularly useful when traveling or in situations where internet connectivity is limited.
4. Compatibility: The Google Authenticator app is compatible with a wide range of online services and websites. You can use it to secure accounts on popular platforms such as Google, Facebook, Twitter, Dropbox, and more. Having a single app for multiple accounts provides a convenient and streamlined approach to two-factor authentication.
5. Easy to use: The app features a user-friendly interface that makes it simple to set up and use. Once configured, the process of generating verification codes and entering them during login is quick and straightforward.
6. Multi-device support: Google Authenticator allows you to set up the app on multiple devices. This can be beneficial if you have a primary device and want a backup option or if you use different devices for different accounts.
7. Security key backup: The app provides the ability to create a backup of your accounts’ security keys. This ensures that if you lose or change your device, you can easily restore your accounts to the new device without any hassle.
Overall, using the Google Authenticator app offers numerous advantages in terms of account security, convenience, and compatibility. It is a trusted and widely used tool that helps protect your personal information and provides peace of mind when accessing online services.
How to download and install Google Authenticator?
To start using Google Authenticator, you’ll need to download and install the app on your mobile device. Follow these steps to get started:
Step 1: Choose your device: Google Authenticator is available for both Android and iOS devices. Open the respective app store on your device (Google Play Store for Android or App Store for iOS) and search for “Google Authenticator”.
Step 2: Download and install the app: Select the Google Authenticator app from the search results and tap on the “Download” or “Install” button. The app will start downloading and installing automatically on your device.
Step 3: Launch the app: Once the installation is complete, locate the Google Authenticator app on your device’s home screen or app drawer and tap on it to launch the app.
Step 4: Set up Google Authenticator: Upon opening the app, you will be prompted to set up Google Authenticator. You can either choose to set up an account by scanning a QR code or by manually entering an account key.
Option 1: Scan QR code: If the online service or website supports QR code scanning, select the “Scan a barcode” or “Scan QR code” option within the app. Use your device’s camera to scan the QR code displayed on the screen of the service or website you want to secure. The app will automatically detect the QR code and set up the account in Google Authenticator.
Option 2: Enter account key manually: If the service or website does not support QR code scanning, select the “Enter a provided key” or “Manual entry” option within the app. Enter the account name and account key provided by the service or website, and tap the “Add” or “Save” button to add the account to Google Authenticator.
Step 5: Verify the account: After adding the account, Google Authenticator will start generating verification codes for that account. To verify the setup, enter the current verification code when prompted by the service or website.
That’s it! You have successfully downloaded, installed, and set up Google Authenticator on your mobile device. Now you can proceed to use the app to secure your accounts and generate verification codes for two-factor authentication.
Setting up Google Authenticator
Once you have downloaded and installed Google Authenticator on your mobile device, it’s time to set up the app and start securing your accounts. Follow these steps to set up Google Authenticator:
Step 1: Open Google Authenticator: Launch the Google Authenticator app on your device by tapping on its icon.
Step 2: Add an account: To add an account to Google Authenticator, you have two options: scanning a QR code or manually entering an account key.
Option 1: Scan QR code: If the service or website you want to secure supports QR code scanning, choose the “Scan a barcode” or “Scan QR code” option in the app. Use your device’s camera to scan the QR code displayed on the service or website. The app will automatically detect the QR code and add the account to Google Authenticator.
Option 2: Enter account key manually: If the service or website does not support QR code scanning, select the “Enter a provided key” or “Manual entry” option within the app. Enter the account name and the account key provided by the service or website. Tap the “Add” or “Save” button to add the account to Google Authenticator.
Step 3: Verify the account: After adding the account, Google Authenticator will start generating verification codes for that account. To verify the setup, enter the current verification code when prompted by the service or website.
Step 4: Repeat for additional accounts: If you have more accounts to secure, repeat the above steps to add them to Google Authenticator. You can add multiple accounts from different services or websites to the app.
Step 5: Backup your accounts: It is essential to create a backup of your accounts’ security keys. In case you change or lose your device, having a backup ensures that you can easily restore your accounts to the new device. To back up your accounts, go to the settings within Google Authenticator and follow the provided instructions.
Note: It is crucial to securely store and protect your backup codes or recovery keys. Consider using a password manager or a secure location to store these codes, ensuring their accessibility in case of device loss or reset.
By following these steps, you can set up Google Authenticator and start using it to generate verification codes for your accounts. This two-factor authentication process significantly enhances the security of your online accounts and helps protect them from unauthorized access.
Exploring the user interface
The user interface of Google Authenticator is designed to be simple and intuitive, making it easy for users to navigate and access their accounts. Let’s explore the main features and components of the Google Authenticator user interface:
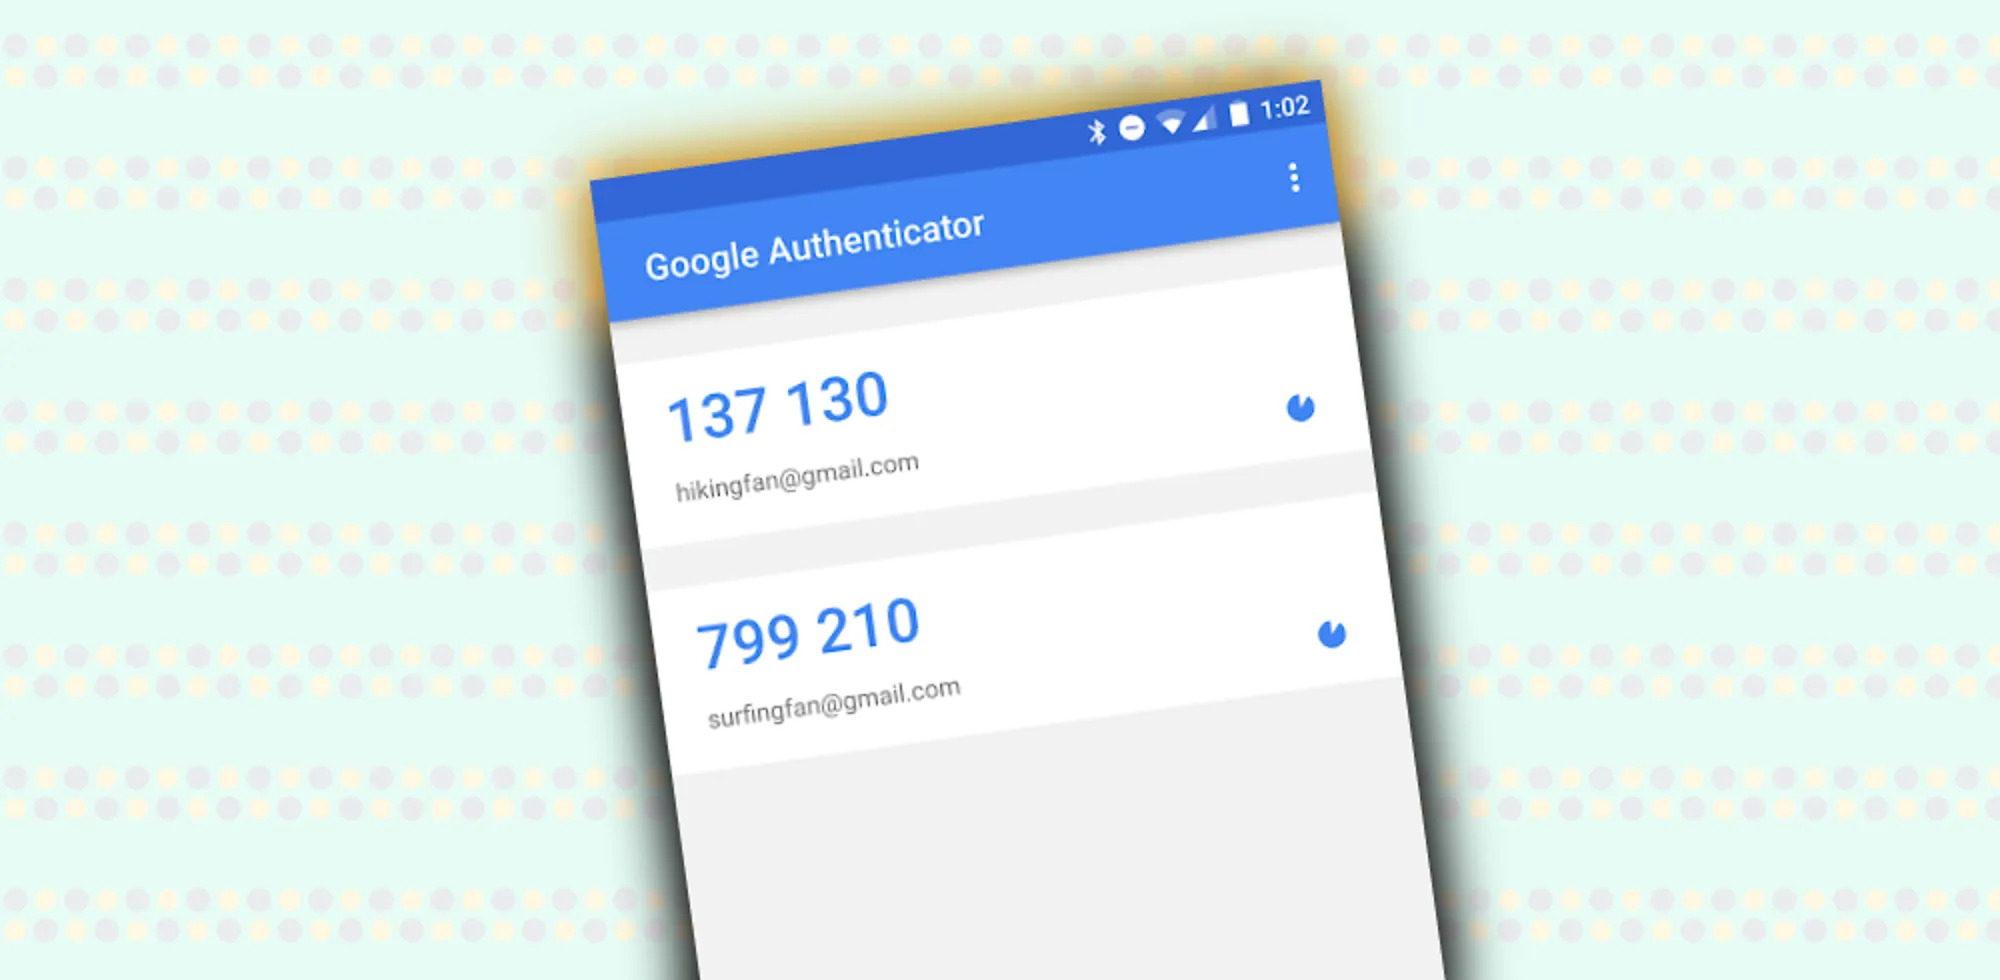
1. Account list: The main screen of Google Authenticator displays a list of all the accounts you have added. Each account is represented by the account name or the website/service logo, making it easy to identify and access the desired account for which you need a verification code.
2. Verification codes: For each account, Google Authenticator generates a verification code that changes every few seconds. The current verification code for each account is displayed next to the account name or logo. These codes serve as the one-time passwords that must be entered during login to verify your identity.
3. Refresh button: To manually refresh the verification codes, you can tap on the refresh button located next to each code. This can be useful if the code has expired or if you want to ensure you have the most up-to-date code for account verification.
4. Copy code: Google Authenticator allows you to copy the verification code for a specific account. By tapping on the code, you can quickly copy it to the clipboard and paste it into the required field during login. This eliminates the need to manually type the code, saving time and minimizing errors.
5. Settings: The settings menu in Google Authenticator provides additional options to customize your experience. Here, you can manage the backup and restore of your accounts, enable or disable app lock, change the time display format, and adjust other preferences.
6. Multi-device sync: If you have multiple devices with Google Authenticator installed, the app offers the ability to sync your accounts across those devices. This ensures that you can access your accounts and generate verification codes from any synced device, providing flexibility and convenience.
7. Account details: By tapping on an account in the list, you can access additional details for that account. This includes the account name, account key, and the account issuer (if applicable). These details can be useful when managing and organizing your accounts within the app.
The user interface of Google Authenticator is designed to be minimalistic and focused on functionality. Its intuitive design allows users to easily navigate the app, access their accounts, and obtain the required verification codes for enhanced account security.
Generating verification codes
The primary function of Google Authenticator is to generate verification codes that serve as one-time passwords for your online accounts. These verification codes add an extra layer of security to your accounts by requiring not only your password but also a unique code that changes every few seconds. Let’s explore how Google Authenticator generates these verification codes:
1. Time-Based One-Time Password (TOTP) algorithm: Google Authenticator uses the Time-Based One-Time Password (TOTP) algorithm to generate the verification codes. This algorithm relies on the current time and a secret key known only to the app and the service or website you’re securing. By combining these factors, Google Authenticator can generate a unique verification code that is valid only for a short period.
2. Code synchronization: When you set up an account in Google Authenticator, the app synchronizes with the respective service or website using the shared secret key. This synchronization ensures that the verification codes generated by Google Authenticator and the codes expected by the service or website are in sync, allowing for successful authentication.
3. Code expiration: Verification codes generated by Google Authenticator have a short lifespan, typically around 30 seconds, before they expire and a new code is generated. This short duration adds an additional layer of security as it reduces the window of opportunity for potential hackers who may have intercepted the code.
4. Continuous code updates: Google Authenticator continuously updates the verification codes in real-time, ensuring that the codes on your device are always up to date and synchronized with the service or website you’re securing. The app does this by calculating the code using the TOTP algorithm and the current time on your device.
5. Reliable code generation: The algorithm used by Google Authenticator ensures the reliability and consistency of the generated verification codes. As long as the time on your device is accurate, the app will generate the correct code for authentication purposes.
6. Code usage: When you log in to a service or website that requires two-factor authentication, enter your regular login credentials as usual. Afterward, you’ll be prompted to enter the current verification code generated by Google Authenticator. Simply launch the app, locate the account for which you need the code, and enter the displayed code into the required field.
7. Time-based code updates: Google Authenticator updates the verification code automatically every few seconds as per the TOTP algorithm. This continuous update ensures that you always have a valid and up-to-date code available to complete the login process.
By generating verification codes using the TOTP algorithm, Google Authenticator provides a secure and reliable method of adding an extra layer of authentication to your online accounts. These time-sensitive codes effectively minimize the risk of unauthorized access to your accounts, making them an invaluable tool for protecting your personal information.
Adding accounts to Google Authenticator
To fully leverage the capabilities of Google Authenticator, you need to add your online accounts to the app. Here’s a step-by-step guide on how to add accounts:
Step 1: Open Google Authenticator: Launch the Google Authenticator app on your mobile device.
Step 2: Add an account: Tap on the “+” or “Add” button within the app to initiate the account adding process.
Step 3: Choose an account verification method: You have two options for adding an account – scanning a QR code or manually entering the account information.
Option 1: Scan a QR code: If the service or website supports QR code scanning, select the “Scan a barcode” or “Scan QR code” option in Google Authenticator. Use your device’s camera to scan the QR code displayed on the service or website.
Option 2: Manual entry: If the service or website does not support QR code scanning, select the “Enter a provided key” or “Manual entry” option in the app. Enter the account name and the account key provided by the service or website.
Step 4: Verify the account: After adding the account, Google Authenticator will start generating verification codes for it. To verify the setup, enter the current verification code when prompted by the service or website requesting authentication.
Step 5: Repeat for additional accounts: If you have more accounts to secure, repeat the above steps to add them to Google Authenticator. You can add multiple accounts from various services or websites to the app.
Step 6: Organize and label accounts: To keep your accounts organized within Google Authenticator, consider labeling them. This can be particularly helpful if you have multiple accounts from the same service or website. Tap on an account in the app to access the account details and add a custom label to differentiate it from others.
Step 7: Prioritize frequently used accounts: If you have accounts that you frequently access, you can rearrange the account list within Google Authenticator. Simply tap and hold an account, then drag it up or down to the desired position in the list to prioritize it.
By following these steps, you can add your accounts to Google Authenticator and take advantage of its two-factor authentication capabilities. This ensures that you have an additional layer of security when accessing your online accounts and provides peace of mind knowing that your personal information is protected.
Managing and organizing accounts
As you add more accounts to Google Authenticator, it’s essential to effectively manage and organize them within the app. Here are some tips for managing and organizing your accounts:
1. Labeling accounts: To easily identify and differentiate your accounts, consider labeling them within Google Authenticator. Each account can be assigned a custom label, making it easier to locate and select the correct account when generating verification codes.
2. Account prioritization: If you frequently access certain accounts, you can prioritize them by rearranging the account list in the app. Simply tap and hold an account, then drag it up or down to the desired position. This allows you to quickly access the accounts that you use most often.
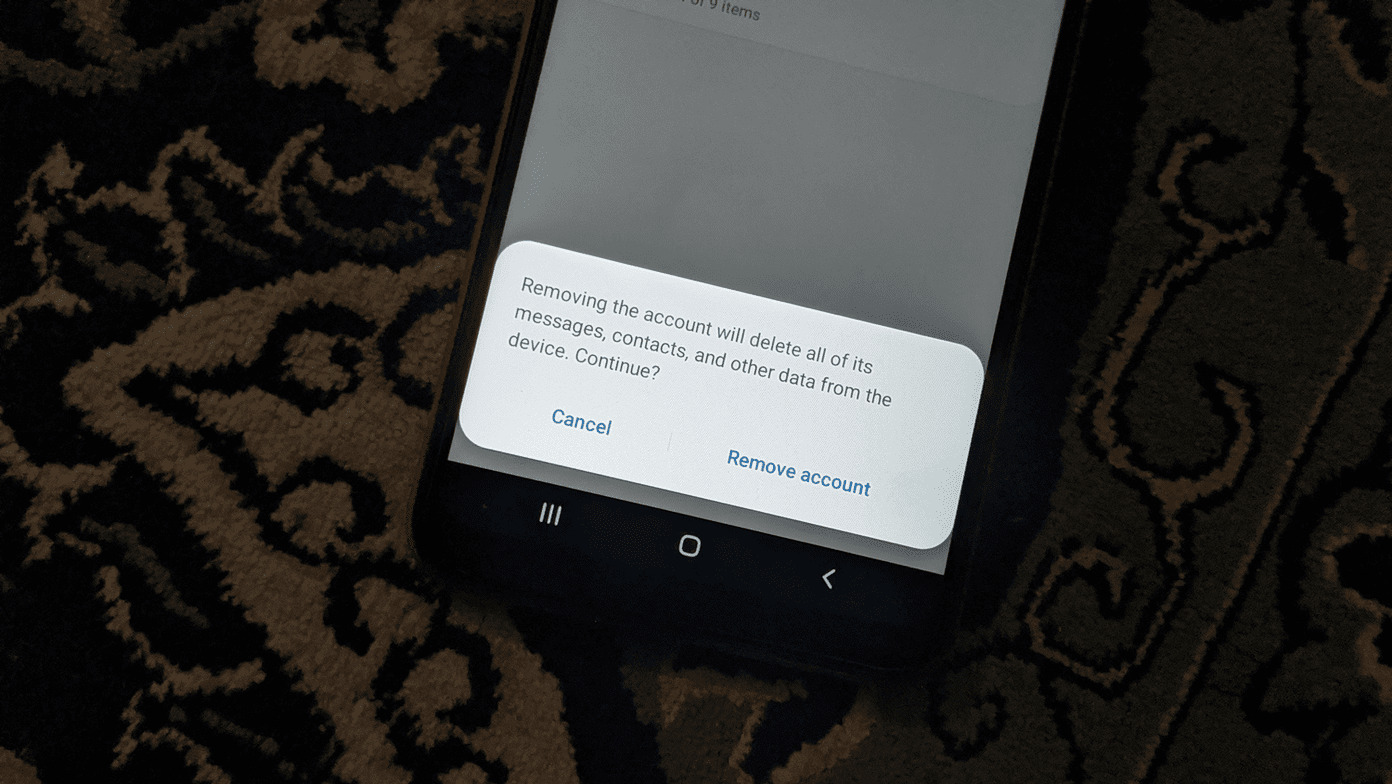
3. Removing unused accounts: If you no longer require two-factor authentication for a particular account, or if you have ceased using a specific service or website, it’s a good practice to remove that account from Google Authenticator. This helps declutter the app and ensures that you only have active and relevant accounts listed.
4. Backup and restore: Google Authenticator provides options for backing up and restoring your accounts. It is highly recommended to create a backup of your accounts’ security keys. In case you change or lose your device, you can easily restore your accounts to the new device without any hassle.
5. Multi-device sync: If you use multiple devices, consider enabling multi-device sync within the app. This allows you to sync your accounts across all your devices, ensuring that you have access to your accounts and can generate verification codes from any synced device.
6. Account organization: You can organize your accounts based on different criteria such as service or website type, personal or professional accounts, or any other categorization method that suits your needs. By grouping accounts together, you can quickly locate and manage them within the app.
7. Regularly review accounts: It’s a good practice to periodically review the accounts listed in Google Authenticator. This helps ensure that all added accounts are still active, relevant, and in use. Remove any obsolete or unused accounts to keep the app streamlined and focused on your active accounts.
By effectively managing and organizing your accounts in Google Authenticator, you can enhance your user experience and make it more convenient to generate verification codes when needed. This organization also helps ensure that you have quick and easy access to the accounts that require two-factor authentication for added security.
Customizing Google Authenticator settings
Google Authenticator offers several settings that you can customize to enhance your user experience and tailor the app to your preferences. Let’s explore some of the key settings you can modify:
1. Auto-refresh: By default, Google Authenticator automatically refreshes the verification codes every few seconds. However, you can adjust the auto-refresh interval in the settings. For example, you may choose to increase the refresh interval to reduce battery usage or decrease it for faster code updates.
2. Time display format: Depending on your preference, you can choose between a 12-hour or 24-hour time display format. This allows you to view the time information alongside the generated verification codes in a format you find most convenient.
3. App lock: To add an extra layer of security to the Google Authenticator app itself, you can enable the app lock feature. This requires you to enter a PIN, pattern, or biometric authentication (fingerprint or face recognition) to access the app. App lock helps protect your verification codes from unauthorized access if your device is lost, stolen, or accessed by others.
4. Account backup and restore: Google Authenticator allows you to back up your accounts’ security keys for easy restoration on a new device. You can customize the backup and restore settings to specify which accounts to include in the backup and choose the preferred method of backup (e.g., via cloud storage, email, or QR code).
5. Multi-device sync: If you use Google Authenticator across multiple devices, you can enable the multi-device sync feature. This ensures that your accounts and their verification codes are synchronized across all your devices, allowing you to access and generate codes from any synced device.
6. Notifications: You can enable notifications within Google Authenticator to receive alerts when new verification codes are generated for your accounts. Notifications can help you stay updated and ensure that you always have the most current codes available.
7. Theme and appearance: Some versions of Google Authenticator allow you to customize the theme and appearance of the app. You can choose from different color schemes or layout options to personalize the visual presentation of the app.
8. Account details: Within the settings, you can access account-specific details, such as the account name, the account key, and the issuer (if applicable). This information can be useful for managing and organizing your accounts within the app.
9. Resetting app settings: If needed, you can reset all app settings to their default values. This can be helpful if you want to start fresh or if you encounter any issues with customized settings and want to revert to the original configuration.
By customizing these settings within Google Authenticator, you can personalize your experience and optimize the app to meet your specific needs. It’s recommended to explore the settings and adjust them according to your preferences for a seamless and secure two-factor authentication process.
Troubleshooting common issues
While Google Authenticator is a reliable app for securing your online accounts, you may encounter some common issues. Here are some troubleshooting steps to address these issues:
1. Incorrect time on your device: Google Authenticator relies on accurate time synchronization with the service or website you’re securing. If you encounter issues with verification codes not working, ensure that your device’s date and time settings are correct. Consider enabling automatic time synchronization or manually adjusting the time zone and time settings.
2. Code not refreshing: If the verification codes in Google Authenticator are not refreshing automatically, try manually refreshing the app by swiping down or tapping the refresh button. If the issue persists, ensure that you have a stable internet connection and that the app has the necessary permissions to access the network.
3. Device change or loss: If you change or lose your device, you may lose access to your accounts in Google Authenticator. To prevent this, it is essential to regularly back up your accounts’ security keys within the app. In case of device change or loss, restore your accounts from the backup on your new device.
4. QR code scanning issues: If you encounter difficulties scanning QR codes when adding accounts, ensure that your device’s camera is functioning correctly. Try adjusting the lighting conditions or scan the QR code from different angles. If the issue persists, consider manually entering the account information instead.
5. Account mismatch: If you have multiple accounts from the same service or website and experience issues with verification codes being applied to the wrong account, double-check the labels and account details in Google Authenticator. Make sure each account is correctly labeled and the account key is entered or scanned accurately.
6. App lock issues: If you have enabled app lock and experience issues accessing Google Authenticator, ensure that you are entering the correct PIN, pattern, or using the correct biometric authentication information. If you forget the app lock credentials, you may need to reset the app settings and set it up again.
7. Account removal: If you want to remove an account from Google Authenticator, ensure that you are selecting the correct account and double-check your selection before confirming the removal. Once an account is removed, the verification codes associated with that account will no longer be generated.
8. Compatibility issues: While Google Authenticator is compatible with a wide range of online services and websites, there might be instances where it may not work with a specific platform. If you encounter compatibility issues, check if the service or website supports Google Authenticator or if they provide an alternative two-factor authentication method.
If you continue to experience issues with Google Authenticator after troubleshooting, consider reaching out to the support team of the respective service or website for further assistance. They can provide specific guidance and address any potential compatibility issues or account-related concerns.
Conclusion
Google Authenticator is a powerful and user-friendly app that adds an extra layer of security to your online accounts through two-factor authentication. By generating time-based verification codes, it helps protect your personal information and safeguard against unauthorized access.
In this article, we explored what the Google Authenticator app looks like and why it is beneficial to use. We discussed the process of downloading and installing the app, setting it up, and explored its user interface. We also delved into the generation of verification codes, adding accounts, managing and organizing accounts, customizing settings, and troubleshooting common issues that may arise.
By utilizing Google Authenticator, you significantly increase the security of your online accounts. The app’s offline functionality, compatibility with various services, and ease of use make it a popular choice for protecting personal information from potential threats.
Remember to regularly back up your accounts’ security keys, label and prioritize your accounts, and stay vigilant when troubleshooting common issues. By following these best practices, you can ensure a seamless and secure experience with Google Authenticator.
Take advantage of the benefits offered by Google Authenticator and enjoy peace of mind knowing that your online accounts are protected by an additional layer of authentication. Implement two-factor authentication with Google Authenticator for enhanced security and enjoy the convenience of generating verification codes directly from your mobile device.