Introduction
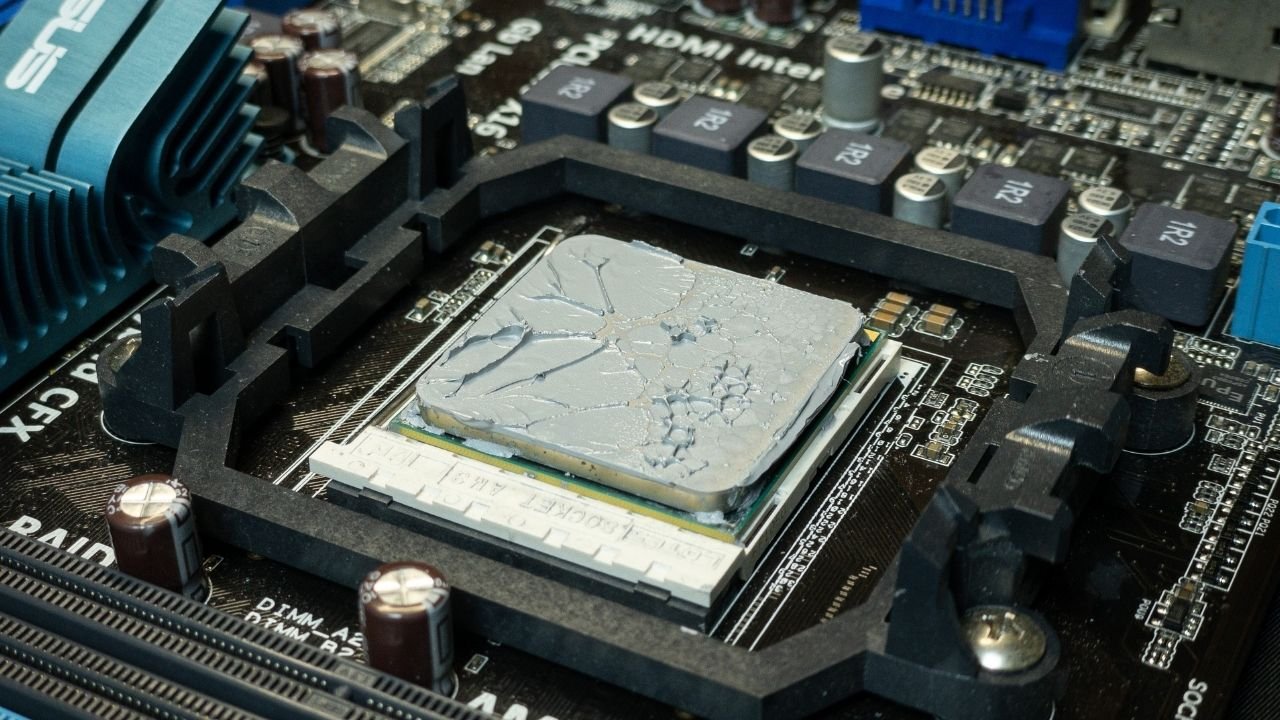
When it comes to upgrading or replacing a CPU cooler, one crucial step that often gets overlooked is removing the existing thermal paste. Thermal paste, also known as thermal compound, is a crucial component that helps transfer heat between the CPU and the cooler.
Why do you need to remove thermal paste before switching your CPU cooler? The answer is simple – residual thermal paste can adversely affect the performance of the new cooler. If not removed properly, it can create air gaps, hinder heat transfer, and ultimately lead to higher CPU temperatures.
In this article, we will provide you with a step-by-step guide on how to remove thermal paste effectively. We will also discuss the tools and materials you will need to accomplish this task. Whether you are a beginner or an experienced DIY enthusiast, this guide will help you navigate the process smoothly.
But before we dive into the details, it’s essential to understand the importance of proper thermal paste application. A well-applied thermal paste layer ensures maximum contact between the CPU and cooler, enhancing heat dissipation and preventing thermal throttling.
Now, let’s gather the necessary tools and materials before we embark on our journey to switch CPU coolers and remove old thermal paste.
Why Do You Need to Remove Thermal Paste?
Removing old thermal paste is a critical step before installing a new CPU cooler. While it may seem tempting to skip this step and simply apply the new cooler on top of the existing paste, doing so can lead to several issues that can impact your system’s performance. Let’s take a look at why it’s essential to remove the old thermal paste.
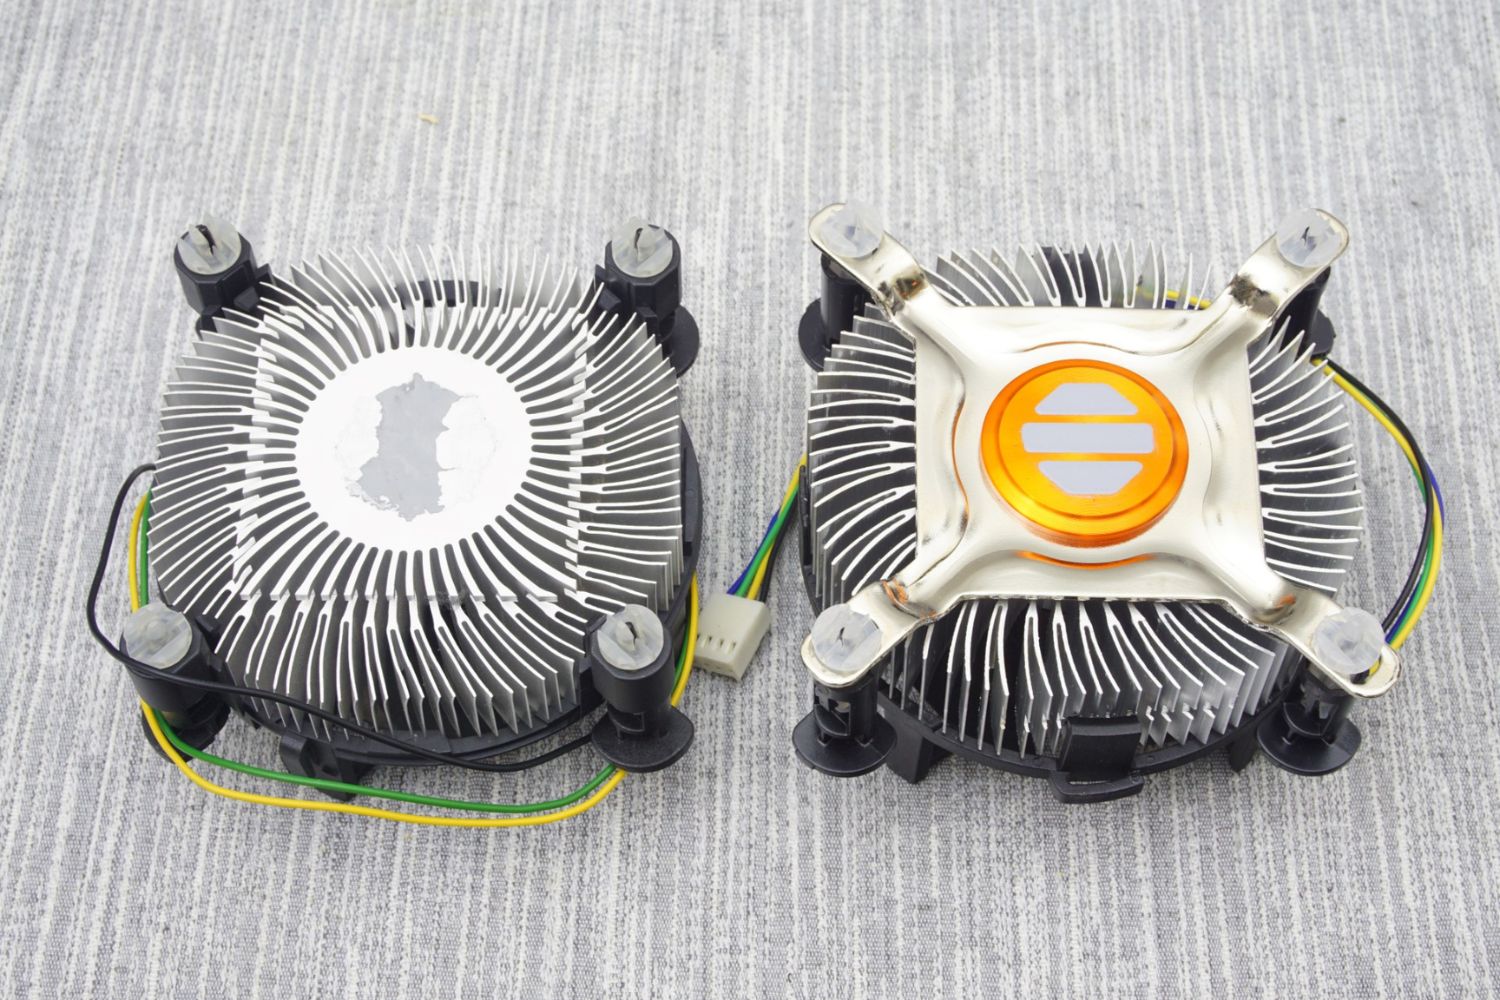
1. Proper Heat Transfer: The primary function of thermal paste is to facilitate efficient heat transfer between the CPU and the cooler. Over time, thermal paste can dry out or lose its effectiveness, resulting in decreased heat transfer. By removing the old thermal paste, you ensure optimal contact between the CPU and the cooler, maximizing heat dissipation and preventing overheating.
2. Air Gaps: If you apply a new layer of thermal paste on top of the old one without removing it, air gaps can form between the cooler and the CPU’s heat spreader. These air gaps obstruct the heat transfer process, leading to increased temperatures and reduced cooling efficiency. By removing the old thermal paste, you eliminate the risk of air gaps, ensuring better thermal conductivity.
3. Contamination: Over time, dust, debris, and other contaminants can accumulate on the surface of the old thermal paste. When you install a new cooler without removing the old paste, you trap these particles between the CPU and the cooler, compromising heat transfer and potentially causing long-term damage. Removing the old thermal paste ensures a clean and contaminant-free surface for the new cooler to make proper contact.
4. Improper Application: Applying new thermal paste on top of the old one can result in an uneven application. This can lead to gaps and inconsistencies in the thermal interface, hindering heat dissipation. Properly removing the old thermal paste allows you to start with a clean slate and ensures even and consistent application of the new paste.
5. Warranty Concerns: Some CPU cooler manufacturers may void the warranty if it is determined that improper installation, such as applying new thermal paste on top of the old one, has been performed. To safeguard your warranty and prevent any potential issues that may arise, it is crucial to remove the old thermal paste before installing a new cooler.
By taking the time to properly remove the old thermal paste, you set the foundation for optimal cooling and extend the longevity of your CPU and cooler. Now that we understand the importance of removing thermal paste let’s move on to the tools and materials needed for the process.
Tools and Materials Needed
Before you begin the process of removing thermal paste, it’s essential to gather the necessary tools and materials. Having the right equipment at hand will ensure a smooth and efficient process. Here are the essential tools and materials you will need:
1. Isopropyl Alcohol: Isopropyl alcohol, also known as rubbing alcohol, is a key component for removing thermal paste. It helps dissolve the old paste and clean the surface effectively. Make sure to use 90% or higher concentration for optimal results.
2. Cotton Swabs or Microfiber Cloth: These will be used to apply the isopropyl alcohol onto the CPU surface and remove the thermal paste. Cotton swabs are convenient for reaching tight spaces, while a microfiber cloth is helpful for larger areas.
3. Thermal Paste Remover (Optional): While isopropyl alcohol is usually sufficient for removing thermal paste, you may opt to use a specialized thermal paste remover. These removers are specifically formulated to dissolve thermal paste quickly and effectively. They can be an excellent choice if you’re dealing with stubborn or dried-out thermal paste.
4. Latex or Nitrile Gloves: Wearing gloves will help keep your hands clean and prevent any oils or contaminants from getting on the CPU surface. Additionally, gloves provide extra protection when handling chemicals such as isopropyl alcohol.
5. Anti-Static Wrist Strap (Recommended): While not mandatory, using an anti-static wrist strap can prevent static electricity from damaging the sensitive electronic components of your CPU. It’s a recommended precautionary measure to ensure the safety of your hardware.
6. Paper Towels or Soft Cloth: These will come in handy for drying the CPU surface and removing any residue left after cleaning with isopropyl alcohol or thermal paste remover.
7. Plastic Spudger or Credit Card (Optional): If the thermal paste has hardened or is difficult to remove, a plastic spudger or credit card can be used to gently scrape off any residue without scratching the CPU surface. Be cautious not to apply excessive force to avoid damaging the CPU.
8. Ziplock Bag or Container (Optional): You can use a ziplock bag or a small container to store the CPU cooler mounting hardware, screws, and any other small components while you remove the thermal paste and swap the cooler.
With these tools and materials at your disposal, you are well-prepared to tackle the process of removing thermal paste. Now let’s move on to the step-by-step guide on how to remove thermal paste using different methods.
Step-by-Step Guide to Removing Thermal Paste
Removing thermal paste requires precision and care to ensure proper cleaning of the CPU surface. In this step-by-step guide, we will explore two common methods for removing thermal paste: using isopropyl alcohol and cotton swabs and using a thermal paste remover. Follow these instructions carefully for a successful removal process:
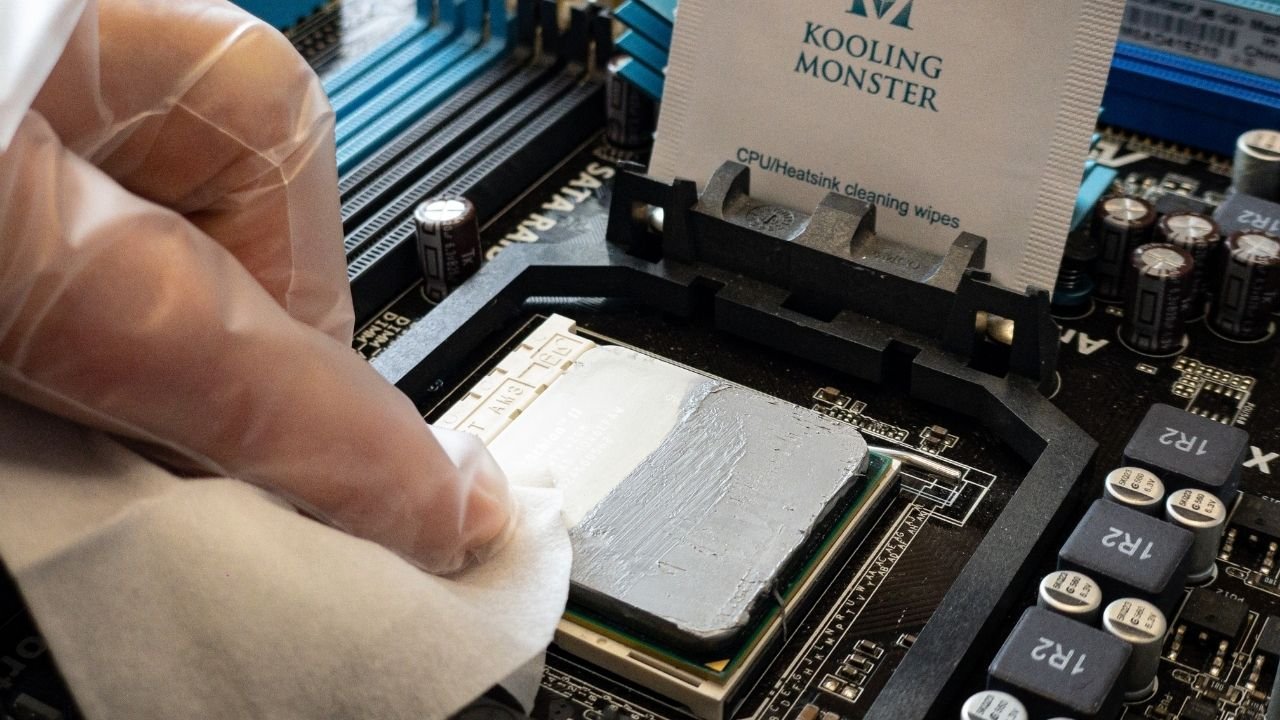
Method 1: Using Isopropyl Alcohol and Cotton Swabs
- Prepare your workspace by ensuring it is clean and free from any dust or debris that could potentially contaminate the CPU surface.
- Power off your computer and unplug it from the power source. This will prevent any accidental damage or electrical shock.
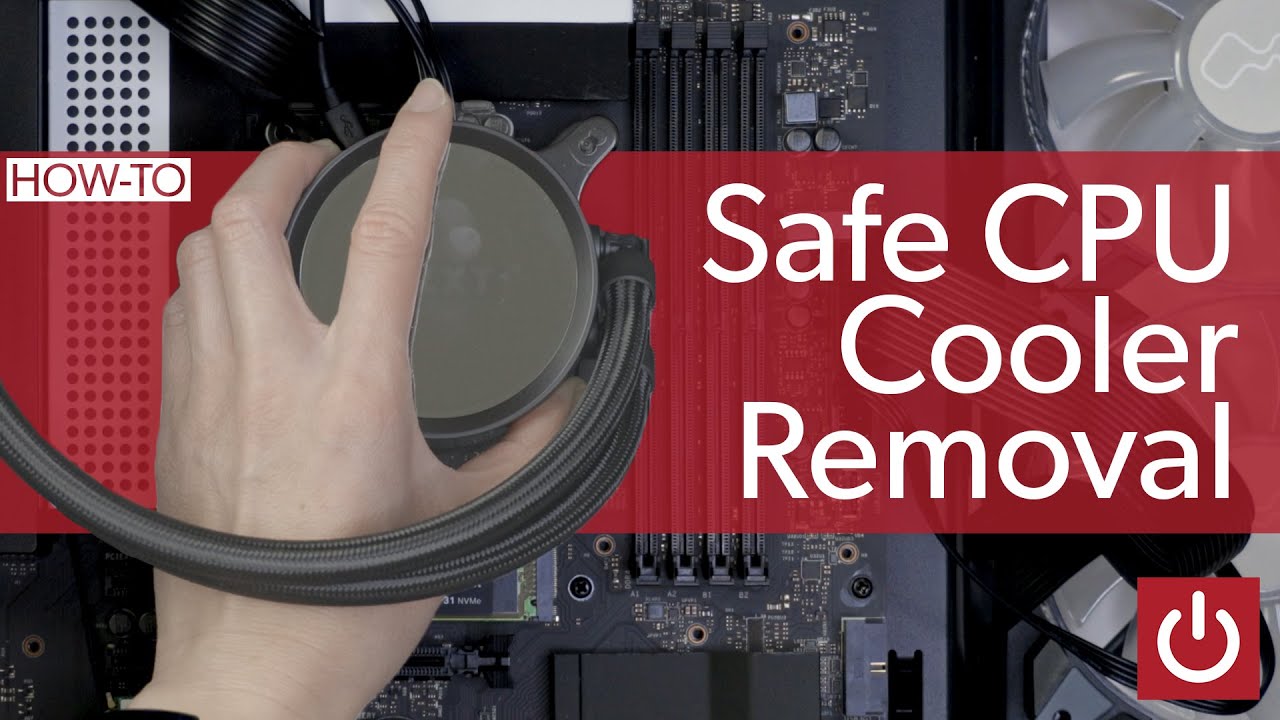
- If possible, remove the CPU cooler from the motherboard to have better access to the CPU surface. Refer to the manufacturer’s instructions or your motherboard manual for guidance.
- Put on latex or nitrile gloves to avoid transferring oils or contaminants to the CPU surface.
- Dampen a cotton swab with isopropyl alcohol. Do not soak it; just make sure it is slightly damp.
- Gently rub the cotton swab against the CPU surface, applying light pressure to remove the thermal paste. Be cautious not to scratch the CPU surface.
- Continue rubbing in small circular motions until the thermal paste residue is completely removed.
- Use a fresh cotton swab dampened with isopropyl alcohol when necessary to ensure thorough cleaning.
- Dry the CPU surface with a paper towel or a soft cloth.
- Inspect the CPU surface to ensure that all the thermal paste residue has been removed. If needed, repeat the cleaning process until the surface is clean and free from residue.
Method 2: Using Thermal Paste Remover
- Follow steps 1-4 of Method 1 to prepare your workspace, power off your computer, and put on gloves.
- If possible, remove the CPU cooler from the motherboard to have better access to the CPU surface.
- Apply a small amount of thermal paste remover onto a cotton swab or microfiber cloth.
- Gently rub the cotton swab or cloth against the CPU surface, using light pressure. Ensure thorough coverage of the thermal paste residue.
- Allow the thermal paste remover to sit on the surface for the recommended amount of time, as specified by the product instructions.
- After the specified time, use a fresh cotton swab or cloth dampened with isopropyl alcohol to wipe away the thermal paste remover and residue.
- Dry the CPU surface with a paper towel or a soft cloth.
- Inspect the CPU surface to ensure that all the thermal paste residue has been removed. If needed, repeat the cleaning process until the surface is clean and free from residue.
Once you have finished cleaning the CPU surface and removing the thermal paste, you are now ready to install the new CPU cooler. Refer to the manufacturer’s instructions or your CPU cooler manual for guidance on the installation process.
Remember, patience and attention to detail are key when removing thermal paste. Take your time and ensure thorough cleaning for optimal heat transfer and performance. Now that you have successfully completed the thermal paste removal process, you can proceed with confidence to install your new CPU cooler.
Method 1: Using Isopropyl Alcohol and Cotton Swabs
One of the common methods for removing thermal paste is by using isopropyl alcohol and cotton swabs. This method is effective and widely used, especially for removing fresh or dried-out thermal paste that is not too stubborn. Follow these steps to successfully remove thermal paste using this method:
- Prepare your workspace by ensuring it is clean and free from any dust or debris that could potentially contaminate the CPU surface.
- Power off your computer and unplug it from the power source. This will prevent any accidental damage or electrical shock.
- If possible, remove the CPU cooler from the motherboard to have better access to the CPU surface. Refer to the manufacturer’s instructions or your motherboard manual for guidance.
- Put on latex or nitrile gloves to avoid transferring oils or contaminants to the CPU surface.
- Dampen a cotton swab with isopropyl alcohol. Do not soak it; just make sure it is slightly damp.
- Gently rub the cotton swab against the CPU surface, applying light pressure to remove the thermal paste. Be cautious not to scratch the CPU surface.
- Continue rubbing in small circular motions until the thermal paste residue is completely removed.
- Use a fresh cotton swab dampened with isopropyl alcohol when necessary to ensure thorough cleaning.
- Dry the CPU surface with a paper towel or a soft cloth.
- Inspect the CPU surface to ensure that all the thermal paste residue has been removed. If needed, repeat the cleaning process until the surface is clean and free from residue.
By following these steps carefully, you can effectively remove the thermal paste using isopropyl alcohol and cotton swabs. This method is recommended for most situations and provides satisfactory results. However, if the thermal paste is stubborn or dried-out, you may want to consider using a thermal paste remover, which we will explore in the next method.
Now that you have successfully removed the thermal paste using this method, you can proceed with confidence to install the new CPU cooler. Refer to the manufacturer’s instructions or your CPU cooler manual for guidance on the installation process.
Method 2: Using Thermal Paste Remover
Another effective method for removing thermal paste is by using a specialized thermal paste remover. This method is particularly useful for stubborn or dried-out thermal paste that may be challenging to remove with just isopropyl alcohol and cotton swabs. Follow these steps to successfully remove thermal paste using a thermal paste remover:
- Follow steps 1-4 of Method 1 to prepare your workspace, power off your computer, and put on gloves.
- If possible, remove the CPU cooler from the motherboard to have better access to the CPU surface.
- Apply a small amount of thermal paste remover onto a cotton swab or microfiber cloth.
- Gently rub the cotton swab or cloth against the CPU surface, using light pressure. Ensure thorough coverage of the thermal paste residue.
- Allow the thermal paste remover to sit on the surface for the recommended amount of time, as specified by the product instructions.
- After the specified time, use a fresh cotton swab or cloth dampened with isopropyl alcohol to wipe away the thermal paste remover and residue.
- Dry the CPU surface with a paper towel or a soft cloth.
- Inspect the CPU surface to ensure that all the thermal paste residue has been removed. If needed, repeat the cleaning process until the surface is clean and free from residue.
Using a thermal paste remover can expedite the process of removing stubborn or dried-out thermal paste, as these removers are specifically formulated to dissolve thermal paste quickly and effectively. The recommended amount of time for the thermal paste remover to sit on the surface will vary depending on the product, so be sure to follow the instructions provided.
Once you have successfully removed the thermal paste using this method, you can proceed with confidence to install the new CPU cooler. Refer to the manufacturer’s instructions or your CPU cooler manual for guidance on the installation process.
Remember to handle the thermal paste remover with care, as it may contain chemicals that can be harmful. Follow the safety precautions and guidelines outlined by the manufacturer to ensure a safe and effective removal process.
Tips and Precautions
As you embark on the journey of removing thermal paste, it’s important to keep in mind some tips and precautions to ensure a smooth and safe process. Here are some valuable tips and precautions to consider:
- 1. Take your time: Removing thermal paste requires patience and precision. Rushing through the process may result in incomplete removal or accidental damage to the CPU surface. Take your time and be thorough in your cleaning.
- 2. Use the right amount of isopropyl alcohol: When using isopropyl alcohol, ensure that the cotton swab is slightly damp, not soaked. Excessive alcohol can drip and potentially damage other components. Use enough to effectively clean the thermal paste, but not too much.
- 3. Avoid excessive force: Be gentle when applying pressure to remove the thermal paste. Scrubbing too hard can scratch the CPU surface, affecting its performance. Use light, circular motions to gradually remove the residue.
- 4. Protect against static electricity: To avoid static discharge, it’s advisable to wear an anti-static wrist strap or regularly ground yourself by touching a metal object. This will help prevent any damage to sensitive electronic components.
- 5. Dispose of materials properly: Dispose of used cotton swabs, paper towels, or any other cleaning materials properly. It’s important to adhere to proper waste disposal practices to protect the environment.
- 6. Follow manufacturer’s instructions: When using a thermal paste remover, always read and follow the instructions provided by the manufacturer. Each product may have specific application and time guidelines. Paying attention to these instructions will yield the best results.
- 7. Clean the CPU cooler: While the focus is on removing old thermal paste, take the opportunity to clean your CPU cooler as well. Remove any dust or debris buildup from the cooler’s fins and fan using compressed air or a soft brush.
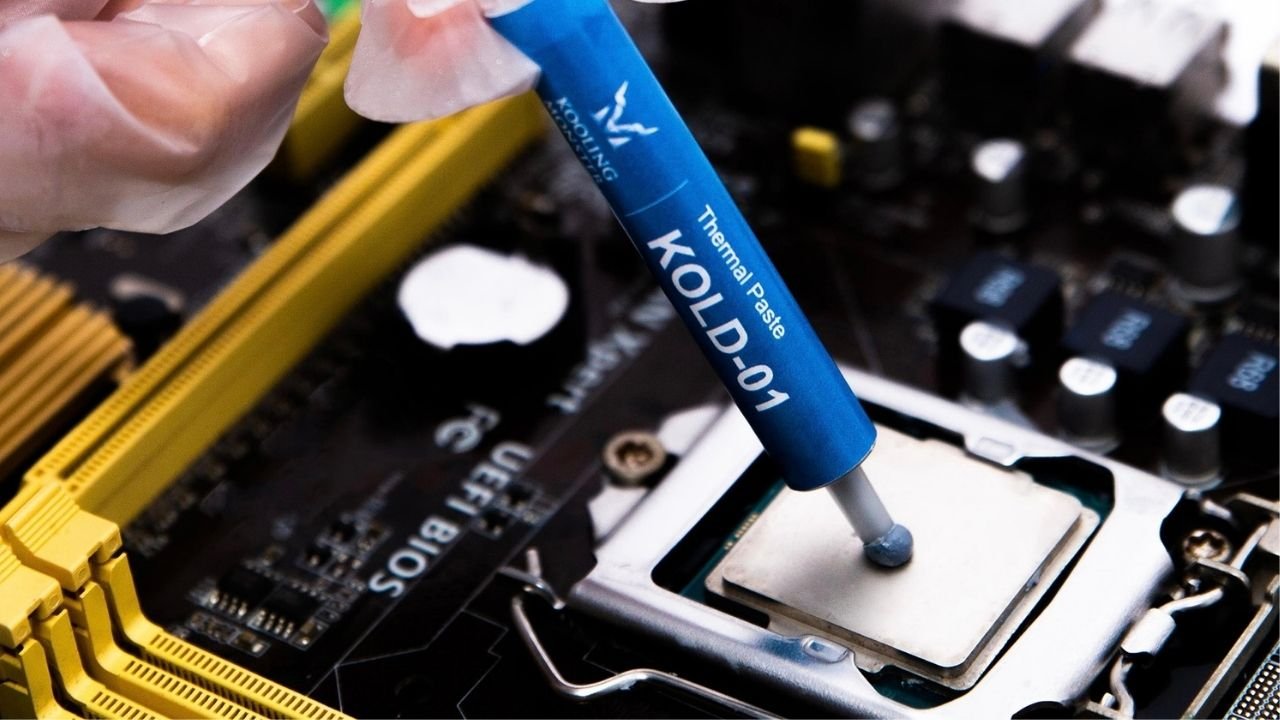
- 8. Apply a new layer of thermal paste: After thoroughly cleaning the CPU surface, apply a small amount of fresh thermal paste following the recommended application method. This ensures optimal heat transfer between the CPU and the new cooler.
By following these tips and precautions, you can navigate the process of removing thermal paste more effectively and with reduced risk of damage to your hardware. Remember, proper preparation and attention to detail are key to achieving successful results.
Now that you have armed yourself with these valuable tips and precautions, you are ready to confidently proceed with the removal and replacement of thermal paste in your CPU cooler upgrade or replacement endeavor.
Conclusion
Removing thermal paste is an important step in upgrading or replacing a CPU cooler. It ensures proper heat transfer, prevents air gaps, and eliminates contamination that can hinder the cooling performance of your system. By following the step-by-step guide and using the recommended tools and materials, you can successfully remove old thermal paste and prepare your CPU for a new cooler.
Whether you choose to use isopropyl alcohol and cotton swabs or a specialized thermal paste remover, it is crucial to exercise caution and handle your hardware with care. Take your time, avoid applying excessive force, and follow the manufacturer’s instructions and safety precautions to ensure a smooth and safe process.
Remember to properly dispose of used materials and ground yourself against static electricity to protect your components. Additionally, take advantage of the opportunity to clean your CPU cooler and apply a fresh layer of thermal paste for optimal heat transfer.
By understanding the importance of removing thermal paste and following the provided guidance, you can enhance the performance and longevity of your CPU and cooler combination. Enjoy the benefits of improved cooling efficiency and a more stable system as you embark on your CPU cooler upgrade or replacement journey.