Introduction
Welcome to our guide on how to install the Ryzen 5 3600X CPU cooler! Whether you’re a seasoned tech enthusiast or a beginner looking to upgrade your processor, installing a CPU cooler is an essential step in ensuring optimal performance and temperature management. The Ryzen 5 3600X is a powerful processor that requires a reliable and efficient cooling solution to unlock its full potential.
In this article, we will walk you through the step-by-step process of installing the Ryzen 5 3600X CPU cooler. We’ll cover everything from preparation to troubleshooting, ensuring that you have all the information you need to successfully complete the installation.
Before we dive into the installation process, it’s important to note that proper installation of the CPU cooler is crucial for maintaining optimum CPU temperatures and longevity. Improper installation can lead to overheating and reduced performance.
Throughout this guide, we will provide detailed instructions, tips, and precautions to help you install the Ryzen 5 3600X CPU cooler with confidence. So, grab your tools and let’s get started on enhancing your cooling solution!
What You’ll Need
Before we begin the installation process, let’s discuss the essential tools and materials you’ll need to install the Ryzen 5 3600X CPU cooler:
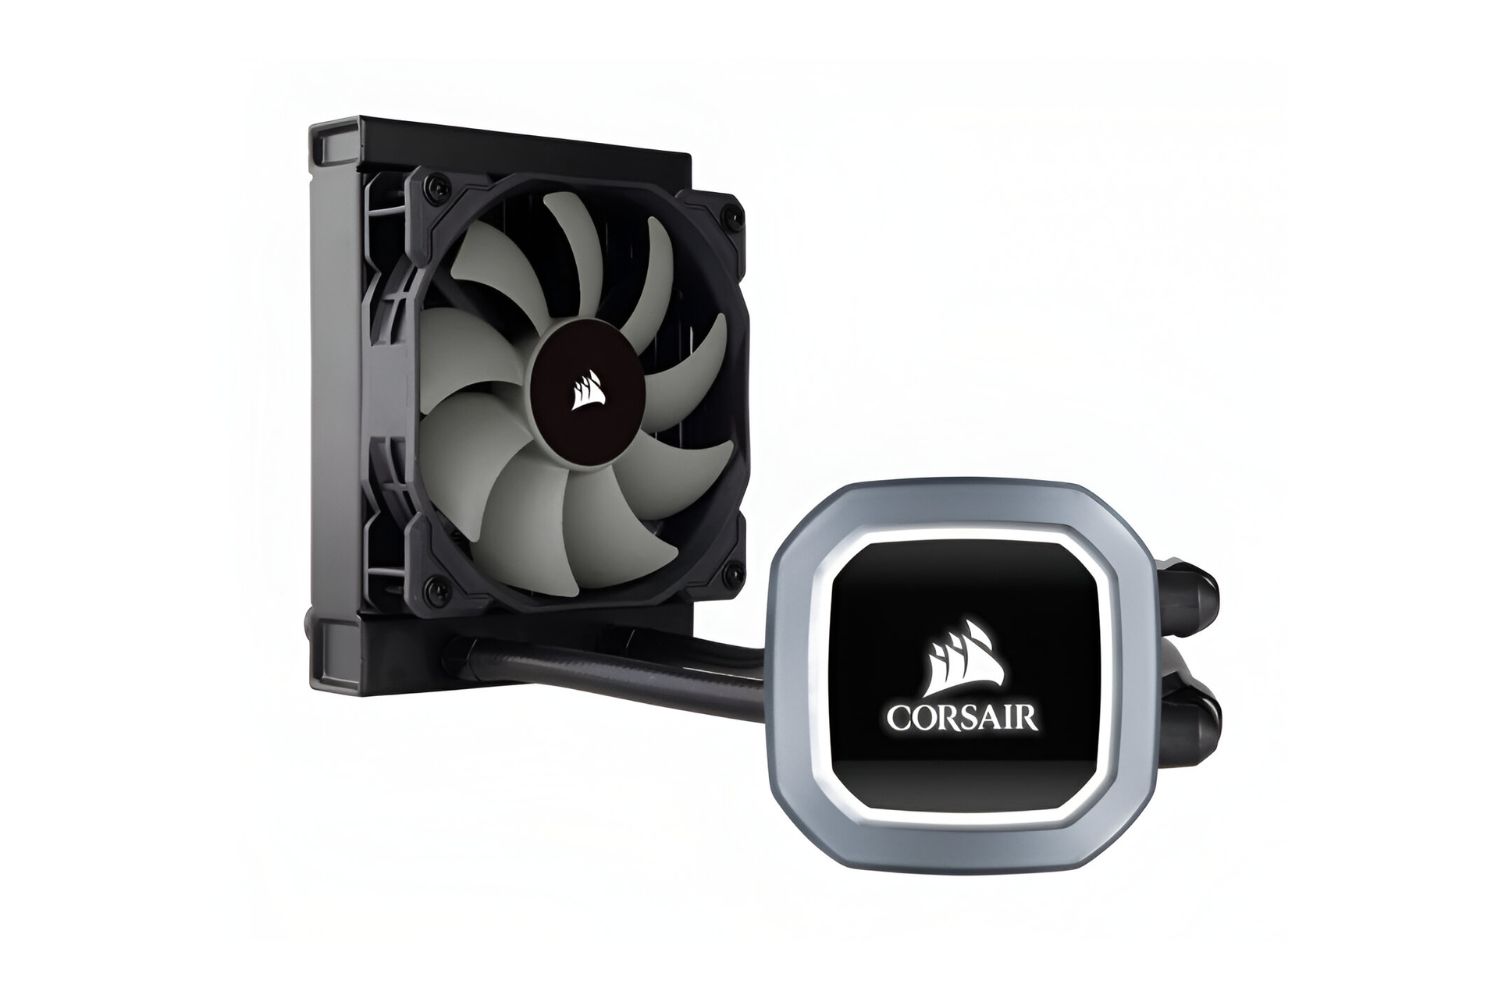
- Ryzen 5 3600X CPU Cooler: Ensure that you have the compatible CPU cooler specifically designed for the Ryzen 5 3600X processor. It’s important to choose a cooler that can meet the cooling demands of the CPU to prevent overheating.
- Thermal Paste: High-quality thermal paste is vital for efficient heat transfer between the CPU and the cooler. Check if your CPU cooler comes with pre-applied thermal paste, or purchase a separate tube of thermal paste if needed.
- Screwdriver or Allen wrench: You’ll need a screwdriver or an Allen wrench, depending on the type of screws used to secure the CPU cooler. Make sure the tool matches the screw head to avoid damage.
- Isopropyl Alcohol and Lint-free Cloth: Isopropyl alcohol (70% or higher concentration) is essential for cleaning the thermal paste residue from the CPU and cooler. Use a lint-free cloth, such as a microfiber cloth or coffee filter, to avoid leaving any fibers behind.
- User Manual: Keep the user manual of your CPU cooler handy throughout the installation process. It contains specific instructions and diagrams provided by the manufacturer for your particular model.
- Grounding Strap: While not mandatory, a grounding strap can help prevent static discharge from damaging sensitive components during the installation process. If you don’t have a grounding strap, touch a grounded metal surface before handling any components.
It’s important to have all the necessary tools and materials ready before you start the installation process. This ensures a smooth and efficient installation without any interruptions. Now that you have everything prepared, let’s move on to the next step: Preparation.
Step 1: Preparation
Before diving into the installation process, it’s crucial to prepare your workspace and familiarize yourself with the Ryzen 5 3600X CPU cooler and its components. Follow these steps to ensure a smooth and successful installation:
- Shut Down and Unplug: Before working on your computer, shut it down properly and unplug the power cord from the wall outlet. This prevents any risk of electric shock or damage to your components.
- Clean and Static-Free Workspace: Find a clean, clutter-free workspace with ample lighting. Clear away any objects that may interfere with the installation process. It’s also advisable to work on an anti-static mat or a non-conductive surface to prevent static electricity from damaging your components.
- Refer to the CPU Cooler Manual: Take a few moments to consult the user manual that came with your Ryzen 5 3600X CPU cooler. Familiarize yourself with the various components, their orientations, and the necessary steps for installation. This will help you understand the process better and prevent any potential mistakes.
- Prepare the Thermal Paste: If your CPU cooler does not come with pre-applied thermal paste, you’ll need to apply it yourself. Follow the manufacturer’s instructions to apply an appropriate amount of thermal paste on the surface of the CPU. Be sure to use isopropyl alcohol and a lint-free cloth to remove any pre-existing thermal paste from the CPU.
- Gather Necessary Tools: Ensure that you have all the necessary tools, as mentioned in the “What You’ll Need” section. This includes a screwdriver or Allen wrench that matches the screws, isopropyl alcohol and a lint-free cloth, and a grounding strap if you have one.
By following these steps, you’ll be well-prepared to proceed with the Ryzen 5 3600X CPU cooler installation. Once you’re confident that you’ve completed all the necessary preparation, you can move on to the next step: removing the old CPU cooler.
Step 2: Removing the Old CPU Cooler
Now that you’ve completed the necessary preparations, it’s time to remove the old CPU cooler from your system. Follow these steps carefully to ensure a smooth removal process:
- Disconnect Power and Cables: As a safety measure, ensure your computer is turned off and disconnected from the power source. Additionally, unplug any cables connected to the old CPU cooler, such as the fan power cable and the pump if you have a liquid cooling system.
- Remove the Mounting Bracket: Depending on the type of CPU cooler you’re replacing, you may need to remove the mounting bracket that secures it to the motherboard. Consult your CPU cooler’s manual to identify the type of mounting system and follow the instructions to remove it correctly.
- Unfasten Cooler Screws: Use a screwdriver or Allen wrench to unfasten the screws securing the CPU cooler to the motherboard. The number of screws and their placement may vary depending on your specific CPU cooler model. Be sure to remove all the screws to ensure a safe removal.
- Detach the CPU Cooler: Once all the screws are removed, gently lift and detach the old CPU cooler from the CPU socket. Be cautious not to exert excessive force or damage the motherboard while doing so. If the CPU cooler feels stuck, gently twist it back and forth to loosen it before removing it completely.
- Clean the CPU Surface: Before installing the new CPU cooler, it is crucial to clean the surface of the CPU using isopropyl alcohol and a lint-free cloth. Wipe away any thermal paste residue or debris to ensure a clean and smooth contact surface for the new CPU cooler.
Once you’ve completed these steps, you’re ready to move on to the next phase: applying thermal paste to the CPU surface. Removing the old CPU cooler can be a delicate process, so take your time and handle the components with care to avoid any damage or mishaps.
Step 3: Applying Thermal Paste
Now that you have removed the old CPU cooler, it’s time to apply a fresh layer of thermal paste to ensure optimal heat transfer. Follow these steps to apply the thermal paste correctly:
- Identify the CPU Surface: Take a moment to locate the CPU surface. It is a small, square-shaped metal area on the motherboard. Ensure it is clean and free from any dust or residue.
- Prepare the Thermal Paste: If your CPU cooler does not come with pre-applied thermal paste, you will need to apply it yourself. Squeeze a small pea-sized dot or a thin line of thermal paste onto the center of the CPU surface. Remember, less is more, and you want to avoid applying too much paste as it can hinder heat transfer.
- Spread the Thermal Paste: Gently spread the thermal paste over the CPU surface using a plastic spatula, a credit card, or the heat sink itself. Ensure that the thermal paste is spread evenly to cover the entire surface, creating a thin and uniform layer.
- Avoid Air Bubbles: Take care to prevent air bubbles from forming between the CPU and the CPU cooler. Air bubbles can hinder heat transfer and compromise cooling performance. To avoid this, apply gentle pressure while spreading the thermal paste to push out any trapped air.
- Double-Check the Application: After spreading the thermal paste, double-check to ensure it covers the entire CPU surface evenly. Look for any gaps or clumps that may affect heat transfer. If needed, make adjustments by spreading the paste more evenly.
Remember, applying thermal paste is a crucial step for effective heat transfer between the CPU and the CPU cooler. Take your time, be precise, and strive for an even and thin layer of thermal paste for optimal cooling performance.
Great! You’ve successfully applied the thermal paste to the CPU. Now, let’s move on to the exciting part – mounting the Ryzen 5 3600X CPU cooler!
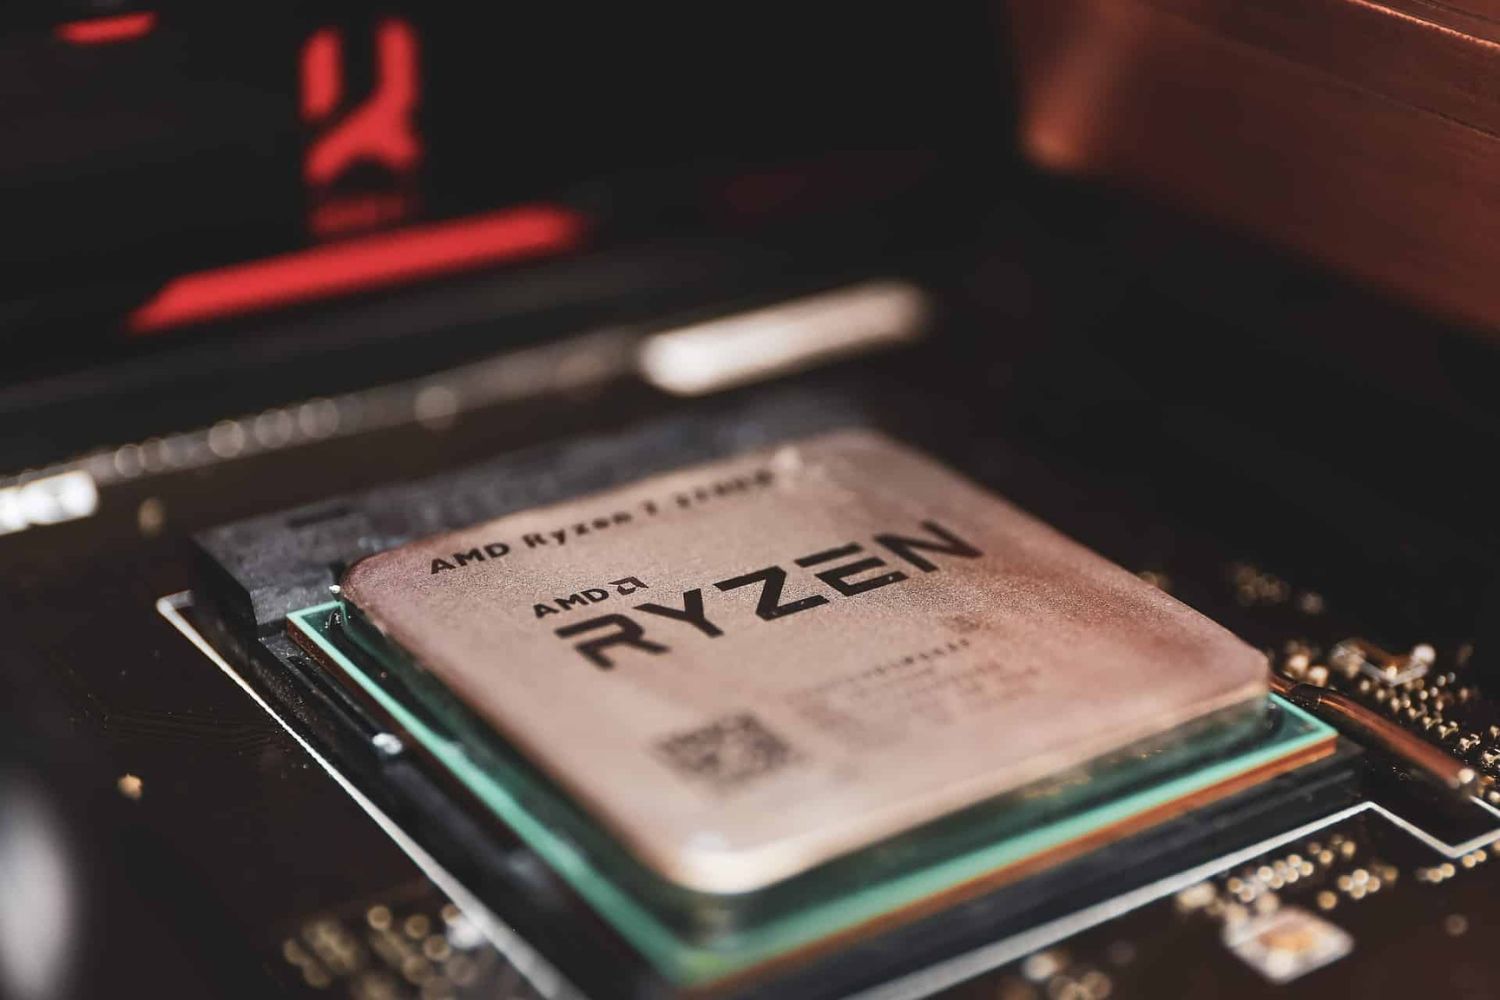
Step 4: Mounting the Ryzen 5 3600X CPU Cooler
Now that you have applied the thermal paste, it’s time to mount the Ryzen 5 3600X CPU cooler onto your motherboard. Follow these steps to ensure a secure and proper installation:
- Align the CPU Cooler: Carefully position the Ryzen 5 3600X CPU cooler over the CPU socket, aligning the mounting holes with the corresponding brackets on the motherboard. Take note of any notches or specific orientations specified in your CPU cooler’s manual.
- Secure the Mounting Bracket: Depending on your CPU cooler model, you may need to attach a mounting bracket to the CPU cooler. Consult your CPU cooler’s manual for specific instructions on how to secure the mounting bracket in place. Use screws or other fasteners provided by the manufacturer.
- Attach the CPU Cooler: Gently lower the CPU cooler onto the CPU socket, ensuring that it is properly seated. Align the mounting holes on the CPU cooler with the brackets on the motherboard. You may need to apply light pressure to press the cooler down until it is securely in place.
- Tighten the Screws: Using a screwdriver or an Allen wrench, tighten the screws in a diagonal pattern. Start with a loose screw in one corner, then tighten the screw in the opposite corner. Repeat this process for the remaining screws until they are all securely fastened.
- Check for Proper Alignment: Ensure that the CPU cooler is aligned evenly and sits flush on the CPU socket. Verify that the Cooler Master logo or any other branding on the CPU cooler is facing in the desired direction for aesthetic purposes, if applicable.
- Reconnect Cables: Once the CPU cooler is mounted, reconnect any cables that were previously disconnected, such as the fan power cable and any RGB connectors.
By following these steps, you can successfully mount the Ryzen 5 3600X CPU cooler onto your motherboard. Double-check that all screws are secure, and the cooler is firmly in place. Now it’s time to move on to the next step: connecting the CPU cooler.
Step 5: Connecting the CPU Cooler
With the Ryzen 5 3600X CPU cooler securely mounted, it’s time to connect it to your system. Follow these steps to properly connect the CPU cooler:
- Locate the CPU Fan Header: Identify the CPU fan header on your motherboard. It is typically labeled as “CPU_FAN” or “CPU_FAN1.” Refer to your motherboard’s manual if you’re unsure about the exact location.
- Connect the Fan Cable: Take the fan cable from the CPU cooler and connect it to the CPU fan header on the motherboard. Ensure that the connection is secure and aligned correctly. The connector should only fit one way, so do not force it.
- Adjust Fan Orientation (Optional): Depending on your system’s airflow and personal preference, you may want to adjust the orientation of the CPU cooler fan. This can be done by gently twisting the cooler, without loosening the mounting screws, to achieve the desired direction of airflow.
- Connect RGB Cables (If Applicable): If your CPU cooler has RGB lighting and requires connection to a RGB header on the motherboard, consult the CPU cooler manual and your motherboard’s manual for the proper RGB cable connection. Follow the instructions carefully to ensure proper synchronization and control of the RGB lighting.
- Secure Any Additional Cables: Depending on your specific CPU cooler model, there may be additional cables for features such as pump speed control or additional fan headers. Secure these cables following the manufacturer’s instructions and ensure they are connected to the appropriate headers on the motherboard.
- Verify Secure Connection: After connecting all the necessary cables, double-check that they are securely connected and not tangled or blocking any components. Ensure that the cables are routed neatly for optimal airflow and aesthetics.
By following these steps, you can properly connect the CPU cooler to your motherboard. Double-check all cable connections and ensure they are secure and in the correct orientation. Now, it’s time to move on to the final step: testing and troubleshooting.
Step 6: Testing and Troubleshooting
Once you have completed the installation of the Ryzen 5 3600X CPU cooler, it’s essential to test its functionality and address any potential issues. Follow these steps to ensure everything is in working order:
- Power On Your Computer: Connect your computer to a power source and turn it on. Listen for any unusual noises or vibrations coming from the CPU cooler. If you notice any abnormal sounds, power off your system immediately to investigate the issue.
- Monitor CPU Temperatures: Use software like Ryzen Master or third-party monitoring applications to monitor your CPU temperatures. Keep an eye on the temperatures to ensure they remain within safe ranges during normal operation. Elevated temperatures may indicate improper installation or insufficient cooling.
- Check Fan Speed: Verify that the CPU cooler fan is spinning correctly and at the appropriate speed. You can access the BIOS or use monitoring software to check the fan speed. If the fan is not spinning or operating at unusually low speeds, ensure that the fan cable is securely connected to the CPU fan header.
- Inspect Thermal Paste Spread: Carefully examine the spread of the thermal paste between the CPU and the cooler. It should be uniformly distributed and cover the entire CPU surface. If there are any gaps or uneven spread, you may need to reapply the thermal paste and reinstall the CPU cooler.
- Perform Stress Tests: If you want to ensure the CPU cooler’s efficiency under heavy loads, consider running stress tests or CPU-intensive tasks for an extended period. This will help identify any overheating issues or system instability that might arise during demanding usage scenarios.
- Troubleshooting: If you encounter any issues such as overheating, loud noise, or system instability, first check if the CPU cooler is seated correctly and all connections are secure. Ensure that the mounting screws are tightened evenly and that the fan is functioning properly. If the issue persists, consult the CPU cooler’s manual or seek assistance from the manufacturer’s support.
By following these steps and testing the functionality of your Ryzen 5 3600X CPU cooler, you can identify and resolve any potential problems that may arise. Remember to monitor temperatures regularly to ensure your system is performing optimally and safely.
Congratulations! You have completed the installation of the Ryzen 5 3600X CPU cooler. Enjoy the improved cooling efficiency and performance of your system!
Conclusion
Installing the Ryzen 5 3600X CPU cooler is a crucial step in maintaining optimal performance and temperature management for your system. By following the steps outlined in this guide, you can successfully install the CPU cooler and enjoy improved cooling efficiency for your processor.
Throughout the installation process, it’s important to prioritize safety, cleanliness, and attention to detail. Take your time to prepare your workspace, familiarize yourself with the CPU cooler and its components, and ensure proper alignment and connection of all cables.
Remember to apply thermal paste evenly and avoid any air bubbles that could hinder heat transfer. Securely mount the CPU cooler and connect it to the appropriate headers on the motherboard, ensuring all connections are secure and cables are properly routed.
Once the installation is complete, it’s essential to test the functionality of the CPU cooler by monitoring temperatures, checking fan speed, and performing stress tests to ensure optimal performance under heavy loads. Troubleshoot any issues that may arise, following the troubleshooting steps outlined in this guide.
By successfully installing the Ryzen 5 3600X CPU cooler and ensuring its proper functionality, you can enjoy the benefits of improved cooling efficiency for your system. Whether you’re a gaming enthusiast, content creator, or simply someone seeking better performance, a properly installed and functioning CPU cooler is essential for maintaining the health and longevity of your processor.
We hope this guide has provided you with the necessary information and steps to install the Ryzen 5 3600X CPU cooler with confidence. Remember, if you encounter any difficulties or have specific questions about your CPU cooler or system, consult the manufacturer’s manual or seek assistance from their customer support.
Enjoy your newly installed CPU cooler and the enhanced performance it brings to your system!