Introduction
Welcome to our step-by-step guide on how to install the Corsair Hydro Series High Performance Liquid CPU Cooler H60. If you want to optimize the cooling performance of your computer’s CPU, upgrading to a liquid cooler like the H60 can be a game-changer. With its powerful cooling capabilities and easy installation process, the Corsair Hydro Series H60 is a popular choice among PC enthusiasts and gamers.
By switching to a liquid cooler, you can ensure that your CPU stays cool even during intense tasks, such as gaming or video editing, preventing overheating and maximizing performance. The H60 offers superior cooling efficiency compared to traditional air coolers, thanks to its copper base plate, aluminum radiator, and low-noise fan.
In this guide, we will walk you through the entire installation process, from preparing your computer to testing the installation. Whether you are a seasoned computer enthusiast or a beginner looking to upgrade your system, this guide will provide you with the knowledge and confidence to successfully install the Corsair Hydro Series H60 cooler.
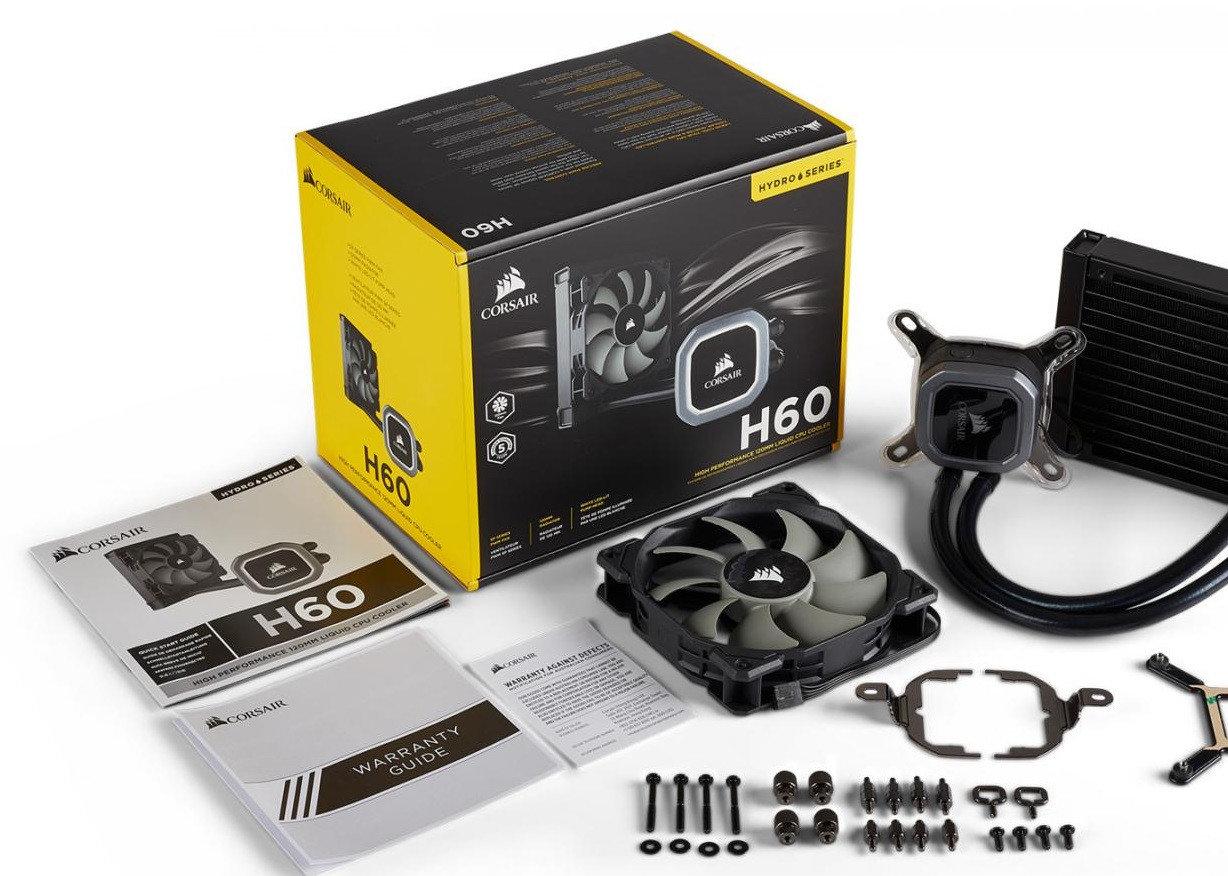
Before we dive into the installation process, let’s briefly go over the tools and materials you will need to have on hand:
- Phillips screwdriver
- Thermal paste
- Isopropyl alcohol or a cleaning solution
- Cotton swabs or lint-free cloth
- Thermal compound remover (optional)
With these tools and materials ready, you’re all set to embark on the installation process. So, let’s get started!
Tools and Materials Needed
Prior to installing the Corsair Hydro Series High Performance Liquid CPU Cooler H60, it is important to gather all the necessary tools and materials. Having these items on hand will ensure a smooth and efficient installation process. Here’s a list of what you’ll need:
- Phillips screwdriver: This tool will be required to remove the old CPU cooler and secure the new H60 cooler.
- Thermal paste: Thermal paste is crucial for ensuring proper heat transfer between the CPU and the cooler. It helps in dissipating heat effectively and preventing overheating. Make sure to choose a high-quality thermal paste for optimal results.
- Isopropyl alcohol or a cleaning solution: Before installing the new cooler, it’s essential to clean the CPU surface thoroughly. Isopropyl alcohol or a specialized cleaning solution can be used to remove any residual thermal paste and ensure a clean surface for the new installation.
- Cotton swabs or lint-free cloth: These are necessary for applying the cleaning solution and removing any residue from the CPU surface. Make sure to use lint-free cloth or cotton swabs to prevent any lint or fibers from getting stuck on the CPU.
- Thermal compound remover (optional): In case there is hardened or stubborn thermal compound on the CPU, a thermal compound remover can come in handy. This optional tool can assist with the cleaning process.
Gathering these tools and materials prior to starting the installation will save you time and ensure that you have everything you need at your fingertips. It’s important to have a well-organized workspace and to handle the tools with care to avoid any accidents or damage to your computer components.
Now that you have all the necessary tools and materials, it’s time to move on to the next step: Preparing the computer for installation. Let’s proceed to the next section to get started!
Step 1: Preparing the Computer for Installation
Before installing the Corsair Hydro Series High Performance Liquid CPU Cooler H60, it is essential to properly prepare your computer. This step will help ensure a successful and hassle-free installation process. Here’s what you need to do:
1. Shut down your computer: Begin by shutting down your computer and disconnecting it from the power source. This will prevent any potential electrical shocks or damage during the installation process.
2. Remove the side panel: Open the computer case by removing the side panel. Most cases have screws or latches securing the panel in place. Use a screwdriver if necessary and set aside the panel in a safe location.
3. Ground yourself: Static electricity can seriously damage sensitive computer components. To prevent this, ground yourself by touching a grounded metal object or by wearing an anti-static wristband. This will discharge any static electricity in your body.
4. Locate the CPU: Identify the CPU inside your computer. It is a small chip usually located on the motherboard. Take note of its location and the surrounding components.
5. Disconnect the cables: Carefully disconnect any cables that may be obstructing access to the CPU area. This includes power cables, data cables, and any other connectors that might be in the way. Take note of their positions to make reconnection easier later on.
6. Remove the RAM modules (optional): If your CPU cooler is blocking the RAM slots, it may be necessary to remove the RAM modules. Gently push down on the retaining clips at each end of the modules to release them from the slots. Set them aside in a safe place.
7. Clean the CPU surface: Using the isopropyl alcohol or a cleaning solution along with the cotton swabs or lint-free cloth, clean the surface of the CPU thoroughly. Remove any existing thermal paste residue from the CPU surface. Ensure that the surface is clean and dry before proceeding.
By completing these preparatory steps, you have set the stage for a successful installation of the Corsair Hydro Series H60 cooler. With the computer properly prepared, you can now move on to the next step: Removing the old CPU cooler.
Step 2: Removing the Old CPU Cooler
Now that you have prepared your computer for installation, it’s time to remove the old CPU cooler. This step is crucial to ensure a clean installation of the Corsair Hydro Series High Performance Liquid CPU Cooler H60. Follow these steps to remove the old cooler:
1. Locate the CPU cooler: Identify the location of the existing CPU cooler. It is usually positioned on top of the CPU, secured with screws or mounting brackets.
2. Disconnect the fan cable: Locate the fan cable connected to the CPU cooler and gently disconnect it from the motherboard. Make sure to remember the orientation of the connector to facilitate reconnection later.
3. Remove the mounting screws or brackets: Carefully unscrew or remove the mounting screws or brackets that secure the CPU cooler to the motherboard. Take note of their positions as different coolers may have different mounting mechanisms.
4. Release the cooler from the CPU: Once the mounting screws/brackets are removed, carefully detach the CPU cooler from the CPU by gently twisting it or lifting it straight up, depending on the type of mounting mechanism. Be cautious not to apply too much force to avoid damaging the CPU or motherboard.
5. Clean the CPU surface: After removing the old cooler, take a moment to inspect the surface of the CPU. Clean any residual thermal paste that may be present using isopropyl alcohol or a cleaning solution along with a cotton swab or lint-free cloth. Ensure that the surface is dry before proceeding.
6. Remove the old thermal paste: If there is hardened or stubborn thermal paste on the CPU or heatsink, use a thermal compound remover and follow the instructions provided. This will ensure a clean surface for the new thermal paste application.
By following these steps, you have successfully removed the old CPU cooler from your computer. Remember to handle the cooler and CPU with care to avoid any accidental damage. Now you’re ready to move on to the next step: Preparing the new Corsair Hydro Series H60 cooler.
Step 3: Preparing the New Corsair Hydro Series H60 Cooler
With the old CPU cooler removed, it’s time to prepare the new Corsair Hydro Series High Performance Liquid CPU Cooler H60. This step is crucial to ensure a smooth and successful installation. Follow these steps to prepare the new cooler:
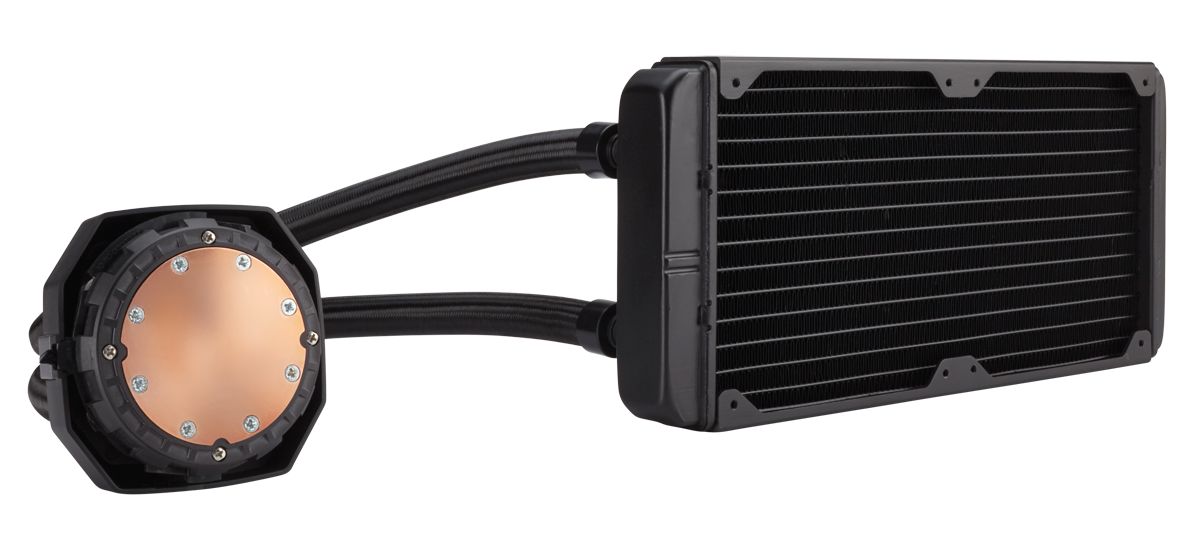
1. Familiarize yourself with the components: Take a moment to familiarize yourself with the components of the Corsair Hydro Series H60 cooler. This includes the pump, radiator, fan, tubing, and mounting brackets. Understanding these components will make the installation process easier.
2. Apply thermal paste: Before attaching the cooler to the CPU, it’s necessary to apply thermal paste on the CPU surface. The thermal paste helps promote better heat transfer between the CPU and the cooler. Follow the manufacturer’s instructions for the recommended amount and application method.
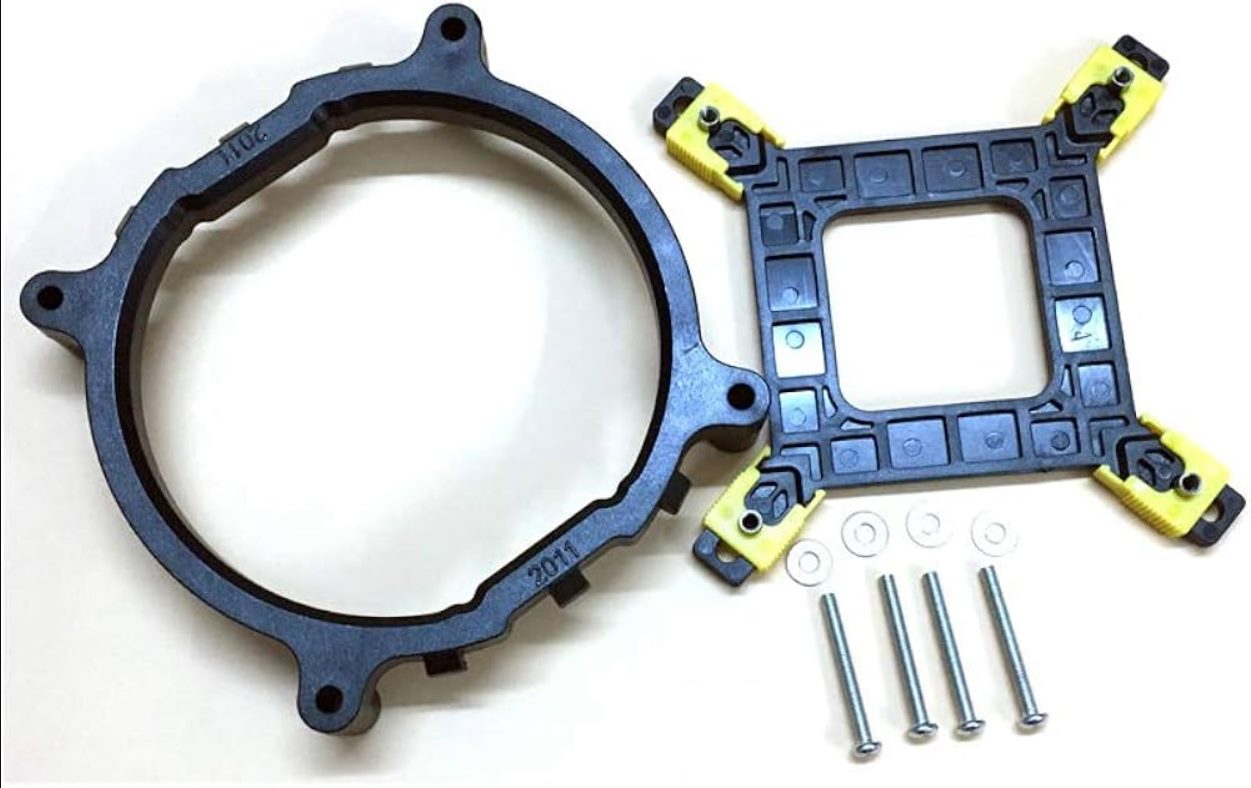
3. Attach the mounting brackets: Depending on your motherboard socket type, attach the appropriate mounting brackets to the pump. The H60 cooler supports multiple socket types, so ensure that you choose the correct brackets for your motherboard.
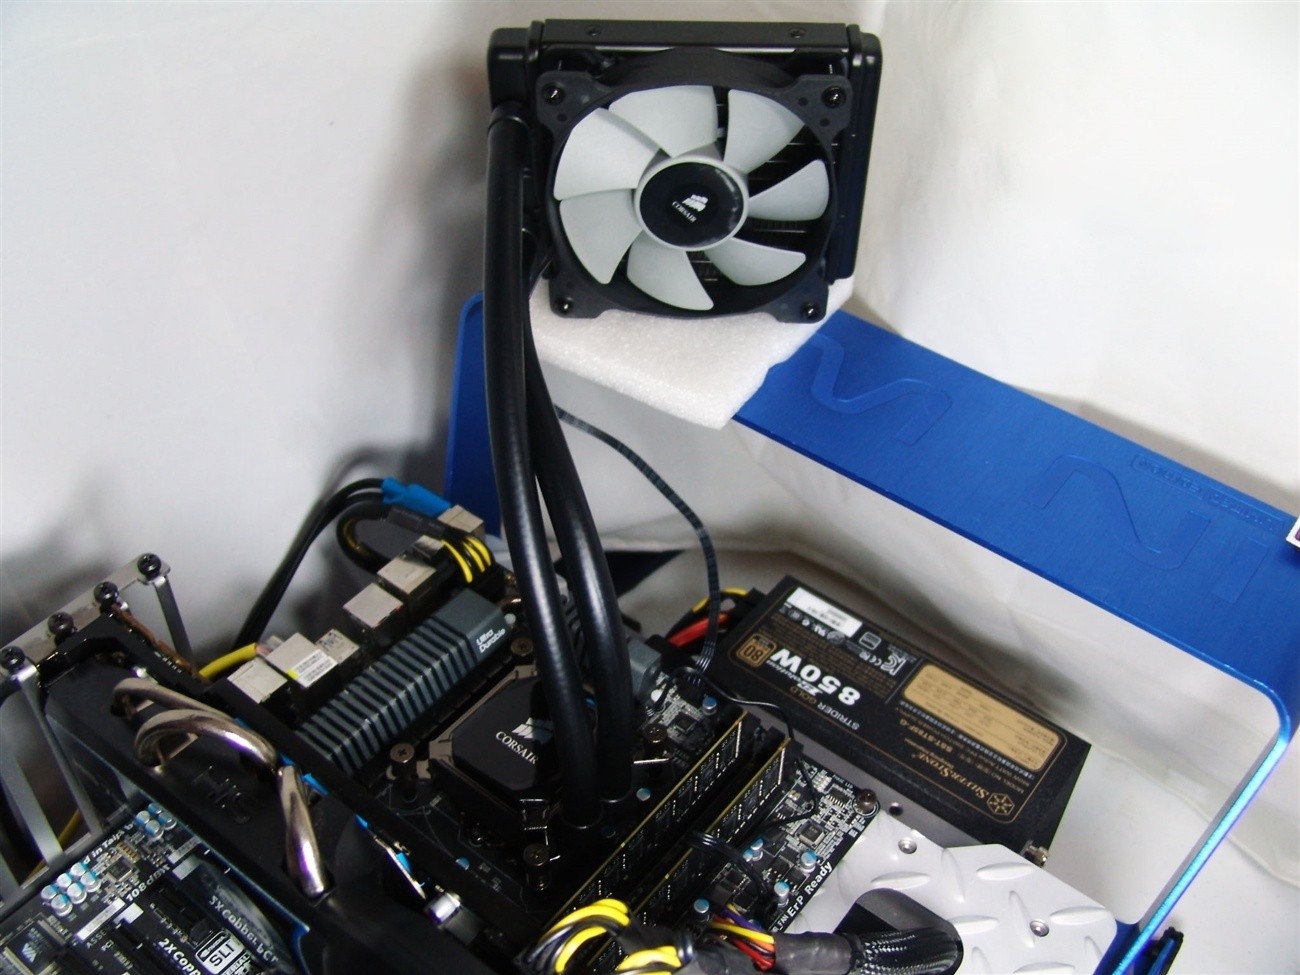
4. Position the radiator: Determine the optimal position and orientation for mounting the radiator in your computer case. Generally, installing it at the rear exhaust fan location or on the top of the case provides efficient cooling. Securely attach it using the appropriate screws or brackets provided.
5. Connect the tubing: Connect the tubing from the pump to the radiator. Ensure a secure and tight connection, as this will allow efficient coolant flow throughout the system. Be careful not to bend or kink the tubing excessively.
6. Orient the pump and fan: Orient the pump so that the Corsair logo is in the desired position. The fan should be attached to the radiator to ensure proper airflow. Consult the installation manual for the recommended fan orientation for maximum cooling effectiveness.
By following these steps, you have successfully prepared the new Corsair Hydro Series H60 cooler for installation. Take your time to ensure that all components are securely attached and in the optimal position. With the cooler prepared, you’re now ready to move on to the next step: Installing the Corsair Hydro Series H60 cooler.
Step 4: Installing the Corsair Hydro Series H60 Cooler
Now that you have prepared the Corsair Hydro Series H60 cooler, it’s time to install it onto your computer. Follow these step-by-step instructions to ensure a proper and secure installation:
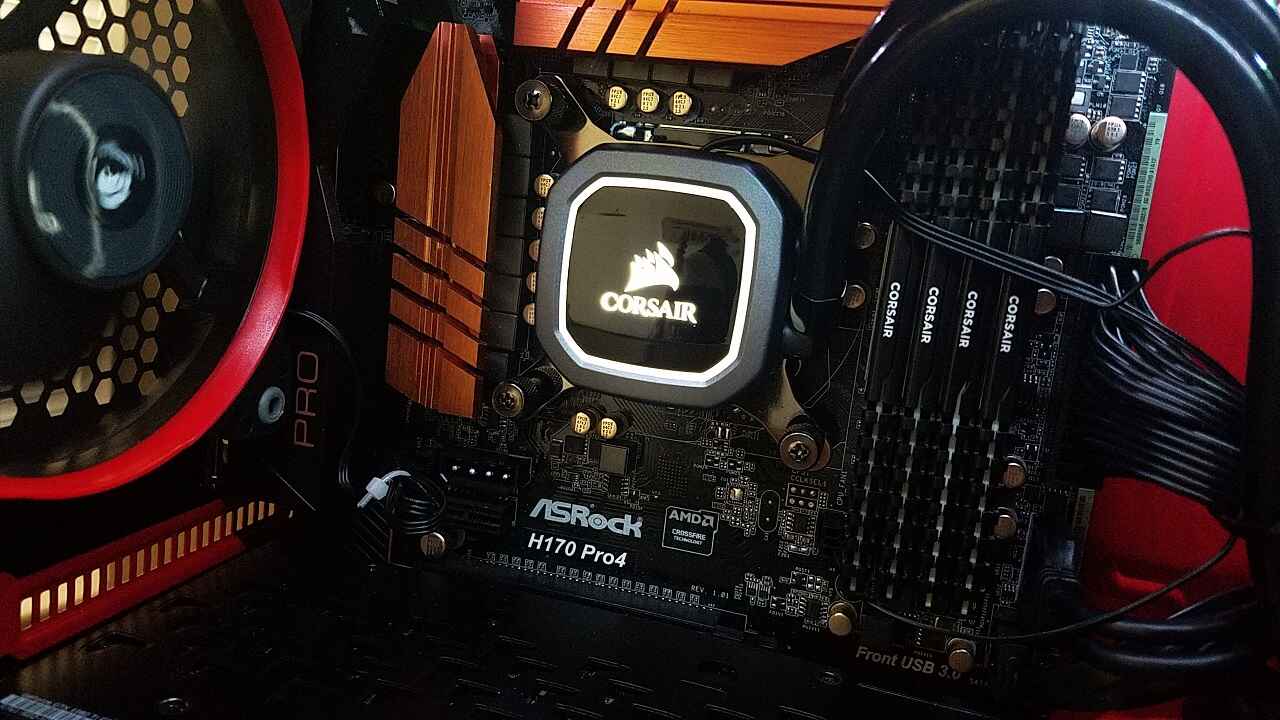
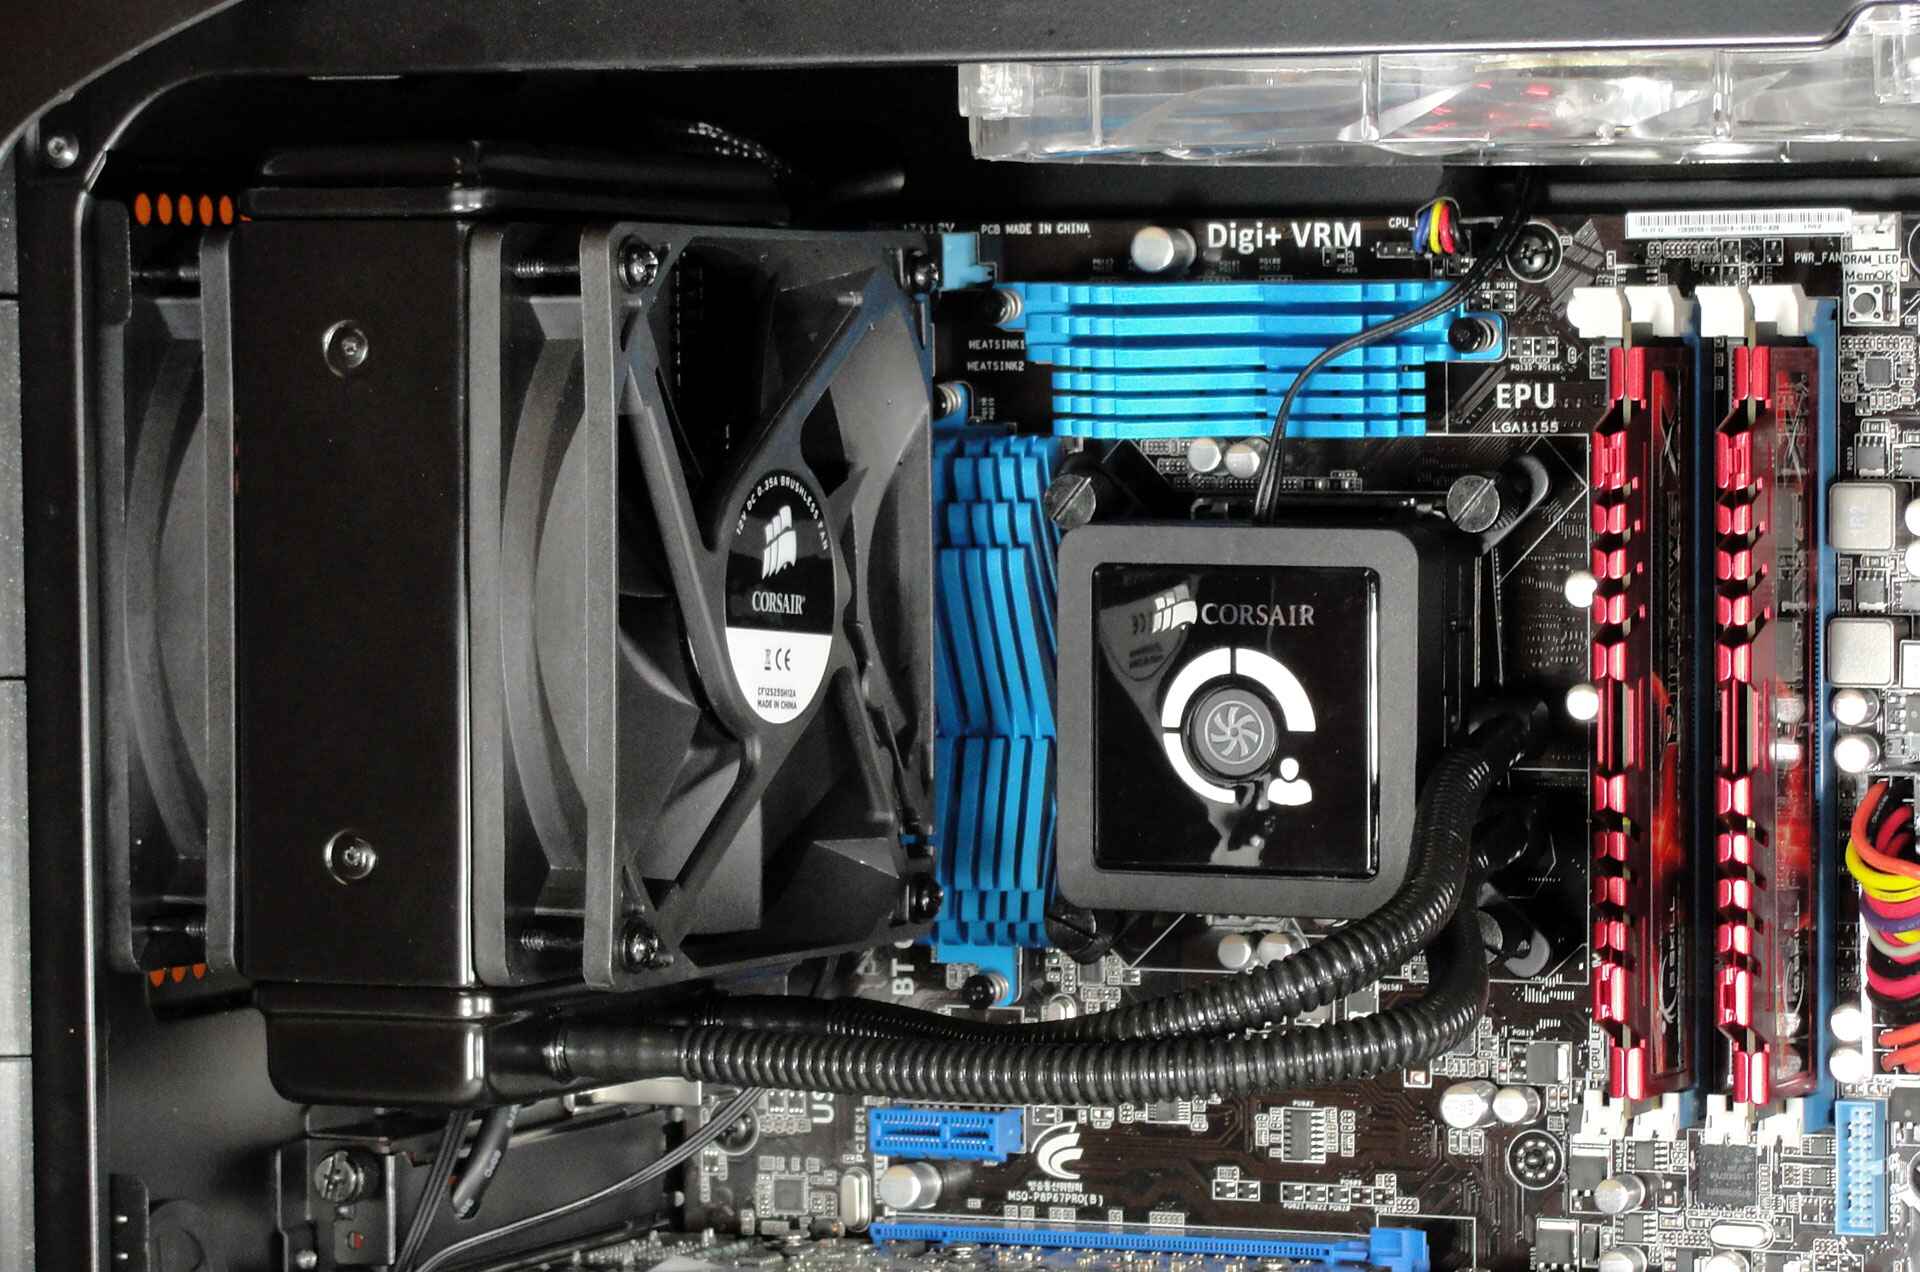
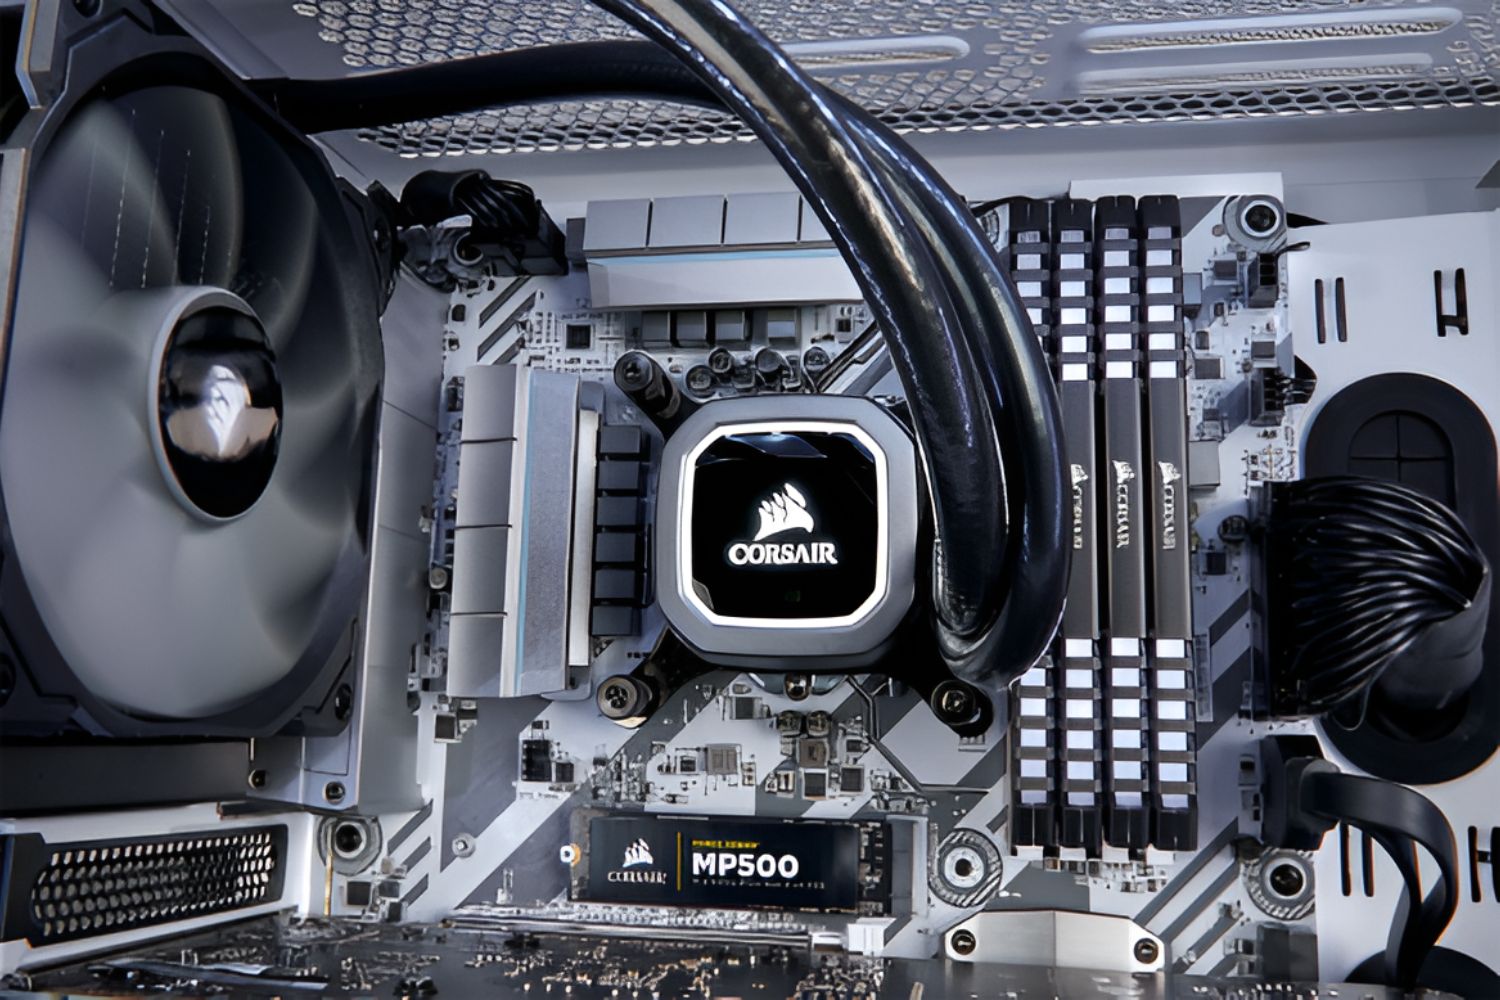
1. Position the pump on the CPU: Carefully position the pump unit onto the CPU, aligning it with the mounting holes on the motherboard. Take note of any notches or guides that indicate the correct orientation.
2. Attach the pump to the CPU: Once properly aligned, use the provided mounting screws or brackets to secure the pump onto the CPU socket. Make sure to tighten the screws evenly and firmly but avoid overtightening, as it may damage the hardware or affect cooling performance.
3. Connect the pump fan cable: Locate the fan header on the motherboard labeled “CPU_FAN” or a similar designation. Connect the pump’s fan cable to this header to ensure proper control and monitoring of the cooler.
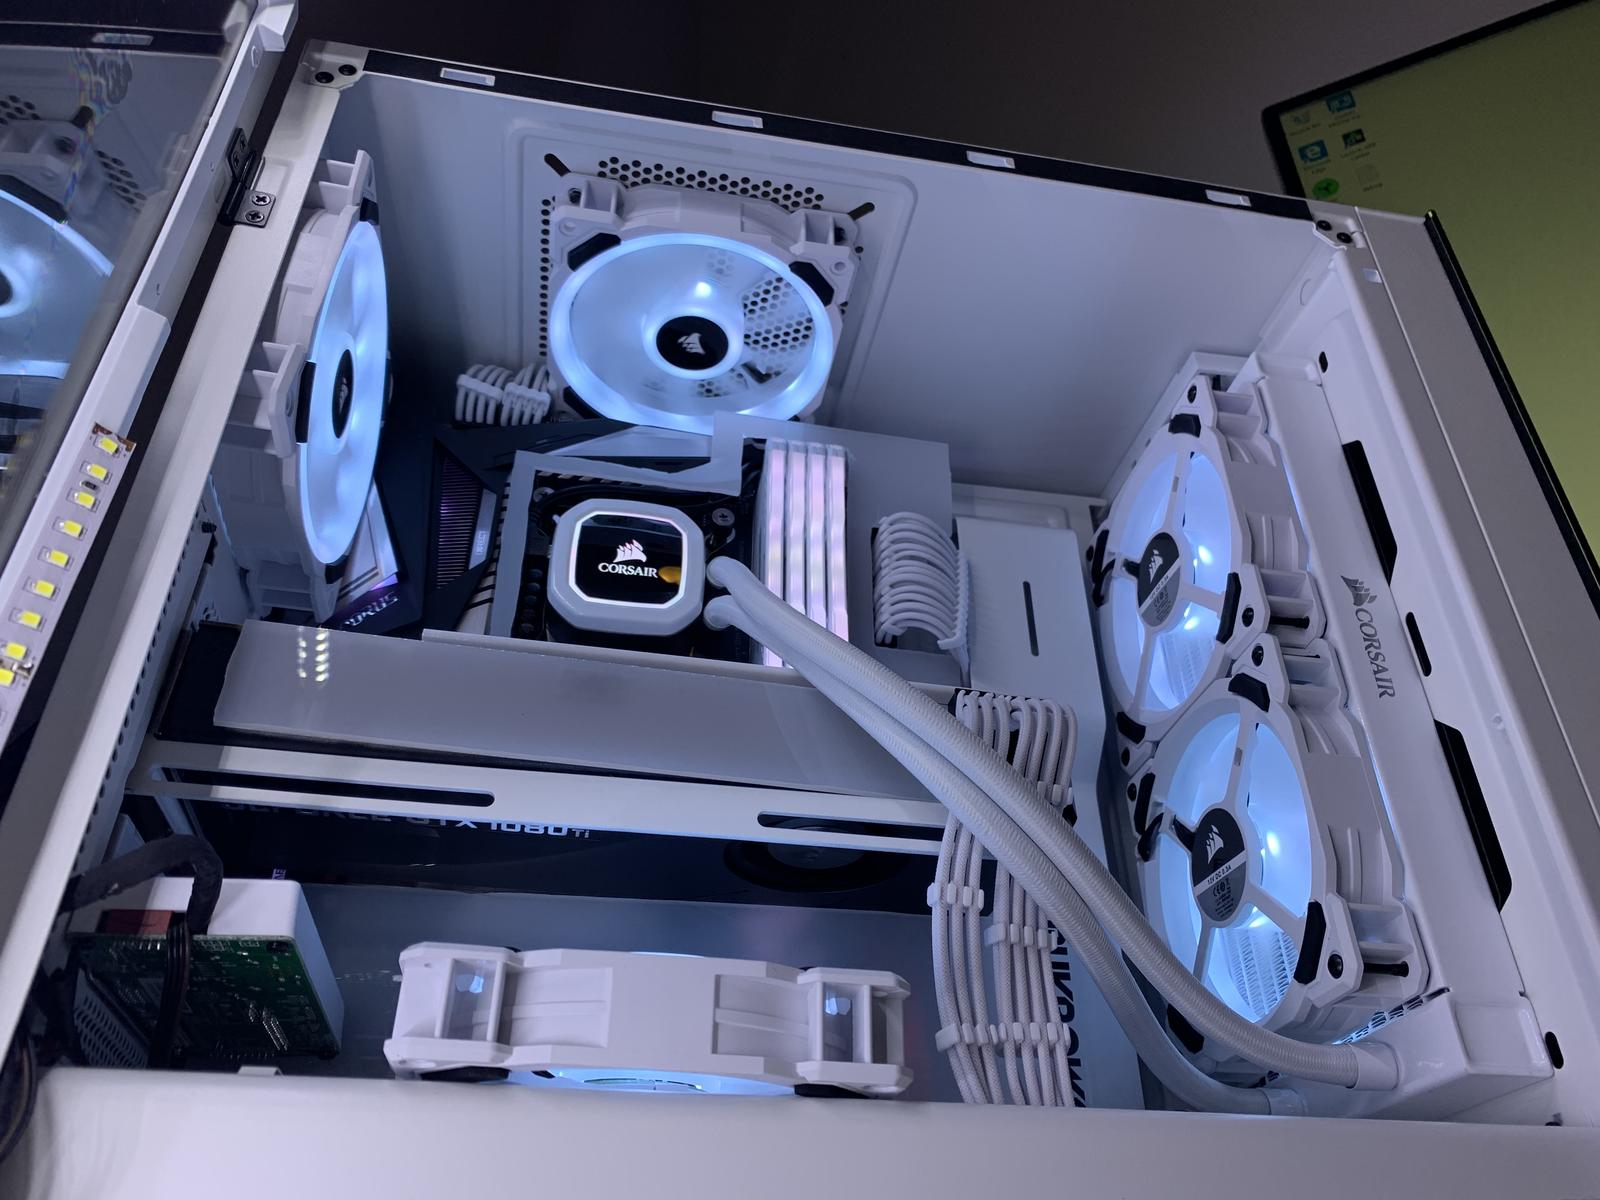
4. Mount the radiator/fan assembly: Position the radiator/fan assembly in the previously determined location within the computer case. Ensure that it is securely attached using the provided screws or brackets. Verify that the fan is facing the correct direction to promote optimal airflow.
5. Connect the fan cables: Locate the appropriate fan headers on the motherboard and connect the fan cables from the radiator to these headers. Ensure a secure connection to enable the motherboard to control the fan speed and monitor the cooling performance.
6. Route the tubing: Carefully route the tubing from the pump to the radiator, avoiding any sharp bends or pinch points. Secure the tubing using zip ties or cable management solutions to ensure a clean and organized installation.
7. Check for clearance: Double-check that there is sufficient clearance between the cooler and other components such as RAM modules or graphics cards. Ensure that no cables or other obstructions interfere with the installation.
By following these steps, you have successfully installed the Corsair Hydro Series H60 cooler onto your computer. Take a moment to admire your work and ensure that everything is securely in place. Once installed, you’re ready to move on to the next step: Connecting the cooler to the motherboard.
Step 5: Connecting the Cooler to the Motherboard
Now that you have successfully installed the Corsair Hydro Series H60 cooler onto your computer, it’s time to connect it to the motherboard. This step is crucial for ensuring proper power and control of the cooler. Follow these steps to connect the cooler to the motherboard:
1. Locate the CPU fan header: Identify the CPU fan header on the motherboard. It is typically labeled “CPU_FAN” or something similar. Take note of its location.
2. Connect the pump connector: Take the pump connector from the H60 cooler and carefully plug it into the CPU fan header. Ensure that the connection is secure and aligned properly. You may need to refer to your motherboard manual if you’re unsure about the location of the CPU fan header.
3. Check the BIOS settings: Once the cooler is connected to the motherboard, you should access the BIOS settings to ensure that the CPU fan control is set correctly. Depending on your motherboard model, access the BIOS by pressing the designated key during the boot-up process (usually F2, DEL, or ESC). In the BIOS, navigate to the hardware monitoring section and verify that the CPU fan is detected and functioning properly.
4. Monitor and adjust fan speed: To optimize cooling performance, you can adjust the fan speed settings in the BIOS or through software provided by your motherboard manufacturer. Some motherboards also have dedicated software for controlling and monitoring fan speeds. Make sure the fan speed is set to an appropriate level for your specific needs.
5. Test the cooler: Once the cooler is connected and the fan speed is adjusted, it’s time to test its functionality. Power on your computer and monitor the CPU temperature using software such as CPU-Z or Core Temp. Ensure that the temperature is within acceptable limits and that the cooler is working efficiently to keep the CPU cool.
By following these steps, you have successfully connected the Corsair Hydro Series H60 cooler to the motherboard. Double-check all connections and settings to ensure they are correct. Now, you can move on to the next step: Testing the installation and securing the cooler.
Step 6: Testing the Installation and Securing the Cooler
Now that you have connected the Corsair Hydro Series H60 cooler to the motherboard, it’s time to test the installation and ensure that everything is functioning properly. Follow these steps to test the installation and secure the cooler:
1. Power on your computer: Start your computer and observe the cooler in action. Listen for any unusual noises and ensure that the fan is spinning smoothly.
2. Monitor CPU temperature: Use monitoring software such as CPU-Z or Core Temp to keep an eye on your CPU temperature. Ideally, the temperature should be within normal limits, indicating that the cooler is effectively dissipating heat from the CPU.
3. Check for leaks: Examine the cooler, tubing, and connections for any signs of leakage. Look for dripping liquid or dampness around the pump or radiator. If you detect any leaks, immediately shut down your computer and contact Corsair customer support for assistance.
4. Secure the cooler: Ensure that all screws or mounting brackets securing the cooler and radiator are tight and secure. Double-check that there is no movement or wobbling of the cooler. This will prevent any potential damage and ensure the longevity of the installation.
5. Cable management: Take a moment to organize and secure any loose cables to maintain a clean and tidy installation. Use cable ties or routing channels to manage the cables and prevent them from interfering with the cooler or other components.
6. System stability test: To verify the stability of your system, consider running a stress test or benchmarking software. These tools will put your CPU under heavy load and help you evaluate the cooling performance of the Corsair Hydro Series H60 cooler.
By following these steps, you have successfully tested the installation of the Corsair Hydro Series H60 cooler and ensured its proper functioning and stability. If everything is in order, you can now enjoy improved cooling performance and the benefits of a liquid CPU cooler.
Conclusion
Congratulations on successfully installing the Corsair Hydro Series High Performance Liquid CPU Cooler H60! By following the step-by-step guide provided, you have upgraded your computer’s cooling system, which will help keep your CPU running at optimal temperatures even during demanding tasks. The H60’s advanced liquid cooling technology, combined with its easy installation process, makes it a popular choice among PC enthusiasts and gamers.
Throughout the installation process, you learned how to prepare your computer, remove the old CPU cooler, prepare the new H60 cooler, install it onto your computer, and connect it to the motherboard. Testing the installation ensured that everything was functioning as expected. By completing each step carefully, you have optimized the performance and longevity of your computer’s CPU.
Remember, maintaining a properly cooled CPU is essential for preventing overheating, which can lead to performance issues and potential damage to your system. With the Corsair Hydro Series H60 cooler in place, you can enjoy efficient cooling and extend the lifespan of your CPU.
If you ever need to reapply thermal paste or remove and reinstall the cooler for any reason, don’t hesitate to refer back to this guide. Understanding the installation process will give you the confidence to handle any cooling-related tasks in the future.
Thank you for choosing the Corsair Hydro Series H60 cooler and investing the time to improve your computer’s performance. With this reliable and efficient cooling solution, you can take your computing experience to new heights. Happy computing!