Whether you’re a beginner or a professional photographer, you’re no doubt familiar with the importance of editing your photos. Done post-shoot, editing is crucial to improving image quality, fixing errors, or even adding your unique artistic flair to your shots.
There are a whole host of apps and software available for you to edit your photos. Beginning from the premium Adobe Photoshop and Lightroom, these tools can enhance your photos to make them more shareworthy and marketable. Yet having these tools isn’t enough to make your photos look good—you also need to know how they work to even begin the editing process.
In this article, we show you how to edit your photos to step up your photography game.
Important Notes Before Editing Photos

Photo Editing Software
One of the essential aspects of learning how to edit photos is the photo editing software you use. Free open-source websites and software like Fotor, Pixlr, and GIMP are fantastic options, as are advanced, paid programs like Adobe Photoshop and Lightroom. Even your humble smartphone has its own in-built photo editing functionality for quick post-processing on the fly.
Regardless of what you choose, every program is more than capable of getting the job done.
Preserving Original Images
Some photo editing apps automatically save a copy of the original photos that you capture. There are yet others that will save your edited photos over the originals if you don’t specify how you want them to handle your edits. As photo editing is a trial-and-error process, you should always make it a habit to save your original photos as a failsafe.
To retain the full integrity of your photos, make sure that your camera captures your shots in the RAW format. While the size of photos saved in this format is typically large, you can always whittle this down when you edit them.
Importing and Selecting Images
The best thing about digital photography is capturing multiple photos to increase your chances of snapping beautiful shots. Before you start editing your photos, you can save them on your computer and organize them accordingly. Once complete, you can review and sort which ones you want to edit.
How to Edit Photos: Types of Image Corrections
The first step to good photo editing is image correction. In this section, we’ll show you a list of the most basic image corrections you can implement to your photos to improve their lighting.
Brightness and Contrast
When you’re done with a photography expedition and check your spoils, you may notice that they appear too bright or dark. Every image’s brightness and contrast levels depend on numerous factors, including the camera settings and amount of light that entered the lens. To fix this error, you can adjust the con
Adjusting the brightness and contrast ratings is one of the quickest methods you can use to fix the lighting of your photos.
Contrast
An image’s contrast is essentially the difference between light and dark pixels making up its composition. When you lower the contrast, you reduce the range of colors in your photo, while increasing the contrast emphasizes highlights and dark shadows. Skillful manipulation of contrast will either make your photo look more vivid or subdued, depending on the mood you’re attempting to convey.
Brightness
This one’s pretty self-explanatory: increasing the brightness of dark photos will help make your subjects more visible. However, don’t be too quick to tweak the brightness level of your photos. Brightening extremely dark images may trigger graininess and/or generate too much noise, which can negatively affect the quality of your photo’s appearance.
Color Corrections
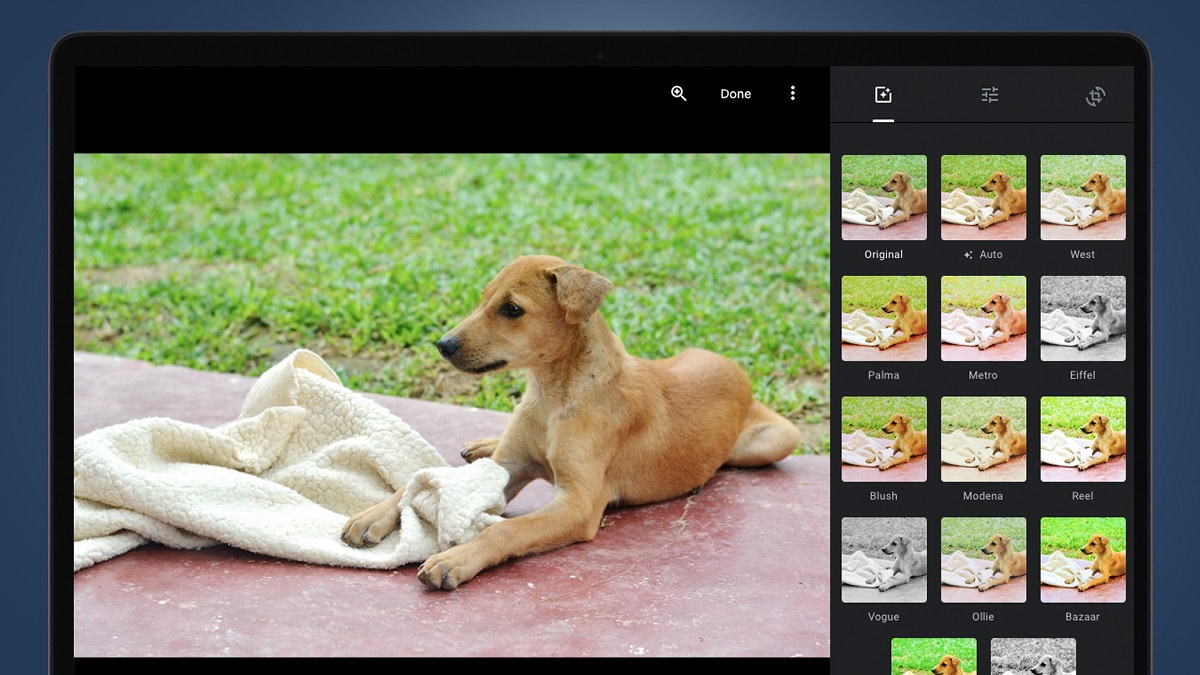
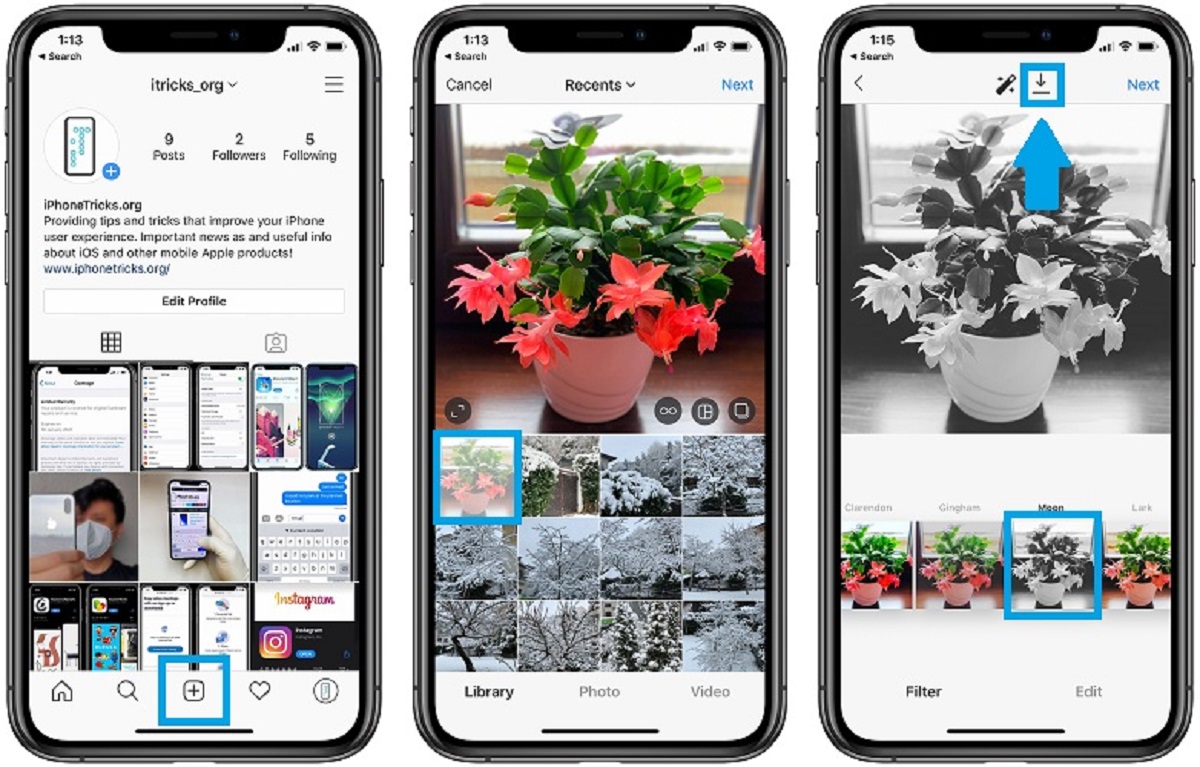
Filters
Some apps include predefined templates of color corrections that can instantly apply beautiful and unique filters to your photos. For instance, Instagram filters can make your photos look as if they are captured on a film camera or a polaroid.
Saturation
There may be instances where your photo’s depth of colors appears lifeless or dull. You can improve their appearance by increasing the saturation level to enliven or enrich their tone. You can also reduce the saturation level to make your photos appear less vibrant—great for achieving a vintage look and feel. Removing the saturation completely results in grayscale or black and white images.
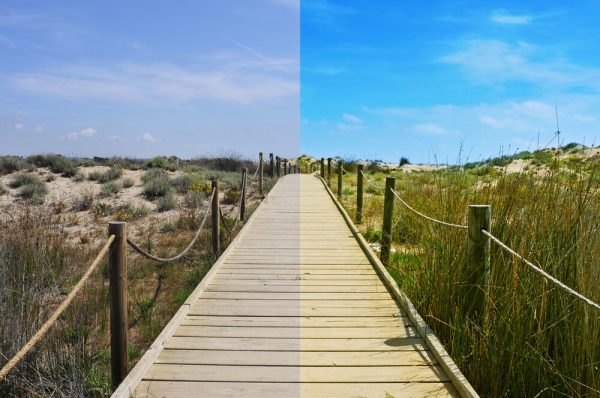
Temperature
Temperature is the determinant of how cool or warm the colors in your photos are. As a general rule of thumb, cooler temperatures make your photos look bluer, while warmer temperatures make them appear more orange or red.
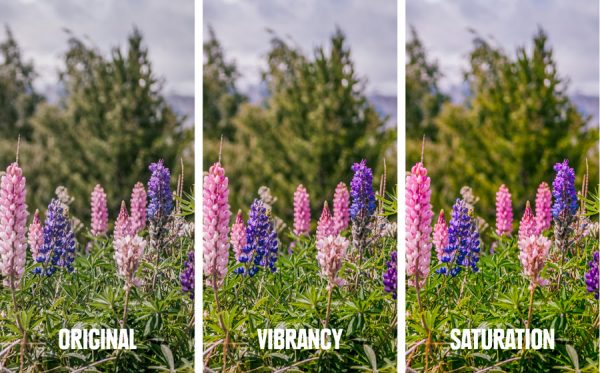
Vibrance
With the vibrance tool, you can improve the saturation level for less vibrant or colorful parts of your photos without oversaturating the other portions. The colors in your photos will be preserved, making them look more natural.
Image Noise
Put simply, noise refers to visual distortion in your photos. For the most part, too much noise will make your photos look grainy, and they may become discolored if it’s especially high. Tweaking the noise level of your photos helps fix this problem.
Sharpening
In some cases, some photos won’t have as much clarity as you’d like them to have. By sharpening your photos, you’ll improve the edges around your subject, making them appear clearer and crisper. However, take note to sharpen with moderation: too much sharpness will impact the authenticity of your photo and could even potentially trigger a significant loss in image detail.
Auto Adjustment Features
Many photo editing apps—especially the ones available on your phone—come with an auto adjustment feature. With this tool, your app will impose suggested changes to your photo that you can then choose to retain or reverse. Adobe Photoshop is one such example, carrying a set of auto adjustment tools that includes Auto Color, Auto Contrast, and Auto Tone.
How To Edit Photos: The Basics
Now that you’ve gotten a good understanding of the basics of image corrections and the changes they make, we’ll now show you how to adjust them in the photo editing process.
Cropping and Spot-Cleaning Your Photos
Straighten Your Photos

Before applying some image corrections, make sure that you have properly aligned your subjects with the background. For instance, if you’re capturing an image of the Eiffel Tower in portrait mode, make sure it’s not slanting, its edges are straight, and the associated background elements are intact. And if you’re shooting in landscape mode, ensure that the horizon is directly proportional as well.
Cropping
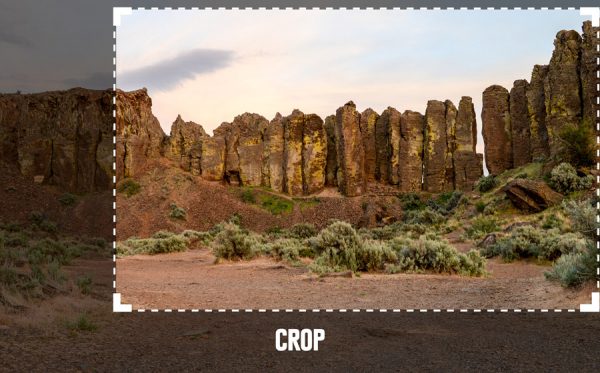
After aligning everything, you can crop your photos to remove unwanted sections from your photos. Cropping is also important to reposition your subject in the photo.
Spot-Cleaning Images
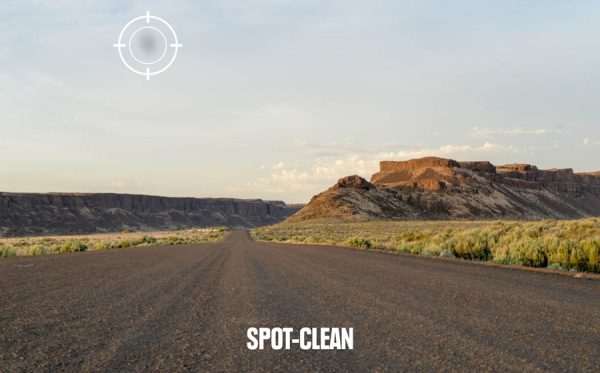
When you’re shooting outdoor sceneries and other landscapes, some particles can alter your camera lenses and eventually manifest as glitches on your photos. These glitches may take the form of black spots that are distracting and unsightly.
To fix these, you can use spot-removing tools like Photoshop’s Spot Healing and Clone Stamping to clean up your photos.
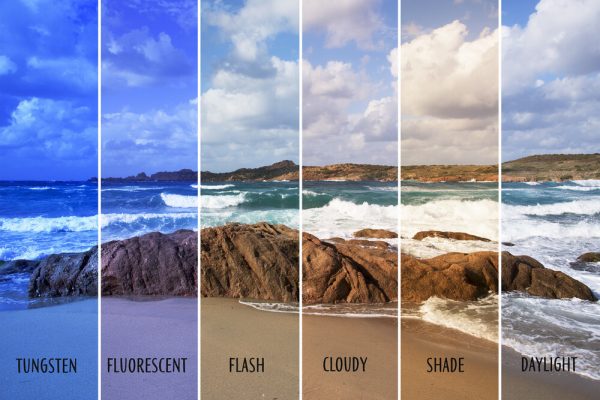
Adjust White Balance
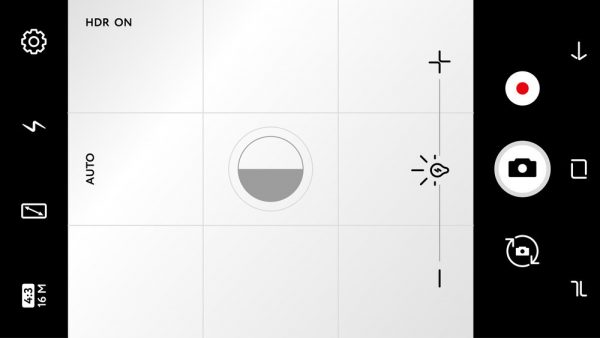
A photo’s white balance level is linked to color levels instead of exposure levels. If one of your photos has a color tone with an unnatural or unattractive theme, adjusting its white balance level can remedy the issue. With JPEG files, you can have minimal levels of white balance adjustment during the editing process since they record significantly less digital data compared to RAW files.
Most photo editing apps allow you to select from preset modes, such as cloudy, daylight, or flash to enhance the photos for the appropriate lighting environment. Aside from that, some apps also include a tint and a temperature slider to fine-tune the lighting of your photos.
Adjust Contrast and Exposure
Contrast Adjustment
When the contrast is too high, your photo either becomes too light or too dark. When it has extremely low contrast, your photo will appear dull and drab. To fix this issue, simply adjust your photo’s contrast level to medium. However, if you want your photos to look a certain way, you can also adjust the contrast level to be either low or high.
Exposure Adjustment
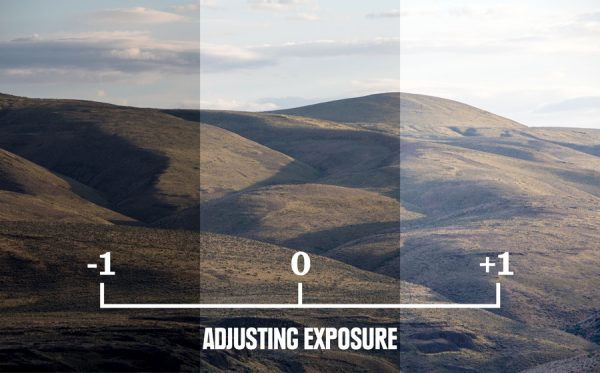
Exposure refers to the amount of light that enters your camera lens and is the setting that determines the overall brightness of your photos. Too much exposure makes your photo appear excessively bright, while too little darkens it significantly. You can use your photo editing apps to fix exposure discrepancies in your photos, adjusting them such that the lighting is well-balanced.
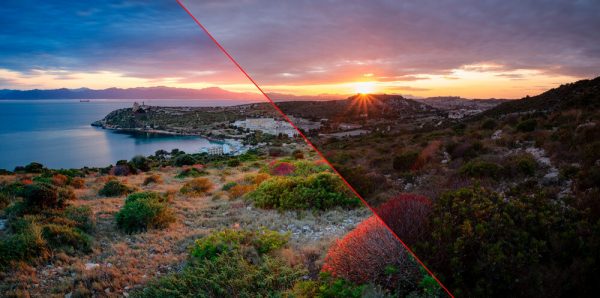
Adjust Saturation and Vibrancy

After you’ve fixed the white balance levels, you can further improve the colors in your photos by adjusting their vibrancy and saturation levels. Increasing the saturation levels makes all colors within the frame richer and more concentrated. Adjusting the vibrancy levels retains color intensity in the brighter elements and increases the intensity of colors for neutral colors. When bright colors are integrated, your photos will take on a dramatic, artistic flair.
Sharpen Your Photos
To make your photos appear cleaner and crisper, sharpening them is the way to go. Such sharpening tools are a staple part of every photo editing kit, and these can help you adjust your photo’s overall sharpness levels. Typically, you start at 50% and then increase or decrease the level until you hit your desired outcome.
To verify the effect of sharpening your photos, closely examine the individual parts of the frame. Although super-fine details won’t make a difference for social media purposes, they are excellent if you’re planning to enlarge and print your photos. Do note that excessive sharpening may make your photos noisy, so apply this effect sparingly.
Finalize and Save Your Photos
Once you’re done with the image correction process, don’t forget to save both the raw and edited versions. After that, you can set them aside and revisit them later so you can decide if you’re 100% satisfied with the results. Otherwise, you can apply the necessary adjustments in case you forgot some parts.
Edit Photos For Stellar Results
Photography takes a lot of hard work—it doesn’t start and end with you simply taking up the camera and snapping the photos. What you do after is just as, if not more, important to help you produce the best photos. Now that you’re familiar with the basics of photo editing, it’s time to put what you’ve learned to the test!