Introduction
Have you ever found yourself struggling to navigate through your timeline in Adobe Premiere Pro? With so many clips and tracks, it can be difficult to see the details or work on precise edits. Fortunately, Premiere Pro offers several methods to zoom in on your timeline, allowing you to focus on specific sections and make adjustments with ease.
In this article, we will explore four different methods to zoom in on the timeline in Premiere Pro. Whether you prefer using buttons, keyboard shortcuts, sliders, or the zoom tool, there is a zooming method that will suit your workflow. By mastering these techniques, you can improve your efficiency and accuracy when working on video projects.
Before we dive into the four methods, let’s take a moment to understand the importance of zooming in on your timeline. Zooming in allows you to manipulate and fine-tune individual clips, adjust keyframes, and align elements precisely. By magnifying the timeline, you gain better control over your editing process, resulting in a more polished and professional end product.
Now, let’s explore each method in detail and discover how to effectively zoom in on the timeline in Adobe Premiere Pro.
Method 1: Using the Zoom In/Out buttons
One of the simplest ways to zoom in on the timeline in Premiere Pro is by using the Zoom In/Out buttons located in the Program Monitor. These buttons resemble magnifying glasses, with one pointing in and the other pointing out.
To zoom in on the timeline, click on the Zoom In button. Each click will increase the zoom level, making the timeline elements appear larger and more detailed. You can continue clicking until you reach your desired level of zoom.
Conversely, if you need to zoom out, click on the Zoom Out button. This will progressively decrease the zoom level, showing a broader view of your timeline. Repeat the process until you achieve the desired zooming level.
Using the Zoom In/Out buttons provides a straightforward approach to zooming in on your timeline. It is a quick and convenient option, especially if you prefer using the mouse over keyboard shortcuts. Additionally, the buttons are easily accessible, allowing you to adjust your timeline zoom level with just a few clicks.
However, it’s important to note that the Zoom In/Out buttons have predefined zoom levels. If you require more precise control over your zoom level, you may want to explore other methods, such as using keyboard shortcuts or the zoom slider.
Now that you know how to utilize the Zoom In/Out buttons, let’s move on to the next method and explore how to zoom in using keyboard shortcuts.
Method 2: Using keyboard shortcuts
For those who prefer using keyboard shortcuts to navigate through their timeline in Adobe Premiere Pro, there are several handy shortcuts available to zoom in and out.
Here are the primary keyboard shortcuts for zooming in on the timeline:
- Zoom In: Press the “=” key to zoom in on the timeline. Each press of the “=” key will increase the zoom level.
- Zoom Out: Press the “-” key to zoom out on the timeline. Each press of the “-” key will decrease the zoom level.
With these keyboard shortcuts, you can quickly adjust the zoom level of your timeline by simply pressing a key. This method offers precise control and is especially beneficial for users who are comfortable with using shortcuts to enhance their editing workflow.
Additionally, if you want to zoom in or out gradually, you can combine the zoom shortcuts with the “Alt” key:
- Zoom In Gradually: Hold down the “Alt” key and press the “=” key multiple times.
- Zoom Out Gradually: Hold down the “Alt” key and press the “-” key multiple times.
Using these keyboard shortcuts allows you to adjust the zoom level smoothly, making it easier to focus on specific areas of your timeline. Whether you need to fine-tune a specific clip or work on precise edits, utilizing the keyboard shortcuts for zooming in and out can greatly enhance your editing process.
Now that you know how to zoom in with keyboard shortcuts, let’s proceed to the next method and explore the zoom slider.
Method 3: Using the zoom slider
If you prefer a visual interface for adjusting the zoom level of your timeline in Adobe Premiere Pro, the zoom slider is a handy tool to utilize.
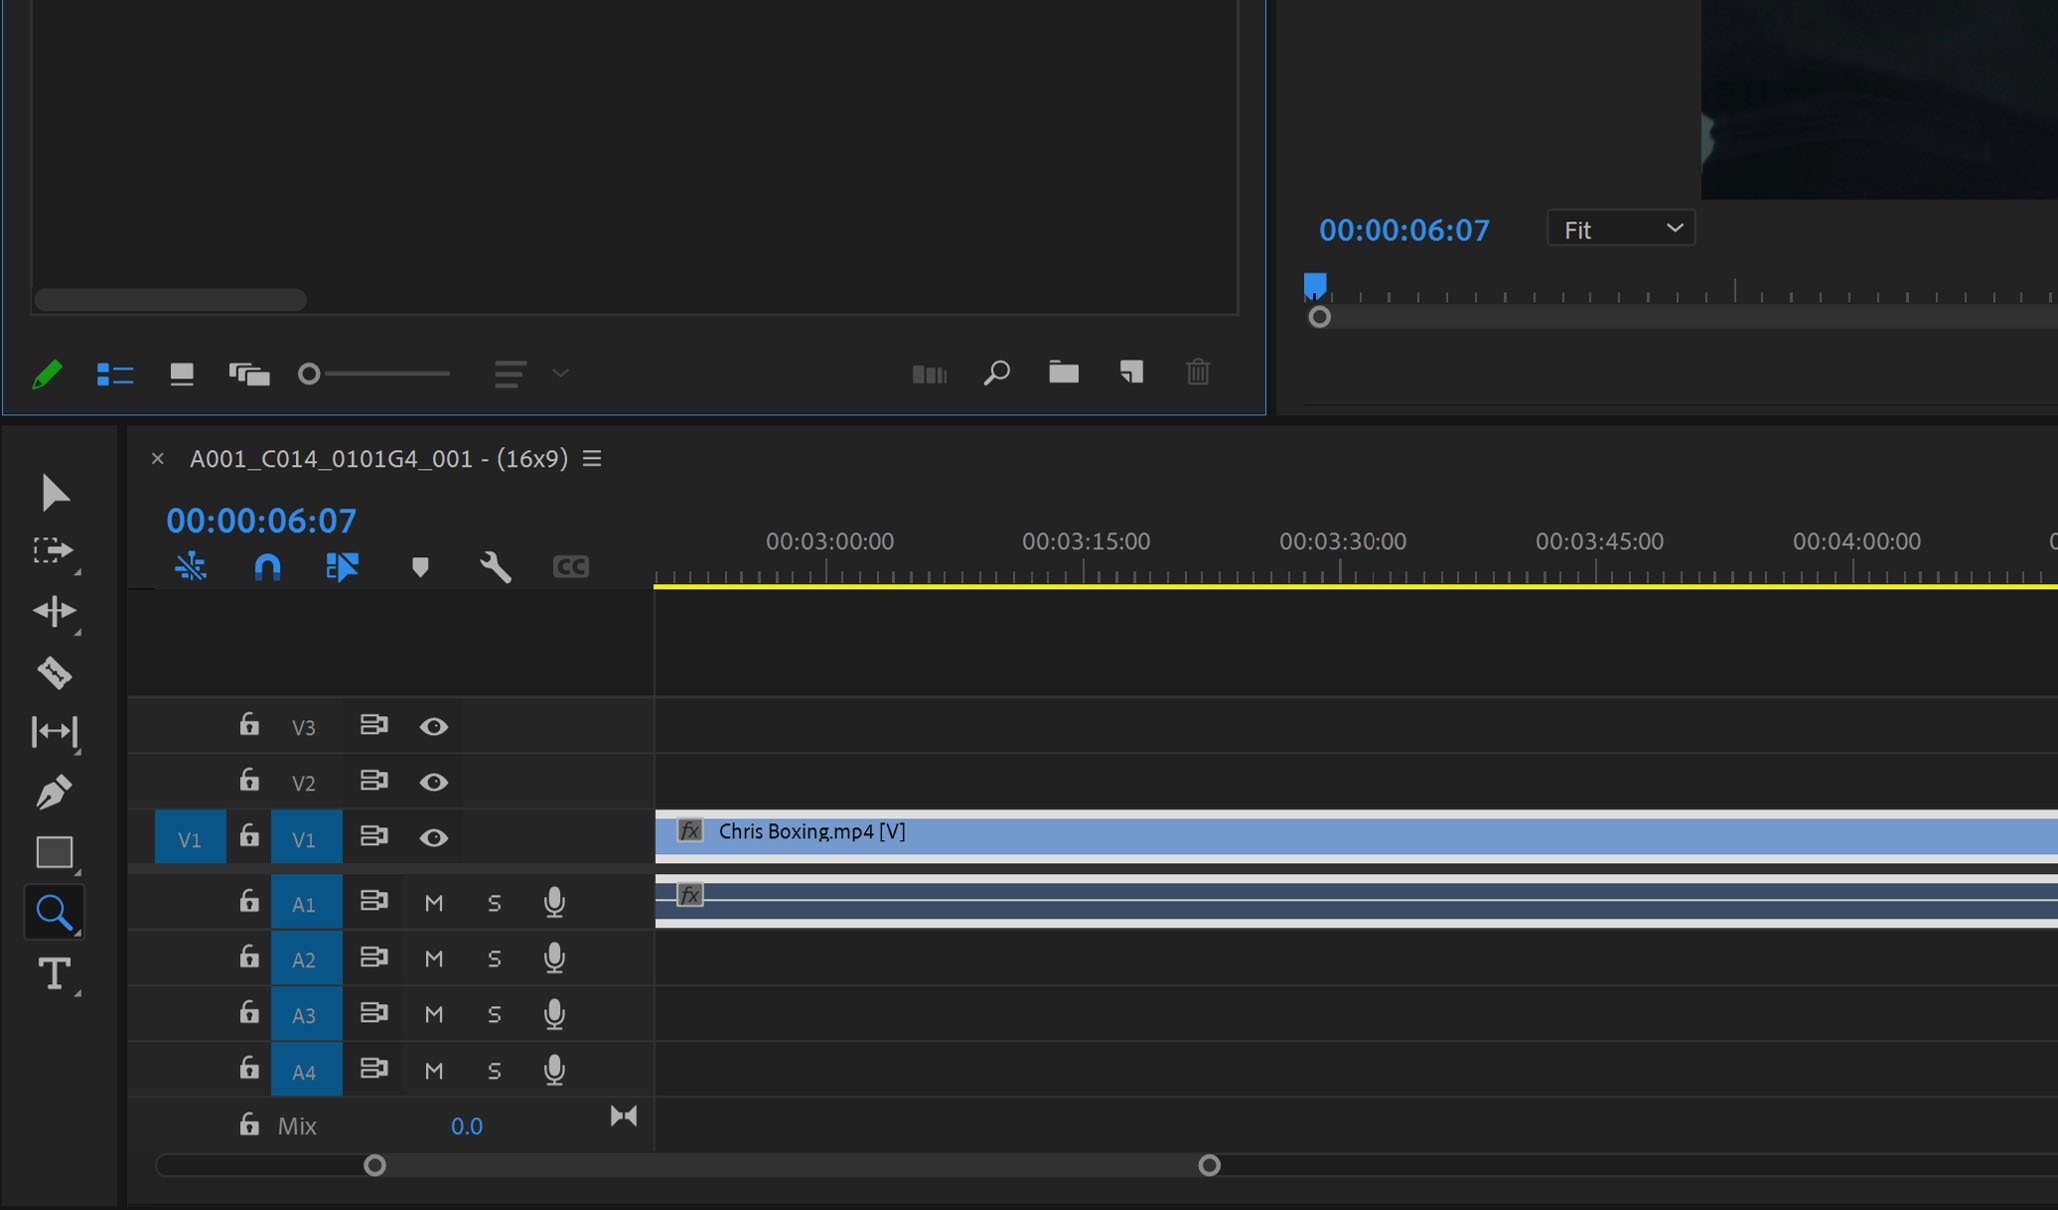
To access the zoom slider, locate the zoom controls at the bottom right corner of the timeline panel. The controls consist of a small magnifying glass icon and a slider bar.
To zoom in on the timeline using the slider, click and drag the slider towards the right. As you move the slider to the right, the zoom level will increase, displaying a more detailed view of your timeline. For a gradual zoom adjustment, you can drag the slider incrementally to the right.
Conversely, if you need to zoom out, click and drag the slider towards the left. As you move the slider to the left, the zoom level will decrease, providing a wider perspective of your timeline.
The zoom slider offers a visual representation of the zoom level, allowing you to easily gauge and control how much of your timeline is displayed. This method is especially useful when you need precise control over your zoom level and prefer a more interactive approach.
One benefit of using the zoom slider is the ability to see the immediate changes in your timeline as you adjust the zoom level. This can be particularly helpful when you need to focus on specific sections or make detailed edits. The zoom slider provides a seamless way to navigate through your project and work with precision.
Now that you are familiar with the zoom slider, let’s move on to the final method for zooming in on the timeline – using the zoom tool.
Method 4: Using the zoom tool
If you prefer a more interactive and hands-on approach to zooming in on your timeline in Adobe Premiere Pro, the zoom tool is the perfect option for you.
To access the zoom tool, click on the magnifying glass icon located in the toolbar on the left side of the timeline panel. Once you activate the zoom tool, your cursor will change to a magnifying glass with a plus sign (+).
To zoom in on a specific area of your timeline, click and drag your cursor across the section you want to zoom in on. As you drag your cursor, the selected area will be magnified, allowing you to view and work on that particular portion in detail.
If you need to zoom out, you can use a similar process. Activate the zoom tool and click and drag your cursor across the area you want to zoom out on. As you drag your cursor, the selected area will decrease in size, providing a wider view of your timeline.
The zoom tool offers a unique way to zoom in on specific sections of your timeline, allowing for a more detailed and focused editing experience. By selectively zooming in on certain areas, you can precisely manipulate and adjust clips, keyframes, and other elements with ease.
One advantage of using the zoom tool is the ability to zoom in and out instantly, providing a real-time visualization of your edits. This allows for quick exploration and refinement of your timeline, ensuring a seamless editing process.
Now that you are familiar with the zoom tool and its benefits, let’s wrap up our discussion on how to zoom in on the timeline in Adobe Premiere Pro.
Conclusion
Mastering the art of zooming in on the timeline in Adobe Premiere Pro is essential for efficient and precise video editing. In this article, we explored four different methods to zoom in on your timeline: using the Zoom In/Out buttons, utilizing keyboard shortcuts, leveraging the zoom slider, and employing the zoom tool.
Each method offers its own benefits and caters to different preferences and workflows. The Zoom In/Out buttons provide a simple and accessible way to adjust the zoom level with a click of a button. Keyboard shortcuts offer a quick and efficient approach for users who prefer using shortcuts within Premiere Pro. The zoom slider provides a visual interface to gauge and control the zoom level, offering precise adjustments. Lastly, the zoom tool allows for an interactive and hands-on zooming experience, enabling users to focus on specific sections of their timeline.
By incorporating these zooming techniques into your editing workflow, you can enhance your efficiency, accuracy, and overall editing experience. Whether you need to make intricate adjustments to individual clips or align elements precisely, mastering the art of zooming in on the timeline will undoubtedly improve the quality of your video projects.
Experiment with each method and find the approach that best suits your editing style. Remember, practice makes perfect, so take the time to familiarize yourself with these techniques and incorporate them into your editing process. Soon enough, you’ll be navigating and manipulating your timeline like a pro.
So, go ahead and start zooming in on your timeline in Adobe Premiere Pro, and take your video editing skills to new heights!