Overview
Zooming in DaVinci Resolve is a useful technique that allows you to focus on specific details or create dramatic effects in your videos. Whether you’re editing a film, creating a tutorial, or working on a promotional video, knowing how to effectively zoom in can add depth and visual interest to your project.
In this article, we will explore three different methods that you can use to zoom in DaVinci Resolve. These methods include using the Zoom Viewer, utilizing the Zoom tool, and taking advantage of convenient keyboard shortcuts. Let’s dive in and discover how you can effortlessly zoom in and enhance your editing skills in DaVinci Resolve.
By learning how to zoom in DaVinci Resolve, you can bring attention to specific subjects, highlight important details, or add visual variety to your videos. Zooming can be particularly helpful when creating engaging tutorials, showcasing product features, or conveying emotions in a narrative piece. Understanding the various methods available to zoom in DaVinci Resolve will empower you to unleash your creativity and achieve the desired effect within your video projects.
Throughout this guide, we will explain each method step-by-step, providing clear instructions and highlighting any important tips or considerations. Whether you are a beginner or an experienced DaVinci Resolve user, you will find valuable insights and techniques to enhance your zooming skills.
Let’s get started by exploring the first method – zooming with the Zoom Viewer.
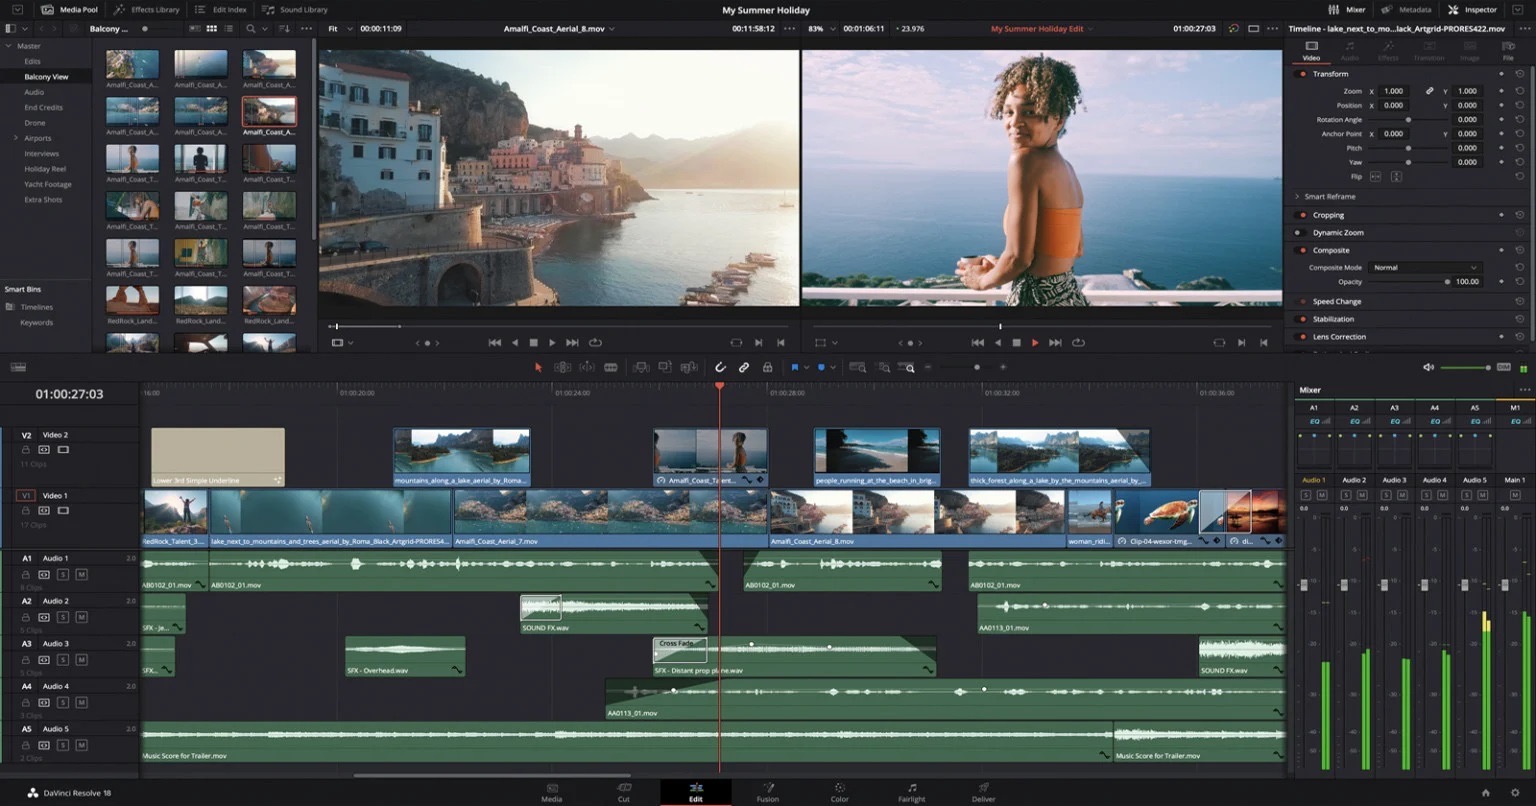
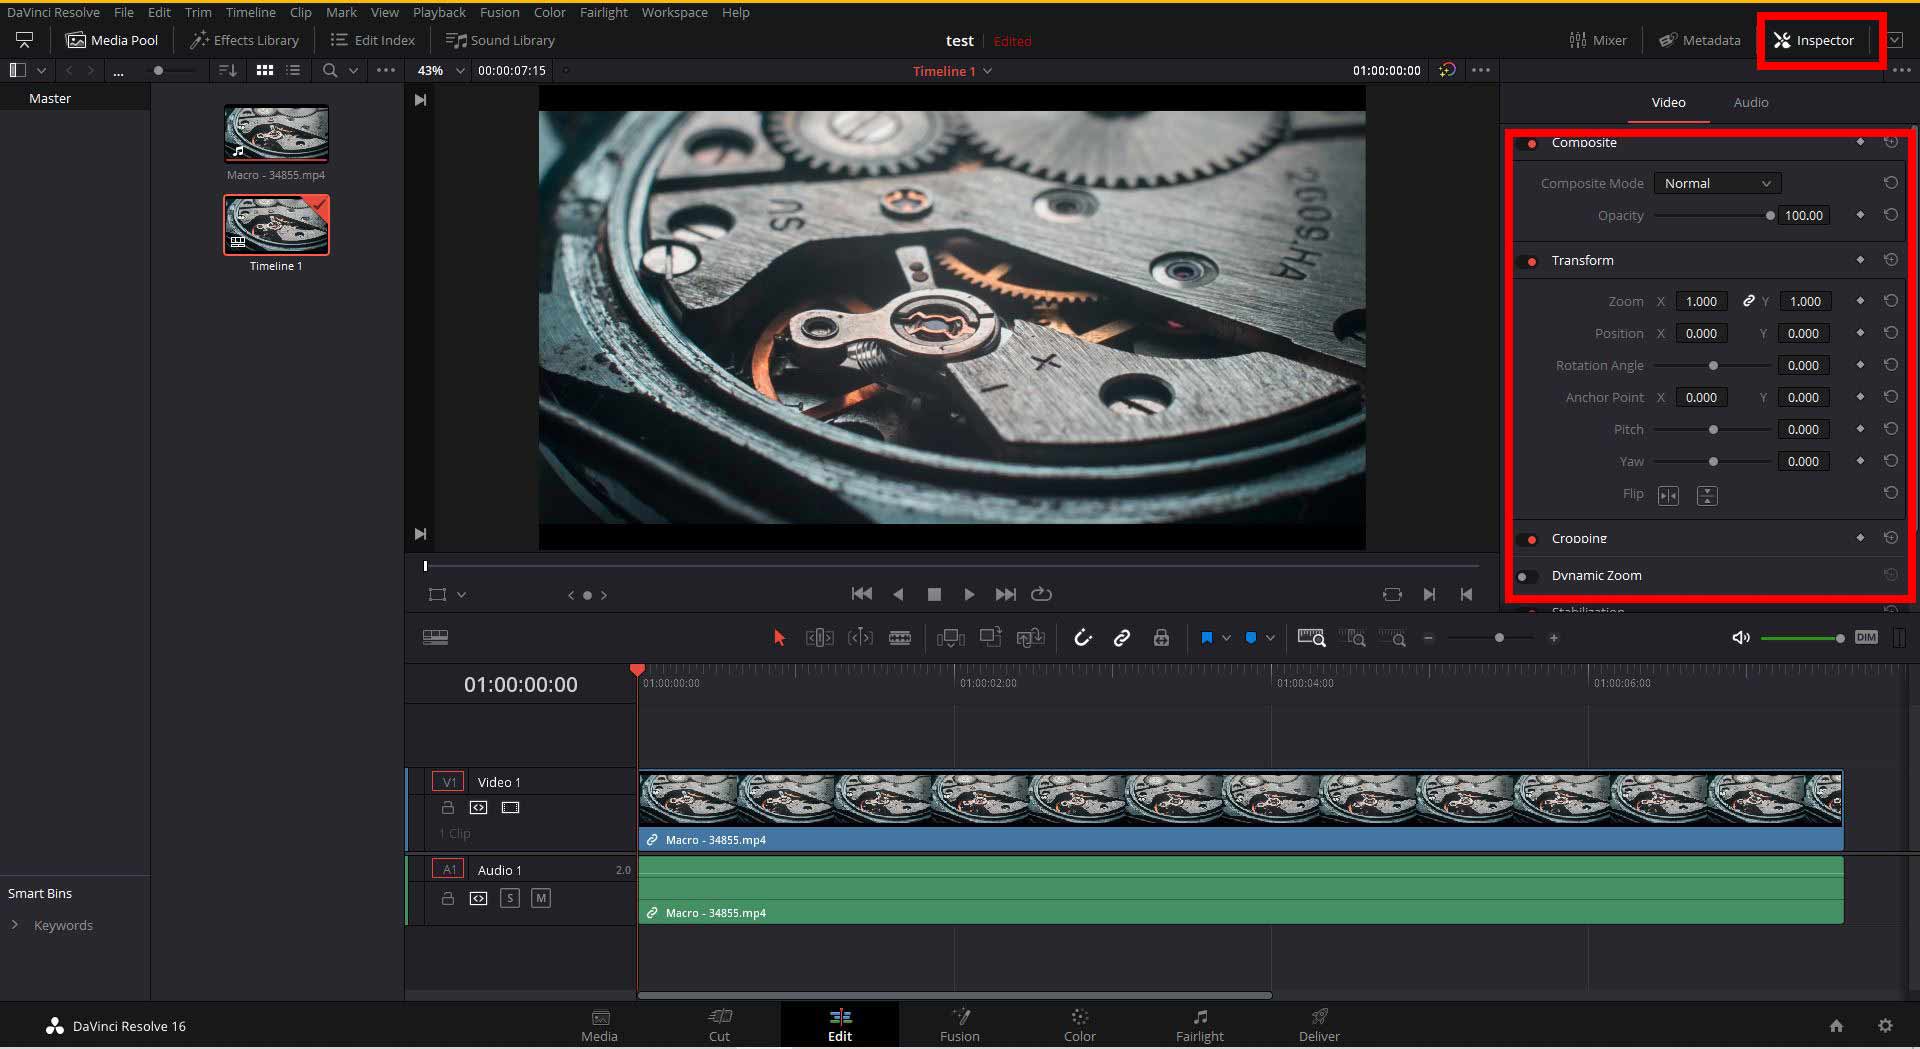
Method 1: Zooming with the Zoom Viewer
The Zoom Viewer is a powerful feature in DaVinci Resolve that allows you to zoom in and out smoothly within the viewer window. This method gives you precise control over the zoom level and provides a real-time preview of the zoom effect. Here’s how you can use the Zoom Viewer to zoom in DaVinci Resolve:
- Launch DaVinci Resolve and open the project you want to work on.
- Select the clip or section of the timeline where you want to apply the zoom effect.
- In the Viewer panel, locate the Zoom Viewer icon, which looks like a magnifying glass. It is usually located in the bottom left corner of the viewer window.
- Click on the Zoom Viewer icon to enable the zoom feature.
- Once enabled, you can use the Zoom controls to adjust the zoom level. The Zoom controls are located to the right of the Zoom Viewer icon.
- To zoom in, drag the Zoom slider to the right. You will see the image getting closer and more detailed in real-time as you adjust the slider.
- To zoom out, drag the Zoom slider to the left. The image will start to gradually shrink as you decrease the zoom level.
- You can also click on the plus (+) and minus (-) buttons next to the Zoom slider to zoom in and out incrementally.
- Continue adjusting the zoom level until you achieve the desired effect. Take note of how the zoom affects the composition and focus of your video.
- When you are satisfied with the zoom settings, you can play back the clip in the timeline to see the zoom effect in action.
The Zoom Viewer in DaVinci Resolve provides a convenient and straightforward way to incorporate zooming into your video editing workflow. Experiment with different zoom levels and combinations to create visually appealing and engaging effects. Remember to save your progress regularly to ensure that your edits are preserved.
Now that we have explored the first method of zooming in DaVinci Resolve, let’s move on to the next method – zooming with the Zoom tool.
Method 2: Zooming with the Zoom tool
Another effective method to zoom in DaVinci Resolve is by using the Zoom tool. This tool allows you to quickly zoom in and out on specific sections of your video timeline, giving you precise control over the zoom level. Here’s how you can use the Zoom tool to zoom in DaVinci Resolve:
- Launch DaVinci Resolve and open the project you want to work on.
- Locate the Zoom tool in the toolbar at the top of the timeline. It looks like a magnifying glass.
- Click and hold down the left mouse button on the Zoom tool icon to activate the zooming functionality.
- With the Zoom tool active, move your cursor over the section of the timeline that you want to zoom in on.
- Click and drag the cursor to the right to zoom in or to the left to zoom out.
- As you drag the cursor, you will notice that the zoom level changes, allowing you to focus on specific details of your video.
- Release the mouse button to set the zoom level. You can adjust the zoom level further by repeating steps 4 to 6.
- You can also use the scroll wheel on your mouse to zoom in and out. Scroll up to zoom in and scroll down to zoom out.
- Continue zooming in and out with the Zoom tool until you achieve the desired level of zoom.
- Preview your video playback to see how the zoom effect enhances your footage.
The Zoom tool in DaVinci Resolve provides a simple and intuitive way to quickly zoom in and out on specific sections of your video timeline. It offers a flexible and dynamic approach to zooming that can be easily adjusted to fit your specific creative vision. Remember to save your work regularly to ensure that your edits are preserved.
Now that we have covered the second method of zooming in DaVinci Resolve, let’s move on to the final method – zooming with keyboard shortcuts.
Method 3: Zooming with Keyboard Shortcuts
In DaVinci Resolve, you can also zoom in and out quickly and efficiently using keyboard shortcuts. These shortcuts provide a convenient way to adjust the zoom level without the need for additional tools or manual adjustments. Here’s how you can use keyboard shortcuts to zoom in DaVinci Resolve:
- Launch DaVinci Resolve and open the project you want to work on.
- Select the clip or section of the timeline where you want to apply the zoom effect.
- Press the “+” key on your keyboard to zoom in or the “-” key to zoom out.
- Each press of the “+” key will incrementally increase the zoom level, while each press of the “-” key will decrease the zoom level.
- You can also use the “=” key to reset the zoom level to its default setting.
- As you press the zoom shortcuts, observe the changes in the viewer window to ensure that the desired zoom level is achieved.
- Preview your video playback to see how the zoom effect enhances your footage.
By utilizing these keyboard shortcuts, you can quickly and seamlessly adjust the zoom level, saving you time and providing precise control over the zoom effect. Incorporating these shortcuts into your workflow will enhance your efficiency and allow you to focus more on the creative aspects of your video editing process.
With this method, you can easily experiment with different zoom levels and quickly switch between zoomed-in and zoomed-out perspectives, adding depth and impact to your videos. Remember to save your work regularly to ensure that your edits are preserved.
Now that we have explored all three methods of zooming in DaVinci Resolve, you have a range of techniques at your disposal to effectively implement zoom effects into your video editing projects. Experiment with these methods and combine them creatively to achieve the desired visual impact and storytelling elements in your videos.