Introduction
GPU acceleration has become a widely used technology in various applications, including web browsing, video editing, and image editing. It leverages the power of your computer’s graphics processing unit (GPU) to enhance performance and speed up tasks. However, there may be situations where you might want to turn off GPU acceleration.
This article explores what GPU acceleration is, the reasons why you may want to disable it, and how to turn it off in different applications. Whether you’re experiencing compatibility issues, encountering performance problems, or simply want to conserve power, understanding how to disable GPU acceleration can be useful.
It’s important to note that disabling GPU acceleration shouldn’t be seen as a universal solution. In many cases, GPU acceleration provides significant benefits, especially when dealing with graphic-intensive tasks. However, there are instances where turning it off can be advantageous, and this article will guide you through the process.
Before diving into the steps to disable GPU acceleration, it’s essential to have a clear understanding of what GPU acceleration entails and its impact on various applications.
Stay tuned as we delve into the intricacies of GPU acceleration and explore how to turn it off to suit your specific needs.
What is GPU Acceleration?
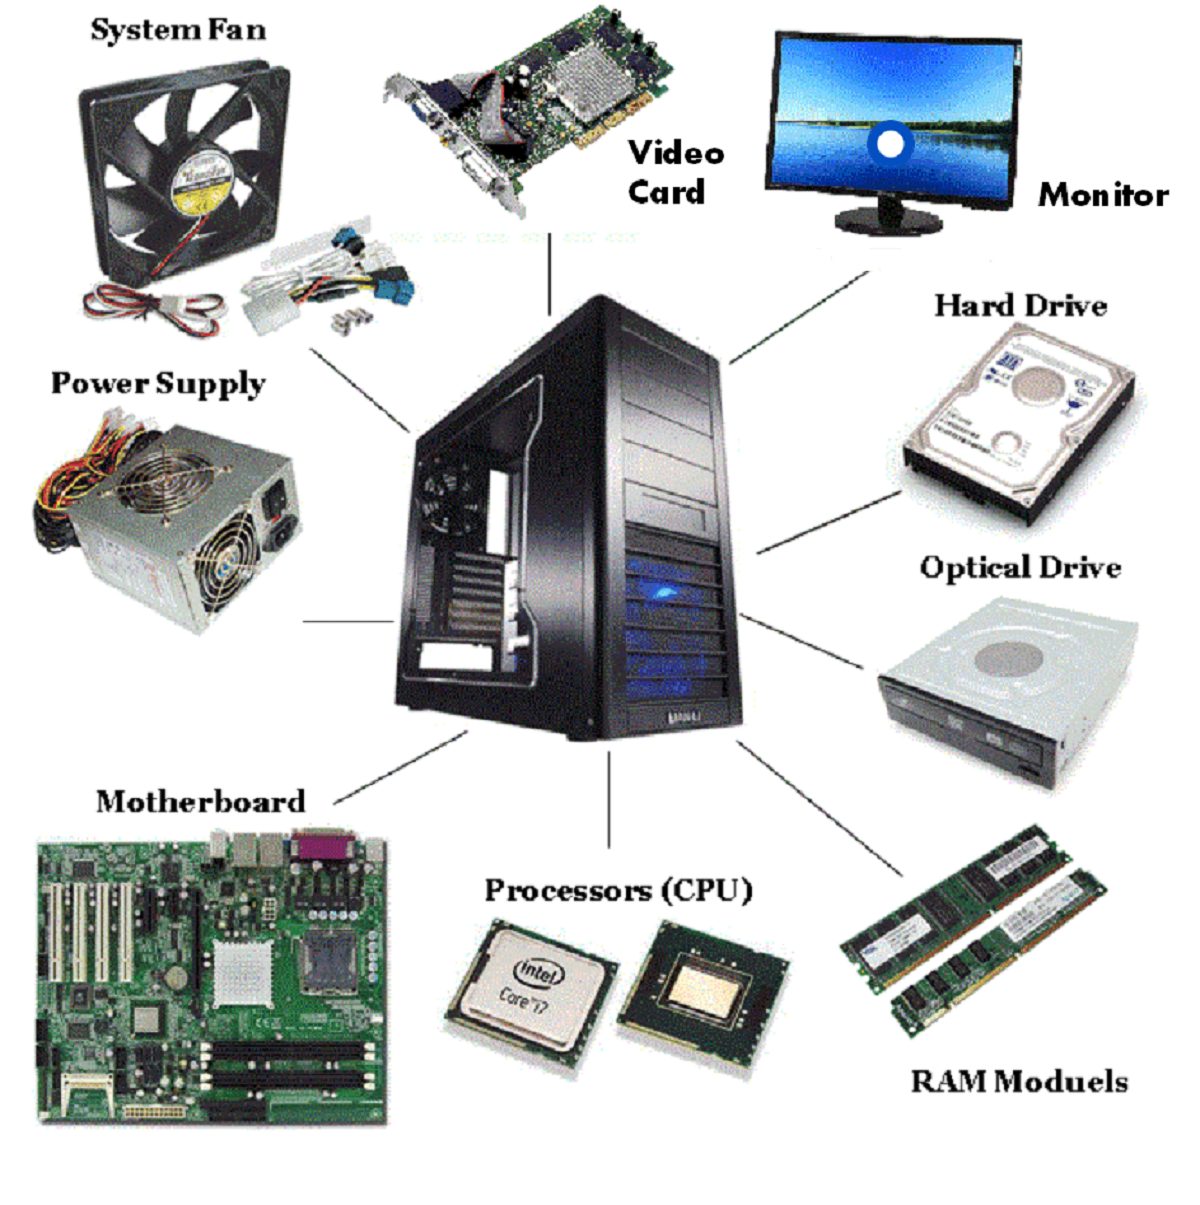
GPU acceleration, also known as hardware acceleration, is a technology that harnesses the power of the graphics processing unit (GPU) in your computer to accelerate specific tasks. Traditionally, the CPU (central processing unit) handled all computations, including graphics rendering. However, with the advent of GPUs, certain tasks can be offloaded to the GPU, leading to faster and more efficient processing.
The GPU is designed to process and render complex images, making it ideal for graphic-intensive tasks such as video editing, 3D rendering, and gaming. By utilizing GPU acceleration, these tasks can be performed more quickly and effectively, resulting in smoother playback, reduced render times, and enhanced overall performance.
GPU acceleration primarily relies on parallel processing, where multiple tasks are divided and executed simultaneously by different processing units within the GPU. This parallel processing capability is particularly beneficial for tasks that involve complex calculations or large data sets, as it allows for significant speed improvements compared to relying solely on the CPU.
It’s worth noting that GPU acceleration is not limited to graphics-related tasks. It can also be utilized for general-purpose computing, known as GPGPU (General-Purpose Computing on GPUs). This opens up possibilities for accelerating scientific simulations, data analysis, and other computationally intensive tasks.
GPU acceleration has become increasingly prevalent in modern applications, including web browsers, video editors, and image editing software. In web browsers, GPU acceleration allows for smoother scrolling, faster rendering of web pages, and improved video playback. In video editing software, it enables real-time previewing, faster video encoding, and smooth timeline scrubbing. Image editing software utilizes GPU acceleration for tasks such as image manipulation, filter application, and rendering.
While GPU acceleration offers numerous benefits, there may be instances where disabling it is desirable. In the following sections, we will explore the reasons why you might want to turn off GPU acceleration and how to do so in different applications.
Reasons to Turn Off GPU Acceleration
Despite the benefits that GPU acceleration provides, there are several situations where disabling it can be beneficial. Let’s explore some reasons why you might want to turn off GPU acceleration:
1. Compatibility Issues: Certain applications or hardware configurations may not be fully compatible with GPU acceleration. This can result in rendering glitches, crashes, or other performance issues. Disabling GPU acceleration can help resolve these compatibility problems and ensure a smoother user experience.
2. Performance Problems: In some cases, GPU acceleration may actually hinder performance instead of improving it. This can happen if your computer’s GPU is outdated or not powerful enough to handle the acceleration demands of a particular application. Disabling GPU acceleration in such situations can help alleviate performance issues and prevent lag or slowdowns.
3. Power Consumption: GPU acceleration can be power-intensive, especially during resource-intensive tasks. If you’re concerned about battery life on a laptop or want to conserve energy on a desktop, disabling GPU acceleration can help reduce power consumption and extend battery life.
4. Display or Graphics Glitches: While it’s rare, GPU acceleration can sometimes cause visual artifacts or graphical glitches, such as screen flickering, pixelation, or distorted images. Disabling GPU acceleration can eliminate these display issues and ensure a visually pleasing experience.
5. Temperature and Heat: GPU acceleration can generate significant heat, especially during heavy workloads. This increased heat can impact the overall system temperature and potentially lead to thermal throttling or even hardware damage. Disabling GPU acceleration can help keep your system cooler and reduce the risk of overheating.
It’s important to note that the decision to turn off GPU acceleration should be based on the specific circumstances and needs of your system. While disabling it can address the mentioned issues, it may also result in a reduction in overall performance for certain tasks that heavily rely on GPU processing.
Now that we’ve explored the reasons why you might want to disable GPU acceleration, let’s take a look at how to turn it off in different applications.
How to Turn Off GPU Acceleration in Different Applications
Disabling GPU acceleration can vary depending on the application you’re using. Here’s a guide on how to turn off GPU acceleration in different applications:
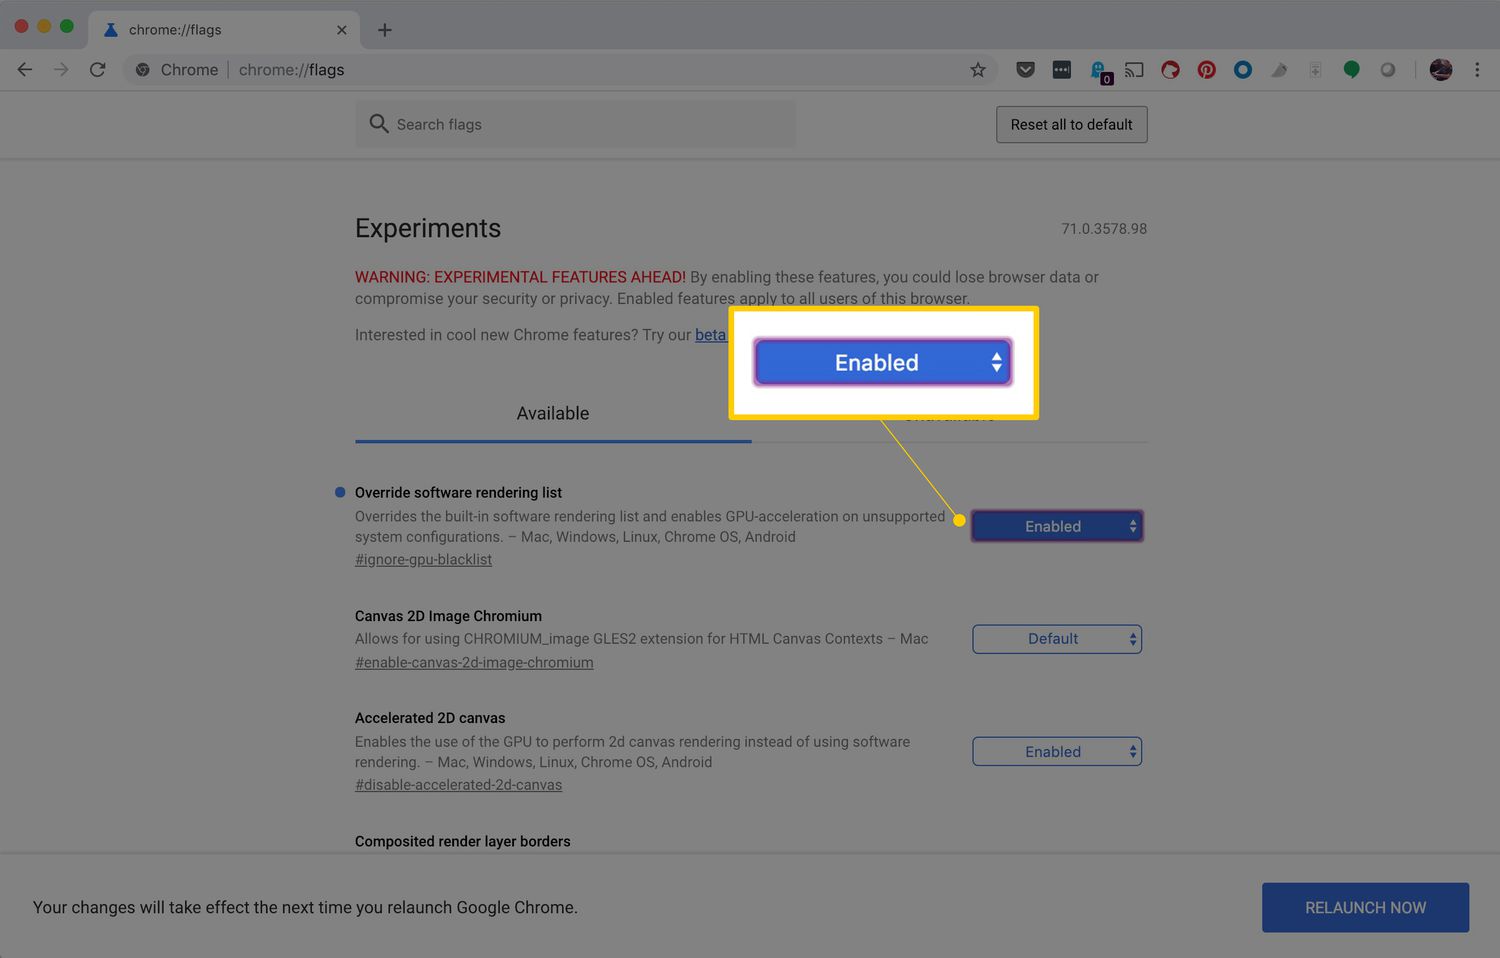
1. Web Browsers: In popular web browsers like Google Chrome, Mozilla Firefox, and Microsoft Edge, you can disable GPU acceleration through the browser settings. Typically, you’ll find this option under the advanced settings or performance settings. Simply navigate to the appropriate setting and disable GPU acceleration. Remember to restart your browser for the changes to take effect.
2. Video Editing Software: Video editing software, such as Adobe Premiere Pro or Final Cut Pro, often provides options to enable or disable GPU acceleration. In the preferences or settings menu, look for options related to hardware acceleration or GPU utilization. Disable these options to turn off GPU acceleration in the video editing software. Keep in mind that the exact steps may vary depending on the software version you’re using.
3. Image Editing Software: Similar to video editing software, image editing software like Adobe Photoshop or GIMP may have settings related to GPU acceleration. In the preferences or performance settings, look for options to enable or disable GPU acceleration. Uncheck or disable these options to turn off GPU acceleration in the image editing software.
4. Other Applications: Different applications may have their own methods for enabling or disabling GPU acceleration. It’s advisable to check the application’s documentation or search online for specific instructions on how to disable GPU acceleration for that particular software.
Remember that disabling GPU acceleration may impact the performance or rendering capabilities of the application. If you encounter any issues after turning off GPU acceleration, you can always revert to the default settings or seek assistance from the application’s support team.
Now that you have an understanding of how to turn off GPU acceleration in various applications, let’s move on to specific instructions for disabling it in web browsers, video editing software, and image editing software.
Turning Off GPU Acceleration in Web Browsers
Disabling GPU acceleration in web browsers can be useful if you experience compatibility issues, performance problems, or visual glitches. Here’s a general guide on how to turn off GPU acceleration in popular web browsers:
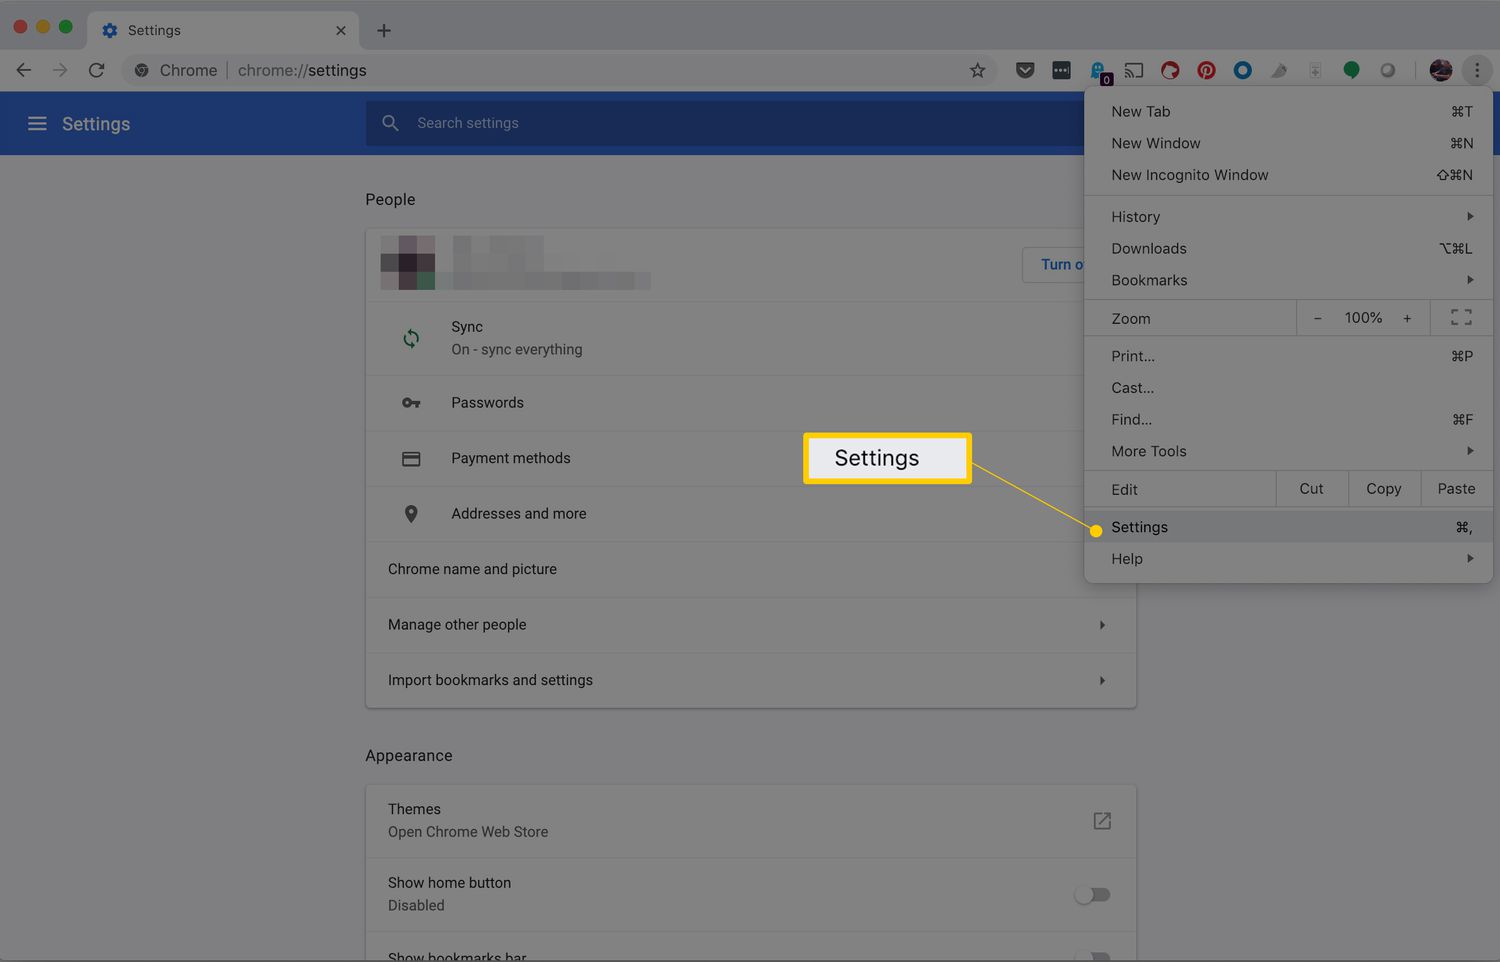
1. Google Chrome: In Google Chrome, open the browser menu by clicking on the three-dot icon in the top right corner. From the menu, select “Settings.” Scroll down and click on “Advanced” to expand the advanced settings. Look for the “System” section and toggle off the option that says “Use hardware acceleration when available.” Restart Chrome for the changes to take effect.
2. Mozilla Firefox: In Mozilla Firefox, open the browser menu by clicking on the three-line icon in the top right corner. From the menu, select “Options.” In the options page, navigate to the “General” section on the left sidebar. Scroll down to the “Performance” section and uncheck the box that says “Use recommended performance settings.” Then, uncheck the box that says “Use hardware acceleration when available.” Restart Firefox for the changes to take effect.
3. Microsoft Edge: In Microsoft Edge, open the browser menu by clicking on the three-dot icon in the top right corner. From the menu, select “Settings.” Scroll down and click on “System” in the left sidebar. In the system settings, toggle off the option that says “Use hardware acceleration when available.” Restart Edge for the changes to take effect.
Please note that the location of the GPU acceleration settings may vary depending on the browser version. If you’re using a different browser or a different version, consult the browser’s documentation or search online for specific instructions.
Disabling GPU acceleration in web browsers can help resolve compatibility issues, improve performance on certain systems, and eliminate visual glitches. However, keep in mind that by disabling GPU acceleration, you may experience a slight decrease in performance, especially when dealing with graphics-intensive websites or applications.
Now that you know how to turn off GPU acceleration in web browsers, let’s move on to the next section where we’ll explore disabling GPU acceleration in video editing software.
Turning Off GPU Acceleration in Video Editing Software
Disabling GPU acceleration in video editing software can be helpful if you’re encountering compatibility issues, performance problems, or experiencing crashes. Here’s a general guide on how to turn off GPU acceleration in popular video editing software:
1. Adobe Premiere Pro: In Adobe Premiere Pro, go to the “File” menu and select “Project Settings” followed by “General.” In the General settings tab, locate the “Video Rendering and Playback” section. Change the option from “GPU Acceleration” to “Software Only.” Click “OK” to apply the changes.
2. Final Cut Pro: In Final Cut Pro, navigate to the “Preferences” menu by clicking on “Final Cut Pro” and selecting “Preferences.” Under the “Playback” tab, you’ll find an option to select the rendering mode. Choose “Use CPU only.” Click “OK” to save the changes.
3. DaVinci Resolve: In DaVinci Resolve, go to the “Preferences” menu by clicking on “DaVinci Resolve” and selecting “Preferences.” In the preferences dialogue box, navigate to the “System” tab. In the GPU Processing mode, select “OpenCL” or “Metal” instead of “CUDA” or “Auto.” Restart DaVinci Resolve for the changes to take effect.
4. Other Video Editing Software: If you’re using a different video editing software, check the preferences or settings menu for options related to GPU acceleration. Look for options to enable or disable hardware acceleration or GPU processing. The exact steps may vary depending on the software you’re using, so consult the software’s documentation or search online for specific instructions if needed.
Keep in mind that disabling GPU acceleration in video editing software may decrease performance during playback or rendering, especially in tasks that heavily rely on GPU processing. However, if you’re experiencing issues with GPU acceleration, disabling it can help improve stability and resolve certain compatibility problems.
Now that you know how to turn off GPU acceleration in video editing software, let’s move on to the next section where we’ll explore disabling GPU acceleration in image editing software.
Turning Off GPU Acceleration in Image Editing Software
Disabling GPU acceleration in image editing software can be beneficial if you’re encountering compatibility issues, performance problems, or experiencing graphical glitches. Here’s a general guide on how to turn off GPU acceleration in popular image editing software:
1. Adobe Photoshop: In Adobe Photoshop, go to the “Edit” menu and select “Preferences,” followed by “Performance.” In the performance settings, uncheck the option that says “Use Graphics Processor.” Click “OK” to save the changes.
2. GIMP: In GIMP, go to the “Edit” menu and select “Preferences.” In the preferences window, navigate to the “System Resources” section. Uncheck the box that says “Use Graphics Processor.” Click “OK” to save the changes.
3. Corel PaintShop Pro: In Corel PaintShop Pro, go to the “File” menu and select “Preferences,” followed by “Performance.” In the performance settings, uncheck the option that says “Use Graphics Processor.” Click “OK” to save the changes.
4. Other Image Editing Software: If you’re using a different image editing software, look for options related to GPU or graphics processor settings in the preferences menu. Disable the option that enables GPU acceleration or graphics processor usage. The location of these settings may vary, so consult the software’s documentation or search online for specific instructions if needed.
Disabling GPU acceleration in image editing software may result in a minor decrease in performance, especially when handling large image files or applying complex filters. However, if you’re encountering compatibility issues or experiencing graphical glitches, turning off GPU acceleration can help resolve such problems and ensure smoother and more stable editing sessions.
Now that you know how to turn off GPU acceleration in image editing software, let’s move on to the next section where we’ll explore potential issues and troubleshooting tips when disabling GPU acceleration.
Potential Issues and Troubleshooting
While disabling GPU acceleration can often resolve compatibility issues, performance problems, or graphical glitches, it’s important to be aware of potential issues that may arise and know how to troubleshoot them. Here are some common issues you may encounter and troubleshooting tips:
1. Decreased Performance: Disabling GPU acceleration may result in a slight decrease in overall performance, especially for tasks that heavily rely on GPU processing. If you notice significant performance degradation, consider re-enabling GPU acceleration or upgrading your graphics hardware if feasible.
2. Inconsistent UI Behavior: Turning off GPU acceleration can sometimes lead to UI inconsistencies, such as laggy animations or slower responsiveness. In such cases, updating your graphics drivers to the latest version may resolve the issue. Visit the manufacturer’s website and download the appropriate drivers for your graphics card.
3. Visualization Errors: When GPU acceleration is disabled, you may encounter visualization errors or display glitches, such as missing particles, distorted textures, or incorrect rendering. These issues can often be resolved by updating your graphics drivers or adjusting the graphics settings within the application.
4. System Stability: In rare cases, disabling GPU acceleration can negatively impact system stability, leading to crashes or freezes. If you experience system instability after disabling GPU acceleration, consider reverting to the default settings or seeking assistance from the application’s support team.
5. Software Incompatibility: Some software may have specific requirements or dependencies on GPU acceleration. Disabling it may result in certain features not functioning as intended or becoming unavailable. If you rely heavily on these features or experience loss of functionality, consider enabling GPU acceleration or exploring alternative software solutions.
Remember to consult the documentation or knowledge base of the specific applications you’re using for troubleshooting guidance tailored to their functionality and potential issues.
Experimenting with different settings, updating drivers, and seeking support from the software’s developers can often help resolve any problems you encounter after disabling GPU acceleration. It’s important to weigh the benefits and drawbacks of disabling GPU acceleration to ensure it aligns with your specific needs and requirements.
Now that we’ve explored potential issues and troubleshooting tips, let’s conclude this article with a brief summary.
Conclusion
GPU acceleration is a powerful technology that enhances performance and speed in applications such as web browsing, video editing, and image editing. However, there are instances where disabling GPU acceleration can be beneficial. By understanding how to turn off GPU acceleration and when it may be necessary, you can optimize your system’s performance and address compatibility issues.
In this article, we explored what GPU acceleration is and its impact on various applications. We also discussed reasons why you might want to disable GPU acceleration, including compatibility issues, performance problems, power consumption concerns, and display glitches.
We provided a guide on how to turn off GPU acceleration in different applications, including web browsers, video editing software, and image editing software. It’s important to note that the steps may vary depending on the software versions you’re using, so consult the specific documentation or search online for accurate instructions.
We also highlighted potential issues that may arise after disabling GPU acceleration and offered troubleshooting tips. Issues such as decreased performance, inconsistent UI behavior, visualization errors, system stability, and software incompatibility can potentially be resolved through updating graphics drivers, adjusting graphics settings, or seeking support from the software’s developers.
Ultimately, the decision to disable GPU acceleration should be based on your specific circumstances and needs. While disabling it can address certain compatibility issues and improve stability, it may result in a decrease in performance for tasks that heavily rely on GPU processing power.
By being aware of the benefits and drawbacks of GPU acceleration and understanding how to disable it, you can make informed decisions to optimize your system’s performance and tailor it to your specific requirements.
I hope this article has provided you with valuable insights and guidance on disabling GPU acceleration. Consider the information presented here to customize your computer’s settings effectively.