Introduction
Welcome to the world of DaVinci Resolve, a powerful and versatile video editing software that has revolutionized the way professionals and enthusiasts edit, color grade, and produce videos. Whether you are a seasoned editor or a novice looking to explore the world of video editing, this guide will walk you through the process of downloading videos from DaVinci Resolve.
DaVinci Resolve is known for its advanced features and robust capabilities, making it a top choice for filmmakers, content creators, and video editors worldwide. With its intuitive interface and powerful tools, DaVinci Resolve offers the perfect platform to bring your creative ideas to life.
However, one question that often arises is how to download videos from DaVinci Resolve. While the software is primarily designed for editing and post-production tasks, there may be times when you want to save a copy of your edited video or download videos from other sources for editing and manipulation.
In this guide, we will explore the various methods and best practices for downloading videos from DaVinci Resolve. Whether you want to download your own edited videos or extract videos from other sources, we will provide step-by-step instructions and valuable tips to help you accomplish this task effortlessly.
Throughout this guide, we will cover the process of importing videos into DaVinci Resolve, editing them, and finally, exporting the edited videos. Additionally, we will share useful tips and tricks to ensure the best video downloading experience.
Before we dive into the details, it is important to note that downloading videos from DaVinci Resolve should only be done in compliance with copyright laws and intellectual property rights. Always ensure that you have the necessary permissions or rights to download and use any video content.
With that said, let’s get started with an overview of DaVinci Resolve and how to navigate this powerful software.
Getting Started with DaVinci Resolve
If you are new to DaVinci Resolve, it’s important to familiarize yourself with the software’s interface and basic functionalities. DaVinci Resolve offers a range of features and tools that can help you achieve professional-grade video editing results. Here are the key steps to get started:
1. Download and Install DaVinci Resolve: Visit the official Blackmagic Design website and download the latest version of DaVinci Resolve. Install the software following the on-screen instructions for your operating system.
2. Set up Project Settings: Launch DaVinci Resolve and create a new project by clicking on the “Project Manager” icon. Here, you can specify the project name, location, frame rate, resolution, and other settings according to your requirements.
3. Import Media: Once your project is set up, you can import your media files into DaVinci Resolve. Click on the “Media” tab, navigate to the folder where your videos are stored, and select the files you want to import. You can also use the drag-and-drop feature to import files directly into the software.
4. Organize and Review Footage: After importing your videos, DaVinci Resolve provides tools to organize and review your footage. Use the “Bins” panel to create folders and organize your media files. The “Timeline” panel allows you to preview your videos and make initial selections for editing.
5. Understand the Workspace: DaVinci Resolve offers multiple workspaces, including the “Cut,” “Edit,” “Fusion,” and “Color” workspaces. Each workspace provides a different set of tools and functionalities. Familiarize yourself with the layout of the workspace and understand the purpose of each panel and tool.
6. Learn Basic Editing Tools: DaVinci Resolve offers a wide range of editing tools to trim, cut, and arrange your videos. Explore the basic editing tools such as the “Cut,” “Trim,” “Ripple Edit,” and “Slip Edit” to start shaping your footage. You can also apply transitions, add titles, and perform audio editing within the software.
7. Color Grade Your Videos: One of the standout features of DaVinci Resolve is its advanced color grading capabilities. Experiment with the color grading tools to enhance the visual quality and mood of your videos. Adjust brightness, contrast, saturation, and apply creative looks to achieve the desired cinematic effect.
Remember, these are just the foundational steps to get started with DaVinci Resolve. The software offers a plethora of advanced features and functionalities that you can explore as you become more comfortable with the basics. Practice, experimentation, and continuous learning will help you unlock the full potential of DaVinci Resolve for your video editing projects.
Importing Videos into DaVinci Resolve
Once you have set up your project and familiarized yourself with the basics of DaVinci Resolve, it’s time to import your videos into the software. DaVinci Resolve supports a wide range of video formats, making it easy to work with different types of footage. Here are the steps to import videos:
1. Open the Media Page: In DaVinci Resolve, click on the “Media” tab located at the bottom of the interface to access the Media Page. Here, you can browse and manage your media files.
2. Locate Your Video Files: Navigate to the folder where your video files are stored. You can explore your system’s folders in the left-hand sidebar of the Media Page or use the search bar to find specific files.
3. Select and Import Files: Once you have located the video files you want to import, select them by clicking on the file names. Press the “Import Selected” button or simply drag and drop the files into the media pool. DaVinci Resolve will automatically import the selected videos and display them in the media pool.
4. Organize Your Media: After importing the videos, you can organize them into folders or bins for easier management. Right-click within the media pool and select “Create Folder” to create a new folder. You can then drag and drop the videos into the desired folders to keep your media organized.
5. Preview Your Imported Videos: To preview your imported videos, simply double-click on a video clip in the media pool. The clip will open in the viewer window, allowing you to preview its content.
6. Trim and Select Footage: If you have long video clips and only want to use specific portions, you can use the trim tools in the viewer to select the desired sections. Set in and out points by dragging the handles or using the shortcut keys “I” and “O”. This allows you to trim and select the parts of the clip you want to work with.
7. Add Videos to the Timeline: To start editing your imported videos, drag them from the media pool onto the timeline. The timeline provides a visual representation of your video project, allowing you to arrange and edit your footage.
By following these steps, you can easily import videos into DaVinci Resolve and begin your editing journey. Remember to organize your media efficiently, as it will help streamline your workflow and make it easier to locate and access your footage as you progress with your editing process.
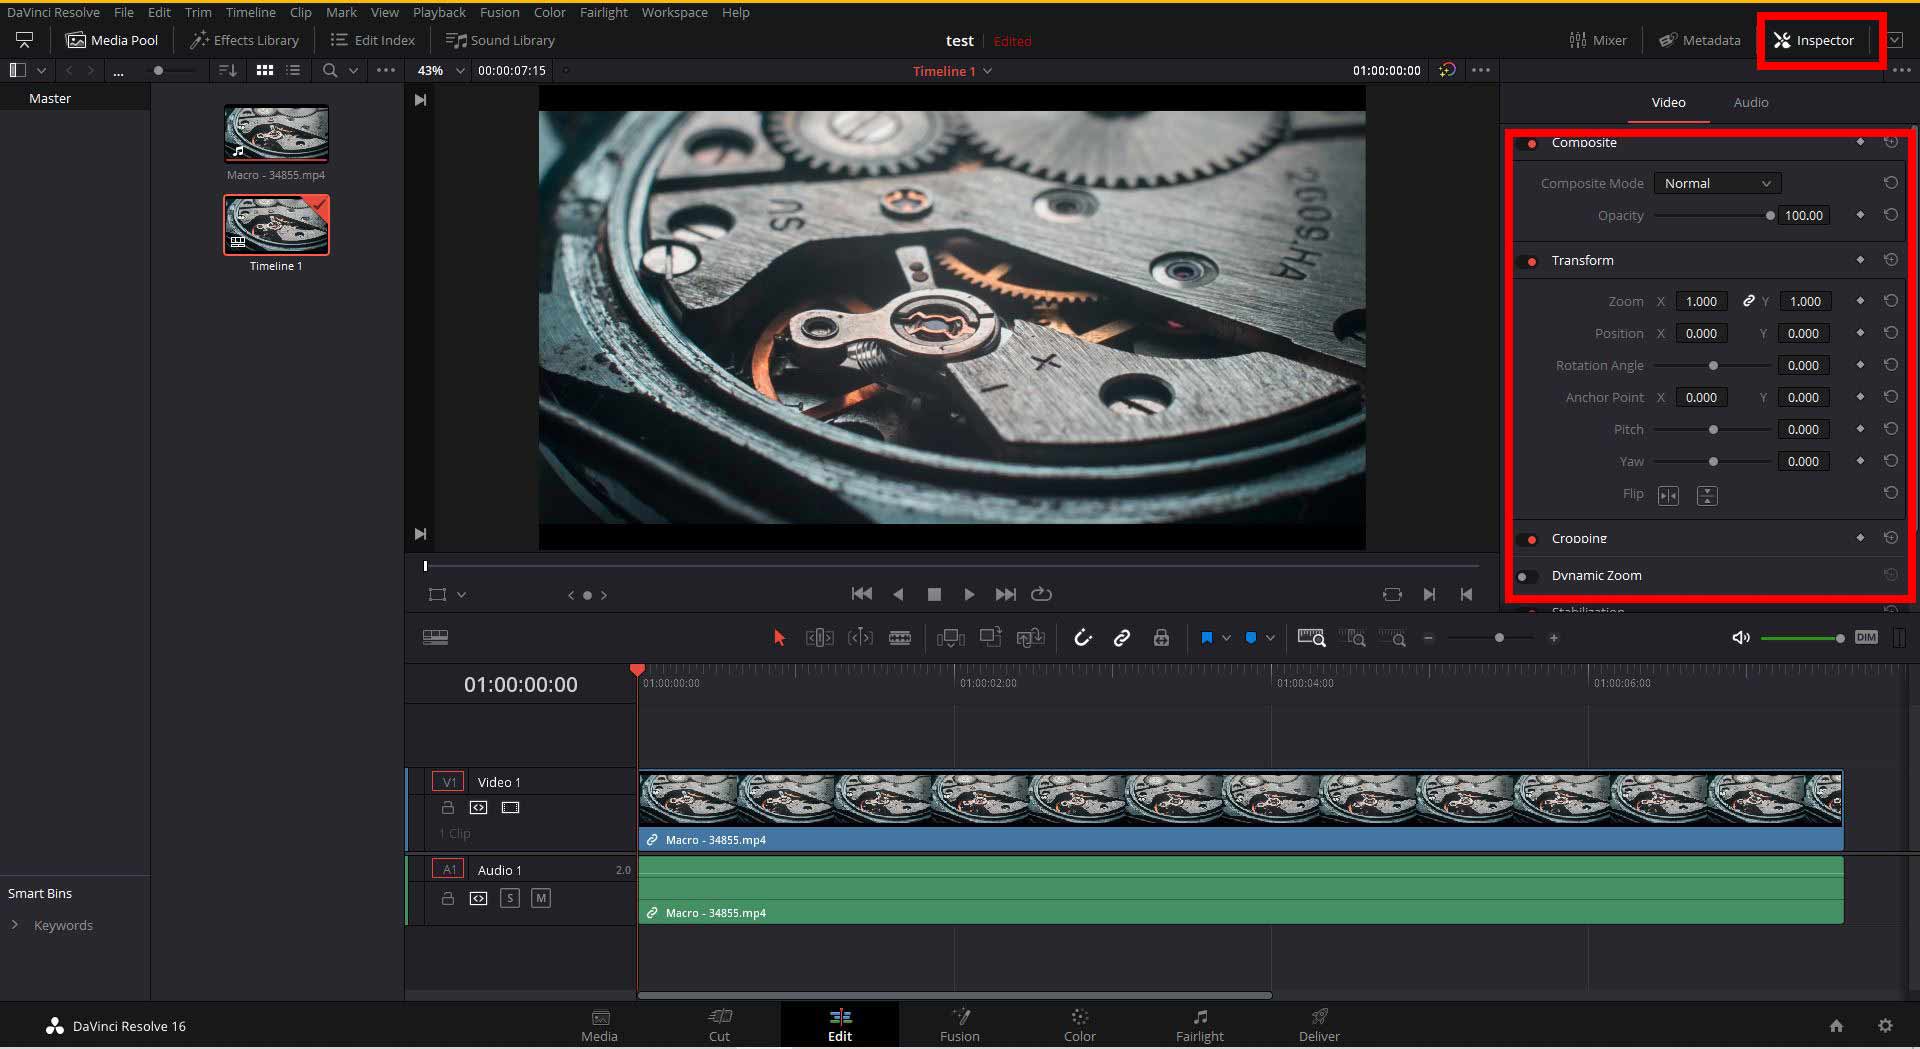
Editing Videos in DaVinci Resolve
Once you have imported your videos into DaVinci Resolve, it’s time to unleash your creativity and start editing. DaVinci Resolve offers a wide range of editing tools and features to help you polish your videos and bring your vision to life. Here are the key steps to edit videos in DaVinci Resolve:
1. Arrange Clips on the Timeline: Drag the imported video clips from the media pool onto the timeline in the desired order. This allows you to create a sequence of clips that will form the foundation of your video project.
2. Trim and Cut Clips: Use the trimming tools to refine your clips and remove any unwanted parts. The “Cut” tool allows you to split clips at specific points, while the “Trim” tool lets you adjust the in and out points of a clip to shorten or lengthen its duration. Experiment with different cuts and transitions to create seamless transitions between shots.
3. Add Effects and Transitions: DaVinci Resolve offers a wide range of effects and transitions to enhance your video editing. From basic color corrections to advanced visual effects, you can add layers of creativity to your project. Experiment with different effects and transitions to achieve the desired look and feel of your video.
4. Apply Audio Enhancements: Pay attention to the audio aspects of your video as well. DaVinci Resolve allows you to adjust audio levels, remove background noise, and add music or voice-over tracks to enhance the overall quality of your video’s sound. Ensure that the audio elements perfectly complement the visuals.
5. Incorporate Titles and Graphics: DaVinci Resolve provides built-in tools for adding titles, captions, and graphics to your videos. Use these tools to introduce scenes, add text overlays, or create lower thirds to display important information. Customize the font, style, and animation to match the overall theme of your video.
6. Utilize Color Grading tools: DaVinci Resolve is renowned for its powerful color grading capabilities. Use the color grading tools to adjust the color, contrast, and tone of your footage. Experiment with different color grading techniques to achieve the desired mood and atmosphere in your video.
7. Preview and Fine-Tune: Regularly preview your edits to ensure the flow and coherence of your video. Use DaVinci Resolve’s playback controls and viewer window to review your changes. Make adjustments as needed to refine the pacing, timing, and overall aesthetic of your video.
Remember, editing is a creative process, and there are no hard and fast rules. Feel free to experiment with different techniques and styles to find your unique editing approach. The key is to create a video that effectively communicates your message and engages your viewers.
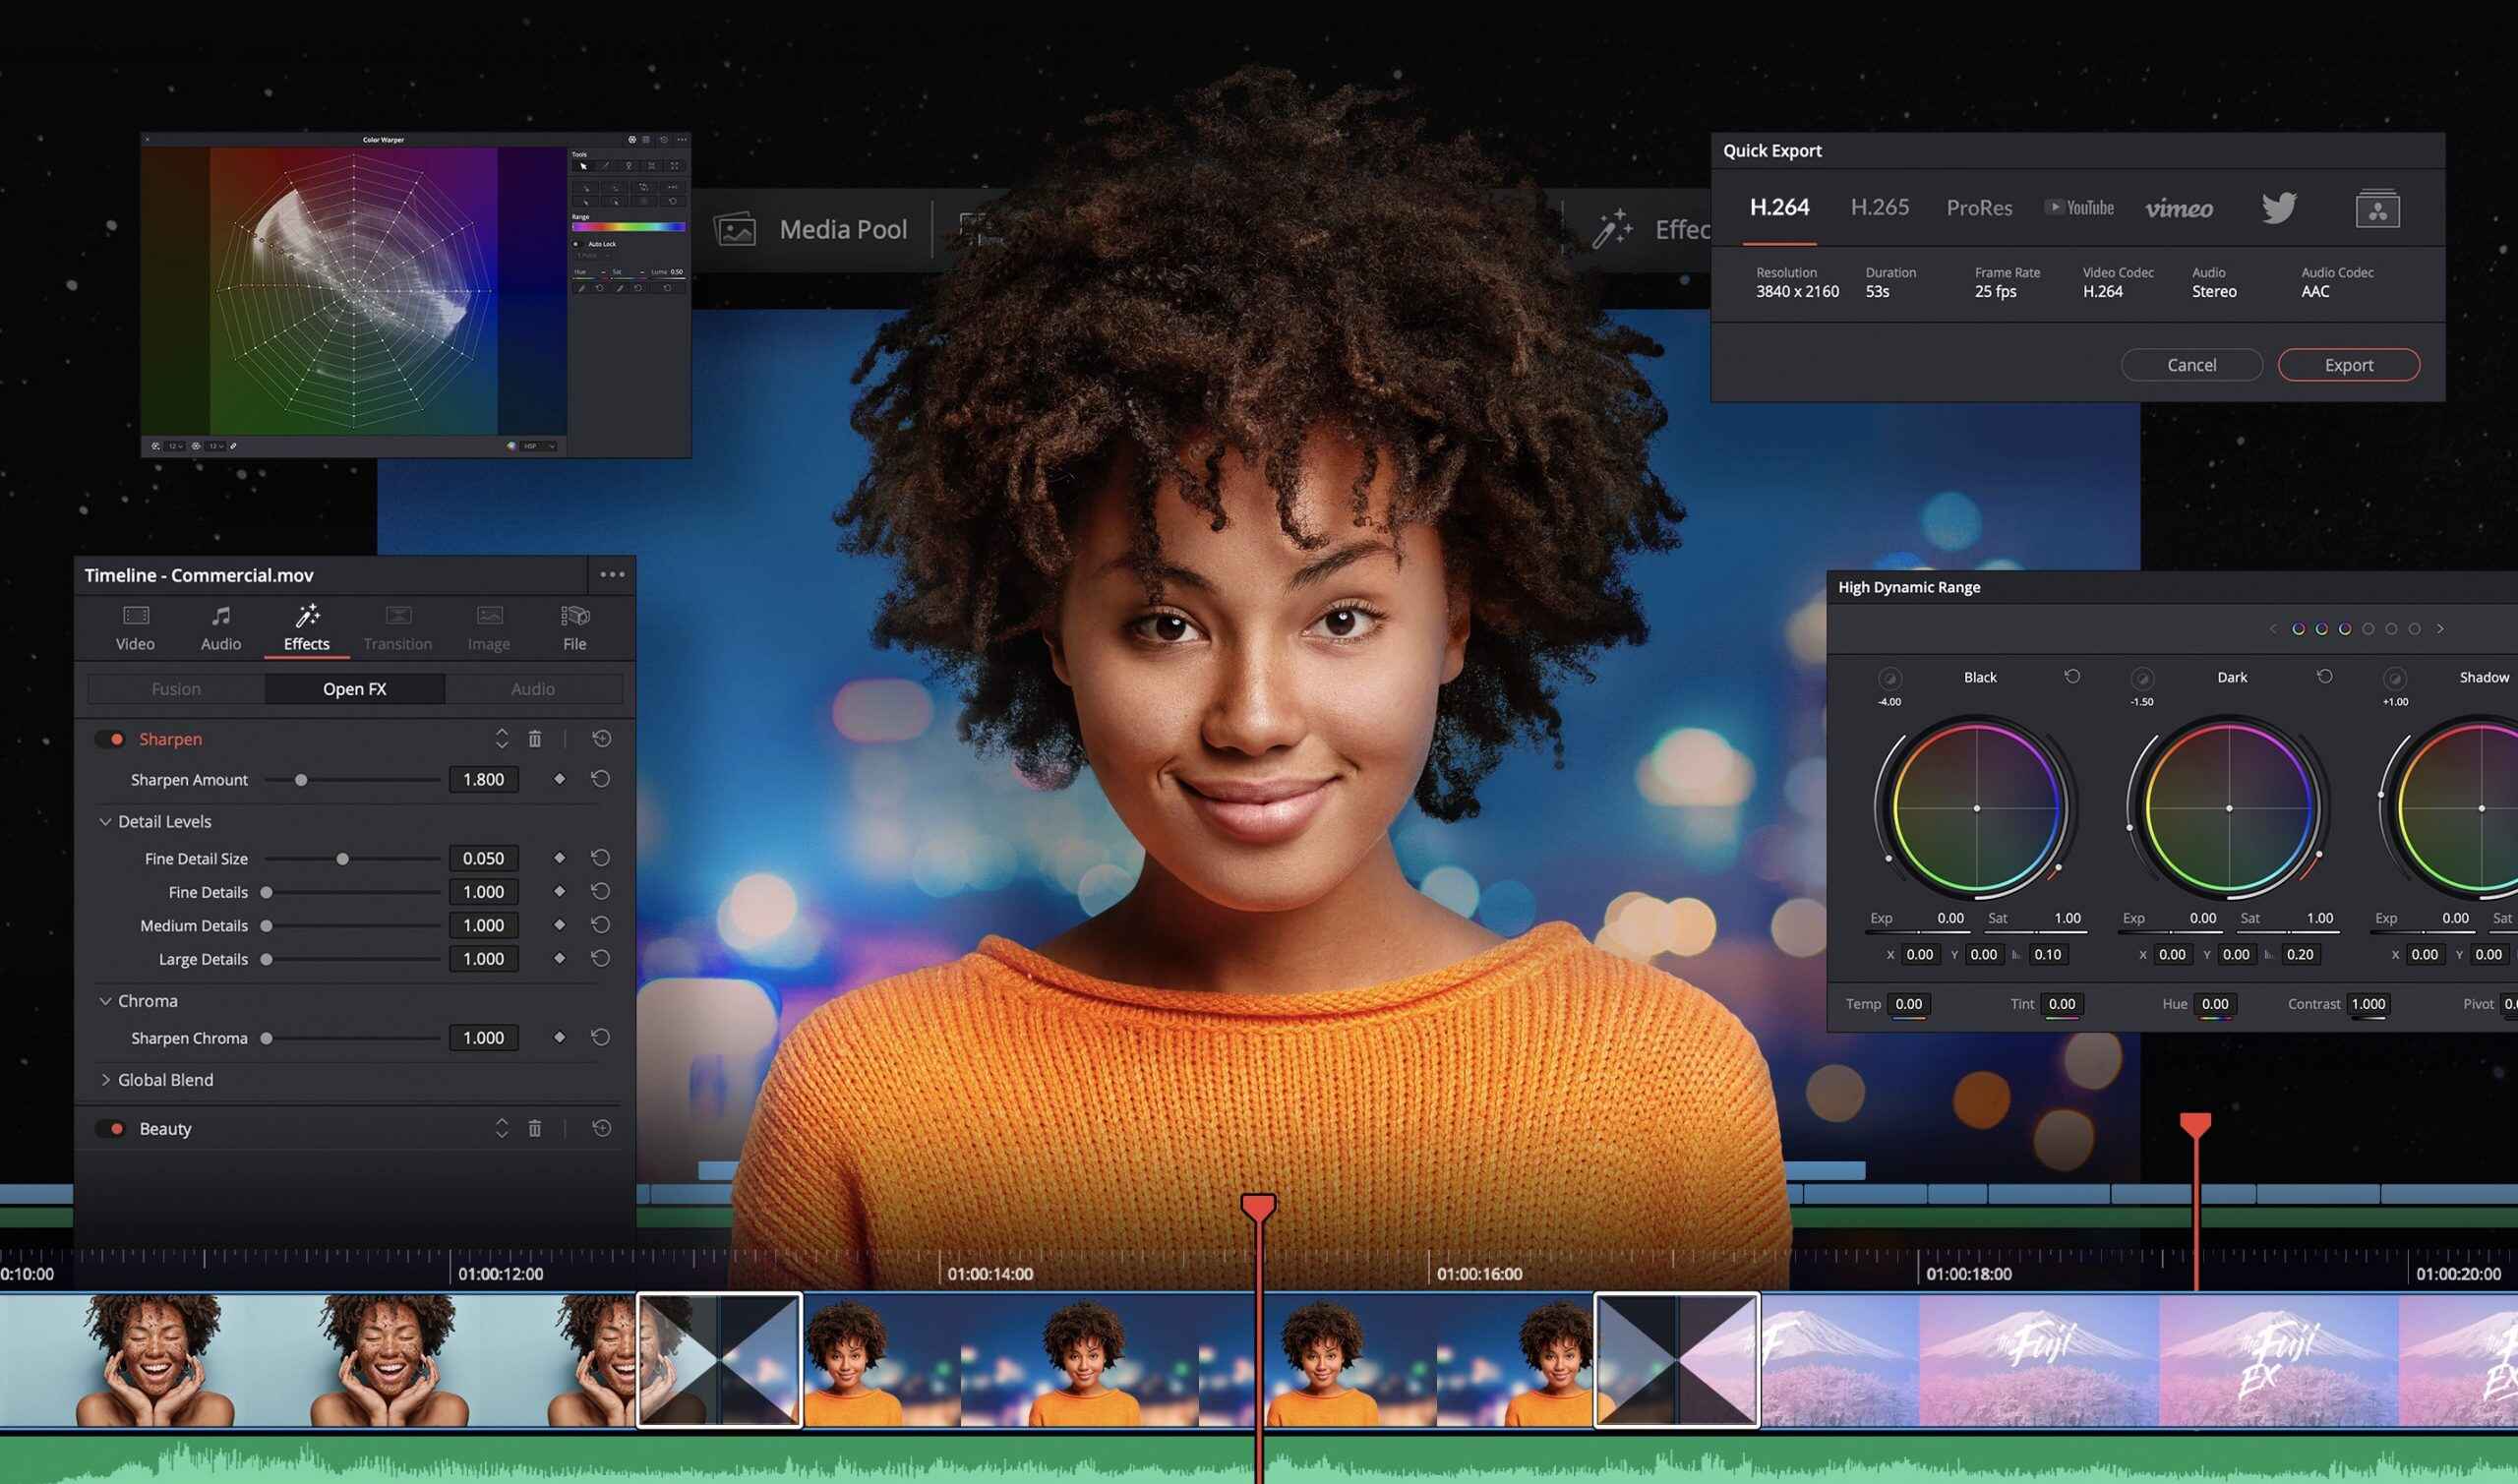
Exporting Videos in DaVinci Resolve
After you have finished editing your videos in DaVinci Resolve, the final step is to export your project into a playable video file that can be shared or uploaded. DaVinci Resolve offers a variety of export settings and options to ensure your video’s quality and compatibility. Here’s how you can export your videos:
1. Navigate to the Deliver Page: Click on the “Deliver” tab located at the bottom of the interface to access the Deliver Page. This is where you can configure the export settings for your video.
2. Select the Output Format: Choose the desired output format for your video. DaVinci Resolve offers a range of popular video formats, including MP4, MOV, and AVI. Select the format that best suits your needs and project requirements.
3. Configure Export Settings: Customize the export settings to achieve the desired video quality and file size. You can adjust parameters such as resolution, frame rate, codec, bit rate, and audio settings. Consider the intended use of your video and the platform on which it will be shared to ensure the optimal settings.
4. Set the Output Location: Specify the folder or location where you want to save the exported video file. Click on the folder icon next to the “Save to” field to select the destination folder.
5. Start the Export Process: Once you have configured the export settings and selected the output location, click on the “Start Render” button to begin the export process. DaVinci Resolve will process your video and create the final output file.
6. Monitor the Export Progress: DaVinci Resolve provides a progress bar and estimated time remaining during the export process. You can monitor the progress and make any necessary adjustments, such as pausing or canceling the export if required.
7. Review the Exported Video: Once the export process is complete, navigate to the output location and open the exported video file. Preview the video to ensure that it meets your expectations in terms of quality, playback, and overall appearance.
8. Share and Distribute Your Video: With the exported video file in hand, you can now share it with others. Upload it to video sharing platforms, social media platforms, or use it for professional presentations or personal use.
By following these steps, you can successfully export your edited videos from DaVinci Resolve and ensure that they are in the appropriate format for your intended use. Experiment with different export settings to find the right balance between video quality and file size, keeping in mind the platform or device on which the video will be viewed.
Best Practices for Video Downloading
When it comes to downloading videos, whether from DaVinci Resolve or other sources, it’s important to follow best practices to ensure a smooth and efficient process. Here are some key guidelines to keep in mind:
1. Respect Copyright and Intellectual Property: Before downloading any video, make sure you have the necessary permissions or rights to do so. Respect copyright laws and intellectual property rights, and only download videos that are legally available for use and distribution.
2. Check Video Quality and Format: Before downloading a video, verify the quality and format of the file. Ensure that it meets your requirements and is compatible with your editing software or playback device. Downloading videos in the highest possible quality can provide better editing flexibility and enhanced visual appeal.
3. Use Reliable Sources: When downloading videos from the internet, use trusted and reliable sources. This helps avoid the risk of downloading malware or low-quality videos. Explore reputable platforms, official websites, or authorized sources for downloading videos.
4. Check Download Speed and Stability: Ensure that your internet connection is stable and reliable before initiating any video downloads. A slow or unstable connection can result in incomplete or corrupted video downloads. Consider using a download manager or accelerator to optimize the download speed and improve overall efficiency.
5. Organize Your Downloaded Videos: After downloading videos, create a logical and organized system to store and manage your files. Use folders or directories to categorize videos based on topics, projects, or other criteria. This makes it easier to locate and access your downloaded videos in the future.
6. Regularly Scan for Viruses and Malware: To ensure the safety and integrity of your computer and files, regularly scan your downloaded videos for viruses and malware. Use reputable antivirus software to detect and remove any potential threats that may compromise your system’s security.
7. Keep Track of Downloaded Videos: Maintain a record or inventory of the videos you’ve downloaded. This helps you keep track of the content you have access to and prevents duplication or unnecessary downloads. Consider creating a spreadsheet or using a digital asset management system to catalog your downloaded videos.
8. Update Your Software: To optimize your video downloading experience, keep your software, including your editing software and download manager, up to date. Regular updates provide bug fixes, stability improvements, and enhanced features that contribute to a seamless video downloading process.
By following these best practices for video downloading, you can ensure a secure and efficient workflow. Remember, always prioritize legality, quality, and organization when downloading videos, and maintain an ethical approach throughout your video creation journey.
Downloading Videos from DaVinci Resolve
While DaVinci Resolve is primarily designed for editing and post-production tasks, there may be times when you need to download videos from the software for various purposes such as archiving, sharing, or further editing. Here are the steps to download videos from DaVinci Resolve:
1. Open the Edit Page: Launch DaVinci Resolve and open the project containing the video you want to download. Ensure that you have the necessary project and media files accessible.
2. Locate the Desired Video: Navigate to the media pool or timeline to locate the specific video you want to download. You can use the search function or browse through your clips to find the desired footage.
3. Export the Video: Right-click on the video clip and select the “Export” option from the context menu. This will open the export settings window where you can configure the parameters for the downloaded video.
4. Configure Export Settings: In the export settings window, specify the desired output format, resolution, frame rate, and other settings according to your requirements. Consider the intended use and compatibility of the downloaded video for optimal results.
5. Choose the Output Location: Select the folder or location where you want to save the downloaded video. Click on the folder icon in the export settings window to browse and choose the desired destination.
6. Start the Download: Once you have configured the export settings and selected the output location, click on the “Start Export” button to initiate the downloading process. DaVinci Resolve will process the video and generate the downloaded file.
7. Verify the Downloaded Video: After the download is complete, navigate to the designated output location and verify the downloaded video. Playback the file to ensure that it matches your expectations in terms of quality, format, and content.
Remember, the time taken for the downloading process will depend on various factors such as the length and complexity of the video, as well as your computer’s processing capabilities. It is important to have sufficient storage space and a stable internet connection to ensure a smooth and uninterrupted downloading process.
By following these steps, you can successfully download videos from DaVinci Resolve and have the files readily available for offline use or distribution. Whether you are archiving your edited projects or downloading videos for further editing in other software, DaVinci Resolve provides a straightforward process to acquire your desired footage.
Conclusion
Downloading videos from DaVinci Resolve can be a beneficial process for various purposes, including archiving, sharing, or further editing. Throughout this guide, we have explored the steps and best practices for downloading videos from DaVinci Resolve.
We began by introducing DaVinci Resolve as a powerful video editing software and highlighting its features and capabilities. We then discussed how to get started with DaVinci Resolve, including downloading and installing the software, setting up projects, and importing videos into the software.
We delved into the editing process within DaVinci Resolve, exploring how to arrange and edit clips on the timeline, trim and cut footage, add effects and transitions, and perform color grading and audio enhancements. We emphasized the importance of creativity and experimentation in achieving desired editing results.
Furthermore, we examined the process of exporting videos from DaVinci Resolve, ensuring the proper configuration of output settings, and selecting the appropriate output format for specific needs. We also discussed best practices for video downloading, emphasizing the importance of respecting copyright, using reliable sources, and organizing downloaded files.
Lastly, we explored the specific steps involved in downloading videos from DaVinci Resolve, including locating the desired video, configuring export settings, choosing the output location, and initiating the download process.
By following the guidelines outlined in this guide, you can confidently navigate the process of downloading videos from DaVinci Resolve. Whether you are a professional filmmaker, content creator, or an aspiring video editor, the ability to download and work with videos efficiently is a valuable skill.
Remember to always respect copyright laws and intellectual property rights when downloading videos, ensuring that you have the necessary permissions or rights to do so. Additionally, stay updated with the latest version of DaVinci Resolve and maintain an organized workflow to make the most of your video editing projects.
With the knowledge and understanding gained from this guide, you are now equipped to confidently download videos from DaVinci Resolve and unleash your creativity in bringing your video projects to life.