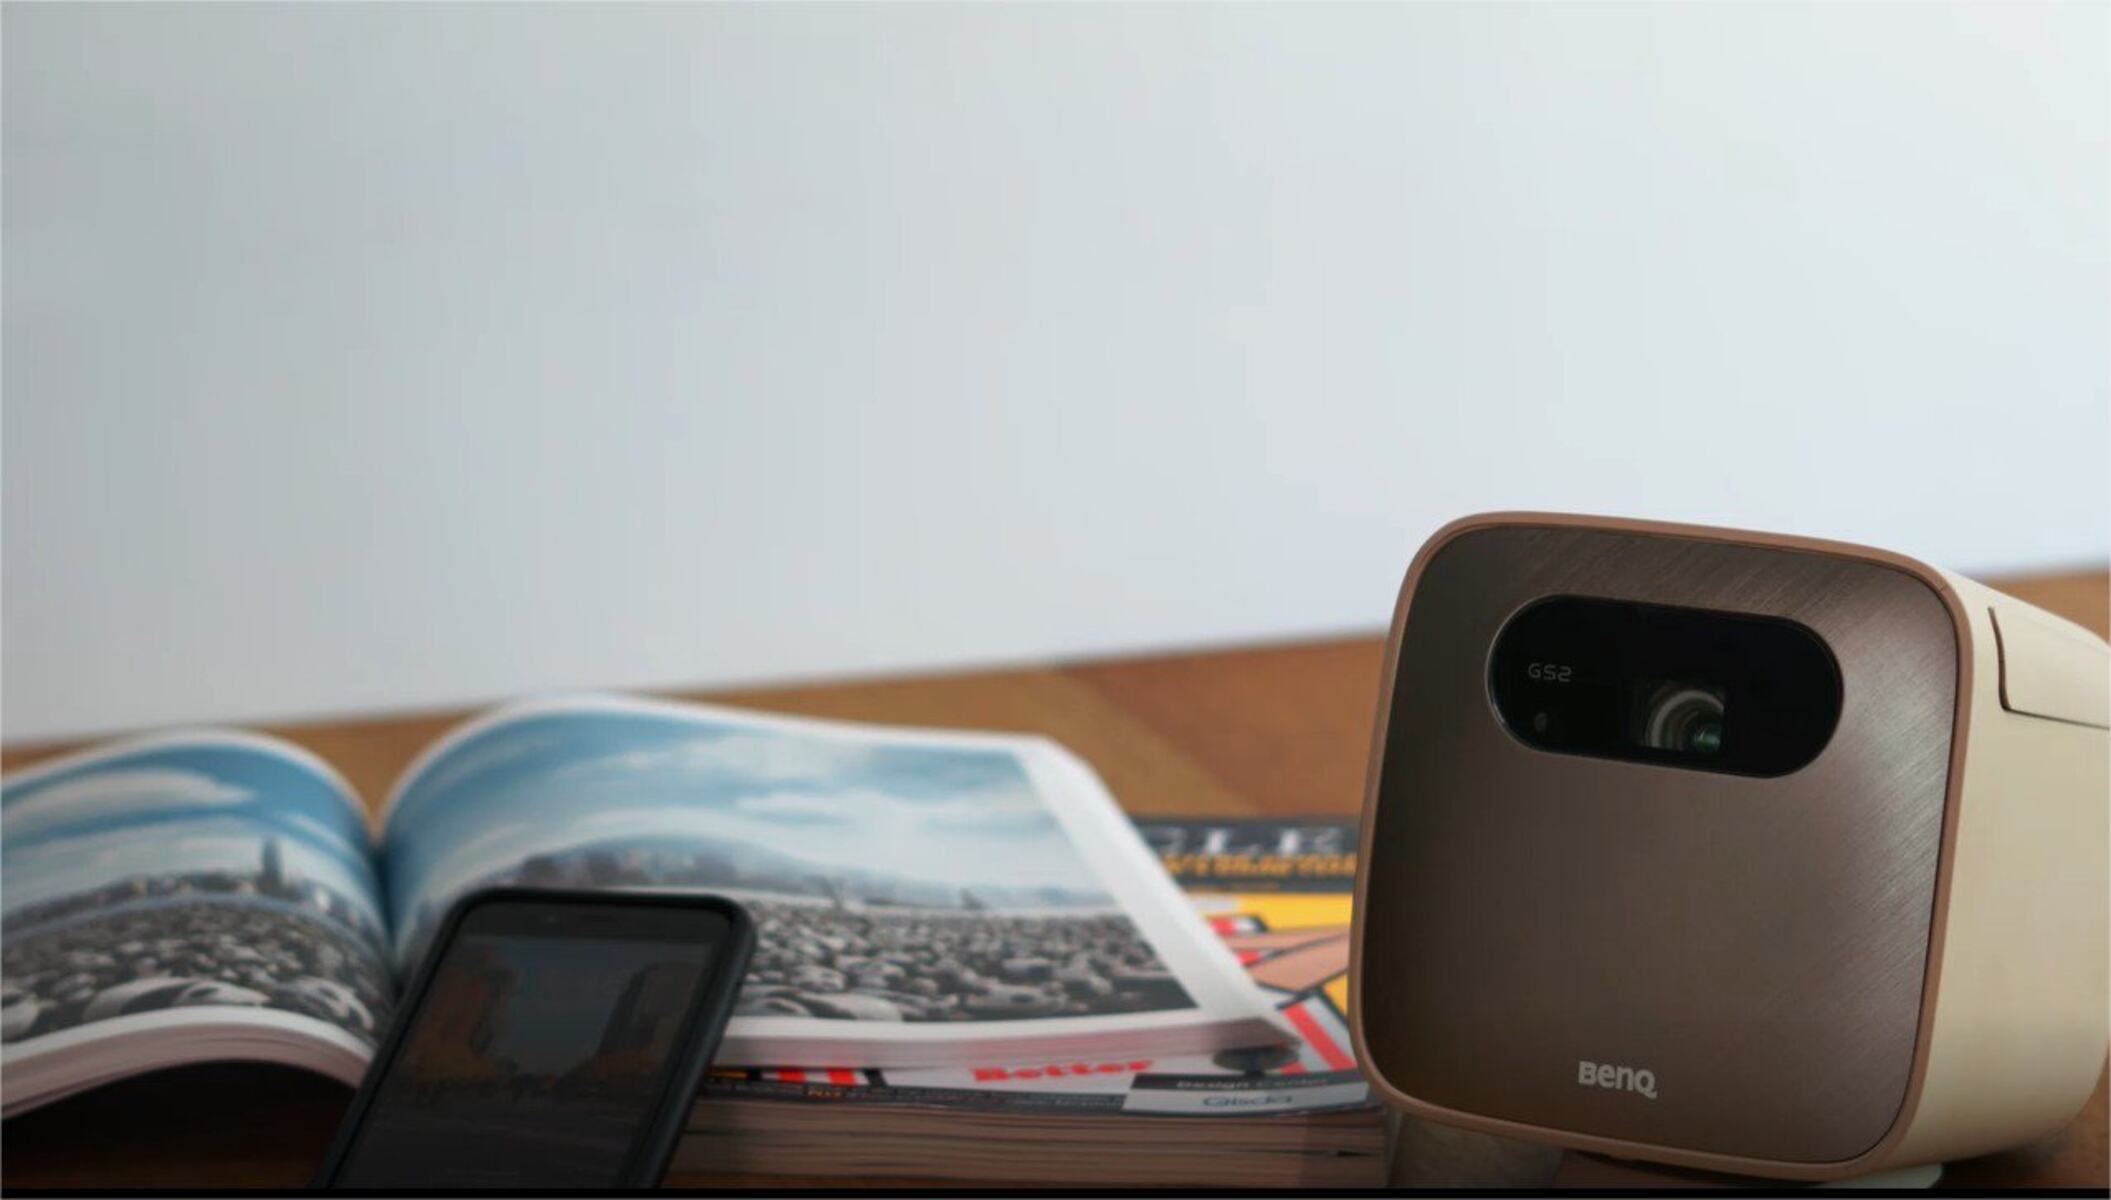
Introduction
Wireless projection has revolutionized the way we connect and present information. Gone are the days of tangled cables and limited mobility. With wireless projection, you can seamlessly connect your device to a projector without the need for any physical connections. Whether you’re giving a presentation in a boardroom, sharing photos and videos at a family gathering, or enjoying a movie night at home, wireless projection provides the freedom and flexibility to showcase your content with ease.
In this article, we will explore the world of wireless projection and guide you through the process of connecting your device to a projector wirelessly. We will discuss different options available in the market, highlight their benefits, and provide step-by-step instructions to help you embark on your wireless projection journey.
Whether you’re a business professional, an educator, or a tech-savvy individual, wireless projection offers numerous advantages that can enhance your overall experience. No longer restricted by the length of a cable, you can move freely around the room while delivering your presentation or sharing content. This freedom allows for better engagement with your audience and creates a more interactive environment.
Additionally, wireless projection eliminates the hassle of setting up and disassembling cables, reducing the overall setup time. This convenience is particularly beneficial in fast-paced environments where quick and efficient connectivity is essential. Furthermore, wireless projection enables seamless collaboration among team members, as multiple devices can connect to the projector simultaneously, allowing for easy sharing of ideas and content.
Another advantage of wireless projection is its compatibility with various devices and operating systems. Whether you’re using a laptop, smartphone, or tablet, wireless projection solutions are designed to work with a wide range of devices, ensuring that you can connect and display your content without any compatibility issues. This versatility makes wireless projection a great option for individuals and organizations operating in multi-device environments.
In the following sections, we will explore different wireless projection options, discuss their specific requirements, and provide detailed instructions on how to wirelessly connect your device to a projector. By the end of this article, you will have all the information you need to make the most of wireless projection technology and bring your presentations, videos, and photos to life with ease.
Overview of Wireless Projection
Wireless projection allows you to transmit audio and video signals from your device to a projector without the need for any physical connections. It provides a seamless and convenient way to share content on a larger screen, making it an essential tool for presentations, entertainment, and collaboration.
There are several technologies available for wireless projection, each with its own features and capabilities. The most common methods include wireless HDMI adapters, Miracast technology, Apple AirPlay, and wireless display adapters.
Wireless HDMI adapters work by connecting a small receiver to the projector’s HDMI port, while a transmitter is connected to your device. The adapter wirelessly transfers the video and audio signals from your device to the projector, allowing you to mirror your screen or extend your display. This method provides high-quality audio and video transmission, making it ideal for presentations and media playback.
Miracast technology, on the other hand, utilizes Wi-Fi Direct to establish a direct connection between your device and the projector. It allows you to mirror the screen of your device wirelessly, providing a seamless way to share content without the need for additional hardware. Miracast is supported by many modern devices and operating systems, making it a versatile and widely accessible option for wireless projection.
For Apple device users, Apple AirPlay provides a convenient way to wirelessly connect to a projector. With AirPlay, you can stream audio and video content directly from your iPhone, iPad, or Mac to an Apple TV or an AirPlay-enabled projector. It offers a simple and intuitive user interface, making it an excellent choice for Apple enthusiasts.
Wireless display adapters, such as Google Chromecast and Microsoft Wireless Display Adapter, are compact devices that plug into the HDMI port of your projector. They allow you to wirelessly cast content from your device to the projector, similar to Miracast technology. These adapters often offer additional features, such as screen mirroring and support for multiple device types, making them versatile options for wireless projection.
Overall, wireless projection offers a flexible and convenient way to connect your device to a projector. Whether you’re giving a presentation, sharing media files, or collaborating with teammates, wireless projection technologies provide the freedom and mobility you need to engage your audience effectively. In the following sections, we will delve into the specific requirements and steps involved in setting up wireless projection using different methods, empowering you to take advantage of this cutting-edge technology.
Benefits of Wireless Projection
Wireless projection offers a multitude of benefits that make it a preferred choice for individuals and organizations alike. Let’s explore some of the key advantages of using wireless projection in various scenarios.
Flexibility and Mobility: Perhaps one of the most significant advantages of wireless projection is the freedom and mobility it provides. Without the need for physical connections, you can move around the room while presenting or sharing content. This flexibility allows for better engagement with your audience and creates a more interactive environment.
Convenience and Efficiency: Setting up and disassembling cables can be time-consuming and cumbersome. With wireless projection, you can say goodbye to tangled cables and save valuable setup time. This convenience is particularly beneficial for professionals who frequently give presentations or need to quickly connect their devices to projectors.
Collaboration and Interaction: Wireless projection enables seamless collaboration among team members. Multiple devices can connect to the projector simultaneously, making it easy to switch between presenters and share ideas or content. This collaborative approach enhances productivity and fosters effective teamwork.
Device Compatibility: Wireless projection solutions are designed to work with a wide range of devices, including laptops, smartphones, and tablets. Regardless of the make or operating system, you can enjoy the benefits of wireless projection without worrying about compatibility issues. This flexibility makes wireless projection ideal for individuals and organizations operating in multi-device environments.
High-Quality Audio and Video: Wireless projection technologies, such as wireless HDMI adapters, provide high-quality audio and video transmission. Whether you’re showcasing a multimedia presentation or enjoying a movie night, you can count on wireless projection to deliver crisp visuals and immersive sound.
Easy Setup and Configuration: Most wireless projection methods have simple setup processes and user-friendly interfaces, making them accessible to users of all technical levels. With just a few steps, you can connect your device to a projector wirelessly and start sharing your content effortlessly.
Portability: Wireless projection devices are often compact and portable, making them easy to carry around. Whether you’re traveling for work or need to set up a temporary projection system, wireless projection offers a convenient solution that doesn’t require bulky equipment.
Cost-Effective Solution: In some cases, investing in wireless projection equipment can be a cost-effective solution compared to traditional wired setups. Instead of purchasing multiple cables and adapters, a single wireless projection device can connect to various devices, saving both money and space.
With all these benefits, wireless projection provides a versatile and practical solution for individuals, educational institutions, businesses, and even home entertainment setups. The next sections will guide you through the requirements and step-by-step instructions to wirelessly connect your device to a projector using different methods, helping you make the most of wireless projection technology.
Requirements for Wireless Projection
Before diving into the process of setting up wireless projection, it’s important to understand the requirements involved. While wireless projection offers convenience and flexibility, there are specific elements necessary to ensure a smooth and successful connection between your device and the projector. Let’s explore the key requirements below:
Wireless Projection-Compatible Projector: To establish a wireless connection, you will need a projector that is compatible with wireless projection technologies. Not all projectors come with built-in wireless capabilities, so it’s important to check your projector’s specifications or consult the manufacturer’s documentation to confirm wireless compatibility.
Wireless Projection Adapter or Technology: Depending on the method you choose, you will need a wireless projection adapter or a device with built-in wireless projection technology. This can include wireless HDMI adapters, Miracast-enabled devices, Apple AirPlay-enabled devices, or wireless display adapters.
Device Compatibility: Ensure that the device you plan to connect to the projector wirelessly supports the chosen wireless projection method. Different devices have varying levels of compatibility with different wireless projection technologies. It’s essential to check compatibility requirements to ensure a seamless connection.
Network Connection: For some wireless projection methods, such as Miracast, a Wi-Fi network connection is required. Make sure you have a stable and reliable Wi-Fi network available to connect your device and projector. If using a wireless HDMI adapter, a network connection may not be necessary, as the connection is established directly between the device and the adapter.
Compatible Operating System: Verify that your device’s operating system is compatible with the chosen wireless projection technology. Different wireless projection methods may have specific requirements for operating systems, so be sure to check compatibility information before proceeding.
Power Source: Ensure that both your device and the wireless projection adapter or technology have sufficient power. Wireless projection requires power to establish and maintain the connection, so make sure your device is adequately charged or connected to a power source to prevent any interruption during the presentation or content sharing.
Range of Wireless Signal: Consider the range of the wireless signal between your device and the projector. Depending on the wireless projection method and the specific devices being used, the range may vary. It’s generally recommended to have the devices within a reasonable distance from each other to ensure a stable and reliable connection.
By fulfilling these requirements, you will have the necessary components and settings in place to set up wireless projection. In the next sections, we will outline the specific steps involved in connecting your device to a projector wirelessly using various methods, guiding you through each process with detailed instructions and troubleshooting tips.
Option 1: Wireless HDMI Adapters
One of the most popular methods for wireless projection is through the use of wireless HDMI adapters. These adapters enable you to connect your device to a projector wirelessly and enjoy high-definition audio and video transmission. Follow the steps below to set up wireless projection using a wireless HDMI adapter:
Step 1: Check Projector Compatibility: Ensure that your projector has an HDMI port and is compatible with wireless HDMI adapters. Check the manufacturer’s documentation or consult their website to confirm compatibility.
Step 2: Connect Wireless Adapter to Projector: Plug the wireless HDMI adapter into the HDMI port of the projector. Ensure a secure connection to avoid any interruptions or loss of signal during the presentation or content sharing.
Step 3: Connect Wireless Adapter to Device: Connect the wireless HDMI adapter to your device. Depending on the specific adapter, you may need to use an HDMI cable or a USB receiver to establish the connection. Follow the manufacturer’s instructions for a proper and secure connection.
Step 4: Enable Wireless Projection on Device: Once the adapter is connected to both the projector and your device, enable the wireless projection feature on your device. This can often be found in the display settings or through a dedicated wireless projection app provided by the adapter manufacturer.
Step 5: Adjust Projector Settings: On your projector, select the appropriate input source to receive the wireless signal from the HDMI adapter. This may require navigating through the projector’s menu and selecting the HDMI input option.
Once the setup is complete, you should see your device’s screen mirrored or extended onto the projector. You can then proceed with your presentation or share content wirelessly with ease.
It is important to note that different wireless HDMI adapters may have slight variations in setup and operation. Carefully read the instructions provided by the manufacturer and refer to any troubleshooting guides if you encounter any difficulties during the setup process.
With wireless HDMI adapters, you can enjoy the convenience of wireless projection without compromising on audio and video quality. These adapters are capable of transmitting high-definition content, making them ideal for presentations, multimedia playback, and even gaming.
Keep in mind that the range of wireless signal can vary among different wireless HDMI adapters. Stay within a reasonable distance between your device and the adapter to ensure a stable and uninterrupted connection. Additionally, ensure that both your device and the adapter have sufficient power to maintain the wireless projection throughout your presentation.
In the next sections, we will explore additional wireless projection methods, providing step-by-step instructions to help you connect your device to a projector wirelessly using various technologies.
Option 2: Miracast Technology
Miracast technology offers a convenient and widely supported method for wirelessly connecting your device to a projector. With Miracast, you can mirror your device’s screen onto the larger display without the need for any additional hardware. Follow the steps below to set up wireless projection using Miracast technology:
Step 1: Check Projector Compatibility: Ensure that your projector supports Miracast technology. Some projectors come with built-in Miracast capabilities, while others may require the use of an external Miracast adapter. Check the manufacturer’s documentation or consult their website to confirm compatibility.
Step 2: Enable Miracast on Projector: If your projector has built-in Miracast, enable the Miracast feature on the projector. This can typically be done through the projector’s settings menu or by pressing a dedicated Miracast button on the remote control. If using an external Miracast adapter, follow the manufacturer’s instructions to connect and enable Miracast functionality.
Step 3: Enable Miracast on Device: On your device, enable the Miracast feature. The process may vary depending on the operating system and device manufacturer. In general, you can find the Miracast option in the device’s settings menu under display or connectivity settings. Enable Miracast and wait for your device to search for available Miracast-enabled devices.
Step 4: Connect to Projector: Once your device detects the Miracast-enabled projector, select it to establish the connection. You may be prompted to enter a PIN code for security purposes, especially when connecting to a new device for the first time. Follow the on-screen instructions, if any, to complete the connection.
Step 5: Mirror or Extend Display: After the connection is established, you can choose to mirror your device’s screen onto the projector for an exact replica, or extend your display to use the projector as a secondary display. This can be done through the display settings on your device. Make sure to select the appropriate display mode to suit your needs.
With Miracast technology, you can wirelessly share your device’s screen, including presentations, videos, and other content, on a larger projector display. Miracast is supported by many devices and operating systems, making it a versatile option for wireless projection.
While setting up Miracast is generally straightforward, it’s important to ensure that both your device and the projector are within a reasonable distance for a stable connection. Range limitations can vary depending on the devices used, but staying within a close proximity can help minimize interference and maintain a reliable wireless projection.
Keep in mind that some devices or operating systems may have variations in the terminology used for Miracast. For example, on Android devices, Miracast is often referred to as “Screen Mirroring.” Regardless of the terminology, the functionality remains the same.
In the next sections, we will explore more wireless projection options, providing step-by-step instructions to help you connect your device to a projector wirelessly using different technologies.
Option 3: Apple AirPlay
For Apple device users, Apple AirPlay provides a seamless and user-friendly way to wirelessly connect to a projector. With AirPlay, you can stream audio and video content from your iPhone, iPad, or Mac to an Apple TV or an AirPlay-enabled projector. Follow the steps below to set up wireless projection using Apple AirPlay:
Step 1: Check Projector Compatibility: Ensure that your projector supports Apple AirPlay. Look for projectors labeled as AirPlay-enabled or that have built-in Apple AirPlay functionality. Alternatively, you can connect an Apple TV device to a projector to enable AirPlay capabilities.
Step 2: Connect Apple TV (if applicable): If you’re using an Apple TV, connect it to your projector using an HDMI cable. Ensure the Apple TV is powered on and connected to the same Wi-Fi network as your Apple device. Follow the on-screen instructions on the Apple TV to complete the setup process.
Step 3: Enable AirPlay on Apple Device: On your iPhone, iPad, or Mac, swipe up from the bottom (on iPhones and iPads) or open the Control Center (on Macs) to access the AirPlay feature. Tap the AirPlay icon, usually represented by a rectangle with an arrow pointing upward or a screen mirroring icon, and select the AirPlay-enabled projector or Apple TV from the list of available devices.
Step 4: Enter AirPlay Code (if applicable): In some cases, when connecting to a new AirPlay-enabled projector or Apple TV for the first time, you may be prompted to enter an AirPlay code. This code will be displayed on the projector or Apple TV screen. Enter the code on your Apple device to authenticate and establish the connection.
Step 5: Start AirPlay: After the connection is established, you can now start streaming audio and video content from your Apple device to the projector. Open the app or content you wish to display, and it will appear on the projector screen or TV connected to the Apple TV.
Apple AirPlay offers a seamless and intuitive way to wirelessly connect your Apple devices to projectors, making it ideal for presentations, media playback, and more. AirPlay is supported on a wide range of Apple devices, including iPhones, iPads, and Mac computers.
Ensure that both your Apple device and the AirPlay-enabled projector or Apple TV are connected to the same Wi-Fi network for a stable and reliable connection. Additionally, keep in mind that functionality and features may vary depending on the device and operating system version you are using.
In the next sections, we will explore more wireless projection options, providing step-by-step instructions to help you connect your device to a projector wirelessly using different technologies.
Option 4: Wireless Display Adapters
Wireless display adapters provide a versatile and accessible option for wirelessly connecting your device to a projector. These compact devices, such as Google Chromecast and Microsoft Wireless Display Adapter, plug into the HDMI port of your projector, allowing you to cast or mirror content from your device onto the projector screen. Follow the steps below to set up wireless projection using a wireless display adapter:
Step 1: Check Projector Compatibility: Confirm that your projector has an available HDMI port to connect the wireless display adapter. Ensure that it supports the display adapter technology you are using, such as Google Chromecast or Microsoft Wireless Display Adapter.
Step 2: Plug in the Wireless Display Adapter: Connect the wireless display adapter to the HDMI port of your projector. If the adapter requires power, ensure it is connected to a power source as well. Some adapters may use a USB port on the projector itself for power, eliminating the need for an additional power source.
Step 3: Switch Projector Input: On your projector, select the HDMI input option that corresponds to the port where the wireless display adapter is connected. This can usually be done through the projector’s remote control or menu system.
Step 4: Connect Device to the Wireless Display Adapter: On your device, open the wireless display settings or screen mirroring option. Scan for available wireless display adapters and select the one that matches your wireless display adapter. Follow any on-screen instructions to establish the connection.
Step 5: Cast or Mirror Content: Once the connection is established, you can cast or mirror content from your device onto the projector screen. Depending on the specific wireless display adapter and the capabilities of your device, you may be able to mirror the entire screen or cast specific apps or media files onto the projector.
Wireless display adapters offer a simple and convenient way to wirelessly connect your device to a projector. These adapters often have additional features, such as support for multiple device types and the ability to cast content from various apps and sources.
It’s important to note that different wireless display adapters may have variations in setup and operation. Refer to the manufacturer’s instructions and any troubleshooting guides provided to ensure a smooth and successful wireless projection experience.
Keep in mind the range limitations of the wireless display adapter. Generally, staying within a reasonable distance between your device and the adapter will help maintain a strong and reliable wireless connection.
In the next sections, we will explore additional wireless projection options, providing step-by-step instructions to help you connect your device to a projector wirelessly using various technologies.
Step 1: Check Projector Compatibility
Before beginning the process of setting up wireless projection, it is crucial to check the compatibility of your projector with the wireless projection method you wish to use. This step ensures that your projector has the necessary capabilities to establish a wireless connection with your device. Follow the guidelines below to check the compatibility:
Consult the Manufacturer’s Documentation: The first step is to refer to the manufacturer’s documentation provided with your projector. Look for information on wireless projection capabilities and supported technologies. This documentation may be available in the user manual or on the manufacturer’s website.
Online Research: In case the manufacturer’s documentation is not readily available or does not provide the required information, conduct online research about your specific projector model. Visit the manufacturer’s website or other trusted sources to find detailed specifications for the projector. Look for any mentions of wireless projection compatibility or supported wireless technologies.
Contact the Manufacturer: If you are unable to find the necessary compatibility information, consider reaching out to the manufacturer directly. They may be able to provide you with the required details or clarify any queries you have regarding wireless projection compatibility.
Look for Wireless Projection Logos/Labels: Many projectors that support wireless projection methods come with specific logos or labels indicating their compatibility. Look for symbols such as “Wireless Projection Compatible,” “Miracast Certified,” or “AirPlay Enabled.” These logos or labels often serve as visual indicators of the projector’s wireless projection capabilities.
Consider External Adapters: If your projector does not have built-in wireless projection capabilities, explore the option of using an external adapter. Several wireless projection technologies, such as Miracast or HDMI adapters, can be connected externally to the projector to enable wireless connectivity. Check the compatibility of the external adapters with your projector model.
By following these steps and ensuring your projector’s compatibility, you can move forward with confidence in selecting and setting up the appropriate wireless projection method for your needs. It is important to determine the compatibility in advance to avoid any issues during the setup process and to ensure a seamless wireless projection experience.
In the subsequent steps, we will guide you through the specific instructions for connecting your device wirelessly to the projector using the chosen wireless projection method.
Step 2: Connect Wireless Adapter to Projector
Once you have confirmed the compatibility between your projector and the wireless projection method you’re using, the next step is to connect the wireless adapter to the projector. This step establishes the physical connection between the two devices, enabling wireless communication. Follow the instructions below to connect the wireless adapter to the projector:
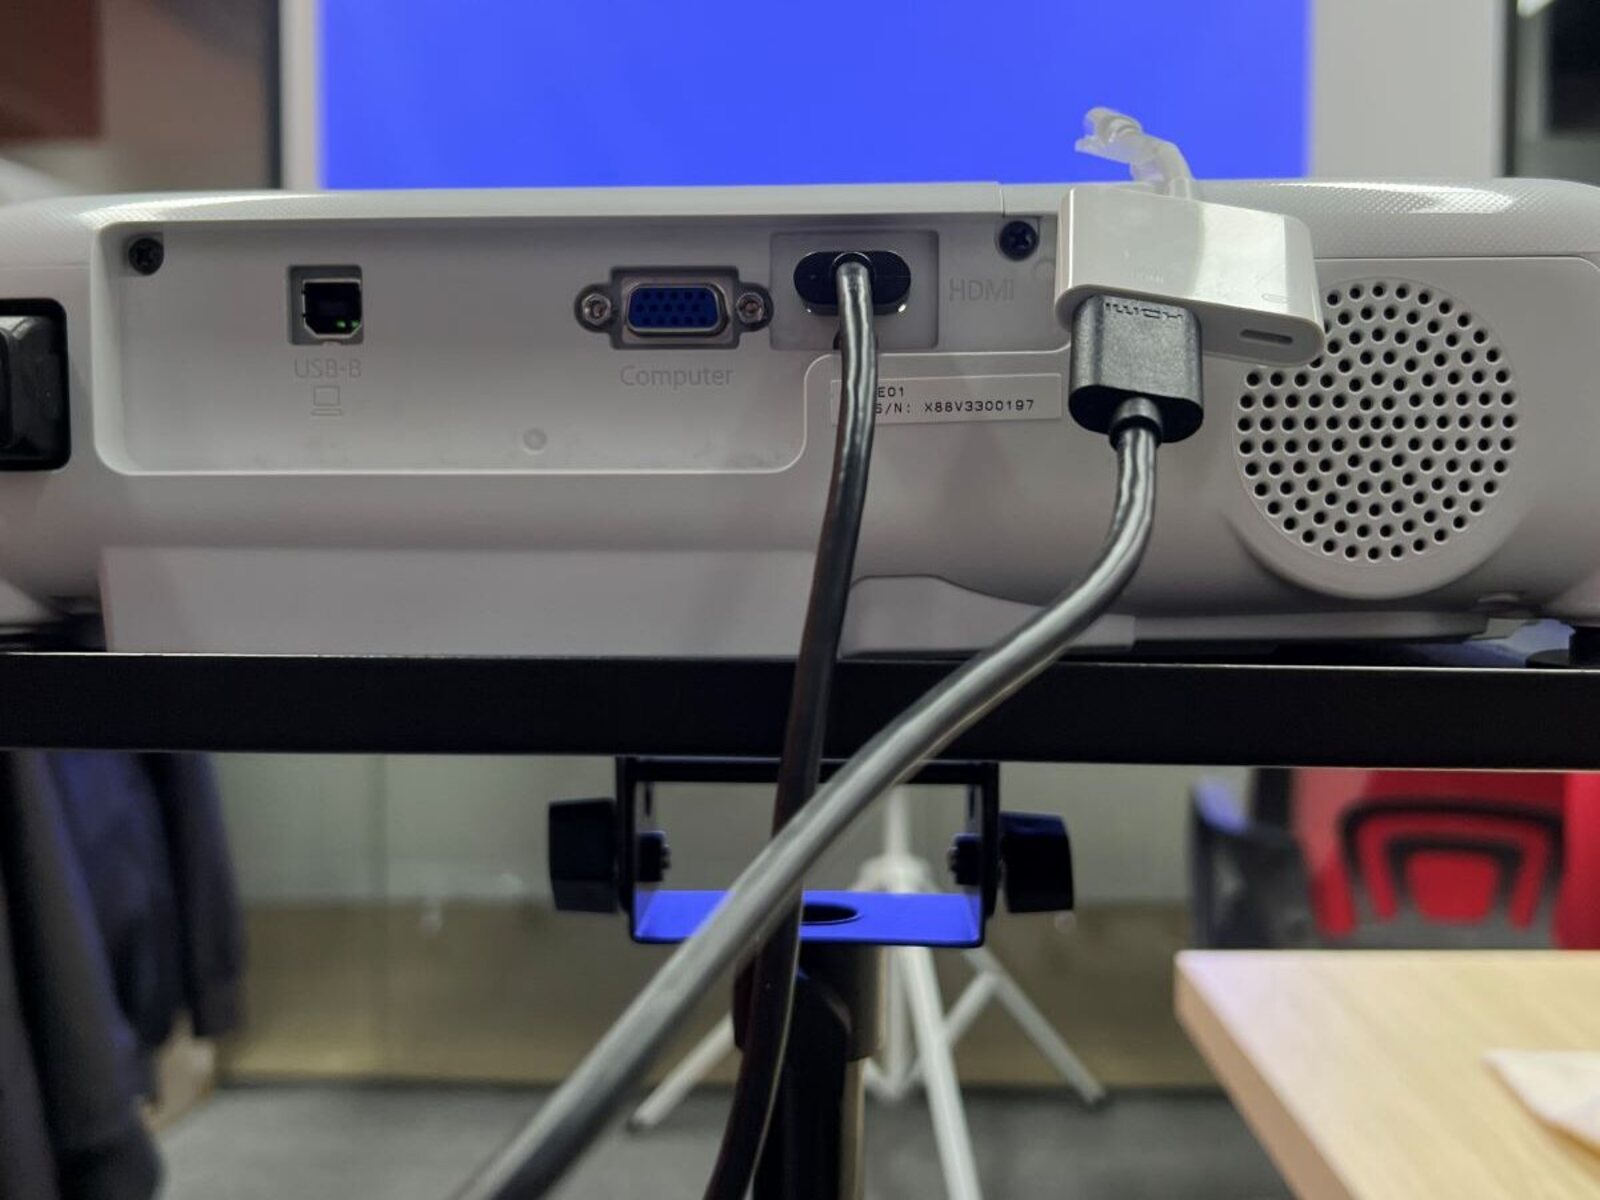
1. Identify the HDMI Port: Locate the HDMI port on your projector. It is usually found on the back or side of the device. The HDMI port will typically resemble a small trapezoidal-shaped slot.
2. Power Off the Projector: Before making any connections, make sure the projector is powered off. This will prevent any potential damage to the devices or interruptions during the setup process.
3. Insert the Wireless Adapter into the HDMI Port: Take the wireless adapter and gently insert it into the HDMI port of the projector. Ensure a secure connection by pushing it in fully until it is firmly seated in the port.
4. Secure the Adapter: Some wireless adapters come with additional features or attachments to secure them in place. If your wireless adapter has any clips, screws, or other securing mechanisms, use them to fasten the adapter to the projector securely. This ensures that the adapter remains in place during the wireless projection session.
5. Connect Power (if Applicable): Depending on the specific wireless adapter, you may need to provide power to it. Some adapters have built-in power sources that draw power from the HDMI port itself, while others require an external power source. If your wireless adapter requires external power, make sure to connect it to a power outlet or available USB port on the projector itself.
6. Power On the Projector: After you have connected the wireless adapter and ensured a secure power connection, power on the projector. Wait for it to fully start up and initialize before proceeding with the next steps.
By following these steps, you have successfully connected the wireless adapter to the projector. This physical connection is essential for establishing wireless communication between your device and the projector. Once this connection is established, you can proceed to the next steps to connect your device and start projecting wirelessly.
If you encounter any issues during this process, refer to the instruction manual or troubleshooting guide provided with the wireless adapter and the projector. Additionally, ensure that both the wireless adapter and the projector are in good working condition and that any necessary firmware updates are installed.
In the subsequent steps, we will guide you through connecting the wireless adapter to your device and enabling wireless projection for a seamless and convenient display experience.
Step 3: Connect Wireless Adapter to Device
After successfully connecting the wireless adapter to the projector in the previous step, the next step is to establish a connection between the wireless adapter and your device. This connection allows for the wireless transmission of audio and video signals from your device to the projector. Follow the instructions below to connect the wireless adapter to your device:
1. Identify the Connection Type: Determine the type of connection required to connect the wireless adapter to your device. Depending on the specific wireless adapter, you may need to use an HDMI cable or a USB receiver.
2. Connect the Adapter to Your Device: Take the appropriate cable or USB receiver and attach it to the wireless adapter. Ensure a secure connection by firmly plugging it into the corresponding port on your device. For HDMI connections, insert the HDMI cable into the HDMI port of your device. For USB receivers, insert the USB receiver into an available USB port.
3. Adjust Device Display Settings (if Required): In some cases, you may need to adjust the display settings on your device to ensure it recognizes the wireless adapter. Go to the display settings on your device and make sure that the correct source or input is selected to reflect the connection through the wireless adapter.
4. Power On Your Device: Ensure your device is powered on and functioning properly. This ensures that it can establish a connection with the wireless adapter and start transmitting the audio and video signals wirelessly.
5. Verify Connection: Once you have made the physical connection between the wireless adapter and your device, verify that the connection is established correctly. On your device, check for any notifications or settings related to the wireless adapter. This may include an on-screen prompt confirming the connection or an indicator light on the wireless adapter itself.
After successfully connecting the wireless adapter to your device, you have now established the necessary link for wireless projection. The wireless adapter will transmit the audio and video signals from your device to the projector, enabling you to enjoy a wireless display experience.
If you encounter any difficulties during this step, refer to the user manual or documentation provided with the wireless adapter. Additionally, ensure that both your device and the wireless adapter are powered on and in close proximity to each other to maintain a reliable wireless connection.
Now that the wireless adapter is connected to both the projector and your device, you can proceed to the next steps to enable wireless projection on your device and make any necessary adjustments to ensure optimal display quality.
Step 4: Enable Wireless Projection on Device
After connecting the wireless adapter to your device and the projector, the next step is to enable wireless projection on your device. This step allows your device to recognize and establish a wireless connection with the wireless adapter, enabling the transmission of audio and video signals to the projector. Follow the instructions below to enable wireless projection on your device:
1. Open Device Settings: Navigate to the settings menu on your device. This can usually be accessed through the home screen or by swiping down from the top of the screen and selecting the settings icon.
2. Locate Display or Screen Mirroring: Look for the display or screen mirroring option in the settings menu. The terminology may vary depending on your device, but it is typically located within the display or connectivity settings.
3. Enable Wireless Projection: Enter the display or screen mirroring settings and enable the wireless projection feature. Some devices may provide a toggle switch or a button to enable wireless projection, while others may require you to select the wireless adapter from a list of available devices.
4. Select the Wireless Adapter: If your device presents a list of available devices, select the wireless adapter that corresponds to the one connected to the projector. This establishes the connection between your device and the wireless adapter.
5. Wait for Connection Confirmation: Once you have selected the wireless adapter, wait for a moment as your device establishes the connection. You may see a confirmation message or an indicator that the wireless projection connection has been established.
Upon enabling wireless projection on your device, it will recognize the wireless adapter and establish a connection to it. This allows your device to transmit the audio and video signals wirelessly to the wireless adapter, which in turn sends the signals to the projector for display.
If you encounter any difficulties during this step, refer to the user manual or documentation provided with your device. Depending on your device and its operating system, there may be slight variations in the settings and terminology used for enabling wireless projection.
Now that wireless projection is enabled on your device, you are ready to proceed to the next step and make any necessary adjustments to optimize the display quality and settings for a seamless wireless projection experience.
Step 5: Adjust Projector Settings
After enabling wireless projection on your device, the final step is to adjust the settings on the projector to ensure optimal display quality and compatibility with your device. Fine-tuning the projector settings allows you to customize the visual and audio output according to your preferences. Follow the instructions below to adjust the projector settings:
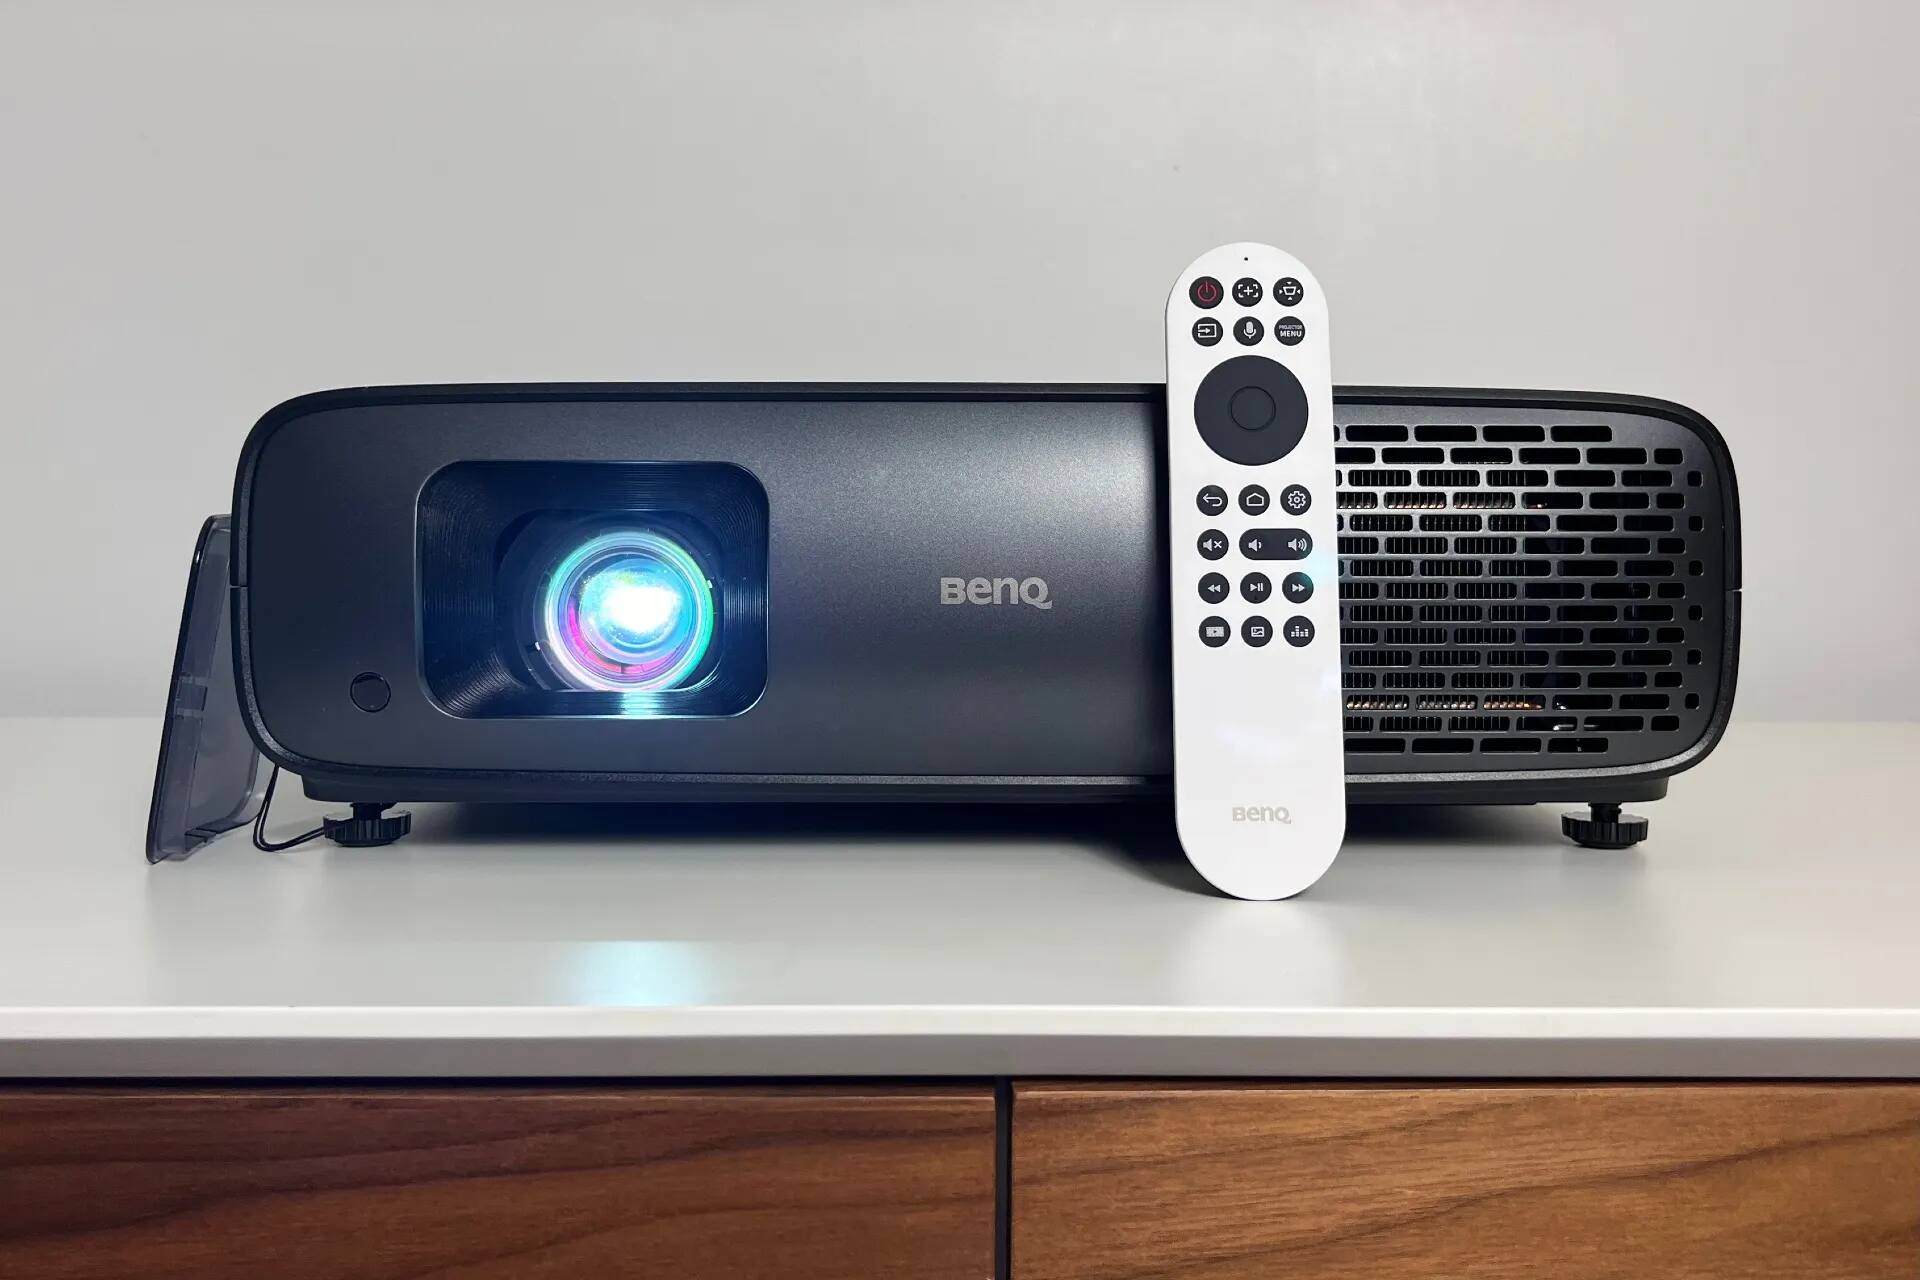
1. Navigate the Projector Menu: Use the projector’s remote control or on-screen menu to access the settings. Look for options related to input sources or display settings.
2. Select the Wireless Projection Input: Within the projector settings, select the input source that corresponds to the wireless projection connection. This is usually labeled as the HDMI input port to which the wireless adapter is connected.
3. Adjust Display Settings: Once you have selected the wireless projection input, you can adjust the display settings to optimize the image quality. This may include options such as brightness, contrast, color temperature, aspect ratio, and sharpness. Experiment with these settings to achieve the desired visual appeal.
4. Configure Audio Settings: If your projector has built-in speakers or if you have connected external speakers, navigate to the audio settings on the projector. Adjust options such as volume, equalizer settings, and audio output to ensure clear and balanced sound output.
5. Check for Overscan/Underscan: Some projectors may have an overscan or underscan setting that affects the display of the image on the screen. Overscan crops out a portion of the image, while underscan may display a black border around the image. Ensure these settings are adjusted appropriately to display the full image on the screen.
6. Test and Refine Settings: After adjusting the display and audio settings, test the projected image and audio by displaying content from your device. Make any necessary refinements to the settings until you achieve the desired display quality and audio output.
By adjusting the projector settings, you can enhance the display quality, color accuracy, and overall viewing experience of the wireless projection. These settings allow you to customize the projection to match your preferences, ensuring optimal visual and audio performance.
If you encounter any difficulties during this step, refer to the projector’s user manual or documentation for detailed instructions on adjusting the settings. Projector menus and options may vary based on the manufacturer and model.
Once you have fine-tuned the projector settings, you are now ready to enjoy your wireless projection experience. Whether you are giving a presentation, sharing multimedia content, or enjoying a movie, wireless projection provides a convenient and flexible display option for a seamless and immersive experience.
Troubleshooting Tips
While setting up wireless projection, you may encounter some common issues or challenges. To help you resolve these problems and ensure a smooth wireless projection experience, here are some troubleshooting tips:
1. Check Power and Connections: Make sure that all devices, including the projector, wireless adapter, and your device, are properly powered on. Ensure that the wireless adapter is securely connected to both the projector and your device, and that all cables are firmly plugged in.
2. Verify Wi-Fi Network Connection: If your wireless projection method requires a Wi-Fi network connection, ensure that your device is connected to the same network as the projector or wireless adapter. Check that the network connection is stable and that the network signal strength is sufficient.
3. Restart Devices: If you encounter connectivity issues or experience lag during wireless projection, try restarting all the devices involved. Power off the projector, wireless adapter, and your device, then turn them back on after a few moments. This can often resolve temporary glitches or conflicts in the wireless connection.
4. Update Firmware and Software: Ensure that your projector, wireless adapter, and device have the latest firmware and software updates installed. Manufacturers regularly release updates to improve compatibility, performance, and security. Visit the respective manufacturer’s websites to download and install any available updates for your devices.
5. Adjust Wi-Fi Channel: If you are experiencing interference or a weak Wi-Fi signal, try changing the Wi-Fi channel on your router. Other nearby devices or networks may be causing interference, and switching to a less congested channel can improve the wireless connection for your projector and device.
6. Avoid Signal Interference: Keep your device and the wireless adapter within a reasonable range and avoid obstacles that may obstruct the wireless signal. Thick walls, other electronic devices, and physical barriers can interfere with the signal strength and quality. Positioning the devices in direct line-of-sight can help optimize the wireless connection.
7. Use High-Quality HDMI Cables: If you are using a wireless HDMI adapter, ensure that you are using high-quality HDMI cables. Poor quality or damaged cables can result in signal loss or degradation, affecting the display or audio quality. Replace any faulty cables with reliable and certified HDMI cables.
8. Check Device Compatibility: Confirm that your device is compatible with the chosen wireless projection technology. Different devices and operating systems may have varying support for wireless projection methods. Check the manufacturer’s specifications or consult their support/documentation for detailed compatibility information.
9. Go through Troubleshooting Guides: Refer to the user manuals or troubleshooting guides provided with your projector, wireless adapter, and device. These guides often contain specific solutions and known issues related to wireless projection. Following the recommended troubleshooting steps can help address specific problems you may encounter.
10. Contact Customer Support: If you are unable to resolve the issue using the troubleshooting tips mentioned above, don’t hesitate to reach out to the customer support of the respective manufacturers. They can provide personalized assistance and guidance to troubleshoot and resolve any persistent issues you may be facing.
By following these troubleshooting tips, you can overcome common challenges and ensure a successful wireless projection experience. Remember that each wireless projection technology may have specific troubleshooting steps, so refer to the manufacturer’s documentation and support resources for further assistance.
Conclusion
Wireless projection has revolutionized the way we connect our devices to projectors, offering flexibility, convenience, and enhanced collaboration opportunities. In this article, we explored the various options available for wireless projection, including wireless HDMI adapters, Miracast technology, Apple AirPlay, and wireless display adapters.
We discussed the benefits of wireless projection, such as increased mobility, time-saving convenience, improved collaboration, and compatibility with a wide range of devices. Each wireless projection method offers unique features and advantages, allowing you to choose the one that best suits your needs and preferences.
We also provided step-by-step instructions for setting up wireless projection using different methods, covering key steps such as checking projector compatibility, connecting wireless adapters to projectors and devices, enabling wireless projection on devices, adjusting projector settings, and troubleshooting common issues. By following these instructions, you can successfully establish wireless connections and enjoy seamless projection of your content.
It’s important to keep in mind that while wireless projection offers great benefits, it may have limitations in terms of range, signal strength, and compatibility. To ensure a smooth and reliable wireless projection experience, it’s crucial to check compatibility, maintain a stable network connection, and follow the troubleshooting tips provided.
Whether you’re delivering a presentation, enjoying multimedia content, or collaborating with colleagues, wireless projection provides a convenient and flexible solution. Embrace the power of wireless projection to transform your visual experiences and take full advantage of the possibilities it offers.
With the knowledge and guidance from this article, you are now equipped to confidently set up and utilize wireless projection technology. Embrace the freedom and convenience of wirelessly connecting your devices to projectors, and let it enhance your productivity, creativity, and entertainment experiences. Happy wireless projecting!