Introduction
Welcome to the world of PHP Composer! In this article, we will explore the power and versatility of PHP Composer, a dependency management tool for PHP. Whether you are a beginner or an experienced PHP developer, Composer is an essential tool that will streamline your development workflow and make managing dependencies a breeze.
PHP Composer is a command-line tool that allows you to easily manage PHP package dependencies for your projects. It simplifies the process of installing, updating, and removing packages, ensuring that you have the correct versions and dependencies required for your project to run smoothly.
With Composer, you can easily set up autoloading for your classes, manage libraries and frameworks, and collaborate with other developers on shared projects with ease. It eliminates the hassle of manually downloading and including libraries, saving you time and effort when starting a new project or integrating new functionality into an existing one.
In this article, we will walk you through the process of installing Composer, creating a new project, managing dependencies, and handling common errors that might occur along the way. Whether you are developing a small personal project or working on a large-scale enterprise application, Composer will become an invaluable tool in your PHP development toolkit.
So, if you are ready to dive into the world of PHP Composer and take your PHP development skills to the next level, let’s get started!
What is PHP Composer?
PHP Composer is a dependency management tool for PHP that allows developers to easily manage and integrate external libraries and packages into their projects. It simplifies the process of including third-party code, ensuring that the correct versions and dependencies are automatically installed and updated.
Traditionally, when working on PHP projects, developers had to manually download, include, and manage external libraries and dependencies. This process was time-consuming, error-prone, and often resulted in compatibility issues. PHP Composer revolutionized this process by providing a centralized package management solution.
At its core, Composer operates based on a `composer.json` file, which serves as a manifest for your project’s dependencies. This file specifies the required packages, their versions, and any additional configurations or scripts that need to be executed during the installation or update process.
Composer leverages the vast PHP ecosystem of libraries and packages, which are available through a central repository known as Packagist. This repository houses a multitude of PHP packages and allows developers to easily search for and include the necessary dependencies for their projects.
When a package is added to a project’s `composer.json` file, Composer automatically resolves and downloads all the required dependencies, ensuring that the right versions and constraints are met. This eliminates the need to manually download and configure each library or package, speeding up the development process and reducing the chance of conflicts.
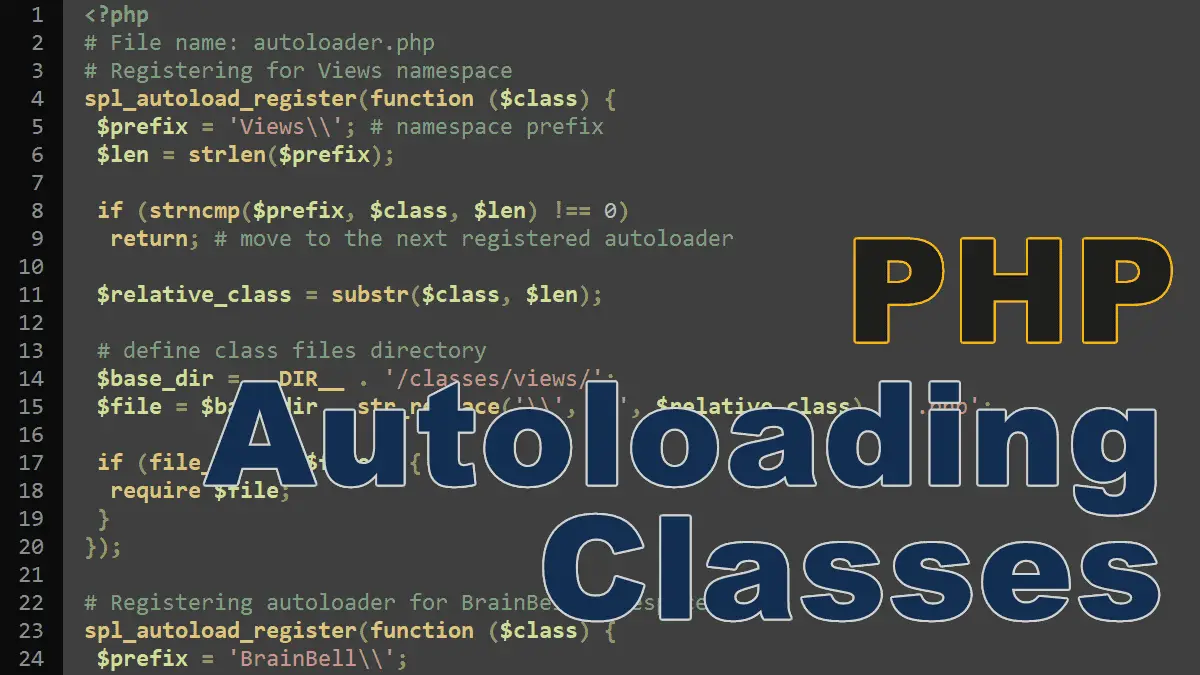
Additionally, Composer provides a robust autoloading mechanism. It generates autoload files that allow you to seamlessly include and use classes from third-party packages, making it simple to integrate external code into your project’s codebase.
Installing Composer
Before you can start using PHP Composer, you need to have it installed on your system. Fortunately, the installation process is straightforward and can be done in just a few simple steps.
To begin, make sure you have PHP installed on your machine. Composer requires PHP version 5.3.2 or above to run properly. You can check your PHP version by running the command “php -v” in your terminal.
Once you have PHP installed, follow these steps to install Composer:
- Visit the official Composer website at https://getcomposer.org/ and navigate to the “Download” page.
- Depending on your operating system, you can choose either the Windows Installer or the Unix/Linux/Mac OS X option.
- For Windows users, download and run the Composer Setup.exe file. This will guide you through the installation process and set up Composer on your system.
- For Unix/Linux/Mac OS X users, open your terminal and execute the following command:
php -r "copy('https://getcomposer.org/installer', 'composer-setup.php');"
- After the download is complete, run the following command to install Composer:
php composer-setup.php
- Once the installation process finishes, you can move the Composer executable to a directory listed in your system’s PATH variable. This will allow you to run Composer from any directory in your terminal.
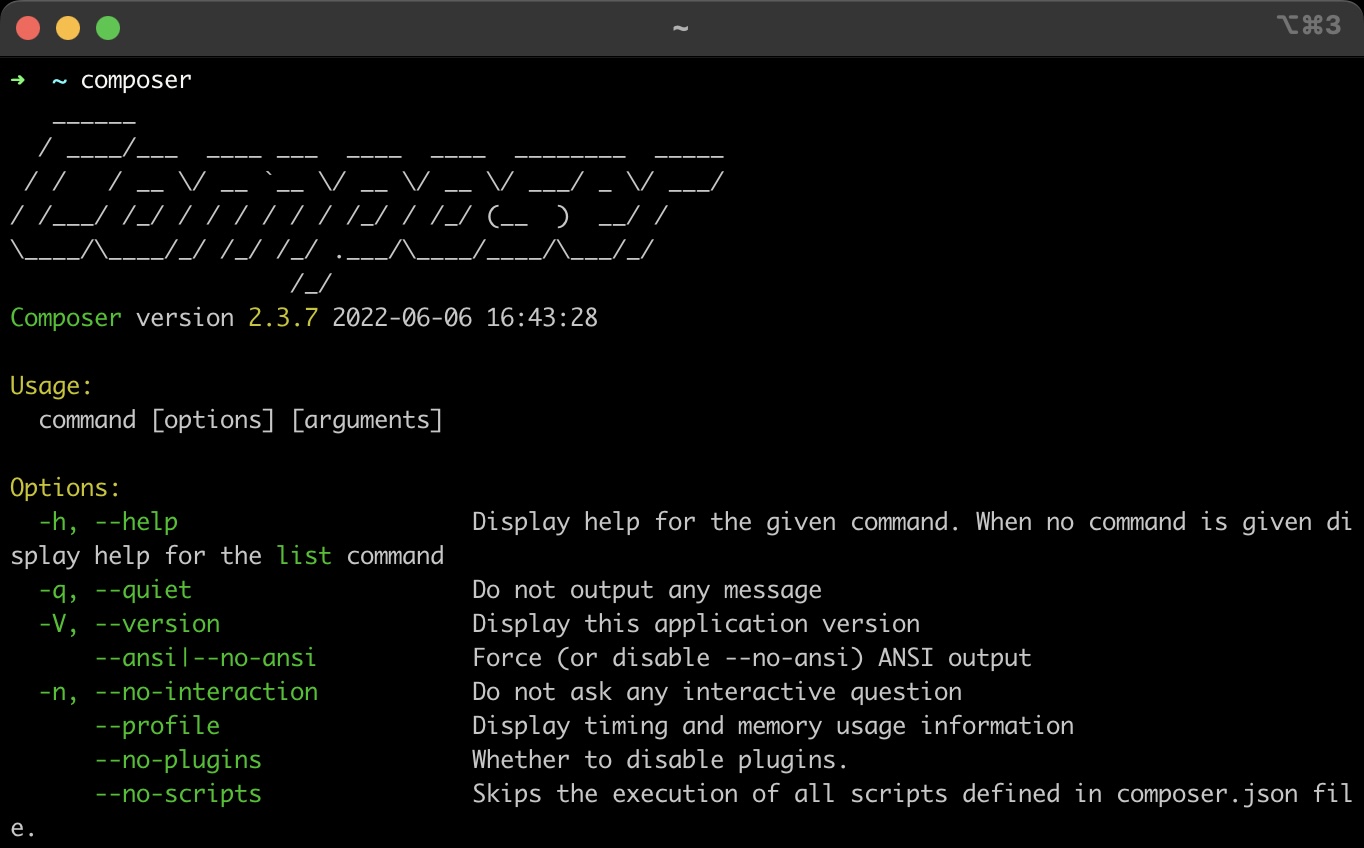
To verify that Composer was installed correctly, open a new terminal window and run the command “composer” – you should see the Composer logo and available commands displayed.
With Composer successfully installed, you are now ready to start leveraging its features and capabilities to manage dependencies in your PHP projects.
Creating a New Project with Composer
Now that you have Composer installed, let’s explore how to create a new PHP project using Composer. Creating a project with Composer involves a few simple steps that will set up the project structure and manage its dependencies effectively.
To create a new project with Composer, follow these steps:
- Open your terminal or command prompt and navigate to the directory where you want to create your project.
- Run the following command to initialize a new Composer project:
composer init
This command will prompt you with a series of questions to gather information about your project, such as the project name, description, author, and more. You can either provide the information or press Enter to skip a question and use the default value.
Once you have provided the necessary details, Composer will generate a `composer.json` file in your project’s directory. This file acts as a configuration file for Composer, specifying your project’s dependencies and other settings.
Next, you can start adding dependencies to your project by editing the `composer.json` file. You can manually add packages and their desired versions under the `”require”` section, or you can search for packages on Packagist and add them using the Composer command-line tool.
For example, if you want to include the popular PHP framework Laravel in your project, you can run the following command:
composer require laravel/laravel
This command will download and install the latest version of Laravel and automatically update your `composer.json` file with the proper package information.
After adding dependencies, you can run the following command to install them:
composer install
This command will resolve the dependencies specified in your `composer.json` file and install them in the `vendor` directory of your project.
Once the installation process is complete, you can include the autoload file generated by Composer in your PHP scripts to easily access the classes and functions provided by the installed packages. You can do this by adding the following line at the top of your PHP files:
require 'vendor/autoload.php';
With this set up, you can now start developing your PHP project, leveraging the power of Composer to manage and include external dependencies efficiently.
Managing Dependencies with Composer
One of the key features of PHP Composer is its ability to manage dependencies within your projects. Composer simplifies the process of including and updating external libraries or packages, ensuring that your project remains up-to-date with the latest versions and compatible dependencies.
When you add dependencies to your project’s `composer.json` file, Composer reads and resolves those requirements. It then downloads the necessary packages and their dependencies, creating a well-structured `vendor` directory within your project.
By default, Composer installs the packages into the `vendor` directory and generates an autoload file, which allows you to conveniently include classes and functions from the installed packages in your PHP code.
Composer provides several commands that help manage dependencies:
- composer install – This command reads the `composer.json` file and installs all the defined dependencies with their specified versions. It ensures that the required packages and their dependencies are downloaded and available for use in your project.
- composer update – This command reads the `composer.json` file and updates all the packages to their latest versions, as specified by the defined version constraints. It is recommended to run this command periodically to ensure that your project is using the most up-to-date packages.
- composer require – This command allows you to add new dependencies to your project. It automatically updates the `composer.json` file with the required package and version, and downloads the package along with its dependencies.
- composer remove – This command removes a package and its dependencies from your project, updating the `composer.json` file accordingly.
Composer also provides features such as semantic versioning, which allows you to define version constraints for your dependencies. This ensures that your project can receive updates without breaking compatibility.
Additionally, Composer creates a `composer.lock` file, which pins the exact versions of the installed packages. This file is crucial when collaborating with other developers or deploying your project, as it guarantees that everyone is using the same versions of the dependencies.
By effectively managing dependencies with Composer, you can easily keep your project up-to-date, ensure compatibility, and leverage the extensive PHP package ecosystem without the hassle of manual configuration.
Updating Dependencies
Keeping your project’s dependencies up-to-date is essential to ensure compatibility, security, and access to the latest features and bug fixes. PHP Composer provides a simple and efficient way to update your project’s dependencies to their latest versions.
To update your dependencies, you can use the Composer command:
composer update
This command reads the `composer.json` file and checks if there are any newer versions available for your installed packages. It updates the packages to the latest versions based on the version constraints defined in the `composer.json` file.
Running the `composer update` command without specifying any packages will update all the dependencies in your project. However, you can also update specific packages by listing their names as arguments.
composer update packageName1 packageName2
The Composer update process involves four main steps:
- Package resolution: Composer calculates the latest versions of the packages based on the version constraints specified in the `composer.json` file. It determines the optimal combination of packages that satisfy all the dependencies.
- Dependency resolution: Composer resolves the dependencies of the updated packages by checking if any new dependencies were introduced or if the existing dependencies need to be updated as well.
- Downloading: Composer downloads the updated packages and their dependencies from the package repositories, ensuring that all the required files are available locally.
- Updating autoload files: Composer regenerates the autoloader files so that your project can access the updated classes and functions.
After running the update command, Composer updates the `composer.lock` file, pinning the exact versions of the installed packages. This ensures that everyone working on the project uses the same versions and avoids potential compatibility issues.
It’s important to note that when updating dependencies, some updates may introduce breaking changes or require modifications to your code. Therefore, it’s recommended to thoroughly test your project after updating dependencies to ensure that it functions as expected.
Regularly updating your dependencies with Composer allows you to benefit from the latest improvements in the packages you use, while maintaining a secure and efficient codebase.
Removing Dependencies
As your PHP project evolves and changes, you may find the need to remove certain dependencies that are no longer required. PHP Composer provides a simple and straightforward way to remove dependencies from your project, ensuring that your codebase remains lean and efficient.
To remove dependencies with Composer, you can use the following command:
composer remove packageName1 packageName2
This command removes the specified packages from your project, updating the `composer.json` file and removing the corresponding files from the `vendor` directory.
When removing a package, Composer performs the following tasks:
- Updating the `composer.json` file: Composer removes the entry for the removed package from the `require` or `require-dev` section of the `composer.json` file, ensuring that it is no longer considered a dependency.
- Dependency resolution: Composer resolves the remaining dependencies to ensure that the removed package’s dependencies are still satisfied. If any other packages are no longer needed as a result of removing the specified packages, Composer will also remove them from the project.
- Removing files: Composer removes the files and directories associated with the removed packages from the `vendor` directory. This helps to keep your project clean and free from unnecessary files.
- Updating the autoload files: Composer regenerates the autoloader files so that your project’s code does not attempt to include or use files that are no longer present after removing the dependencies.
It’s important to note that when removing a package, you should ensure that no other parts of your project rely on that package. Removing a package that is still actively used by your code can cause errors or break functionality.
Once you have removed the undesired dependencies, it is a good practice to run tests and verify that your project still functions correctly. This ensures that the removal process did not inadvertently break any functionality or introduce unexpected behavior.
By utilizing Composer’s ability to remove dependencies, you can keep your project’s codebase focused and efficient, ensuring that you only depend on the packages and libraries that are necessary for your project’s success.
Creating Autoloaders
PHP Composer simplifies the process of autoloading classes and functions from your project’s dependencies. It automatically generates autoloaders that allow you to seamlessly include and use classes from third-party packages, making it easy to integrate external code into your project’s codebase.
When you install dependencies using Composer, it generates an autoload file by default. This file, usually named `autoload.php`, is located in the `vendor` directory of your project. You need to include this autoload file in your PHP scripts so that the classes and functions from the installed packages can be accessed.
Here’s how to create autoloaders and use them:
- Include the Composer’s autoload file in your PHP script by adding the following line at the top:
require 'vendor/autoload.php';This statement automatically loads the autoload file and registers an autoloader function that’s responsible for finding and including the required class files.
Once you include the autoload file, you can start using classes and functions from your project’s dependencies without the need for manual `require` or `include` statements.
Composer’s autoloader follows the PSR-4 (PHP Standards Recommendation) standard for class autoloading. This convention maps the class namespaces to specific directories within your project.
For example, if you have a class called `MyApp\Utils\Logger` with the namespace `MyApp\Utils`, Composer’s autoloader will look for the corresponding file `Logger.php` inside the directory `src/Utils` of your project.
If you have multiple files with the same name, Composer can differentiate them based on the namespaces and autoload the correct file.
In addition to the default autoloader, Composer allows you to define your own custom autoloaders if needed. This can be useful when working with legacy code or if you have specific requirements for class loading in your project.
To define a custom autoloader, you can use the `autoload` key in your `composer.json` file. Here, you can specify a callback that will handle the class-loading logic for your project.
By utilizing Composer’s autoload feature, you can easily integrate and use classes and functions from external packages, saving you time and effort in managing the include statements and ensuring smooth interoperability between your code and the dependencies of your project.
Using Composer Plugins
PHP Composer offers a powerful feature called plugins, which extend the functionality of Composer itself. Plugins allow you to automate tasks, enhance package management, and customize the behavior of Composer to better suit your project’s needs.
Plugins are separate packages that you can install and configure to work alongside Composer. They can provide a wide range of functionalities, such as version control integration, code generation, asset management, and much more.
To use a Composer plugin, you need to install it just like you would install any other package. You can either add it to the `require` or `require-dev` section of your `composer.json` file or use the Composer command-line tool:
composer require vendor/package
Once the plugin is installed, you can configure it in the `extra` section of your `composer.json` file. The available configuration options and details can usually be found in the plugin’s documentation.
Some popular Composer plugins include:
- composer-asset-plugin: Enables asset management and integration with popular frontend tools such as Bower and NPM.
- hirak/prestissimo: Speeds up the installation process by performing parallel downloads of packages.
- phpunit/phpunit: Integrates PHPUnit, a popular testing framework, to run tests for your project.
- sensiolabs/security-checker: Scans your project’s dependencies for known security vulnerabilities.
Composer plugins can significantly enhance your development workflow by automating repetitive tasks and providing additional functionality seamlessly integrated with Composer. They enable you to customize Composer to meet the specific requirements of your project or streamline specific aspects of your development process.
When using plugins, it’s essential to ensure that you choose trustworthy and well-maintained packages from reputable sources. Additionally, as with any package or dependency, be diligent in keeping plugins up to date to benefit from security patches, bug fixes, and new features.
Explore the vast range of Composer plugins available in the Composer ecosystem, and leverage their power to enhance your development experience and simplify your project’s management.
Common Composer Errors and How to Fix Them
While PHP Composer is a robust and reliable tool, you may encounter common errors during the dependency management process. Understanding these errors and knowing how to resolve them will help you effectively troubleshoot and continue working on your projects. Here are some common Composer errors and their solutions:
1. “Composer not found” or “Command not found”
This error indicates that Composer is not installed correctly or not accessible in your system’s PATH. To fix this, make sure Composer is installed and its executable is in a directory listed in your system’s PATH variable.
2. “Failed to execute git clone”
This error occurs when Composer fails to execute the “git clone” command. Ensure that Git is installed on your system and accessible from the command line. Additionally, check your internet connection and any firewall or proxy settings that might be blocking the cloning process.
3. “Class not found” or “Namespace not found”
When Composer fails to autoload a class or namespace, it is usually an issue with the class naming and the corresponding file locations. Double-check the namespaces and class names in your code and verify that they match the file structure and naming conventions defined by the Composer autoload mechanism.
4. “Version conflict”
This error occurs when multiple packages have conflicting version requirements. You can try resolving this conflict by updating the version constraints in your `composer.json` file to find a compatible version for all packages. Alternatively, you can specify specific version constraints to alleviate conflicts.
5. “Outdated dependencies”
When Composer detects that some of your project’s dependencies have newer versions available, it displays a warning message. Update your dependencies using the `composer update` command to ensure that you are using the latest versions and benefit from bug fixes and new features.
6. “Composer.json is not valid JSON”
If your `composer.json` file contains syntax errors or is not properly formatted as JSON, Composer will fail to read it. Use a JSON validator or linter to identify and fix any syntax errors in the file.
7. “Memory limit exceeded”
If Composer encounters a memory limit error, you can increase the PHP memory limit by modifying the `memory_limit` value in your php.ini file. Alternatively, you can try running Composer with the `php -d memory_limit=-1 composer.phar` command to temporarily disable the memory limit.
When faced with any error, make sure to read the error message and any provided details carefully. The Composer community is an excellent resource for troubleshooting specific error messages, and searching online forums or issue tracks can often lead to solutions provided by experienced users.
By understanding and resolving these common Composer errors, you will be equipped to handle any obstacles that may arise during the management of your PHP dependencies.
Conclusion
PHP Composer is an indispensable tool for PHP developers, offering powerful dependency management capabilities that streamline the development process. Whether you are starting a new project or working on an existing one, Composer simplifies the inclusion, installation, and updating of external libraries and packages.
In this article, we explored various aspects of PHP Composer, starting from its installation and initialization of a new project. We learned how Composer manages dependencies, ensuring that the correct versions and dependencies are automatically resolved and included in your project.
We also delved into topics such as creating autoloaders, which allow for seamless inclusion of classes and functions from installed packages. Furthermore, we explored how to leverage Composer plugins to enhance functionality and automate tasks.
Additionally, we discussed common errors that may occur during the dependency management process and provided solutions on how to resolve them effectively.
With PHP Composer as your ally, you can leverage the vast PHP package ecosystem, rapidly prototype ideas, and develop robust applications. Composer saves you time and effort, allowing you to focus on writing quality code and delivering exceptional software.
So, embrace PHP Composer and unlock the full potential of your PHP projects. Whether you’re a novice developer or an experienced professional, integrating Composer into your workflow will undoubtedly boost your productivity and enhance the efficiency of your PHP development process.


