Introduction
When it comes to deploying a PHP application, there are several crucial steps that need to be followed to ensure a smooth and successful deployment. Whether you’re launching a new website or updating an existing one, understanding the deployment process is essential.
In this article, we will guide you through the process of deploying a PHP application, covering everything from setting up a development environment to configuring domains and DNS. By following these steps, you’ll be able to confidently deploy your PHP application and make it accessible to users around the world.
Deploying a PHP application involves more than simply uploading your files to a server. It requires careful planning, configuration, and testing to ensure that your application runs smoothly and efficiently. This process is crucial for ensuring your application’s security, performance, and availability.
Throughout this article, we will provide you with step-by-step instructions, tips, and best practices to help you navigate the deployment process with ease. By following these guidelines, you’ll be able to deploy your PHP application in a way that maximizes its functionality and minimizes any potential issues.
So, whether you’re a seasoned developer or someone new to PHP application deployment, let’s dive in and explore the essential steps to successfully deploy your PHP application.
Step 1: Set Up a Development Environment
Before you begin deploying your PHP application, it is crucial to have a well-configured development environment. This environment will allow you to develop, test, and debug your application before deploying it to a live server. Here are the key steps to set up a development environment:
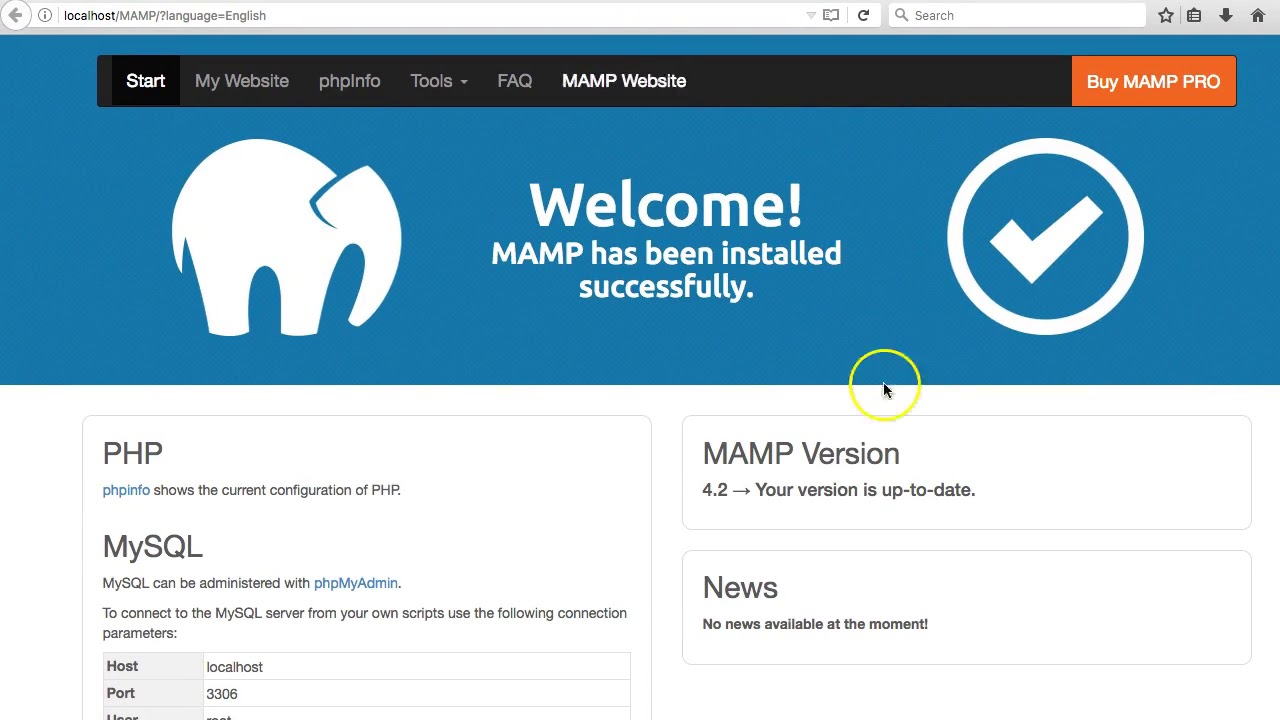
- Choose a PHP Development Server: Select a PHP development server that best suits your needs. Some popular options include XAMPP, WAMP, and MAMP, which provide a preconfigured environment with PHP, Apache, and MySQL.
- Install the Development Server: Download and install the selected PHP development server on your local machine. Make sure to follow the installation instructions provided by the server’s documentation.
- Configure PHP: Once the development server is installed, you may need to configure PHP to meet the requirements of your application. This includes adjusting settings such as memory limit, file upload size, and error reporting.
- Set Up a Database: If your PHP application requires a database, set up a local database server such as MySQL or PostgreSQL. Create a new database and user that will be used for development purposes.
- Install a Code Editor: Choose a code editor that supports PHP development, such as Visual Studio Code, Sublime Text, or PhpStorm. Install the editor on your machine and configure it according to your preferences.
- Set Up Version Control: Use a version control system like Git to track changes in your codebase. Initialize a new repository for your PHP application and start committing your code to keep a history of changes.
By following these steps, you can create a well-configured development environment that closely resembles the production server. This will enable you to develop and test your PHP application in a controlled environment before deploying it to the live server.
Step 2: Choose a Hosting Provider
Choosing the right hosting provider is crucial for the successful deployment of your PHP application. The hosting provider determines the availability, stability, and performance of your application. Here are the key factors to consider when selecting a hosting provider:
- Performance and Reliability: Look for a hosting provider with a proven track record of high performance and reliability. A reliable hosting provider ensures that your PHP application stays online with minimal downtime, providing a smooth user experience.
- Scalability: Consider the scalability options provided by the hosting provider. As your application grows, you may need to scale up your hosting resources to accommodate increased traffic and user demand.
- Server Configuration: Ensure that the hosting provider supports the required PHP version and offers the necessary server configurations for your application. This includes support for databases, server-side scripting, and any additional libraries or extensions that your application relies on.
- Security Measures: Pay attention to the security measures implemented by the hosting provider. Look for features such as SSL certificates, automatic backups, firewalls, and malware scanning to safeguard your PHP application from attacks and vulnerabilities.
- Customer Support: Evaluate the level of customer support provided by the hosting provider. Quick and knowledgeable support is essential in case of any technical issues or emergencies that may arise.
- Cost: Consider the pricing structure of the hosting provider and ensure that it aligns with your budget. Compare different hosting plans and features to find the best value for your PHP application.
Take your time to research and compare different hosting providers to find the one that best suits your needs. Read reviews, check their uptime guarantees, and assess the overall reputation of the hosting providers you’re considering.
Remember, choosing a reliable hosting provider is a critical decision that directly impacts the performance and availability of your PHP application. Invest your time in finding a provider that offers the necessary features, support, and scalability options to effectively host your PHP application.
Step 3: Prepare Your Application for Deployment
Before deploying your PHP application, it is essential to ensure that it is properly prepared and optimized for a smooth deployment process. Here are the key steps to prepare your application:
- Review Your Code: Perform a comprehensive code review to identify any bugs, errors, or inefficient code. Make necessary improvements and optimize your code for better performance and maintainability.
- Update Dependencies: Check if your application relies on any external libraries or dependencies. Ensure that you have the latest versions installed and that they are compatible with your PHP framework or CMS.
- Cleanup Unused Files and Resources: Remove any unnecessary files, images, or resources that are not required for your application to function. This reduces the size of your application and improves deployment and loading times.
- Optimize Database Queries: Analyze your database queries and optimize them for better performance. Use indexes, caching mechanisms, and query optimization techniques to enhance the efficiency of your database interactions.
- Configure Environment-Specific Settings: Ensure that your application’s configuration files are properly set up for the deployment environment. This includes database connection details, caching settings, and any environment-specific configurations.
- Implement Error Handling: Set up proper error handling and logging mechanisms to capture and log any errors or exceptions that occur during runtime. This helps you identify and resolve issues quickly.
- Test Application Functionality: Perform thorough testing of your application to verify that all functionalities are working as expected. Test various scenarios, user interactions, and edge cases to ensure a smooth user experience.
By preparing your application for deployment, you minimize the chances of encountering issues or errors during the deployment process. This step is crucial in ensuring that your PHP application is in optimal condition and ready to be deployed to a live server.
Step 4: Set Up the Server Environment
Once you have prepared your PHP application, the next step is to set up the server environment on which your application will be deployed. This involves configuring the server, installing necessary software, and securing the environment. Here are the key steps to set up the server environment:
- Choose an Operating System: Select an operating system that is compatible with your PHP application and hosting provider. Common choices include Linux distributions like Ubuntu, CentOS, or Debian.
- Install a Web Server: Set up a web server like Apache or Nginx on the server. Configure the server to handle PHP scripts and serve your application’s web pages.
- Install PHP: Install the appropriate version of PHP on the server. Make sure to include the necessary modules and extensions required by your application.
- Configure PHP Settings: Adjust the PHP configuration to match the requirements of your application. Set the appropriate values for variables like max execution time, memory_limit, and upload_max_filesize.
- Install and Configure a Database Server: If your application requires a database, install and configure a database server like MySQL or PostgreSQL. Create a new database and user for your application.
- Enable Required Extensions: Enable any additional PHP extensions that your application relies on, such as PDO, OpenSSL, or GD Library. These extensions provide additional functionality and enhance the capabilities of your PHP application.
- Set Up Security Measures: Ensure that your server is properly secured. Implement measures like firewall configurations, SSH key-based authentication, and regular security updates to protect your server from potential threats.
- Optimize Server Performance: Fine-tune server settings to optimize performance. This may include enabling caching mechanisms like OpCache or configuring server-level caching like Redis or Memcached.
Setting up the server environment properly is crucial for the successful deployment and performance of your PHP application. By following these steps, you create a robust and secure server environment that can handle your application’s demands efficiently.
Step 5: Upload Your Application to the Server
Now that you have set up the server environment, it is time to upload your PHP application to the server. This step involves transferring your application’s files from your local development environment to the server. Here’s how you can upload your application to the server:
- Choose an FTP Client: Select a FTP/SFTP client like FileZilla, WinSCP, or Cyberduck. Install and configure the client to establish a connection with the server.
- Access the Server Directories: Use the FTP client to connect to the server using the provided credentials. Navigate to the root directory or the designated directory of your application.
- Transfer Files: Transfer your PHP application’s files from your local machine to the server’s directory. Ensure that you maintain the original file structure and preserve file permissions.
- Upload Dependencies: If your application relies on external libraries or dependencies, ensure that these are also uploaded to the server. This may include frameworks, image assets, or CSS/JS files.
- Verify Successful Upload: Double-check that all files and folders have been successfully uploaded to the server. Confirm that the file sizes and permissions match those in your local development environment.
Uploading your PHP application to the server is a critical step in the deployment process. Ensure that the file transfer is done accurately and without any errors to prevent discrepancies or functionality issues on the live server.
Once the files are uploaded, you are ready to move on to the next step of configuring the server environment to ensure your PHP application runs smoothly and efficiently.
Step 6: Configure the Server Environment
After uploading your PHP application to the server, the next step is to configure the server environment to ensure optimal performance and functionality. This involves setting up various configurations and parameters specific to your application. Here’s how you can configure the server environment:
- Create a Virtual Host (optional): If you have multiple applications or domains hosted on the same server, consider creating a virtual host for your PHP application. This allows you to have separate configurations and domains for each application.
- Configure Document Root: Set the document root of your web server to point to the directory where your PHP application’s files are located. This ensures that the server knows which files to serve as the entry point of your application.
- Configure URL Rewrite (if needed): If your PHP application uses clean URLs or requires URL rewriting for routing purposes, configure the server to handle the rewrite rules. This is typically done using the Apache mod_rewrite module or an equivalent module in other web servers.
- Configure PHP Settings: Adjust the PHP configuration settings specific to your application. This may include memory limits, maximum execution time, error reporting levels, and other parameters that affect the behavior of your PHP application.
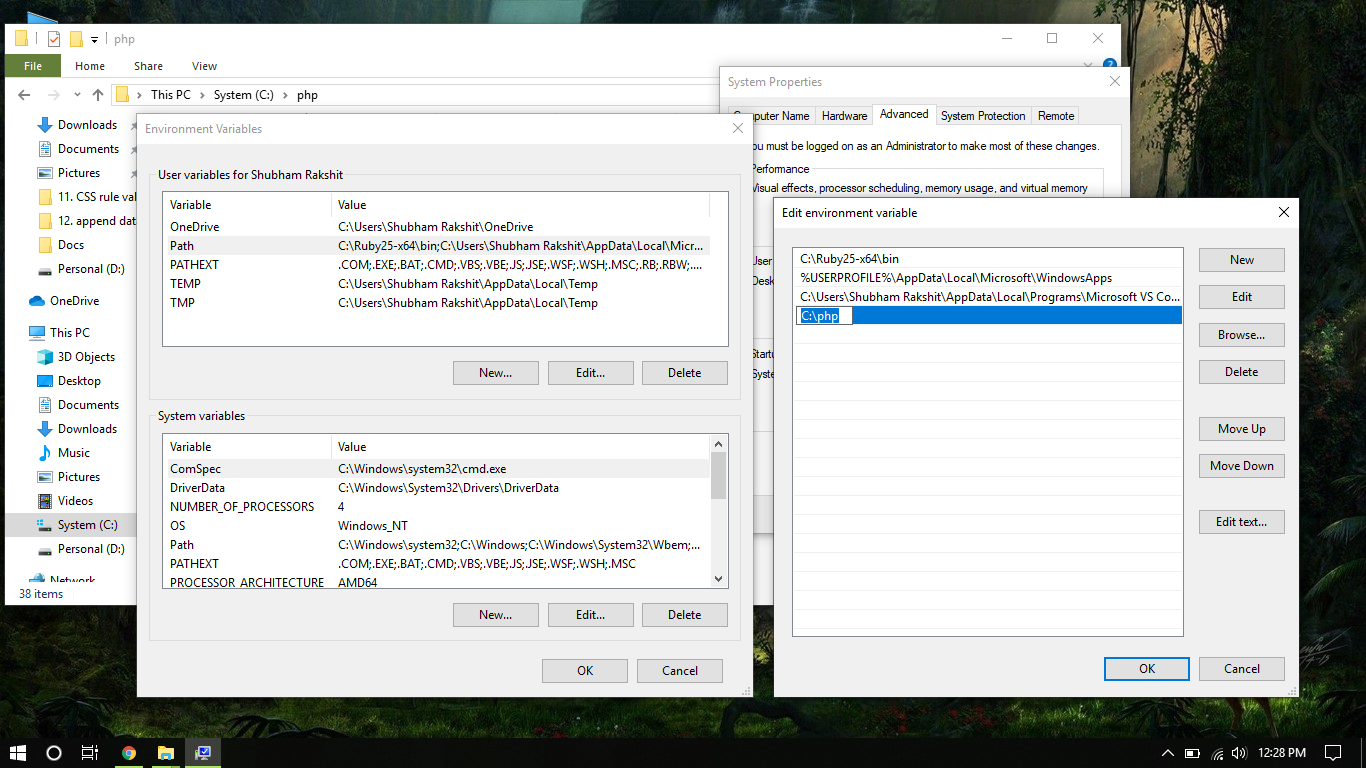
- Set Up Environment Variables: If your application relies on environment variables, configure them on the server. This is useful for storing sensitive information like API keys, database credentials, or other configuration settings specific to your deployment environment.
- Enable Caching: Utilize server-side caching mechanisms like opcode caches (e.g., OPcache) or data caching systems (e.g., Redis or Memcached) to improve your application’s performance and reduce server load.
- Configure Error Logging: Implement error logging to capture and track any PHP errors or exceptions that occur during runtime. This facilitates troubleshooting and allows you to identify and resolve issues quickly.
Configuring the server environment ensures that your PHP application runs smoothly and is optimized for performance. Take the time to review and adjust the server settings based on your application’s requirements.
Once the server environment is properly configured, you are ready to move on to the next step of installing any required dependencies for your PHP application.
Step 7: Install Required Dependencies
When deploying a PHP application, it is common to rely on external libraries, frameworks, or dependencies to enhance its functionality. In this step, we will focus on installing and managing these required dependencies on the server. Here’s how you can install the necessary dependencies for your PHP application:
- Dependency Management Tool: Determine the dependency management tool that is appropriate for your PHP application. Composer is a popular choice for PHP projects. Install Composer on your server if you haven’t already.
- Dependency Configuration: Create a `composer.json` file in the root directory of your PHP application. Specify the required dependencies and their versions in this file using Composer’s syntax.
- Dependency Installation: Run the Composer command to install the required dependencies. This will download and install the specified packages into the appropriate directories of your PHP application.
- Autoloading: Ensure that your PHP application is set up to autoload the installed dependencies. Adjust the autoloading configuration in your codebase so that the classes and files of the dependencies can be accessed without manual require statements.
- Update Dependencies (if needed): Regularly update your dependencies to newer versions that include bug fixes or new features. Run the Composer `update` command to update the installed packages while respecting version constraints specified in `composer.json`.
By properly managing and installing your PHP application’s dependencies, you ensure that it has access to the necessary external libraries and frameworks. This allows your application to leverage the functionality provided by these dependencies effectively.
Remember to keep your dependencies updated to benefit from bug fixes, security patches, and new features introduced by the dependencies’ maintainers.
Now that your dependencies are installed, it’s time to move on to the next step: testing your deployment to ensure everything is working as expected.
Step 8: Test Your Deployment
Testing your deployment is a critical step to verify that your PHP application is functioning as intended on the live server. It helps you identify and rectify any issues before making your application publicly accessible. Here are the key aspects to consider when testing your deployment:
- Functionality Testing: Test all the core functionalities of your PHP application to ensure they are working correctly. This includes submitting forms, validating user input, handling database interactions, and any other critical features.
- Browser Compatibility: Test your PHP application across different web browsers to ensure it renders and functions consistently. Pay attention to layout, CSS styles, JavaScript functionality, and any browser-specific issues.
- Error Handling and Logging: Trigger and test error scenarios to ensure that your application handles errors gracefully. Check that error messages are logged correctly and that users are provided with informative error messages.
- Performance Testing: Assess the performance of your PHP application by simulating varying levels of user traffic. Monitor the response times, server resource usage, and transaction throughput to identify any performance bottlenecks.
- Security Testing: Conduct security tests to identify vulnerabilities in your PHP application. Check for common security flaws such as SQL injection, cross-site scripting (XSS), and cross-site request forgery (CSRF) vulnerabilities.
- Mobile Responsiveness: Test your PHP application on mobile devices to ensure it is responsive and provides a seamless user experience across different screen sizes and orientations.
- Integration Testing: If your PHP application interacts with external services or APIs, test the integration to ensure seamless communication and proper handling of data.
Thoroughly testing your deployment is crucial for delivering a stable and dependable PHP application to your users. It helps you identify and resolve any issues or bugs that might have occurred during the deployment process.
Once you have confirmed that your PHP application passes all the necessary tests, you can proceed to the final steps of configuring domains and DNS to make your application accessible to users worldwide.
Step 9: Configure Domains and DNS
Configuring domains and DNS is a vital step in making your PHP application accessible to users through a user-friendly domain name. This step involves mapping your domain name to the IP address of your server. Here’s how you can configure domains and DNS for your PHP application:
- Register a Domain: Purchase a domain name from a reputable domain registrar. Choose a domain name that reflects your brand or the purpose of your PHP application.
- Obtain Server IP Address: Determine the IP address of your server where your PHP application is deployed. You can find this information from your hosting provider or server administrator.
- Access DNS Management: Log in to your domain registrar’s website and access the DNS management section for the purchased domain name.
- Create DNS Records: Create a DNS record (usually an “A” record) that links your domain name to the IP address of your server. This record tells the DNS servers how to direct traffic to your server when users access your domain.
- Set Up Subdomains (if needed): If your PHP application requires subdomains, create additional DNS records for each subdomain, mapping them to the appropriate IP addresses or server aliases.
- Configure SSL Certificate (optional): If you want to secure your PHP application with HTTPS, obtain and install an SSL certificate for your domain. This provides a secure connection between the user’s browser and your server.
- Propagation Time: Keep in mind that DNS changes may take some time to propagate worldwide. The changes typically take effect within a few hours, but it can vary depending on the DNS provider and caching settings.
Configuring domains and DNS allows users to access your PHP application by typing in a user-friendly domain name instead of relying on the server’s IP address. This step is crucial for establishing a professional online presence.
Once the DNS changes have propagated, users can access your PHP application through the configured domain name, and your deployment process is nearly complete.
Step 10: Monitor and Maintain Your Application
Deploying a PHP application is not a one-time event; it requires ongoing monitoring and maintenance to ensure its stability, security, and optimal performance. Here are the key aspects to consider when monitoring and maintaining your PHP application:
- Monitor Server Resources: Continuously monitor your server’s resources, such as CPU usage, memory usage, and disk space. This helps you identify potential issues and optimize resource allocation as needed.
- Monitor Application Performance: Utilize tools or services to monitor the performance of your PHP application. Keep an eye on response times, page load speeds, and transaction success rates to ensure a smooth user experience.
- Implement Regular Backups: Set up regular backups of your application’s files and databases. This ensures that you can quickly restore your PHP application in case of any unforeseen issues or data loss.
- Install Security Updates: Stay updated with the latest security patches and updates for your server software, PHP version, and dependencies. Regularly install these updates to protect your PHP application from known vulnerabilities.
- Monitor Error Logs: Continuously monitor your application’s error logs to identify and address any recurring issues or errors. Regularly review and investigate logged errors to maintain a stable and bug-free PHP application.
- Periodically Review Code: Regularly review and refactor your PHP application’s codebase to optimize performance, maintainability, and readability. Remove deprecated functions, rewrite inefficient code, and implement best coding practices.
- Stay Informed: Keep yourself updated with the latest trends, technologies, and security practices in the PHP development community. Stay informed about any vulnerabilities or security risks related to your application’s dependencies.
- Implement Scalability Measures: As your PHP application grows and traffic increases, implement scalability measures such as load balancing, caching, and horizontal scaling to handle the increased demand efficiently.
Maintaining and monitoring your PHP application on an ongoing basis ensures its optimal performance, security, and reliability. Regularly assess and improve your application to meet the changing needs of your users and technological advancements.
By following these best practices for monitoring and maintaining your PHP application, you can ensure that your deployment remains successful and that your application continues to meet the needs of your users.
Conclusion
Deploying a PHP application involves a series of essential steps that are crucial for a successful deployment. From setting up a development environment to configuring domains and DNS, each step plays a vital role in ensuring the availability, performance, and security of your application.
By following this comprehensive guide, you have learned how to set up a development environment, choose a hosting provider, prepare your application for deployment, configure the server environment, upload your application to the server, install dependencies, test your deployment, configure domains and DNS, and monitor and maintain your application.
Each step requires careful consideration and attention to detail to ensure a smooth deployment process. Remember to thoroughly test your deployment before making your application live, as this will help you identify and address any potential issues or bugs.
Furthermore, ongoing monitoring and maintenance are essential for the long-term success of your PHP application. Regularly update dependencies, monitor performance, apply security patches, and keep an eye on server resources to ensure your application remains secure, stable, and optimized.
By following these guidelines and best practices, you can confidently deploy your PHP application and provide a seamless experience for your users. Don’t forget to stay informed about advancements in PHP development and regularly upgrade your application to take advantage of new features and improvements.
With a well-deployed PHP application, you can reach a wider audience and leverage the full potential of your application. Happy deploying!