Introduction
Running PHP on MAMP allows developers to create and test dynamic websites and web applications locally before deploying them to a live server. MAMP, an abbreviation for macOS, Apache, MySQL, and PHP, is a powerful and popular web development environment for macOS systems. It provides an all-in-one solution, bundling Apache web server, MySQL database server, and PHP, making it easy to set up a local server for PHP development.
Whether you’re a beginner or an experienced developer, MAMP offers a user-friendly interface and straightforward installation process. In this article, we will guide you through the step-by-step process of installing and running PHP on MAMP. By following these steps, you’ll be able to run and test your PHP projects locally on your macOS machine.
Before we dive into the installation process, it’s important to note that MAMP is only compatible with macOS operating systems. If you’re using a Windows or Linux system, you’ll need to look into alternative solutions such as WAMP (Windows) or LAMP (Linux).
Now, let’s get started with the prerequisites for installing and running PHP on MAMP.
Prerequisites
Before you proceed with installing and running PHP on MAMP, ensure that you have the following prerequisites in place:
- A macOS operating system (MAMP is specifically designed for macOS)
- Enough free disk space to accommodate the MAMP installation
- A stable internet connection for downloading the MAMP software
It’s essential to have a macOS system as MAMP is not compatible with Windows or Linux. If you’re using a non-macOS system, consider exploring alternative development environments such as WAMP or LAMP as mentioned earlier.
Make sure you have sufficient disk space to install MAMP. The installation package usually requires a few hundred megabytes of free space. Additionally, ensure that your internet connection is reliable, as you’ll need to download the MAMP software from the official website.
Once you have verified these prerequisites, you’re ready to move on to the installation process. In the next section, we will guide you through the step-by-step process of downloading and installing MAMP on your macOS system.
Step 1: Download and Install MAMP
To begin, follow these steps to download and install MAMP on your macOS system:
- Open your preferred web browser and navigate to the official MAMP website (https://www.mamp.info).
- Once on the MAMP website, click on the “Download” button located on the top navigation menu. This will take you to the downloads page.
- On the downloads page, you’ll find two versions of MAMP available: MAMP and MAMP PRO. For beginners, we recommend downloading the free version of MAMP by clicking on the “Download Now” button under the regular MAMP section.
- Your download should start automatically. Once the download is complete, locate the downloaded MAMP package file in your “Downloads” folder.
- Double-click on the MAMP package file to begin the installation process. Follow the on-screen instructions and agree to the license agreement if prompted.
- During the installation, you may be asked to provide your macOS administrator password. Enter the password and continue with the installation.
- Once the installation is complete, navigate to your “Applications” folder and locate the MAMP folder. Open the folder to reveal the MAMP application.
- Double-click on the MAMP application. This will start the MAMP control panel, which will allow you to manage and start the MAMP servers.
Congratulations! You have successfully downloaded and installed MAMP on your macOS system. In the next step, we will guide you on how to start the MAMP servers.
Step 2: Start MAMP Servers
After successfully installing MAMP on your macOS system, it’s time to start the MAMP servers. Follow these steps to start the servers:
- Open the MAMP application by locating it in your “Applications” folder and double-clicking on it.
- Once the MAMP control panel opens, you will see tabs for “Start”, “Stop”, and “Preferences”. Click on the “Start” tab.
- The MAMP control panel will now display the status of the Apache and MySQL servers. Click on the “Start Servers” button to initiate the startup process.
- As the servers start, you may see some log outputs in the console window of the control panel, indicating the successful startup of Apache and MySQL services.
- Once the servers are up and running, the status indicators next to Apache and MySQL will turn green, indicating that the servers are active and ready to be used.
That’s it! You have started the MAMP servers successfully. The Apache server will handle the HTTP requests, while the MySQL server will handle the database-related operations. With the servers running, you can proceed to the next step, which is to configure the PHP settings in MAMP.
Step 3: Configure MAMP PHP Settings
To ensure that MAMP uses the correct PHP version and configuration, you need to configure the PHP settings. Follow these steps to configure the PHP settings in MAMP:
- In the MAMP control panel, click on the “Preferences” tab.
- In the preferences window, go to the “PHP” tab.
- On this tab, you will see a dropdown menu with a list of available PHP versions. Select the PHP version you want to use for your development environment. If you’re unsure, you can choose the recommended version or the latest stable release.
- After selecting the PHP version, click on the “OK” button to save the changes.
- Next, click on the “Start” tab in the MAMP control panel to ensure that the updated PHP configuration takes effect.
By following these steps, you have successfully configured the PHP settings in MAMP. You can now proceed to the next step, which is creating a PHP file to test your setup.
Step 4: Create a PHP File
Now that you have MAMP installed, servers running, and PHP settings configured, it’s time to create a PHP file to test your setup. Follow these steps to create a PHP file:
- Open a text editor of your choice, such as Notepad or Sublime Text.
- Create a new file and save it with a .php extension. For example, you can name it “test.php”.
- In your newly created PHP file, add the following code:
<?php echo "Hello, World!"; ?> - Save the PHP file in the “htdocs” folder of your MAMP installation directory. The default location for the htdocs folder is “
/Applications/MAMP/htdocs/“.
Once you have saved the PHP file in the htdocs folder, it’s ready to be executed. In the next step, we will guide you on how to test PHP on MAMP.
Step 5: Test PHP on MAMP
After creating the PHP file in the previous step, it’s time to test PHP on MAMP. Follow these steps to test your PHP setup:
- Open your preferred web browser.
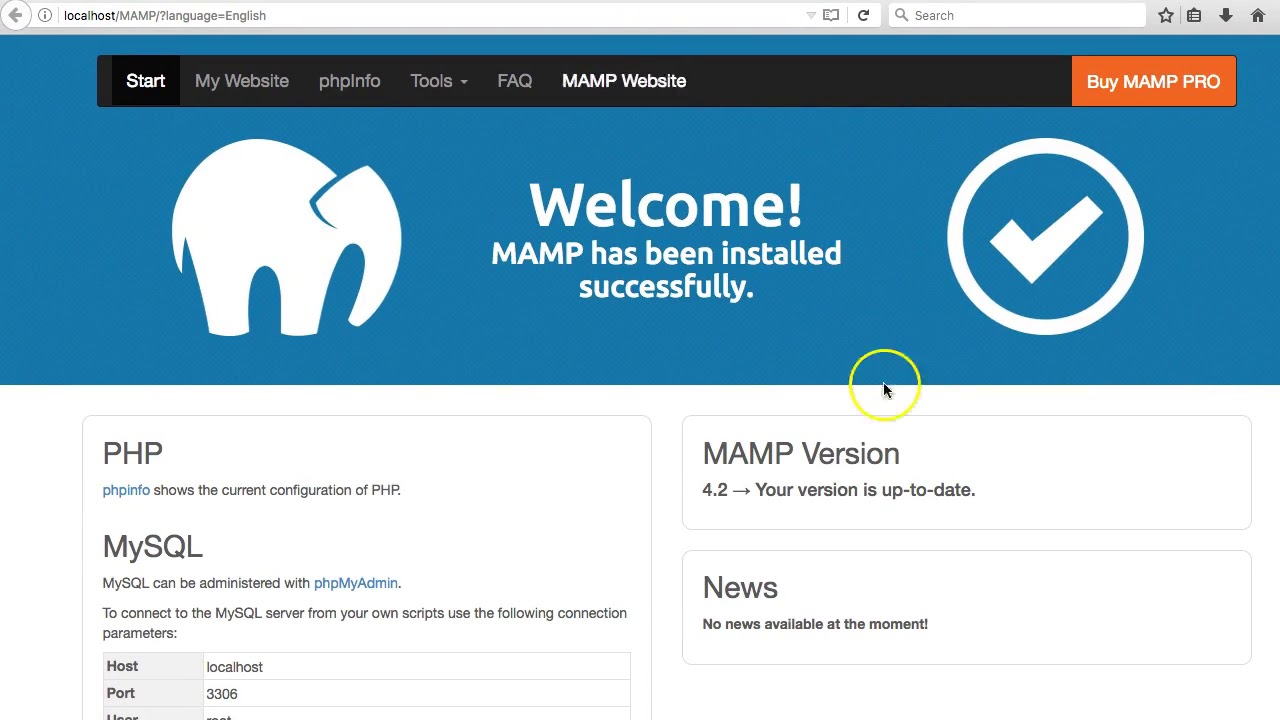
- In the address bar, type “localhost” or “127.0.0.1” and press Enter.
- This will open the MAMP start page, which displays information about your PHP and MySQL versions.
- To test your PHP file, append the file name to the address. For example, if your PHP file is named “test.php”, the URL will be “localhost/test.php”.
- Press Enter, and the PHP file will be executed.
- If everything is set up correctly, you should see the output “Hello, World!” displayed on the page.
Congratulations! You have successfully tested PHP on MAMP. This confirms that your MAMP installation, server setup, and PHP configuration are all functioning correctly.
Now that you’ve completed all the steps, you can start developing and testing your PHP projects locally on MAMP before deploying them to a live server. Enjoy the seamless PHP development experience provided by MAMP and unleash your creativity with web development projects.
Conclusion
In this article, we have covered the step-by-step process of running PHP on MAMP, a powerful web development environment for macOS systems. By following these steps, you can easily set up a local server and start developing dynamic websites and web applications using PHP.
We began by discussing the prerequisites, which include having a macOS system, sufficient disk space, and a stable internet connection. Once you’ve verified the prerequisites, you can proceed to the installation process.
We walked you through the steps to download and install MAMP on your macOS system. After successful installation, we showed you how to start the MAMP servers, including Apache and MySQL. We also covered the configuration of PHP settings to ensure that your PHP version and configuration are correctly set up.
To test your PHP setup, we guided you through the process of creating a PHP file and executing it on the MAMP server. By visiting the MAMP start page in your web browser and appending the PHP file name to the URL, you were able to see the output of your PHP code.
With PHP running on MAMP, you now have the ability to develop and test PHP projects locally. This allows you to explore and experiment with different functionalities and features before deploying your applications to a live server.
Remember to always keep your MAMP installation updated and follow best practices for PHP development. Take advantage of the powerful tools and features provided by MAMP to enhance your productivity and create amazing PHP applications.
We hope this guide has been helpful and has provided you with the necessary knowledge to run PHP on MAMP. Happy coding!