Introduction
PHP Laravel is a popular open-source PHP framework used for building dynamic web applications. Developed by Taylor Otwell, Laravel provides developers with a simple and elegant syntax that makes it easy to write clean, efficient, and maintainable code.
With its robust features and extensive libraries, Laravel has gained a significant following in the web development community. It offers developers the tools they need to create complex web applications, from simple websites to enterprise-level solutions.
One of the key advantages of using Laravel is its emphasis on simplicity and readability. The framework follows the Model-View-Controller (MVC) architectural pattern, which allows for clear separation of concerns and promotes code reusability. This makes it easier for developers to collaborate, refactor code, and add new features to existing applications.
Another standout feature of Laravel is its comprehensive documentation, which provides a wealth of information and resources for developers. From the official Laravel website to numerous community-driven tutorials and forums, developers can find answers to their questions and get support throughout their development journey.
In this article, we will explore the features, benefits, and practical aspects of working with PHP Laravel. We will discuss key concepts such as routing, controllers, models and migrations, views and blade templates, validation, database operations, authentication and authorization, and more. By the end of the article, you will have a solid understanding of how to get started with Laravel and build powerful web applications.
What is PHP Laravel?
PHP Laravel is an open-source PHP web application framework that follows the Model-View-Controller (MVC) architectural pattern. It is designed to simplify the development process and make it more enjoyable for developers. Laravel provides a clean and elegant syntax while offering powerful features and a vast ecosystem of libraries and packages.
At its core, Laravel aims to improve the productivity of developers by providing a framework with a consistent and expressive syntax that allows them to write code effortlessly. It comes with a host of built-in functionalities, including database interactions, routing, caching, error handling, and security, enabling developers to focus on application logic rather than reinventing the wheel.
Laravel embraces modern development principles and best practices, making it a favorite among developers. It emphasizes the use of reusable and modular code, enabling developers to build scalable and maintainable applications. The framework also promotes test-driven development (TDD), which ensures that applications are thoroughly tested and robust.
One of the reasons why Laravel is highly regarded in the PHP community is its vibrant ecosystem. It offers a wide range of packages and libraries, called “Laravel Packages,” which provide additional functionalities to enhance the development experience. These packages can be easily integrated into Laravel projects, saving developers time and effort.
Furthermore, Laravel has a strong and active community that constantly contributes to the framework’s development. The Laravel community provides extensive documentation, tutorials, forums, and online resources, making it easier for developers to learn, troubleshoot, and share knowledge.
With its elegant syntax, powerful features, and supportive community, PHP Laravel has become one of the most popular frameworks for PHP web development. It empowers developers to build robust and scalable applications quickly and efficiently while following industry best practices.
Key Features of PHP Laravel
PHP Laravel is known for its rich set of features that help developers create high-quality web applications. Let’s explore some of its key features:
- Routing: Laravel provides a simple and expressive syntax for defining routes, making it easy to handle HTTP requests and create clean and SEO-friendly URLs.
- ORM (Object Relational Mapping): Laravel’s built-in ORM, called Eloquent, simplifies database interactions by allowing developers to work with database records as objects, eliminating the need to write complex SQL queries.
- Template Engine: Laravel uses Blade, a powerful and intuitive template engine, which provides features like template inheritance, conditional statements, loops, and more. Blade makes it easy to create dynamic and reusable views.
- Authentication and Authorization: Laravel comes with a built-in authentication system, making it simple to implement user authentication and authorization. It provides features like user registration, login, password hashing, and role-based access control.
- Validation: Laravel’s validation feature allows developers to validate user input easily. It provides a wide range of validation rules and error messages, ensuring data integrity and enhancing user experience.
- Caching: Laravel offers various caching techniques, including file-based, database, and Redis caching. Caching improves application performance by temporarily storing frequently accessed data.
- Error Handling: Laravel simplifies error handling by providing a unified exception handling mechanism. It allows developers to customize error pages and gracefully handle exceptions.
- Queueing: Laravel’s built-in queueing system allows developers to defer time-consuming tasks and improve application performance. It supports different queueing backends like Redis, Beanstalk, and databases.
- Testing: Laravel provides robust testing features, including unit testing, integration testing, and feature testing. It integrates seamlessly with PHPUnit, making it easy to write and execute tests to ensure the stability of the application.
These are just some of the key features that make PHP Laravel a powerful framework for web application development. Its focus on developer productivity, code simplicity, and extensive feature set have contributed to its widespread adoption and popularity in the PHP community.
Benefits of PHP Laravel
PHP Laravel offers numerous benefits that make it a highly preferred choice for web application development. Here are some key benefits of using PHP Laravel:
- Efficient Development Process: Laravel simplifies the development process by providing a clean and elegant syntax, along with pre-built functionalities. This reduces development time and effort, allowing developers to focus on application logic rather than repetitive tasks.
- MVC Architecture: Laravel follows the Model-View-Controller (MVC) architectural pattern, which promotes code organization and separation of concerns. This makes the codebase more maintainable, scalable, and readable, leading to improved collaboration among developers.
- Robust Security Features: Laravel comes with built-in security features such as database query parameter binding, CSRF protection, secure user authentication, and encryption. These features help developers build secure web applications and protect against common security threats.
- Extensive Ecosystem: Laravel has a vast ecosystem of packages and libraries that enhance its capabilities. These packages cover various functionalities like user authentication, payment gateways, image manipulation, and more. Leveraging these packages saves development time and effort.
- Powerful ORM: Laravel’s Object-Relational Mapping (ORM) tool, Eloquent, simplifies database interactions by allowing developers to work with database records as objects. This abstraction layer eliminates the need for writing complex SQL queries, making database operations more straightforward and less error-prone.
- Easy Integration: Laravel seamlessly integrates with various third-party services and APIs, facilitating the development of feature-rich web applications. It provides well-documented APIs and libraries for popular services like AWS, Redis, Mailgun, and more.
- Community Support: Laravel has a large and active community of developers who provide support through forums, online tutorials, and extensive documentation. The community contributes packages, bug fixes, and continuous improvements to the framework, ensuring its growth and longevity.
- Testing Capabilities: Laravel offers built-in testing features and integrates seamlessly with testing frameworks like PHPUnit. This enables developers to write unit tests, integration tests, and feature tests to ensure the stability and reliability of their applications.
- Continuous Improvement: Laravel has a dedicated team of developers who continuously work on improving the framework. Regular updates, bug fixes, and feature enhancements ensure that developers have access to the latest and best tools for web application development.
These benefits, along with many others, make PHP Laravel a preferred choice for developers when building robust and scalable web applications. Laravel’s focus on developer productivity, code simplicity, and security features have solidified its position as one of the most popular PHP frameworks in the industry.
Getting Started with PHP Laravel
If you’re new to PHP Laravel, this section will guide you through the initial steps to get started with the framework. Follow these steps to set up your development environment and create your first Laravel application:
- Install PHP and Composer: Make sure you have PHP and Composer installed on your system. You can download and install PHP from the official PHP website, and Composer from the Composer website.
- Install Laravel: Once you have PHP and Composer installed, open your command-line interface (CLI) and run the following command:
composer global require laravel/installer. This will install the Laravel installer globally on your system. - Create a New Laravel Application: To create a new Laravel application, navigate to the directory where you want to create your project and run the following command:
laravel new project-name. Replaceproject-namewith the desired name for your Laravel project. - Serve the Application: Once the installation process is complete, navigate to the project directory and run the following command:
php artisan serve. This will start a development server, and you can access your Laravel application in your browser by visitinghttp://localhost:8000.
That’s it! You now have a Laravel application up and running. You can explore the project’s directory structure and start building your application by adding routes, controllers, models, views, and more.
It’s worth noting that Laravel also provides a Homestead virtual machine for a more advanced development environment setup. Homestead offers a pre-packaged Vagrant box with everything you need to develop Laravel applications.
Refer to the Laravel documentation for more details on installation options, advanced configuration, and deploying your Laravel applications to production servers.
With these initial steps, you’re ready to dive into the exciting world of PHP Laravel and start building modern, feature-rich web applications.
Setting up PHP Laravel
Before you can start working with PHP Laravel, you need to set up your development environment. Follow these steps to ensure that you have everything you need:
- Install PHP: PHP is the programming language used by Laravel. You’ll need to install PHP on your computer. Visit the official PHP website and download the appropriate version for your operating system. Follow the installation instructions provided.
- Install Composer: Composer is a dependency management tool for PHP. Laravel uses Composer to manage its dependencies. Download the latest version of Composer from the Composer website and follow the installation instructions for your operating system.
- Install Laravel: Once you have PHP and Composer installed, you’re ready to install Laravel. Open your command-line interface (CLI) and run the following command:
composer global require laravel/installer. This will install the Laravel installer globally on your system.
With Laravel installed, you now have the necessary tools to start creating Laravel applications. You can check if Laravel is installed correctly by running the laravel command in your CLI. It should display Laravel’s version information.
It’s important to note that Laravel requires a web server to run your applications. You have a few options for setting up a local development server:
- PHP’s Built-in Development Server: Laravel comes with a built-in development server, which you can start by running the
php artisan servecommand in your project directory. This server will serve your Laravel application athttp://localhost:8000. - Homestead: Homestead is a pre-packaged virtual machine that comes with Laravel pre-installed. It provides a consistent development environment and eliminates compatibility issues. You can find installation instructions in the Laravel documentation.
- Other Web Servers: You can set up Laravel with popular web servers like Apache or Nginx. Refer to the Laravel documentation for instructions on configuring Laravel with these servers.
Once you have your local development server set up, you can create a new Laravel project by running the laravel new project-name command in your CLI. Replace project-name with the desired name for your Laravel project.
Congratulations! You now have PHP Laravel set up and ready to use. You can start building powerful web applications using Laravel’s rich set of features and elegant syntax.
Creating a New Laravel Application
Creating a new Laravel application is a straightforward process that can be done using the Laravel installer, which we installed during the setup process. Follow these steps to create a new Laravel application:
- Open your command-line interface (CLI): Open your preferred CLI, such as Command Prompt, Terminal, or Git Bash.
- Navigate to the desired directory: Use the
cdcommand to navigate to the directory where you want to create your new Laravel application. For example, runcd my-projectsto navigate to a folder named “my-projects”. - Run the Laravel new command: In your CLI, run the following command:
laravel new projectName. Replace “projectName” with the desired name for your Laravel application. For example, to create an application named “myapp”, you would runlaravel new myapp. - Wait for the installation to complete: The Laravel installer will now download the necessary files and dependencies for your new application. This process may take a few minutes depending on your internet speed.
- Navigate to the new project directory: Once the installation is complete, navigate to the newly created project directory using the
cdcommand. For example, if your project name is “myapp”, runcd myapp. - Start the development server: Finally, start the development server by running the command
php artisan serve. This will start the server, and you can access your Laravel application in the browser by visitinghttp://localhost:8000.
Your new Laravel application is now up and running! You can start exploring and modifying the project’s files to meet your specific requirements.
It’s important to note that Laravel follows the Model-View-Controller (MVC) architectural pattern, which separates the application’s logic into these three components. As you create your Laravel application, you’ll be working with routes, controllers, models, and views to build out your application’s functionality.
Now that you have created your Laravel application, you are ready to start building and customizing it according to your project’s requirements. Laravel provides a powerful foundation and a wide range of features to help you develop scalable and efficient web applications.
Laravel Directory Structure
The directory structure of a Laravel application plays a crucial role in organizing and managing the codebase. Laravel follows a convention-over-configuration approach, which means that it provides a default directory structure that developers can follow for their projects. Here is an overview of the key directories and files in a Laravel application:
- app: This directory contains the core application code, including Controllers, Models, and Views. The Controllers folder holds the application’s controllers, which handle the logic and process incoming requests. The Models folder contains the application’s data models, representing database tables. The Views folder holds the application’s Blade templates, responsible for rendering the HTML/UI of the application.
- bootstrap: The bootstrap directory contains files that set up the application’s environment and prepare it for request handling. The files in this directory include the app.php file, which bootstraps the application, and the autoload.php file, which handles class autoloading.
- config: The config directory holds various configuration files for the application, including database settings, cache settings, and application-specific configurations. Developers can update these files to customize the behavior of the Laravel framework.
- database: This directory contains database-related files, such as migrations and seeds. Migrations are used to manage database schema changes, while seeds allow populating the database with test data during development.
- public: The public directory is the entry point of the application and contains the index.php file, which serves as the front controller. It also holds assets like CSS, JavaScript, and image files that are accessible to users directly.
- resources: The resources directory contains non-PHP resources such as language files, views, and assets. The lang subdirectory contains language files for localization. The views subdirectory holds the Blade template files, which are used to generate the HTML/UI of the application.
- routes: The routes directory contains the routing configuration for the application. The web.php file defines the routes for handling HTTP requests made to the application. Developers can define routes for different HTTP verbs (GET, POST, etc.) and map them to specific controller methods.
- storage: The storage directory stores various files generated during the runtime of the application, including logs, cache files, sessions, and uploaded files. It also contains the app/public folder, which is used for storing publicly accessible files such as user-uploaded images or documents.
- tests: The tests directory holds automated tests for the application. Laravel provides a testing framework based on PHPUnit, allowing developers to write unit tests, integration tests, and feature tests to ensure the quality and reliability of the application.
This is just a high-level overview of the Laravel directory structure. Laravel provides a well-organized and logical structure that makes it easier for developers to navigate, locate, and maintain the different components of their application.
As you continue developing your Laravel application, you may create additional directories and files based on your project’s specific requirements. Laravel’s flexible directory structure gives you the freedom to structure your codebase in a way that best suits your needs.
Understanding Laravel Routing
In Laravel, routing plays a critical role in directing incoming HTTP requests to the appropriate controller methods for processing. Routing defines the endpoints of your application and helps determine how the application responds to user actions.
Laravel follows a simple and expressive syntax for defining routes. Routes can be defined in the `routes/web.php` file for web-based routes, and in the `routes/api.php` file for API routes. Let’s take a closer look at how routing works in Laravel:
Basic Routing:
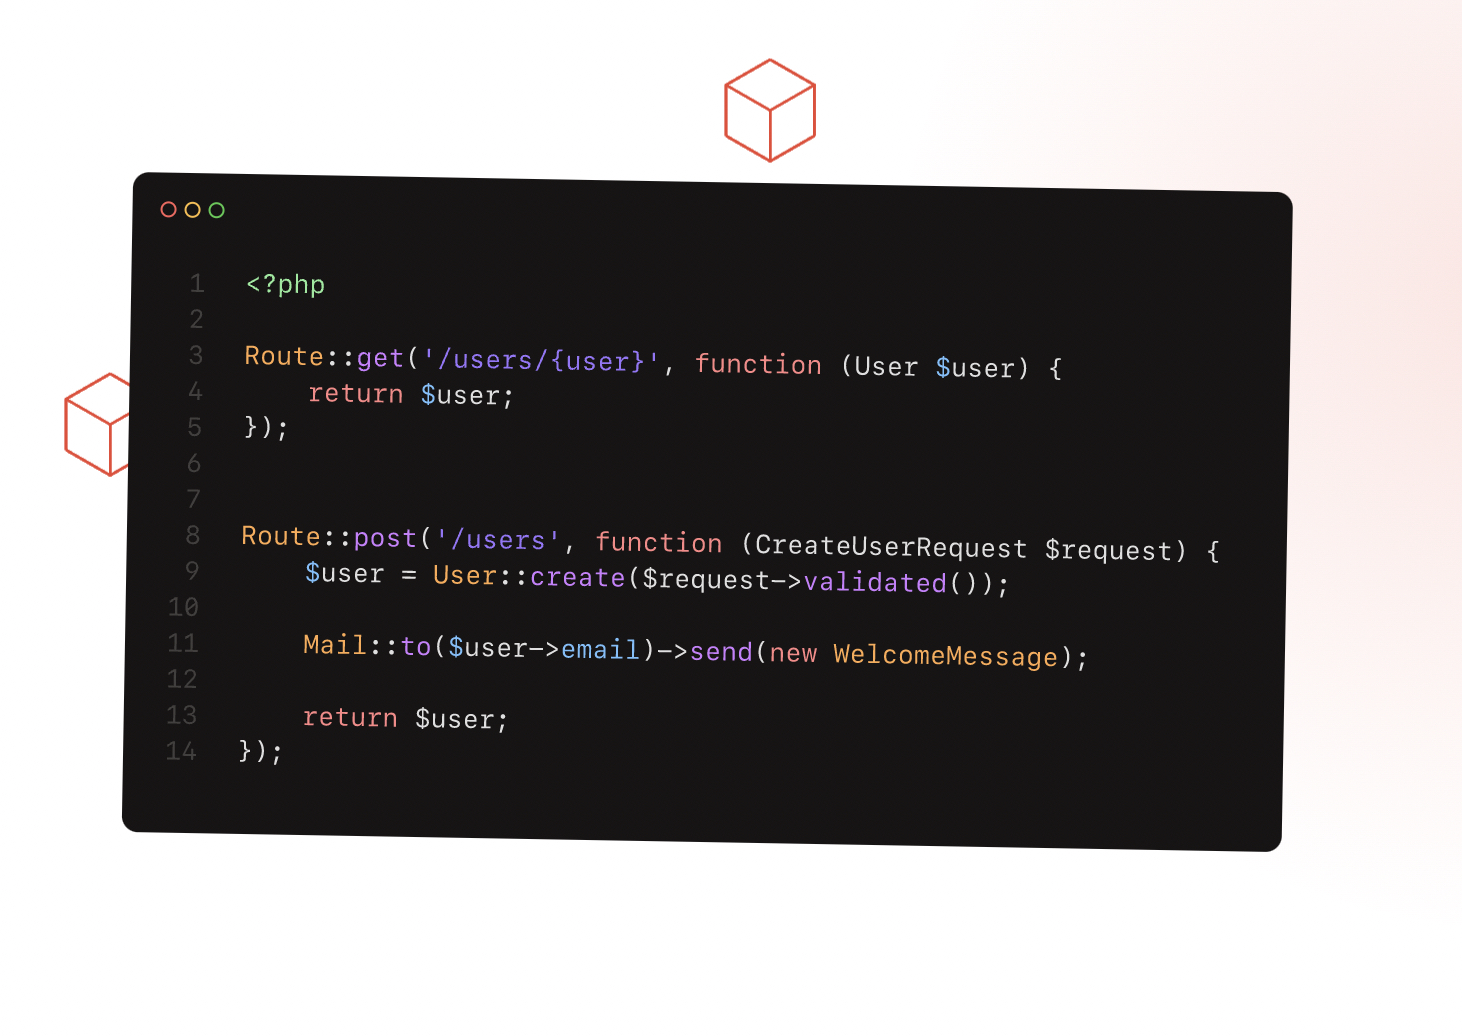
To define a route, you can use the `Route` facade followed by the desired HTTP verb (e.g., `get`, `post`, `put`, `patch`, `delete`), and specify the URI and a callback function that handles the request. For example, to define a route that responds to a GET request at the root URL (“/”), you can use the following code:
php
Route::get('/', function () {
    return 'Hello, Laravel!';
});
You can use methods provided by the `Route` facade to respond to different HTTP verbs and define routes for specific URIs. In addition to using anonymous functions as callbacks, you can also specify a controller method that handles the request by using the syntax `ControllerName@methodName`. This approach keeps your routes clean and separates the logic into separate controller files.
Route Parameters:
In Laravel, you can define route parameters by enclosing them in curly braces `{}` within the route URI. These route parameters capture the dynamic segments of the URL and make them accessible within the route’s callback or controller method. For example, to define a route that accepts a user ID, you can use the following code:
php
Route::get('/users/{id}', function ($id) {
    return 'User ID: ' . $id;
});
You can access the captured route parameters in your route callback or controller method using the same parameter name as specified in the route definition.
Named Routes:
Laravel allows you to assign names to your routes, making it easier to reference them in your application. To assign a name to a route, you can chain the `name` method onto the route definition. For example:
php
Route::get('/about', function () {
    return view('about');
})->name('about');
You can then use the named route in your application by using the `route` helper function. For example, to generate a link to the `about` route, you can use the following code:
php
<a href="<?php echo route('about'); ?>">About</a>
Route Groups and Middleware:
Laravel allows you to group related routes together using the `Route::group` method. This is beneficial when you want to apply specific middleware, prefixes, or namespaces to a set of routes. For example, to apply the `auth` middleware to a group of routes, you can do the following:
php
Route::group(['middleware' => 'auth'], function () {
    Route::get('/dashboard', 'DashboardController@index')->name('dashboard');
    Route::get('/profile', 'ProfileController@index')->name('profile');
});
In this example, both the `/dashboard` and `/profile` routes will be protected by the `auth` middleware, ensuring that only authenticated users can access them.
Laravel’s routing system provides a flexible and intuitive way to define your application’s endpoints and handle HTTP requests. Understanding how routing works is essential for building robust and interactive web applications using Laravel.
Creating Routes in Laravel
In Laravel, routes define the endpoints of your application and determine how incoming HTTP requests are handled. Laravel provides a simple and expressive syntax for creating routes, allowing you to define various types of routes based on the HTTP verbs and URIs.
Basic Routes:
To create a route, you can use the `Route` facade provided by Laravel. The most common way to create a route is by using the `get` method. For example, to create a route that responds to a GET request at the root URL (“/”), you can use the following code:
php
Route::get('/', function () {
    return 'Hello, Laravel!';
});
Laravel provides similar methods for other HTTP verbs such as `post`, `put`, `patch`, and `delete`. You can use these methods to create routes that handle corresponding HTTP requests.
Route Parameters:
Laravel allows you to define route parameters by enclosing them in curly braces `{}` within the route URI. These parameters capture dynamic segments of the URL and make them accessible within the route’s callback or controller method. For example, to define a route that accepts a user ID, you can use the following code:
php
Route::get('/users/{id}', function ($id) {
    return 'User ID: ' . $id;
});
You can access the captured route parameters in your route’s callback or controller method by defining corresponding parameters in the function definition.
Named Routes:
Laravel allows you to assign names to your routes, which can be helpful when generating URLs or linking to routes. To assign a name to a route, you can chain the `name` method onto the route definition. For example:
php
Route::get('/about', function () {
    return view('about');
})->name('about');
You can then use the named route in your application by using the `route` helper function. For example, to generate a link to the `about` route, you can use the following code:
php
<a href="<?php echo route('about'); ?>">About</a>
Route Groups:
Laravel allows you to group related routes together using the `Route::group` method. This can be useful when you want to apply common middleware, route prefixes, or namespaces to a set of routes. For example, to group a set of admin routes with a prefix and apply authentication middleware, you can do the following:
php
Route::group(['prefix' => 'admin', 'middleware' => 'auth'], function () {
    Route::get('/dashboard', 'AdminController@dashboard');
    Route::get('/users', 'AdminController@users');
    // other admin routes...
});
In this example, all routes within the group will be prefixed with “/admin” and protected by the “auth” middleware, ensuring that only authenticated users can access the admin routes.
Laravel provides a flexible and intuitive routing system for handling incoming HTTP requests. By utilizing the various routing methods, parameters, named routes, and route groups, you can create a well-structured and organized set of routes for your Laravel application.
Laravel Controllers
In Laravel, controllers play a crucial role in handling the logic and processing of incoming HTTP requests. Controllers provide a way to organize the code and separate the concerns of different parts of your application.
Creating a Controller:
In Laravel, you can create a new controller using the Artisan command-line tool. Open your command-line interface (CLI) and run the following command:
php artisan make:controller MyController
This command will generate a new controller file named `MyController` inside the `app/Http/Controllers` directory. Laravel follows the PSR-4 autoloading standard, so make sure to namespace your controller according to your application’s structure.
Defining Controller Methods:
A controller consists of several methods, each of which defines the logic for handling a specific HTTP request. For example, to handle a GET request for showing a user’s profile, you can define a method in your controller like this:
public function show($id)
{
    $user = User::find($id);
    return view('users.profile', ['user' => $user]);
}
The `show` method takes a parameter `$id`, which represents the user’s ID. It retrieves the user from the database using the `User` model and passes the user data to the ‘users.profile’ view for rendering.
Routing to Controller Methods:
To route an incoming request to a specific controller method, you can define a route and specify the controller method as the callback. For example, to route a GET request to the `show` method in your `MyController` controller, you can define the following route:
Route::get('/users/{id}', 'MyController@show');
The `{id}` parameter in the route URL will be passed as an argument to the `show` method in the `MyController` controller.
Middleware in Controllers:
You can apply middleware to a controller method or the entire controller to add additional functionality or protect the route. To apply middleware to a method, you can specify it in the route definition. For example:
Route::get('/users/{id}', 'MyController@show')->middleware('auth');
In this case, the `’auth’` middleware will be applied to the `show` method, ensuring that only authenticated users can access the user profile.
Controller Resource Routes:
Laravel provides a convenient way to generate routes for CRUD operations using controller resource routing. By using the `Route::resource` method, Laravel generates the necessary routes for creating, reading, updating, and deleting resources. For example:
Route::resource('users', 'UserController');
This single line of code will generate routes for all the standard CRUD operations for a `UserController`, including `index`, `create`, `store`, `show`, `edit`, `update`, and `destroy`.
Controllers in Laravel help keep your application logic organized and maintainable. By defining controller methods and routing requests to them, you can handle different HTTP requests and perform the necessary operations to fetch or modify data, interact with models, and render views.
Laravel Models and Migrations
In Laravel, models and migrations are an integral part of the framework’s powerful database management system. Models represent your application’s data structures and interact with the database, while migrations provide a convenient way to manage and version the database schema.
Laravel Models:
Laravel models are PHP classes that handle database operations and represent your application’s data structures. Models allow you to interact with your database tables and define relationships between them.
To create a new model, you can use the Artisan command-line tool. Run the following command in your CLI:
php artisan make:model Product
This command will generate a new model file named `Product.php` inside the `app` directory. You can define properties and methods in your model to handle database operations, such as querying, inserting, updating, and deleting data.
Laravel Migrations:
Laravel migrations provide a convenient way to manage your database schema and version it over time. Migrations are timestamped files stored in the `database/migrations` directory. Each migration file represents a set of database changes.
To create a new migration, use the Artisan command-line tool with the `make:migration` command. For example, to create a migration for creating a `products` table, run:
php artisan make:migration create_products_table
This command will generate a new migration file with a timestamped name (e.g., `2022_01_01_123456_create_products_table`). In the migration file, you can use the Schema builder provided by Laravel to define the table structure, add columns, specify indexes, and define relationships.
Running Migrations:
To run your migrations and apply the defined database changes, use the `migrate` Artisan command:
php artisan migrate
This command will execute all pending migrations and update the database accordingly. Laravel keeps track of the executed migrations in the `migrations` table.
Rolling Back Migrations:
If you need to undo a migration and revert the changes made to the database, you can use the `migrate:rollback` command:
php artisan migrate:rollback
This command will roll back the last executed migration. You can also use the `migrate:rollback` command with the `–step` option to rollback multiple migrations.
Laravel models and migrations provide a robust way to manage and interact with your application’s database. By creating models, you can abstract the database operations and focus on the application’s business logic. Migrations, on the other hand, ensure that your database schema is updated and versioned, making it easier to work collaboratively and maintain data integrity.
Laravel Views and Blade Templates
In Laravel, views and Blade templates are fundamental components for constructing the user interface of your web application. Views allow you to separate the presentation logic from your application’s business logic, providing a clear and organized way to render HTML, CSS, and JavaScript.
Creating Views:
To create a new view, you can use the `view` helper function or the `View` facade. Laravel follows a convention-over-configuration approach, so by default, the views are stored in the `resources/views` directory. For example, to create a view named `welcome.blade.php`, you can use the following code:
return view('welcome');
Laravel uses the `.blade.php` file extension for Blade templates.
Passing Data to Views:
You can pass data from your controller to the view by passing an associative array or an object as the second parameter to the `view` function or by using the `with` method. For example:
return view('welcome', ['name' => 'John']);
// or
return view('welcome')->with('name', 'John');
You can access the passed data within the view using Blade’s syntax, such as `{{ $name }}`.
Blade Templating:
Laravel’s Blade templating engine provides powerful features for building dynamic and reusable views. You can use conditionals, loops, template inheritance, and more to enhance your views. Here are a few examples:
<!-- Conditionals -->
@if ($name == 'John')
    <p>Hello, John!</p>
@else
    <p>Hello, guest!</p>
@endif

<!-- Loops -->
@foreach ($users as $user)
    <p>{{ $user->name }}</p>
@endforeach

<!-- Template Inheritance -->
@extends('layout.master')

@section('content')
    <h1>Welcome to my website!</h1>
@endsection
Blade allows you to write clean and expressive templates, making it easier to manage and update your views.
Including Subviews:
In Laravel, you can include subviews within your main view by using the `@include` directive. This allows you to reuse common elements across multiple views. For example, to include a header partial, you can use the following code:
@include('partials.header')Blade Layouts:
Laravel also provides a way to define layouts that encapsulate common elements of your website. You can define a layout by creating a separate Blade layout file and using the `@yield` and `@section` directives. For example, in your `layout.master` file:
<!-- layout.master.blade.php -->
<html>
    <head>
        <title>My Website</title>
    </head>
    <body>
        @yield('content')
    </body>
</html>
You can then extend the layout in your views by using the `@extends` directive and defining the content sections with the `@section` directive:
<!-- welcome.blade.php -->
@extends('layout.master')

@section('content')
    <h1>Welcome to my website!</h1>
@endsection
Laravel views and Blade templates allow for clean and reusable user interface development. By utilizing the various Blade directives, you can create dynamic and structured views that enhance the presentation of your Laravel application.
Laravel Validation
Laravel provides a comprehensive validation system that makes it easy to validate user input and ensure data integrity within your applications. With Laravel’s validation features, you can define rules, validate incoming data, and handle validation errors efficiently.
Validating Data:
To validate user input, Laravel provides the `validate` method, which is usually called within a controller method that handles form submissions. The `validate` method takes two parameters: an array of the incoming data to validate and an array of validation rules. For example:
public function store(Request $request)
{
    $validatedData = $request->validate([
        'name' => 'required|max:255',
        'email' => 'required|email|unique:users',
        'password' => 'required|min:8',
    ]);

    // Process the validated data
}
In this example, the `validate` method ensures that the ‘name’ field is required and has a maximum length of 255 characters, the ’email’ field is required and in a valid email format, and the ‘password’ field is required and has a minimum length of 8 characters.
Custom Validation Rules:
In addition to built-in validations, Laravel allows you to define custom validation rules to handle specific validation requirements. Custom rules can be defined by using the `Rule` facade, closures, or custom validation classes. For example, to validate that a field is a valid URL and starts with ‘https://’, you can define a custom rule like this:
use Illuminate\Validation\Rule;

$request->validate([
    'website' => ['required', Rule::url()->startsWith('https://')],
]);
Displaying Validation Errors:
If validation fails, Laravel automatically redirects the user back to their previous page and provides an error bag containing the validation errors. You can display these errors in your views using the provided `@error` and `@enderror` Blade directives. For example:
<!-- form.blade.php -->
<input type="text" name="name">
@error('name')
    <span class="text-danger">{{ $message }}</span>
@enderror
Here, the `@error` directive displays the error message associated with the ‘name’ input field if there is a validation error.
Form Request Validation:
Laravel also allows you to define form request classes that handle validation independently of your controllers. Form request objects encapsulate the logic for validating incoming requests and can be customized for each specific form. For example:
php artisan make:request StorePostRequest
This command will generate a new form request class named `StorePostRequest`. In the form request class, you can define the validation rules and error messages using the `rules` and `messages` methods. Once defined, you can type-hint the form request class in your controller methods, and Laravel will automatically handle the validation.
Laravel’s validation system is a vital component for ensuring data integrity within your applications. By leveraging the built-in validation rules, custom validation rules, and form request validation, you can easily validate user input, handle errors gracefully, and provide a seamless user experience.
Laravel Database Operations
Laravel provides a powerful and expressive database ORM (Object Relational Mapping) called Eloquent, which simplifies database operations and makes working with databases a breeze. With Eloquent, you can perform common database operations like querying, inserting, updating, and deleting data using a fluent and intuitive syntax.
Fetching Data:
To retrieve data from the database, you can use Eloquent’s query builder methods or model query methods. For example, to fetch all users from the ‘users’ table, you can use the following code:
$users = DB::table('users')->get();

// Or using a model
$users = User::all();
The `get` method retrieves all rows from the table, while the `all` method fetches all records from the corresponding Eloquent model.
Filtering Data:
Eloquent makes it easy to filter data based on specific criteria. You can use methods such as `where`, `orWhere`, `whereIn`, `whereBetween`, and more to construct complex queries. For example, to fetch all active users who joined in the last month, you can use the following code:
$users = User::where('active', true)
            ->whereDate('created_at', '>', now()->subMonth())
            ->get();
Inserting Data:
To insert new records into the database, you can create a new instance of your model and assign values to its properties. Then, call the `save` method to persist the data to the database. For example:
$user = new User;
$user->name = 'John Doe';
$user->email = 'john@example.com';
$user->save();
Updating Data:
To update existing records, you can retrieve the record, modify the desired attributes, and call the `save` method. Alternatively, you can use the `update` method to update multiple records with a single query. For example:
$user = User::find(1);
$user->name = 'Jane Doe';
$user->save();

// Or update multiple records
User::where('active', true)->update(['active' => false]);
Deleting Data:
To delete records from the database, you can use the `delete` method. For example, to delete a user with a specific ID:
$user = User::find(1);
$user->delete();
Additional Query Methods:
Eloquent provides a wide range of methods to perform common SQL operations, such as counting records, ordering results, limiting the number of results, eager loading relationships, and more. Refer to the Laravel documentation for a complete list of query builder methods and their usage.
Laravel’s Eloquent ORM simplifies database operations and provides a clean and expressive syntax for working with databases. With Eloquent, you can perform CRUD operations effortlessly, construct complex queries, and leverage the power of relationships for efficient data management in your Laravel applications.
Laravel Authentication and Authorization
Laravel provides a comprehensive authentication and authorization system out of the box, allowing you to easily implement user authentication and control access to different parts of your application. Laravel’s authentication system includes features like user registration, login, password reset, and session management.
Authentication Setup:
To set up authentication in Laravel, you can use the Artisan command-line tool to generate the necessary files and scaffolding. Run the following command in your CLI:
php artisan make:auth
This command will generate the views, routes, and controllers needed for authentication. It will also create the necessary migration files for the `users` table and add the authentication-related routes to your `routes/web.php` file.
User Authentication:
Laravel makes it easy to handle user authentication. By default, Laravel uses the session driver to store user sessions. You can use Laravel’s built-in `Auth` facade to authenticate users, log them in, log them out, and check if a user is authenticated.
Authorization:
Laravel provides an easy way to control access to different parts of your application using authorization gates and policies. Gates allow you to define authorization logic based on a callback, while policies provide a more structured approach to authorization based on classes and methods.
To define a gate, you can use the `Gate` facade and the `define` method. For example, to define a gate that checks if a user is an administrator, you can do the following:
Gate::define('admin', function ($user) {
    return $user->isAdmin();
});
You can then use the `@can` or `@cannot` Blade directives in your views to conditionally display or hide certain content based on user authorization.
Policies, on the other hand, allow you to define authorization logic in dedicated policy classes. Each policy class typically corresponds to a model, and its methods define the authorization rules for different actions on that model.
Protecting Routes:
Laravel makes it easy to protect routes and ensure that only authenticated users have access. You can use the `auth` middleware to protect routes and APIs. For example, to protect a route, you can do the following:
Route::get('/dashboard', function () {
    // Only authenticated users can access this route
})->middleware('auth');
You can also use the `@auth` and `@guest` Blade directives to conditionally show or hide content based on whether the user is authenticated.
Laravel’s authentication and authorization system provides a solid foundation for handling user authentication, managing sessions, and controlling access to different parts of your application. It simplifies the implementation of common authentication and authorization features, saving you time and effort in building secure and user-friendly web applications.
Laravel Middleware
Laravel middleware is a powerful feature that sits between a request and a response, allowing you to filter and modify incoming requests and outgoing responses in your application. Middleware provides an excellent way to add additional layers of functionality to your application’s HTTP pipeline.
Creating Middleware:
To create a new middleware class, you can use the Artisan command-line tool. Run the following command in your CLI:
php artisan make:middleware MyMiddleware
This command will generate a new middleware class named `MyMiddleware` inside the `app/Http/Middleware` directory. In this class, you can define the logic that should be applied to the request and define any modifications you want to make to the response.
Registering Middleware:
To register your middleware, you can add it to the `$middleware` property in the `app/Http/Kernel.php` file. The middlewares in the `$middleware` array will be processed on every request. You can also assign middlewares to specific routes or groups of routes by adding them to the `$routeMiddleware` property.
Middleware Execution Flow:
When a request is made, Laravel executes middlewares in the order they are registered in the `Kernel` file. Middlewares can perform various tasks like checking authentication, validating input, handling CORS, logging, and more. After all the middlewares have been processed, the request is passed to the route handler.
Middleware Parameters:
Laravel allows you to pass additional parameters to your middlewares. These parameters can be defined when you add the middleware to the `$routeMiddleware` array in the `Kernel` file. For example:
protected $routeMiddleware = [
    'auth' => \App\Http\Middleware\Authenticate::class,
    'admin' => \App\Http\Middleware\Admin::class,
    'can' => \Illuminate\Auth\Middleware\Authorize::class . ':permission',
];
In this example, the `can` middleware accepts a parameter named `permission`. When applying this middleware to routes, you can pass the desired permission as an argument:
Route::get('/admin', function () {
    // Only users with the 'admin' permission can access this route
})->middleware('can:admin');
Terminable Middleware:
Laravel provides a concept called “terminable middleware,” which allows you to perform additional actions after the response has been sent. Terminable middleware should implement the `TerminableMiddleware` interface and define the `terminate` method. This method will be called after the response is sent to the browser. You can use this feature, for example, for logging activities.
Laravel middleware allows you to modify and filter requests and responses in a flexible and reusable manner. Whether you need to perform authentication, handle CORS headers, or add custom functionality, middleware can be a powerful tool in your Laravel application.
Summary
In summary, Laravel is a popular and powerful PHP framework that offers a wide range of features and tools for building robust web applications. From its expressive syntax and elegant routing system to its comprehensive authentication and authorization capabilities, Laravel provides developers with a solid foundation to create scalable and efficient applications.
Throughout this article, we covered various aspects of working with Laravel. We explored the installation and setup process, understanding the key features such as routing, controllers, models, and migrations. We also discussed the importance of views and Blade templates for creating dynamic user interfaces, and we delved into Laravel’s validation system that helps maintain data integrity.
Additionally, we discussed Laravel’s database operations using the Eloquent ORM, which simplifies working with databases. We also explored the authentication and authorization features offered by Laravel, allowing developers to secure their applications and control access to different parts of the system.
Furthermore, we touched on the concept of middleware, which provides a flexible mechanism to handle requests and responses in the HTTP pipeline, adding additional functionality to your application.
Laravel’s vast ecosystem, extensive documentation, and active community make it an excellent choice for developers looking for a modern PHP framework. Whether you are a beginner or an experienced developer, Laravel’s simplicity and comprehensive features make it a pleasure to work with.
By utilizing Laravel’s tools and following its best practices, developers can build efficient, maintainable, and scalable web applications that meet the demands of today’s digital landscape. So, start exploring Laravel and unlock its full potential to create impressive web applications!