Introduction
Welcome to the world of AirPods Pro, where you can experience an immersive audio experience like never before. With their innovative noise cancelling feature, AirPods Pro provide a perfect blend of high-quality sound and a serene listening environment. Whether you’re working, traveling, or simply trying to drown out the distractions of everyday life, these wireless earbuds have got you covered.
Noise cancelling technology is a game-changer when it comes to enjoying your favorite music or podcasts. It works by actively reducing external sounds, allowing you to focus on what matters most – the audio you want to hear. By creating an equal and opposite sound wave, the AirPods Pro effectively cancel out ambient noise, providing a peaceful listening experience.
In this guide, we will explore how to get the most out of the noise cancelling feature in your AirPods Pro. We’ll walk you through the steps to turn on noise cancelling, adjust the level of noise cancellation, and even customize the settings to suit your preferences. Additionally, we’ll cover tips on extending your AirPods Pro battery life and using noise cancelling during phone calls.
So, grab your AirPods Pro and let’s dive into the world of immersive and uninterrupted audio.
Understanding Noise Cancelling
Noise cancelling is a revolutionary technology that eliminates unwanted background noise, allowing you to enjoy your audio content without any distractions. The AirPods Pro utilize advanced algorithms and microphones to achieve this remarkable feat.
When you activate noise cancelling on your AirPods Pro, the built-in microphones pick up the surrounding sound waves. These waves are then analyzed by the AirPods Pro’s H1 chip, which generates an inverted sound wave to counteract the noise. By playing the inverted sound wave simultaneously with the original sound, the external noise is effectively cancelled out, resulting in a more immersive listening experience.
It’s important to note that noise cancelling works best for continuous, low-frequency sounds such as the hum of an airplane engine, traffic noise, or the murmur of a crowded coffee shop. Sudden, sharp sounds like a door slamming or a dog barking may not be completely eliminated, but they will be significantly reduced.
Additionallhy, AirPods Pro also come with a Transparency Mode. This mode allows you to have conversations or to be aware of important sounds in your environment without having to take off your AirPods Pro. It uses the same microphones to amplify external sounds, giving you the ability to listen and engage with your surroundings while still enjoying your audio content.
Now that you have a basic understanding of how noise cancelling works, it’s time to discover how to activate and customize this incredible feature on your AirPods Pro. By following the simple steps ahead, you’ll be able to create your own peaceful audio bubble in no time.
Turning on Noise Cancelling
Activating noise cancelling on your AirPods Pro is a breeze. Follow these steps to immerse yourself in your audio and block out the world around you:
- Ensure that your AirPods Pro are connected to your iPhone or other compatible Apple device.
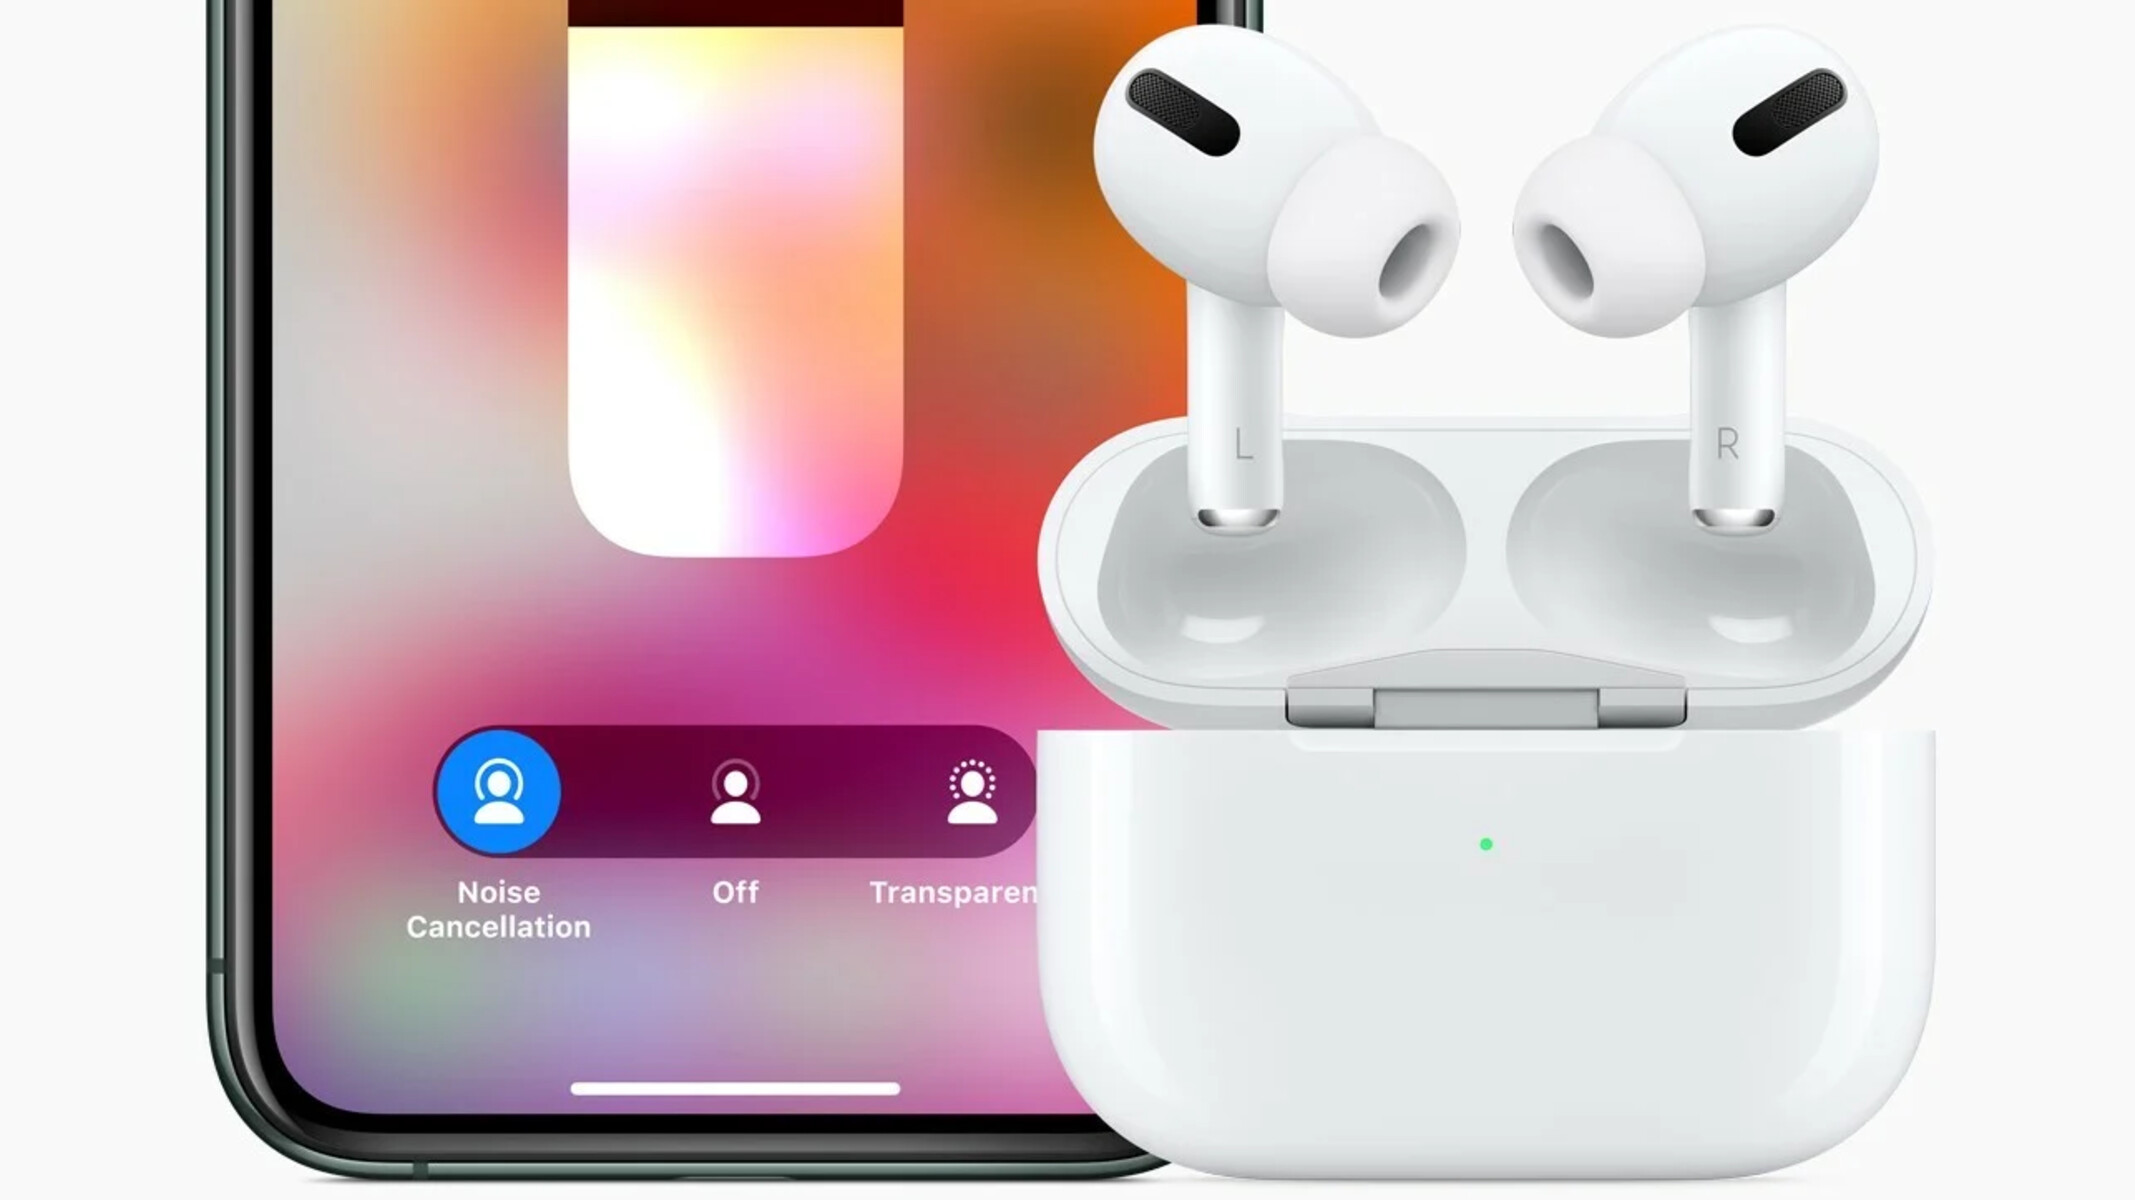
- Open the Control Center on your device by swiping down from the top right corner of the screen (or up from the bottom on older iPhones or iPads).
- Press and hold the volume slider in the Control Center.
- AirPods Pro settings will appear. Here, you can toggle between three different options: Noise Cancellation, Off, and Transparency Mode.
- Select “Noise Cancellation” to activate the feature.
Alternatively, you can also enable noise cancelling directly from the Bluetooth settings on your device. Simply go to Settings > Bluetooth, find your AirPods Pro in the list of connected devices, and tap on the “i” icon next to it. From there, you’ll have access to the same noise cancellation options mentioned above.
Once noise cancelling is turned on, you’ll be able to enjoy your audio content without the distractions of the outside world. It’s the perfect way to create your own personal sanctuary, no matter where you are.
Now that you know how to activate noise cancelling, let’s explore how to adjust the level of noise cancellation to perfectly suit your environment and preferences.
Adjusting Noise Cancellation Levels
One of the great features of the AirPods Pro is the ability to customize the level of noise cancellation according to your needs. Whether you want to block out all external noise or let some ambient sounds in, here’s how you can adjust the noise cancellation levels:
- Make sure your AirPods Pro are connected to your device.
- Open Control Center by swiping down from the top right corner of the screen (or up from the bottom on older iPhones or iPads).
- Press and hold the volume slider in the Control Center.
- When the AirPods Pro settings appear, tap on the “Noise Cancellation” option.
- You’ll see a slider that allows you to adjust the level of noise cancellation.
You can move the slider to the left to decrease the level of noise cancellation and let more outside sound in, or move it to the right to increase the level and block out more noise. Find the sweet spot that suits your preferences, whether you prefer complete immersion or need to be aware of your surroundings.
In addition to adjusting the noise cancellation levels, you can also enable Transparency Mode, which lets you hear and interact with your environment while still enjoying your audio. To activate Transparency Mode, simply follow the same steps above, but instead of selecting “Noise Cancellation,” choose “Transparency Mode” from the AirPods Pro settings.
By being able to fine-tune the noise cancellation levels, the AirPods Pro offer a truly personalized audio experience. Now that you know how to adjust the noise cancellation, let’s take a look at how you can customize other noise cancellation settings.
Using Transparency Mode
Transparency Mode is a fantastic feature of the AirPods Pro that allows you to stay connected to your environment while still enjoying your audio. This mode is especially useful when you need to hear important sounds, have conversations, or simply want to feel more aware of your surroundings. Here’s how you can use Transparency Mode on your AirPods Pro:
- Ensure that your AirPods Pro are connected to your iPhone or other compatible Apple device.
- Open the Control Center on your device by swiping down from the top right corner of the screen (or up from the bottom on older iPhones or iPads).
- Press and hold the volume slider in the Control Center.
- In the AirPods Pro settings, select “Transparency Mode.”
Once Transparency Mode is activated, your AirPods Pro will use the built-in microphones to amplify the sounds of your surroundings, allowing you to listen to conversations, announcements, or any other important audio without needing to remove your earbuds.
If you want to temporarily pause the audio playback and engage in a conversation or listen attentively, simply press your finger on the sensor area of either AirPod or on the stem. This will activate Quick Listen mode, which reduces the volume and amplifies external sounds, making it easier to hear what’s happening around you.
When you’re ready to resume your audio experience, just release your finger from the sensor, and the playback will resume at the previous volume level.
Transparency Mode offers a seamless blend of audio and awareness, allowing you to customize your listening experience to suit your needs. Now that you know how to use this feature, let’s move on to customizing other noise cancellation settings on your AirPods Pro.
Customizing Noise Cancellation Settings
Not only can you adjust the level of noise cancellation on your AirPods Pro, but you can also customize various settings to enhance your audio experience. Here are some of the options you can explore:
- AirPods Pro Settings: Open the Settings app on your iPhone and go to “Bluetooth.” Find your AirPods Pro in the list of connected devices and tap on the “i” icon. Here, you can adjust settings like noise cancellation, press and hold action, and more.
- Press and Hold Action: You can customize what happens when you press and hold the sensor area on your AirPods Pro. By default, it activates Siri. However, you can change it to switch between noise cancellation and Transparency Mode or to play/pause audio.
- Ear Tip Fit Test: To ensure that you’re getting the best noise cancellation experience, you can use the Ear Tip Fit Test. This test helps you determine if you have the right size ear tips for a proper and secure fit. Open the Settings app, go to “Bluetooth,” tap on the “i” icon next to your AirPods Pro, and select “Ear Tip Fit Test.”
- Auto Switching: If you frequently switch between multiple Apple devices, you can enable Auto Switching. This feature allows your AirPods Pro to seamlessly connect to the device you’re currently using.
By taking the time to customize these settings, you can fine-tune your AirPods Pro to match your preferences and elevate your audio experience even further.
Now that you know how to customize the noise cancellation settings on your AirPods Pro, let’s explore some tips on maximizing their battery life.
Maximizing Battery Life
The AirPods Pro deliver impressive battery life, allowing you to enjoy hours of uninterrupted audio. To make the most out of your battery, try implementing these smart charging and usage practices:
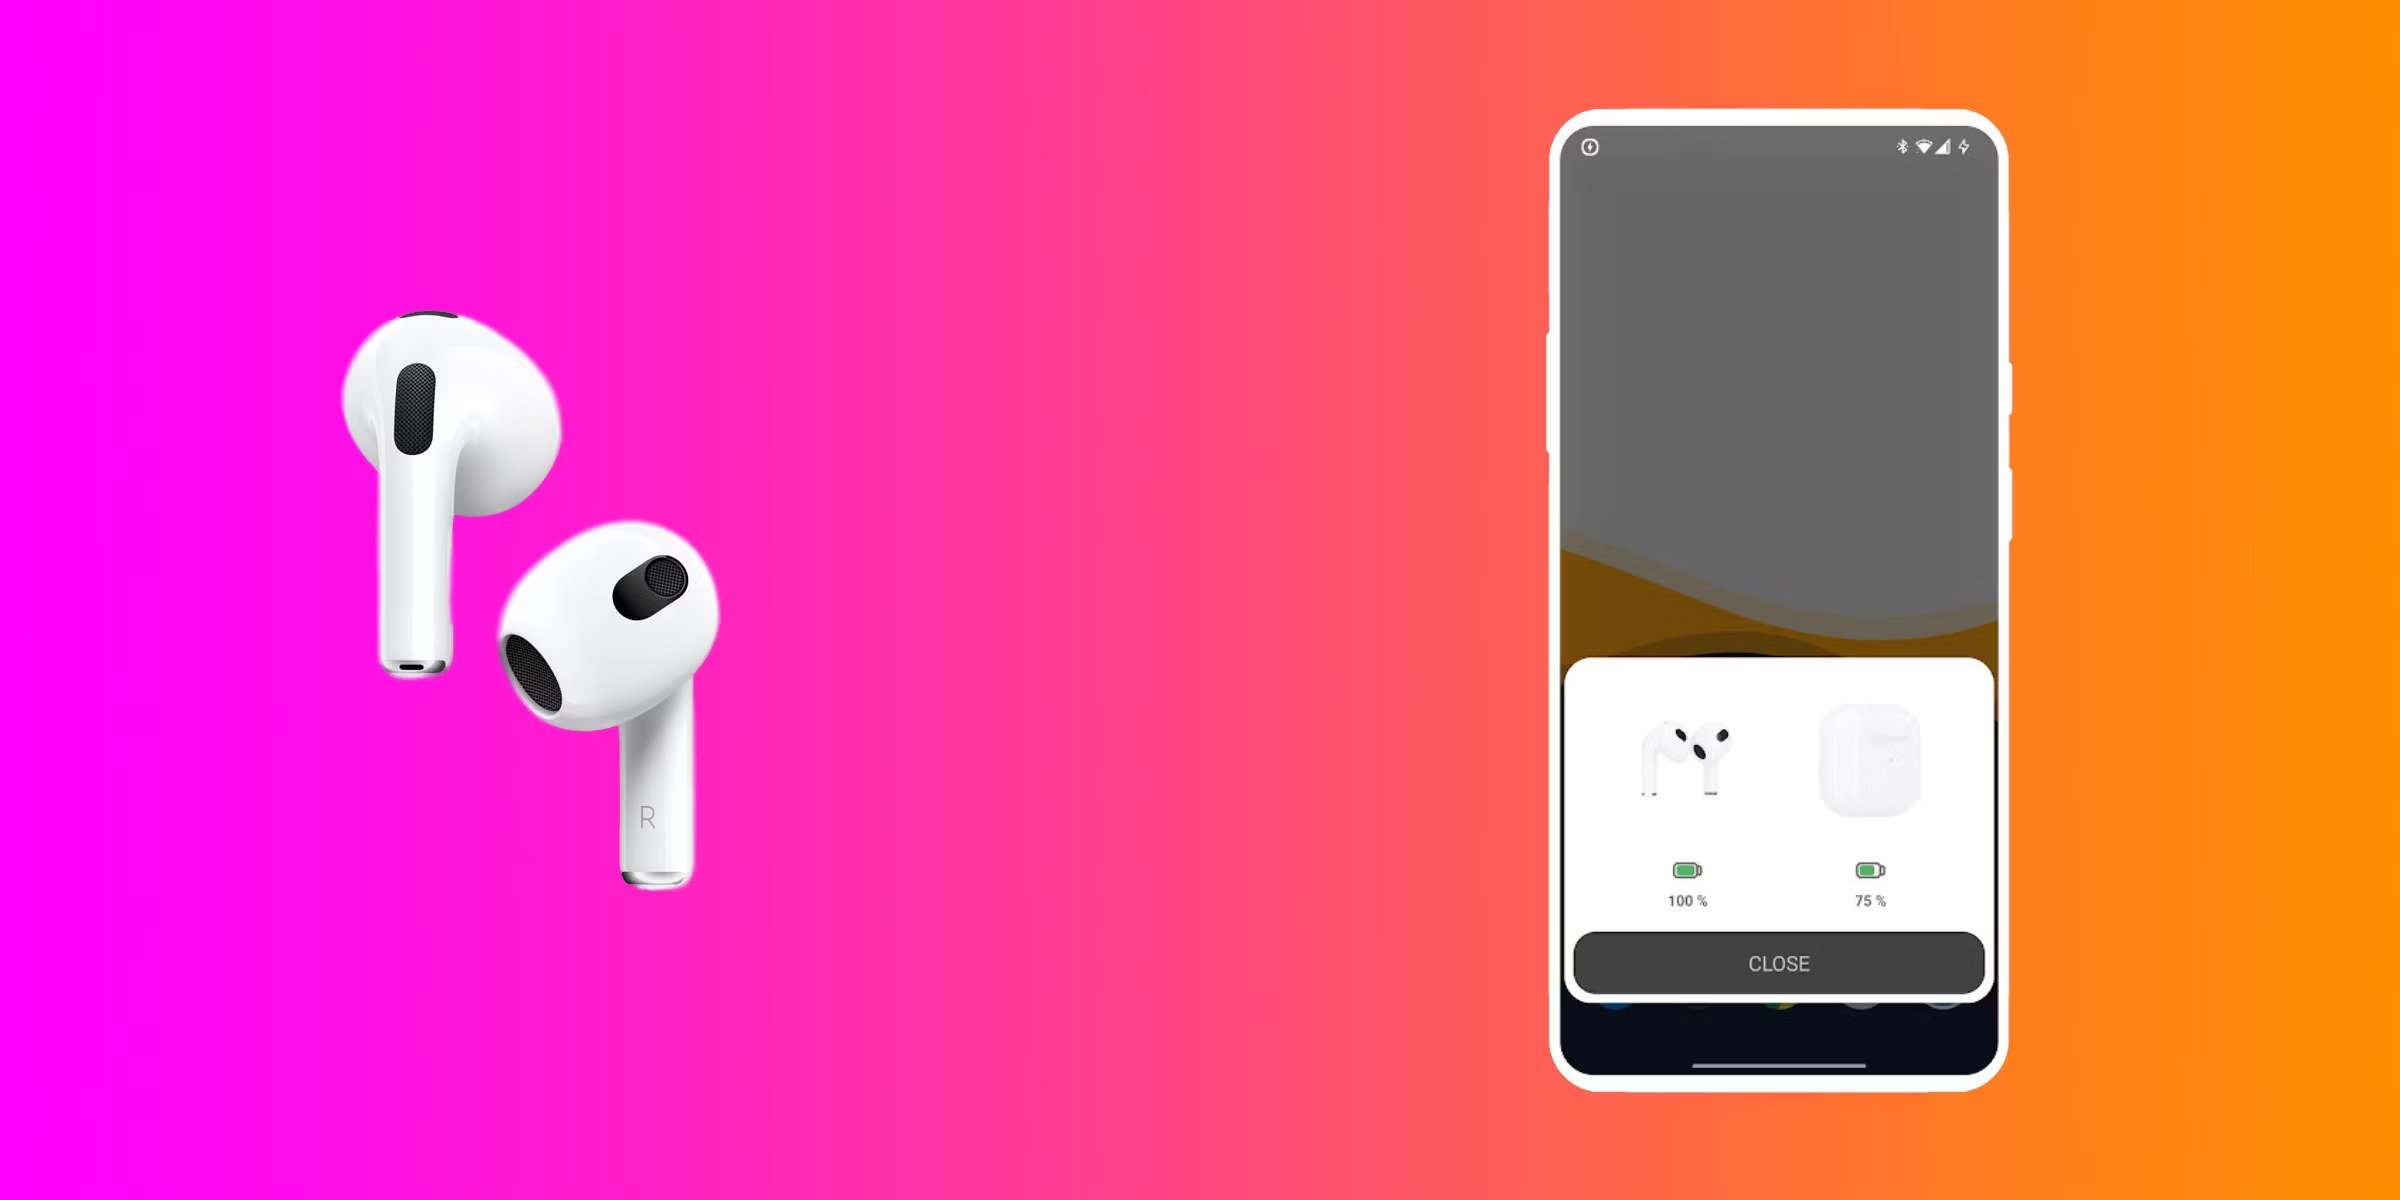
- Place them in the charging case: Whenever you’re not using your AirPods Pro, make sure to store them in the charging case. This not only keeps them secure but also charges them at the same time.
- Charge your case regularly: To ensure that your AirPods Pro are always ready to go, keep the charging case charged. Plug it in overnight or whenever it’s convenient to maintain a full battery.
- Optimize usage: Minimize unnecessary battery drain by using only the necessary features. For example, if you don’t need noise cancellation or Transparency Mode, turn them off to prolong the battery life.
- Use low-power mode: If you’re running low on battery and still want to keep using your AirPods Pro, enable low-power mode. This feature reduces power consumption and extends the listening time.
- Keep firmware up to date: Apple periodically releases firmware updates for the AirPods Pro. These updates often include optimizations and improvements that can help maximize battery life. Make sure your AirPods Pro are always running the latest firmware by keeping them connected to your Apple device.
By following these battery-saving tips, you can enjoy longer listening sessions without worrying about running out of power. Now, let’s explore some additional tips specifically for using noise cancellation during phone calls.
Tips for Using Noise Cancelling during Calls
When making or receiving phone calls using your AirPods Pro with noise cancelling enabled, there are a few tips you can keep in mind to ensure crystal-clear audio quality:
- Use noise cancelling for noisy environments: Noise cancelling can be incredibly useful when you’re in a noisy environment or on a crowded street. It helps to enhance your voice and eliminate background noise for the person on the other end of the call.
- Adjust the noise cancellation level: Depending on the situation, you may need to adjust the level of noise cancellation to strike the right balance between your voice and the ambient noise. Experiment with the noise cancellation slider to find the ideal setting.
- Be mindful of your voice volume: With noise cancellation, you might unconsciously speak louder than usual. Remember to speak at a normal volume to ensure clear communication with the other person on the call.
- Consider using Transparency Mode: In certain situations, you may want to switch to Transparency Mode during calls. This allows you to hear your own voice more naturally, making it easier to have conversations without accidentally raising your voice.
- Minimize distractions from media playback: Noise cancelling is designed to reduce external noise, but it may also affect your ability to hear media playback from your device during calls. Adjust the volume of playback or pause it temporarily to avoid distractions.
- Keep AirPods Pro clean: Regularly clean your AirPods Pro and the charging case to maintain optimal sound quality during calls. Use a soft, lint-free cloth to wipe away dust or debris from the surfaces.
By following these tips, you can make the most of the noise cancelling feature during phone calls, ensuring clear and uninterrupted communication.
With these tips in mind, you are now fully equipped to harness the power of noise cancellation and take advantage of all the amazing features your AirPods Pro have to offer.
Conclusion
With the noise cancelling feature on your AirPods Pro, you can transform your listening experience and create a world of immersive audio. By following the simple steps outlined in this guide, you can easily activate noise cancellation, adjust the levels, and even customize the settings to suit your preferences.
Whether you’re looking to enjoy your favorite music, tune out the distractions in a bustling city, or have crystal-clear phone calls in noisy environments, the AirPods Pro’s noise cancelling feature has you covered.
Remember to keep your AirPods Pro charged and store them in the charging case when not in use to maximize battery life. Additionally, take advantage of the Transparency Mode when you want to be aware of your surroundings without compromising your audio experience.
Lastly, don’t forget to clean your AirPods Pro regularly to maintain optimal performance and sound quality during calls and while enjoying your favorite audio content.
Now, go forth and embrace the world of noise cancellation with your AirPods Pro. Enjoy the immersive audio and revel in the ability to create your personal listening sanctuary wherever you go.