Introduction
Welcome to the world of AirPods Gen 2, where you can experience your favorite music like never before. These truly wireless earbuds not only offer seamless connectivity and exceptional sound quality but also come equipped with an incredible noise cancelling feature. Whether you’re commuting to work, studying in a noisy environment, or simply looking for some peace and quiet, AirPods Gen 2 allow you to escape into a world of immersive audio with the simple touch of a button.
In this step-by-step guide, we will walk you through the process of turning on the noise cancelling feature on your AirPods Gen 2. Whether you’re a tech-savvy individual or new to the world of wireless earbuds, this guide has got you covered. So, put on your AirPods Gen 2, and let’s dive into the wonderful world of noise cancellation!
Before we proceed, it’s important to note that the noise cancelling feature is available exclusively on AirPods Pro and AirPods Max. If you own either of these models, you’re in luck! However, if you have the standard AirPods Gen 2, unfortunately, this feature is not available. So, make sure you check the compatibility of your AirPods before following this guide.
Step-by-Step Guide to Turning on Noise Cancelling on AirPods Gen 2
1. Check AirPods Gen 2 Compatibility:
Before diving into the noise cancelling feature, make sure your AirPods Gen 2 are compatible. AirPods Gen 2 do not have built-in noise cancelling technology, so you won’t find this feature on these models. If noise cancelling is a must-have for you, consider upgrading to AirPods Pro or AirPods Max, which offer this feature.
2. Put Your AirPods Gen 2 in Your Ears:
Make sure your AirPods Gen 2 are properly inserted into your ears. The noise cancellation feature works by analyzing the sounds around you and creating inverse sound waves to cancel out the incoming noise. To achieve optimal noise cancellation, ensure a secure and snug fit.
3. Open the Control Center on Your iPhone or iPad:
Swipe down from the top-right corner of your iPhone or iPad screen to access the Control Center. This is where you’ll find the necessary settings to enable noise cancellation on your AirPods Gen 2.
4. Locate the Airplay Icon:
In the Control Center, look for the Airplay icon. It resembles a triangle with concentric circles expanding from it. Tap the Airplay icon to access the audio settings for your AirPods.
5. Tap and Hold the Volume Slider:
With the Airplay menu open, locate the volume slider. Tap and hold on the volume slider to reveal additional options. A menu will appear below the slider, displaying volume controls, audio output options, and more.
6. Enable Noise Cancelling Mode:
In the menu that appears, you should see an option for noise cancellation. Toggle the noise cancellation setting to enable this feature on your AirPods Gen 2. Once enabled, the AirPods will actively work to reduce the background noise around you.
7. Customize Noise Control Options:
If you want more control over the noise cancelling feature, you can customize the settings. On the same menu that appeared when you tapped and held the volume slider, look for the “Noise Control” or “Noise Cancelling” options. Tap on it to access the advanced settings, such as transparency mode or adaptive EQ.
8. Enjoy your Noise Cancelling AirPods Gen 2:
With noise cancellation enabled, put on your AirPods Gen 2 and enjoy the immersive audio experience. Whether you’re listening to music, watching videos, or taking work calls, the noise cancelling technology will help you focus on what matters most without any distractions.
Check AirPods Gen 2 Compatibility
Before you proceed with enabling noise cancelling on your AirPods Gen 2, it’s essential to ensure that your device is compatible with this feature. AirPods Gen 2 do not come with built-in noise cancelling technology, so you won’t find the noise cancellation option on these models. If noise cancellation is a must-have for you, consider upgrading to AirPods Pro or AirPods Max, as these models offer this advanced feature.
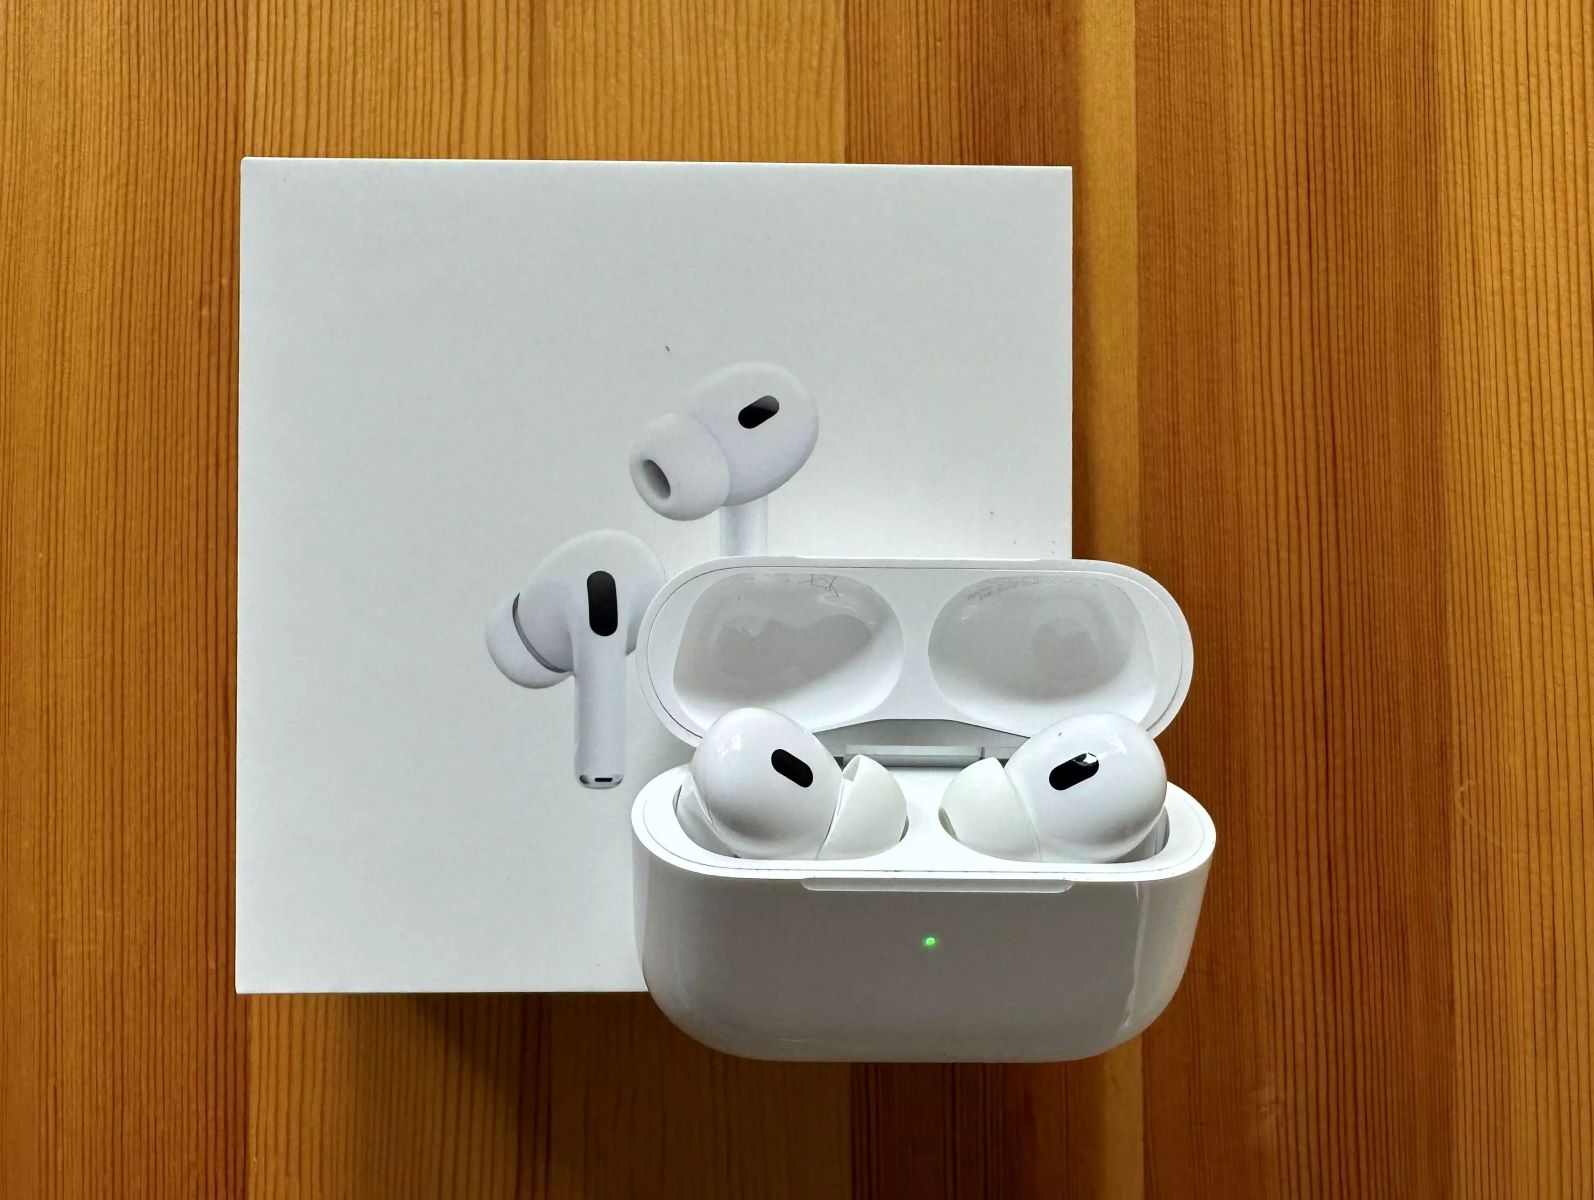
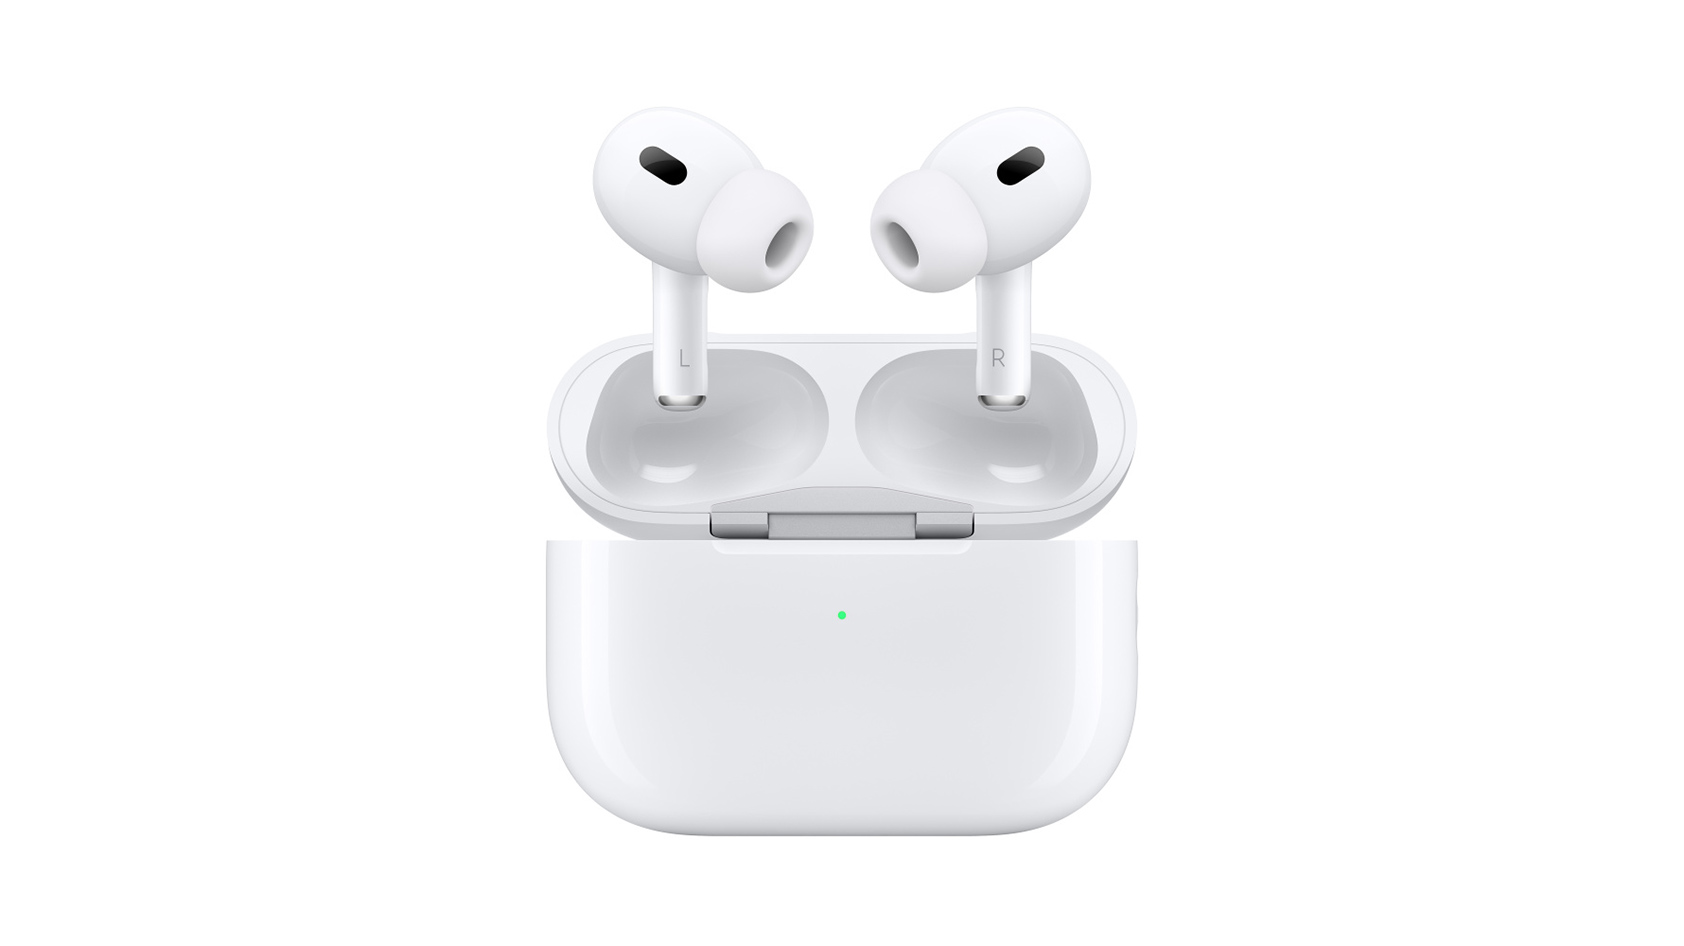
AirPods Pro, released in 2019, were specifically designed to provide active noise cancellation. These earbuds not only deliver exceptional sound quality but also use advanced technology to block out external noise, creating an immersive audio experience. The tight seal created by the silicone ear tips helps minimize the ambient noise, allowing you to focus on your music or calls.
AirPods Max, introduced in 2020, is Apple’s first over-ear headphone model. These premium headphones boast high-fidelity audio and industry-leading active noise cancellation capabilities. With a combination of adaptive EQ, transparency mode, and spatial audio, AirPods Max deliver an unparalleled audio experience, whether you’re listening to music, watching movies, or making important calls.
So, if you’re looking for noise cancelling capabilities, be sure to check if you have AirPods Pro or AirPods Max rather than AirPods Gen 2. AirPods Gen 2 still offer exceptional audio quality and a seamless wireless experience, but the noise cancelling feature is not available on these models.
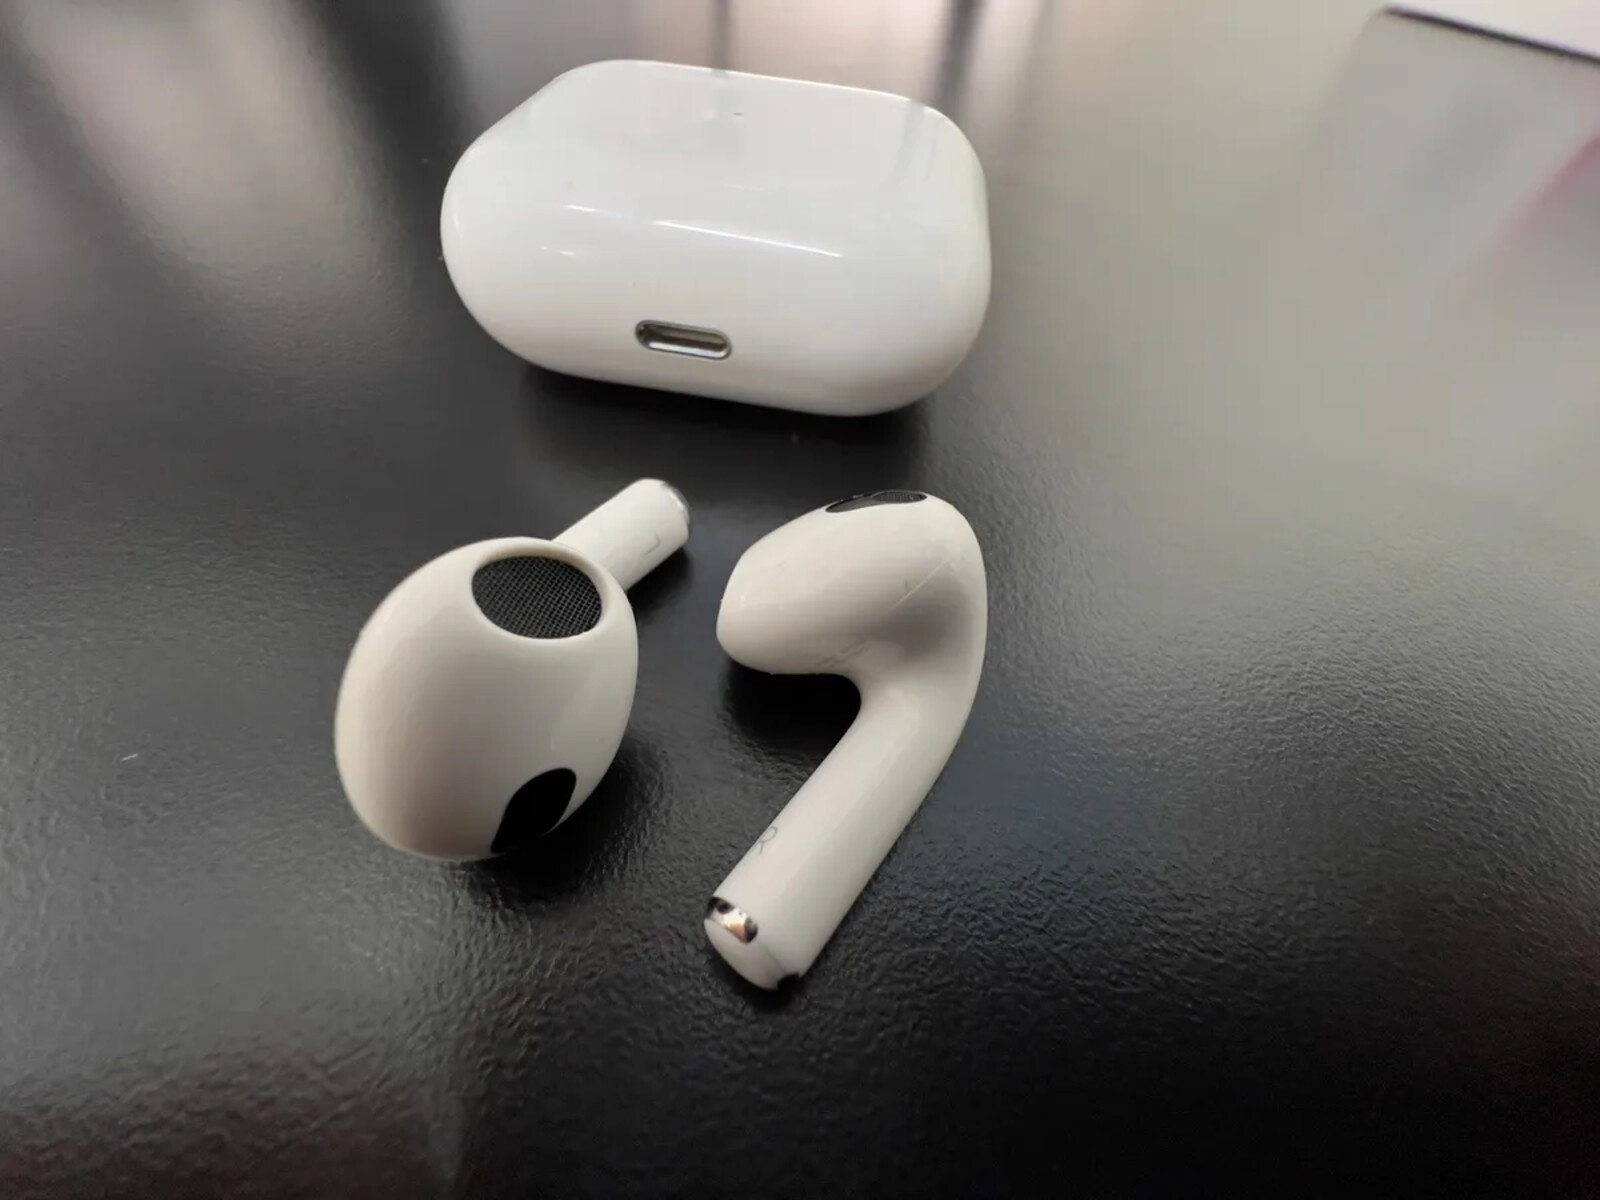
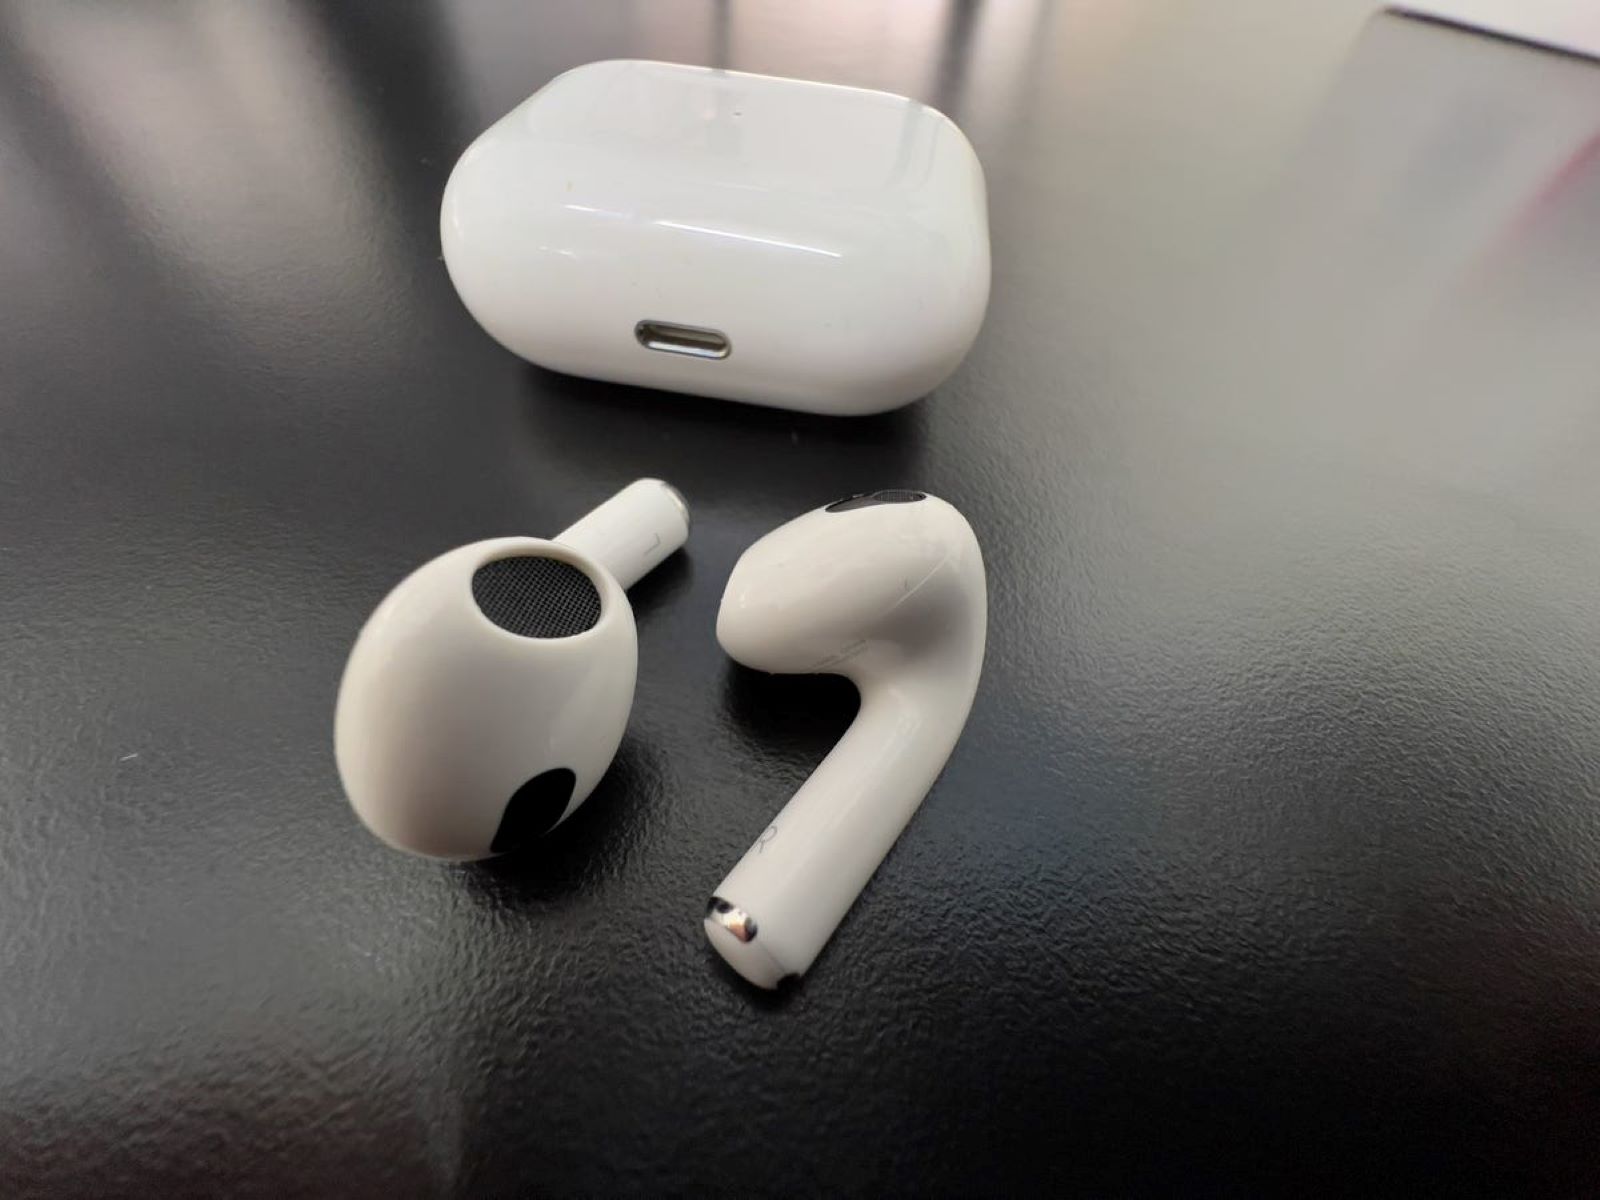
If you’re unsure about which AirPods model you have, there are a few ways to check. Firstly, you can look at the charging case. AirPods Pro and AirPods Max have a slightly different design compared to AirPods Gen 2, and their cases may also have distinct markings or labels indicating their model. Additionally, you can check in your device’s settings. On your iPhone, for example, go to Settings > Bluetooth and look for your AirPods. If the model name displayed is AirPods Pro or AirPods Max, then you have the compatible model for noise cancelling.
By confirming the compatibility of your AirPods, you can ensure that you follow the appropriate steps for enabling noise cancelling. If you find that you have AirPods Gen 2, don’t worry! They still offer a range of fantastic features and can provide an exceptional audio experience for your everyday use.
Put Your AirPods Gen 2 in Your Ears
Now that you’ve confirmed that you have AirPods Gen 2, it’s time to ensure that they are properly inserted into your ears for optimal comfort and audio performance. The noise cancellation feature works by analyzing the sounds around you and creating inverse sound waves to cancel out the incoming noise. To experience the best noise cancellation, it’s important to wear your AirPods Gen 2 correctly.
Here are a few steps to help you put your AirPods Gen 2 in your ears:
-
Hold your AirPods Gen 2 with the stem pointing downwards.
-
Gently place the earbud into your ear canal. The tip of the AirPods should fit comfortably in your ear.
-
Twist the AirPods slightly if needed to ensure a secure fit.
-
Repeat the process for the second AirPod, making sure it is placed securely in your other ear.
It’s important to note that a secure and snug fit is crucial for effective noise cancellation. The silicone ear tips on AirPods Pro create a seal that helps isolate external noise. However, with AirPods Gen 2, which doesn’t have interchangeable ear tips, achieving a proper fit may require some adjustment.
If you find that your AirPods Gen 2 are not fitting comfortably or securely, you can try the following:
-
Adjust the position of the AirPods in your ears. Gently twist or tilt them for a better fit.
-
Clean the ear tips and the inside of your ears. Sometimes, dust or wax buildup can affect the fit and sound quality.
-
Experiment with different sizes of ear tips. Though AirPods Gen 2 do not come with interchangeable tips, there are third-party accessories available that can provide a more customized fit.
Remember, a proper fit not only ensures better noise cancellation but also enhances the overall audio quality and comfort of your AirPods Gen 2. Take your time to adjust and find a position that feels secure and comfortable for extended wear.
With your AirPods Gen 2 securely in place, you’re now ready to move on to the next step in enabling noise cancellation on your device. We’ll guide you through the process of accessing the necessary settings and toggling on the noise cancellation feature, allowing you to enjoy a more immersive audio experience.
Open the Control Center on Your iPhone or iPad
To enable noise cancellation on your AirPods Gen 2, you’ll need to access the Control Center on your iPhone or iPad. The Control Center is a convenient hub that allows you to quickly access and control various settings and features of your device. Here’s how you can open the Control Center:
-
Unlock your iPhone or iPad by entering your passcode or using Touch ID or Face ID.
-
On the Home screen or any other screen, swipe down from the top-right corner of the display. This will open the Control Center.
The Control Center provides easy access to frequently used controls and toggles, such as volume, brightness, Wi-Fi, and Bluetooth. With a simple swipe, you can make adjustments and customize settings on the go.
If you’re using an iPhone X or later, or an iPad with iPadOS 12 or later, the process of accessing the Control Center may vary slightly. Instead of swiping down from the top-right corner, you’ll need to swipe down from the top-right edge of the screen. This gesture will reveal the Control Center, allowing you to proceed with enabling noise cancellation on your AirPods Gen 2.
Once you’ve successfully opened the Control Center, you’re ready to continue with the next step. In the Control Center, you’ll find additional options related to your AirPods, including the ability to adjust the volume, switch audio output, and, most importantly, enable noise cancellation.
Now that you’ve accessed the Control Center, you’re one step closer to enjoying the immersive audio experience that noise cancellation provides. In the next section, we’ll guide you on how to locate the Airplay icon in the Control Center, which will allow you to access the necessary settings for enabling noise cancellation on your AirPods Gen 2.
Locate the Airplay Icon
Once you have opened the Control Center on your iPhone or iPad, the next step is to locate the Airplay icon. The Airplay icon is the gateway to accessing the audio settings for your AirPods Gen 2 and enabling the noise cancellation feature.
Here’s how you can find the Airplay icon in the Control Center:
-
In the Control Center, look for the rectangular box with concentric circles expanding from it. This is the Airplay icon.
-
The Airplay icon is typically located in the upper-right or upper-left corner of the Control Center, depending on your device and settings.
-
If you’re having trouble finding the Airplay icon, you can try swiping left or right within the Control Center. This may reveal additional pages or options, including the Airplay icon.
-
Once you have located the Airplay icon, tap on it to access the audio settings.
The Airplay icon represents different audio sources and devices that you can connect to, such as Bluetooth speakers, headphones, or, in our case, AirPods Gen 2. Tapping on the Airplay icon will open a menu that displays available audio output options and settings.
Take a moment to familiarize yourself with the Airplay menu. You’ll notice various options related to audio, including volume controls, playback settings, and the ability to switch between different audio devices. This menu provides you with greater control over your AirPods Gen 2 and allows you to customize the audio experience to your liking.
Now that you have successfully located the Airplay icon in the Control Center, we can proceed to the next step in enabling noise cancellation on your AirPods Gen 2. In the following section, we’ll guide you through the process of specifically tapping and holding the volume slider to reveal additional options, including the noise cancellation setting.
Tap and Hold the Volume Slider
Once you have accessed the audio settings by tapping the Airplay icon in the Control Center, the next step is to tap and hold the volume slider. Tapping and holding the volume slider will reveal additional options, including the ability to enable noise cancellation on your AirPods Gen 2.
Here’s how you can tap and hold the volume slider to access the noise cancellation setting:
-
In the Control Center, locate the volume slider. It is represented by a horizontal bar with a speaker icon on the left side.
-
Tap and hold on the volume slider with your finger or stylus. This action will prompt a menu to appear below the slider.
-
As you continue to hold on the volume slider, you will see a menu appear with volume controls, audio output options, and other settings.
The menu that appears when you tap and hold the volume slider is where you’ll find different audio options and settings to enhance your AirPods Gen 2 experience. This includes the highly sought-after noise cancellation feature.
Take a moment to explore the menu and get familiar with the options available. Alongside the noise cancellation option, there may be other features like the Transparency mode, which allows you to hear the outside world while still wearing your AirPods Gen 2.
Enabling noise cancellation will enhance your listening experience by reducing ambient noise, allowing you to immerse yourself fully in your music, podcasts, or other audio content.
Once you have accessed the menu by tapping and holding the volume slider, you’re perfectly positioned to enable noise cancellation and customize your AirPods Gen 2 settings according to your preferences. In the next section, we’ll guide you through the process of enabling noise cancellation specifically and offer some additional control options for you to explore.
Enable Noise Cancelling Mode
After accessing the menu by tapping and holding the volume slider in the Control Center, it’s time to enable the noise cancellation mode on your AirPods Gen 2. Enabling this feature will allow your AirPods to actively reduce background noise and provide you with a more immersive and focused audio experience.
Here’s how you can enable noise cancellation on your AirPods Gen 2:
-
With the menu open after tapping and holding the volume slider, look for the noise cancellation option. It is typically represented by an icon or text indicating noise cancellation.
-
Tap on the noise cancellation option to toggle it on. The toggle will change its state, indicating that noise cancellation is now activated.
Once you have enabled noise cancellation, your AirPods Gen 2 will actively work to reduce the external noise around you, allowing you to fully immerse yourself in your audio content. Whether you’re listening to music, watching videos, or taking important calls, the noise cancellation mode will provide a more focused and uninterrupted experience.
It’s important to note that noise cancellation on AirPods Gen 2 is not as advanced as on AirPods Pro or AirPods Max. However, it still offers significant noise reduction, especially for ambient sounds and background noise. This feature can greatly enhance your audio experience and help create a quiet environment, even in noisy surroundings.
To get the most out of your noise cancellation, make sure that you have a tight and secure fit with your AirPods Gen 2. A proper fit ensures the best possible noise isolation and performance, allowing you to fully enjoy the benefits of the noise cancellation mode.
Now that you have successfully enabled noise cancellation on your AirPods Gen 2, you can proceed to the next section to learn more about customizing additional noise control options and getting the most out of your noise cancelling AirPods Gen 2.
Customize Noise Control Options
While enabling noise cancellation on your AirPods Gen 2 is a great start, you also have the option to customize additional noise control options to further enhance your audio experience. These settings allow you to tailor the noise cancellation feature to your specific preferences and needs.
Here’s how you can customize the noise control options on your AirPods Gen 2:
-
With the noise cancellation enabled, go back to the menu that appeared when you tapped and held the volume slider in the Control Center.
-
In this menu, look for options like “Noise Control” or “Noise Cancelling” settings.
-
Tap on the relevant option to access advanced noise control settings.
Within the noise control settings, you’ll find various customization options depending on your specific AirPods Gen 2 model and its supported features. Some possible options include:
-
Transparency Mode: This mode allows external sounds to pass through your AirPods, keeping you aware of your surroundings while still enjoying your audio. It can be useful in situations where you need to hear announcements, have conversations, or stay alert.
-
Adaptive EQ: This feature automatically adjusts the equalization settings based on the shape and fit of your ears, enhancing the audio quality for a personalized listening experience.
-
Custom Controls: Depending on your device and software version, you may have the option to assign custom controls to the AirPods, allowing you to quickly access specific features or Siri.
Take some time to explore these settings and experiment with different combinations to find what works best for you. Everyone’s preferences for noise cancellation and ambient awareness differ, and the ability to customize these options allows you to personalize your audio experience to your liking.
Keep in mind that these customization options may vary based on the AirPods model, software version, and connected device. Be sure to check for the available settings specific to your AirPods Gen 2 to fully maximize the potential of your noise control customization.
Now that you have explored the noise control customization options, you are ready to enjoy your fully personalized and optimized noise cancelling AirPods Gen 2 experience. In the final section, we’ll summarize the key steps and highlight the benefits of enabling noise cancellation on your AirPods Gen 2.
Enjoy your Noise Cancelling AirPods Gen 2
Congratulations! You have successfully enabled noise cancellation and customized the settings for your AirPods Gen 2. Now, it’s time to sit back, relax, and enjoy the immersive audio experience that your noise cancelling AirPods provide.
With noise cancellation activated, you can escape into your favorite music, podcasts, or audiobooks without the distractions of the outside world. Whether you’re working in a noisy environment, commuting on a busy train, or simply wanting to create a tranquil atmosphere, your AirPods Gen 2 will help you achieve a focused and immersive audio experience.
The noise cancellation feature works by using advanced algorithms to analyze the sounds around you and generate inverse sound waves that cancel out the unwanted noise. This technology allows you to enjoy your audio content with greater clarity, detail, and richness.
One of the key advantages of the noise cancellation feature is its ability to help reduce fatigue caused by ambient noise. By selectively blocking out external sounds, your AirPods Gen 2 allow you to concentrate on your music or calls, relieving stress and improving overall focus and productivity.
Don’t forget to adjust the volume to a comfortable level that suits your preferences. The noise cancellation feature can also help prevent the need to increase the volume excessively, as it already helps to eliminate much of the background noise.
Furthermore, with the customizable noise control options, such as Transparency mode or Adaptive EQ, you can further fine-tune your AirPods Gen 2 listening experience to match your specific preferences and surroundings. Whether you need to hear your surroundings or want to enhance the quality of your audio, these options give you greater control over your audio settings.
Enjoy the freedom of wireless listening with the seamless connectivity of AirPods Gen 2, combined with the remarkable noise cancellation feature. Let the immersive audio quality and customizable noise control settings transform the way you enjoy your favorite content.
Now that you have mastered the process of enabling and customizing noise cancellation on your AirPods Gen 2, you can fully embrace a world of immersive audio experiences. So, put on your AirPods Gen 2, relax, and enjoy the endless possibilities of noise cancelling technology!
Conclusion
Turning on noise cancellation on your AirPods Gen 2 unlocks a whole new level of audio immersion and focus. Although AirPods Gen 2 do not come with built-in noise cancellation, you can still enjoy exceptional audio quality and wireless convenience with these earbuds. If noise cancellation is a crucial feature for you, consider upgrading to AirPods Pro or AirPods Max.
By following our step-by-step guide, you learned how to ensure AirPods compatibility, properly insert them into your ears for optimal performance, access the Control Center on your iPhone or iPad, locate the Airplay icon, tap and hold the volume slider to reveal additional options, enable noise cancellation, and customize noise control settings.
With noise cancellation activated on your AirPods Gen 2, you can escape the distractions of the outside world and enjoy a focused audio experience. Whether you’re studying, working, commuting, or simply seeking a peaceful environment, the noise cancellation feature helps you create your personal audio sanctuary.
With customizable noise control options, such as Transparency mode and Adaptive EQ, you have the flexibility to further tailor your audio experience to your preferences and surroundings. Take the time to explore and experiment with these settings to maximize the potential of your noise cancelling AirPods Gen 2.
As you embark on your journey of noise cancelling audio bliss, remember to ensure a secure and snug fit for your AirPods Gen 2, clean them regularly, and adjust the volume to a comfortable level. These simple steps will enhance your overall listening experience and prolong the lifespan of your AirPods.
So, whether you choose to immerse yourself in your favorite music, dive into captivating podcasts, or enjoy clear phone conversations, your noise cancelling AirPods Gen 2 will be your reliable companion, delivering exceptional audio performance and unparalleled convenience.
Now, it’s time to put on your AirPods Gen 2, customize your noise control settings, and indulge in the world of noise cancelling audio. Let the sounds you love take center stage while the distractions fade away.