Introduction:
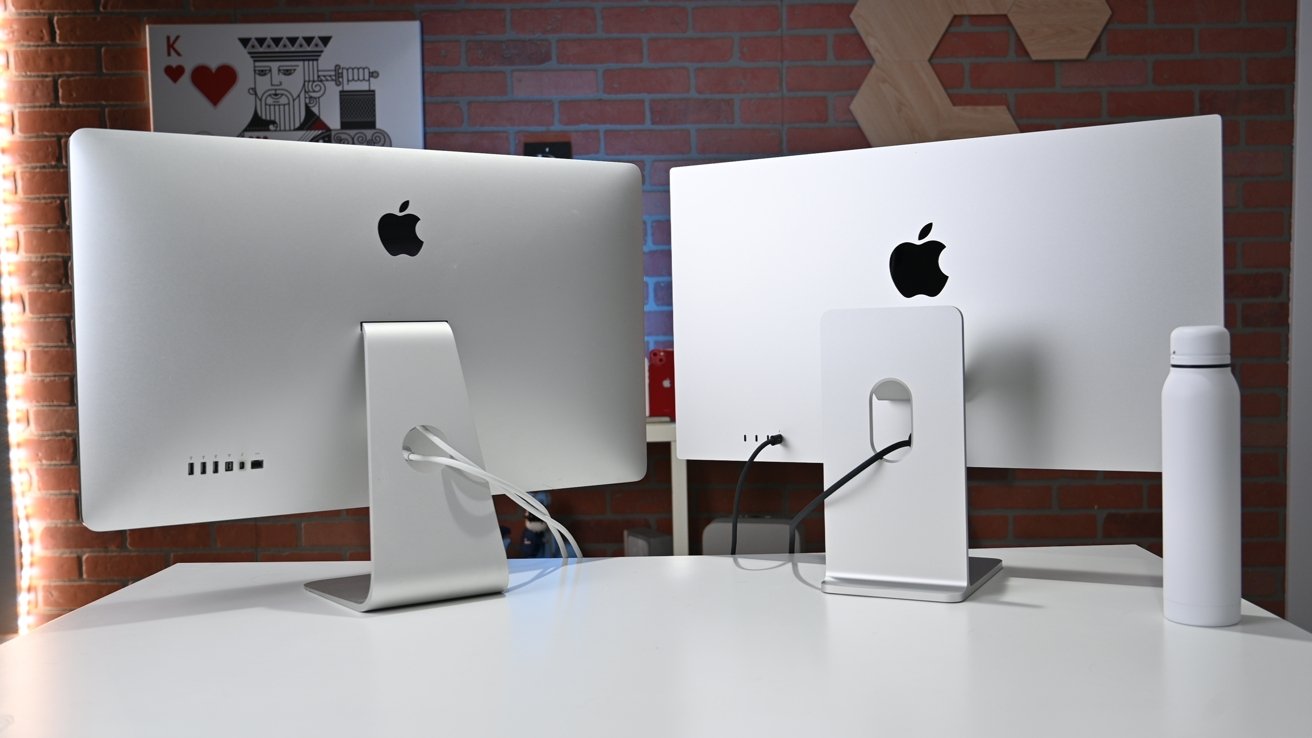
Welcome to the exciting world of using your iMac as a monitor! Whether you’re looking to expand your workspace or simply enjoy a larger display, using your iMac as a monitor can be a game-changer. This handy feature, known as Target Display Mode, allows you to utilize your iMac’s stunning display with other devices, giving you the flexibility and convenience you need.
By using your iMac as a monitor, you can easily connect your laptop, gaming console, or any device with a compatible port to enjoy a larger screen and enhance your overall viewing experience. In this article, we will explore two methods to use your iMac as a monitor: Target Display Mode and AirPlay.
In the following sections, we will guide you through the process step by step, highlighting the requirements and providing troubleshooting tips along the way. So, let’s dive in and discover how to unlock the potential of your iMac as a powerful display.
Note: Target Display Mode is available on select iMac models, typically those released in 2009 or later. If you are unsure about your iMac’s compatibility, check the Apple Support website for the specific model and technical specifications.
Requirements:
Before you can begin using your iMac as a monitor, there are a few key requirements that you need to meet. These requirements ensure compatibility and a smooth connection process. Here’s what you’ll need:
- Compatible iMac: Not all iMac models support Target Display Mode. Make sure your iMac is one of the supported models, typically those released in 2009 or later. You can check the specific model and technical specifications on the Apple Support website.
- Thunderbolt or Mini DisplayPort: To connect your iMac to another device, you’ll need either a Thunderbolt or Mini DisplayPort. Most newer iMacs come with Thunderbolt ports, while older models might have Mini DisplayPorts.
- Compatible Device: Ensure that the device you want to connect to your iMac has a Thunderbolt or Mini DisplayPort output. This can include laptops, gaming consoles, and certain desktop computers.
- Thunderbolt Cable: To establish the connection between your iMac and the external device, you’ll need a Thunderbolt cable or a cable with Thunderbolt and Mini DisplayPort connectors on each end.
- Wi-Fi Network: If you plan on using AirPlay to connect your devices, ensure that both your iMac and the device you want to connect are connected to the same Wi-Fi network.
By meeting these requirements, you’ll be well-equipped to successfully use your iMac as a monitor. Now that you have the necessary hardware and connections, let’s move on to the methods you can use to achieve this.
Method 1: Using Target Display Mode:
Target Display Mode is a built-in feature that allows you to use your iMac as a monitor for another device. This method provides a direct and seamless connection, enabling you to enjoy the iMac’s stunning display. Follow these steps to use Target Display Mode:
- Step 1: Check Compatibility: Ensure that your iMac is compatible with Target Display Mode. As mentioned earlier, this feature is available on select iMac models released in 2009 or later. Refer to the Apple Support website to confirm compatibility.
- Step 2: Connect the Thunderbolt Cable: Connect one end of the Thunderbolt cable or the Thunderbolt to Mini DisplayPort cable to the Thunderbolt or Mini DisplayPort output on your iMac. Connect the other end to the Thunderbolt or Mini DisplayPort output on the external device you want to use with your iMac.
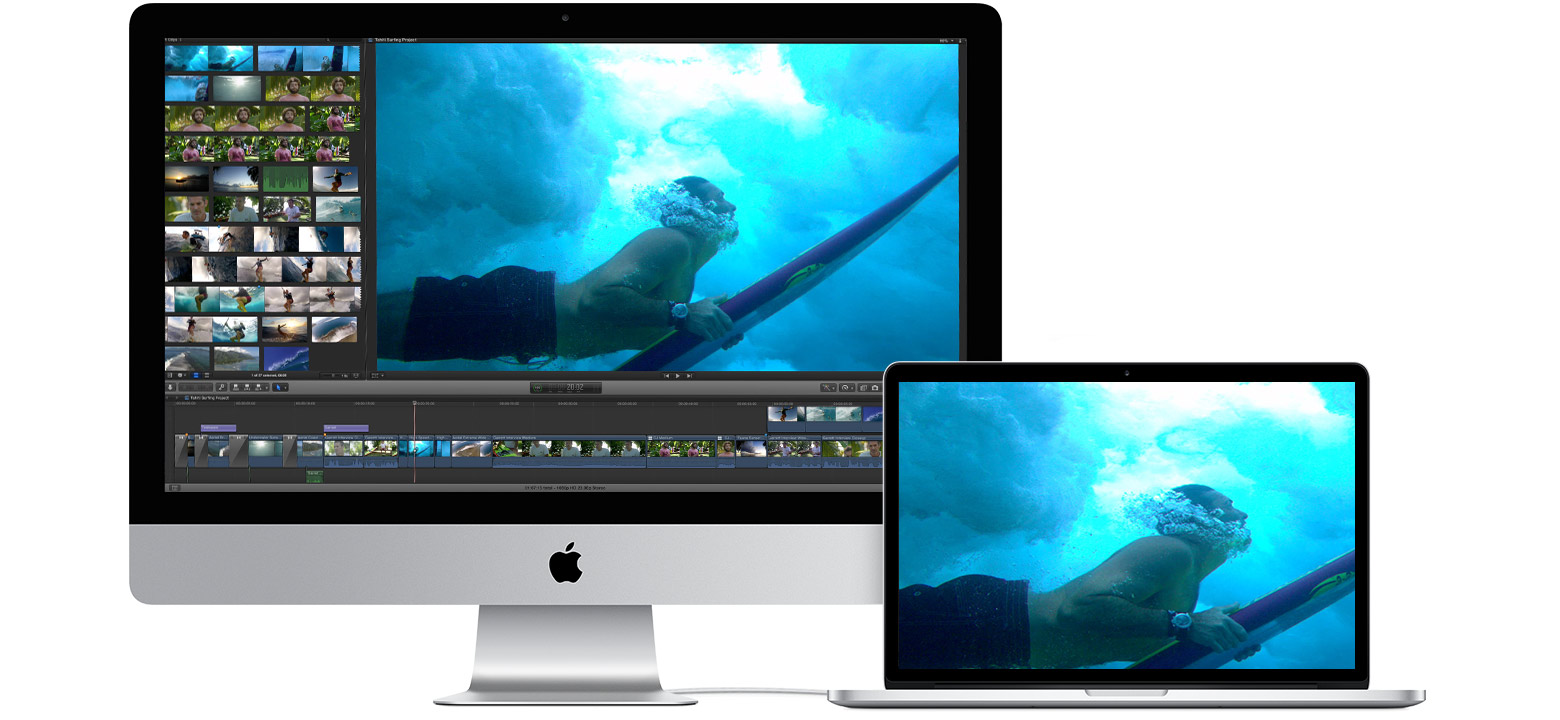
- Step 3: Enable Target Display Mode: On your iMac, press the Command (⌘) + F2 keys simultaneously to enable Target Display Mode. Alternatively, you can go to the Apple menu, select System Preferences, choose Displays, and then click on the “Show mirroring options in the menu bar when available” checkbox. Once enabled, your iMac will function as a monitor and display the content from the connected device.
With Target Display Mode activated, you can now enjoy the benefits of using your iMac as a monitor. The connected device’s screen will be mirrored on your iMac, providing an immersive viewing experience. Remember to adjust the resolution settings on the connected device to optimize the display on your iMac.
Step 1: Check Compatibility:
Before using your iMac as a monitor using Target Display Mode, it’s important to ensure that your iMac is compatible. Not all iMac models support this feature, so it’s crucial to confirm compatibility. Here’s how you can check:
- Visit the Apple Support website: Go to the Apple Support website and search for your iMac model. Look for the technical specifications or product information page.
- Check the model year: Look for the release year of your iMac model. Typically, iMac models released in 2009 or later are compatible with Target Display Mode.
- Refer to the technical specifications: Scroll down on the iMac’s product page and find the technical specifications section. Look for information related to Target Display Mode or monitor functionality.
- Confirm compatibility: Ensure that the technical specifications mention support for Target Display Mode or indicate that the iMac can function as a monitor for other devices. If this information is present, your iMac is compatible.
If you are still unsure about your iMac’s compatibility, you can always contact Apple Support for further assistance. They will be able to provide you with accurate information and guide you through the process.
It’s crucial to confirm compatibility to avoid any frustration or wasted time attempting to use Target Display Mode on an incompatible iMac. Once you have confirmed compatibility, you can proceed with connecting your iMac to another device and unlocking the full potential of your iMac as a versatile monitor.
Step 2: Connect the Thunderbolt Cable:
Once you have confirmed the compatibility of your iMac for Target Display Mode, the next step is to connect the Thunderbolt cable or Thunderbolt to Mini DisplayPort cable. Follow these simple instructions:
- Locate the Thunderbolt ports: On your iMac, locate the Thunderbolt or Mini DisplayPort outputs. The location of these ports may vary depending on the model of your iMac, but they are typically found on the back or side of the iMac.
- Connect one end of the Thunderbolt cable: Take one end of the Thunderbolt cable or Thunderbolt to Mini DisplayPort cable and insert it firmly into the Thunderbolt or Mini DisplayPort output on your iMac. Make sure it is firmly seated to establish a proper connection.
- Connect the other end of the Thunderbolt cable: Take the other end of the Thunderbolt cable and connect it to the Thunderbolt or Mini DisplayPort output on the external device that you want to use with your iMac as a monitor. Ensure it is securely plugged in to maintain a stable connection.
By connecting the Thunderbolt cable, you are establishing a direct connection between your iMac and the external device. The Thunderbolt technology ensures fast data transfer and high-quality display output. If you are using a Thunderbolt to Mini DisplayPort cable, the steps are the same, but simply ensure that the Mini DisplayPort connectors are properly aligned and connected.
Once the Thunderbolt cable is securely connected, you are ready to proceed to the next step and enable the Target Display Mode on your iMac.
Step 3: Enable Target Display Mode:
After connecting the Thunderbolt cable between your iMac and the external device, the final step is to enable Target Display Mode on your iMac. Enabling this mode allows your iMac to function as a monitor for the connected device. Follow these steps:
- On your iMac: Ensure that your iMac is powered on and logged in to the account you wish to use as the monitor.
- Press Command (⌘) + F2 keys: Simultaneously press the Command (⌘) and F2 keys on the iMac’s keyboard. This key combination activates Target Display Mode and switches your iMac to display the content from the connected device.
- Alternatively, use the menu bar: If the Command (⌘) + F2 key combination doesn’t work for your iMac model, you can navigate to the Apple menu in the top-left corner of the screen. From there, select “System Preferences,” then “Displays,” and finally check the box for “Show mirroring options in the menu bar when available.” This will enable you to switch to Target Display Mode from the menu bar in the future.
- Exit Target Display Mode: To exit Target Display Mode and return your iMac to its regular functions, simply press the Command (⌘) + F2 keys again or use the menu bar option, if available.
Once you have enabled Target Display Mode, your iMac will display the screen content from the connected device. The iMac’s display will act as a high-quality monitor, allowing you to enjoy a larger screen and take full advantage of your iMac’s capabilities. Remember to adjust the resolution settings on the connected device to optimize the display on your iMac.
Now that you have successfully enabled Target Display Mode, you can start benefiting from the enhanced viewing experience and productivity that comes with using your iMac as a monitor for other devices.
Method 2: Using AirPlay:
If your iMac supports AirPlay, another method to use it as a monitor is by using AirPlay mirroring. AirPlay allows you to wirelessly mirror the display of your compatible device to your iMac. Follow these steps to utilize AirPlay:
- Step 1: Connect to the Same Wi-Fi Network: Ensure that both your iMac and the device you want to connect to it are connected to the same Wi-Fi network. This is necessary for AirPlay mirroring to work.
- Step 2: Enable AirPlay on the iMac: On your iMac, click on the Apple menu in the top-left corner of the screen. From the drop-down menu, select “System Preferences,” then click on “Displays.” In the Displays settings, navigate to the “AirPlay Display” option and check the box to “Show mirroring options in the menu bar when available.” This will enable AirPlay on your iMac.
- Step 3: Mirror Display on the iMac: Now, on the device you want to connect, look for the AirPlay icon. It is usually represented by a rectangle with an arrow pointing upward. Click on the AirPlay icon and select your iMac from the list of available devices. Once selected, your device’s display will be mirrored on your iMac.
With AirPlay mirroring enabled, you can enjoy the convenience of wirelessly extending your device’s screen to your iMac. This method is especially useful if you prefer a cable-free setup or if you want to use your iMac as a monitor for devices that don’t have a compatible port for direct connection.
Remember to adjust the resolution and display settings on the connected device to optimize the mirroring experience on your iMac. AirPlay mirroring provides a seamless and enjoyable way to utilize your iMac as a monitor, enhancing your viewing experience and productivity.
Now that you have learned about the AirPlay method, you can easily connect your devices wirelessly and make the most of your iMac’s impressive display.
Step 1: Connect to the Same Wi-Fi Network:
Before you can use AirPlay to mirror your device’s display on your iMac, it’s essential to ensure that both your iMac and the device you want to connect are connected to the same Wi-Fi network. This step is crucial for establishing a seamless wireless connection. Follow these instructions to connect to the same Wi-Fi network:
- On your iMac: Click on the Wi-Fi icon in the menu bar located at the top-right corner of the screen. A drop-down menu will appear, displaying the available Wi-Fi networks.
- Select the Wi-Fi network: From the list of available Wi-Fi networks, select the one that you want to connect to. If the Wi-Fi network is password-protected, enter the correct password when prompted.
- Ensure the Wi-Fi connection is stable: Once you are connected to the Wi-Fi network, verify that the internet connection is stable on your iMac. You can do this by opening a web browser and loading a webpage to confirm that you have internet access.
- On the device you want to mirror: Similarly, ensure that the device you want to connect to your iMac is also connected to the same Wi-Fi network. To do this, go to the Wi-Fi settings on the device, select the same Wi-Fi network that the iMac is connected to, and enter the password if required.
By connecting both your iMac and the device to the same Wi-Fi network, you establish a reliable communication channel between them. This is necessary for AirPlay to function properly and facilitate the wireless mirroring of the device’s display on your iMac.
Once you have successfully connected both devices to the same Wi-Fi network, you are ready to proceed to the remaining steps and start mirroring your device’s display on your iMac using AirPlay.
Step 2: Enable AirPlay on the iMac:
After connecting your iMac and the device you want to mirror to the same Wi-Fi network, the next step is to enable AirPlay on your iMac. Enabling AirPlay allows your iMac to receive and display the content from the connected device. Follow these steps to enable AirPlay:
- Click on the Apple menu: In the top-left corner of the screen, click on the Apple menu icon. A drop-down menu will appear.
- Select “System Preferences”: From the drop-down menu, click on “System Preferences.” This will open a new window with various system settings.
- Click on “Displays”: In the System Preferences window, locate and click on the “Displays” icon. This will open the Display settings, where you can customize your screen and monitor options.
- Enable AirPlay Display: In the Display settings, look for the “AirPlay Display” option. Check the box next to “Show mirroring options in the menu bar when available.” This will enable AirPlay on your iMac.
Enabling AirPlay on your iMac allows it to receive and display the mirrored content from the connected device. By checking the box to show mirroring options in the menu bar, you can easily access AirPlay settings whenever you want to connect and mirror your device’s display.
Note that the location of the AirPlay settings may slightly vary depending on the macOS version you are using. However, the general process remains the same, and you should be able to find the AirPlay settings within the Display preferences.
Now that you have successfully enabled AirPlay on your iMac, you are ready to proceed to the next step and mirror the display of your device on your iMac wirelessly. This allows you to enjoy a larger screen and makes multitasking more convenient as you can view the device’s content directly on your iMac.
Step 3: Mirror Display on the iMac:
With AirPlay enabled on your iMac, you can now mirror the display of your device wirelessly. Follow these steps to mirror the display on your iMac:
- On the device you want to mirror: Open the AirPlay settings or control center on your device. The location of these settings may vary depending on the device and operating system you are using. Look for the AirPlay icon, usually represented by a rectangle with an arrow pointing upward.
- Select your iMac: In the AirPlay settings, you should see a list of available devices to connect to. Choose your iMac from the list of available devices.
- Allow the connection: After selecting your iMac, the device will attempt to establish a connection. Depending on the device, you may be prompted to confirm the connection or enter a password.
- Start mirroring: Once the connection is established, your device’s display will start mirroring on your iMac. You should now see the content from your device displayed on the larger screen of your iMac.
With the display mirrored on your iMac, you can enjoy a larger and more immersive viewing experience. This is particularly useful when presenting or showcasing content from your device. You can also utilize your iMac’s superior display quality for activities such as watching movies, playing games, or working on a larger workspace.
Remember to adjust the resolution and display settings on your device to optimize the mirrored display on your iMac. This ensures the best possible viewing experience and allows you to take full advantage of your iMac’s capabilities.
To stop mirroring the display on your iMac, simply disconnect or disable AirPlay on your device. This will return your iMac to its regular state, displaying only its own content.
Now that you have successfully mirrored your device’s display on your iMac, you can enjoy the convenience and flexibility of working or viewing content on a larger screen seamlessly.
Troubleshooting and Tips:
While using your iMac as a monitor can be a straightforward process, you may encounter some common issues or situations where troubleshooting is needed. Here are some troubleshooting tips and useful tips to enhance your experience:
- No AirPlay option: If you don’t see the AirPlay option on your iMac or device, ensure that both devices are connected to the same Wi-Fi network. Additionally, make sure that AirPlay is enabled on your iMac and that your device supports AirPlay.
- Poor Wi-Fi connection: If you experience lag or a choppy mirrored display, check your Wi-Fi connection. Ensure that both your iMac and the device have a stable and strong connection to the Wi-Fi network. Consider moving closer to the Wi-Fi router or using a Wi-Fi range extender if necessary.
- Resolution mismatch: In some cases, the resolution of the mirrored display may not match your iMac’s native resolution. Adjust the resolution settings on your connected device to match the iMac’s resolution for the best display quality.
- Audio output: By default, audio from the connected device will be played through the iMac’s speakers. If you prefer to use the connected device’s audio output, you can change the audio settings on your iMac. Go to the Sound preferences and select the appropriate audio output device.
- Disconnecting devices: To disconnect a device from being mirrored on your iMac, simply disable AirPlay on the device. This will stop the mirroring and return your iMac to its regular display.
- Keep software updated: Ensure that both your iMac and the device you want to mirror have the latest software updates installed. Keeping the operating systems up to date can help resolve any compatibility issues and ensure optimal performance.
These troubleshooting tips and tips can help you overcome common challenges and enhance your experience when using your iMac as a monitor. If you continue to experience issues, consult the official support documentation for your iMac model or contact Apple Support for further assistance.
Now that you are armed with troubleshooting knowledge and useful tips, you can confidently utilize your iMac as a versatile monitor and enjoy the benefits of an expanded workspace or enhanced viewing experience.
Conclusion:
Using your iMac as a monitor opens up a world of possibilities, allowing you to enjoy a larger screen, enhance your productivity, and immerse yourself in a superior viewing experience. By following the methods outlined in this guide, you can easily connect your iMac to other devices and harness its impressive display capabilities.
Through the use of Target Display Mode, you can establish a direct connection between your iMac and a compatible device, utilizing a Thunderbolt or Mini DisplayPort cable. This method guarantees a stable and reliable connection, making it ideal for demanding tasks or high-performance applications.
If cable-free convenience is what you’re after, AirPlay comes to the rescue. By enabling AirPlay on your iMac and connecting your devices to the same Wi-Fi network, you can wirelessly mirror the display of your compatible device onto your iMac. This method offers flexibility and versatility, making it suitable for a wide range of situations.
Throughout the process, troubleshooting and tips can help you overcome any challenges you might encounter, ensuring a smooth experience. By addressing common issues such as connectivity problems, resolution mismatches, or audio routing, you can optimize your setup and make the most of your iMac as a monitor.
Remember to always check the compatibility of your iMac, establish a stable Wi-Fi connection, and keep both your iMac and connected devices up to date with the latest software updates for optimal performance.
Now that you have learned how to utilize your iMac as a monitor, it’s time to explore the possibilities and enjoy the enhanced visual experience, expanded workspace, and heightened productivity that come with using your iMac as a versatile display. So go ahead, connect your iMac and unlock its full potential!