Introduction
Welcome to our guide on how to use a webcam as a security camera. With the rise in home security concerns, many people are looking for affordable and accessible ways to monitor their surroundings. Thankfully, webcams, which are commonly used for video chatting and online meetings, can also be repurposed as effective security cameras. By following the steps outlined in this guide, you can transform your webcam into a reliable surveillance tool.
In recent years, webcams have become more sophisticated and affordable, making them a viable option for home security. Unlike traditional security cameras, webcams are easy to set up and require minimal technical expertise. You can use a webcam connected to your computer or even a standalone webcam that connects directly to your network. Regardless of the type you choose, the basic principles for using a webcam as a security camera remain the same.
In this guide, we will cover everything you need to know to get started, from choosing the right webcam to setting up motion detection and remote access. We will also discuss other useful features and tips to maximize the security of your webcam setup. By the end of this guide, you’ll have all the information you need to turn your webcam into an efficient and cost-effective security solution.
Before we dive into the technical aspects, it’s important to address the question of why you might consider using a webcam as a security camera. Traditional security camera systems can be expensive and require professional installation. Webcams, on the other hand, offer a budget-friendly alternative without compromising on functionality.
By repurposing a webcam, you can:
- Monitor your home or office remotely
- Deter potential intruders
- Keep an eye on your kids, pets, or elderly family members
- Record suspicious activities or incidents
- Receive alerts and notifications on your mobile device
With these advantages in mind, let’s explore the steps involved in setting up a webcam as a security camera. Whether you’re a tech-savvy individual looking for a DIY solution or a budget-conscious homeowner seeking peace of mind, this guide is here to help you transform your webcam into a reliable security tool.
Choosing the Right Webcam
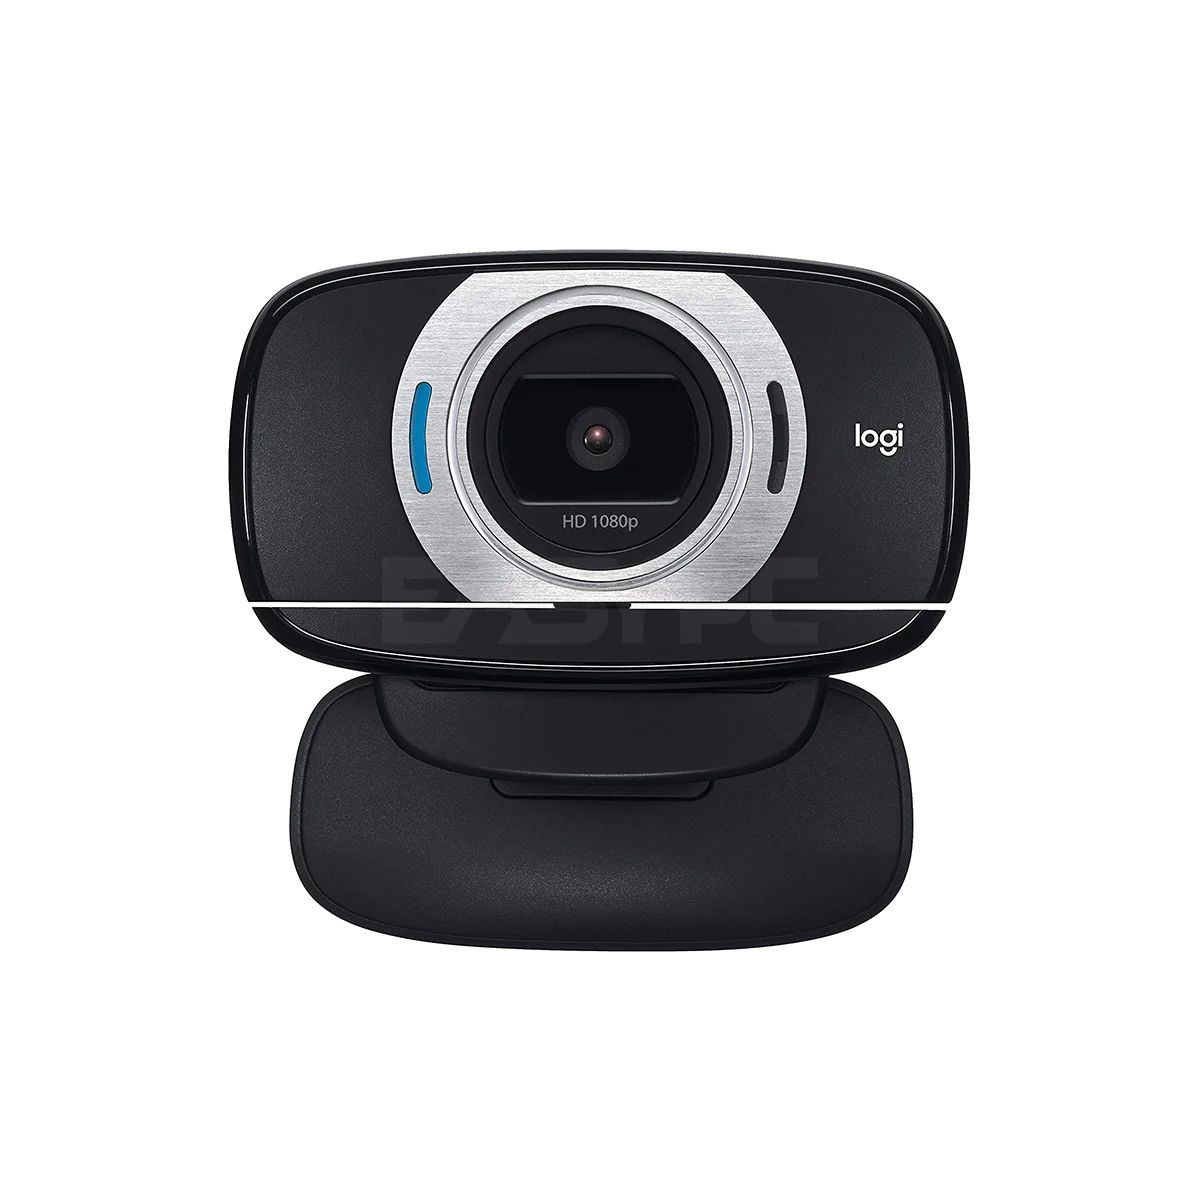
When it comes to using a webcam as a security camera, selecting the right device is crucial. While there are numerous webcams available on the market, not all of them are suitable for surveillance purposes. Here are a few factors to consider in order to choose the best webcam for your security needs:
1. Resolution: Look for a webcam that offers high-resolution video capture. A minimum of 720p or higher is recommended to ensure clear and detailed footage. This will help in identifying faces and capturing important details.
2. Field of view (FOV): The FOV determines the area covered by the webcam. A wider FOV allows for greater coverage, reducing blind spots. Look for webcams with a wide-angle lens or a FOV of 90 degrees or more.
3. Low-light performance: Check if the webcam has good low-light capabilities. This is essential for capturing clear footage in dark or poorly lit areas. Look for webcams with features like low-light correction or night vision.
4. Connectivity: Consider whether you want a webcam with USB connectivity, which connects directly to your computer, or an IP webcam that connects to your network. IP webcams offer more flexibility and can be accessed remotely from anywhere.
5. Audio capabilities: If you want to capture sound along with video, choose a webcam with built-in microphones. This can be useful for monitoring conversations or detecting unusual sounds.
6. Compatibility: Ensure that the webcam is compatible with your operating system. Most webcams support Windows and macOS, but it’s always a good idea to double-check to avoid any compatibility issues.
7. Additional features: Some webcams come with advanced features like pan, tilt, and zoom (PTZ) functionality, which allows you to control the camera’s movement remotely. Consider these features if you require the ability to adjust the camera angle or zoom in on specific areas.
Before making a purchase, read reviews and compare different models to find the webcam that best meets your security requirements and budget. Keep in mind that while there are affordable options available, investing in a reputable brand can ensure better performance and durability.
Now that you have a good understanding of what to look for in a webcam, let’s move on to the next step: installing the webcam software.
Installing the Webcam Software
Once you have chosen the right webcam for your security needs, the next step is to install the appropriate software. The software provided with your webcam will allow you to control and configure the camera settings, as well as access additional features and functionalities. Follow these steps to install the webcam software:
1. Check the instructions: Start by reading the user manual or instructions that came with your webcam. Look for any specific installation instructions or software requirements. Some webcams may require you to install the software before connecting the camera, while others may allow you to install the software after connecting.
2. Download the software: Visit the manufacturer’s website or use the installation CD that came with the webcam to download the latest version of the software. Ensure that you download the software compatible with your operating system.
3. Run the installer: Once the software is downloaded, locate the installer file and double-click on it to run the installation process. Follow the on-screen instructions to proceed with the installation. If prompted, choose the desired options and settings according to your preferences.
4. Connect the webcam: After the software installation is complete, connect your webcam to your computer or network according to the manufacturer’s instructions. If using a USB webcam, simply plug it into an available USB port. For IP webcams, connect the camera to your local network using an Ethernet cable.
5. Configure the settings: Once the webcam is connected, open the webcam software on your computer. The software interface will allow you to configure various settings, including video resolution, frame rate, motion detection sensitivity, and more. Take some time to explore the software and adjust the settings according to your preferences.
6. Test the webcam: To ensure that the webcam is properly installed and functioning correctly, use the software to test the camera and capture a sample video. Check the video quality, audio synchronization, and any additional features you may have enabled.
Remember to keep the webcam software up to date by regularly checking for software updates from the manufacturer’s website. Software updates often provide bug fixes, performance improvements, and new features that can enhance the functionality of your webcam.
Now that you have successfully installed the webcam software, it’s time to position the webcam in the optimal location for surveillance. Next, we will discuss how to position the webcam for effective monitoring.
Positioning the Webcam
Properly positioning your webcam is essential for maximizing its effectiveness as a security camera. The placement of the camera will determine the coverage area and the quality of the captured footage. Here are some tips on how to position your webcam for optimal surveillance:
1. Consider the area to monitor: Identify the specific areas you want to monitor, such as the front door, backyard, or a specific room. Analyze the layout of the area to determine the best vantage point for the camera.
2. Mounting options: Depending on the type of webcam you have, you may have different mounting options. USB webcams are usually mounted on a clip or stand that allows you to easily attach them to your computer monitor or other surfaces. IP webcams typically come with brackets for wall or ceiling mounting.
3. Angle and field of view: Position the webcam at a suitable angle to capture the desired field of view. For monitoring a specific area, aim the camera towards that location and adjust the tilt and pan features if available. Ensure that there are no obstructions that could hinder the camera’s field of view.
4. Avoid backlighting: Be mindful of backlighting, which occurs when the primary light source is behind the subject being monitored. This can result in silhouettes and darkened faces or objects. Position the camera in a way that avoids direct sunlight or bright artificial lights behind the subject.
5. Avoid exposed cables: If you are using an IP webcam and need to run cables, ensure they are hidden or secured to prevent tampering or accidental disconnection. Exposed cables can be a visual clue for potential intruders, revealing the presence of a security camera.
6. Privacy considerations: While positioning the webcam, take privacy concerns into account. Avoid pointing the camera towards private areas, such as bedrooms, bathrooms, or neighboring properties. Respecting privacy boundaries is important to maintain trust and stay within legal guidelines.
7. Test the view: After positioning the webcam, test the view by accessing the camera feed. Ensure that the camera captures the desired area and that the image quality meets your expectations. Adjust the position if necessary.
Remember that the ideal positioning may vary depending on your specific needs and the layout of your premises. Regularly evaluate and adjust the camera’s position as needed to accommodate any changes in your surveillance requirements.
Now that you have positioned your webcam, the next step is to set up motion detection. This feature will enable your webcam to capture video footage only when there is movement, reducing storage space and making it easier to review relevant events. We will discuss this in the next section.
Setting Up Motion Detection
One of the key features that can enhance the effectiveness of your webcam as a security camera is motion detection. By enabling motion detection, your webcam will only record video when it detects movement, saving storage space and making it easier to review important events. Here’s how you can set up motion detection for your webcam:
1. Access webcam settings: Open the webcam software on your computer and navigate to the settings or preferences section. Look for options related to motion detection or motion sensing.
2. Enable motion detection: Locate the option to enable motion detection and toggle the setting to “On” or “Enabled.” This will activate the camera’s motion sensing capabilities.
3. Adjust sensitivity: Motion detection sensitivity determines the level of movement required to trigger the camera. Higher sensitivity settings may result in more frequent recordings, including minor movements like shadows or passing cars. Lower sensitivity settings may filter out some movements. Adjust the sensitivity according to your preferences and the specific monitoring needs of your environment.
4. Define detection zones: Some webcam software allows you to define specific areas within the camera’s field of view to monitor for movement. This can be useful if there are areas you want to exclude from motion detection, such as windows with constant movement due to passing traffic or tree branches. Define the detection zones by selecting or drawing the desired areas in the software interface.
5. Configure recording settings: Determine how the webcam will record and store the video footage when motion is detected. Options may include continuous recording, scheduled recording, or event-based recording. Choose the most suitable recording mode based on your requirements and available storage space.
6. Set up alerts: Many webcam software applications offer the option to send email or push notifications when motion is detected. Configure the alert settings to receive notifications on your mobile device or computer whenever there is movement within the camera’s detection zone.
7. Test motion detection: To ensure that motion detection is functioning correctly, test it by moving within the camera’s field of view. Monitor the software interface or check the recorded footage to verify that the motion detection is capturing the movement and triggering the appropriate actions, such as recording the video or sending alerts.
By setting up motion detection, you can effectively monitor your surroundings without having to sift through hours of continuous video footage. It allows you to focus on events that matter, such as suspicious activities or unexpected movements.
Now that you have configured motion detection, the next step is to adjust the camera settings to optimize its functionality. In the following section, we will discuss important camera settings to consider when using a webcam as a security camera.
Adjusting Camera Settings
Once you have set up motion detection for your webcam, it’s important to fine-tune the camera settings to optimize its functionality as a security camera. These settings will help improve the quality of the captured footage and enhance the overall performance of your webcam. Here are some key camera settings to consider:
1. Video resolution: Adjust the video resolution to a suitable level that balances storage space and video quality. Higher resolutions result in clearer and more detailed footage but may consume more disk space. Choose a resolution that meets your needs without compromising storage limitations.
2. Frame rate: The frame rate determines the number of frames captured per second. Higher frame rates result in smoother and more fluid video playback. However, increasing the frame rate may lead to larger file sizes. Choose a frame rate that provides a good balance between smoothness and storage efficiency.
3. Exposure: Adjust the exposure settings to ensure the camera accurately captures the lighting conditions in the environment. For areas with high contrast or varying lighting, consider enabling auto exposure to let the camera adjust the exposure levels automatically.
4. White balance: White balance settings help maintain accurate color representation in different lighting conditions. Choose an appropriate white balance mode or set a manual white balance if necessary to ensure that the recorded footage accurately represents the colors in the environment.
5. Focus: Depending on your webcam, you may have manual or automatic focus options. Choose the appropriate focus setting to ensure that the camera is capturing clear and sharp images. Adjust the focus if necessary to improve the clarity of the video footage.
6. Audio settings: If your webcam has built-in microphones, adjust the audio settings to optimize sound quality. Consider enabling noise cancellation or adjusting the microphone sensitivity to achieve clear audio recordings.
7. Save location: Specify the folder or directory where the recorded video footage will be saved. Ensure that you have sufficient storage space in the selected location to accommodate the recorded videos.
8. Encryption and privacy: If remote access or cloud storage options are available, ensure that the camera settings include encryption methods to protect the captured footage and maintain privacy. Enable any security features offered by the webcam software to safeguard the recorded videos.
Regularly review and adjust these camera settings to accommodate any changes in lighting conditions, desired video quality, or storage requirements. Experiment with different settings to find the optimal configuration that suits your specific surveillance needs.
Now that you have adjusted the camera settings, it’s time to explore the option of remote access to view your webcam’s feed from anywhere. In the next section, we will discuss how to set up remote access for your webcam security camera.
Remote Access for Viewing the Webcam
Remote access is a crucial feature when using a webcam as a security camera. It allows you to view the camera’s live feed and recorded footage from anywhere, using a computer, smartphone, or tablet. Setting up remote access is relatively straightforward and involves the following steps:
1. Static IP address or dynamic DNS: If you are using an IP webcam, you will need either a static IP address or a dynamic DNS (Domain Name System) service. A static IP address is a fixed address assigned to your webcam by your internet service provider, while a dynamic DNS service provides a domain name that dynamically maps to your webcam’s changing IP address. You can contact your ISP for more information on obtaining a static IP or search for dynamic DNS services online.
2. Port forwarding: Configure port forwarding on your router to allow remote access to your webcam. This involves forwarding specific ports used by the webcam to your webcam’s local IP address. Refer to the user manual or support documentation of your router for instructions on how to set up port forwarding.
3. Remote access software: Install remote access software on your computer or mobile device. There are various applications available that allow you to access your webcam remotely. Popular options include TeamViewer, AnyDesk, or Splashtop. Install the software on the devices from which you want to access the webcam.
4. Configuration and setup: Open the remote access software and follow the provided instructions to connect to your webcam. Enter the IP address or domain name associated with your webcam, along with the appropriate port number and login credentials if required. Configure any additional settings or preferences according to your needs.
5. Test the remote access: Ensure that the remote access is working correctly by connecting to your webcam from a remote location. Use the remote access software or app to view the live feed or access the recorded footage. Check the video quality, responsiveness, and any additional features provided by the remote access software.
Remember to prioritize the security of your remote access setup for the webcam. Set strong login credentials, enable encryption if available, and keep the remote access software up to date to protect against potential security vulnerabilities.
With remote access enabled, you can conveniently monitor your webcam from anywhere with an internet connection. This offers flexibility and peace of mind, allowing you to keep an eye on your property or loved ones even when you’re away.
Next, we will discuss how to record and save video footage captured by your webcam security camera.
Recording and Saving Video Footage
Recording and saving video footage is an essential aspect of using a webcam as a security camera. By properly configuring your webcam settings, you can capture and store video footage of important events for future reference. Here’s how you can record and save video footage from your webcam:
1. Set up recording mode: Depending on your webcam software, you may have different recording options. Choose the recording mode that suits your needs, such as continuous recording, scheduled recording, or event-based recording triggered by motion detection. Adjust the settings according to your preferences and available storage space.
2. Specify the recording duration: Determine how long each video recording will be. This can typically be defined in terms of duration (e.g., 10 minutes, 30 minutes) or file size (e.g., 100 MB, 500 MB). Consider factors such as storage capacity and how frequently you want to access or review the recorded footage.
3. Select the save location: Choose the folder or directory where the recorded video files will be saved. Ensure that you have sufficient storage space in the selected location to accommodate the recorded videos. Regularly check the available storage to avoid running out of space.
4. Configure file naming and organization: Decide on a naming convention for your video files to easily identify and sort them later. You can include timestamps, camera locations, or other relevant information in the file names. Organize the files into subfolders based on date or specific events for easier access.
5. Set up automatic deletion: If storage space is a concern, enable automatic deletion of older video files to make room for new recordings. Determine how long you want to retain the video footage before it gets automatically deleted. Consider the importance of the footage and legal requirements when determining the retention period.
6. Review and backup: Regularly review the recorded video footage to ensure that it is being captured correctly. Revisit the footage to identify any unusual activities or incidents. Additionally, create backups of the recorded videos to prevent loss in case of hardware failure or accidental deletion.
7. Timestamps and metadata: Ensure that your webcam software adds timestamps and metadata to the recorded video files. This information can be valuable when reviewing and organizing the footage. Check the settings of the webcam software to enable timestamps and customize the metadata as needed.
By configuring these settings, you can ensure that your webcam is reliably recording and saving video footage that can be accessed and reviewed whenever necessary. This provides you with valuable evidence in case of any security incidents or suspicious activities.
In the next section, we will explore other features and tips for maximizing the security of your webcam setup.
Other Webcam Security Features
In addition to the basic functionalities of using a webcam as a security camera, several other features can further enhance the security of your webcam setup. Consider implementing the following features to bolster the effectiveness and reliability of your webcam security system:
1. Two-factor authentication: Many webcam software applications offer the option to enable two-factor authentication (2FA). This adds an extra layer of security by requiring users to provide a second form of verification, such as a unique code sent to their mobile device, in addition to the regular login credentials.
2. Encrypted data transmission: Look for webcam software or applications that support encrypted data transmission. This helps protect your video feed and recorded footage from unauthorized access or interception. It ensures that your video data remains secure while being transmitted over the internet.
3. Live streaming: Some webcam software allows for live streaming, enabling you to monitor your webcam feed in real-time from any device with internet access. This feature is useful for situations where you want to actively keep an eye on things, such as when you’re away from home or want to monitor a specific area in real-time.
4. Cloud storage: Consider utilizing cloud storage services to store your video footage. Cloud storage offers the advantage of offsite backup, protecting your recordings from local hardware failures or theft. Additionally, it provides easy access to your footage from anywhere with an internet connection.
5. Privacy masking: Privacy masking allows you to digitally mask certain areas within the camera’s field of view to protect sensitive or private areas from being recorded. This can be useful when placing the webcam in areas where there may be personal information or areas where privacy needs to be maintained.
6. Integration with other security systems: Explore the possibility of integrating your webcam security system with other security systems you may have in place, such as home security alarms or smart home devices. Integration allows for a more comprehensive and interconnected security solution.
7. Remote control: Some webcam software or applications offer remote control features, allowing you to adjust camera settings or movements remotely. This can be particularly beneficial for PTZ webcams, enabling you to change the camera angle or zoom in on a specific area as needed.
By capitalizing on these additional security features, you can enhance the effectiveness and convenience of your webcam as a security camera. Depending on your specific requirements and budget, consider implementing the features that best complement your overall security strategy.
In the next section, we will provide some valuable tips for maximizing the security of your webcam setup.
Tips for Maximizing Webcam Security
Ensuring the security of your webcam setup is crucial to protect your privacy and property. Here are some valuable tips to help you maximize the security of your webcam:
1. Secure your network: Keep your home or office network secure by setting up a strong WPA2 password for your Wi-Fi, regularly updating the router’s firmware, and enabling built-in security features like firewall and MAC address filtering. This helps prevent unauthorized access to your webcam feed.
2. Change default settings and passwords: Change the default login credentials and settings of your webcam software, as well as the router’s admin login information. Use strong, unique passwords that include a combination of letters, numbers, and special characters.
3. Keep software up to date: Regularly update your webcam software, router firmware, and any other related applications. Software updates often provide security patches and bug fixes that help protect your system from vulnerabilities.
4. Enable firewall protection: Activate the firewall on your computer and router to block unauthorized access to your webcam feed and other devices on your network. Configure the firewall settings to allow only necessary inbound and outbound connections.
5. Use antivirus and anti-malware software: Install reputable antivirus and anti-malware software on your computer to protect against potential threats and ensure that your webcam system remains secure.
6. Regularly check for firmware updates: Check for firmware updates specifically for your webcam model and apply them as necessary. Firmware updates often address security vulnerabilities and improve overall functionality.
7. Physically secure the webcam: If using a standalone webcam, ensure it is securely mounted and not easily accessible or obstructed by objects. Protect the cables from tampering or accidental disconnection.
8. Regularly monitor access logs: Review the access logs of your webcam software and router to check for any suspicious activity or unauthorized access attempts. Be vigilant and report any potential security breaches to your internet service provider or the webcam manufacturer.
9. Disable remote access when not needed: If you do not require remote access to your webcam feed, disable the feature to prevent any potential unauthorized access. Enable it only when necessary and for limited periods.
10. Educate yourself and your family: Educate yourself and your family members about the importance of webcam security. Teach them about best practices, privacy concerns, and the potential risks associated with unauthorized access to the webcam feed.
By following these tips, you can significantly enhance the security of your webcam setup. Implementing these measures will help protect your privacy and ensure that your webcam functions as an effective and secure security camera.
Now that you are equipped with these valuable tips, you can confidently enjoy the benefits of using a webcam as a security camera.
Conclusion
Using a webcam as a security camera is a cost-effective and accessible solution for monitoring your home or office. By repurposing a webcam with the right features and following the necessary steps outlined in this guide, you can transform it into a reliable surveillance tool. The ability to view live feeds, record video footage, and access your webcam remotely provides peace of mind and enhances your overall security strategy.
Choosing the right webcam, installing the necessary software, and positioning the camera correctly are essential in maximizing its effectiveness. Configuring motion detection, adjusting camera settings, and setting up remote access further enhance the functionality and convenience of your webcam security system. Additional features such as two-factor authentication, encrypted data transmission, and integration with other security systems can provide added layers of security.
Remember to prioritize network security, regularly update software and firmware, and practice good password management to protect against potential threats. Implementing antivirus software, monitoring access logs, and educating yourself and your family members about webcam security are also important steps in maintaining a secure setup.
By following the tips and best practices outlined in this guide, you can confidently utilize your webcam as a reliable security camera. Whether you want to monitor your property, deter intruders, keep an eye on your loved ones, or record important events, repurposing a webcam as a security camera provides an affordable and effective solution.
Take the time to research and choose the right webcam with the necessary features for your specific needs. Get familiar with the software and settings, experiment and adjust as needed, and regularly review your security setup to ensure it continues to meet your requirements.
With the knowledge and guidance provided in this guide, you are well-equipped to turn your webcam into a valuable security tool that contributes to the safety and protection of your home or office.


