Introduction
Welcome to the world of Google Photos, where you can store, organize, and share all your cherished memories in one place. Whether it’s breathtaking landscapes, precious family moments, or snapshots of your furry friends, Google Photos provides a seamless platform for uploading and preserving your photos. With its user-friendly interface and robust features, you can easily transfer your treasured images from your computer to Google Photos in just a few simple steps.
In this guide, we will walk you through the process of uploading photos from your computer to Google Photos. We’ll explore the various features available to enhance and organize your uploaded images. So, whether you’re a seasoned photographer or a casual shutterbug, get ready to unlock the full potential of Google Photos and keep your memories safe and accessible.
From organizing your photos into albums, to editing and enhancing them with filters and effects, Google Photos offers a comprehensive suite of tools to transform your pictures into stunning visual stories. Additionally, the platform allows you to effortlessly share your favorite moments with friends and family, making it a perfect companion for creating and preserving lifelong memories.
But before we dive into the nitty-gritty of uploading photos, let’s make sure you have Google Photos up and running on your computer. If you haven’t already done so, it’s easy to get started. Simply follow the steps outlined in the next section to launch Google Photos and sign in to your Google account. Once you’re all set, we’ll guide you through the process of uploading your photos and making the most of Google Photos’ powerful features.
Step 1: Launch Google Photos on your computer
To begin the process of uploading your photos to Google Photos, you’ll first need to launch the application on your computer. Here’s how to do it:
- Ensure that you have a stable internet connection before proceeding.
- Open your preferred web browser such as Google Chrome, Mozilla Firefox, or Safari.
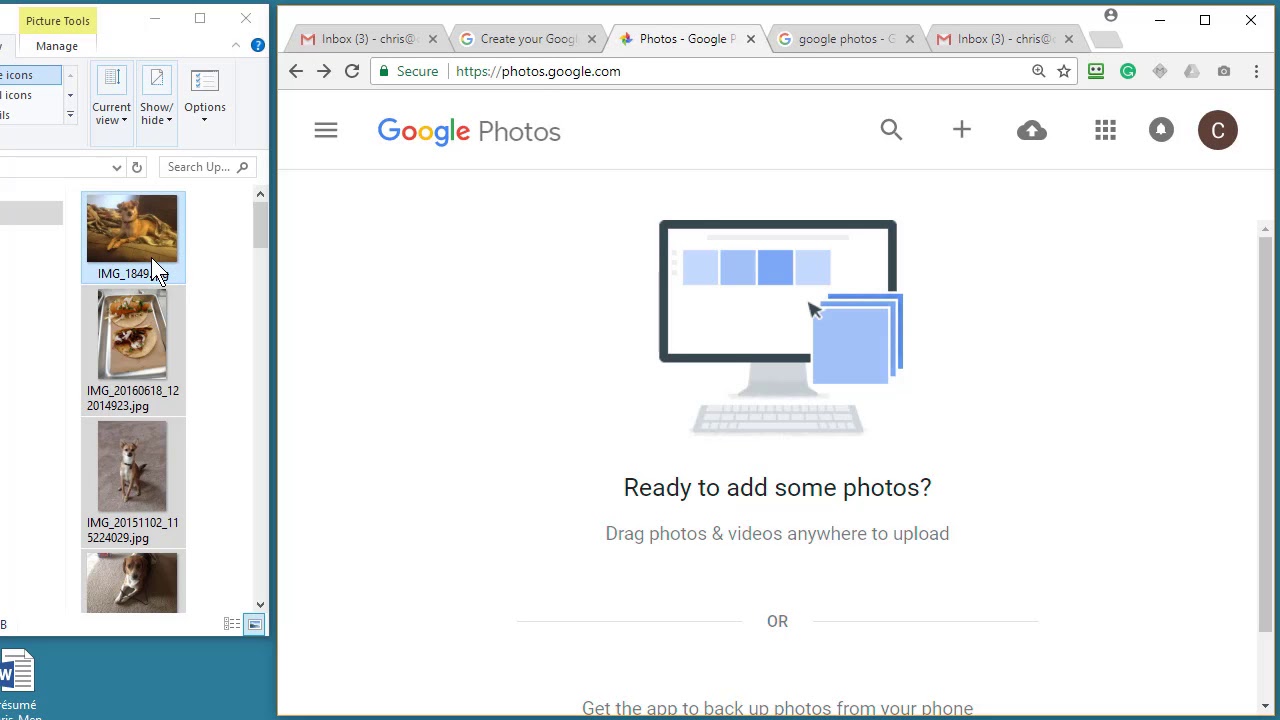
- In the address bar, type “photos.google.com” and press Enter.
- The Google Photos website will load, displaying a beautiful collection of your previously uploaded images.
Alternatively, you can also access Google Photos by navigating to the Google homepage (www.google.com) and clicking on the “Apps” icon in the top-right corner of the screen. From the dropdown menu, click on “Photos” to launch the application.
Google Photos is compatible with both Windows and MacOS operating systems, so regardless of the computer you’re using, you can easily access your photos and begin the upload process.
Once you have successfully launched Google Photos, it’s time to move on to the next step: signing in to your Google account. This will allow you to link your photos to your personal Google account, enabling seamless synchronization across devices and easy access to your uploaded images.
Step 2: Sign in to your Google account
To fully utilize the features of Google Photos and upload your photos, you’ll need to sign in to your Google account. If you already have a Google account, follow these simple steps to sign in:
- On the Google Photos website, click on the “Sign In” button located in the top-right corner of the screen.
- A new window will appear, prompting you to enter your Google account email address or phone number.
- After entering your email address or phone number, click “Next.”
- Enter your account password and click “Next” to proceed.
- If you have two-factor authentication enabled for your Google account, you may be prompted to enter an authentication code.
- Once you have successfully signed in, you will be redirected to the Google Photos homepage, where you can access all the features and settings of the application.
If you don’t have a Google account yet, you can create one by clicking on the “Create account” link found on the sign-in page. Follow the instructions provided to set up your Google account and gain access to Google Photos and other Google services.
By signing in to your Google account, you can take advantage of additional benefits, such as automatic cloud backup of your photos, easy synchronization between devices, and the ability to share your photos with others. With your account linked to Google Photos, you can seamlessly access and manage your uploaded photos from any device with an internet connection.
Now that you’re signed in to your Google account, it’s time to move on to the next step: accessing the upload page in Google Photos. This is where you’ll be able to select the photos you want to upload and bring them into your Google Photos library.
Step 3: Access the upload page
Once you have signed in to your Google account and are on the Google Photos homepage, it’s time to navigate to the upload page. This is where you can choose and upload the photos you want to add to your Google Photos library. Follow these steps to access the upload page:
- In the top-right corner of the Google Photos homepage, you will see a cloud icon with an upward arrow. Click on this icon to open the upload page.
- A drop-down menu will appear, presenting you with several options for uploading photos.
- If you want to upload photos from your computer’s hard drive, select the “Computer” option.
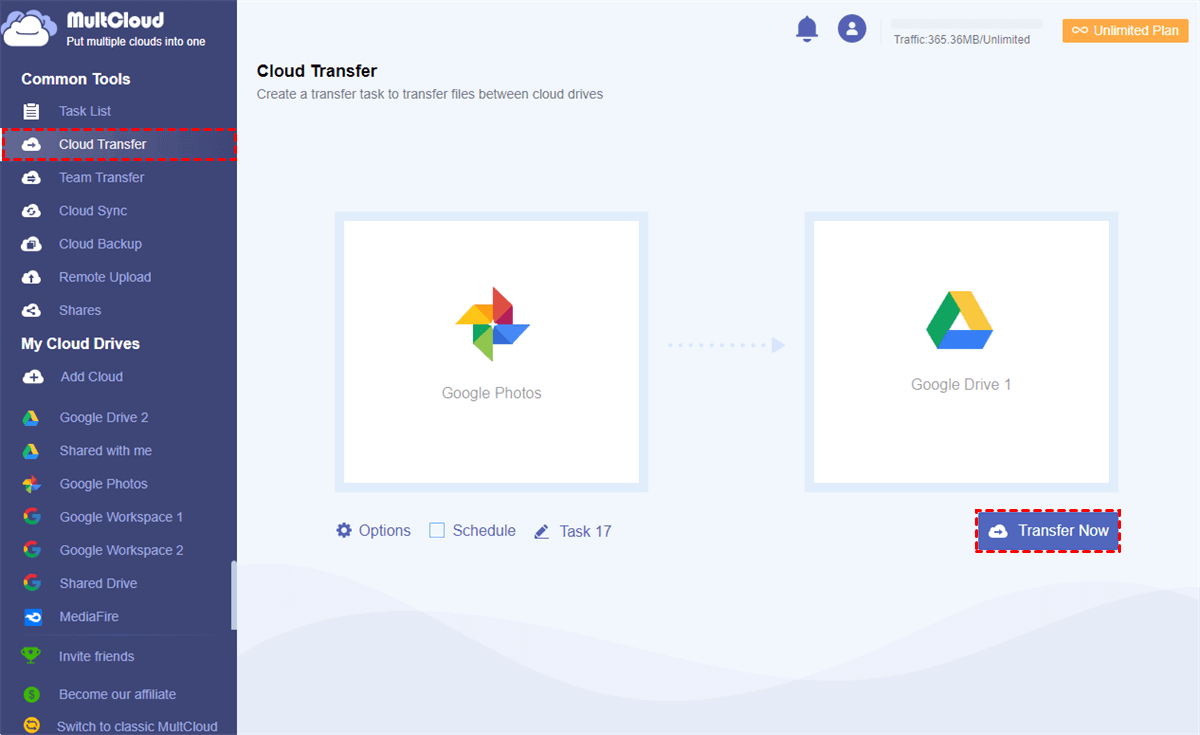
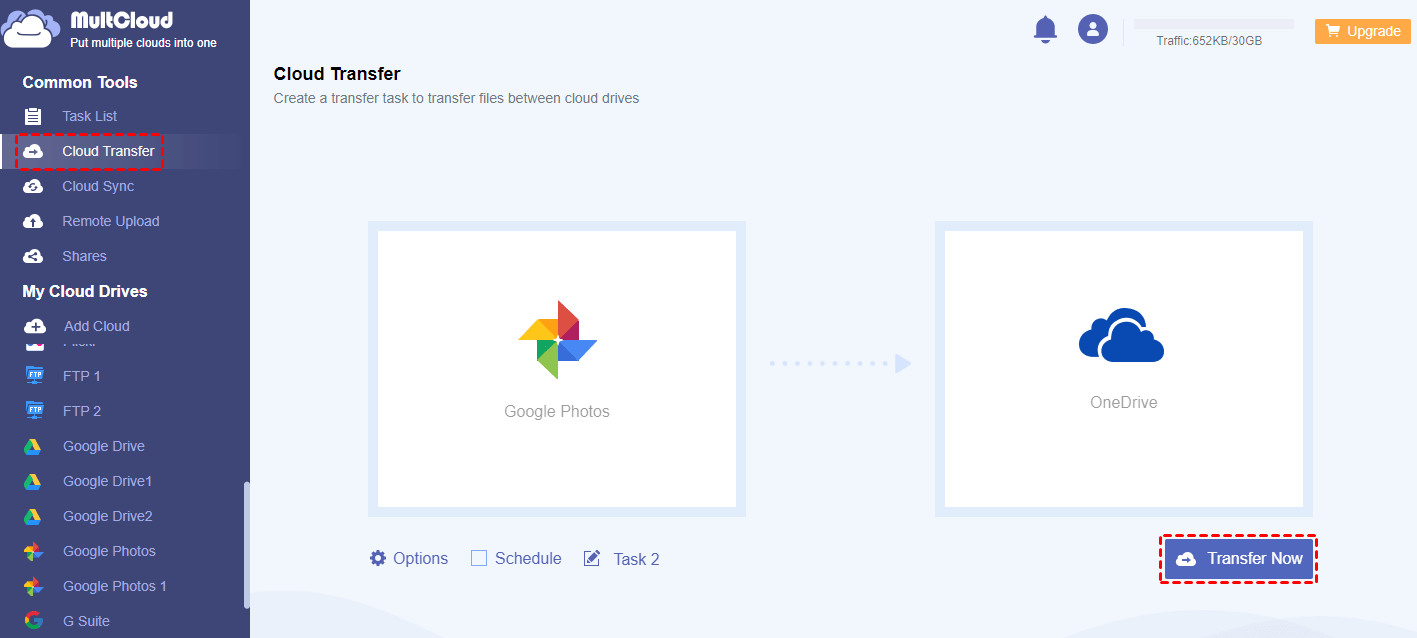
- Alternatively, you can choose other options such as “Google Drive,” “Dropbox,” or “OneDrive” if your photos are stored in those platforms.
By selecting the “Computer” option, a file explorer window will open, allowing you to browse your computer and locate the photos you wish to upload. You can navigate through your folders, select individual photos, or choose entire folders to upload to Google Photos.
Once you have selected the desired photos, click on the “Open” button or double-click on the selected files to initiate the upload process. Google Photos will begin transferring the selected photos from your computer to the cloud storage associated with your Google account.
It’s important to note that Google Photos offers unlimited free storage for photos up to a certain resolution. However, if you choose to upload photos in their original quality, they will count towards your Google account storage limit. Make sure to check your storage usage and plan accordingly to optimize your Google Photos experience.
Now that you know how to access the upload page in Google Photos, it’s time to move on to the next step: selecting the photos you want to upload. We’ll guide you through this process to ensure a smooth and efficient uploading experience.
Step 4: Select the photos you want to upload
Now that you have accessed the upload page in Google Photos, it’s time to select the photos you want to add to your library. Follow these simple steps to choose the photos for uploading:
- On the file explorer window, navigate to the folder where your desired photos are located.
- Click on individual photos to select them or use the Ctrl or Shift key to select multiple photos at once. You can also click and drag your mouse to select a group of photos.
- If you want to upload an entire folder, simply click on the folder once to select it. Google Photos will automatically upload all the photos within that folder, preserving your folder structure.
As you select photos, you can also view their details, such as file size and file type, in the file explorer window. This allows you to verify that you have chosen the correct photos for uploading.
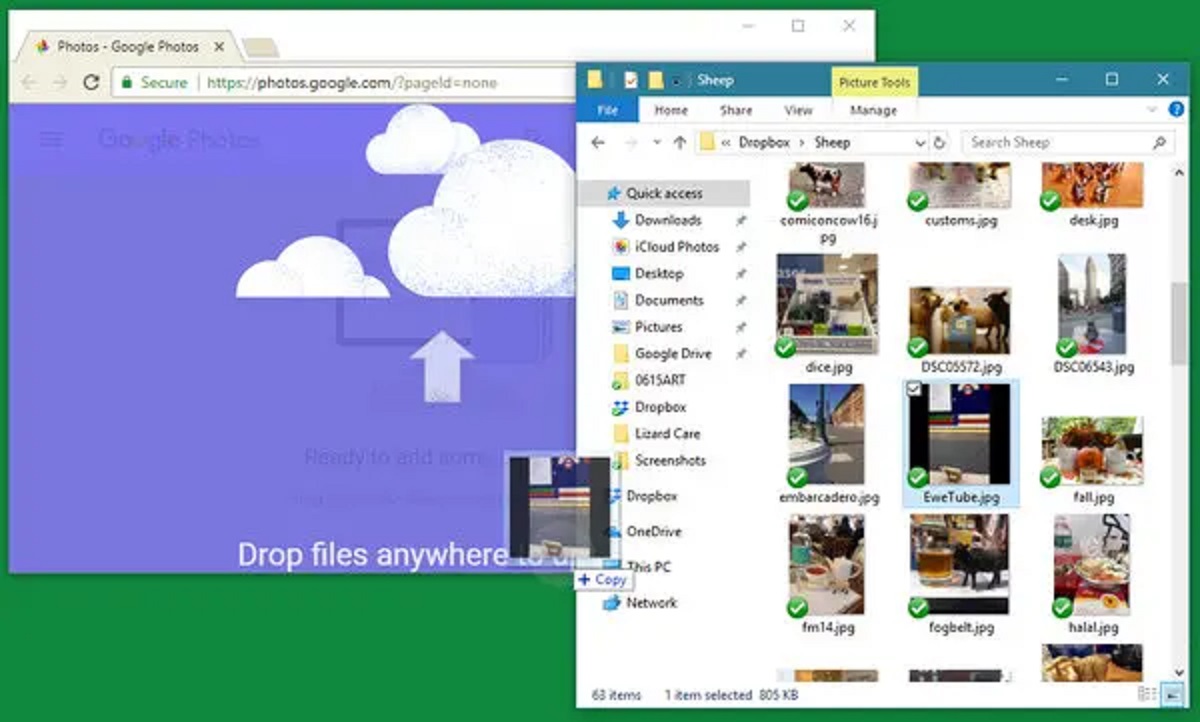
In addition to selecting photos from your computer’s hard drive, you can also drag and drop photos directly into the upload page. Simply open the folder containing the photos you want to upload and drag them into the browser window. Google Photos will automatically begin uploading them to your library.
If you have a large number of photos to upload, you can make use of the “Select all” option. This feature allows you to quickly choose all the photos in a folder with just one click, saving you time and effort in the selection process.
Once you have selected the photos you want to upload, click on the “Open” button or double-click on the selected files to initiate the upload process. Google Photos will begin transferring the photos from your computer to the cloud storage associated with your Google account. The time it takes to complete the upload will depend on the number and size of the selected photos, as well as the speed of your internet connection.
With your photos selected and ready for upload, it’s time to proceed to the next step: initiating the uploading process. We’ll guide you through this step to ensure your photos are successfully transferred to Google Photos.
Step 5: Begin the uploading process
Congratulations on selecting the photos you want to upload to Google Photos! Now it’s time to initiate the uploading process and transfer your cherished memories to the cloud. Follow these steps to begin the upload:
- After selecting your desired photos, click on the “Open” button or double-click on the selected files in the file explorer window.
- Google Photos will start the uploading process, indicated by a progress bar or circle that shows the status of the upload.
- While the photos are uploading, it’s important to keep your internet connection stable and avoid interrupting the process to ensure a smooth transfer.
- You may notice that Google Photos automatically groups your uploaded photos into events or dates, making it easier to locate and organize your images.
It’s worth mentioning that Google Photos provides an option to add descriptions or captions to your uploaded photos. This is a great way to add additional context or details to your images, making them more meaningful and memorable. To add descriptions or captions, simply click on the photo in Google Photos and select the “Info” option. From there, you can enter your desired text and save it.
During the upload process, you can continue using your computer for other tasks or even close the web browser window. Google Photos will continue uploading the selected photos in the background. You can track the progress of the upload by navigating to the “Library” view in Google Photos and viewing the “Uploads” section. Here, you’ll find a list of photos currently being uploaded and their respective statuses.
It’s important to note that the upload speed will depend on various factors such as your internet connection speed and the size of the selected photos. If you have a large number of high-resolution images or videos to upload, it may take some time to complete the process. Patience is key as Google Photos works diligently to transfer your photos securely to the cloud.
Once the uploading process is complete, you’ll receive a notification or see a confirmation message in Google Photos. At this point, your selected photos are safely stored in your Google Photos library, ready to be organized, edited, and shared. Congratulations, you have successfully uploaded your photos to Google Photos!
Now that your photos are safely stored in Google Photos, it’s time to explore the different features and tools available to organize and enhance your images. We’ll guide you through these features in the following steps to help you make the most of your uploaded photos.
Step 6: Organize your uploaded photos
Now that you have successfully uploaded your photos to Google Photos, it’s time to organize them and make them easily accessible. Google Photos offers a range of tools and features to help you efficiently manage and navigate through your photo library. Follow these steps to organize your uploaded photos:
- Open Google Photos on your computer and navigate to the “Library” view.
- Here, you’ll find all your uploaded photos displayed in chronological order.
- To create albums, click on the “+” button or the “Create” button in the sidebar.
- Give your album a name and select the photos you want to include.
- Click “Create” to finalize the album.
- You can create multiple albums to categorize your photos based on events, locations, or any other criteria that suits your preferences.
- In addition to albums, Google Photos automatically groups your photos into “People & Pets” albums based on facial recognition and “Places” albums based on location data.
- You can also search for specific photos using keywords, such as “beach,” “birthday,” or the name of a person.
Apart from creating albums and utilizing search functionality, you can also add tags or labels to your photos to further personalize and organize them. This can be done by clicking on a photo, selecting the “Info” option, and entering relevant tags in the appropriate field. Tags can help you easily find and sort your photos, making it more convenient to locate specific moments or subjects.
Google Photos also offers a “Favorites” feature, allowing you to mark certain photos as favorites. This ensures quick access to your most beloved images and creates a separate album dedicated to your selected favorites.
One of the key advantages of using Google Photos is its ability to automatically back up your photos and videos. This means that even if you delete a photo from your device, it will still be safely stored in Google Photos. It’s a great way to free up storage space on your computer while having peace of mind that your memories are securely preserved in the cloud.
By organizing your uploaded photos in Google Photos, you can easily navigate through your library and relive your favorite moments whenever you desire. Now that your photos are neatly arranged, it’s time to explore the various editing and enhancing features offered by Google Photos. We’ll guide you through these options in the next step to help you make your photos even more captivating.
Step 7: Edit and enhance your photos
With your uploaded photos organized, it’s time to unleash your creativity and enhance their visual appeal using the editing tools available in Google Photos. Whether you want to adjust the colors, apply filters, or add special effects, Google Photos offers a range of features to transform your photos into stunning masterpieces. Follow these steps to edit and enhance your photos:
- Navigate to Google Photos on your computer and open the desired photo for editing.
- Click on the editing icon, which looks like three horizontal sliders, located at the top-right corner of the photo view.
- A new window will appear, providing you with various editing options.
- Here, you can adjust basic parameters such as brightness, contrast, saturation, and warmth using the intuitive sliders.
- If you’re looking to enhance specific aspects of your photo, you can use the “Light,” “Color,” and “Pop” icons to access additional tools.
- The “Light” tool allows you to fine-tune exposure, shadows, highlights, and more.
- With the “Color” tool, you can adjust the vibrancy, tint, and color temperature of your photo.
- The “Pop” tool adds a touch of depth and contrast to make your image stand out.
- In addition to these fundamental adjustments, Google Photos provides a wide range of creative filters to apply to your photos. Simply click on the “Filters” icon and choose from an array of unique styles to transform the mood of your image.
- If you want to experiment further, take advantage of the “More” option, which offers advanced editing tools like selective adjustments, vignettes, and tilt-shift effects.
- Once you have applied your desired edits and enhancements, click on the “Save” button to preserve your changes.
It’s important to note that all edits made in Google Photos are non-destructive, meaning your original photo remains untouched. You can revert back to the original at any time, allowing for experimentation and creativity without the fear of losing your initial image.
Apart from manual editing, Google Photos also incorporates intelligent features such as automatic enhancements and suggested edits. These features analyze your photos and offer one-click adjustments based on the detected scene or subject. It’s a convenient way to quickly enhance your images with minimal effort.
Remember to take your time and explore the various editing tools and options in Google Photos. Play around with the settings, experiment with different filters, and let your creativity shine through as you transform your photos into captivating works of art.
Now that your photos are beautifully edited and enhanced, it’s time to share them with friends and family. In the next step, we’ll guide you through the process of sharing your photos using the sharing features in Google Photos.
Step 8: Share your photos with friends and family
After editing and enhancing your photos in Google Photos, it’s time to share your creations with your loved ones. Whether you want to share a single photo or create a stunning album to showcase a collection of images, Google Photos provides easy-to-use sharing features. Follow these steps to share your photos with friends and family:
- Navigate to Google Photos on your computer and locate the photo or album you wish to share.
- Click on the photo or album to open it in full view.
- Look for the share icon, which looks like an arrow pointing to the right, located at the top-right corner of the screen. Click on this icon to initiate the sharing process.
- A sharing options window will appear, allowing you to choose how you want to share your photo or album.
- You can select to share via email by entering the email addresses of the recipients.
- Alternatively, you can generate a shareable link by selecting the “Get Link” option. This link can be shared via messaging apps, social media platforms, or any other means you prefer.
- If you want to share the photo or album directly with specific people, you can use the “Share with people” option. By entering their email addresses or selecting them from your contacts, you can grant them access to view and even contribute to the shared content.
Once you have chosen your sharing option and selected the recipients, click on the “Send” or “Create Link” button to complete the sharing process. Depending on the method you chose, the recipients will receive an email notification with a link to access the shared photo or album.
It’s worth noting that when you share an album, recipients can view, like, and comment on the photos within the album, creating an interactive and collaborative experience. This makes sharing moments with friends and family even more engaging and memorable.
In addition to sharing photos via email or links, Google Photos integrates seamlessly with other Google services such as Google Drive and Google Photos Partner Sharing. This allows you to easily share your photos with contacts and collaborate on albums, ensuring everyone can enjoy and contribute to the shared memories.
By sharing your photos in Google Photos, you can relive moments, evoke emotions, and strengthen connections with friends and family, no matter where they are. It’s a powerful tool to bring people together through the shared experience of capturing and preserving memories.
Congratulations! You have now successfully uploaded, organized, edited, and shared your photos using Google Photos. Utilize these features to their fullest extent and continue to capture and cherish the moments that matter most to you.
Conclusion
In this guide, we have explored the step-by-step process of uploading photos from your computer to Google Photos. We began by launching Google Photos on your computer and signing in to your Google account. We then accessed the upload page and selected the photos we wanted to upload. After initiating the uploading process, we learned how to organize our uploaded photos and create albums for easy access.
Moving forward, we delved into the editing and enhancing features offered by Google Photos, allowing us to unleash our creativity and make our photos visually stunning. Lastly, we explored how to share our photos and albums with friends and family, creating opportunities to relive cherished memories and forge connections through the shared experience of storytelling.
Google Photos has undoubtedly become an essential tool for photo enthusiasts and casual users alike. With its seamless integration, intelligent features, and generous storage options, it provides a convenient and user-friendly platform for organizing, editing, and sharing our collection of visual memories.
Remember, Google Photos goes beyond acting as a mere photo storage service. It is a gateway to transform ordinary moments into extraordinary stories, encouraging us to celebrate life’s precious moments and share our joy with our loved ones. So, upload your photos, explore the features, and let Google Photos be your creative partner in curating a digital gallery of memories that will last a lifetime.
Embrace the power of Google Photos and embark on a digital journey of storytelling, expression, and connection. Your photos deserve to be seen, cherished, and shared, and with Google Photos, you can create and preserve memories that will transcend time.