Introduction
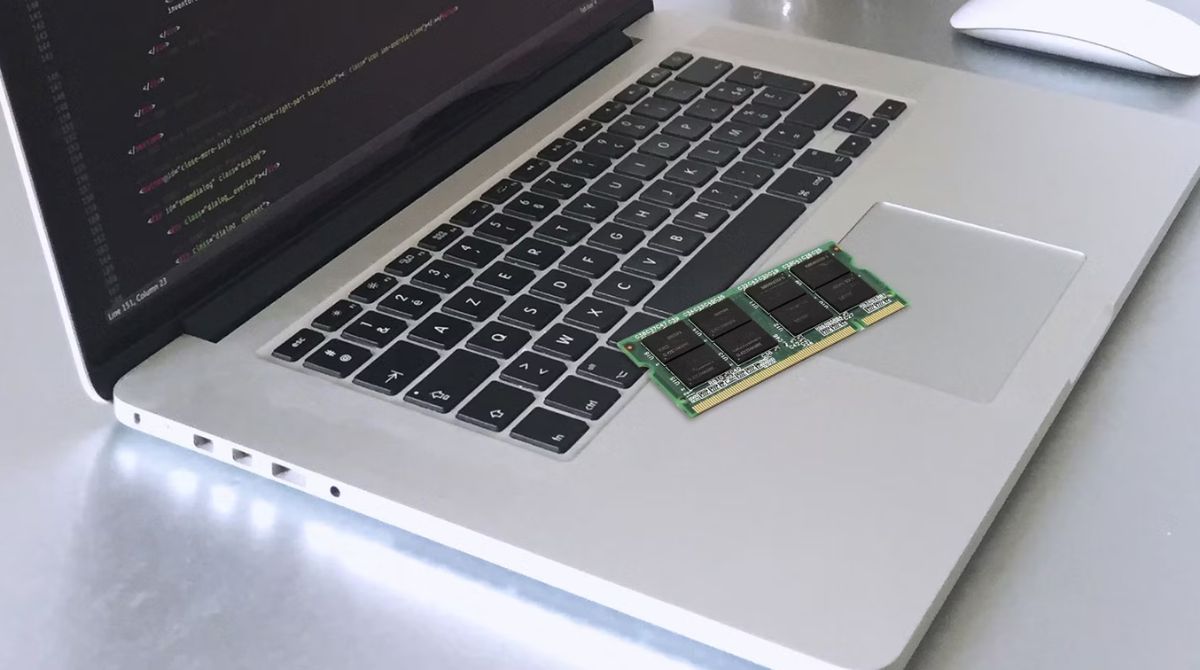
Upgrading your RAM (Random Access Memory) can significantly improve the performance and speed of your computer. Whether you’re a casual user looking for smoother multitasking or a power user dealing with resource-intensive applications, increasing your RAM capacity can make a noticeable difference in overall system responsiveness. This article will guide you through the process of upgrading your RAM, from understanding the basics to selecting the right modules and installing them correctly.
RAM is an essential component of your computer’s memory hierarchy, acting as a temporary storage space for data that the CPU (Central Processing Unit) needs to access quickly. When your RAM fills up, the system starts using slower storage devices like the hard drive or solid-state drive (SSD), resulting in decreased performance. By upgrading your RAM, you provide your computer with more space to work with, reducing the reliance on slower storage and improving overall speed and efficiency.
Before diving into the upgrade process, it’s important to determine if upgrading your RAM is the right solution for the performance issues you’re experiencing. RAM alone may not solve all performance problems, so it’s essential to assess other factors that could impact system speed, such as the processor, storage device, or cooling system. Additionally, ensure that your computer has enough available RAM slots for the desired upgrade capacity.
In this guide, we’ll cover the steps you need to follow to successfully upgrade your RAM. We’ll explore how to determine the compatibility of your computer, select the appropriate RAM modules, backup your data, open your computer’s case, locate and remove the old RAM, insert the new modules, and finally, verify the installation. We’ll also address common troubleshooting issues you may encounter during the upgrade process.
Are you ready to give your computer a performance boost? Let’s get started on upgrading your RAM and enjoy a faster and more responsive computing experience.
Reasons to Upgrade Your RAM
If you find your computer running sluggishly, freezing, or taking an eternity to load programs, it may be time to consider upgrading your RAM. Here are some compelling reasons why upgrading your RAM can benefit your computer:
- Improved Performance: Upgrading your RAM allows your computer to handle more tasks simultaneously, resulting in smoother multitasking and faster program execution. With increased RAM capacity, you can run resource-intensive applications, such as video editing software or high-end games, without experiencing lag or slowdowns.
- Better System Responsiveness: A sufficient amount of RAM enables your computer to store and quickly retrieve frequently-accessed data, reducing the need to rely on slower storage devices. This results in improved system responsiveness, faster boot times, and shorter application loading times.
- Enhanced Multitasking: If you often find yourself working with multiple applications or browser tabs open at the same time, upgrading your RAM can greatly enhance your multitasking ability. With more RAM, your computer can smoothly handle multiple tasks simultaneously without grinding to a halt.
- Efficient Virtual Machine (VM) Usage: Virtual machines can consume a significant amount of resources, including RAM. If you regularly run virtual machines for development, testing, or other purposes, increasing your RAM capacity is crucial to ensure optimal performance and avoid any performance degradation.
- Future-Proofing Your System: As technology advances and software requirements increase, having ample RAM becomes essential to keep your computer up-to-date and compatible with new programs and operating systems. Upgrading your RAM now can extend the lifespan of your computer and save you from the need to purchase a new system in the near future.
Keep in mind that upgrading your RAM is not a panacea for all performance issues. It’s important to assess other hardware components, such as the processor and storage device, to ensure a well-balanced and optimized system. However, increasing your RAM capacity offers a significant boost in performance and can alleviate many performance-related struggles.
In summary, upgrading your RAM offers improved performance, better system responsiveness, enhanced multitasking capabilities, efficient virtual machine usage, and future-proofing for your computer. If you’re experiencing performance issues or need your computer to handle more demanding applications, upgrading your RAM is a wise investment.
Understanding RAM
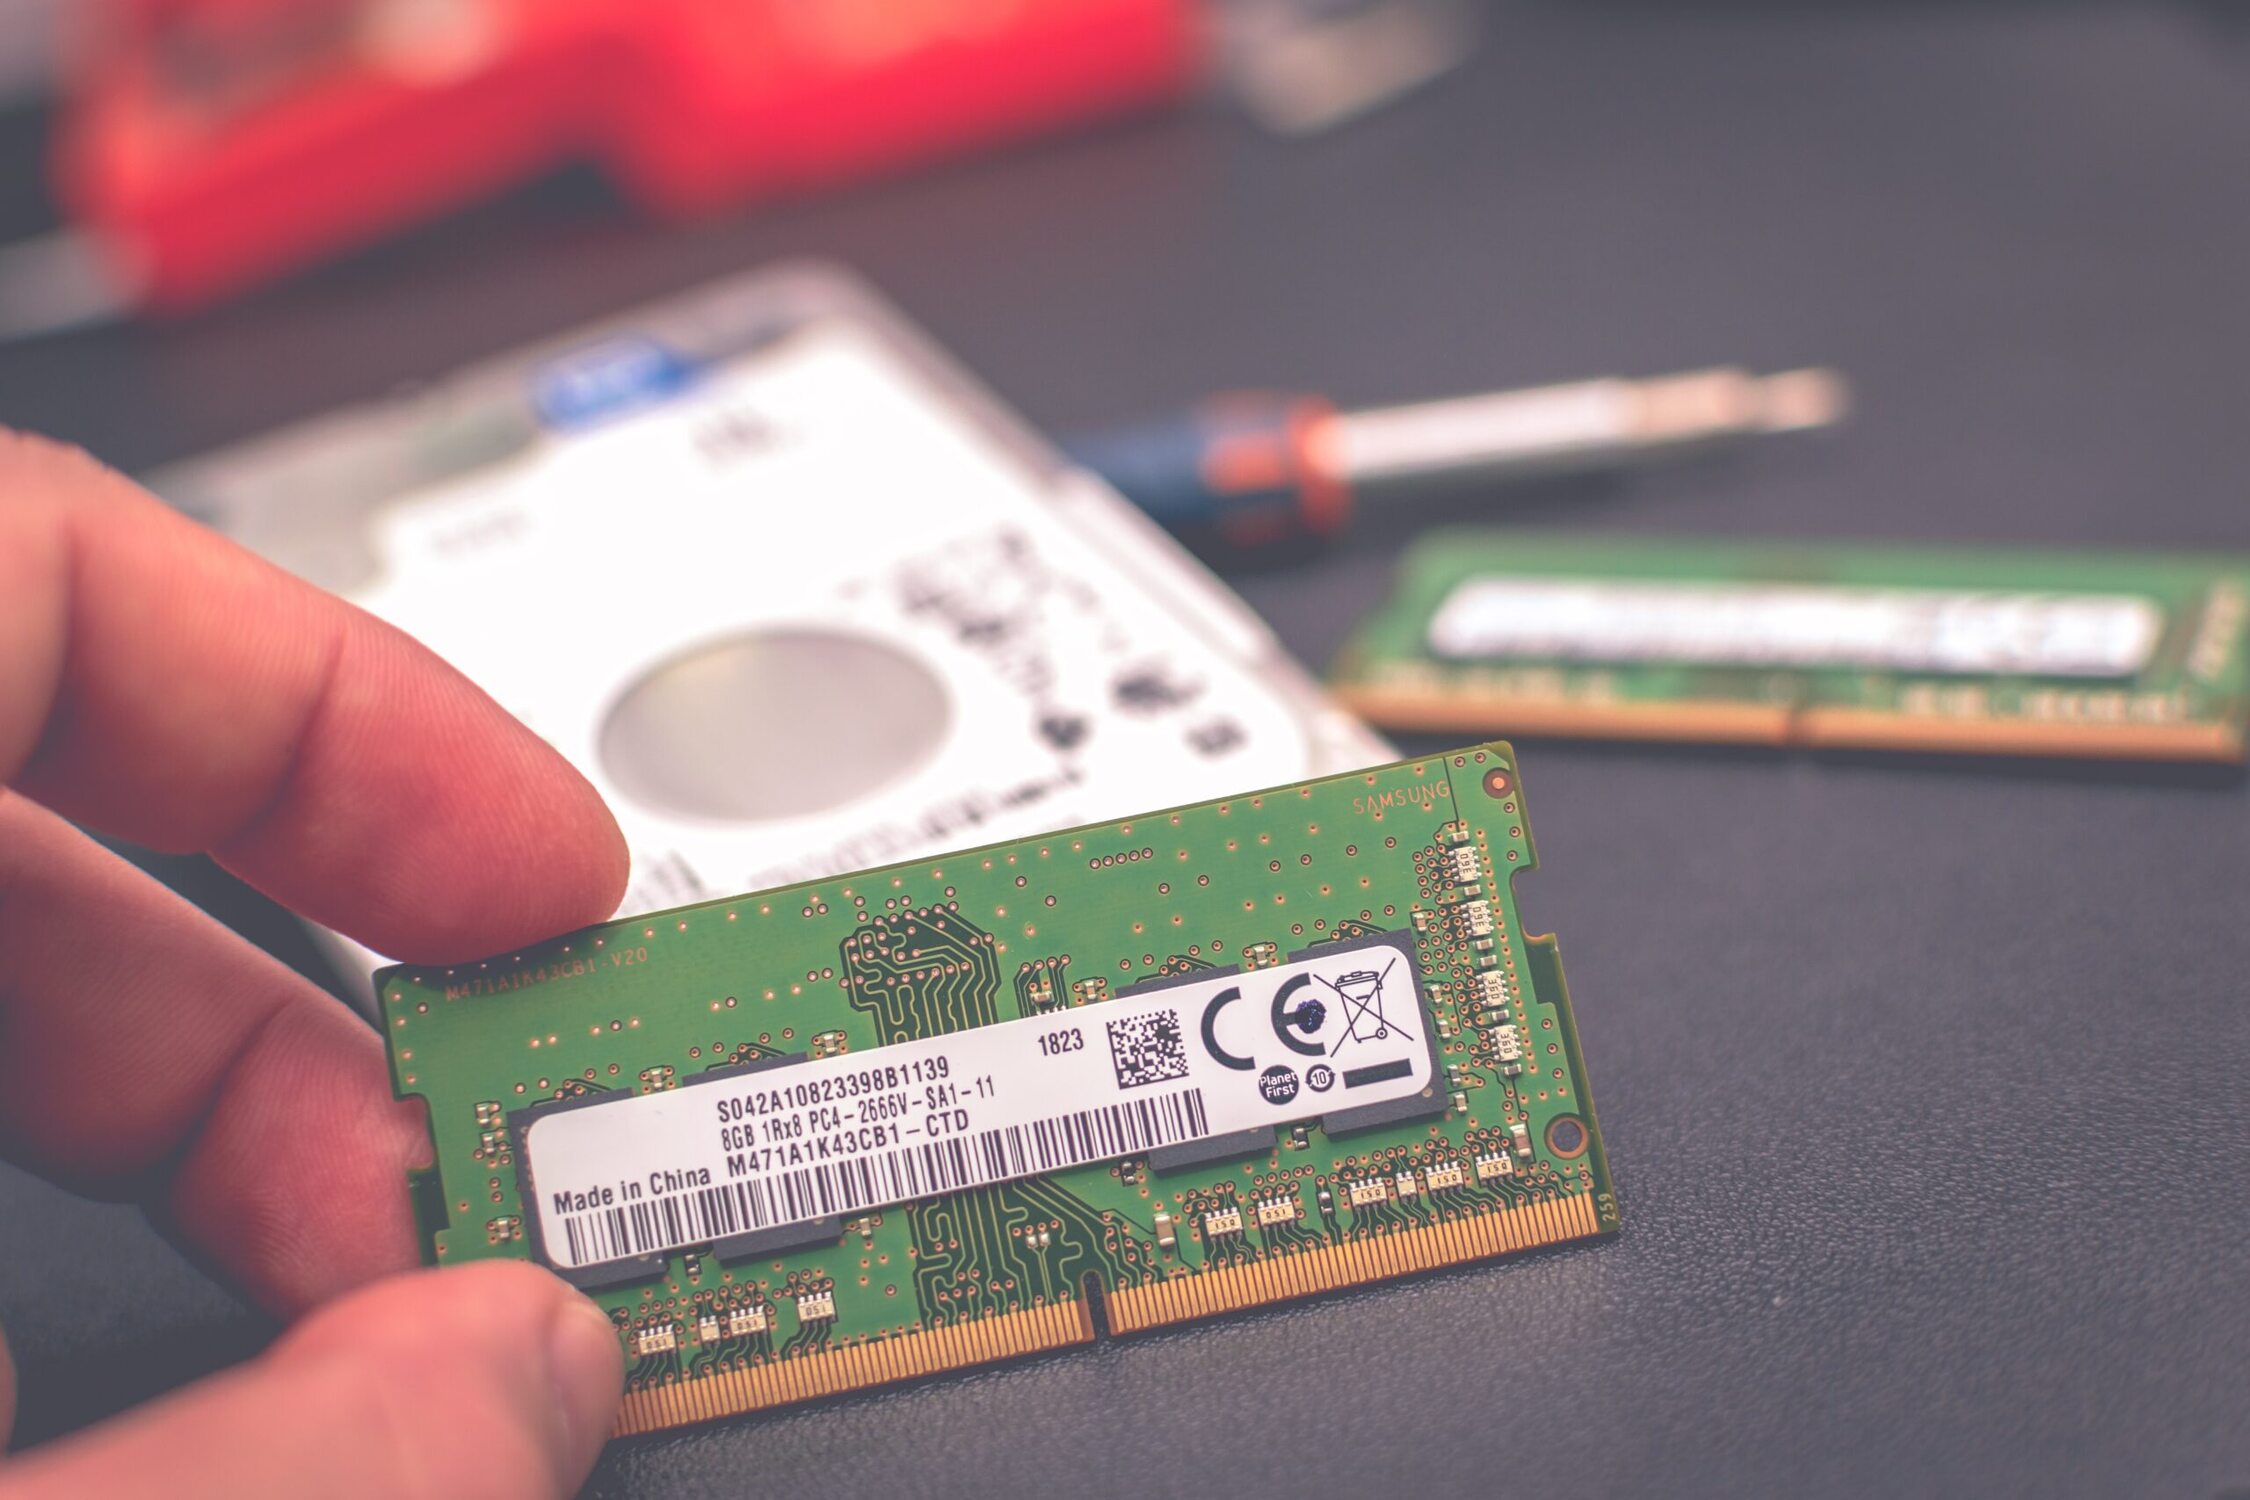
RAM, or Random Access Memory, is a crucial component of your computer’s memory system. It acts as a temporary storage space that allows your computer to quickly access data that is actively being used by the CPU. Understanding how RAM works is essential when considering an upgrade. Here are the key points to grasp:
Function: RAM serves as a bridge between your computer’s processor and its storage devices, such as the hard drive or SSD. It holds data that is currently being used by the CPU, allowing for faster access compared to retrieving data from storage devices. RAM enables quick and temporary storage of information that is actively needed by the system.
Speed: RAM is significantly faster than the storage devices on your computer. It operates at speeds measured in nanoseconds, providing quick read and write access times. This speed allows your computer to retrieve and store data with minimal delay, resulting in improved overall performance.
Capacity: RAM capacity refers to the amount of memory available for your computer to store and access data. It is measured in gigabytes (GB). The more RAM you have, the more data your computer can handle simultaneously. A higher capacity allows for smooth multitasking, running heavy applications, and handling large files effortlessly.
Volatile Memory: RAM is volatile, meaning its contents are cleared when the computer is powered off. This is why it’s crucial to save your work and shut down your computer properly. All data stored in RAM is lost when the power is cut, which is why it’s called temporary storage.
Types of RAM: There are different types of RAM, including DDR (Double Data Rate) and DDR4, which is the latest standard. The type of RAM your computer supports depends on its hardware specifications. It’s important to check your computer’s documentation or refer to its manufacturer’s website to determine the type of RAM compatible with your system.
System Requirements: Different operating systems and applications have minimum and recommended RAM requirements. It’s essential to consider these requirements when upgrading your RAM to ensure optimal performance. Insufficient RAM can result in lag, performance issues, and software crashes.
By understanding how RAM functions, its speed, capacity, and types available, you can make informed decisions about upgrading your computer’s memory. Consider your specific needs, budget, and system requirements to determine the appropriate RAM capacity and type for your upgrade.
Checking Your Computer’s Compatibility
Before proceeding with a RAM upgrade, it’s important to ensure that your computer is compatible with the new RAM modules you intend to install. Here are the key steps to check your computer’s compatibility:
1. Consult the Documentation: Review your computer’s documentation, including the user manual or specifications sheet. Look for information about the supported RAM types, capacities, and any limitations or restrictions on the upgrade. If you don’t have the physical documentation, visit the manufacturer’s website for detailed specifications.
2. Use System Information: Your operating system provides system information that can help identify your current RAM configuration. On Windows, press the Windows key + R, type “msinfo32,” and press Enter to open the System Information window. Look for the “Installed Physical Memory (RAM)” field, which displays the total installed memory. On macOS, click the Apple menu, select “About This Mac,” and click the “Memory” tab to view the installed memory information.
3. Determine RAM Type and Speed: Find out the current RAM type and speed in your system. This information can be helpful when selecting new RAM modules. On Windows, you can use the free CPU-Z tool to identify your RAM type, speed, and other details. On macOS, you can check the “Memory” tab in the “About This Mac” window to find the RAM type and speed.
4. Check RAM Slot Availability: Determine how many RAM slots are available in your computer and how many are currently occupied. Open your computer’s case and visually inspect the motherboard to count the RAM slots. Remember to shut down your computer, unplug it from the power source, and follow proper safety precautions when working with hardware components.
5. Understand RAM Limitations: Some computer models have limitations on the maximum RAM capacity they can support. Check the documentation or manufacturer’s website to ensure you don’t exceed the maximum supported capacity. Additionally, different operating systems have limitations on the maximum addressable RAM, so make sure your operating system supports the upgrade you plan to make.
6. Research RAM Specifications: Once you have identified your computer’s compatibility requirements, research the specific RAM modules that meet those requirements. Consider factors such as capacity, type, speed, and brand reputation when selecting compatible RAM. Online retailers and RAM manufacturer websites provide detailed specifications for their products.
Checking your computer’s compatibility before purchasing and installing RAM modules is crucial to ensure a successful upgrade. By consulting the documentation, using system information tools, determining RAM type and speed, checking slot availability, understanding limitations, and researching compatible RAM specifications, you can confidently select the right RAM modules for your computer.
Choosing the Right RAM
When upgrading your computer’s RAM, it’s essential to choose the right modules that meet your system’s requirements and support optimal performance. Here are the key factors to consider when selecting the right RAM:
1. Capacity: Determine the amount of RAM you need based on your specific usage requirements. Consider the types of applications you run and the tasks you perform. For basic tasks like web browsing and document editing, 8GB to 16GB of RAM should be sufficient. However, if you work with resource-intensive software or perform memory-intensive tasks like video editing or virtualization, you may benefit from 32GB or more of RAM.
2. Type and Speed: Check your computer’s compatibility and choose the appropriate RAM type and speed. DDR (Double Data Rate) is a common RAM type, with DDR4 being the latest standard. Ensure that the RAM you select matches your motherboard’s specifications and supports the correct speed. Upgrading to a higher speed RAM module can improve system performance, but keep in mind that the motherboard and processor must also support that speed.
3. Timing and Latency: RAM modules have latency specifications that impact their performance. Lower latency numbers generally indicate faster response times. For example, a RAM module with a CAS latency of 16 would be faster than one with a CAS latency of 20. However, the difference in real-world performance may not be significant for most users. Consider the price difference and overall system requirements when evaluating the timing and latency specifications.
4. Brand and Quality: Stick to reputable brands when choosing RAM modules. Well-known brands often provide reliable products that undergo rigorous quality testing. Look for trusted brands with good customer reviews and warranties. Cheap RAM modules from unknown brands may pose compatibility and performance issues, so it’s best to invest in quality components to ensure stability and reliability.
5. Consider Future Upgrades: If you anticipate further upgrades in the future, consider purchasing RAM modules with lower capacities initially, leaving room for expansion. This can help save costs and make future upgrades more convenient. Check your computer’s maximum RAM capacity and consider your long-term needs when planning for future upgrades.
6. Budget: Set a budget for your RAM upgrade and compare prices from different retailers. While it’s important to find a balance between price and performance, don’t compromise on quality. Avoid buying the cheapest RAM modules if they lack good customer reviews or reliable warranties. Look for deals and promotions from trusted retailers to get the best value for your money.
By considering the capacity, type and speed, timing and latency, brand and quality, future upgrade options, and budget, you can confidently choose the right RAM modules for your upgrade. A well-chosen RAM upgrade can significantly enhance your computer’s performance and deliver a smoother and more efficient computing experience.
Backing Up Your Data
Before proceeding with a RAM upgrade, it’s crucial to back up your important data to ensure its safety and prevent any potential loss. Here’s what you need to do to back up your data:
1. Identify Important Files: Determine which files and data are crucial and need to be backed up. These may include personal documents, photos, videos, music, and any other irreplaceable files. Make a list of the folders and directories that contain your important data.
2. Choose Backup Method: Decide on the backup method that suits your needs. You can use cloud storage services like Google Drive, Dropbox, or OneDrive, which provide convenient and accessible online backup solutions. Alternatively, you can back up your data to an external hard drive or other removable storage devices.
3. Cloud Backup: For cloud backup, sign up for a cloud storage service and install the relevant application or software on your computer. Configure the backup settings to automatically back up your selected files to the cloud. Ensure that your internet connection is stable and that you have sufficient storage space in your cloud storage account.
4. External Drive Backup: If you choose an external drive backup, connect the drive to your computer. Use backup software or simply copy and paste the selected files and folders onto the external drive. Ensure that the drive is formatted correctly, and there is enough space to accommodate the backup.
5. Verify Backup Integrity: After the backup process is complete, verify the integrity of your backup files. Check a sample of the backed-up files to ensure they are accessible and not corrupted. This step ensures that you have a reliable backup for your data.
6. Create a Backup Schedule: To maintain regular data backups, create a backup schedule that fits your needs. Depending on how frequently your data changes, consider weekly or monthly backups. Automating the backup process ensures that your files are regularly protected and reduces the risk of data loss.
7. Test Data Restoration: It’s essential to periodically test the restoration process to ensure your backup works correctly. Select a few files from your backup and restore them to a separate location on your computer to verify that the files can be successfully retrieved.
Backing up your data is crucial before any system upgrade, including a RAM upgrade. Even though RAM upgrades generally do not impact data directly, it’s always better to err on the side of caution. By identifying important files, choosing a backup method, utilizing cloud storage or external drives, verifying backup integrity, creating a backup schedule, and testing data restoration, you can ensure the safety and accessibility of your important files.
Shutting Down Your Computer
Before you begin the process of upgrading your RAM, it’s essential to shut down your computer properly to prevent any potential damage and ensure a safe upgrade process. Here are the steps to follow when shutting down your computer:
1. Save your work: Before shutting down, make sure to save any unsaved work in progress and close all open applications. This ensures that you don’t lose any important data during the shutdown process.
2. Close applications: Close all running applications and programs on your computer. This will free up resources and minimize the risk of conflicts during the shutdown process.
3. Disconnect peripherals: Unplug any external devices connected to your computer, such as USB drives, external hard drives, printers, and other peripherals. This prevents any potential issues when shutting down and avoids accidental data loss or hardware damage.
4. Save and close any open documents: If you have any open documents or files, save and close them properly before shutting down. This ensures that any changes you made are properly saved and prevents data loss.
5. Exit all applications: Double-check that all applications are closed, including ones running in the background or system tray. Some applications may prevent or delay the shutdown process, so it’s important to ensure that everything is properly closed before proceeding.
6. Windows Shutdown: On a Windows computer, click on the Start button, select the Power icon, and choose the Shutdown option. Windows will initiate the shutdown process and close all running processes before powering off your computer.
7. macOS Shutdown: On a macOS computer, click on the Apple menu in the top-left corner of your screen and select the Shutdown option. macOS will close all running applications and perform a proper shutdown process before powering off.
8. Wait for complete shutdown: Once the shutdown process has begun, wait for your computer to completely power off before proceeding with the RAM upgrade. This ensures that the system has safely shut down and is ready for the hardware modifications.
By following these steps, you can safely shut down your computer before starting the RAM upgrade process. Properly saving work, closing applications, disconnecting peripherals, and allowing the system to completely shut down will help prevent any potential issues and ensure a smooth upgrade process.
Opening Your Computer’s Case
Before you can proceed with upgrading your RAM, you’ll need to open your computer’s case to gain access to the internal components. Follow these steps to safely open your computer’s case:
1. Power off your computer: Ensure that your computer is fully powered off and disconnected from the power source. This step is crucial to prevent any electrical shock or damage to the internal components.
2. Gather the necessary tools: Depending on your computer’s case design, you may require a screwdriver or other tools to remove screws or access panels. Refer to your computer’s documentation or do some research to determine the specific tools needed.
3. Locate the case screws: Examine the exterior of your computer’s case to locate the screws holding the side panel(s) in place. These screws are typically located on the back or side of the case. Some cases may use thumbscrews that can be easily turned by hand.
4. Remove the side panel: Use the appropriate tool to remove the screws or thumbscrews holding the side panel in place. Carefully slide or lift the panel away from the case, being mindful of any cables or connectors that may be attached to it.
5. Ground yourself: Before touching any internal components, it’s important to ground yourself to prevent static discharge that could damage sensitive electronics. You can do this by touching a grounded metal object, such as the metal frame of your computer case or a grounded power outlet.
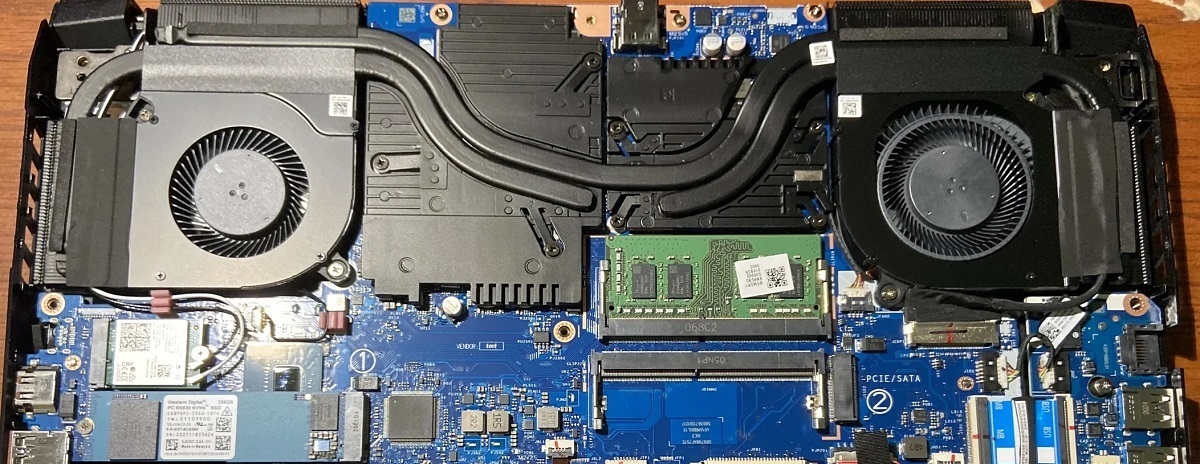
6. Locate the RAM slots: Once the side panel is removed, visually locate the RAM slots on the motherboard. These slots are typically rectangular and may be color-coded. Most motherboards have two to four RAM slots, though this can vary.
7. Handle with care: When working inside your computer’s case, be gentle and avoid excessive force or bending components. Components like the motherboard and RAM are delicate and can be easily damaged if mishandled.
8. Take precautions against static electricity: To further reduce the risk of electrical damage to your components, consider using an antistatic wrist strap. This strap keeps you grounded and prevents static electricity from building up and potentially damaging your computer’s sensitive electronics.
By following these steps and taking the necessary precautions, you can safely open your computer’s case and prepare for the RAM upgrade. Remember to consult your computer’s documentation or manufacturer’s website for specific instructions on opening your particular model’s case.
Locating the RAM Slots
After opening your computer’s case, the next step in upgrading your RAM is to locate the RAM slots on your motherboard. Follow these steps to find the RAM slots:
1. Identify the motherboard: Take a look at the main circuit board inside your computer. This is the motherboard, which is typically a large rectangular or square-shaped board. It houses all the important components of your computer, including the RAM slots.
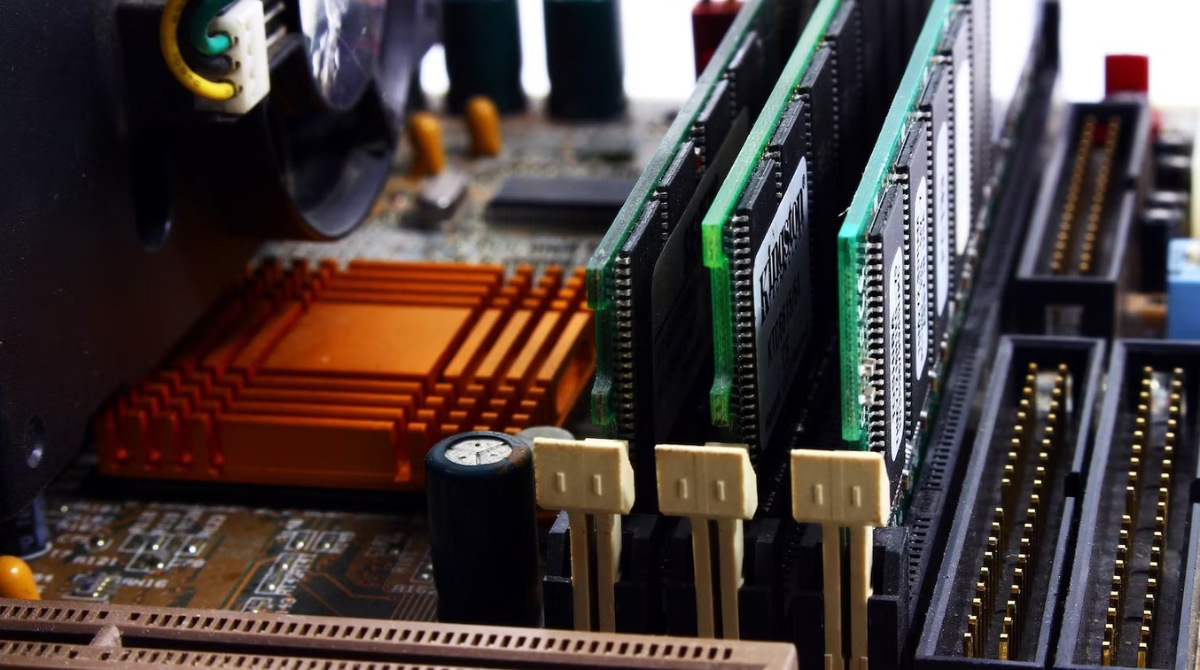
2. Look for the DIMM slots: On the motherboard, locate the DIMM slots. DIMM stands for Dual Inline Memory Module, and these slots are where you will insert your new RAM modules. They are typically long, rectangular slots.
3. Count the available slots: Depending on the motherboard, you may have two, four, or more RAM slots. Count the slots to determine how many are available for the RAM upgrade. It’s essential to know the number of empty slots to ensure compatibility with your new RAM modules.
4. Check for color coding or labels: Some motherboards may have color-coded DIMM slots or labels indicating the preferred slot configuration, such as Dual Channel or Quad Channel memory setups. Refer to your motherboard’s manual or manufacturer’s documentation for guidance on proper RAM installation.
5. Note any obstructions: Ensure that there are no cables, heat sinks, or other components obstructing the RAM slots. Clear away any cables or connectors that may be in the way to ensure easy access to the slots and smooth installation of the new RAM modules.
6. Take photos or make notes: As a precaution, consider taking photos or making notes of the current RAM configuration. This can come in handy if you need to refer back to the previous setup or troubleshoot any issues.
7. Handle the RAM modules carefully: As you prepare to install the new RAM modules, make sure to handle them with care. Hold the modules by their edges, avoiding contact with the connectors or any exposed components. This reduces the risk of damage from static electricity or mishandling.
8. Refer to the motherboard manual: If you encounter any difficulties or are unsure about the location of the RAM slots, you can always consult the motherboard’s manual. The manual provides specific instructions and diagrams for your motherboard model, making it easier to identify the RAM slots.
By following these steps and taking note of any specific instructions provided by your motherboard manufacturer, you can easily locate the RAM slots on your motherboard. This will allow you to proceed with confidence in the RAM upgrade process.
Removing the Old RAM
Now that you have located the RAM slots, it’s time to remove the old RAM modules from your computer. Follow these steps to safely remove the old RAM:
1. Power off your computer: As a precaution, ensure your computer is fully powered off and unplugged from the power source. This step is crucial for your safety and to prevent any damage to the components.
2. Ground yourself: To prevent any static discharge that could harm the sensitive electronic components, ground yourself by touching a grounded metal object or wearing an antistatic wrist strap.
3. Identify the old RAM modules: Locate the old RAM modules that you intend to remove. These modules will be inserted in the RAM slots on the motherboard. Take note of how the modules are positioned in the slots.
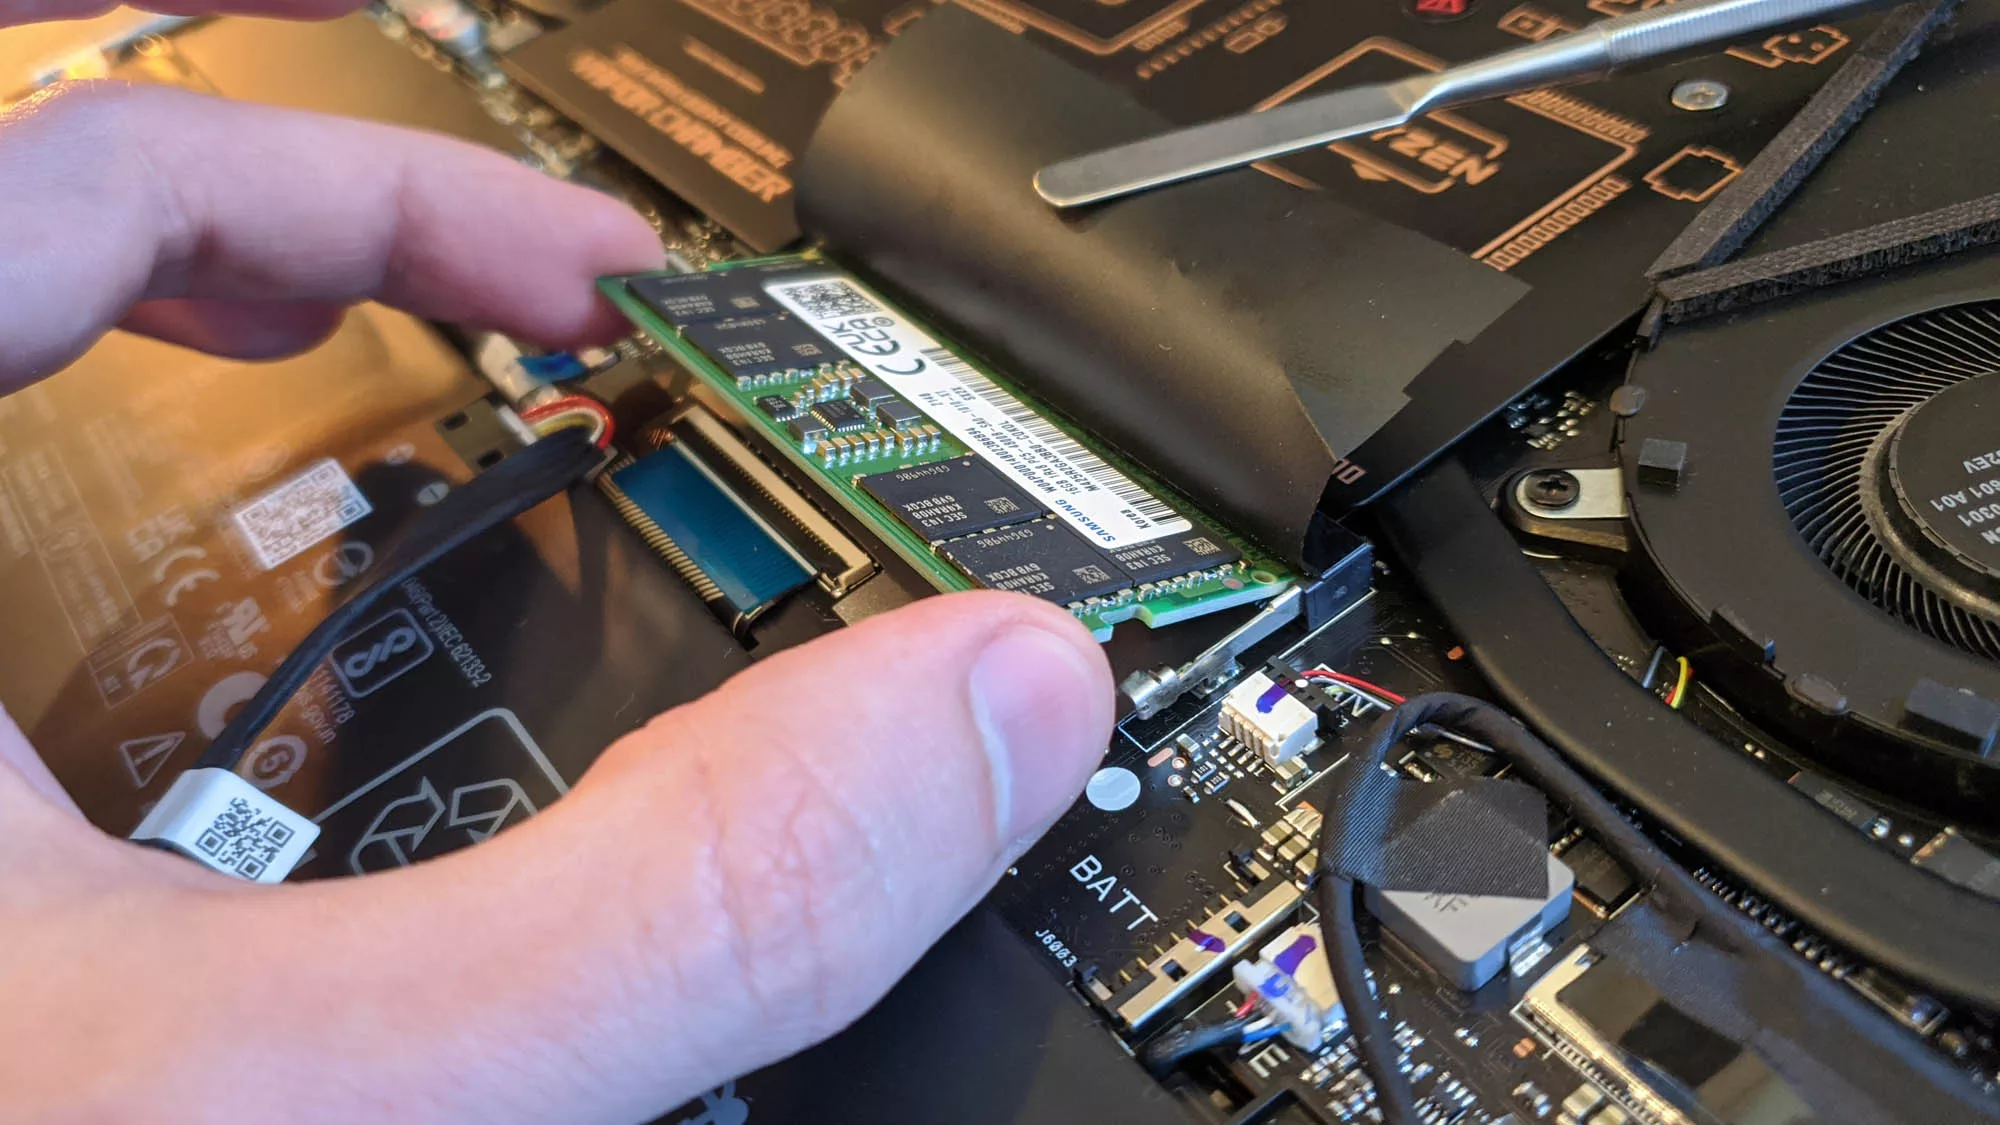
4. Release the retention clips: On either side of each RAM slot, you will find small retention clips holding the RAM modules in place. Gently push the clips outward or downwards to release them. The module should pop up slightly once the clips are released.
5. Remove the old RAM modules: Once the retention clips are released, grasp the edges of the old RAM module firmly but gently. Carefully pull the module straight out of the RAM slot, ensuring that you don’t apply excessive force or bend any components during the process.
6. Place the old RAM modules in an antistatic bag: If you plan to keep the old RAM modules as backups or for any other purpose, place them in an antistatic bag or wrap them in antistatic material. This protects them from static electricity and potential damage.
7. Inspect the RAM slots: Take a moment to inspect the RAM slots for any dust, debris, or foreign objects. If you notice any, use a can of compressed air or a soft brush to gently clean the slots before installing the new RAM modules.
8. Keep the old RAM modules safely: Store the old RAM modules in a safe place where they won’t be exposed to static electricity or physical damage. If you no longer need them, consider recycling or disposing of them properly according to the local regulations.
By following these steps and handling the old RAM modules with care, you can safely remove the old RAM from your computer. Removing the old RAM is a necessary step in the RAM upgrade process and prepares the slots for the installation of the new RAM modules.
Inserting the New RAM
With the old RAM modules removed, it’s time to insert the new RAM into your computer. Follow these steps carefully to ensure a successful installation:
1. Ground yourself: Before handling the new RAM modules, ground yourself by touching a grounded metal object or wearing an antistatic wrist strap. This helps prevent static discharge that could damage the sensitive electronic components.
2. Orient the new RAM modules: Take note of the orientation of the new RAM modules. They should have a notch or cutout on the connector edge that matches with the slot’s key. Align the notch on the module with the RAM slot’s key and ensure that they are correctly oriented.
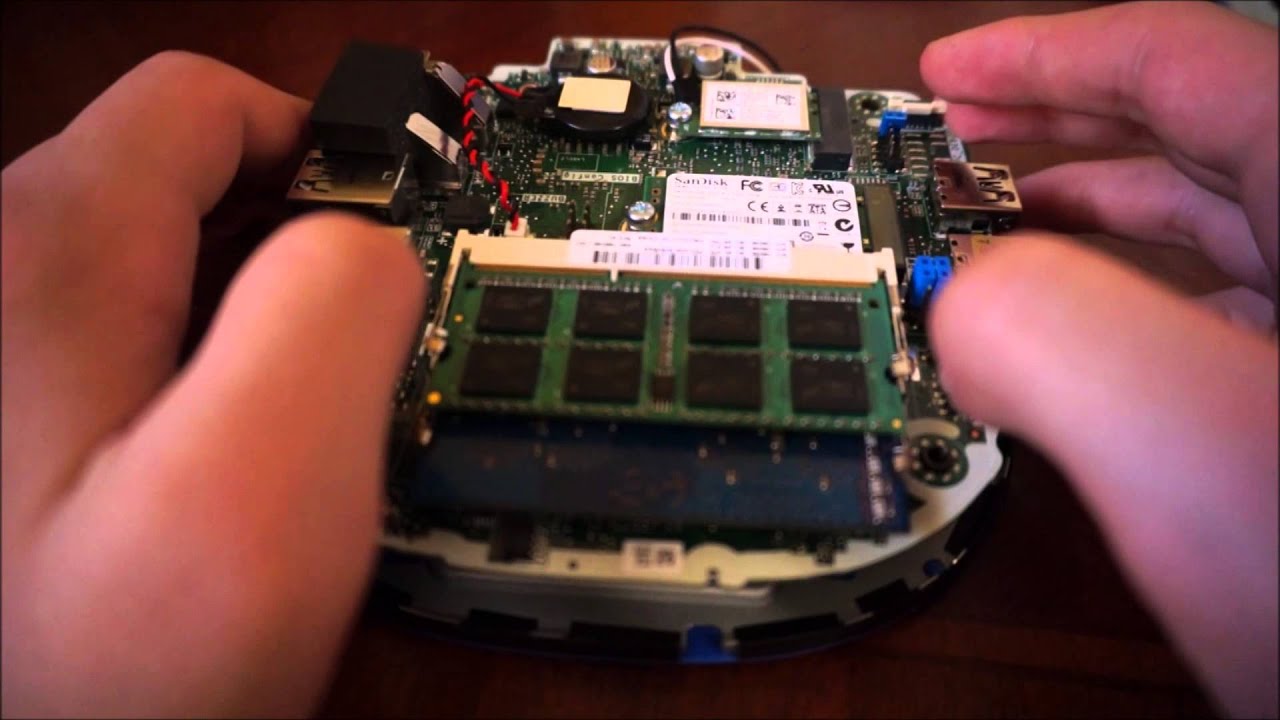
3. Insert the new RAM module: Holding the new RAM module by the edges, gently align it with the slot. Make sure the notch on the module matches with the slot’s key. Insert the module into the slot at a slight angle, with the connector side going in first. Apply even pressure on both ends of the module until it clicks securely into the slot.
4. Repeat for additional modules: If you are installing multiple RAM modules, repeat the previous step for each module, ensuring that each module is inserted into its respective slot. Double-check the orientation and alignment before applying pressure to secure them.
5. Verify proper seating: Once the RAM modules are inserted, gently press down on them to make sure they are fully seated in the slots. The retention clips should automatically close and hold the modules in place securely.
6. Check for equal pressure: Make sure that the applied pressure on the modules is equal on both sides. This ensures that the modules are inserted correctly and reduces the risk of misalignment or connectivity issues.
7. Inspect the installation: Take a moment to visually inspect the installed RAM modules. Ensure that they are evenly inserted, properly seated in the slots, and the retention clips are securely closed. Also, check for any signs of misalignment or physical damage.
8. Replace the computer case: Once you have confirmed that the RAM modules are installed correctly, place the computer case’s side panel back onto the chassis. Secure it in place with the screws or thumbscrews, ensuring that it is tight but not overly tightened. This helps protect the internal components and promotes proper cooling.
By following these steps and taking note of the proper orientation and seating of the new RAM modules, you can successfully install the new RAM into your computer. Remember to be gentle and avoid applying excessive force to prevent any damage to the components.
Closing Your Computer’s Case
After successfully installing the new RAM modules, it’s time to close your computer’s case to protect the internal components. Follow these steps to properly close your computer’s case:
1. Align the side panel: Take the side panel that you removed earlier and align it with the case. Make sure that the panel’s edges match up with the corresponding edges of the case.
2. Secure the side panel: Once the side panel is aligned, gently slide it into place. Ensure that the panel fits snugly and there are no gaps between the panel and the case. If your case has screws or thumbscrews, fasten them to secure the side panel in place. Avoid overtightening the screws to prevent damage to the case or the panel.
3. Check for any obstructions: Before fully securing the side panel, double-check that there are no cables or connectors obstructing its placement. Carefully maneuver any cables if needed to ensure they are neatly tucked and not interfering with the panel’s fit.
4. Verify proper closure: Once the side panel is in place and secured, visually inspect the case to ensure that it is closed correctly. Ensure that all edges are aligned, and the side panel is flush against the case. This ensures proper protection for the internal components.
5. Reconnect peripherals: If you disconnected any peripherals during the RAM upgrade process, now is the time to reconnect them. Plug in any USB devices, external hard drives, printers, or any other peripherals that you previously disconnected.
6. Reconnect power and turn on your computer: Finally, reconnect the power cable to your computer and plug it back into a power source. Press the power button to turn on your computer and verify that it boots up successfully. Listen for any abnormal noises or beeping codes during the boot process, which could indicate a problem with the new RAM installation.
7. Confirm the new RAM installation: Once your computer has booted up, confirm that the new RAM modules are recognized by the system. You can check this through the BIOS/UEFI setup or by using system monitoring software. Ensure that the installed RAM capacity matches your expectation and that the system stability is not compromised.
By following these steps and taking the necessary precautions, you can securely close your computer’s case after upgrading the RAM. Properly aligning the side panel, securing it in place, checking for any obstructions, and reconnecting peripherals will help ensure that your computer is ready for use with the new RAM modules.
Powering Up Your Computer
Now that you have closed your computer’s case after installing the new RAM, it’s time to power up your computer and ensure everything is working properly. Follow these steps to safely power up your computer:
1. Verify all connections: Double-check all the connections, including the power cable, monitor cable, and any other peripherals. Ensure that everything is securely plugged in and properly connected.
2. Press the power button: Locate the power button on your computer’s case and press it to turn on your computer. The power button is typically located on the front panel or top of the case. If your computer is a laptop, the power button is usually located near the keyboard.
3. Listen for startup sounds and watch for display output: Pay attention to the startup sounds your computer makes. You should hear the fans spinning up and possibly a beep code indicating a successful POST (Power On Self Test). Additionally, check that your monitor displays the initial boot screen or BIOS/UEFI setup. If you see any error messages or encounter issues during startup, refer to your computer’s documentation or seek further troubleshooting assistance.
4. Monitor system stability: Once your computer has booted up to the desktop or operating system, monitor its stability. Open several applications and perform various tasks to ensure that the new RAM is functioning correctly. Pay close attention to any signs of instability, such as crashes, freezes, or error messages. If such issues arise, it may indicate a problem with the RAM installation.
5. Check the new RAM’s capacity: Verify that the operating system recognizes the full capacity of the newly installed RAM. On Windows, you can check this in the “System” section of the Control Panel or using system information tools. On macOS, navigate to “About This Mac” and click on the “Memory” tab. The reported RAM capacity should match the amount you installed.
6. Test for optimal performance: If you had specific reasons for upgrading your RAM, such as improved multitasking or running resource-intensive applications, test whether your computer is performing better with the new RAM. Open memory-intensive applications, switch between multiple tasks, and observe if there is noticeable improvement in speed and responsiveness.
7. Run a memory test: To further ensure the stability and reliability of your new RAM, consider running a memory test using specialized software. This test can help detect any memory-related errors or issues that may have gone unnoticed during the startup process. Many free memory testing tools are available online for this purpose.
By following these steps and closely monitoring your computer’s performance and stability, you can successfully power up your computer after installing the new RAM. Properly verifying connections, listening for startup sounds, checking display output, monitoring system stability, confirming the new RAM capacity, and running a memory test will help ensure that your computer is working optimally with the upgraded RAM.
Verifying the New RAM
After powering up your computer with the newly installed RAM, it’s important to verify that the new RAM is functioning correctly. Follow these steps to ensure the successful installation and operation of the new RAM:
1. Check system properties: On your computer, open the system properties window to verify the total installed RAM. On Windows, right-click on “This PC” or “My Computer,” select “Properties,” and navigate to the “System” section. On macOS, click the Apple menu, select “About This Mac,” and click on the “Memory” tab. Confirm that the reported RAM capacity matches the new RAM modules’ specifications.
2. Review BIOS/UEFI settings: Restart your computer and enter the BIOS/UEFI setup. Consult your computer’s documentation or manufacturer’s website for instructions on accessing the BIOS/UEFI on your specific model. Within the BIOS/UEFI, ensure that the RAM is detected correctly and that the system recognizes the new RAM module specifications. Adjust any settings if necessary, such as enabling XMP (Extended Memory Profile), to optimize RAM performance.
3. Monitor system stability: Pay attention to the stability of your computer over time. Run demanding applications, multitask, and perform tasks that used to strain your computer’s performance before the RAM upgrade. If the system remains stable and responsive without crashes, freezes, or performance degradation, it indicates that the new RAM is functioning properly.
4. Run memory-intensive tasks: To further stress test the new RAM, run memory-intensive tasks or applications. This could include video editing, running virtual machines, or performing complex calculations. Monitor the system’s response to ensure that it can handle these tasks smoothly and without issues caused by insufficient or faulty RAM.
5. Perform benchmark tests: Run benchmark tests to compare your computer’s performance before and after the RAM upgrade. Benchmarking software like PCMark or PassMark can provide insights into the overall system performance, including memory bandwidth and latency. Compare the results to see if the new RAM has indeed improved the performance as expected.
6. Consult manufacturer’s specifications: Refer to the manufacturer’s specifications or documentation for the new RAM modules to ensure compatibility and proper operation. Check that the RAM voltage, speed, and timing match the manufacturer’s specifications to optimize performance and longevity.
7. Seek professional help if necessary: If you encounter any issues or suspect that the new RAM is not functioning correctly, it’s advisable to seek help from a professional or the manufacturer’s support team. They can assist in diagnosing and resolving any problems related to RAM compatibility, installation, or faulty modules.
By following these steps and regularly monitoring system stability and performance, you can verify the successful installation and operation of the new RAM. Ensuring the accuracy of reported RAM capacity, reviewing BIOS/UEFI settings, testing system stability, running memory-intensive tasks, performing benchmark tests, and consulting manufacturer’s specifications will help ensure that your computer is utilizing the new RAM properly.
Troubleshooting
While upgrading your RAM can be a smooth process, there may be instances where you encounter issues or challenges. Here are some common troubleshooting steps to overcome potential problems:
1. Check RAM compatibility: Double-check that the new RAM modules are compatible with your computer’s motherboard and meet the required specifications. Ensure that the type, speed, and capacity of the new RAM match the motherboard’s supported configurations.
2. Reseat the RAM: If you experience boot failures or instability after the RAM upgrade, try reseating the RAM modules. Power off your computer, remove and reinsert the RAM modules, making sure they are securely and properly aligned in the slots.
3. Test individual RAM modules: If you installed multiple RAM modules, try testing them individually to identify if there is a problem with a specific module. Remove all but one module and test your computer’s stability. Repeat the process with each module to identify any faulty RAM modules.
4. Update BIOS/UEFI: Outdated BIOS/UEFI firmware can cause compatibility issues with new RAM. Check the manufacturer’s website for BIOS/UEFI updates and install the latest version. Follow the instructions carefully to avoid any firmware update problems. Be cautious as improper BIOS/UEFI updates can cause system instability.
5. Check for dust or debris: Over time, dust or debris can accumulate on RAM modules and slots, affecting their performance. Ensure the RAM slots and modules are clean by using compressed air or a soft brush to gently remove any dust particles. Be careful not to apply excessive force or damage any components.
6. Reset CMOS: If your computer experiences boot failures or fails to detect the new RAM, resetting the CMOS (Complementary Metal-Oxide-Semiconductor) may help. Consult your motherboard’s manual or manufacturer’s website on how to reset the CMOS, as the process can vary depending on the model.
7. Test with different RAM slots: There may be instances where specific RAM slots on the motherboard are faulty. Try installing the new RAM in different slots to identify if the problem lies with a particular slot. Refer to your motherboard’s manual for guidance on recommended RAM slot configurations.
8. Seek professional assistance: If you have exhausted troubleshooting options and are still experiencing issues, it’s best to seek professional assistance from computer technicians or contact the manufacturer’s support team. They can help diagnose and resolve any persistent problems related to the RAM upgrade.
Remember to keep patience and be cautious when troubleshooting. If unsure about any steps or encounter difficulties, it is recommended to seek help rather than risk potential damage to your computer’s components.
Conclusion
Upgrading your RAM can breathe new life into your computer, improving its performance and allowing for smoother multitasking and faster program execution. By following the steps outlined in this guide, you can successfully upgrade your RAM and enjoy the benefits of increased memory capacity.
First, it is important to understand the role of RAM in your computer’s memory hierarchy and how it contributes to overall system performance. Additionally, checking your computer’s compatibility and choosing the right RAM modules for your needs are crucial steps in the upgrade process. Backing up your data and safely shutting down your computer ensure the protection of your files and prevent any potential damage.
Opening your computer’s case and locating the RAM slots allow for easy access to remove the old RAM modules. Carefully inserting the new RAM modules into the slots and closing the computer’s case safeguard the components and ensure proper installation. Powering up the computer, verifying the new RAM, and troubleshooting any issues that may arise ensure that the upgrade is successful and the computer is performing optimally.
Remember, always take caution when handling computer components and follow safety guidelines. If you encounter any difficulties or are unsure about any step, consult your computer’s documentation or seek professional assistance.
With the upgraded RAM, you can expect a noticeable improvement in your computer’s performance, better system responsiveness, enhanced multitasking capabilities, and the ability to handle memory-intensive tasks effectively. Enjoy the benefits of a faster and more efficient computing experience!


