Introduction
Upgrading the RAM on your MacBook can significantly improve its performance and speed, allowing you to run more demanding applications and multitask with ease. RAM (Random Access Memory) is responsible for temporarily storing data that your MacBook needs to access quickly. By increasing the amount of RAM, you can ensure smoother and more efficient operations, especially when working with resource-intensive tasks such as video editing, graphic design, or gaming.
While upgrading RAM on a MacBook may sound like a daunting task, it is actually a straightforward process that can be done by following a few simple steps. This guide will provide you with a step-by-step walkthrough of how to upgrade the RAM on your MacBook, helping you unleash its full potential without unnecessary expense or professional assistance.
Before proceeding with the RAM upgrade, it is essential to ensure that your specific MacBook model is compatible with the desired RAM upgrade. Different MacBook models have different RAM restrictions, and exceeding the specified limitations may lead to compatibility issues and potentially void your warranty. Therefore, it is crucial to verify the maximum supported RAM capacity for your specific MacBook model to avoid any complications.
Note that upgrading the RAM on a MacBook does require opening the device and handling internal components, which can potentially void your warranty. If your MacBook is under warranty, it’s advisable to contact Apple or an authorized service provider for assistance with your RAM upgrade to ensure you don’t affect your warranty coverage.
Now that we’ve covered the basics, let’s move on to the step-by-step process of upgrading the RAM on your MacBook.
Requirements for Upgrading RAM on MacBook
Before you proceed with upgrading the RAM on your MacBook, there are a few essential requirements you need to consider. Ensuring that you have the necessary tools and knowledge will make the process smoother and help you avoid any potential issues. Here’s what you’ll need:
- Compatible RAM: Make sure you purchase the right RAM modules for your MacBook model. Check the specifications of your MacBook to determine the type and maximum supported capacity of RAM.
- MacBook Model: Identify the specific model of your MacBook. You can find this information by clicking on the Apple logo in the top-left corner of your screen and selecting “About This Mac.”
- Online Documentation: Visit the Apple Support website or search for your MacBook’s model to find detailed instructions and documentation specific to your device.
- Static-Free Workstation: Set up a clean, static-free workspace to perform the upgrade. Static electricity can damage sensitive electronic components, so consider using an anti-static mat or grounding wrist strap.
- Tools: Gather the necessary tools for the process, including a screwdriver set with the appropriate size and type of screws for your MacBook model.
- Data Backup: Back up all your important files and data before starting the RAM upgrade process. Although the process is generally safe, it’s always a good idea to have a recent backup to prevent any loss of data.
- Patience and Attention: Take your time and be careful during the entire process. Follow the instructions closely and double-check every step to ensure a successful RAM upgrade without any damage to your MacBook.
By having these requirements met, you’ll be well-prepared to proceed with the RAM upgrade process on your MacBook and maximize its performance.
Steps to Upgrade RAM on MacBook
Now that you have gathered the necessary requirements, it’s time to dive into the step-by-step process of upgrading the RAM on your MacBook. Follow these steps carefully to ensure a smooth and successful RAM upgrade:
Step 1: Determine the Compatibility of Your MacBook
Before purchasing new RAM modules, check the compatibility of your MacBook model. Identify the maximum supported RAM capacity and the type of RAM required. This information can be found in the documentation or Apple’s official website.
Step 2: Gather the Necessary Tools
Collect the essential tools needed for the RAM upgrade. You’ll typically require a screwdriver set with the appropriate screwdriver size for your MacBook model. Make sure you have a clean, dry, and static-free workspace to perform the upgrade.
Step 3: Back Up Your Data
Prioritize the safety of your data by creating a backup. This step ensures that your important files and documents are protected in case of any unforeseen issues during the RAM upgrade process. Utilize an external hard drive, cloud storage, or any other preferred backup method.
Step 4: Power Off Your MacBook and Disconnect All Peripherals
Power off your MacBook and unplug all connected peripherals. This will minimize the risk of electrical damage and interference during the RAM upgrade process.
Step 5: Locate and Remove the Existing RAM Modules
Depending on your MacBook model, you’ll need to locate the RAM compartment. Remove the back cover or unscrew the RAM panel to reveal the existing RAM modules. Carefully detach them by gently spreading the retaining clips on the sides.
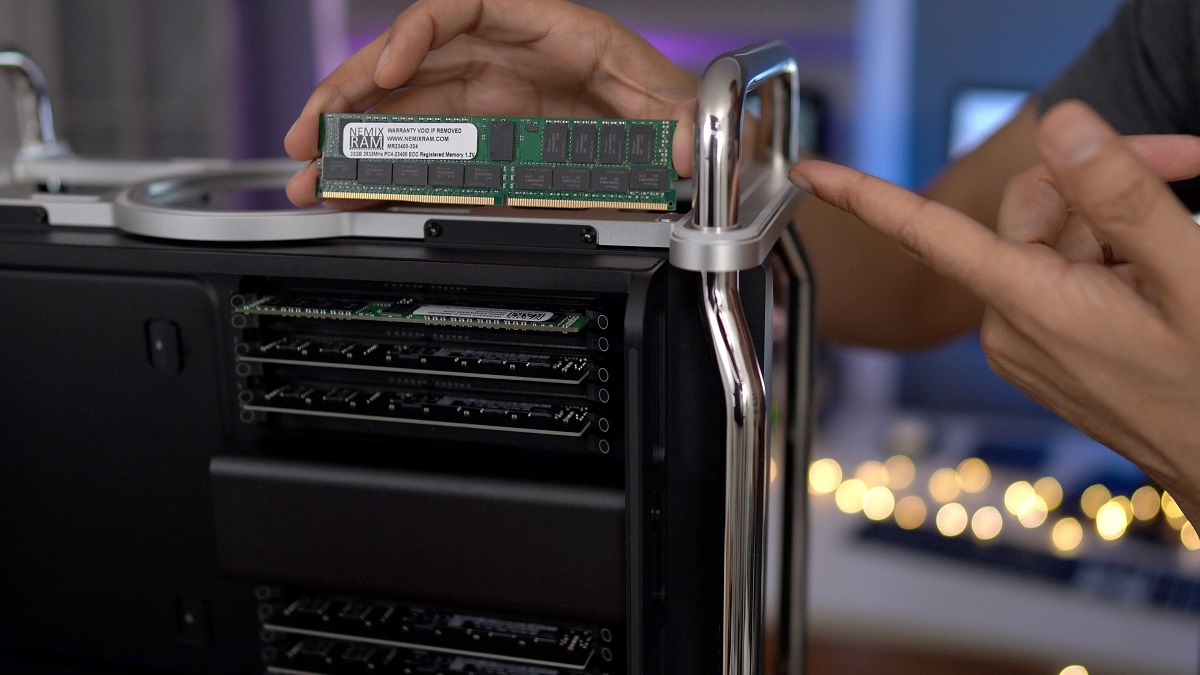
Step 6: Install the New RAM Modules
Insert the new RAM modules into the vacant slots, aligning them correctly with the notches on the sides. Apply gentle pressure until the modules are fully seated and the retaining clips snap back into place. Ensure a secure and snug fit, but avoid excessive force.
Step 7: Reassemble Your MacBook
Replace the RAM panel or back cover that was removed earlier. Use the screwdriver to tighten the screws, but be cautious not to overtighten. Ensure that everything is securely fastened before proceeding to the next step.
Step 8: Power On Your MacBook and Test the New RAM
Power up your MacBook and wait for it to boot. Once it’s fully operational, go to “About This Mac” from the Apple menu to confirm that the new RAM modules are recognized. You should see the increased RAM capacity displayed.
Congratulations! You have successfully upgraded the RAM on your MacBook. Enjoy the improved performance and efficiency in your daily tasks and resource-demanding applications.
Step 1: Determine the Compatibility of Your MacBook
Before you embark on the RAM upgrade journey, it’s crucial to determine the compatibility of your MacBook model. Each MacBook has specific requirements and limitations when it comes to RAM upgrades. Follow these steps to ensure a smooth and successful upgrade:
1. Identify Your MacBook Model: Start by learning which MacBook model you own. You can do this by clicking on the Apple logo in the top-left corner of your screen and selecting “About This Mac.” This will display detailed information about your MacBook, including the model name.
2. Check the Official Apple Documentation: Visit the Apple Support website or use their search function to find the official documentation for your specific MacBook model. Look for information regarding RAM upgrade options and limitations. Apple provides detailed specifications and compatibility information for each MacBook model.
3. Determine Maximum Supported RAM: The official documentation will specify the maximum supported RAM capacity for your MacBook model. It is essential to stay within this limit to ensure compatibility and prevent any potential issues. Exceeding the maximum supported RAM capacity can lead to instability and performance problems.
4. Determine RAM Type: Check the required RAM type for your MacBook. It could be DDR3, DDR4, or another type depending on your MacBook model. This information is crucial as using the wrong RAM type can cause compatibility issues and prevent your MacBook from functioning correctly.
5. Consider Brand Recommendations: While not mandatory, it’s recommended to choose RAM modules from reputable brands that are known to have high compatibility rates with MacBooks. While third-party RAM options may be more affordable, opting for reliable brands can provide peace of mind and ensure optimal performance.
By taking the time to determine the compatibility of your MacBook, you’ll ensure a seamless and problem-free RAM upgrade process. It’s important to note that if you’re unsure or uncomfortable performing the upgrade yourself, consulting an authorized service provider or an Apple store for guidance and assistance is always an option.
Step 2: Gather the Necessary Tools
Before you begin the RAM upgrade process on your MacBook, it’s important to gather the necessary tools to ensure a smooth and efficient upgrade. Having the right tools at hand will help you complete the upgrade process without any complications. Here are the essential tools you’ll need:
1. Screwdriver Set: MacBook models may require different types and sizes of screws. It’s essential to have a screwdriver set that includes the appropriate screwdriver bit for your specific MacBook model. This will allow you to remove and reinstall the necessary screws during the upgrade process.
2. Clean Workspace: Prepare a clean and clutter-free workspace to perform the RAM upgrade. Make sure the surface is dry and free from any dust or debris. A clutter-free workspace is vital to keep track of small components and prevent them from getting misplaced or damaged during the process.
3. Static-Free Workstation: Static electricity can damage sensitive electronic components, including the RAM modules. To prevent any discharge of static electricity during the upgrade, consider using an anti-static mat or grounding wrist strap. This will help protect your MacBook and the new RAM modules from potential damage.
4. Cleaning Cloth: It’s always a good idea to have a soft cleaning cloth on hand to wipe off any dust or fingerprints from the MacBook and RAM modules. This will ensure a clean installation and prevent any potential issues caused by debris or dirt.
5. Tweezers (Optional): While not always necessary, having a pair of tweezers can be helpful for handling small components or cables during the upgrade process. Tweezers can provide better precision and control, especially when working in tight spaces.
By gathering these essential tools, you’ll be well-equipped to carry out the RAM upgrade on your MacBook. Having everything organized and readily available will streamline the process and reduce the chances of encountering any difficulties or delays.
Step 3: Back Up Your Data
Before proceeding with the RAM upgrade on your MacBook, it’s crucial to prioritize the safety of your data by creating a backup. While the RAM upgrade process is generally safe, there is always a small risk of unforeseen issues that could lead to data loss. By backing up your data, you can ensure that your important files and documents are safeguarded. Follow these steps to back up your data:
1. External Hard Drive: Connect an external hard drive to your MacBook. This could be a USB, Thunderbolt, or FireWire drive. Ensure that your external drive has sufficient capacity to accommodate all the data you wish to back up.
2. Time Machine (MacOS): If you’re using MacOS, you can utilize the built-in Time Machine feature. It allows you to automatically back up your MacBook to an external drive. Set up Time Machine by going to System Preferences, selecting Time Machine, and following the on-screen instructions.
3. Cloud Storage: Consider using cloud storage services such as iCloud, Google Drive, Dropbox, or OneDrive. These services allow you to store and access your files securely from anywhere. Upload important files and documents to the cloud storage of your choice.
4. Manual File Transfer: For specific files or folders, you can manually copy them to the external hard drive or cloud storage. This can be done by dragging and dropping the files or using the copy and paste function.
5. Verify Backup: Once you have completed the backup, double-check your external drive or cloud storage to ensure that all your important files are successfully backed up. Take the time to go through your files and verify their presence in the backup location.
Backing up your data before performing any hardware modifications, such as a RAM upgrade, is a best practice that can save you from potential data loss. It provides a safety net in case anything goes wrong during the upgrade process or if any unexpected issues arise.
By following these steps, you can proceed with confidence, knowing that your valuable data is protected and can be easily restored in the event of an unforeseen circumstance. Take the time to back up your data, and enjoy peace of mind throughout the RAM upgrade process.
Step 4: Power Off Your MacBook and Disconnect All Peripherals
Before beginning the RAM upgrade process, it’s important to properly power off your MacBook and disconnect any peripherals. This ensures your safety and prevents any potential damage to your MacBook or the internal components. Follow these steps to proceed:
1. Save and Close All Applications: Prior to powering off your MacBook, save your work and close all applications. This ensures that no data will be lost or corrupted during the shutdown process.
2. Shut Down Your MacBook: Click on the Apple logo in the top-left corner of the screen and select “Shut Down.” Alternatively, you can hold down the power button until the Shut Down confirmation dialog appears, and then click “Shut Down.”
3. Disconnect the Power Adapter: Unplug the power adapter from your MacBook. This step is important to prevent any electrical hazards and avoid accidentally powering on the MacBook during the upgrade process.
4. Remove Any Connected Peripherals: Disconnect all peripherals from your MacBook, such as external hard drives, USB devices, headphones, or any other connected accessories. This ensures that there are no cables or devices obstructing the RAM upgrade process.
5. Ground Yourself: It’s important to discharge any static electricity by grounding yourself. Touching a grounded metal object or using an anti-static wrist strap can help prevent any static charges from damaging the internal components of your MacBook.
6. Wait for a Few Minutes: After shutting down your MacBook and disconnecting the peripherals, it’s a good practice to wait for a few minutes, allowing any residual internal power to dissipate. This helps ensure a safer environment for the RAM upgrade process.
By properly powering off your MacBook and disconnecting all peripherals, you minimize the risk of electrical damage or interference during the RAM upgrade process. Taking these precautions will help ensure a smooth and successful upgrade experience without any unnecessary complications.
Step 5: Locate and Remove the Existing RAM Modules
Once you have powered off your MacBook and disconnected all peripherals, it’s time to locate and remove the existing RAM modules. Follow these steps to proceed:
1. Refer to the Documentation: Consult the official documentation or online resources specific to your MacBook model. This will provide you with detailed information on the location of the RAM compartment and how to access it.
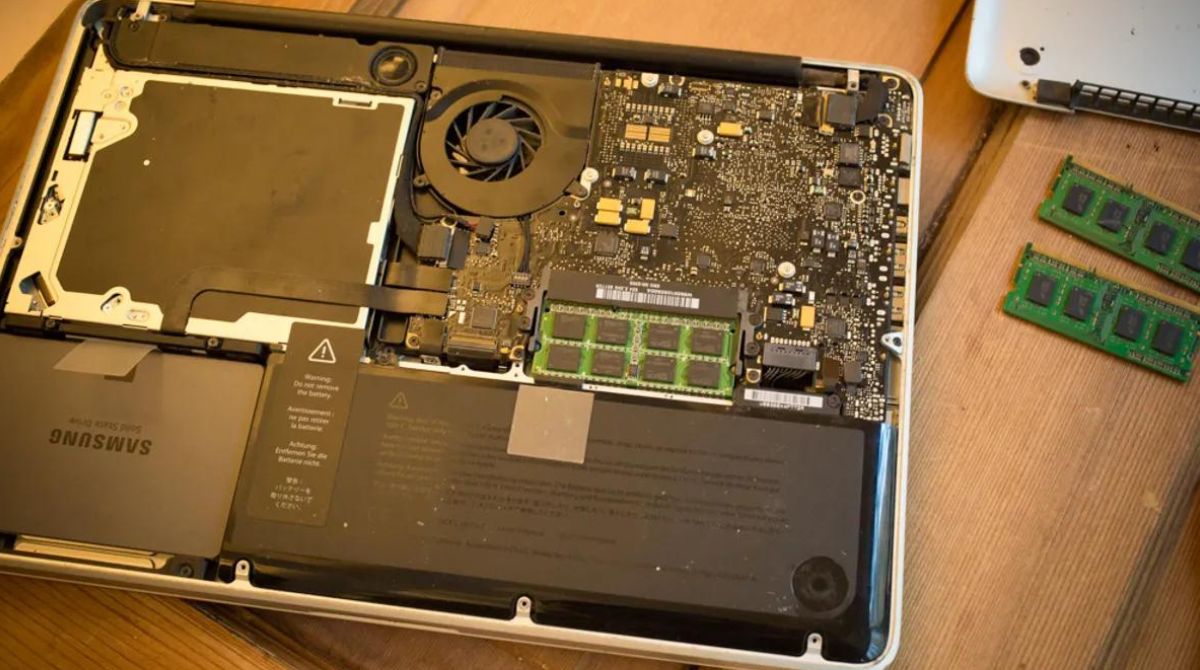
2. Remove the Back Cover/Access Panel: Depending on your MacBook model, you may need to remove the back cover or an access panel to reveal the internal components, including the RAM slots. Use the appropriate screwdriver from your toolkit to loosen and remove the screws holding the cover or panel in place.
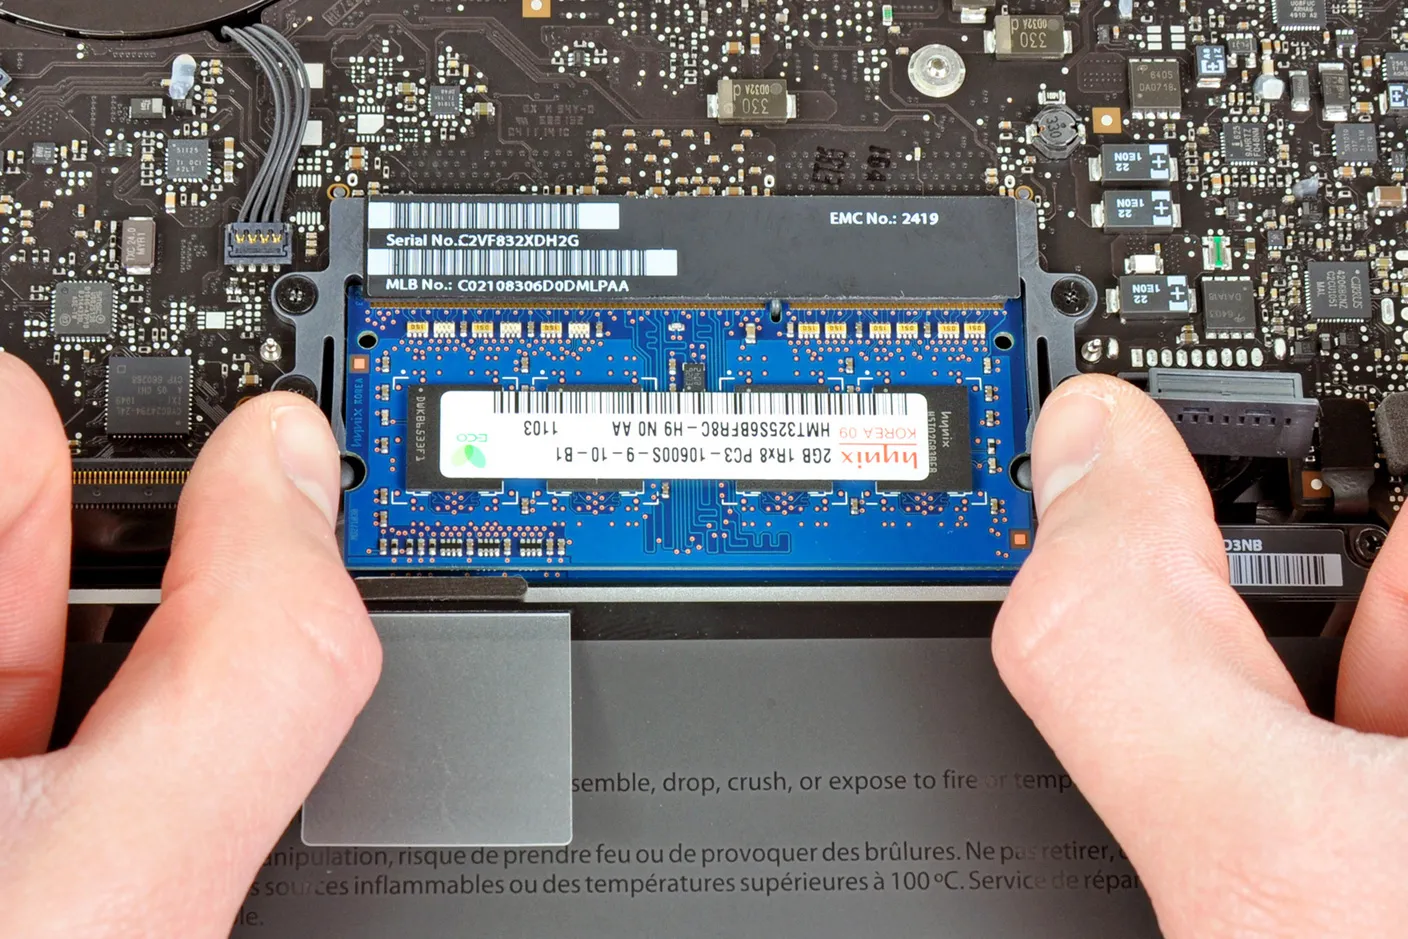
3. Identify the RAM Modules: Once you have gained access to the internal components, visually identify the existing RAM modules. They are rectangular in shape and typically have retaining clips on each side to hold them in place.
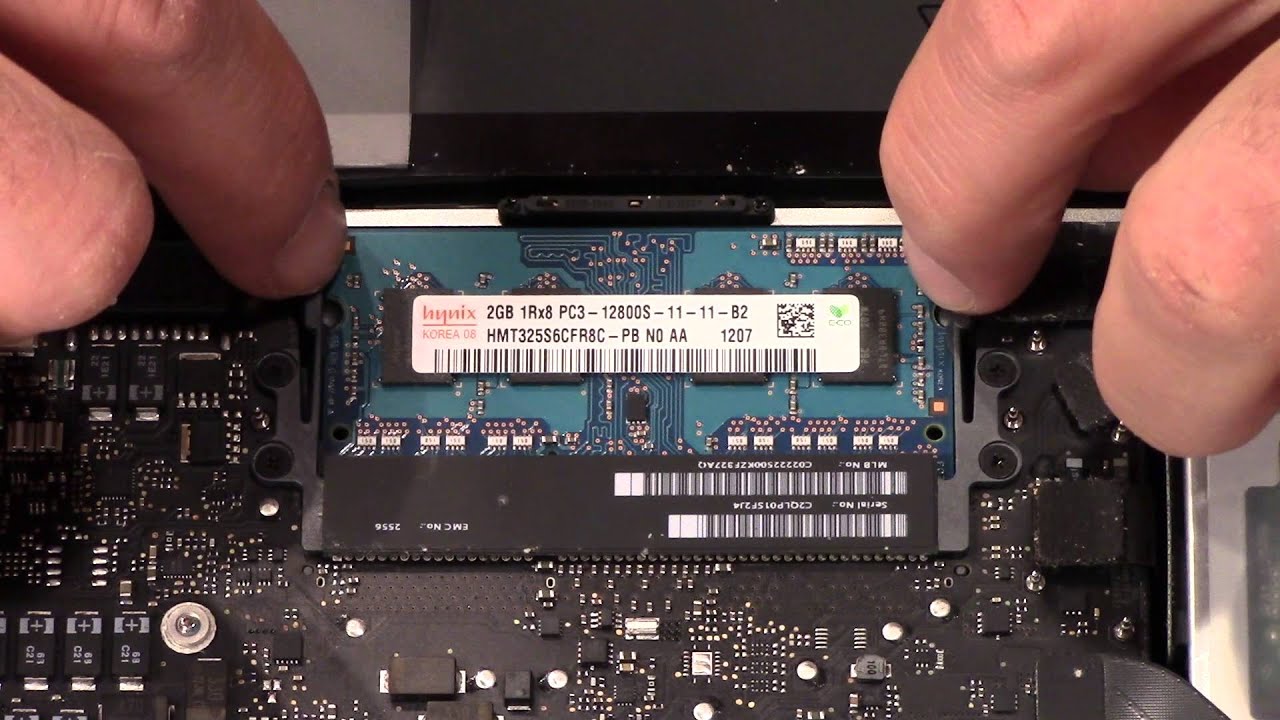
4. Detach the Retaining Clips: Carefully spread the retaining clips on both sides of the RAM module. Apply even pressure with your fingers to gently push the clips away from the module until they disengage. The module will slightly pop up once the clips are released.
5. Remove the RAM Module: After releasing the retaining clips, hold the module on the edges and gently pull it out of the slot at a 45-degree angle. Ensure that you do not touch the gold connectors on the bottom of the module to avoid any potential damage from static electricity or oil from your fingertips.
6. Repeat for Multiple RAM Modules: If your MacBook has multiple RAM slots, repeat the process of releasing the retaining clips and removing the modules for each slot.
7. Keep the Removed RAM Modules Safe: Set aside the removed RAM modules in a safe place to avoid any accidental damage or static discharge. You may choose to store them in an anti-static bag or on an anti-static surface.
By following these steps, you will successfully locate and remove the existing RAM modules from your MacBook. Take your time, be gentle with the components, and avoid applying excessive force. Properly handling the removal process ensures the integrity of the modules and prevents any unnecessary damage during the RAM upgrade process.
Step 6: Install the New RAM Modules
With the existing RAM modules safely removed from your MacBook, it’s time to install the new RAM modules. Follow these steps to proceed:
1. Verify the Compatibility: Before proceeding with the installation, double-check that the new RAM modules are compatible with your MacBook model. Ensure that they match the specifications outlined in the documentation or online resources for your specific MacBook model.
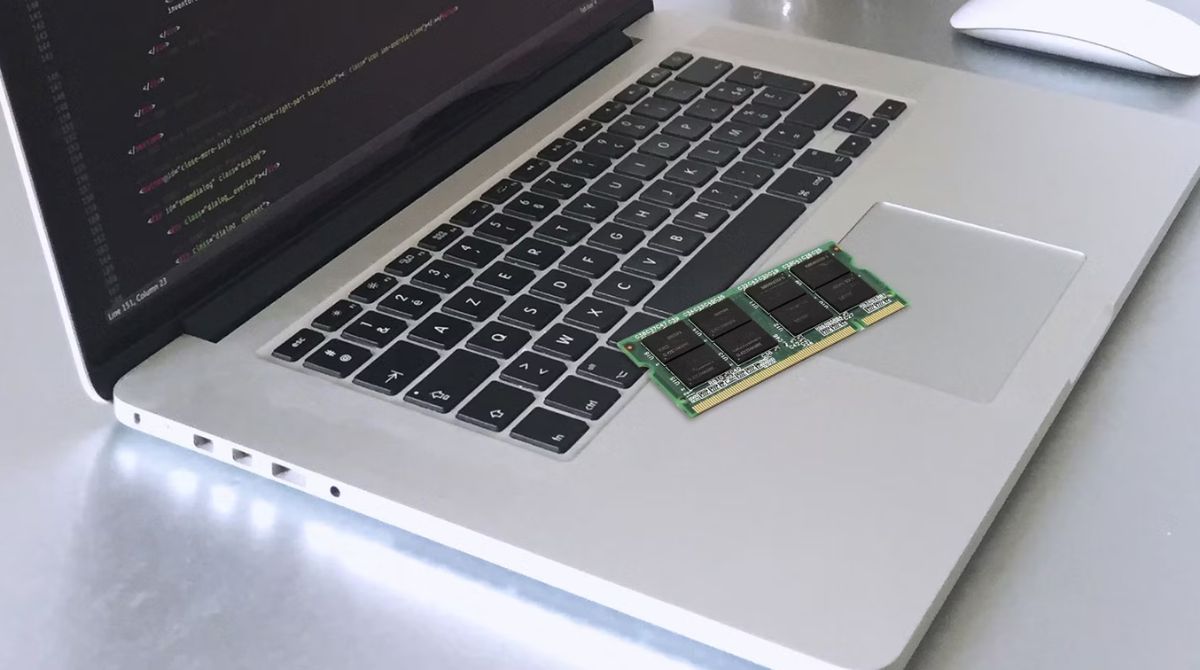
2. Handle the New RAM Modules with Care: Ensure that you are in a static-free environment and handle the new RAM modules by their edges. Avoid touching the gold connectors or any sensitive components to prevent potential damage.
3. Identify the RAM Slots: Locate the vacant RAM slots inside your MacBook. These slots will have the same shape and size as the new RAM modules. Refer to the documentation or online resources for guidance on the specific location and number of RAM slots in your MacBook model.
4. Align the Notches: Holding the new RAM module at a 45-degree angle, align the notches on the bottom edge of the module with the corresponding notches in the RAM slot. The module should fit smoothly into the slot without any resistance.
5. Insert the RAM Module: Once aligned, gently press the new RAM module down into the slot, applying even pressure on both sides. The module will slide in easily, but make sure it is firmly seated. You may hear a clicking sound when the module is properly inserted.
6. Engage the Retaining Clips: Once the RAM module is fully inserted, the retaining clips should automatically slide into place, securing the module. You might need to press gently on the top edges of the module to ensure that the clips engage properly and hold it securely.
7. Repeat for Additional RAM Modules: If you have more than one RAM slot, repeat the process for each additional RAM module, ensuring proper alignment and secure insertion.
8. Verify Proper Installation: After installing all the new RAM modules, visually inspect them to ensure they are seated securely. Check that the retaining clips are holding each module in place, and there are no visible gaps or misalignment.
By carefully following these steps, you will successfully install the new RAM modules in your MacBook. Take your time and ensure proper alignment and insertion for each module. Once the new RAM modules are securely installed, your MacBook will be ready to unlock its enhanced performance.
Step 7: Reassemble Your MacBook
With the new RAM modules successfully installed, it’s time to reassemble your MacBook. Follow these steps to complete the reassembly process:
1. Replace the Back Cover/Access Panel: If you had to remove a back cover or access panel to access the RAM slots, position it back into place. Align the screw holes and use the screwdriver to tighten the screws, but avoid overtightening them. Ensure that the cover or panel is securely fastened.
2. Double-Check Connections: Before fully tightening the screws, double-check all the connections inside your MacBook. Ensure that the RAM modules are inserted correctly, and all other cables and components are properly aligned and securely seated.
3. Tighten the Screws: Once you’ve verified all connections, use the screwdriver to tighten the screws on the back cover or access panel. Be careful not to overtighten, as this could damage the screws or strip the threads.
4. Remove any Lint or Dust: Take a moment to inspect the exterior of your MacBook. Use a soft cleaning cloth or compressed air to remove any lint, dust, or fingerprints that may have accumulated during the upgrade process. Keeping your MacBook clean will help maintain its performance and appearance.
5. Prepare for Startup: With the reassembly complete, you can now prepare to start up your MacBook. Ensure that all peripherals and accessories are still disconnected. This will prevent any potential interference during the startup process.
6. Perform a Final Check: Before turning on your MacBook, perform a final visual check to ensure that everything is in place and securely fastened. This includes screws, cables, and any other components that were involved in the upgrade or reassembly process.
7. Power on Your MacBook: Press the power button on your MacBook to turn it on. Upon successful startup, your MacBook will recognize the new RAM modules and adjust its configuration accordingly. You can verify the installation by checking the increased RAM capacity in the “About This Mac” section under the Apple menu.
8. Test the New RAM: To confirm that the new RAM is functioning correctly, perform various tasks on your MacBook that require memory usage, such as opening multiple applications or running resource-intensive programs. Monitor the performance and ensure smoother operation and improved multitasking capabilities due to the increased RAM capacity.
By following these steps, you will successfully reassemble your MacBook after the RAM upgrade. Take care to make sure all connections are secure and avoid overtightening the screws. Now, you can fully enjoy the benefits of upgraded RAM in your MacBook.
Step 8: Power On Your MacBook and Test the New RAM
Now that your MacBook is reassembled, it’s time to power it on and test the new RAM modules. Follow these steps to ensure that the new RAM is functioning correctly:
1. Press the Power Button: Locate the power button on your MacBook and press it to turn on the device. Wait for the startup chime and for the Apple logo to appear on the screen.
2. Wait for Startup: Give your MacBook a moment to fully start up and initiate all necessary processes. The startup time may be slightly longer than usual since the MacBook is recognizing and configuring the new RAM modules.
3. Navigate to “About This Mac”: Once your MacBook has fully started up, click on the Apple logo in the top-left corner of the screen and select “About This Mac” from the dropdown menu. This will show you an overview of your MacBook’s hardware and system information.
4. Check the RAM Capacity: In the “About This Mac” window, click on the “Memory” tab. Here, you will see the total installed RAM capacity. Verify that it matches the new RAM modules you installed. If it does, then the MacBook has successfully recognized and utilized the new RAM.
5. Test Performance: To assess the impact of the new RAM, you can perform tasks that require memory usage, such as opening multiple applications simultaneously, running software that previously caused your MacBook to slow down, or working on resource-intensive projects. Check if your MacBook now handles these tasks more efficiently and provides a smoother overall performance.
6. Monitor Performance and Stability: While using your MacBook with the new RAM, pay attention to its performance, stability, and responsiveness. If you notice improvements in multitasking, quicker application launches, and reduced lag, it indicates that the new RAM is functioning optimally.
7. Resolve Issues if Necessary: In the rare event that you encounter any unexpected issues, such as crashes, errors, or instability, double-check that the RAM modules are installed correctly. Ensure that they are securely seated in their respective slots. If the problem persists, consider seeking assistance from an authorized service provider or consulting Apple Support.
By following these steps, you can verify that the new RAM in your MacBook is working as intended. Enjoy the enhanced performance, improved multitasking capabilities, and smoother user experience brought by the upgraded RAM.
Conclusion
Upgrading the RAM on your MacBook can significantly enhance its performance and speed, providing you with a more efficient and enjoyable user experience. By following a few simple steps, you can successfully upgrade the RAM on your MacBook without the need for professional assistance. Here’s a recap of the steps involved:
- Determine the compatibility of your MacBook by referring to the official documentation and verifying the maximum supported RAM capacity.
- Gather the necessary tools, including a screwdriver set, static-free workstation, and cleaning cloth.
- Back up your data to ensure its safety and prevent any unexpected loss during the RAM upgrade process.
- Power off your MacBook and disconnect all peripherals before proceeding with the upgrade.
- Locate and remove the existing RAM modules by carefully releasing the retaining clips.
- Install the new RAM modules, ensuring proper alignment and secure insertion.
- Reassemble your MacBook by replacing the back cover or access panel and tightening the screws.
- Power on your MacBook, verify the new RAM capacity, and test the performance of the upgraded RAM.
By following these steps, you have successfully upgraded the RAM on your MacBook, unleashing its full potential. Enjoy the improved performance, enhanced multitasking capabilities, and smoother operation in resource-demanding tasks. Remember to always refer to the official documentation and handle the RAM modules and internal components with care.
If you encounter any difficulties or are unsure about performing the RAM upgrade yourself, it’s recommended to seek assistance from an authorized service provider or consult Apple Support for expert guidance. Embrace the benefits of upgraded RAM and make the most of your MacBook’s capabilities.