Introduction
Upgrading the RAM (Random Access Memory) in a laptop is a fantastic way to boost its performance and ensure smooth multitasking. RAM plays a vital role in the overall speed and responsiveness of a computer, allowing it to quickly access and process data. By increasing the RAM capacity, you can handle more demanding applications, run multiple programs simultaneously, and improve overall system performance.
Whether you’re a student, professional, or gaming enthusiast, upgrading your laptop’s RAM can make a significant difference in your computing experience. In this guide, we’ll take you through a step-by-step process to upgrade the RAM in your laptop.
Before diving into the upgrade process, it’s important to note that not all laptops allow for RAM upgrades. Some laptops have the RAM soldered directly onto the motherboard, making it non-upgradable. To determine if your laptop is upgradable, you’ll need to consult the manufacturer’s specifications or contact their support team.
If your laptop is upgradable, you’re in luck! This guide will give you the confidence and knowledge needed to successfully upgrade your laptop’s RAM. We’ll cover everything from determining the current RAM capacity to identifying the compatible RAM type and actually performing the upgrade.
But before we jump into the technical details, it’s crucial to ensure you have the right tools and equipment for the job. The upgrade process requires a few basic tools, such as a screwdriver and an anti-static wristband, to protect the delicate components inside your laptop. Don’t worry if you don’t have these tools yet – they’re readily available online or at your local electronics store.
Now that you understand the importance of RAM and have the necessary tools, let’s begin the journey to upgrade the RAM in your laptop. Follow the steps outlined in this guide, and soon enough, you’ll be enjoying a faster and more efficient computing experience.
Step 1: Determine the current RAM capacity
Before you start the process of upgrading your laptop’s RAM, it’s essential to determine the current RAM capacity. This information will help you understand how much RAM your laptop currently has and how much additional RAM you can add.
To check the current RAM capacity, you can use the built-in system information tool on your laptop. Here’s how:
- On Windows: Go to the Start menu and search for “System Information.” Open the System Information app that appears in the search results. In the system summary, you’ll find information about your installed RAM, including the total physical memory.
- On macOS: Click on the Apple menu, then select “About This Mac.” In the Overview tab, you’ll see information about your currently installed memory, including the memory type and speed.
- On Linux: Open a terminal window and enter the command “sudo dmidecode –type memory | grep DDR.” This command will display information about your current RAM configuration.
Once you have determined the current RAM capacity, take note of the total amount of RAM installed. This will help you decide how much additional RAM you need to purchase for the upgrade.
Keep in mind that while it’s possible to mix different sizes and types of RAM modules, it’s generally recommended to use identical modules for optimal compatibility and performance. Therefore, it’s a good idea to remove the existing RAM modules and replace them with new ones instead of adding additional RAM modules.
Now that you’re aware of your laptop’s current RAM capacity, it’s time to move on to the next step: identifying the compatible RAM type.
Step 2: Identify the compatible RAM type
Now that you know the current RAM capacity of your laptop, it’s important to identify the compatible RAM type for the upgrade. Different laptops support different types of RAM, so it’s crucial to choose the right type to ensure compatibility and optimal performance.
To identify the compatible RAM type, there are a few key factors to consider:
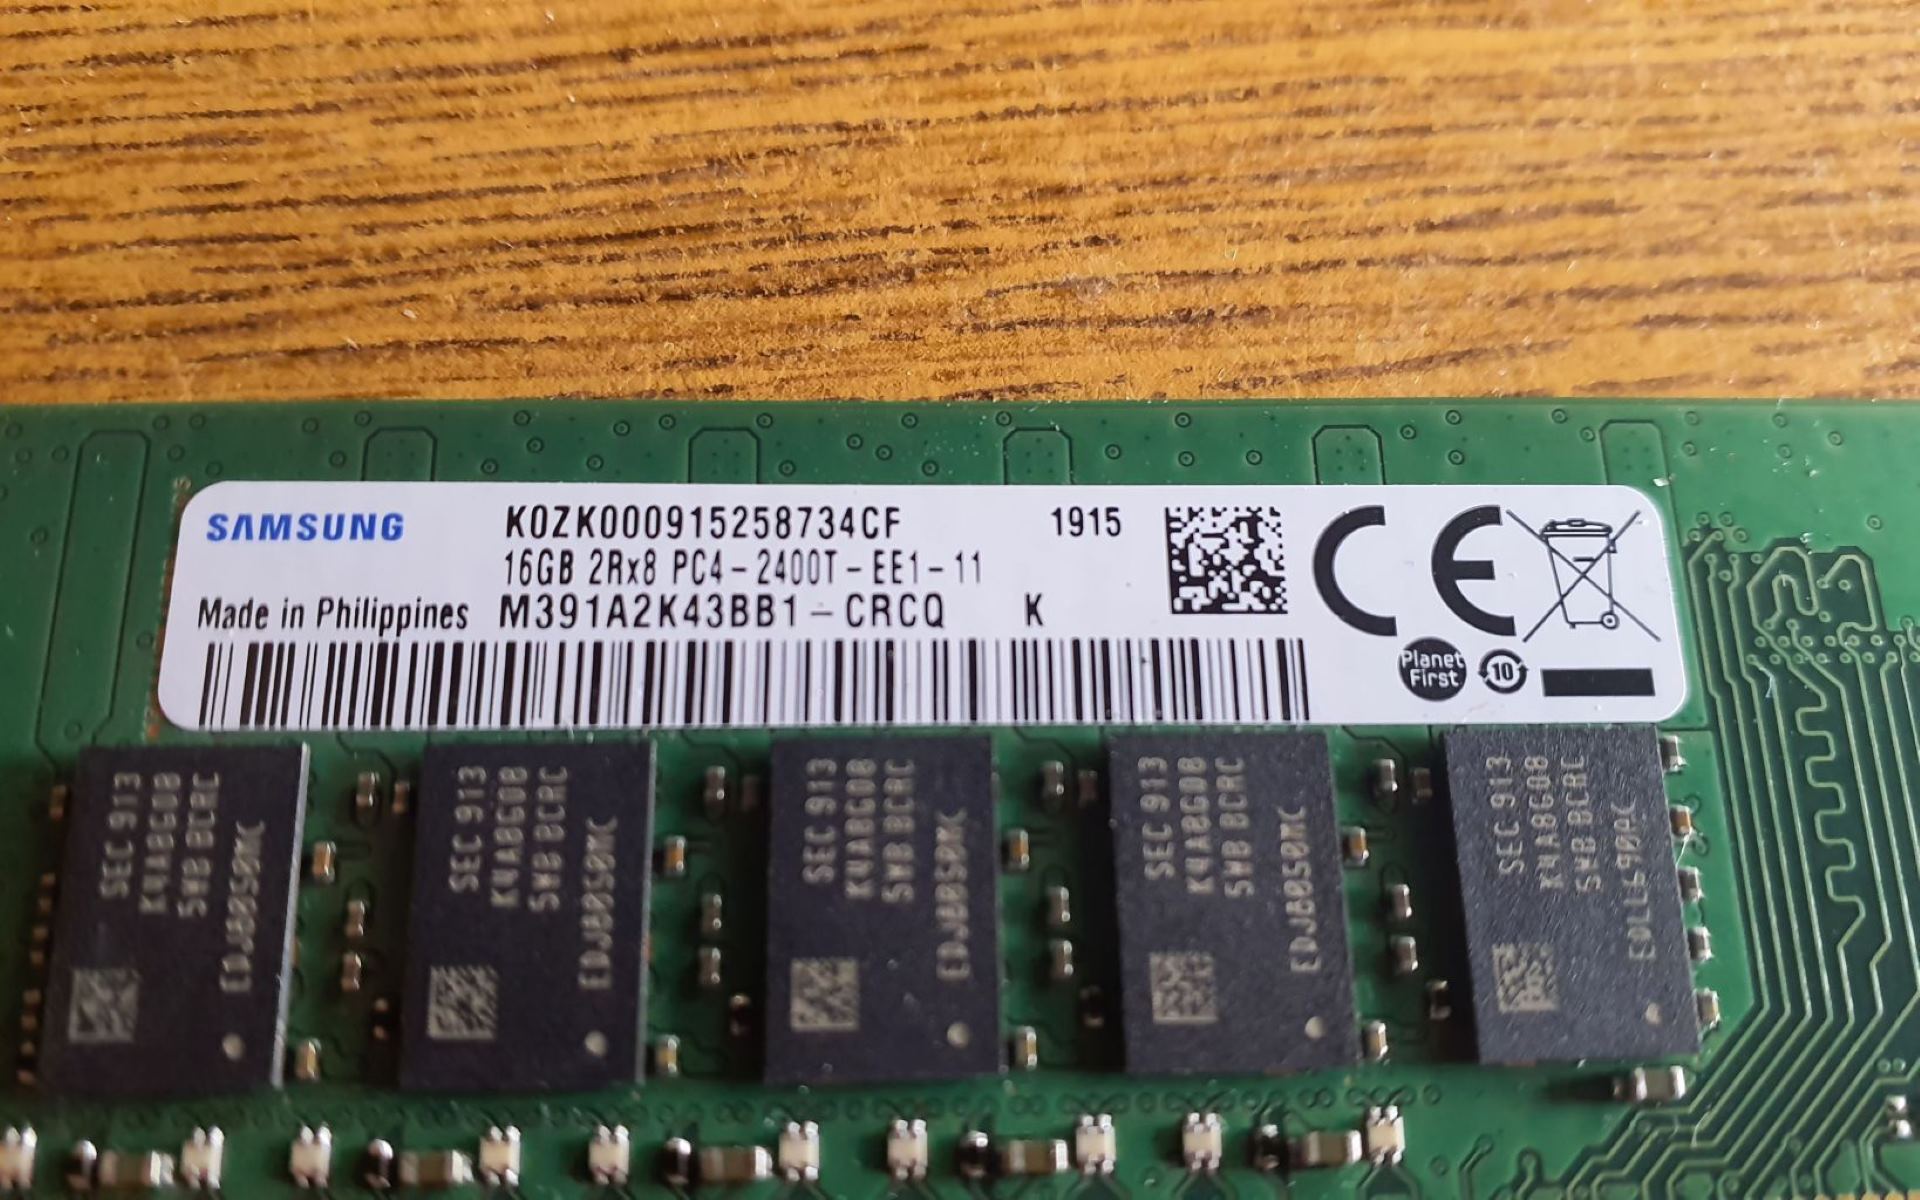
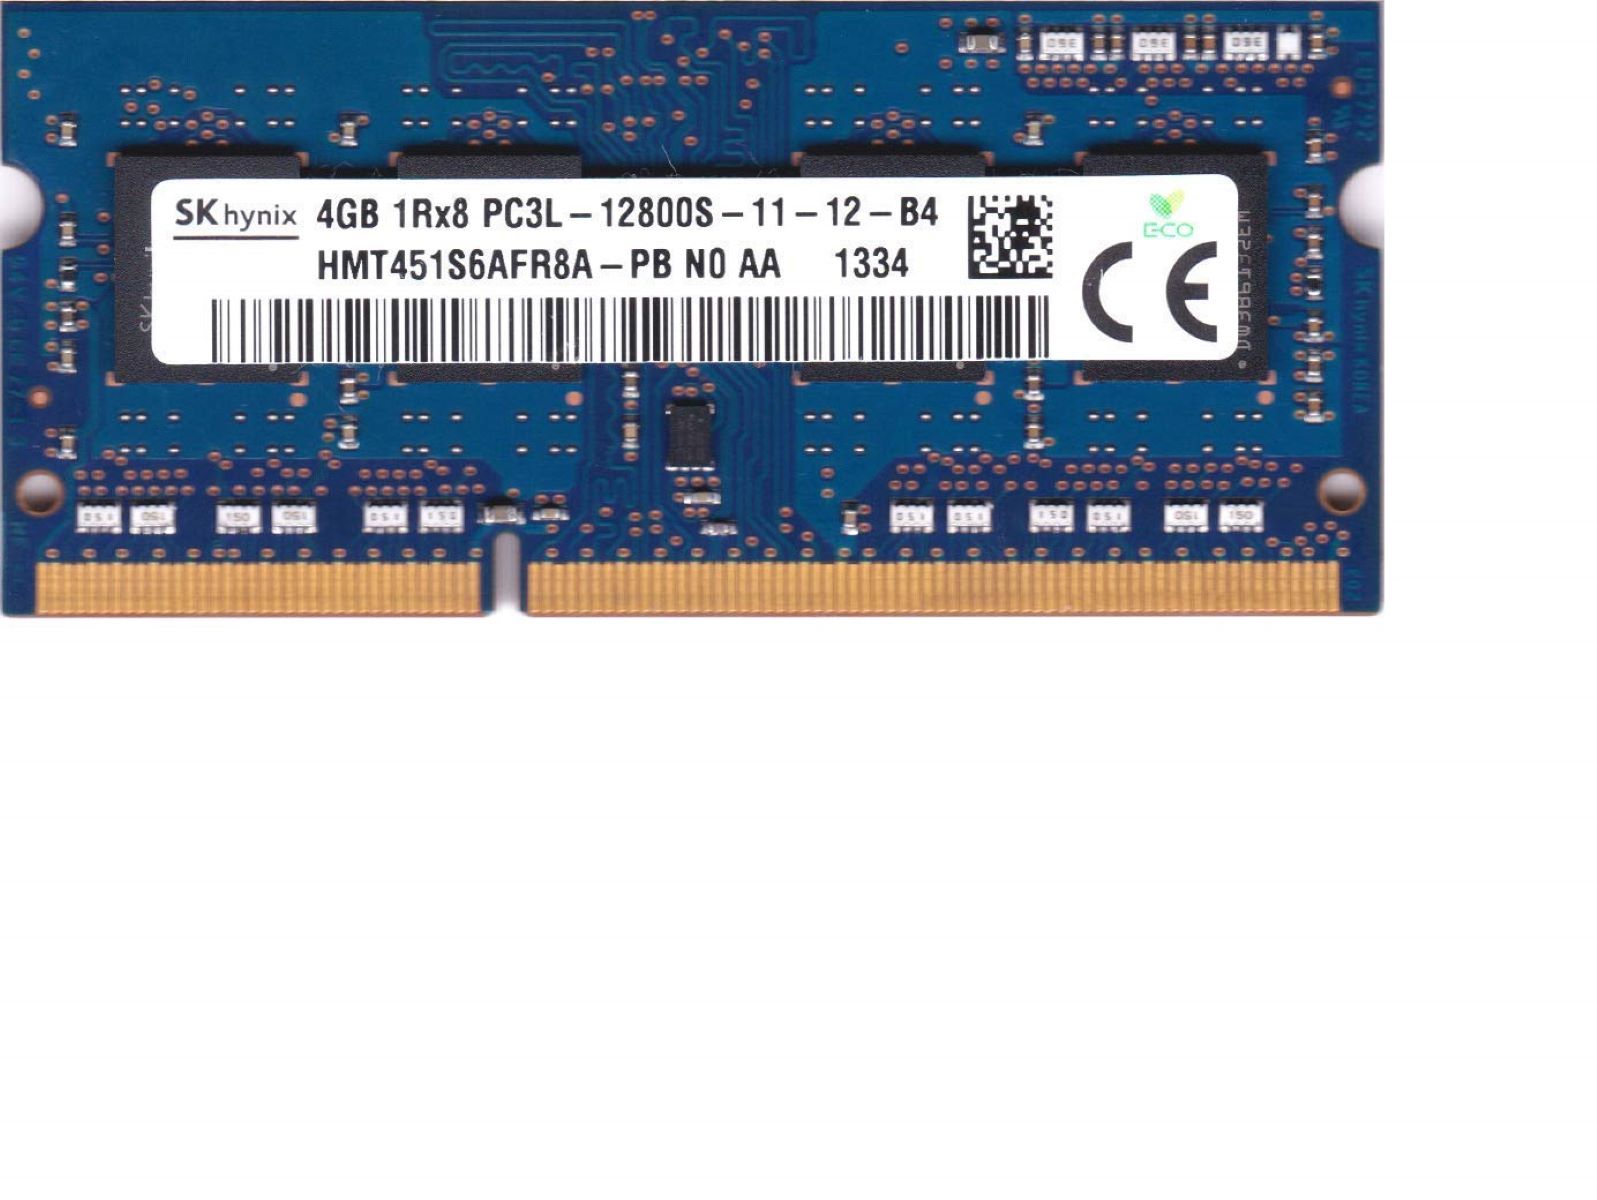
- Type: Determine whether your laptop requires DDR3, DDR4, or another type of RAM. This information can usually be found in the laptop’s specifications or user manual. Pay attention to the maximum supported RAM speed as well.
- Form factor: Check whether your laptop uses SODIMM (Small Outline Dual In-Line Memory Module) or DIMM (Dual In-Line Memory Module) form factor. SODIMMs are smaller and designed for laptops, while DIMMs are larger and typically used in desktop computers.
- Capacity: Consider how much additional RAM you want to add. Generally, it’s recommended to add a minimum of 8GB for noticeable performance improvements, but your specific needs may require more or less.
- Speed: Look for the maximum supported RAM speed of your laptop. While installing faster RAM modules might work, they will only operate at the supported maximum speed of your laptop.
Once you have gathered all the necessary information, you can start searching for compatible RAM modules. You can find these modules online through various retailers or visit your local computer hardware store.
When purchasing RAM, make sure to double-check the specifications and ensure they match your laptop’s requirements. It’s also a good idea to purchase from a reputable brand to ensure quality and compatibility.
With the compatible RAM type identified, you are now one step closer to upgrading your laptop’s RAM. In the next step, we will cover how to purchase the new RAM modules.
Step 3: Purchase the new RAM modules
With the compatible RAM type identified, it’s time to purchase the new RAM modules for your laptop. When selecting the RAM modules, keep in mind the specifications and requirements determined in the previous step.
Here are some tips to consider when purchasing the new RAM modules:
- Brand and reliability: Choose RAM modules from reputable brands known for their reliability and quality. This ensures compatibility and reduces the risk of performance issues.
- Capacity: Determine the capacity of the new RAM modules based on your needs. If you’re primarily using your laptop for basic tasks, such as web browsing and office work, an additional 8GB to 16GB would provide a noticeable improvement. However, if you’re a power user or into resource-intensive tasks like video editing or gaming, consider upgrading to 32GB or even 64GB for optimal performance.
- Speed: Look for RAM modules with the highest compatible speed for your laptop. While faster RAM modules can provide a performance boost, they will only operate at the maximum supported speed of your laptop.
- Warranty: Check if the RAM modules come with a warranty. This provides peace of mind and protection against any potential defects or failures.
You can find compatible RAM modules from various online retailers specializing in computer hardware. Make sure to review customer reviews and ratings before making a purchase. Additionally, consider checking the manufacturer’s website for any specific recommendations or compatibility lists.
Once you have purchased the RAM modules, it’s time to prepare for the installation process. In the next step, we will cover how to get ready for the RAM upgrade.
Step 4: Prepare for installation
Before diving into the process of physically installing the new RAM modules in your laptop, it’s important to properly prepare for the installation. This ensures a smooth and successful upgrade process without any hiccups along the way.
Here are some essential steps to prepare for the RAM installation:
- Gather the necessary tools: Ensure you have all the required tools on hand. You will generally need a small Phillips-head screwdriver and an anti-static wristband. The screwdriver will be used to open the laptop and access the RAM slots, while the anti-static wristband prevents any static electricity from damaging the sensitive components.
- Backup your data: It’s always wise to back up your important data before performing any hardware modifications. While the RAM upgrade itself doesn’t typically involve touching the storage drive, it’s a good precautionary measure to protect your files and ensure a seamless transition.
- Clear a clean and well-lit workspace: Find a spacious and well-lit area where you can comfortably work on your laptop. A clutter-free workspace reduces distractions and the risk of misplacing any screws or components.
- Power off and disconnect your laptop: Before starting the installation, make sure your laptop is completely powered off and unplugged from the power source. This eliminates any electrical hazards and prevents accidental damage to the internal components.
- Ground yourself: To prevent static discharge that can damage your laptop’s sensitive parts, wear an anti-static wristband and connect it to a grounded object. This ensures you remain grounded throughout the installation process.
- Refer to the laptop’s documentation: It’s always a good idea to consult the user manual or documentation provided by the laptop manufacturer for any specific instructions or guidelines regarding RAM installation. Different laptop models may have unique considerations or steps to follow.
By following these preparatory steps, you are setting yourself up for a smooth and successful RAM installation. Once you’ve gathered all the necessary tools and familiarized yourself with the guidelines, you are ready to proceed to the next step: powering off and unplugging your laptop.
Step 5: Power Off and Unplug the Laptop
Before you begin the physical installation of the new RAM modules, it’s crucial to power off your laptop and disconnect it from any power sources. This step ensures your safety and prevents any potential damage to the laptop or its internal components.
Follow these steps to power off and unplug your laptop:
- Save your work: Make sure to save any open documents or files you’re working on. Closing any running applications or programs is also advisable.
- Shut down the laptop: Click on the Start menu (Windows) or the Apple menu (macOS), then select “Shut Down.” Allow your laptop to fully shut down before proceeding to the next step.
- Disconnect the power adapter: Unplug the power adapter from your laptop. This ensures that there is no electrical current flowing through the system during the RAM installation process.
- Remove the battery (if applicable): If your laptop has a removable battery, carefully remove it by following the manufacturer’s instructions. This step guarantees that the laptop is completely powered off and eliminates any residual electrical charge.
Once you have properly powered off and disconnected your laptop, it’s now safe to proceed with accessing the RAM slots and replacing the existing RAM modules with the new ones. In the next step, we will guide you through finding and accessing the RAM slots in your laptop.
Step 6: Locate and Access the RAM Slots
In order to upgrade the RAM in your laptop, you need to locate and access the RAM slots. These slots are where the RAM modules are installed and can usually be found on the underside of the laptop.
Follow these steps to locate and access the RAM slots in your laptop:
- Consult the laptop’s user manual: If you have the user manual or documentation that came with your laptop, refer to it for specific instructions on locating the RAM slots. The manual will provide detailed information on where the RAM slots are situated and how to access them.
- Search online resources: If you don’t have the user manual or can’t find it, you can search online for your laptop’s specific model and RAM slot location. Look for reliable sources such as the manufacturer’s website or reputable forums where other users may have shared information about your laptop’s internals.
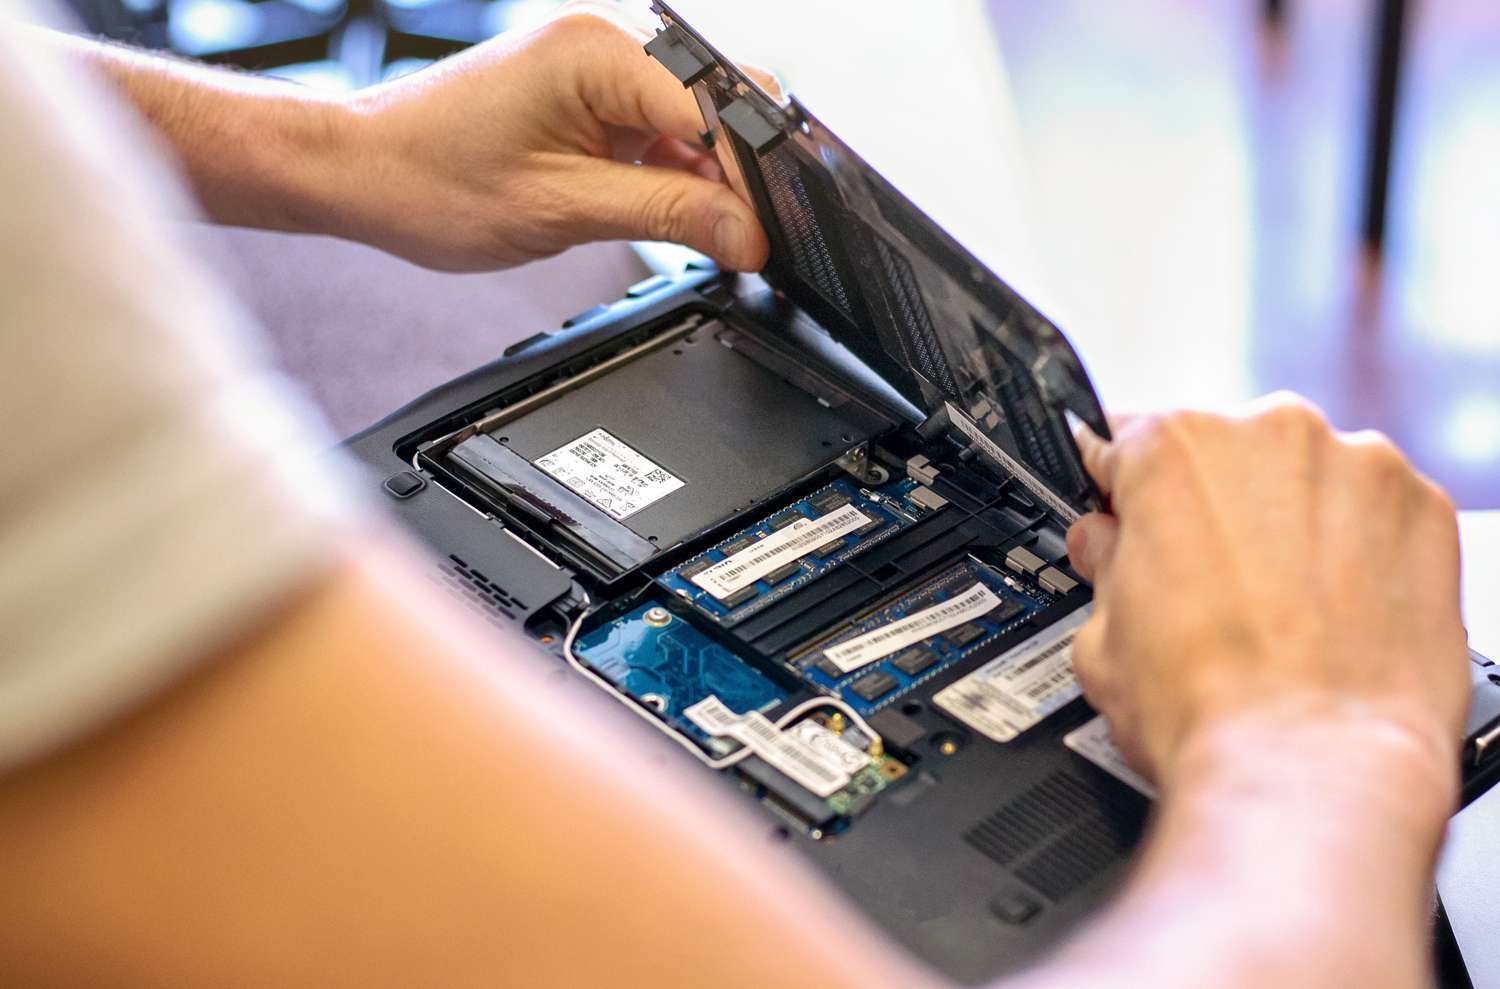
- Inspect the underside of your laptop: Flip your laptop upside down and examine the bottom panel for any removable covers or panels. The RAM slots are commonly located under one of these panels. The panel may have a RAM symbol or a label indicating its purpose.
- Remove the necessary cover: If you have identified the cover or panel that houses the RAM slots, carefully remove it. Most covers are secured with screws or tabs. Use the appropriate tools (such as a screwdriver) to remove the screws or gently push the tabs to release the cover.
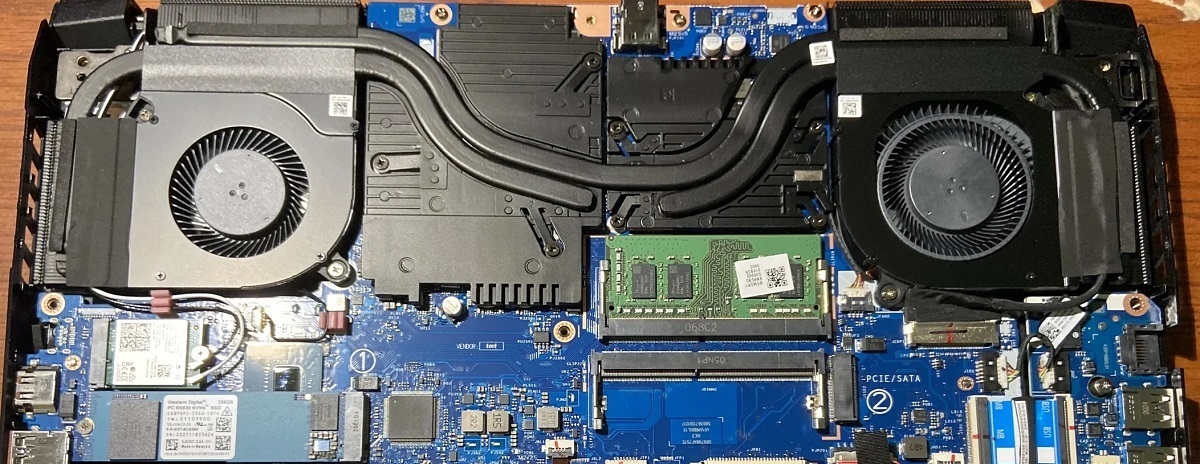
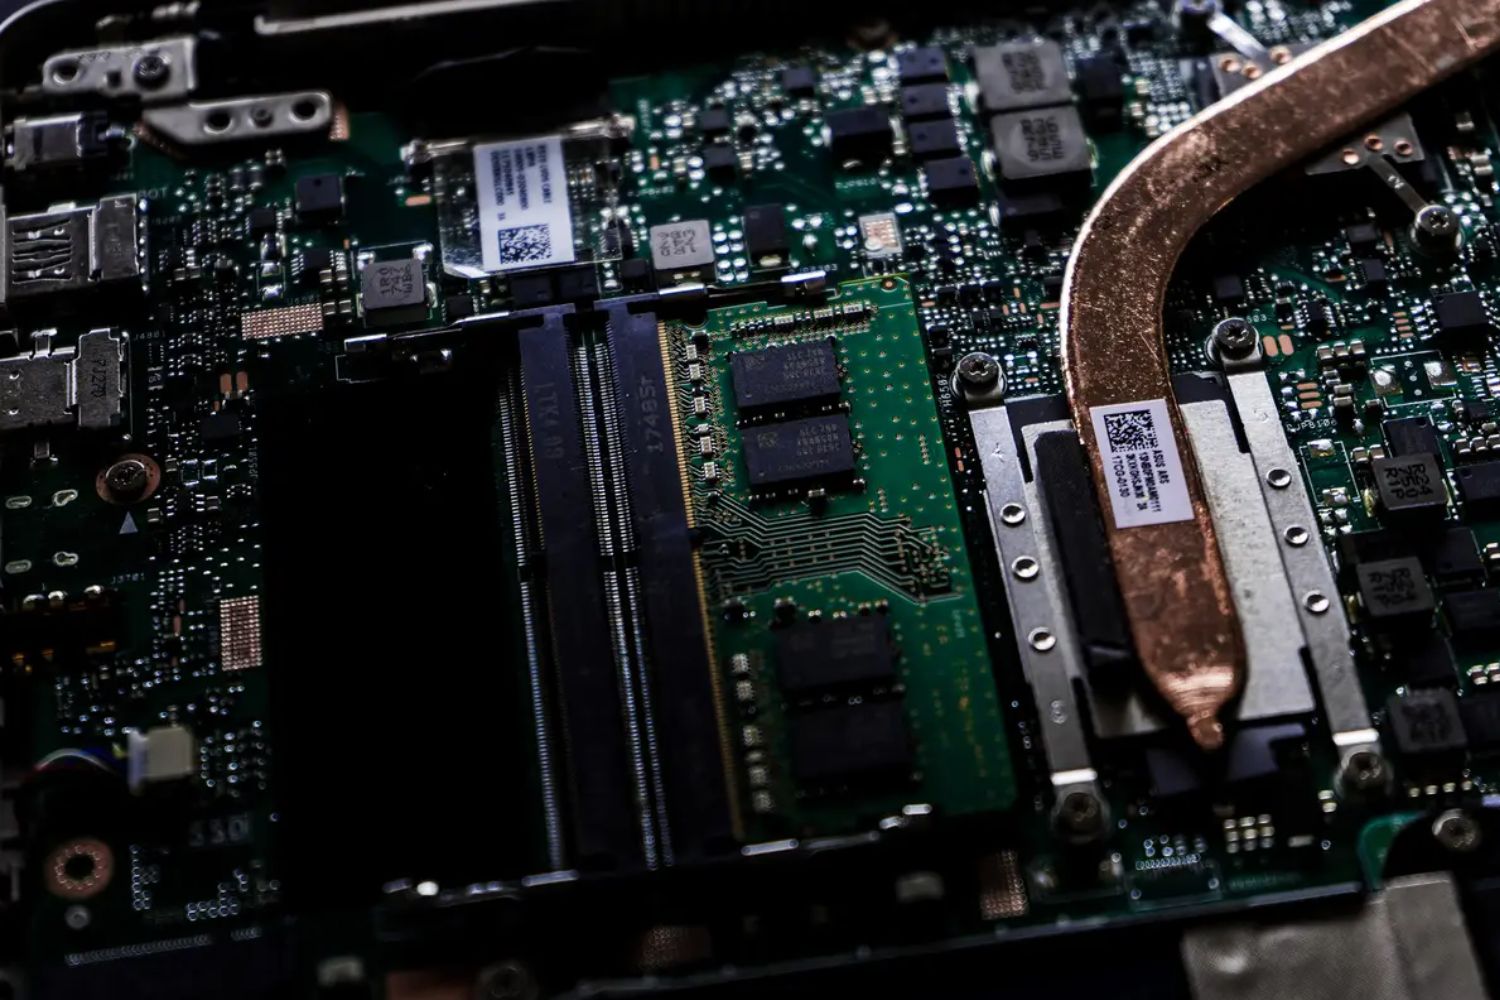
- Identify the RAM slots: Once the cover is removed, you will see one or more rectangular slots. These are the RAM slots. Typically, laptops have two slots for RAM modules, but some models may have more.
Remember to handle the laptop with care while locating and accessing the RAM slots. Be gentle and avoid applying excessive force or causing any damage to the laptop’s components.
Now that you’ve located and accessed the RAM slots, you’re ready to remove the existing RAM modules in the next step. Stay tuned!
Step 7: Remove the Existing RAM Modules
With the RAM slots accessible, the next step in upgrading your laptop’s RAM is to remove the existing RAM modules. This will make space for the new RAM modules that you will be installing.
Follow these steps to safely remove the existing RAM modules:
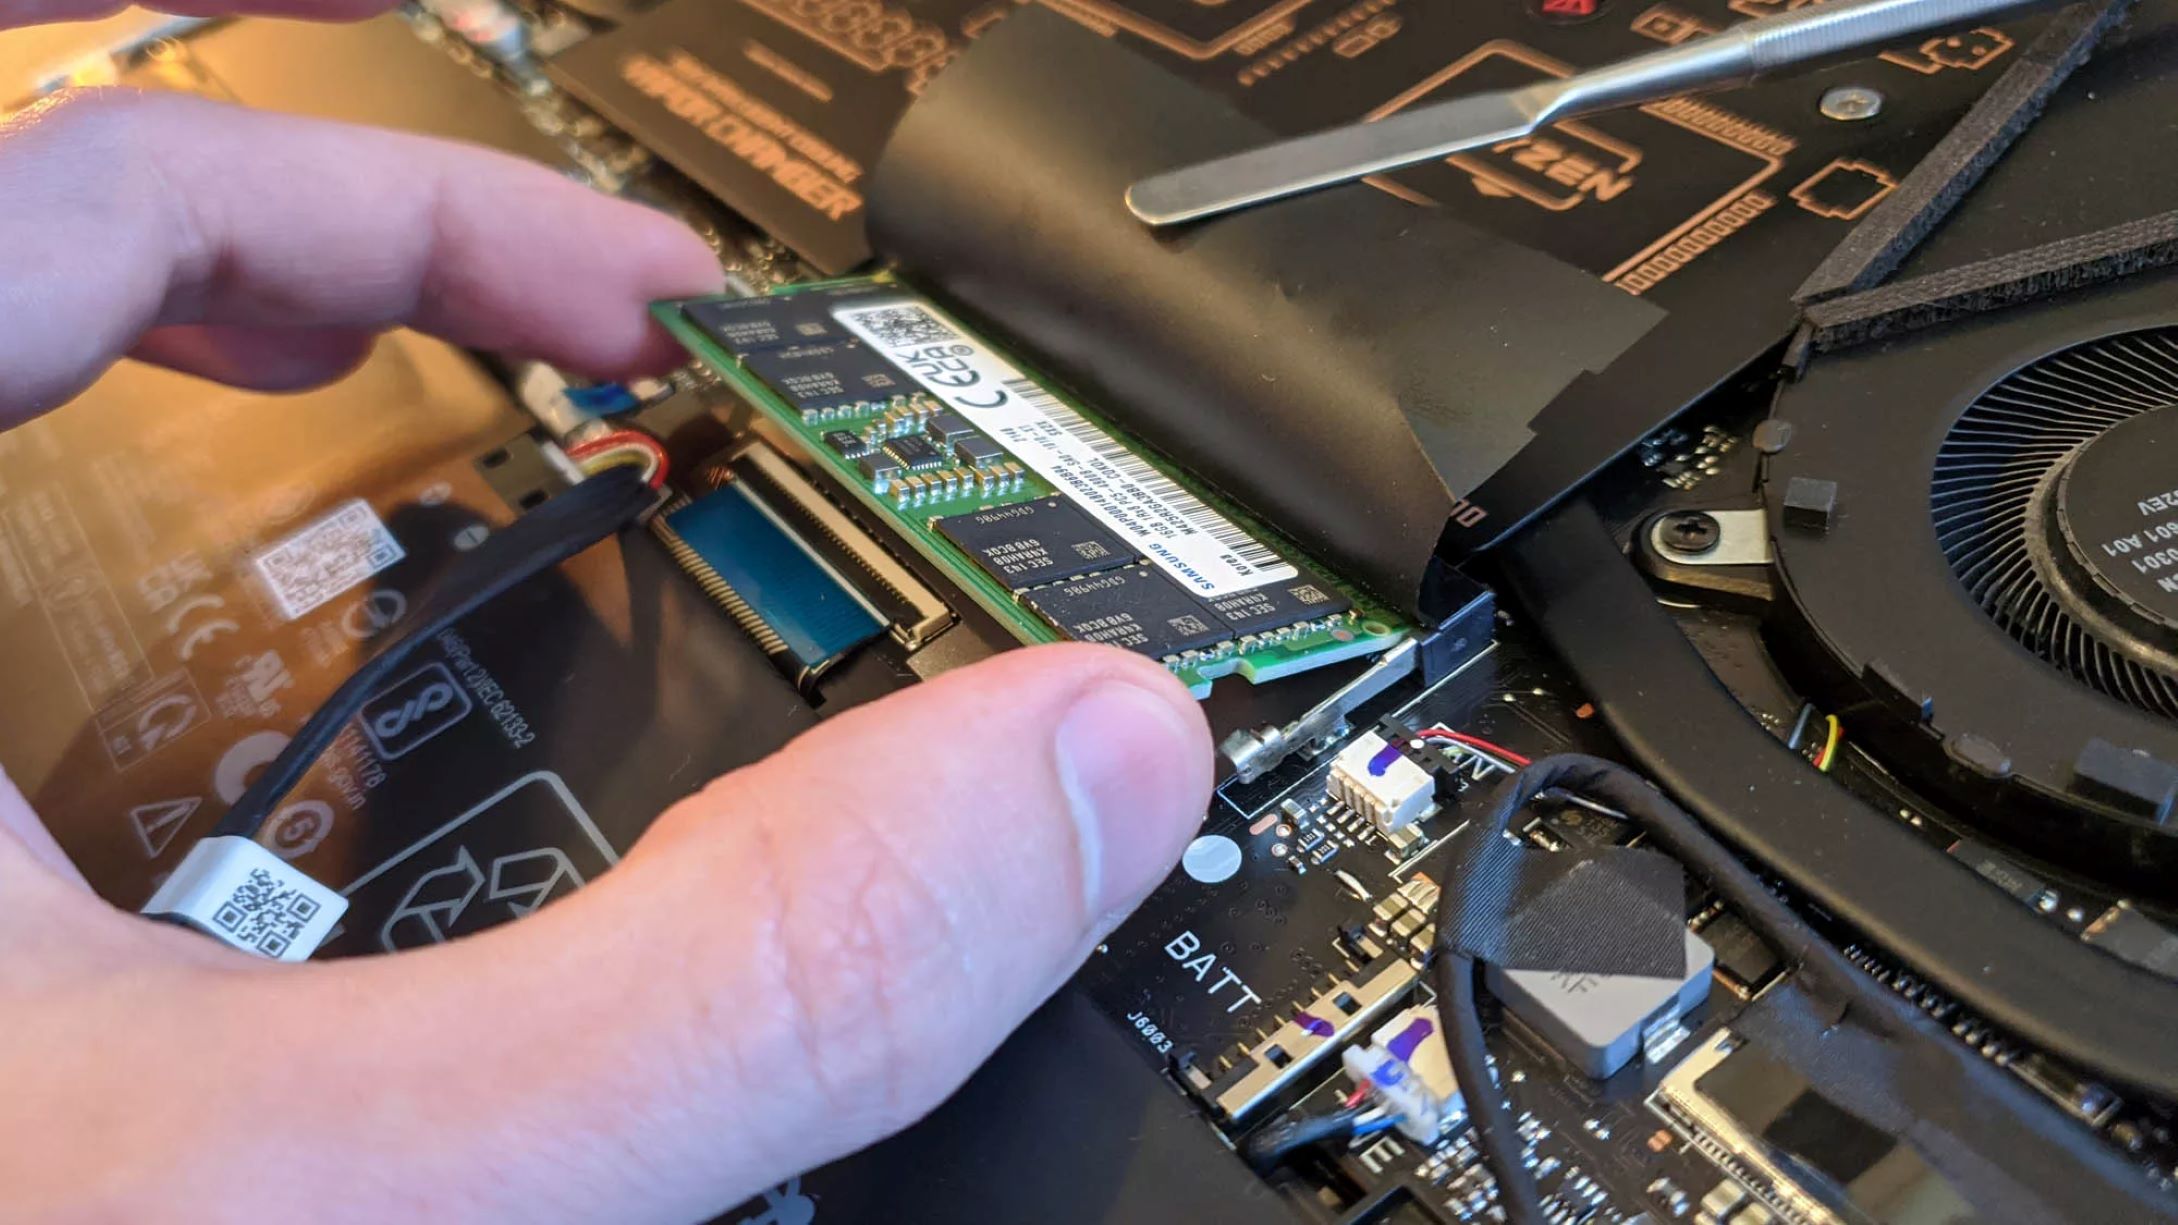
- Release the securing clips: On either side of the RAM module, you will find small clips or tabs that secure it in place. Gently push these clips away from the module to release it. The module will pop up at a slight angle when properly released.
- Remove the module: Once the securing clips are released, carefully lift the module at the angle it popped up. Pull it straight out from the RAM slot to avoid any damage to the module or the slot. If your laptop has more than one RAM module, repeat this process for each module.
- Handle with care: When handling the RAM modules, make sure to hold them by the edges. Avoid touching the gold contacts or any other sensitive components. Additionally, be mindful of static electricity and ground yourself by touching a grounded object or wearing an anti-static wristband.
- Set aside the removed modules: Place the removed RAM modules in a safe and static-free location. If you plan to keep them as backups, ensure they are protected from physical damage and static electricity.
Remember, proper handling when removing the existing RAM modules is important to prevent any damage to the modules or the RAM slots. Take your time, be gentle, and avoid excessive force.
Now that the existing RAM modules have been removed, you can proceed to the next step: inserting the new RAM modules into the RAM slots. Stay tuned for step 8!
Step 8: Insert the New RAM Modules
With the existing RAM modules removed, it’s time to insert the new RAM modules into the RAM slots of your laptop. This step involves carefully aligning the modules and firmly seating them to ensure a proper connection.
Follow these steps to correctly insert the new RAM modules:
- Position the module correctly: Orient the new RAM module properly by aligning the notch(es) on the module with the corresponding keys in the RAM slot. The notch(es) ensure that the module is inserted in the correct direction and prevent any damage.
- Insert the module at an angle: Hold the new RAM module at a slight angle and insert it into the RAM slot. Make sure the module is correctly aligned with the keys and the slot itself. Apply gentle, even pressure to the top of the module, ensuring it is fully inserted.
- Press down to seat the module: Once the module is inserted, press down on the module evenly with your fingers. Apply firm pressure until you hear a click or feel the securing clips on both sides of the slot click into place. This ensures that the module is firmly seated and properly connected.
- Repeat the process if needed: If your laptop has multiple RAM slots and you’re installing multiple RAM modules, repeat the steps for each module. Ensure that each module is correctly aligned and firmly seated before moving on to the next one.
It’s important to ensure that the new RAM modules are fully inserted and securely seated in the RAM slots. A proper connection guarantees that the modules are recognized by the system and function optimally.
Once all the new RAM modules are securely inserted into the RAM slots, you’re ready for the next step: securing the new RAM modules in place. Stay tuned for step 9!
Step 9: Secure the New RAM Modules
After inserting the new RAM modules into the RAM slots, it’s important to secure them in place to ensure stability and reliability. The securing mechanism can vary depending on your laptop model, but it typically involves locking the modules in position.
Follow these steps to properly secure the new RAM modules:
- Check for securing clips or latches: Look for clips or latches on both sides of the RAM slots that are designed to secure the modules. These clips or latches will hold the modules in place.
- Push in or down on the clips: Use your fingers or a small tool to push in or down on the securing clips until they lock into place. You may hear a click or feel the clips securely holding the RAM modules.
- Ensure a snug fit: Double-check that the new RAM modules are firmly secured and have a snug fit in the RAM slots. This will minimize any movement or disconnection that could occur during laptop usage.
Be cautious not to apply excessive force when securing the RAM modules. Apply gentle, even pressure to avoid damaging the modules or the RAM slots. If you encounter any resistance or difficulty, refer to your laptop’s user manual or contact the manufacturer for specific instructions.
Now that the new RAM modules are securely in place, you’re ready to move on to the final step: powering on your laptop and testing the upgraded RAM. Before that, make sure to follow the proper steps to safely power on your laptop.
Step 10: Power On and Test the Upgraded RAM
With the new RAM modules securely installed, it’s time to power on your laptop and test the upgraded RAM. This final step ensures that the system recognizes and utilizes the increased RAM capacity, verifying the success of the upgrade.
Follow these steps to power on and test the upgraded RAM:
- Reassemble your laptop: If you removed any covers or panels during the RAM installation process, carefully reattach them and ensure they are securely in place. Double-check that all screws are tightened properly.
- Connect the power adapter: Plug in the power adapter to your laptop and connect it to a power source. This will provide the necessary power for the system to boot up.
- Power on your laptop: Press the power button to turn on your laptop. Allow the system to fully boot up and reach the desktop or login screen. You may notice that the startup time has improved due to the increased RAM capacity.
- Check the new RAM capacity: Once you’re logged into the system, navigate to the “System Information” or “About This Mac” section, as mentioned in Step 1, to verify that the upgraded RAM is recognized. Ensure that the total installed RAM reflects the new capacity you have added.
- Test system performance: Now that your laptop is powered on with the upgraded RAM, test its performance by running various tasks and applications. Open multiple programs, browse the web, or engage in activities that previously caused your laptop to slow down. Notice the improved multitasking ability and responsiveness, indicating the successful upgrade.
- Monitor for stability and compatibility: Keep an eye out for any stability issues or compatibility problems that may arise after the RAM upgrade. Run your usual workload and pay attention to any unexpected crashes or software glitches. If you encounter any issues, refer to the troubleshooting section in your laptop’s documentation or seek assistance from the manufacturer.
By following these steps, you can ensure that the upgraded RAM is functioning properly and enjoy the enhanced performance of your laptop. Congratulations on successfully upgrading the RAM in your laptop!
Conclusion
Upgrading the RAM in your laptop can significantly improve its performance and allow for smoother multitasking. By increasing the RAM capacity, you can handle more demanding applications, run multiple programs simultaneously, and experience faster overall system responsiveness. The step-by-step process outlined in this guide has provided you with the knowledge and guidance to successfully upgrade the RAM in your laptop.
Throughout the upgrade process, you learned how to determine the current RAM capacity of your laptop, identify the compatible RAM type, and purchase the new RAM modules. You also prepared for the installation by gathering the necessary tools, powering off and disconnecting your laptop, and locating the RAM slots. Then, you removed the existing RAM modules, inserted the new ones correctly, secured them in place, and finally powered on and tested the upgraded RAM.
Always remember to consult your laptop’s user manual or documentation for any specific instructions or guidelines. Additionally, ensure that you handle the RAM modules and laptop components with care, following proper grounding techniques to prevent any damage from static electricity.
With the upgraded RAM installed, observe the improved performance of your laptop during multitasking activities and resource-intensive tasks. Take note of any stability issues or compatibility problems that may arise and refer to the manufacturer’s guidelines for troubleshooting, if necessary.
Now that you have successfully upgraded the RAM in your laptop, you can enjoy a faster and more efficient computing experience. Make the most of your enhanced multitasking capabilities, run more demanding applications, and accomplish your tasks with ease.
Happy computing!